
A green status code lies. Your POST /orders endpoint returns 201 Created, the response body looks perfect, and your test passes. But did the row actually land in the database with the right status? Did the inventory count decrement? A test that only reads the HTTP response checks what the API said, not what the system did. To close that gap you have to look at the database itself.
That’s where database queries inside a test scenario earn their keep. You seed a known state before a request, fire the request, then query the table to confirm the truth on disk. Apidog has this built in through Database Connections and the Database Operation processor, so you can run SQL or NoSQL commands as steps in the same scenario that drives your HTTP calls, with no external scripting glue. If you’re new to building scenarios, the guide on how to write a test scenario with Apidog covers the request-level basics this article builds on. For a refresher on how relational stores model this data, MDN’s server-side overview is a solid primer.
What database operations in a test buy you
An API test that never touches the database is a black box. It trusts the response. Most of the time that’s fine, but the interesting bugs live in the gap between what the API returns and what it persists: a status field that never flips, a foreign key that points nowhere, a soft-delete that hard-deletes.
Database steps let you do three things a pure HTTP test can’t:
- Seed a precise starting state so a test isn’t at the mercy of leftover data.
- Assert against ground truth by reading the row the API claims it wrote.
- Extract a real value from the database and feed it into the next request, so your test uses IDs the server actually generated instead of guesses.
Apidog splits the feature in two. First you create a reusable connection under Settings > Database Connections. Then you attach a Database Operation step to a request as a Pre Processor (runs before the request) or a Post Processor (runs after). One connection, reused across every scenario in the project.
A note on coverage before you plan around it. MySQL, SQL Server (2014 and newer), PostgreSQL, and Oracle work on the free plan. ClickHouse, MongoDB, and Redis are paid. The MongoDB docs say it plainly: connecting to MongoDB is a paid feature. Same for Redis. So the MySQL walkthrough below runs on the free tier; the Mongo and Redis sections need a paid plan.
Step 1: create a database connection
Open Settings > Database Connections and click + New in the top right. Pick your database type, then fill in the connection fields:
- Host (for example
db.staging.internalor127.0.0.1) - Port (
3306for MySQL) - Username and Password
- Database Name (for example
shop)
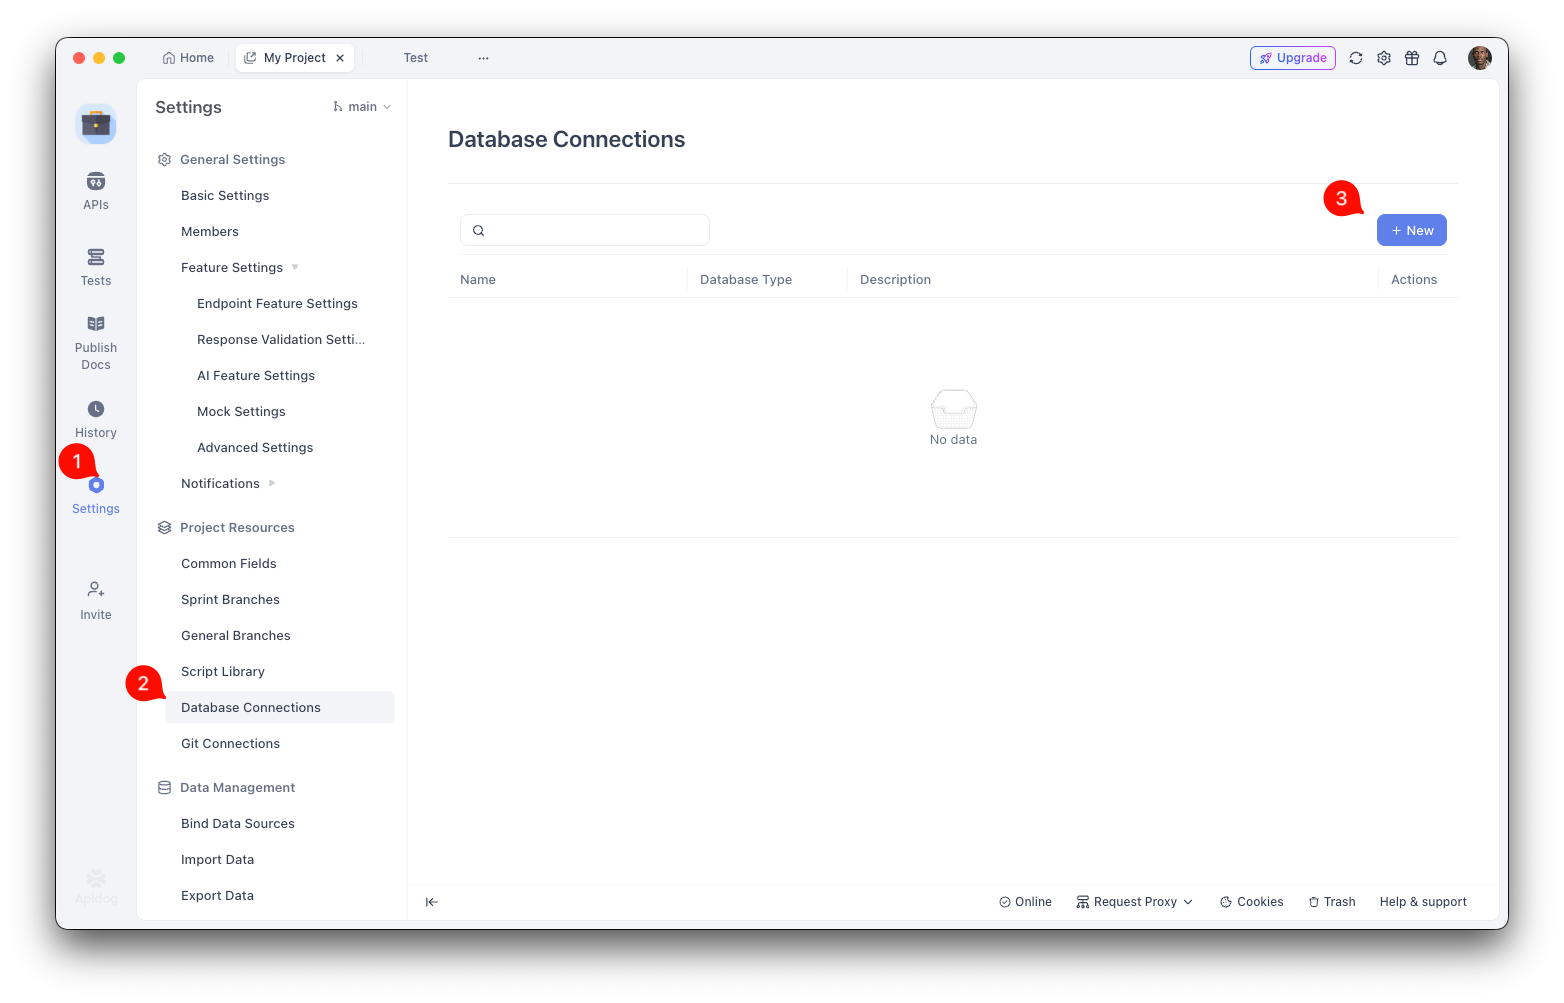
If your database sits behind a bastion, expand the SSH Tunnel section and add the jump-host details. MySQL also exposes an SSL mode with four options: Prefer (the default, which tries SSL then falls back), Require, Verify CA, and Verify Full. Pick the strictest one your server supports. Then click Save.
Two connection gotchas save you a confused afternoon:
- MySQL 8 auth. The default
caching_sha2_passwordplugin can refuse the connection. If you hit an auth error, switch the user withALTER USER 'tester'@'%' IDENTIFIED WITH mysql_native_password BY '...';and try again. The MySQL reference manual covers the plugin difference in depth. - Credentials are local. Connection details are stored on your own machine and are not synced to the cloud. Every teammate configures the connection themselves. If you’re coordinating a team, the notes on sharing database connection settings explain the workflow.
Step 2: seed data with a Pre Processor
Say you’re testing the order-creation flow. You want a known customer to exist before you place an order, so the test doesn’t depend on whatever happens to be in the table.
Open your request, find Pre Processors, hover Add Database Processor, and choose Database operation. Name it something like seed customer, pick your MySQL connection, then under Enter SQL Command write an insert. Dynamic variables use the {{variable_name}} syntax, so you can pull values straight from your environment:
INSERT INTO customers (id, email, status)
VALUES ({{customer_id}}, '{{customer_email}}', 'active')
ON DUPLICATE KEY UPDATE status = 'active';
Now the request runs against a guaranteed state. The customer exists, is active, and has an ID your later steps already know. Seeding in a Pre Processor keeps each test self-contained instead of leaning on test-order side effects.
Step 3: assert against the database with a Post Processor
Here’s the core of it. Your request creates an order. After it returns, you query the orders table to confirm the row exists with the right status.
Add the request that calls your API:
POST /api/orders
Content-Type: application/json

{
  "customer_id": {{customer_id}},
  "items": [{ "sku": "APRON-01", "qty": 2 }]
}
Assume the response body carries the new order ID, which you capture into a variable called order_id with a normal response assertion. Now open Post Processors on that request. In DESIGN Mode you’ll find them in the Run tab; in DEBUG Mode they’re in the Request tab. Hover Add PostProcessor, select Database operation, name it verify order row, and pick your connection.
Under Configure Operation, choose the operation and enter the SQL:
SELECT id, status, total_cents
FROM orders
WHERE id = {{order_id}};
Query results come back as an array of objects, one per row. To pull a single field out, open Extract Results (Optional) and add an Extract Result To Variable entry. Set a Variable Name like db_order_status and a JSONPath Expression that isolates the field from the first row:
$[0].status
Click Send and check the Console to see the raw result and the extracted value. Now db_order_status holds what’s actually on disk. Add an assertion that it equals pending (or whatever your API is supposed to set), and your test finally verifies persistence, not just the HTTP echo. If the API returned 201 but wrote status = 'draft', this is the step that catches it.
Step 4: extract a database value and use it downstream
Extraction isn’t only for assertions. Often the database holds a value the response never returns, and you need it for the next request.
Picture a flow where creating an order also generates an internal fulfillment_ref on the server, written to the row but omitted from the API response. Your next request, GET /api/fulfillments/{ref}, needs it. Query for it in a Post Processor:
SELECT fulfillment_ref
FROM orders
WHERE id = {{order_id}};
Extract it with Variable Name fulfillment_ref and JSONPath Expression $[0].fulfillment_ref. Because Apidog scopes that variable to the environment, your next request just references {{fulfillment_ref}} in its path or body and picks up the real, server-generated value. This is the same pattern as chaining HTTP responses, covered in passing data between test steps and API test orchestration and passing data, except the source of truth is a table instead of a JSON body.
MongoDB and Redis: the NoSQL variants
The processor works the same way for NoSQL stores, with a different configuration surface. Both are paid features, so plan accordingly. The Apidog documentation has the full field reference if you need it.
MongoDB
Add a Database Operation step and select MongoDB as the type. Instead of raw SQL you get an Operation Type dropdown with Find, Insert, Update, Delete, and Run Database Command. For any CRUD action, Collection Name is mandatory. The Query Condition field takes JSON:
{ "_id": "65486728456e79993a150f1c" }
Apidog converts a matching ID string to an ObjectId automatically, so you don’t have to wrap it yourself. When you do need BSON types, the helpers ISODate(...), ObjectId(...), NumberDecimal(...), and NumberLong(...) are supported; the MongoDB manual documents how each of these maps to a stored value. The connection accepts either a full connection string or the individual host and credential components.
One honesty note: the MySQL flow documents JSONPath extraction into a variable, but the MongoDB and Redis docs don’t describe that same Extract Result To Variable mechanism. So lean on Mongo operations for seeding and confirming state, and don’t assume the SQL-style extraction path works identically until you’ve verified it in the Console.
Redis
The Redis connection asks for Host, Port, Password, and Database Index. Visual operations use an Operation Type dropdown supporting GET, SET, and DELETE. To read a cached session, choose GET and set the Key to something like user:session:123. For anything the dropdown doesn’t cover, the Run Redis Command tab runs any valid command:
KEYS user:*
That’s how you confirm a cache entry the API was supposed to write, or clear one before a test to prove the endpoint repopulates it.
Advanced variations and limits
A few things worth knowing before you build a large suite:
- Loops. When you iterate over rows in a ForEach step, reference the current loop item with
{{$.StepID.element.field}}, whereStepIDis the loop step’s actual number. Handy for asserting one row per iteration. - Branching on a DB value. Extract a status field, then route the rest of the scenario on it. Pairing database reads with conditional logic in API test scenarios lets a test take one path when the row is
paidand another when it’spending. - Environment routing. More on this below, but the short version: define one connection per environment and Apidog picks the right one automatically.
- Stored procedures. The visual interface doesn’t handle complex operations like stored procedures. Keep the SQL in your steps to straightforward statements.
- Oracle setup. Oracle needs a separate Oracle Client installed on your machine before it will connect at all.
Handle credentials per environment
You never want a test to hit production data by accident. Apidog’s answer is one Database Connection per environment. You create a staging connection and a local connection, each with its own host and password.
Then you switch environments using the dropdown in the top-right corner. Apidog automatically routes every query in the scenario to the connection that matches the currently selected environment. Select staging and your SELECT runs against staging; flip to local and the exact same step runs against your laptop’s database, no edits to the SQL or the step. Credentials differ per environment without any manual reconfiguration mid-run.
Because those credentials live locally and aren’t synced, this also keeps production passwords off the shared cloud project. Each engineer holds their own.
Automate the workflow with the Apidog CLI
Once the scenario passes in the app, run it headlessly in CI so every pull request re-verifies the database, not just the HTTP contract. Install the CLI and authenticate:
npm install -g apidog-cli
apidog login --with-token <YOUR_ACCESS_TOKEN>
Then run the exact scenario you built, by its ID, against a chosen environment:
apidog run --access-token $APIDOG_ACCESS_TOKEN -t <scenario_id> -e <env_id> -r cli
Here -t is the test scenario ID, -e is the environment ID, and -r is the reporter (cli, html, or junit; comma-separate them for several, like -r html,cli). One thing to plan for: database connection details are local, so the runner needs the exported configuration to reach your database from CI. If you feed the scenario rows from a dataset, data-driven testing with the Apidog CLI shows how each row runs the same database assertions, and scheduling API tests with Apidog covers running this on a cadence so a failing database assertion surfaces like any other test.
Frequently asked questions
Which databases are free and which are paid? MySQL, SQL Server (2014 and newer), PostgreSQL, and Oracle are on the free plan. ClickHouse, MongoDB, and Redis need a paid plan. The MongoDB and Redis docs both state their connectivity is a paid feature, so check the pricing page before planning a NoSQL suite. Download Apidog to try the free databases first.
Can I use a value from the database in a later request? Yes. Add a Post Processor with a Database operation, run a SELECT, then use Extract Result To Variable with a Variable Name and a JSONPath Expression like $[0].fulfillment_ref to isolate the field from the first row. Reference it later as {{variable_name}}. The same chaining idea for HTTP responses is covered in passing data between test steps.
Do my teammates automatically get my database connections? No. Connection credentials are stored locally on each client and aren’t synced to the cloud, so every team member configures the connection themselves. This is deliberate: it keeps production passwords off the shared project.
My MySQL 8 connection keeps failing. Why? MySQL 8 defaults to the caching_sha2_password auth plugin, which can block the connection. Switch the user to mysql_native_password with ALTER USER ... IDENTIFIED WITH mysql_native_password and reconnect.
Can I run stored procedures or complex database logic? Not through the visual interface. It handles standard SELECT, INSERT, UPDATE, and DELETE statements, but complex operations like stored procedures aren’t supported. Keep your test steps to direct statements.
Wrapping up
Database queries turn an API test from “the response looked right” into “the data is actually correct.” Seed a known state in a Pre Processor, verify the persisted row in a Post Processor, and extract server-generated values to chain into the next request, all inside one scenario. Set up a connection per environment and the same steps run safely against staging or local without edits.
Try it free, no credit card required: Download Apidog, point a MySQL connection at your dev database, and add one Post Processor that reads back the row your next request creates.