
Smart mock gets you a fake API in seconds. It reads your endpoint schema and hands back plausible data: a real-looking email, a sensible timestamp, a name that isn’t xJ8kQ. For most frontend work, that’s enough to unblock you.
Then you hit the case Smart mock can’t reach. You want /login to return 200 for a known user and 401 otherwise. You want /orders/{id} to return a shipped order for one ID and a cancelled one for another. You want to force a 500 on demand so your error handling gets exercised before it ever meets production. Smart mock returns one shape per endpoint, so it can’t branch on the request. That’s the gap this guide closes.
Apidog covers it with two features: mock expectations for rule-based conditional responses, and mock scripts for logic that rules can’t express. This walkthrough shows both with concrete examples, and it explains the priority order so your custom rules win over Smart mock every time. If you’re new to the basics, the API mocking overview is a good warm-up, and Apidog is the tool we’ll use throughout. The OpenAPI Initiative documents the contract-first workflow that makes all of this possible.
What conditional mocking actually means
A conditional mock is a rule: when the incoming request looks like this, return that. Apidog builds these rules from two layers.
The first layer is field-level customization inside the endpoint schema. You pin a field to a fixed value, or you attach a dynamic Faker.js expression so it varies on every call. That controls what a field contains, but it still returns one response shape for the endpoint.
The second layer is the full-response mock expectation. An expectation is a named rule with optional conditions and its own response body, status code, and headers. An expectation with no conditions returns fixed data unconditionally. An expectation with conditions returns its data only when the request matches. Stack a few of these and you get real branching: response B when the request matches condition A, an error body when a header is missing, a different payload per path parameter.
That second layer makes on-demand error states and per-request bodies possible. The rest of this guide lives there.
Field-level dynamic values first
Before the branching, it helps to see how a single field gets its value, because your conditional responses will reuse the same syntax.
Inside an endpoint’s schema, any string field can hold a Faker.js expression written as {{$category.method}}. Apidog resolves it fresh on each mock call, using the field types your JSON Schema definition already declares.
{
  "id": "{{$number.int(min=1000,max=9999)}}",
  "customer": "{{$person.fullName}}",
  "email": "{{$internet.email}}",
  "product": "{{$commerce.productName}}",
  "shippingAddress": "{{$location.streetAddress}}, {{$location.city}}",
  "orderedAt": "{{$date.between(from='2024-01-01',to='2024-12-31',format='yyyy-MM-dd')}}"
}
Parameterized methods work, so {{$number.int(min=1000,max=9999)}} bounds the value and {{$date.between(...)}} pins a range and format. You can concatenate static text and multiple expressions in one field, which is how the address above gets built. If you need region-specific data, Apidog supports customizable mock locales so your names, addresses, and phone numbers match a given language or country. The Faker.js reference in Apidog covers the full method catalog.
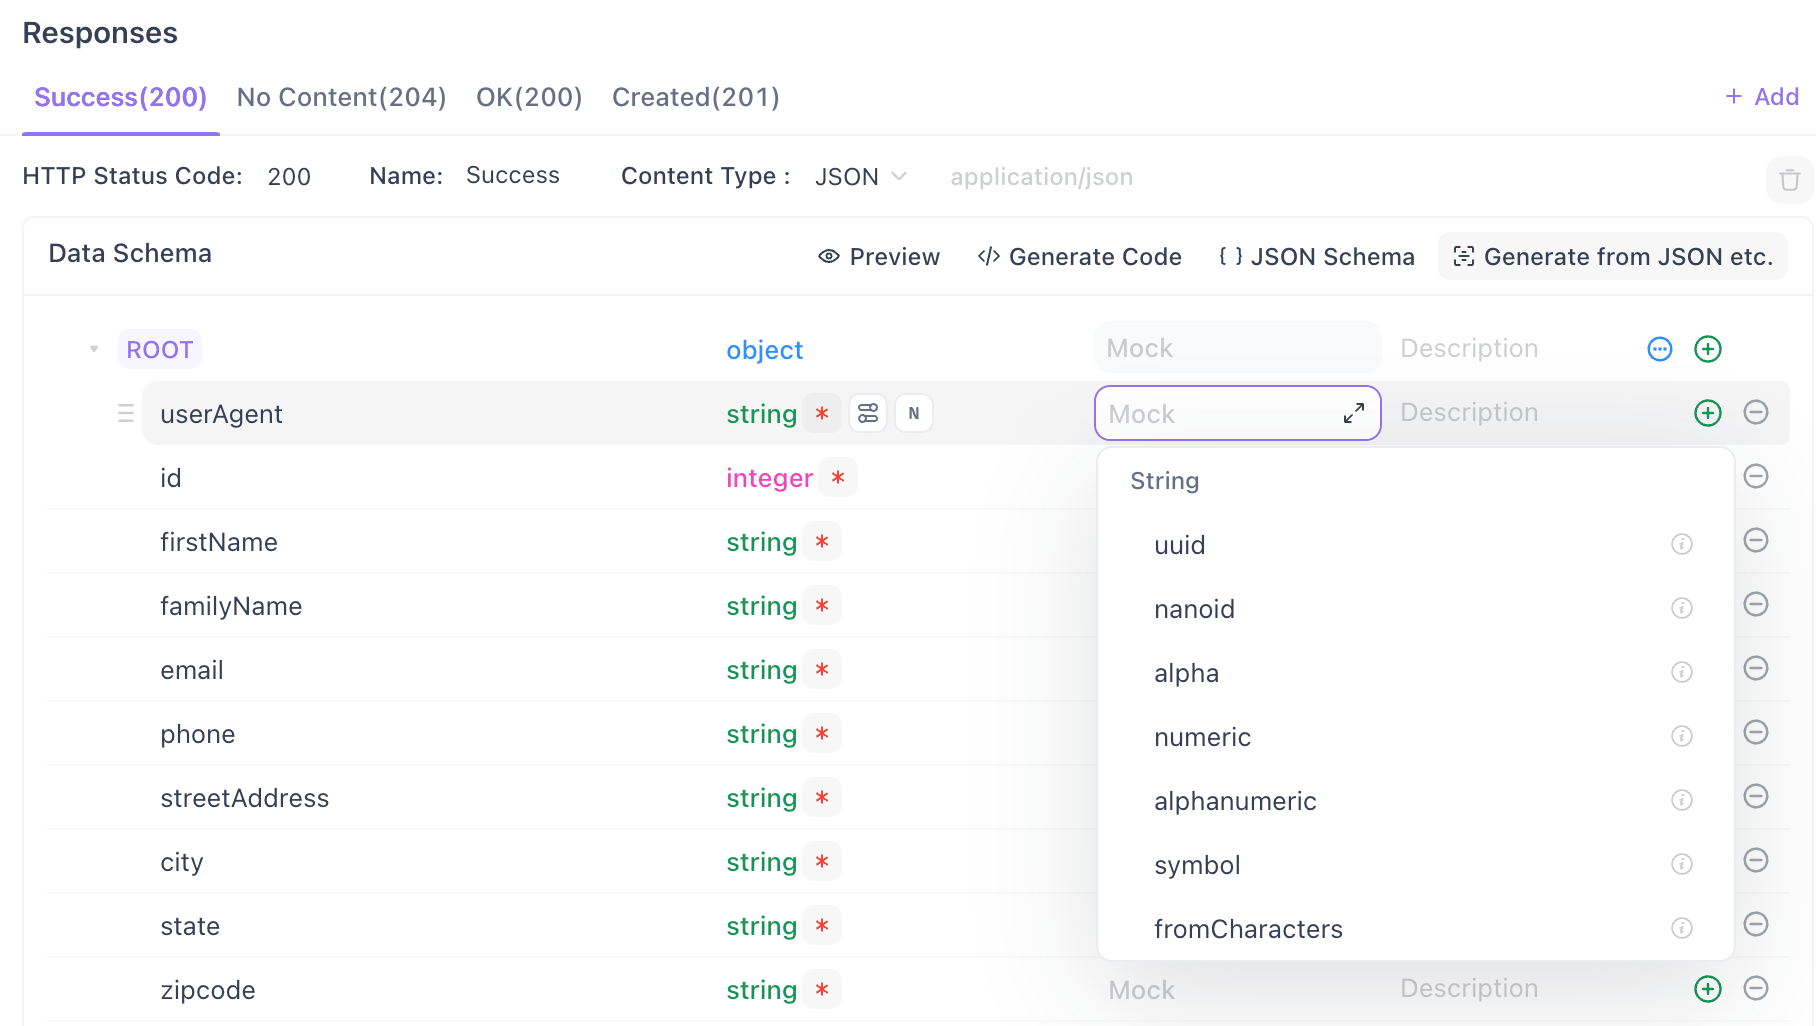
This is Smart mock territory. It’s dynamic, but it’s not conditional. To branch on the request, you move up to expectations.
Walkthrough: a login endpoint that returns 200 or 401
The canonical case: POST /login takes a JSON body with username and password. A known user should get 200 with a token. Everyone else should get 401.
Open the right tab
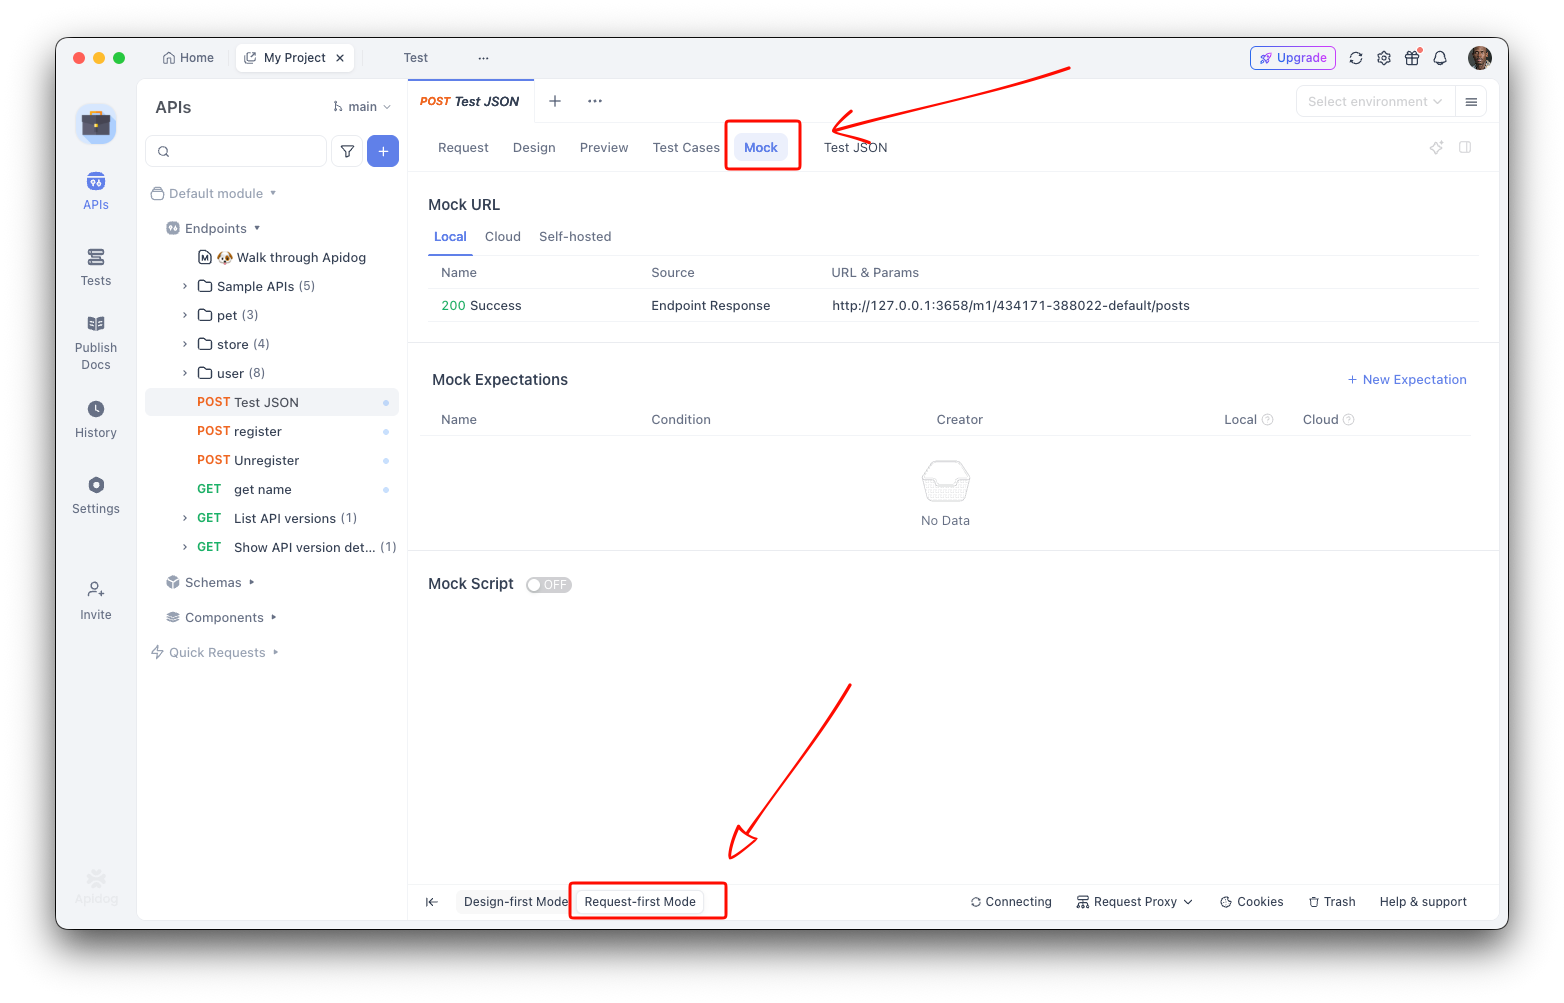
Where you configure this depends on your working mode:
- In DEBUG (Request-first) mode, open the endpoint and click the Mock tab.
- In DESIGN (Design-first) mode, open the endpoint and click the Advanced mock tab.
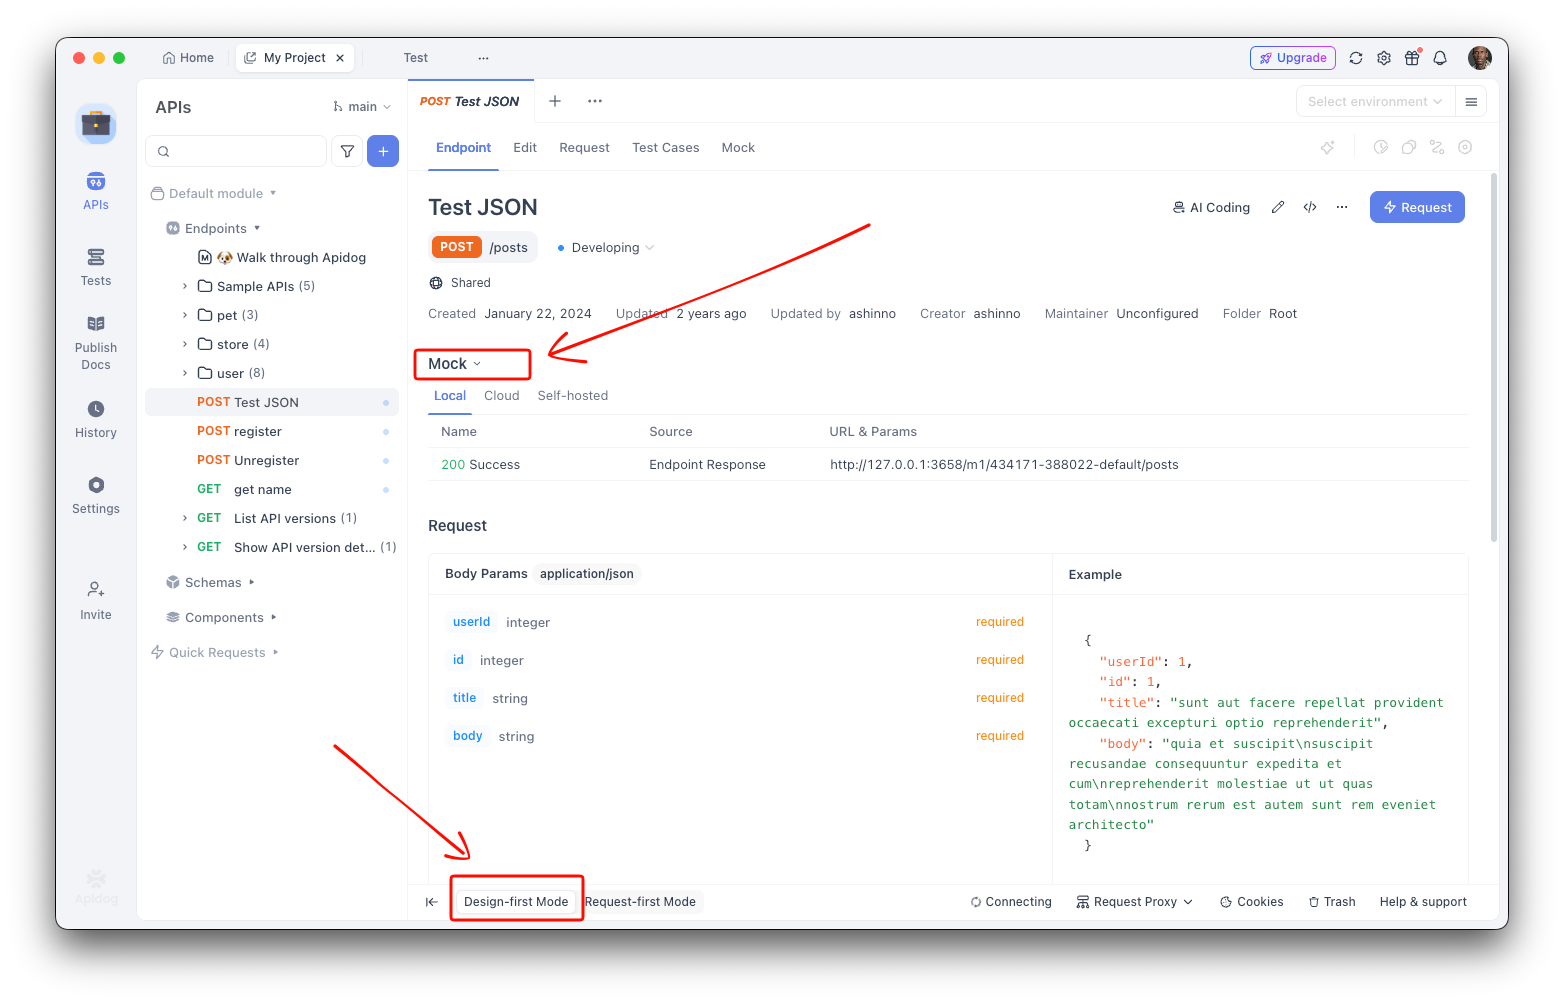
Both lead to the same expectation list. If you want to follow along and don’t have the app yet, Download Apidog and import or create a /login endpoint first.
Add the success expectation
Click New expectation. Give it an expectation name like login-success. Now add a condition. Because username lives in the JSON request body, you match it as a body parameter: put the JSON path of the target property, username, in the name field, and set the condition to equal alice@example.com.
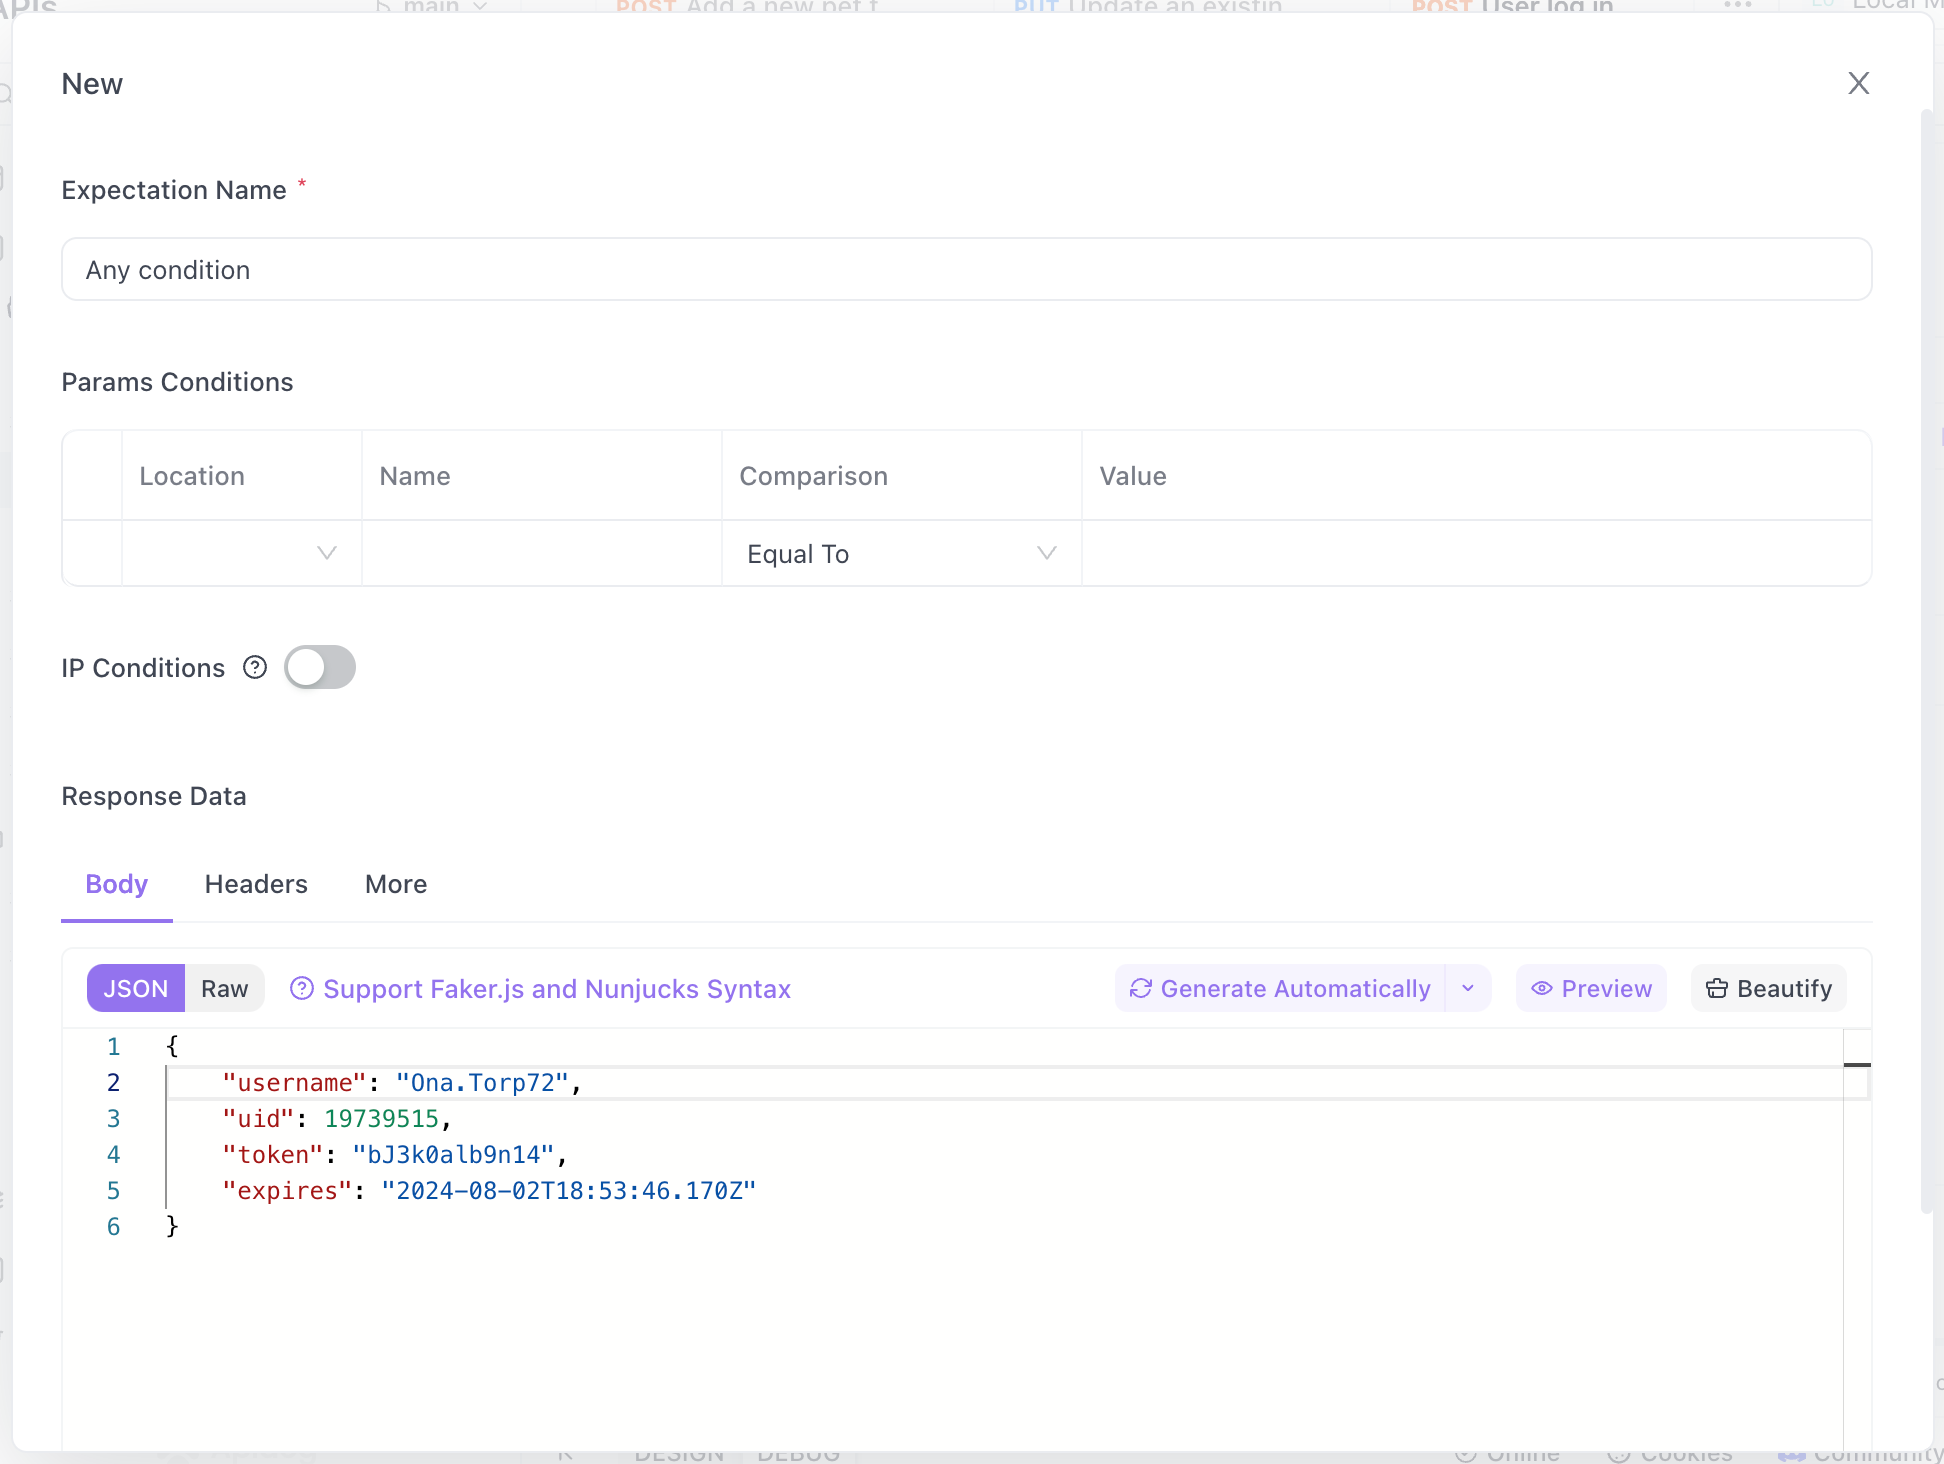
Body-parameter conditions are JSON only, and they’re matched via the JSON path in the name field, so nested properties use dot paths like user.email. Fill in the Response data with the success payload:
{
  "token": "mock-jwt-{{$string.uuid}}",
  "user": {
    "id": 4821,
    "username": "alice@example.com",
    "role": "member"
  }
}
Save. The default HTTP Status Code is 200, so you don’t need to touch anything else for the happy path.
Add the failure expectation
Click New expectation again. Name it login-failure and leave its conditions blank so it acts as the catch-all. Set its Response data to the error body:
{
  "error": "invalid_credentials",
  "message": "Username or password is incorrect."
}
This one needs a non-default status. Open the More tab of the expectation and set the HTTP Status Code to 401. While you’re there, note that the More tab is also where you set Response Delay in milliseconds (default 0) and any custom response headers. A 400ms delay is a cheap way to make sure your loading spinner actually renders.
Order matters
Expectations evaluate top to bottom, and the first match wins. So login-success must sit above login-failure. A request with username equal to alice@example.com matches the first rule and returns the token. Anything else falls through to the unconditional failure rule and gets the 401. If you reversed the order, the blank-condition rule would match everything and your success case would never fire.
Copy the mock URL from the endpoint and test both paths:
# known user -> 200 with a token
curl -X POST https://<your-mock-host>/login \
  -H "Content-Type: application/json" \
  -d '{"username":"alice@example.com","password":"whatever"}'

# anyone else -> 401
curl -X POST https://<your-mock-host>/login \
  -H "Content-Type: application/json" \
  -d '{"username":"stranger@example.com","password":"whatever"}'
Walkthrough: different bodies for /orders/{id} by status
The second common case branches on a path parameter. You want /orders/{id} to return a shipped order for one ID and a cancelled order for another, so your UI can render every state without a live backend.
Create one expectation per state. For each, add a condition on the path parameter id, then fill in the matching Response data.
Expectation order-shipped, condition: path parameter id equals 5001.
{
  "id": 5001,
  "status": "shipped",
  "total": 129.90,
  "trackingNumber": "1Z{{$string.alphanumeric(length=16)}}",
  "shippedAt": "{{$date.recent(days=3,format='yyyy-MM-dd')}}"
}
Expectation order-cancelled, condition: path parameter id equals 5002.
{
  "id": 5002,
  "status": "cancelled",
  "total": 0,
  "cancelledAt": "{{$date.recent(days=1,format='yyyy-MM-dd')}}",
  "refundIssued": true
}
Add a final expectation with no conditions that returns a generic pending order, so any other ID still gets a valid response instead of falling through. Order the specific rules above the catch-all, save, and you have a mock that renders every order state on demand. Mixing conditions works too: add a header condition alongside the path condition and both must hold, because Apidog combines multiple conditions with AND logic (an intersection of the conditions, in the docs’ terms).
Conditions aren’t limited to body and path. You can match on query parameters, header parameters, cookie parameters, and even IP addresses, which lets you restrict a response to specific clients during a test.
Forcing error states on demand
You don’t need a broken backend to test broken responses. An expectation plus the More tab gives you any status you want.
To force a 500, add an expectation whose condition is something you control from the client, say a header X-Mock-Scenario equal to server-error. Set its Response data to a realistic error body and its HTTP Status Code to 500 in the More tab.
{
  "error": "internal_error",
  "requestId": "{{$string.uuid}}",
  "message": "Something went wrong on our end. Please retry."
}
Now the same endpoint serves a normal 200 by default and a 500 whenever you send that header. Do the same for 404, 429 (with a Retry-After header set in the More tab), or 503. Your frontend error handling finally has something to catch. If you assert on these responses in automated checks, the guide to API assertions pairs well with this setup.
One detail for shared projects: each expectation can be toggled on or off independently for the local and cloud mock environments from the expectation list. So you can keep a 500 rule active locally while leaving it off in the cloud mock your teammates hit.
When rules aren’t enough: mock scripts
Expectations are declarative. They match and return, but they can’t compute. When you need a field derived from the request, a total summed from line items, or a body that changes shape based on several inputs at once, you reach for a mock script.
A mock script is JavaScript that runs against the mock response. It lives in the Mock Script section at the bottom of the Mock tab and is enabled with a toggle switch. The script exposes two globals:
$$.mockRequest: read the incoming request viagetParam(key), plusheaders,cookies,body,formdata, andurlencoded.$$.mockResponse: shape the outgoing response viasetBody(),setCode(),setDelay(),json(), and theheadersandcodeproperties.
Here’s a script that computes an order total from the posted line items and echoes back the caller’s currency header:
const body = $$.mockRequest.body;
const items = body.items || [];

const subtotal = items.reduce((sum, item) => {
  return sum + item.price * item.quantity;
}, 0);

const currency = $$.mockRequest.headers["x-currency"] || "USD";

$$.mockResponse.setCode(201);
$$.mockResponse.setBody({
  orderId: Math.floor(Math.random() * 90000) + 10000,
  currency: currency,
  subtotal: subtotal,
  tax: Number((subtotal * 0.08).toFixed(2)),
  total: Number((subtotal * 1.08).toFixed(2))
});
The flow is: Smart mock generates an initial response, your script reads $$.mockRequest and the current $$.mockResponse, applies its logic, calls $$.mockResponse.setBody() (and setCode, setDelay, or headers as needed), and the engine returns the final result. The MDN JavaScript reference is a solid companion if you want to push the logic further with array methods or date math.
The one rule that trips people up
Mock scripts only work with Smart mock. They do not apply to mock expectations or response examples. This is the single most important thing to internalize: you cannot combine a mock script with an expectation-based response. If an expectation matches the request, the script never runs. So pick a lane per endpoint. Use expectations when you’re branching on fixed conditions and returning canned bodies. Use a mock script when you need computed output from Smart mock’s generated base.
How the priority order resolves
Put it all together and here’s the order Apidog walks for any mock request:
- It checks your expectations, top to bottom. The first expectation whose conditions all match wins, and its response is returned. This is why custom rules beat Smart mock: a matching expectation short-circuits everything below it.
- If no expectation matches, Apidog falls back to the Mock method priority you set in Project Settings - Feature Settings - Mock Settings. That’s the tier where Smart mock (and any mock script attached to it) produces the response.
The mental model is simple: specific rules first, generated data second. Order your expectations from most specific to least, keep a blank-condition catch-all at the bottom if you want a guaranteed match, and let Smart mock handle everything else. For a deeper tour of when to lean on each layer, the API mocking use cases guide maps common scenarios to features.
Gotchas worth knowing before you ship
A few constraints will save you a confusing debugging session:
- Parameter conditions do not support
{{variables}}. Apidog project and environment variables aren’t available inside mock expectations, so put literal values in your conditions. - Body-parameter conditions are JSON only, not XML, and must be matched via the JSON path in the name field.
- The request body format in a condition has to match the API spec. A form-data endpoint must be mocked with form-data placement, not JSON.
- Inside mock scripts there’s no logging function, the
pmobject is unavailable (it’s a different execution environment from test scripts), and Apidog variables can’t be used. Keep script logic self-contained.
None of these features carry plan gating in the docs. The only local-versus-cloud distinction is functional: the independent on/off toggle per environment described earlier, not a paywall.
Automate the workflow with the Apidog CLI
Mocking in Apidog is a GUI and cloud capability. The mock engine serves your endpoints from local and cloud mock URLs, and there’s no CLI command that stands up a running mock server. What the Apidog CLI does add is control over the resources those mocks are built from.
Mock responses are generated from the endpoint schema, so the accuracy of your mock tracks the accuracy of your spec. The CLI, and the AI coding agents that drive it (Cursor, Claude Code, Trae, Codex), can create and update the endpoints and schemas in your project. Change the contract in code, sync it up, and the mock output stays correct without anyone reopening the app.
Once the mock has unblocked frontend work, the same project’s test scenarios run headlessly in CI to validate the real backend against the contract the mock described:
apidog run -t <scenario_id> -e <env_id> -r cli
That single command executes your test scenarios and reports results, so the mock and the verification share one source of truth. The Apidog CLI installation guide covers setup, and the Apidog CLI in GitHub Actions walkthrough wires it into a pipeline.
FAQ
Why does my expectation get ignored even though the condition looks right? Almost always ordering or a format mismatch. Expectations evaluate top to bottom and the first match wins, so a broad blank-condition rule sitting above a specific one will swallow the request. Also confirm the body format matches the spec (JSON path for JSON bodies, form-data placement for form endpoints). The API mocking overview covers the setup basics if you want to re-check.
Can I use a mock script and a mock expectation on the same response? No. Mock scripts only run with Smart mock. They’re ignored by mock expectations and response examples. If an expectation matches, the script never executes, so choose one approach per endpoint: expectations for rule-based branching, scripts for computed output.
How do I return a 401 or 500 without breaking the default 200? Add a dedicated expectation with a condition you control from the client (a header works well), then open its More tab and set the HTTP Status Code. The default response stays 200; the error fires only when the condition matches.
Can conditions use my environment variables? No. Apidog {{variable}} values aren’t available inside mock expectations, and parameter conditions don’t support {{variables}}. Use literal values in conditions.
What happens when no expectation matches at all? Apidog falls back to the Mock method priority in Project Settings - Feature Settings - Mock Settings, where Smart mock generates a response from your schema. Adding a blank-condition catch-all expectation is the way to guarantee a specific fallback instead.
Wrapping up
Smart mock handles the common case, and mock expectations handle everything with an if in it: 200 for a known user and 401 otherwise, a different order body per status, a 500 on demand. Reach for a mock script only when you need computed output that rules can’t express, and remember it runs against Smart mock alone. Keep the priority order in mind (specific expectations first, generated data second) and your mocks will branch exactly the way real APIs do. Download Apidog to build your first conditional mock, free, no credit card required.