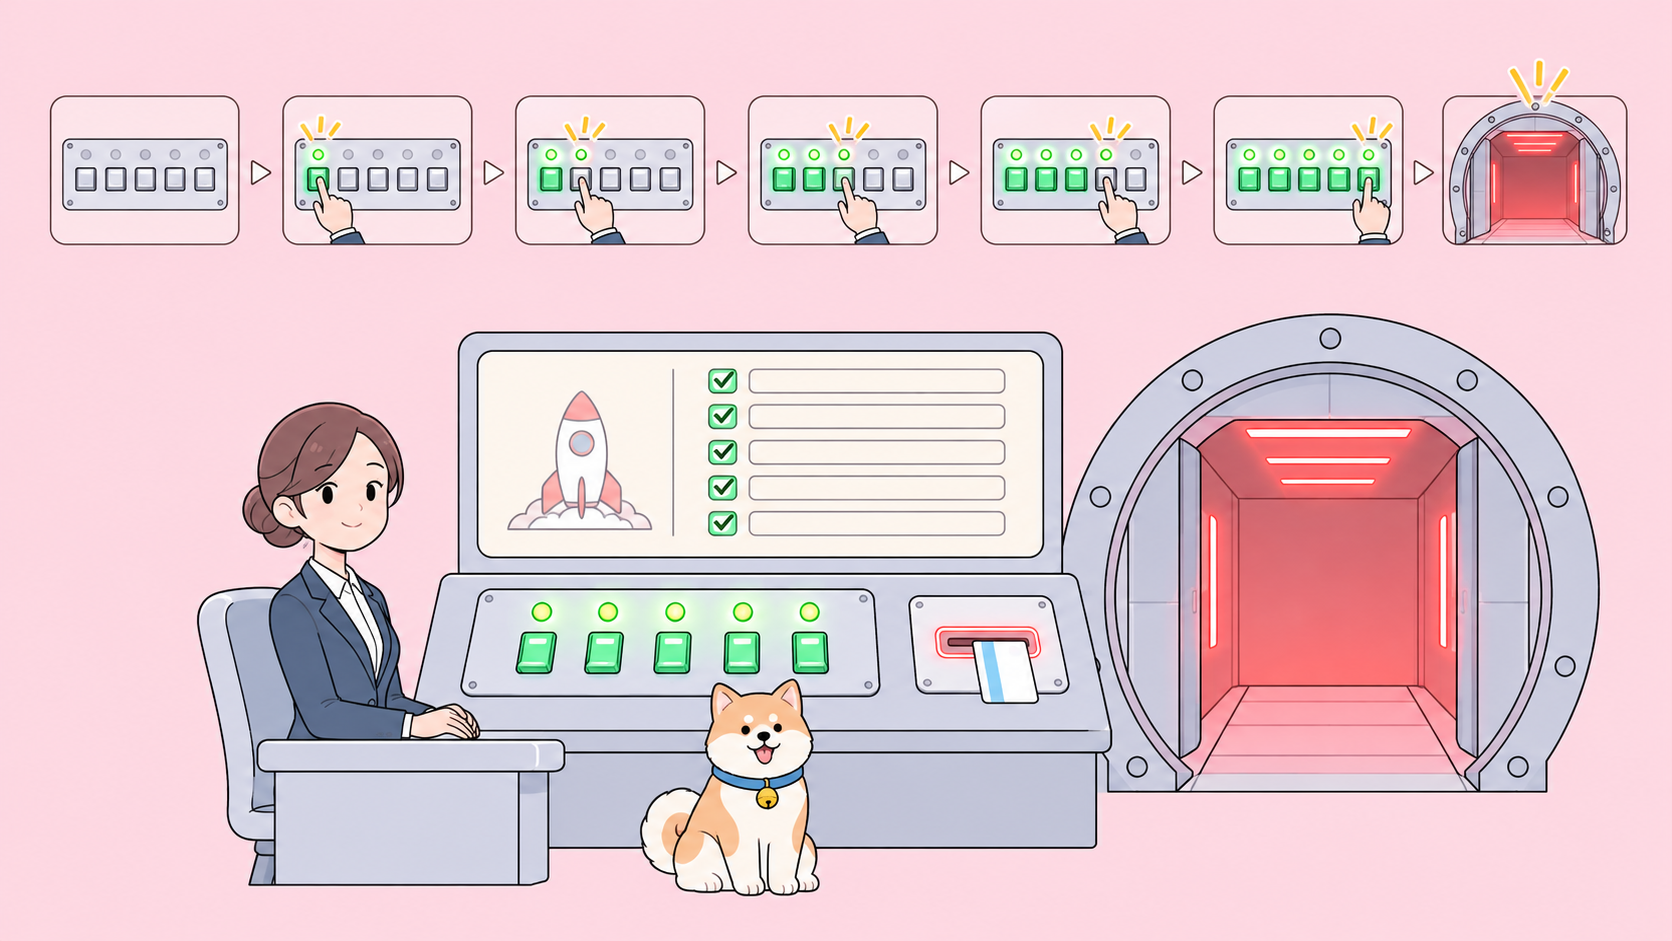
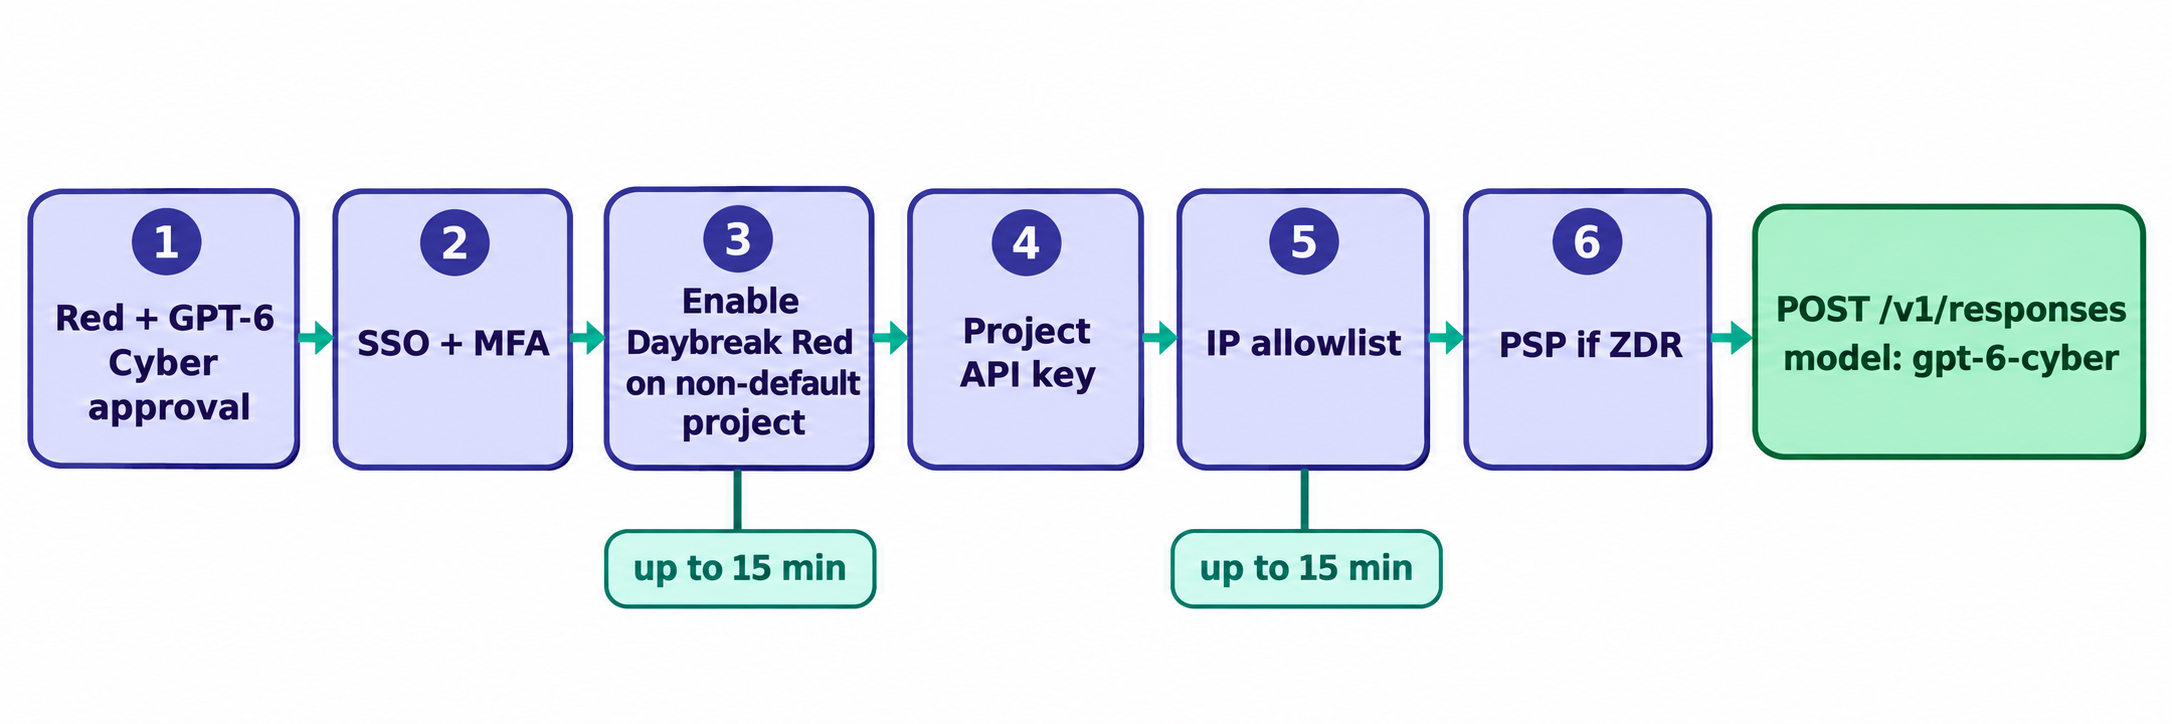
GPT-6 Cyber setup takes six steps: confirm Daybreak Red plus separate GPT-6 Cyber approval, require SSO and MFA on your API organization, have an organization owner enable Daybreak Red on a non-default project, create a key in that project, allowlist your egress IPs, and set up Private Safety Processing if the project uses Zero Data Retention. Then call the Responses API with model: "gpt-6-cyber".
Most failed first calls trace back to one of those steps, not to the model. A key from the wrong project, an office IP missing from the allowlist, or a setting saved four minutes ago will all fail before the model reads your prompt.
GPT-6 Cyber setup checklist
Here’s the whole setup on one page. Each row matches a section below.
| Step | Who does it | Where | Wait |
|---|---|---|---|
| 1. Confirm Red and GPT-6 Cyber approval | Security lead | Your OpenAI account team | Varies |
| 2. Require SSO, enforce MFA | Identity admin | API organization and your IdP | Not stated |
| 3. Enable Daybreak Red on a project | API organization owner | Project settings > General > Daybreak model access | Up to about 15 min |
| 4. Create a project API key | Project member | The enabled project | None |
| 5. Allowlist egress IPs | Organization owner | Settings > Security > IP allowlist | Up to 15 min |
| 6. Set up PSP (ZDR projects only) | Organization owner | Organization settings > Data controls > Data retention | Until Validated |
Plan for at least 30 minutes between your first saved setting and a request that can succeed.
Step 1: Confirm Daybreak Red and GPT-6 Cyber approval
You need two approvals, and the first doesn’t include the second. Daybreak Red gets your organization GPT-5.6 Cyber and reduced refusals on mainline models. GPT-6 Cyber needs a separate model approval on top.
Ask your account team to confirm both before anyone touches settings. OpenAI’s Daybreak overview adds three limits:
- Red is for organizations. Only approved business and enterprise organizations get it. Individuals can apply for Daybreak Blue, which has no cyber-specialized models.
- Money doesn’t buy it. A contract or purchase alone doesn’t guarantee approval.
- It’s internal only. No customer-facing products, downstream traffic or third parties.
Our Daybreak Blue vs Red guide compares the tiers. Note that approval changes nothing on its own: OpenAI ships Daybreak controls switched off.
Step 2: Require SSO and enforce MFA
Every Daybreak Red organization must require SSO on the API organization that holds Cyber access and enforce MFA through your identity provider. If OpenAI gave you a separate Cyber organization, verify its domain and test SSO there too.
Step 3: Enable Daybreak Red on a non-default project
This step needs a specific role and a specific kind of project. From OpenAI’s team setup guide:
- Sign in as an API organization owner. A project owner can’t change this setting.
- Create or select a non-default project for internal security work. Default projects can’t enable Daybreak.
- Go to Project settings > General > Daybreak model access.
- Turn on Daybreak Red. It only appears if your organization is approved.
- Select Save. Changes can take up to about 15 minutes.
- Add the approved users to the project.
Enabling Red in one project doesn’t enable it anywhere else. Keep this project apart from anything that serves customers.
Step 4: Create an API key in that project
Create the key inside the project you just enabled. A key from any other project fails with 403 access_program_not_enabled, even in an approved organization. When you rotate it, the new key must come from the same project. Keys from a dedicated Cyber organization don’t carry over if you migrate organizations.
Step 5: Allowlist your egress IPs
GPT-6 Cyber requests need an IP allowlist for the public IPs your application sends from. The IP allowlist guide gives the details:
- Where: Settings > Security > IP allowlist, for one project or the whole organization. A project list overrides the organization list.
- Format: single addresses such as
203.0.113.10or CIDR ranges such as203.0.113.0/24, up to 50 entries. - Timing: up to 15 minutes to apply.
- Failure: an unlisted IP gets HTTP
401withip_not_authorized.
Private Link isn’t compatible with IP allowlist controls, so pick one. And list every caller: VPN laptops, CI runners and agent sandboxes. A runner on a shared cloud range is the classic reason a call works locally and fails in the pipeline.
Step 6: Set up Private Safety Processing if you use ZDR
Skip this if your project doesn’t use Zero Data Retention. Daybreak approval doesn’t include ZDR.
If it does, configure Private Safety Processing (PSP), which runs automated safety review without OpenAI retaining your prompts or responses:
- Connect an AWS S3, Azure Blob, Google Cloud Storage or OCI Object Storage bucket in a region that matches your data residency.
- Add a 30-day lifecycle rule on the PSP prefix.
- Grant OpenAI access through your cloud’s IAM role, service principal or workload identity.
- Register it under Organization settings > Data controls > Data retention, then run validation.
Wait for Validated. It records one passing check, not continuous health, so recheck after you change bucket policies.
Make your first GPT-6 Cyber API call
Use the Responses API with both the model ID and the access program. This is OpenAI’s documented request:
curl https://api.openai.com/v1/responses \
  -H "Authorization: Bearer $OPENAI_API_KEY" \
  -H "Content-Type: application/json" \
  -d '{
    "model": "gpt-6-cyber",
    "access_programs": {"cyber": "daybreak_red"},
    "safety_identifier": "user_a17f",
    "input": "Suggest a regression test for a path traversal fix."
  }'
Three details matter:
- Set both fields. Selecting
daybreak_reddoesn’t switch your model. - Never send null.
access_programsandcyberare optional, but neither acceptsnull. - Use a real safety identifier. Replace
user_a17fwith a stable, pseudonymous ID for the person making the request.
In the response, model should read gpt-6-cyber and access_programs.cyber should read daybreak_red. Together they prove what served the call.
The model page lists Chat Completions support too, but no Batch API. The smoke test is cheap: at $20 per million input tokens and $100 per million output tokens, a 100-token prompt with a 500-token answer costs about five cents. Keep it as benign as OpenAI’s example.
Set up GPT-6 Cyber in Codex
Codex has two access paths, configured separately.
API key sign-in uses the project from step 3: sign in with its key. The Codex app needs version 26.1013.0 or later for the Daybreak toggle on this path.
ChatGPT sign-in uses your approved workspace. On Business plans, an admin opens Admin Console > Models, finds “Specialty Models” and chooses “Set access” for approved users. On Enterprise plans, a workspace owner keeps Daybreak off under Workspace default and turns Red on in a custom role’s override. Changes take up to about 10 minutes, and the app needs 26.908.40834 or later.
The toggle in the app’s Advanced model picker is off by default. In Codex CLI 0.163.0 or later, pass /daybreak interactively or daybreak=true in headless runs. Without it, requests use standard safeguards.
Troubleshooting GPT-6 Cyber setup errors
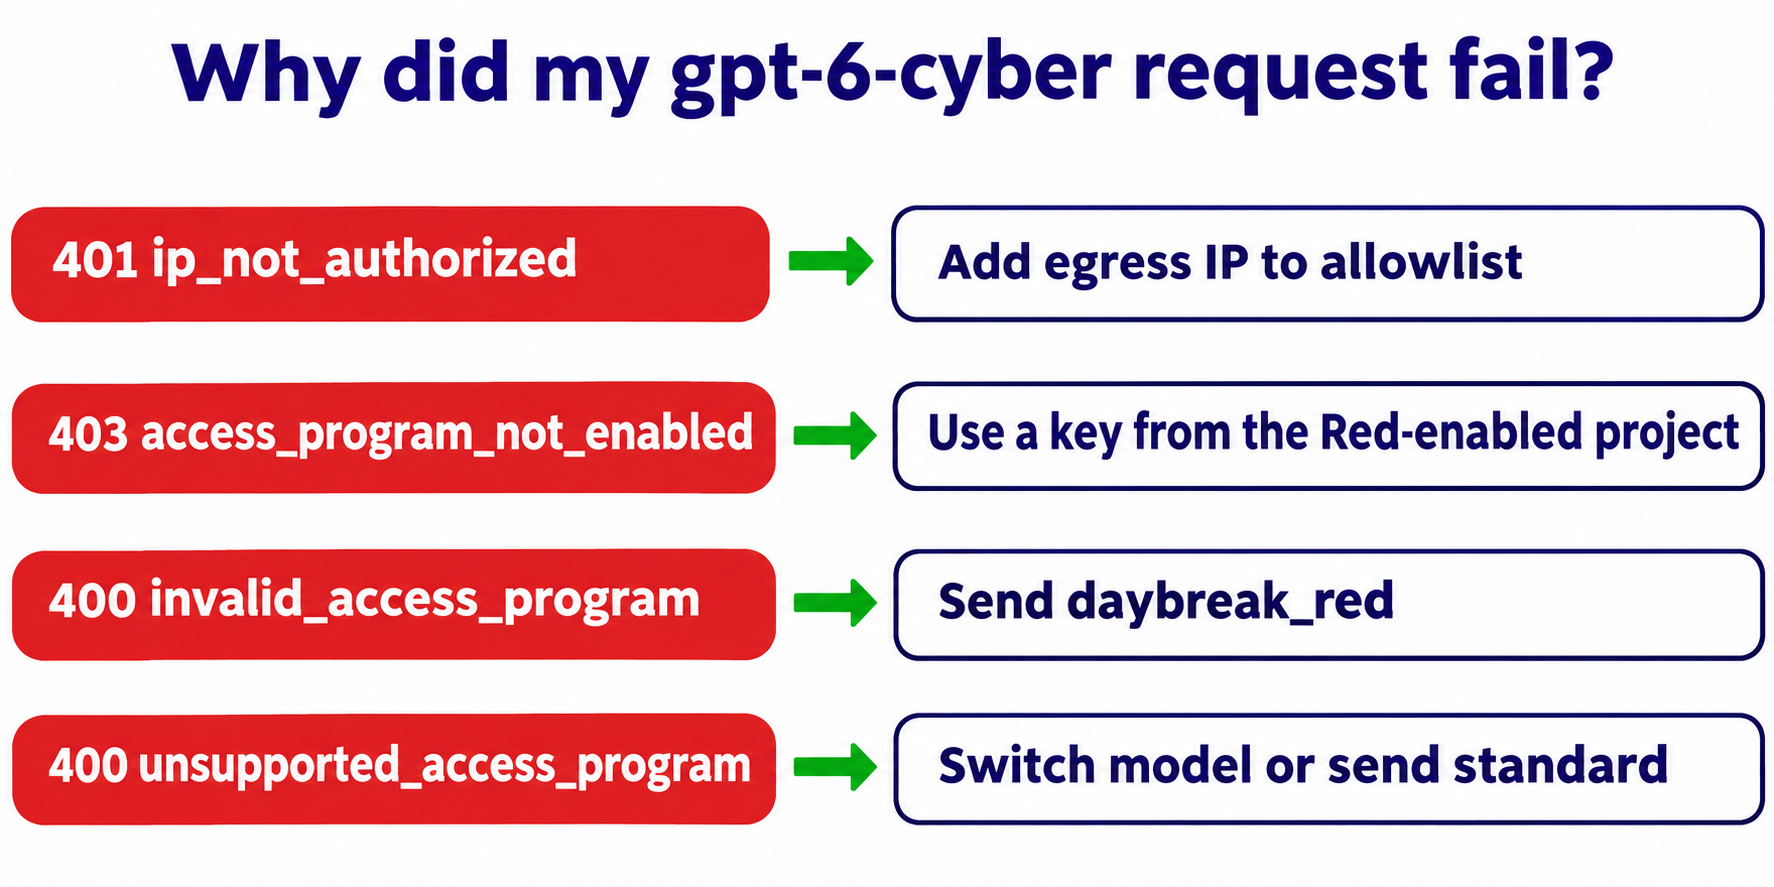
Each error code points to one step. Match it before you open a ticket.
| Error | Points to | Fix |
|---|---|---|
401 ip_not_authorized |
Step 5 | Add the caller’s public IP, wait up to 15 minutes |
403 access_program_not_enabled |
Steps 1, 3 or 4 | Use a key from the Red-enabled project |
400 invalid_access_program |
Request body | Send the value named in the error (daybreak_red here) |
400 unsupported_access_program |
Request body | Switch to a Daybreak model or send standard |
Still stuck? Send support the model ID, exact error, request ID, timestamp and time zone, never the key. And a refusal isn’t a setup error: safeguards still apply after approval, so a declined prompt with a 200 status means the path works.
Let your coding agent guard the setup with Apidog CLI
This setup breaks quietly: someone rotates a key from the wrong project or a CI runner changes IPs. You want a preflight check that reruns after every change, and your coding agent can build it once with Apidog CLI. Apidog Free covers up to 4 users.
npm install -g apidog-cli@latest
apidog login --with-token <YOUR_TOKEN>
apidog skill install
Then give your agent one prompt:
In Apidog project <id>, create an environment "gpt-6-cyber-red" with base URL
https://api.openai.com and a secret OPENAI_API_KEY variable. Add POST
/v1/responses from OpenAI's Daybreak guide. Create a test case
"gpt-6-cyber preflight" that sends OpenAI's documented example request.
Assert status 200, model equals gpt-6-cyber, and access_programs.cyber
equals daybreak_red. Run it once and summarize the result. Never send
exploit prompts or real targets.
The agent reads each schema, validates its payload and runs the check:
apidog environment create gpt-6-cyber-red --project <id> --base-url https://api.openai.com
apidog cli-schema get endpoint-create
apidog endpoint create --project <id> --file endpoint.json
apidog cli-schema validate test-case-create --file preflight.json
apidog test-case create --project <id> --file preflight.json
apidog run --test-case <caseId> --project <id> -e <envId> --env-var "OPENAI_API_KEY=$OPENAI_API_KEY" -r cli,json
Run it from an allowlisted machine, since it’s a live, billed call. The same apidog run line with -r junit goes into a pipeline, as in our Apidog CLI CI/CD guide, once the runner’s IP is allowlisted. Using Codex? See Apidog CLI in Codex.
FAQ
How long does GPT-6 Cyber setup take after approval? Plan for at least 30 minutes. The project setting and the IP allowlist each take up to about 15 minutes to apply, and PSP needs a passing validation.
Can a project owner enable Daybreak Red? No. Only an API organization owner can change Daybreak model access.
Why can’t I enable Daybreak on my default project? OpenAI doesn’t allow it. Use a non-default project for internal security work and a key from that project.
Does turning on Daybreak Red give me GPT-6 Cyber? No. Red gets you GPT-5.6 Cyber. GPT-6 Cyber needs a separate model approval, and the request must name gpt-6-cyber.
Do I need Zero Data Retention for GPT-6 Cyber? No. You only set up Private Safety Processing if your project already uses ZDR.
Can I put GPT-6 Cyber behind my product? No. Daybreak is for internal, authorized security work. OpenAI points external workflows to its Daybreak Partner Program.