Explore the capabilities of WebSocket protocol in FastAPI with this easy-to-follow guide. Learn how to leverage real-time, two-way communication for your projects, enabling smoother interactions and seamless data transfer.
WebSocket is a communication protocol that provides full-duplex communication channels over a single TCP connection. Unlike traditional HTTP requests, WebSocket allows for real-time, bidirectional communication between a client and a server. This makes it ideal for applications that require instant updates or continuous data streaming.
WebSocket operates on a lower level than HTTP and provides a persistent connection between the client and the server. This means that once the WebSocket connection is established, the server can send data to the client at any time without the need for the client to send a request first. This is in contrast to traditional HTTP requests, where the client must initiate the communication by sending a request to the server. If you encounter the WebSocket connection failed, you can check this article for help.
WebSocket uses a simple handshake process to establish a connection. The client sends a WebSocket handshake request to the server, and if the server supports WebSocket, it responds with a handshake response. Once the handshake is complete, the WebSocket connection is established, and both the client and the server can start sending and receiving messages.
Setting Up FastAPI for WebSocket Communication
FastAPI is a modern, fast (high-performance), web framework for building APIs with Python 3.7+ based on standard Python-type hints. It is designed to be easy to use and to provide high performance, making it a perfect choice for building WebSocket communication in FastAPI.
To set up FastAPI for WebSocket communication, we need to install the required dependencies. FastAPI uses the websockets library for WebSocket support. We can install it using pip:
# Install Dependencies

Run the following commands to install the required dependencies:

```bash
pip install fastapi
pip install websockets
Next, let's create a simple FastAPI application with WebSocket support. Open your IDE editor and create a file named "fastapi-ws.py". Copy and paste the following code into the file:
from fastapi import FastAPI, WebSocket

app = FastAPI()

@app.websocket("/ws")
async def websocket_endpoint(websocket: WebSocket):
    await websocket.accept()
    while True:
        data = await websocket.receive_text()
        await websocket.send_text(f"Message received: {data}")
In the above code, we create a WebSocket route "/ws" to handle WebSocket connections. In the websocket_endpoint() function, we use the WebSocket class as a parameter and call the accept() method to accept the WebSocket connection. Then, we use an infinite loop to handle the logic of receiving and sending messages.
Run the Program
To run the FastAPI application and test the WebSocket functionality, we need to use an ASGI server like "uvicorn". Make sure you have "uvicorn" installed by running the following command:
pip install uvicorn
In your IDE editor, open the terminal and navigate to the directory where the "fastapi-ws.py" file is stored. Then, run the following command to start the application:
uvicorn fastapi-ws:app --reload
Now, you can use a WebSocket client tool (such as the Console in your browser's developer tools or a dedicated WebSocket client application) to connect to "ws://localhost:8000/ws". You will be able to send messages and receive replies from the server.
Connecting and Debugging with Apidog
Apidog is an all-in-one API collaboration platform that integrates API documentation, API debugging, API mocking, and API automated testing. It supports various protocols such as http(s), gRPC, and WebSocket. With Apidog, debugging FastAPI interfaces becomes even more convenient.
button
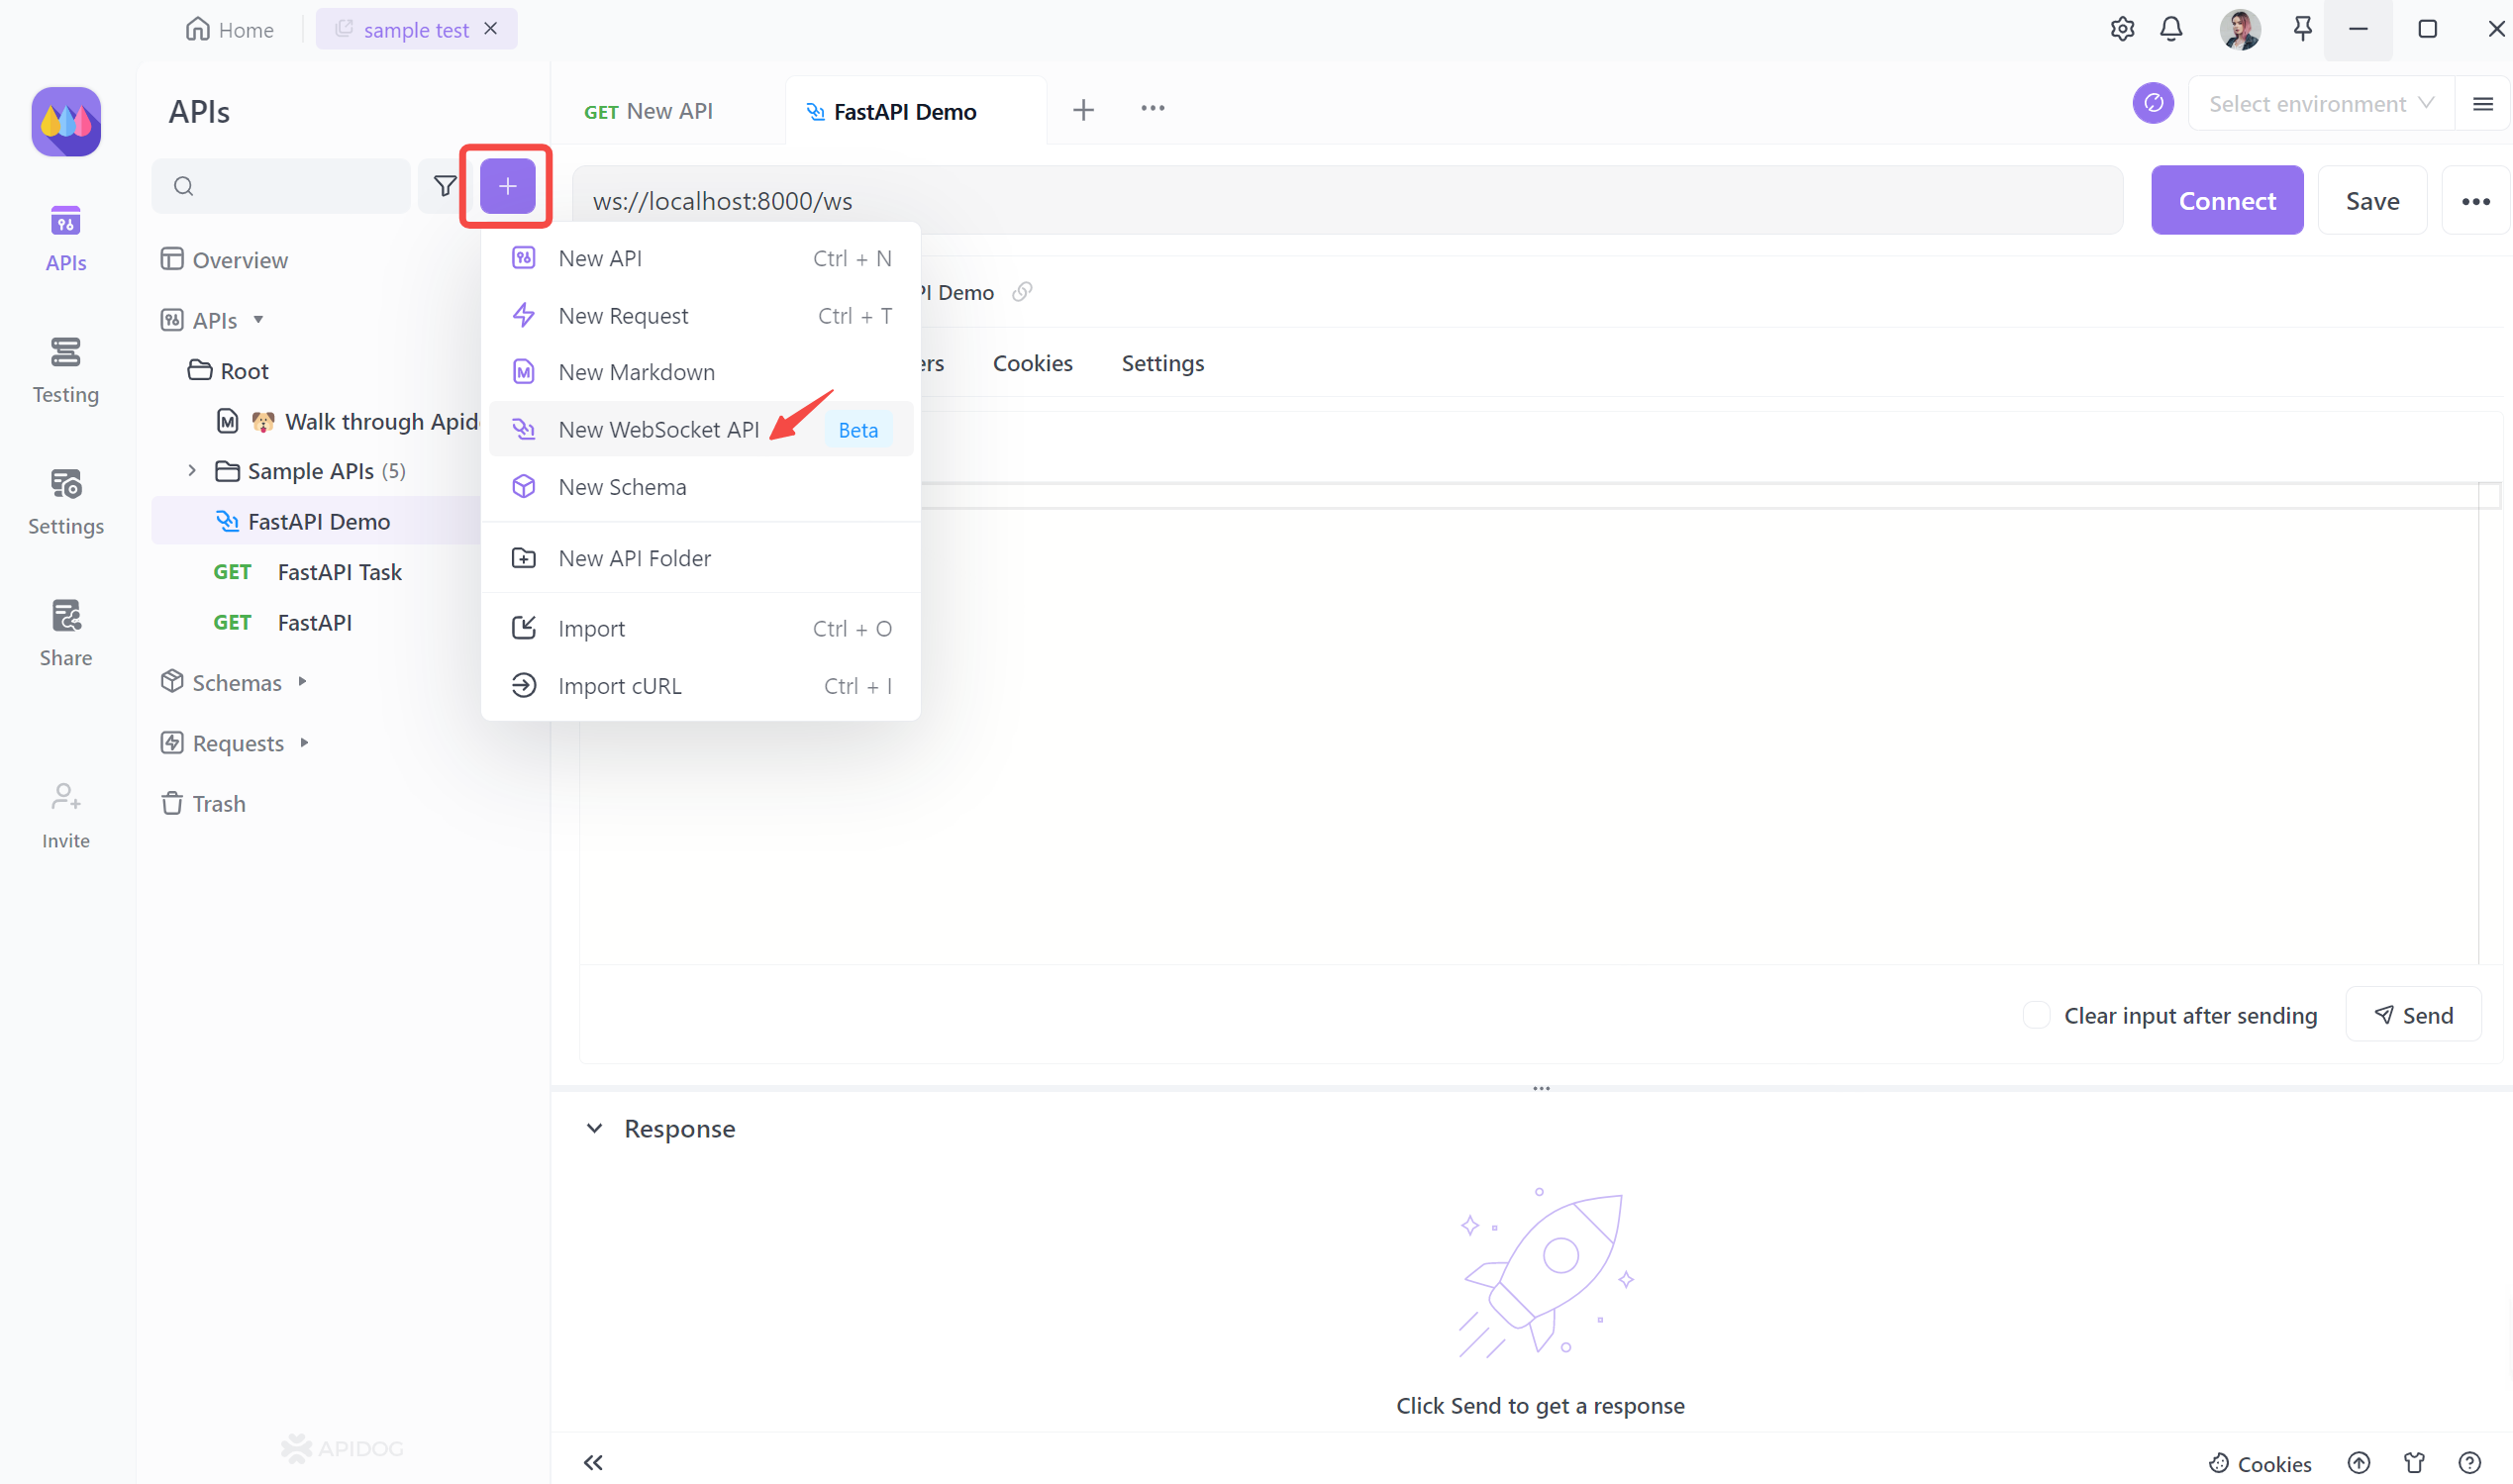
To get started, create a new project in Apidog and add a WebSocket interface to the project. Fill in "ws://localhost:8000/ws" as the WebSocket URL.
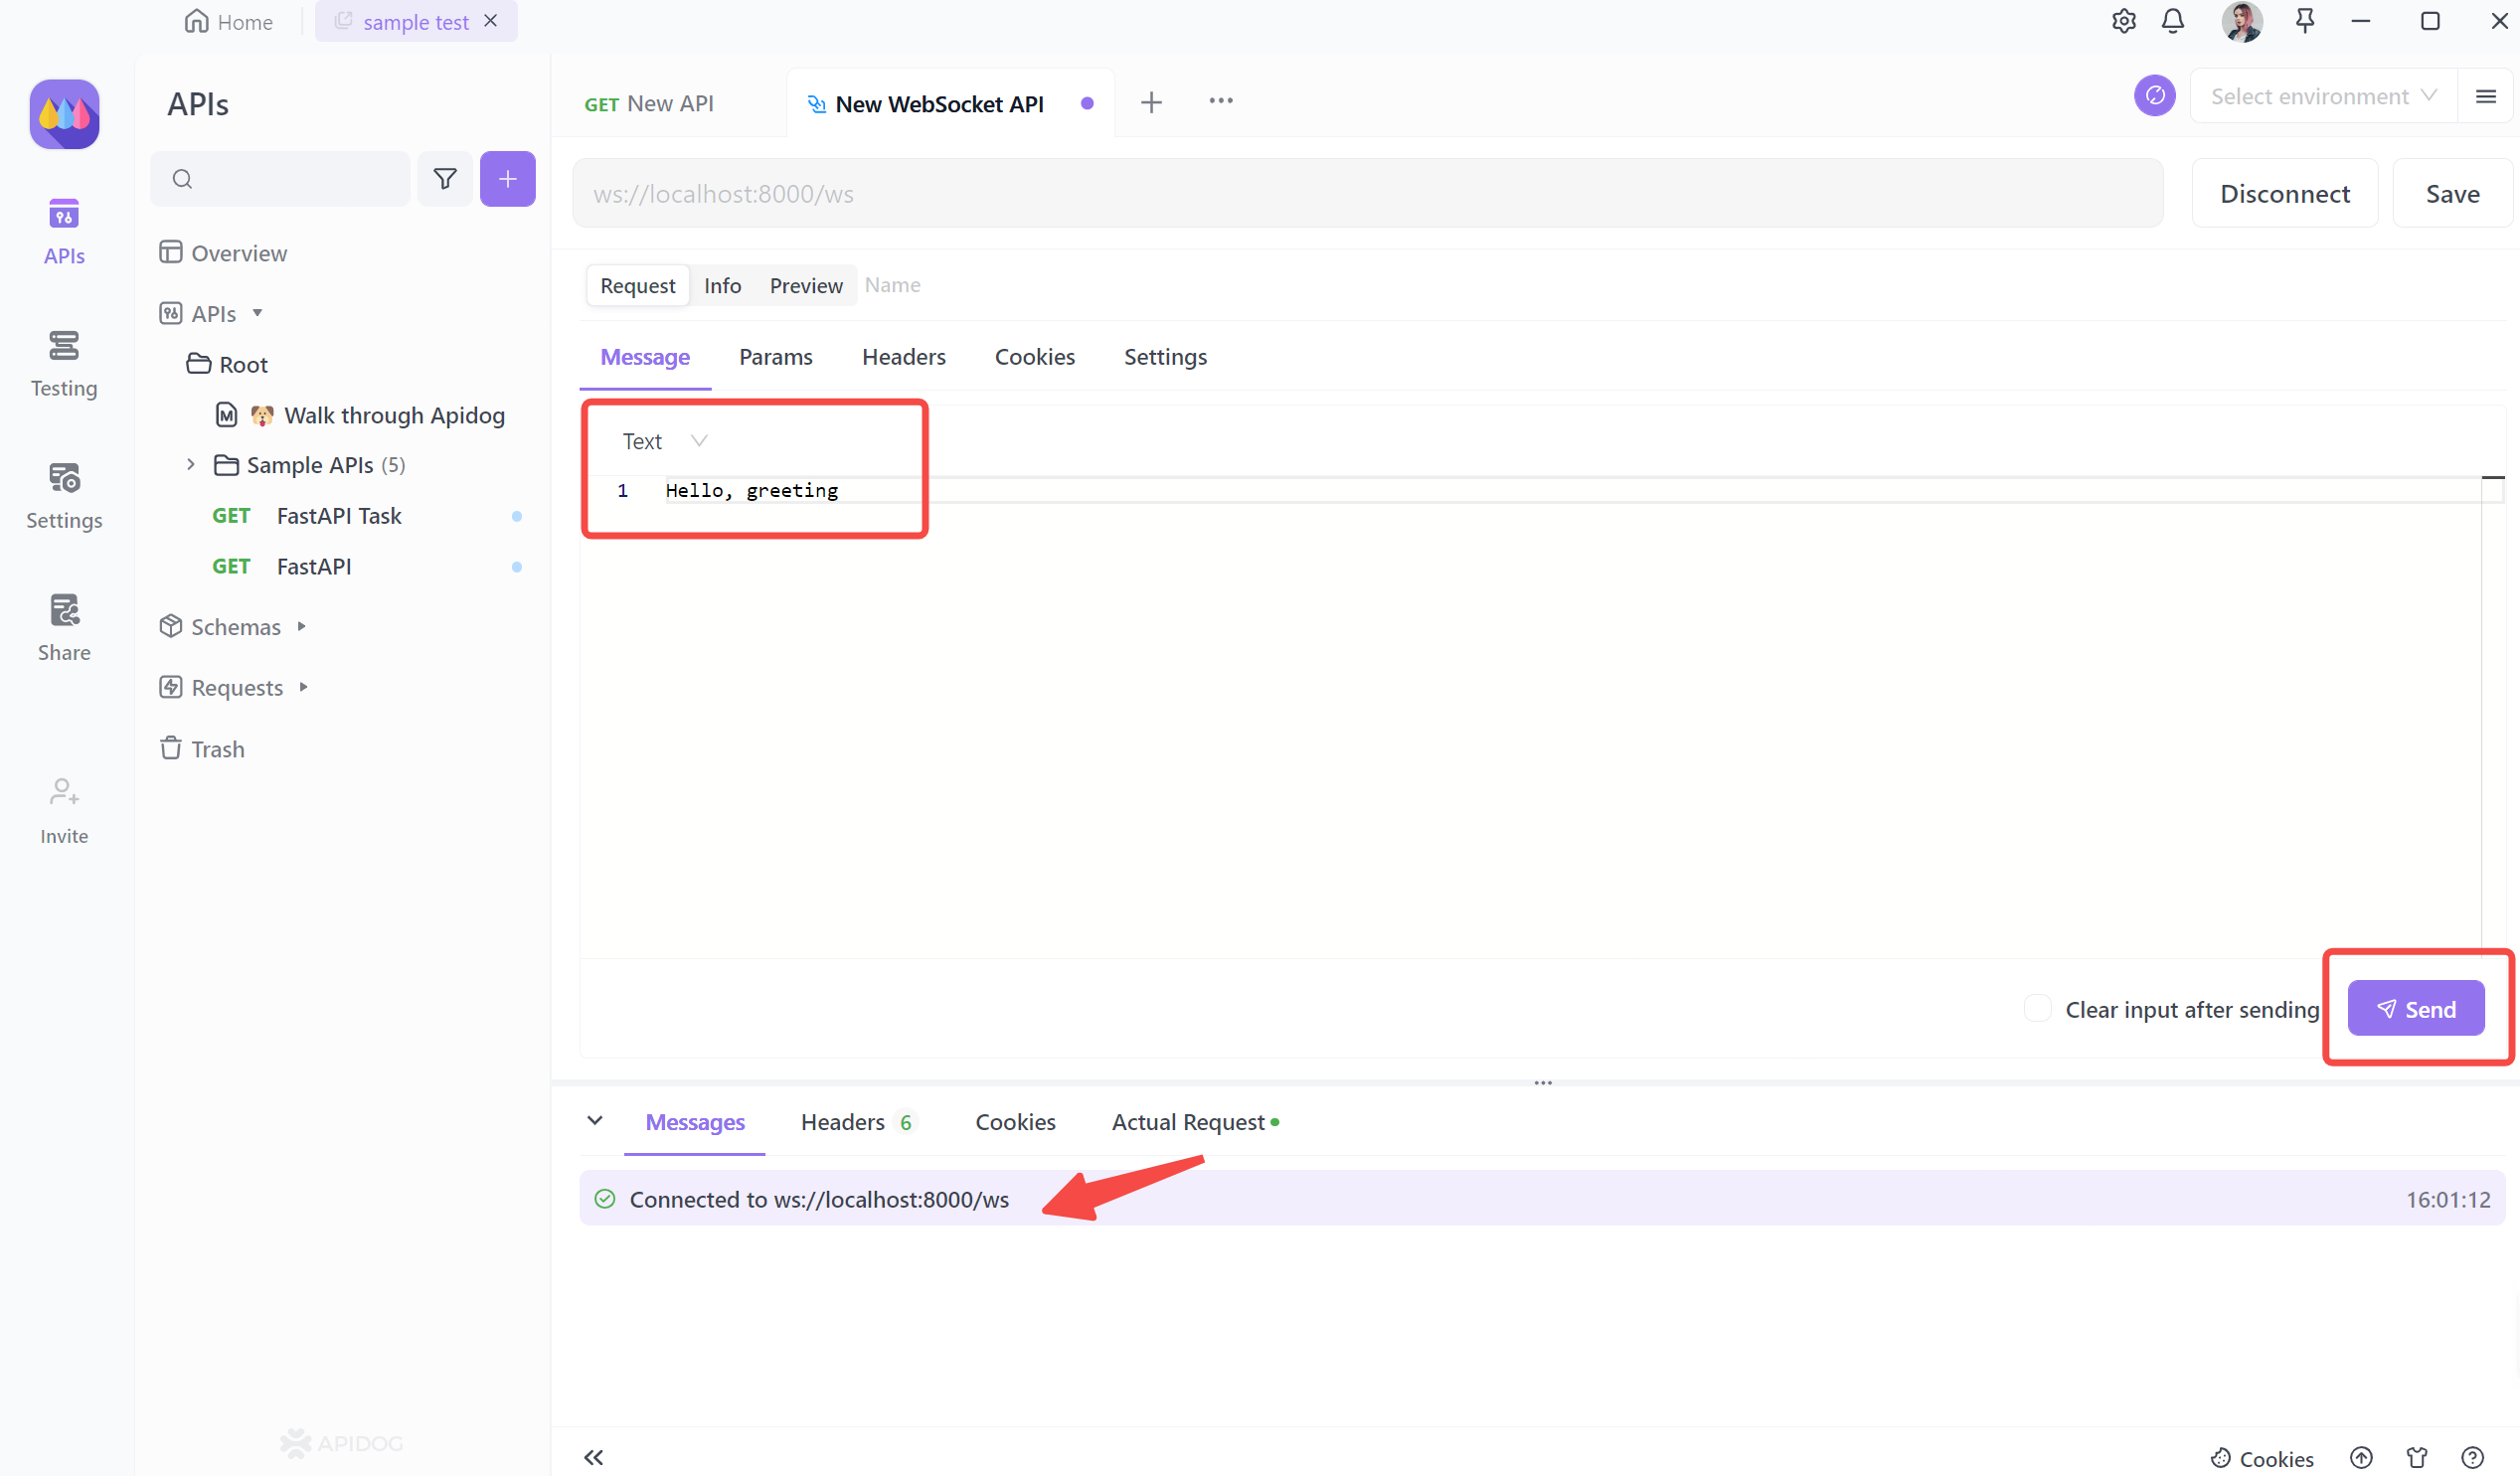
Connect WebSocket in Apidog
Click the "Connect" button to establish the connection. You can then input the necessary information and send the request. Finally, you will receive the response message.
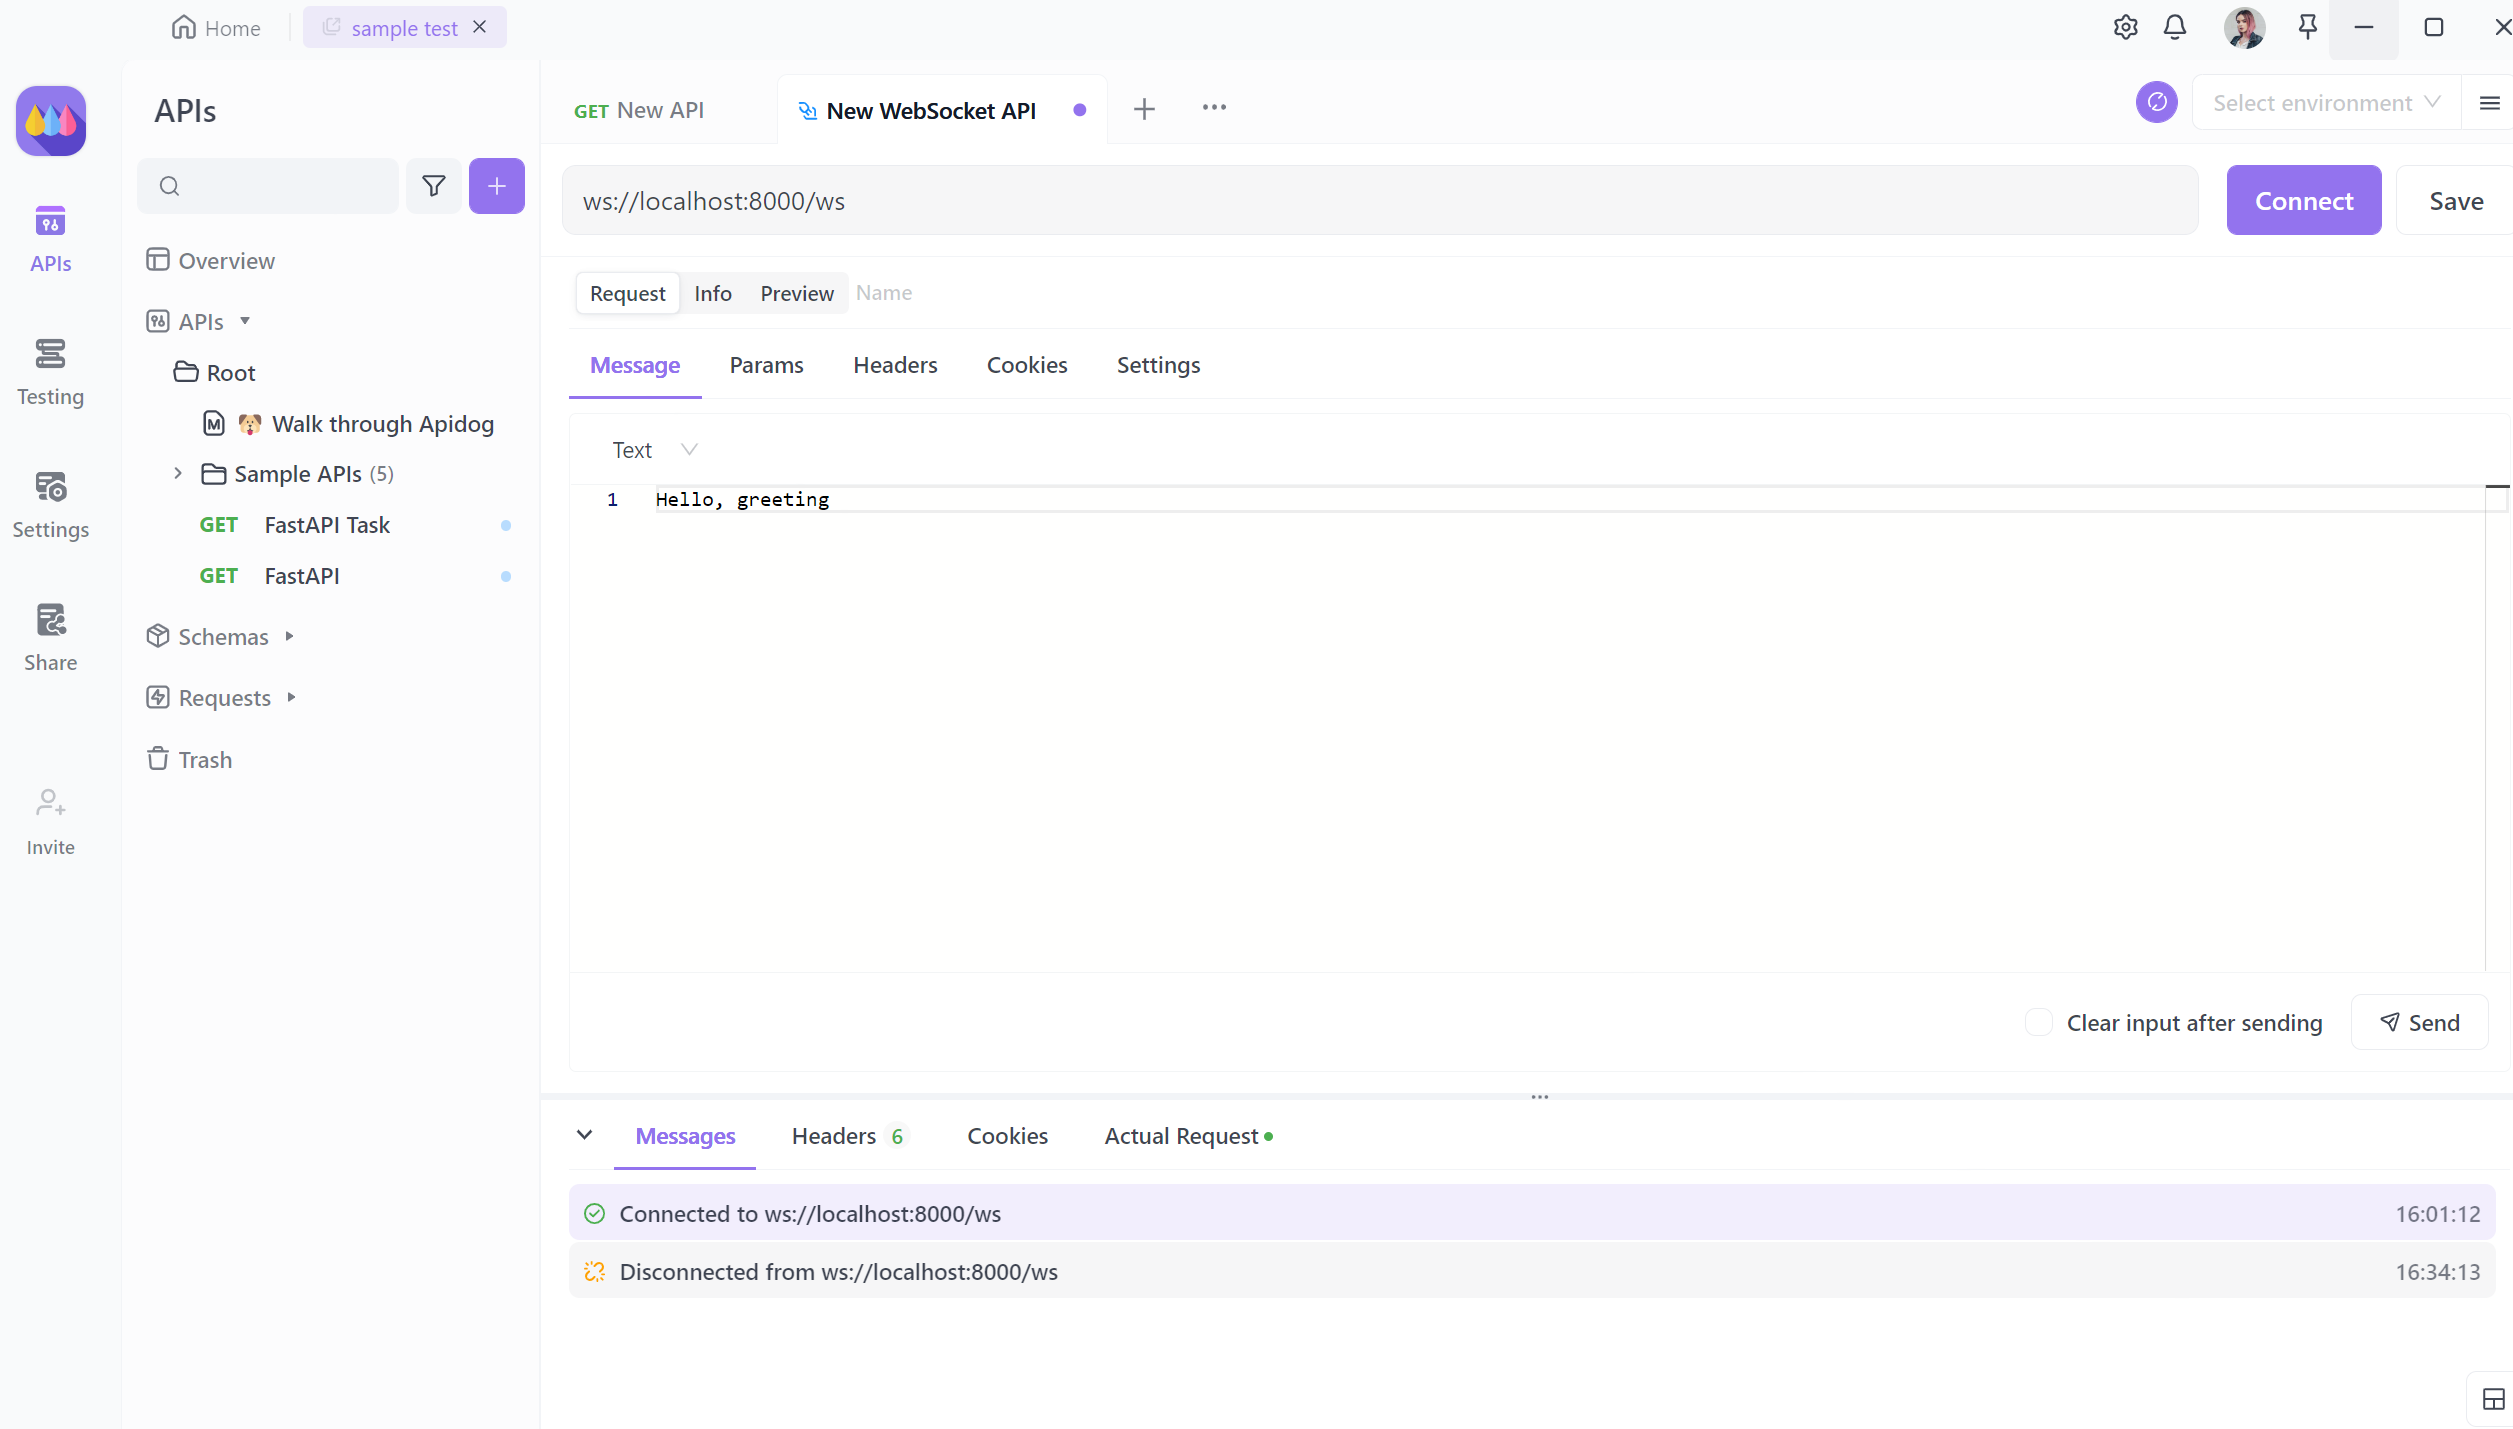
You can click "Disconnect" in the upper right corner above. The disconnect is triggered when the WebSocket connection is closed. It can be used to perform any cleanup tasks or update the server state accordingly.
Establishing a WebSocket Connection in FastAPI
In order to establish a WebSocket connection in FastAPI, we need to define a WebSocket endpoint in our application. FastAPI provides a WebSocket class that we can use to create WebSocket routes.
To define a WebSocket endpoint, we need to import the WebSocket class from the fastapi module. We can then create an instance of the WebSocket class and pass it as a parameter to the websocket_route decorator.
Here's an example of how to define a WebSocket endpoint in FastAPI:
from fastapi import FastAPI, WebSocket

app = FastAPI()

@app.websocket("/ws")
async def websocket_endpoint(websocket: WebSocket):
    await websocket.accept()
    while True:
        data = await websocket.receive_text()
        await websocket.send_text(f"Message received: {data}")
In this example, we define a WebSocket endpoint at the /ws path. The websocket_endpoint function takes a WebSocket parameter, which represents the WebSocket connection.
Inside the websocket_endpoint function, we call the accept method on the WebSocket object to accept the WebSocket connection. This allows the client to start sending and receiving messages.
We then enter a while loop to continuously listen for incoming messages. The receive_text method is used to receive text messages from the client. We can then process the received data as needed.
To send a message back to the client, we use the send_text method of the WebSocket object. In this example, we simply send back the received message with a prefix.
It's important to note that the websocket_endpoint function is an asynchronous function, denoted by the async keyword. This allows us to use await to handle asynchronous operations, such as receiving and sending messages.
To start the FastAPI application with WebSocket support, we can use the uvicorn command-line tool:
uvicorn main:app --reload
Once the application is running, we can establish a WebSocket connection to the /ws path using a WebSocket client, such as the websockets library in Python.