
Swagger-PHP is always the first thing that comes to mind when thinking about generating a Swagger spec for a php project. So what is Swagger-PHP? How do you create specs using Swagger-php? In this article, we will address these questions and introduce you to the details.
What is Swagger-PHP
swagger-PHP is a tool for generating API documentation using Swagger (now known as the OpenAPI Specification) in PHP. swagger-php helps PHP developers create API documentation based on the Swagger (OpenAPI) specification. This tool can generate Swagger (OpenAPI) specifications from PHP code. It allows developers to define API endpoints, requests and responses in code, and automatically generate a Swagger (OpenAPI) specification.
Features of Swagger-PHP
Swagger-PHP is a powerful tool used for generating specifications for OpenAPI versions 3.0 and 3.1. It's also capable of recording APIs using PHP source code. The annotation attribute used by Swagger-php can either be doc blocks or php 8.1, making it highly flexible and versatile.
Whether you're working with doc blocks or the latest PHP version, Swagger-php can help streamline your API development process and make it more efficient overall.

How to Installation and Setup in Swagger-PHP
To start using Swagger-PHP, you need to install it first. Swagger-PHP can be installed using Composer, a dependency manager for PHP.
To install Swagger-PHP, run the following command in your terminal:
composer require zircote/swagger-php
Once installed, you can start using Swagger-PHP to generate Swagger documentation for your API.
Next, you need to set up Swagger-PHP by creating a new Swagger instance and configuring it with your API information. Here's an example of how to set up Swagger-PHP :
require_once('vendor/autoload.php');

use Swagger\Annotations as SWG;

/**
 * @SWG\Swagger(
 *     basePath="/api",
 *     schemes={"http", "https"},
 *     @SWG\Info(
 *         version="1.0.0",
 *         title="My API",
 *         description="API documentation for My API",
 *         @SWG\Contact(name="My Company"),
 *         @SWG\License(name="MIT")
 *     )
 * )
 */
In this example, we've created a new Swagger instance and configured it with our API information, such as the base path, schemes, and API info (version, title, description, contact, and license).
Once you've set up Swagger-PHP, you can start adding Swagger annotations to your API code to generate Swagger documentation. We'll cover this in more detail in the next section.
Creating Swagger Documentation with Swagger-PHP
Swagger-PHP is a PHP library for generating Swagger documents. In this section, we will learn how to create Swagger documentation using Swagger-PHP.
Step 1. Defining API information
First, we need to define the information of the API. This includes the title, description, version, etc. of the API. The following is an example:
$swagger = \Swagger\Swagger::make()
    ->info([
        'title' => 'My API',
        'description' => 'This is a sample API documentation.',
        'version' => '1.0.0'
    ]);
Step 2. Defining the API endpoints
Next, we need to define the endpoints of the API. This includes the HTTP methods, paths, parameters and responses for each endpoint. The following is an example:
$swagger = \Swagger\Swagger::make()
    ->info([
        'title' => 'My API',
        'description' => 'This is a sample API documentation.',
        'version' => '1.0.0'
    ])
    ->get('/users', [
        'summary' => 'Get a list of users.',
        'description' => 'Returns a list of users.',
        'responses' => [
            '200' => [
                'description' => 'A list of users.',
                'schema' => [
                    'type' => 'array',
                    'items' => [
                        '$ref' => '#/definitions/User'
                    ]
                ]
            ]
        ]
    ])
    ->post('/users', [
        'summary' => 'Create a new user.',
        'description' => 'Creates a new user.',
        'parameters' => [
            [
                'name' => 'user',
                'in' => 'body',
                'description' => 'The user to create.',
                'required' => true,
                'schema' => [
                    '$ref' => '#/definitions/User'
                ]
            ]
        ],
        'responses' => [
            '200' => [
                'description' => 'The created user.',
                'schema' => [
                    '$ref' => '#/definitions/User'
                ]
            ]
        ]
    ]);
Step 3. Defining the data model
Finally, we need to define the data models. This includes the attributes and types of each model. The following is an example:
$swagger = \Swagger\Swagger::make()
    ->info([
        'title' => 'My API',
        'description' => 'This is a sample API documentation.',
        'version' => '1.0.0'
    ])
    ->get('/users', [
        'summary' => 'Get a list of users.',
        'description' => 'Returns a list of users.',
        'responses' => [
            '200' => [
                'description' => 'A list of users.',
                'schema' => [
                    'type' => 'array',
                    'items' => [
                        '$ref' => '#/definitions/User'
                    ]
                ]
            ]
        ]
    ])
    ->post('/users', [
        'summary' => 'Create a new user.',
        'description' => 'Creates a new user.',
        'parameters' => [
            [
                'name' => 'user',
                'in' => 'body',
                'description' => 'The user to create.',
                'required' => true,
                'schema' => [
                    '$ref' => '#/definitions/User'
                ]
            ]
        ],
        'responses' => [
            '200' => [
                'description' => 'The created user.',
                'schema' => [
                    '$ref' => '#/definitions/User'
                ]
            ]
        ]
    ])
    ->definitions([
        'User' => [
            'type' => 'object',
            'properties' => [
                'id' => [
                    'type' => 'integer',
                    'format' => 'int64'
                ],
                'name' => [
                    'type' => 'string'
                ],
                'email' => [
                    'type' => 'string'
                ]
            ]
        ]
    ]);
Step 4. Exporting Swagger documents
Finally, we can output the Swagger documentation using the following code:
header('Content-Type: application/json');
echo $swagger->toJson();
This will output a Swagger document in JSON format that can be used to generate API documentation.
Integrating Swagger UI with Swagger-PHP
To fully utilize the benefits of Swagger documentation, it is important to have a user-friendly interface to view and interact with the documentation. This is where Swagger-ui comes in. Swagger-UI is a web-based interface that provides an interactive experience for viewing and testing Swagger documentation.
Integrating Swagger-UI with Swagger-PHP is a straightforward process. First, download the latest version of Swagger-UI from the official GitHub repository. Then, extract the contents of the downloaded archive to a directory on your web server.
Next, create a new PHP file that will serve as the entry point for Swagger-UI. In this file, include the necessary CSS and JavaScript files for Swagger-UI, as well as the Swagger-ui JavaScript library itself. You will also need to include the Swagger-PHP-generated JSON file that contains your API documentation.
<!DOCTYPE html>
<html>
<head>
  <title>Swagger UI</title>
  <link rel="stylesheet" type="text/css" href="path/to/swagger-ui.css">
  <script type="text/javascript" src="path/to/swagger-ui-bundle.js"></script>
  <script type="text/javascript" src="path/to/swagger-ui-standalone-preset.js"></script>
</head>
<body>
  <div id="swagger-ui"></div>
  <script type="text/javascript">
    window.onload = function() {
      // Build a system
      const ui = SwaggerUIBundle({
        url: "path/to/swagger-json.php",
        dom_id: '#swagger-ui',
        presets: [
          SwaggerUIBundle.presets.apis,
          SwaggerUIStandalonePreset
        ],
        layout: "BaseLayout"
      })
    }
  </script>
</body>
</html>
In the above example, replace the path/to placeholders with the actual paths to the Swagger-UI CSS and JavaScript files, as well as the Swagger-PHP, generated JSON file.
Once you have created this file, you can access Swagger-UI by navigating to its URL in your web browser. You should see a fully functional Swagger-ui interface that displays your API documentation and allows you to interact with it.
In conclusion, integrating Swagger-UI with Swagger-PHP is a simple process that greatly enhances the usability of your API documentation. By following the steps outlined above, you can easily create a user-friendly interface for your API documentation that will make it easier for developers to understand and use your API.
Share API specifications
After generating the Swagger specification, I often share it with my team members. In these cases, we often share in Swagger JSON or OpenAPI yaml formats, but that seems a bit outdated.
Here Apidog is the perfect API management tool that instantly generates highly readable API specifications based on Swagger JSON or YAML data. You can also easily share this API specification with the API sharing function.
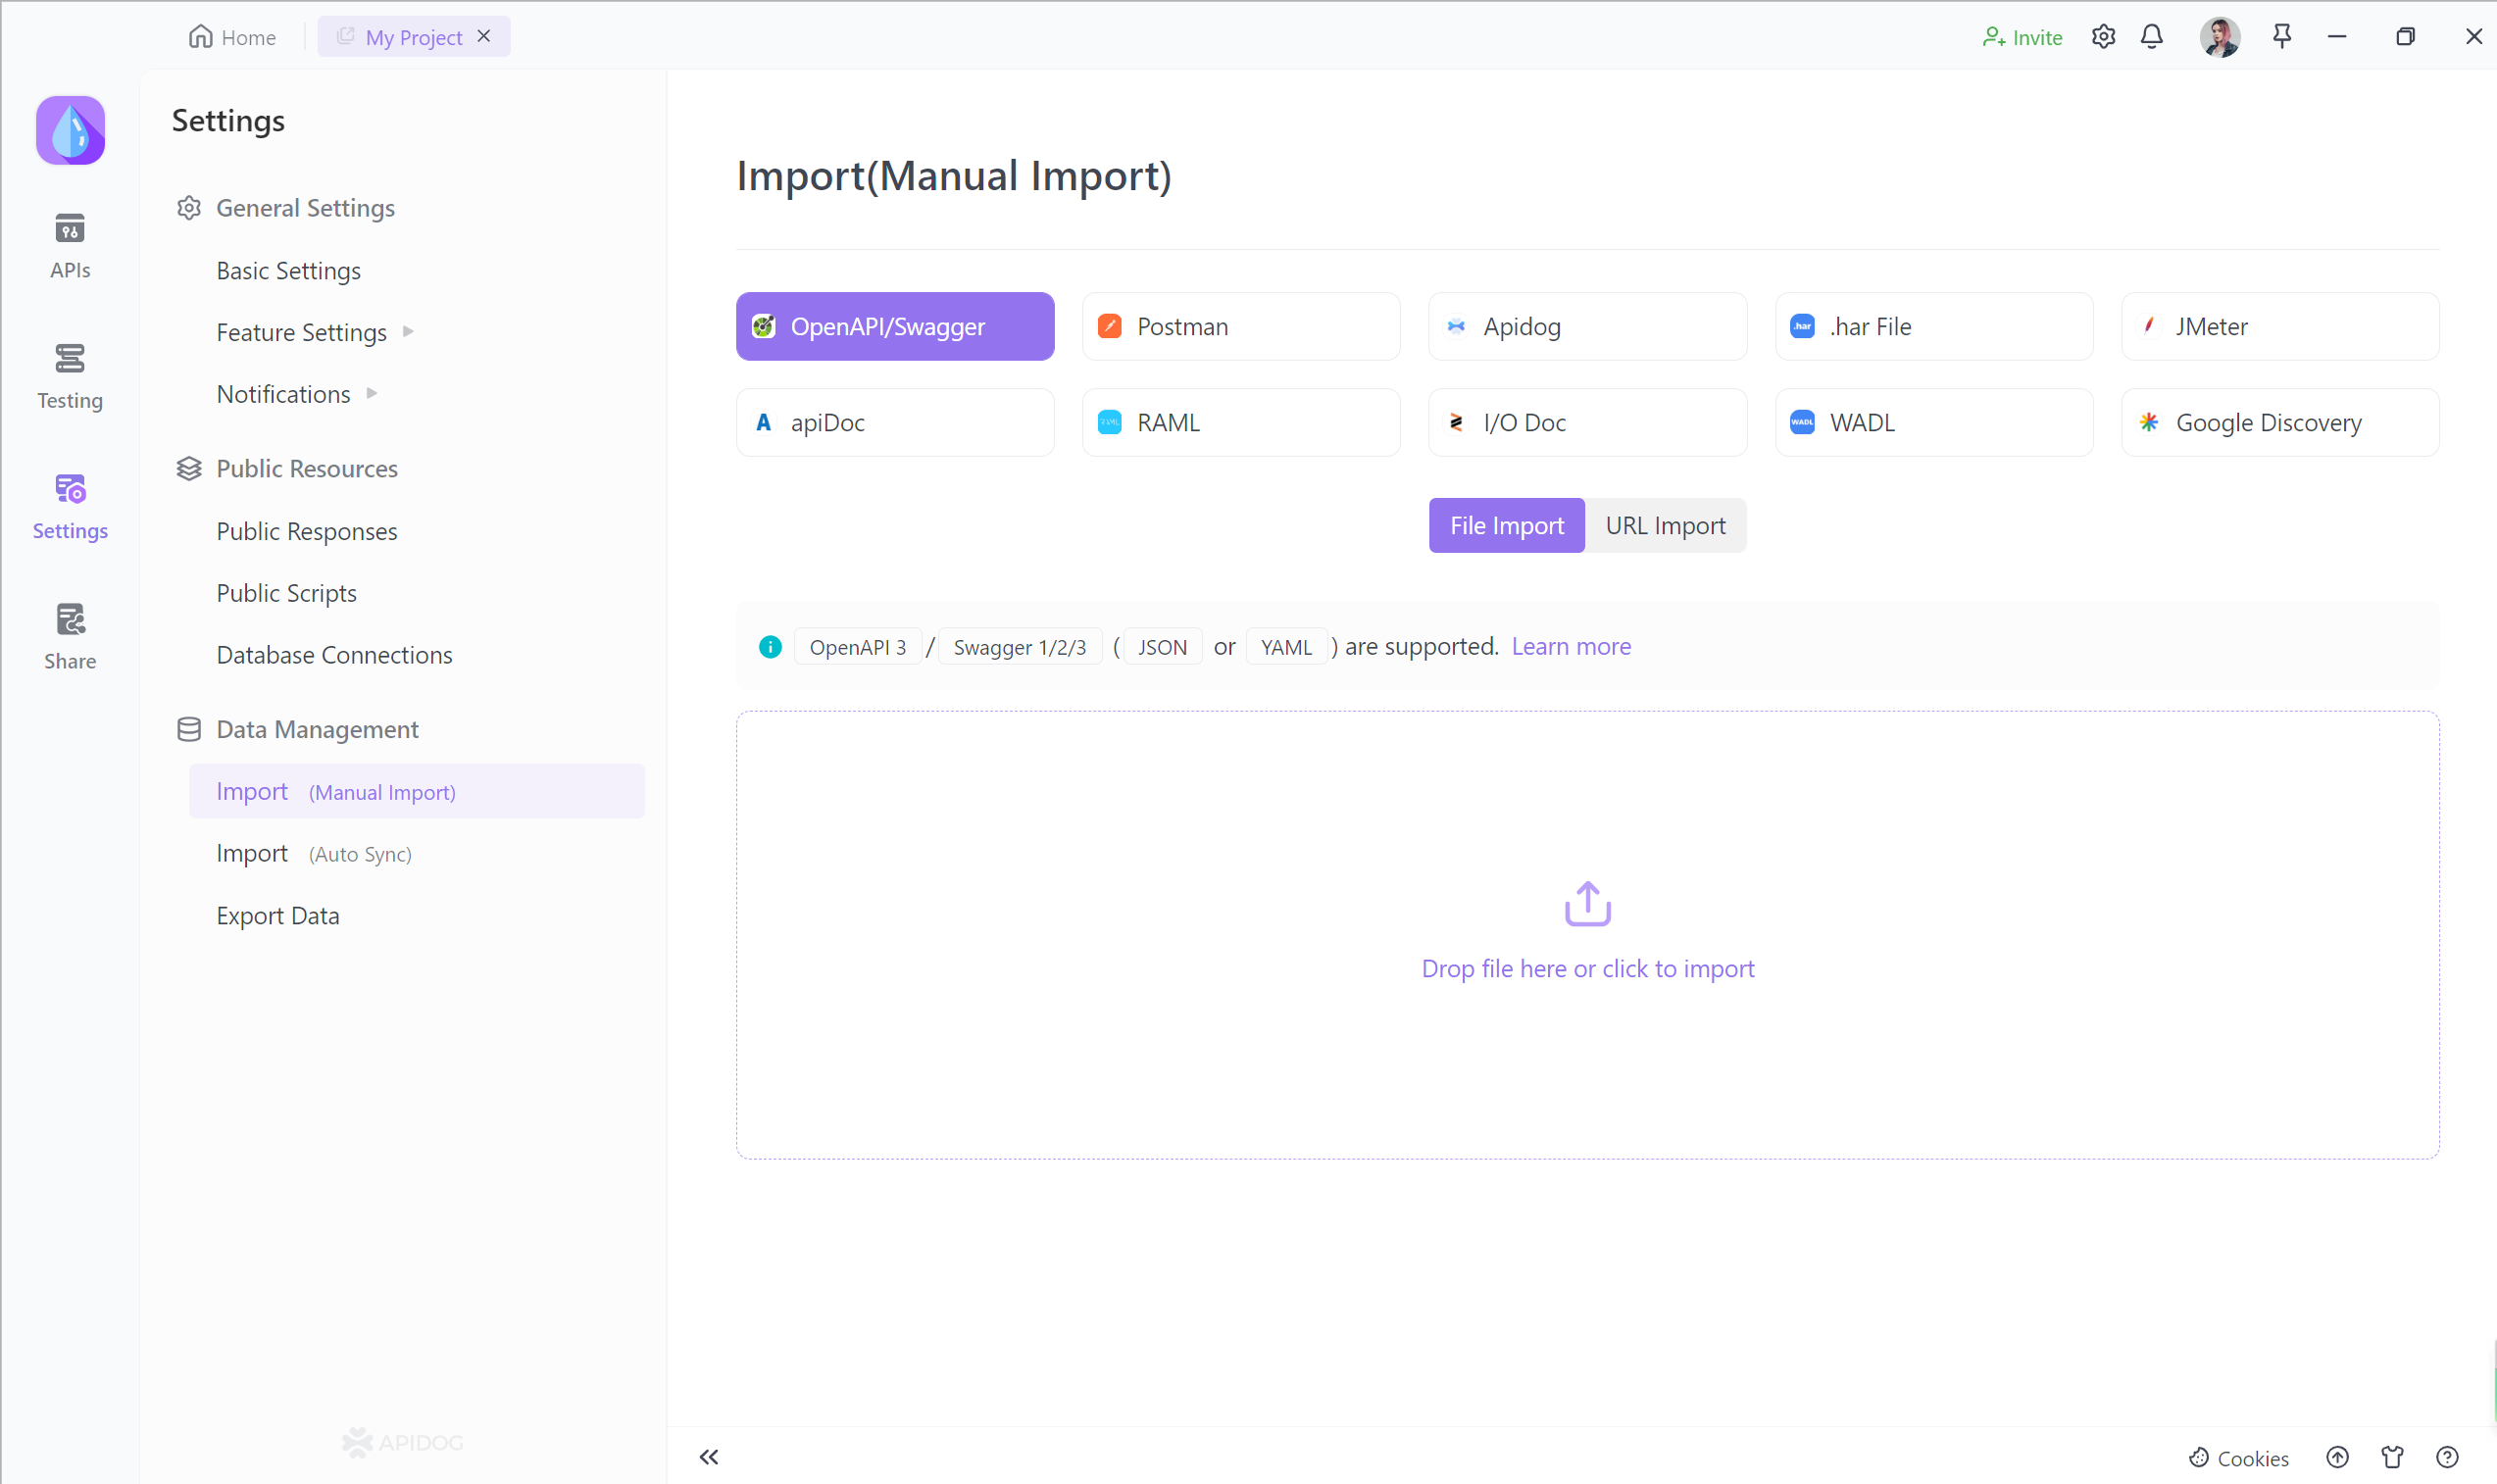
Apidog also provides various functions as an API lifecycle management tool.
API design and specification generation: Apidog is the easiest API design tool to use, allowing you to intuitively design APIs without code, and comfortably generate OpenAPI and Swagger specifications.
API management and unit testing: Apidog makes unit testing very easy as you can efficiently manage your API, send API requests and validate responses.
API Test Automation: Apidog also supports automated testing and is ready for CI/CD. By using this function to set the number of threads, etc., you can easily implement API load tests and API test automation.
Conclusion
In conclusion, Swagger-PHP is a powerful tool for generating Swagger documentation for PHP-based APIs. It allows developers to easily document their APIs and make them accessible to other developers. Additionally, integrating Swagger-UI with Swagger-php provides a user-friendly interface for exploring and testing APIs.
Here are some resources for further learning about Swagger-PHP:
- Official documentation: https://zircote.github.io/swagger-php/
- GitHub repository: https://github.com/zircote/swagger-php
- Swagger-ui: https://swagger.io/tools/swagger-ui/


