
The tech industry has taken major leaps in software development, whether Web or Mobile. Nowadays, the major highlight is the efficient use of Application Programming Interfaces(APIs) in software development. Each feature provided by APIs provides an added advantage to the software application. It allows different software systems to interact and share data easily, improving development efficiency. For example, file upload is one of the most important features many APIs support, allowing users to upload and share files such as images, videos, and documents.
This article will look at the fundamental concepts of file upload in APIs and then provide a step-by-step guide in Apidog. Apidog is an
Basic Concepts of File Upload in APIs
Before directly jumping on to see how a file upload works in APIs, we first need to study some key concepts.
Content-Type
The Content-Type HTTP header specifies the type of content sent in the HTTP message body. It is an important part of HTTP requests and responses because it tells the receiving server or client about the returned content type and how to handle it. The content type specifies the format of the sent data, such as text, HTML, JSON, or XML, and enables the server to parse the content correctly. application/json, text/plain, application/x-www-form-urlencoded, and multipart/form-data, are the most commonly used content types. For our context, we will set the content type to be multipart/form-data, which allows files to be included in the request body.
When a client submits a request with multipart/form-data content type, the request body is divided into multiple parts, each containing a piece of data. A boundary string in the content type header separates each part, which must be unique and not appear in the sent data.
Each part of the request can contain a name and value pair or a file. For example, an HTML form with a file upload field might submit a request with a file part containing the file's binary data and a name part containing the file's name. Other parts might contain additional data, such as form fields or metadata. The format of the header looks like this:
Content-Type: multipart/form-data;
boundary=----xyz123As discussed above, posted data is divided into multiple parts, so the server needs to recognize where each part begins and ends. Each part in the request body is separated by the boundary string, preceded by two dashes “--”. The last part is followed by two dashes and the boundary string, followed by two more dashes. Boundaries usually begin with multiple dashes and end with an alphanumeric suffix (e.g., ------xyz123).
-- ----xyz123 Content-Disposition: form-data; name="file"; filename="example.png" Content-Type: image/png

<Binary data of the file>
-- ----xyz123
Content-Disposition: form-data; name="field1"

value1 -- ----xyz123--
In this example, the request body contains two parts: a file part with the file's binary data and a name part with the value value1. The boundary string separates each part; the last part is followed by two dashes, and two more dashes follow the boundary string.
HTTP Method
HTTP Methods are messages sent to a server that specifies the type of action to be taken. These methods enable more comprehensive communication between the browser and the server. Some of the HTTP methods are listed below:
● GET: Retrieves a resource from the server.
● POST: Submits an entity to the server and creates a new resource.
● PUT: Updates an existing resource on the server.
● DELETE: Deletes a resource from the server.
● PATCH: Partially updates an existing resource on the server.
● HEAD: Retrieves the headers of a resource without its body.
● OPTIONS: Retrieves the HTTP methods supported by a resource.
● TRACE: A message loop-back test is run along the path to the target resource.
In our context, the POST HTTP method should be used to submit the file upload request. It is due to the POST method's support for data submission in the request body.
File Encoding
The method used to represent the character data in a binary file is called file encoding. It ensures that the data in the file can be correctly stored, transmitted, and interpreted across various systems and software. There are numerous file encodings available, including UTF-8 and ASCII.
It is critical to ensure the file encoding is compatible with the server and any other systems processing it when working with file uploads in APIs. In general, UTF-8 is the default file encoding because it is widely supported by many systems and can represent any character.
File Size Limits
File size limits refer to the largest file that can be uploaded to a server. Adjusting file size limits can help prevent denial of service attacks and ensure that large files do not overburden the server's resources. The limits can be set at both the client and server levels.
The browser or software used to make the file upload request can enforce file size limits at the client level. Browsers typically have their file size limits, which vary depending on the browser and operating system. For example, some browsers limit file uploads to 2GB, while others allow larger uploads. On the other hand, file size limits can be set at the server level in the web server configuration or the application code, which can be configured based on the server's available resources, the size of typically uploaded files, and the desired level of security.
API endpoints that accept file uploads should have file size limits to prevent excessively large files from being uploaded to ensure the server remains stable and responsive.
How to Upload Files in Requests Using API?

Apidog is an API documentation and testing tool that helps developers create, document, debug, test, and mock their APIs. Its objective is to facilitate creating and managing REST APIs easier by providing a simple and easy-to-use interface. Apidog is available in cloud-based versions and supports various programming languages and API frameworks, which helps you upload files in API seamlessly.
Now that we've covered the fundamentals of file upload in APIs and understand what Apidog is, let's dive into the step-by-step instructions for performing a file upload with Apidog.
Step 1: Creating a New Project
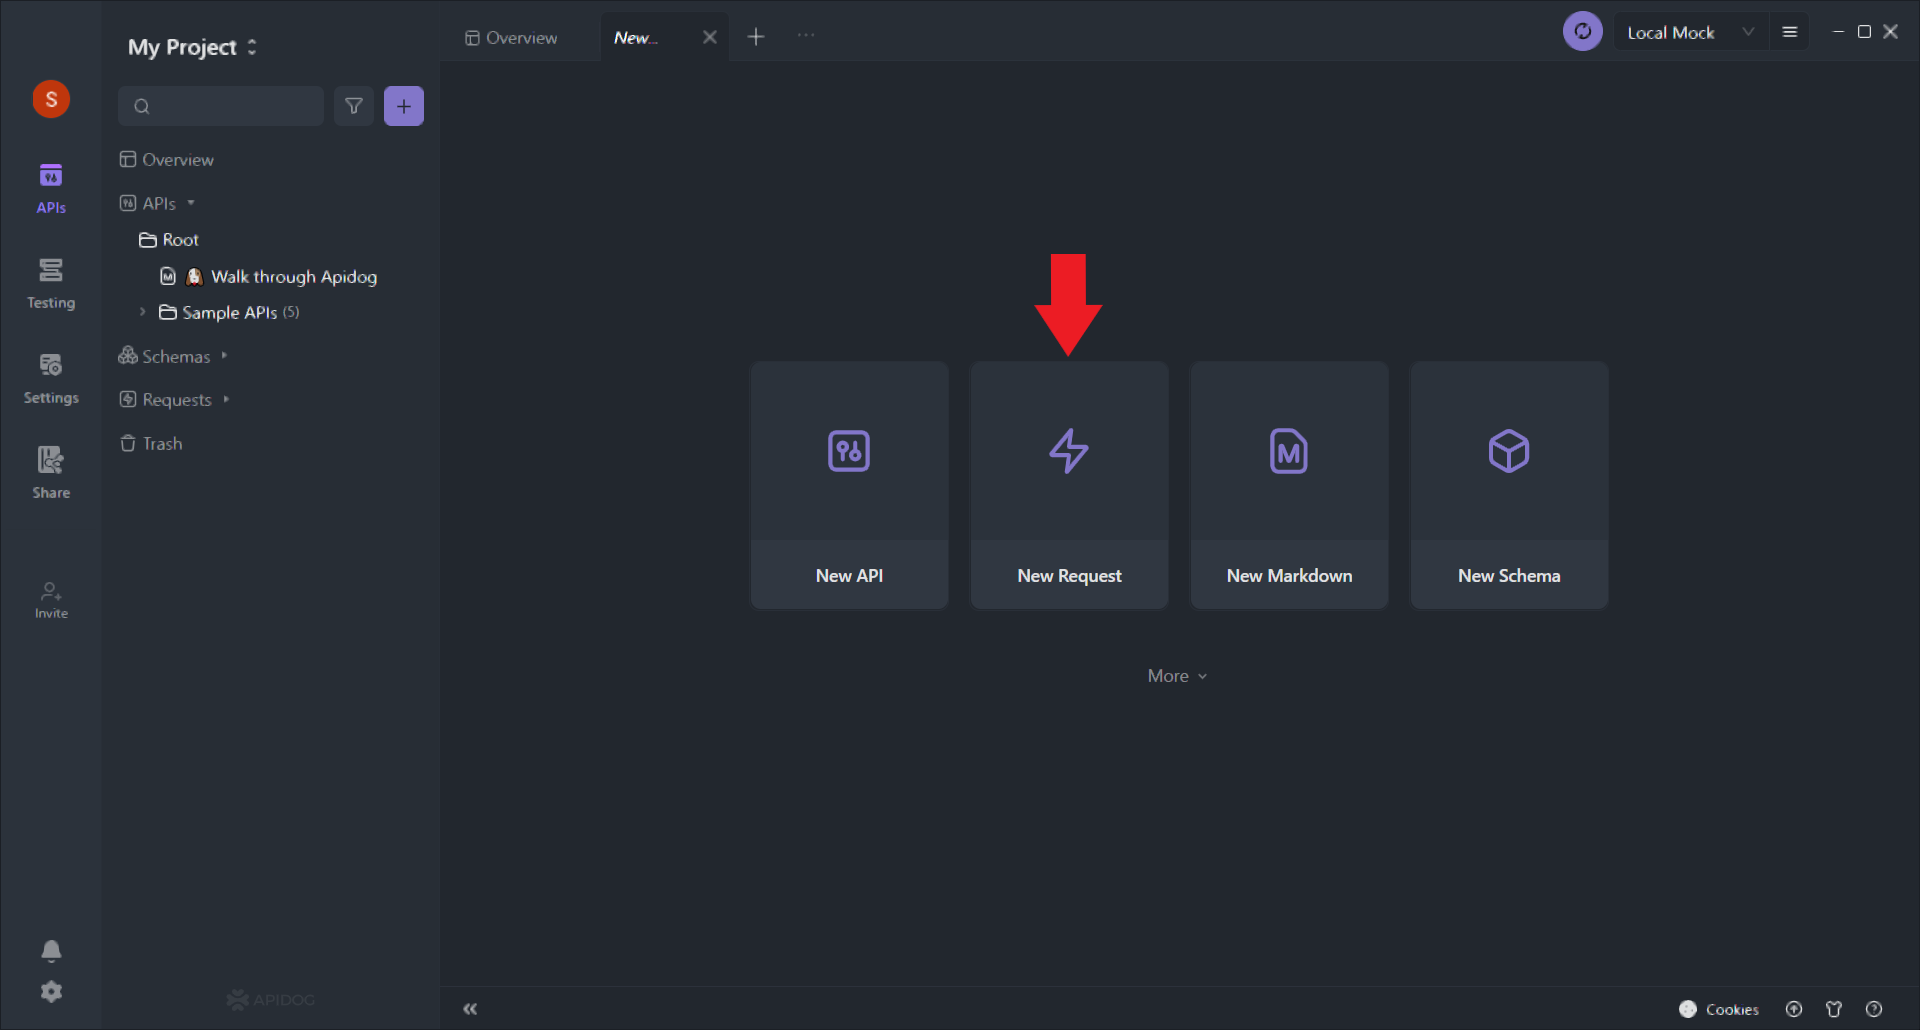
Open the Apidog application and create a new Request.
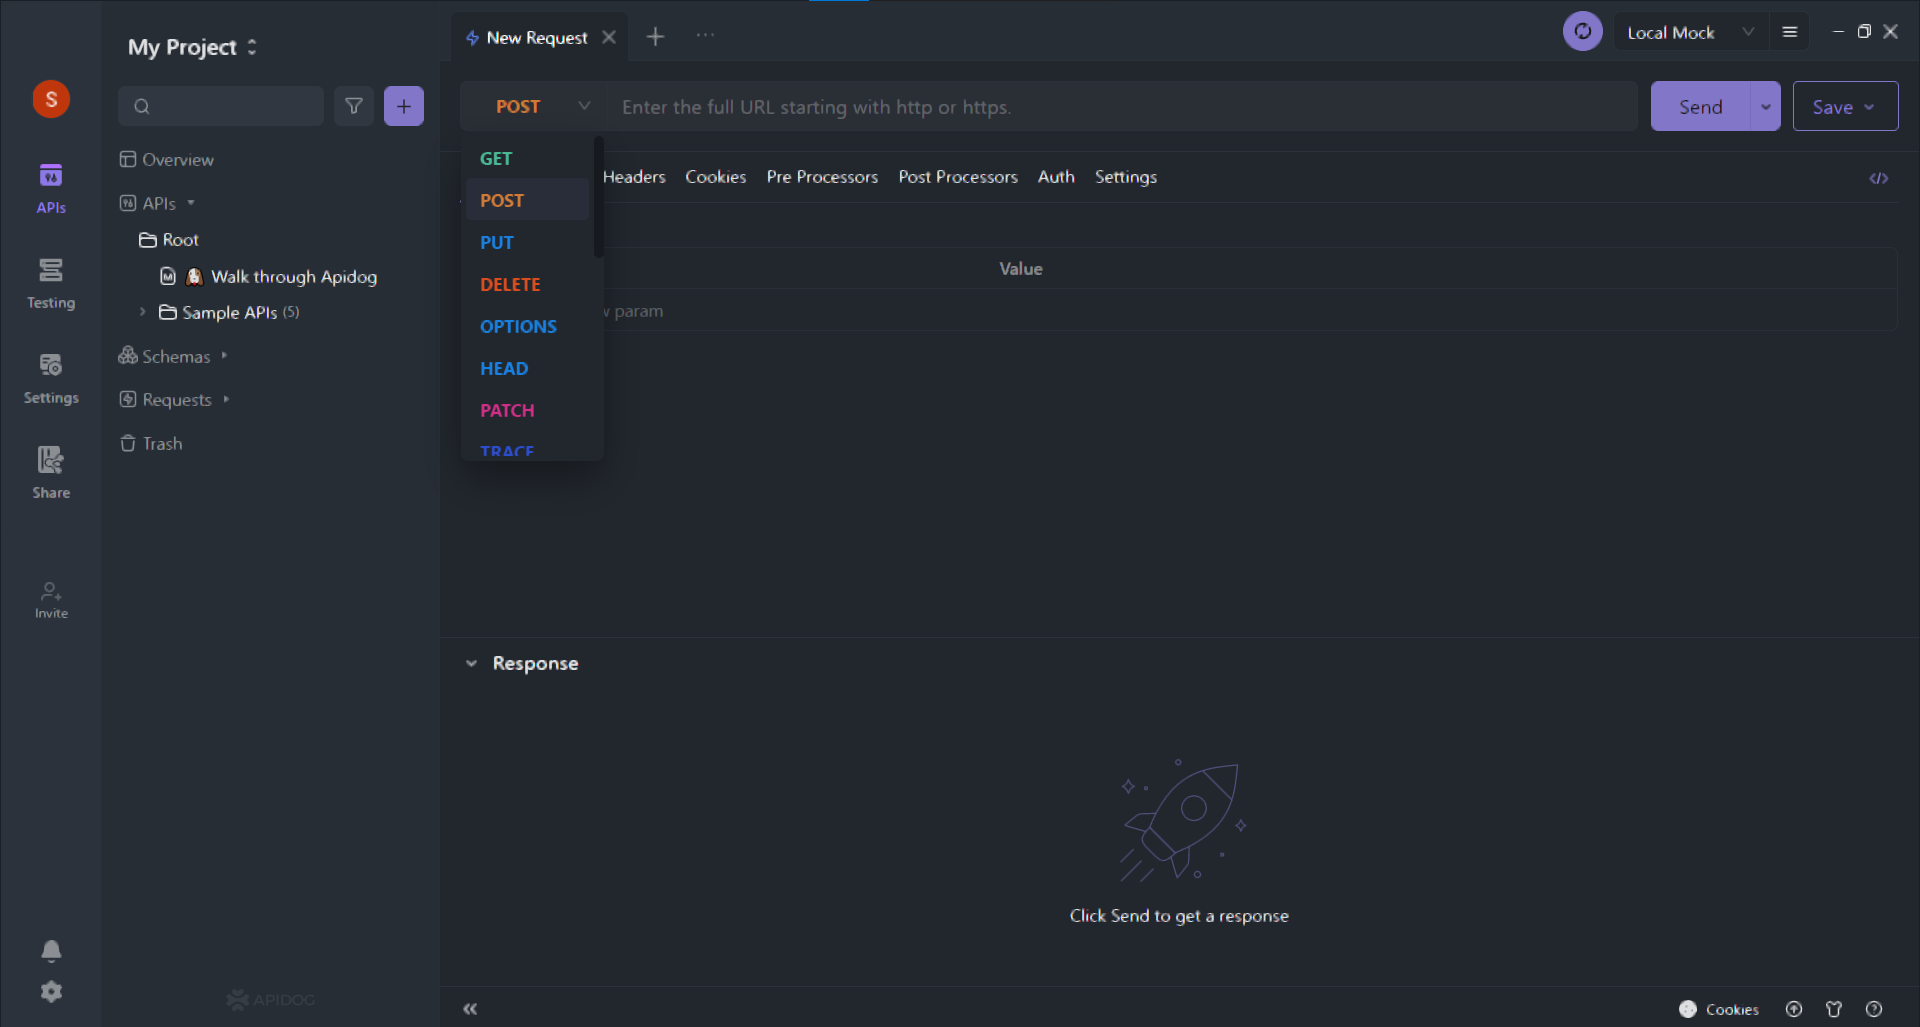
Step 2: Select the Request Method
Select the POST request method from the dropdown options, which include GET, POST, PUT, DELETE, TRACE, HEAD, etc.
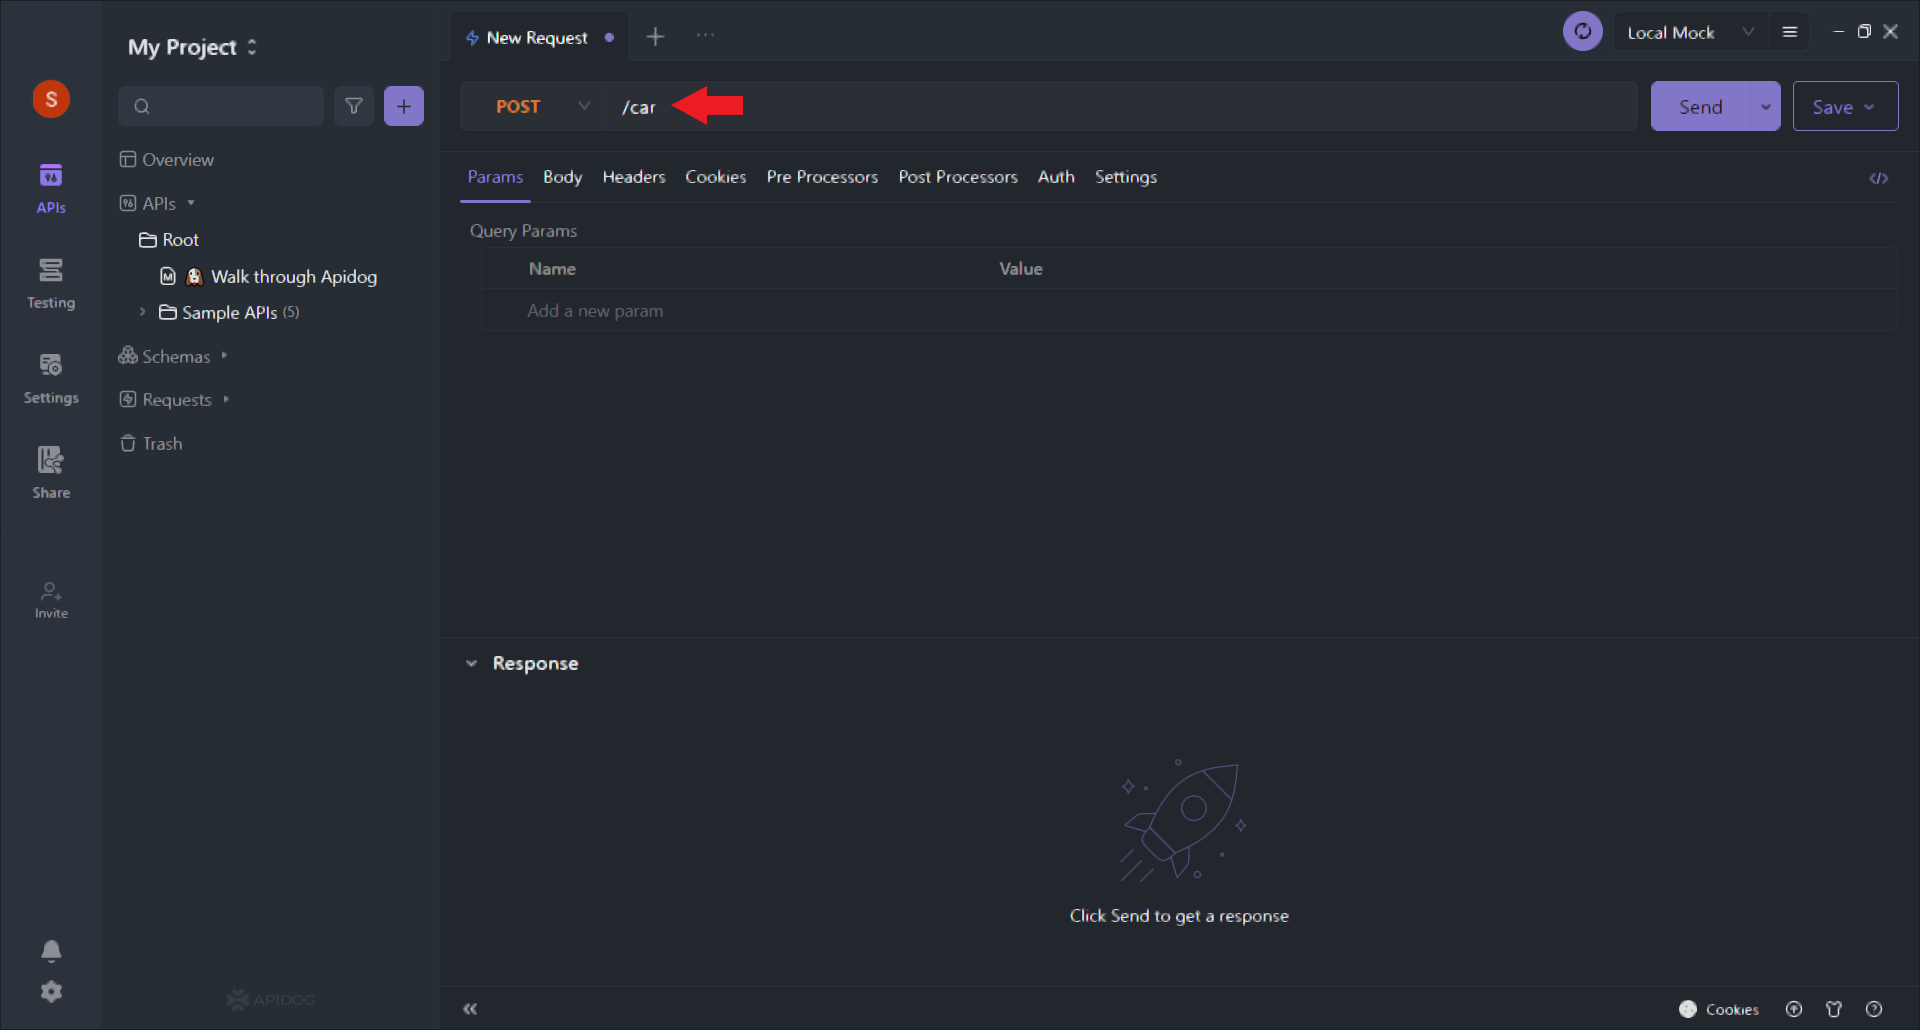
Now we need to enter the URL of the server which will receive the file. With the help of Apidog, we can test using the Local Mock feature available and just need to provide a subfolder like here in this example; we are uploading the image of the car, so we will add /car to the URL only.
While this is not limited, you can use any of the servers that can receive the file, which can also be done with the help of the Testing or the Production environment provided by Apidog.
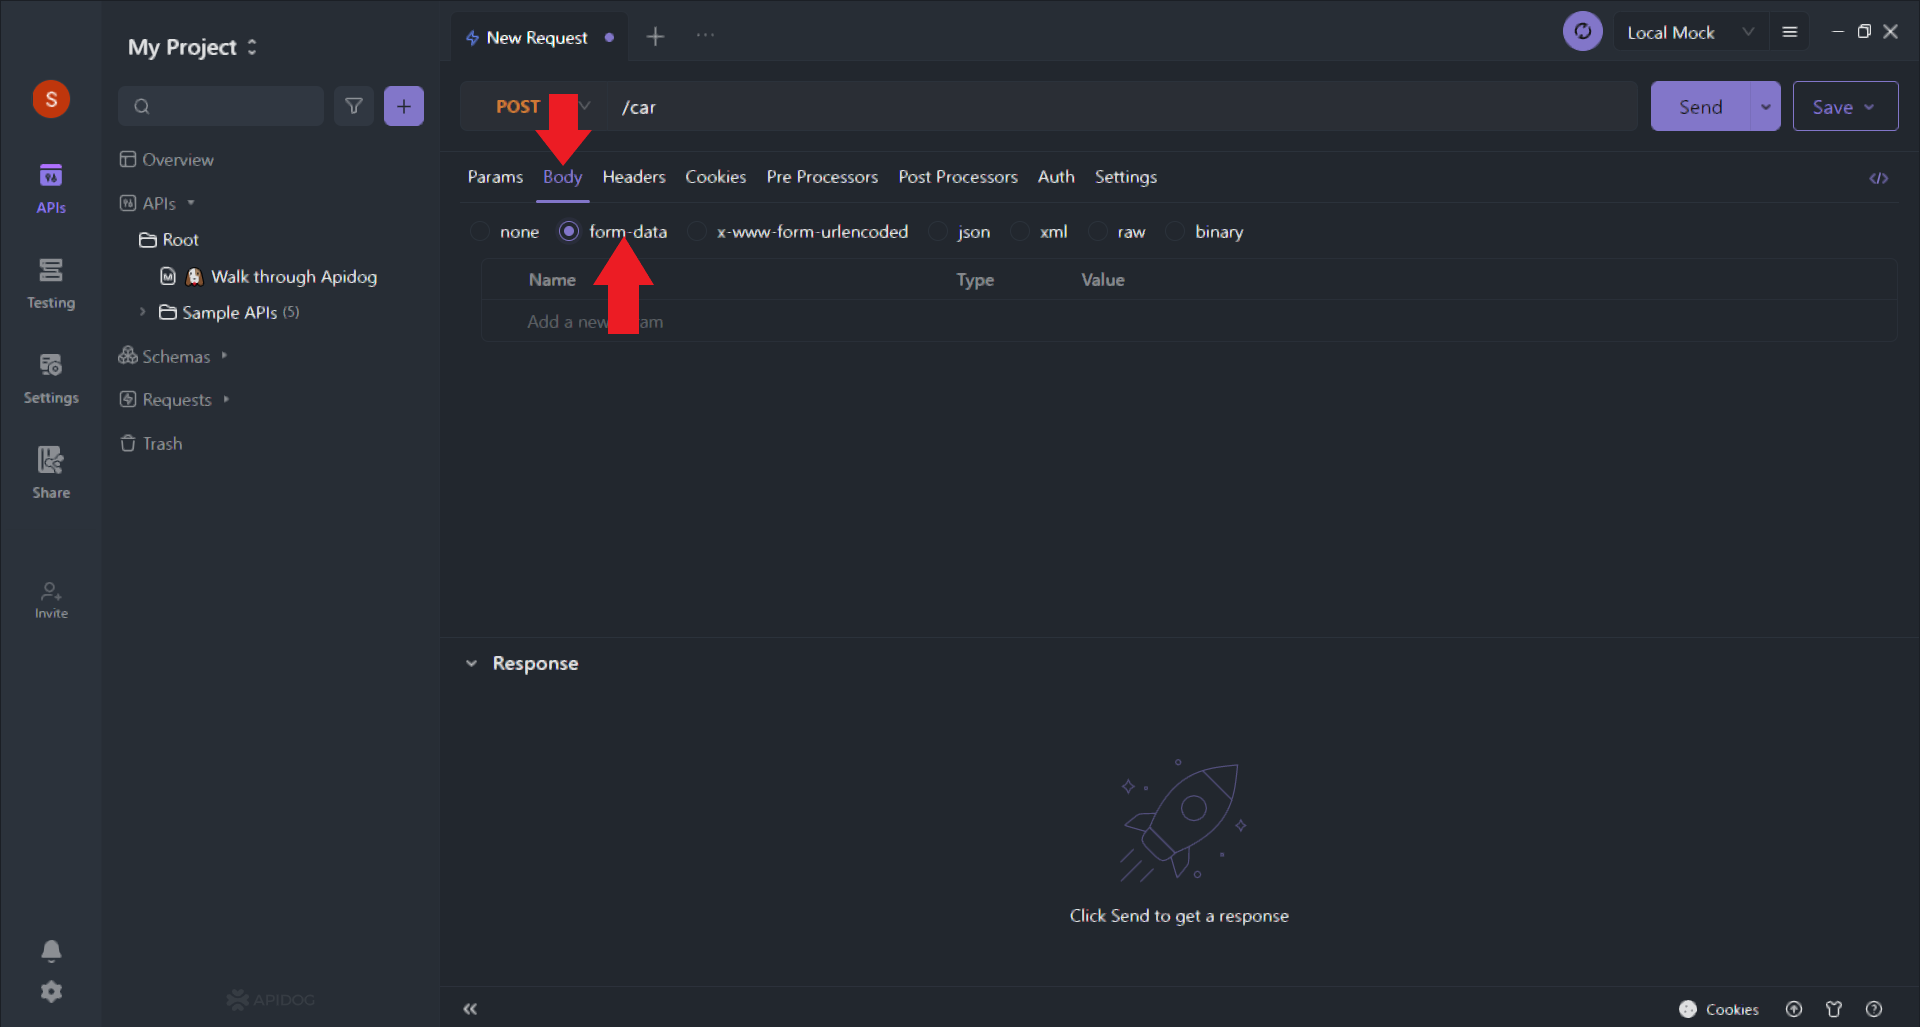
Step 3: Set the Request Body Content Type
Set the request body content type to multipart/form-data next. It ensures the client can include files in the request body. We can do this by heading to the Body section and selecting the form data, as shown below:
Step 4: Add a File Field to the Request Body
To enable clients to upload files to your API, include a file field in the request body. To do so, click the Add a new param box, add the field name, and choose file from the dropdown menu.
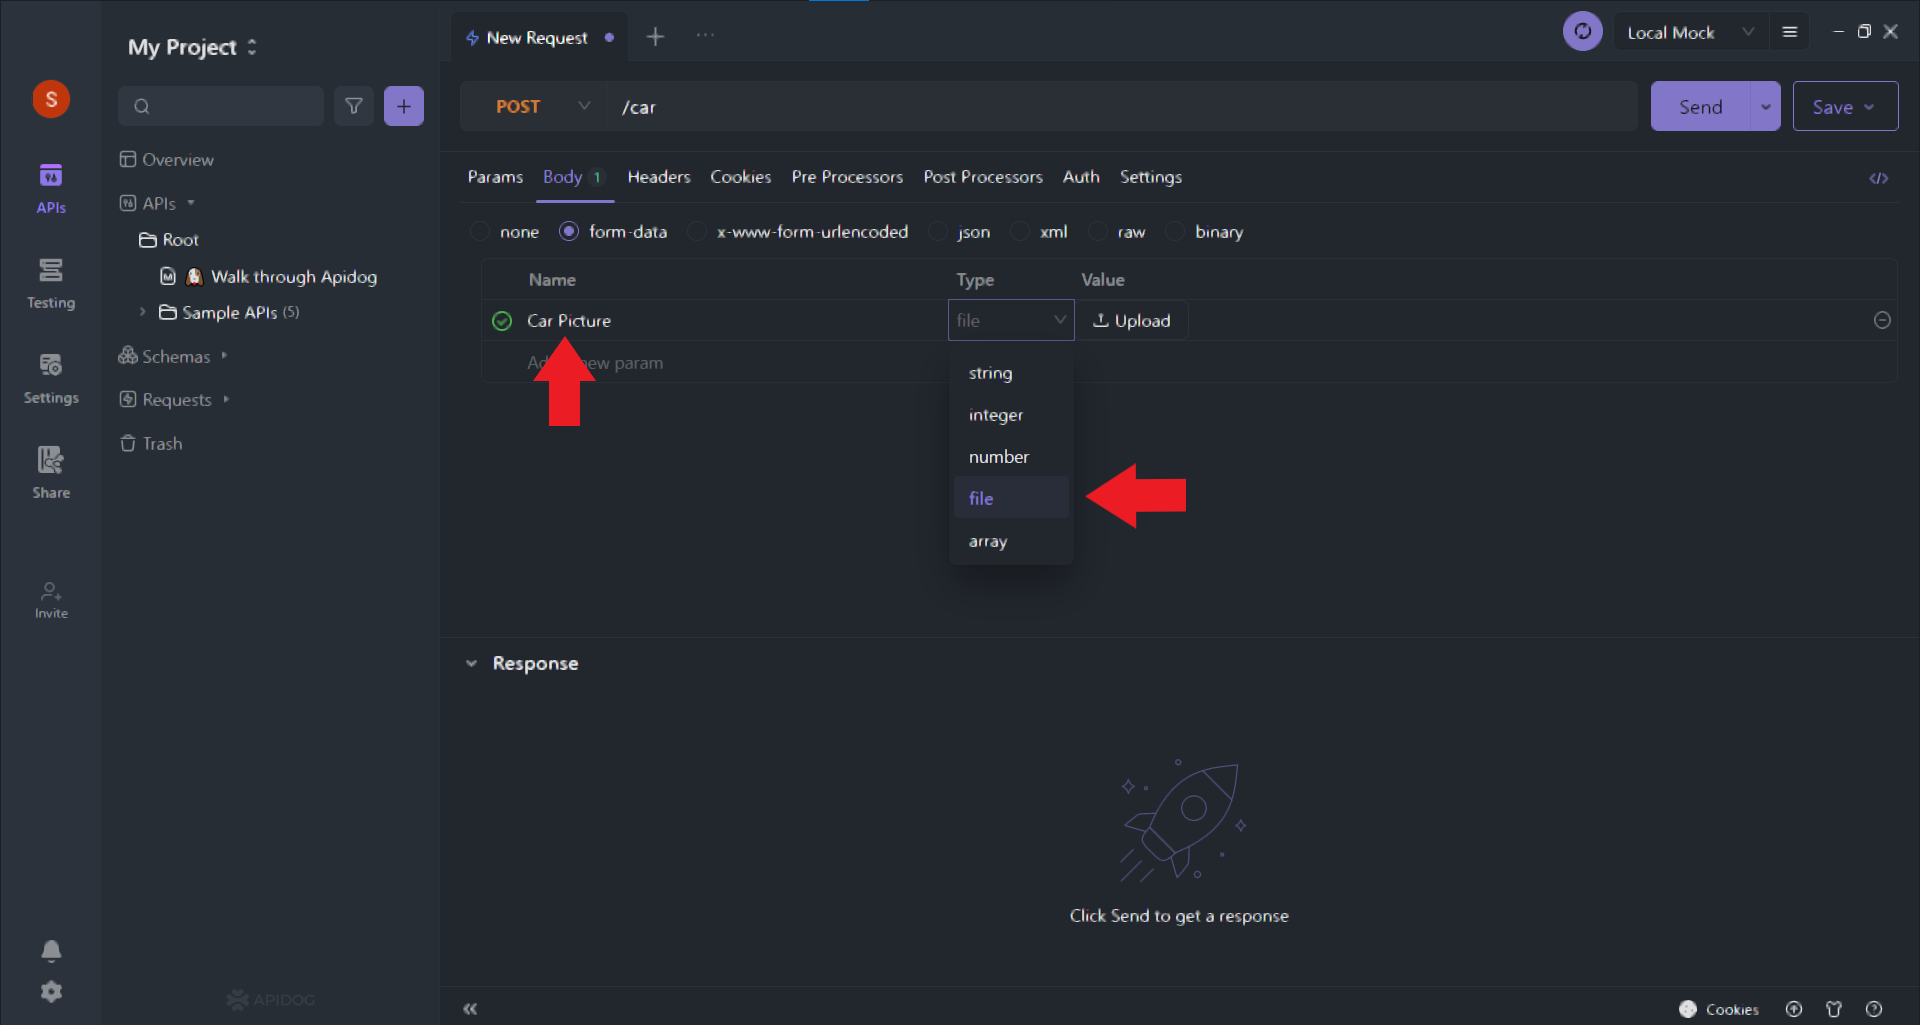
In the image above, you can see that you can upload a file as soon as you select file from the dropdown.
Step 5: Save and Test the Request
After configuring the request, save it and test it with the Apidog testing tool. To do so, click the Send button in the endpoint editor. You can then send a file upload request to the endpoint and check if the server received the file and any additional data you included in the request body. Finally, you will be able to see the final output as shown below:

You can also see your code output in multiple formats provided by Apidog, like Shell, JavaScript, Java, Swift, Go, PHP, Python, HTTP, C, C#, Ruby, etc., which can be seen in the image below:

Congratulations! You have successfully added a File Upload Request with the help of Apidog.
Conclusion
File upload functionality is essential to many web and mobile applications, and file upload APIs are becoming more common. In this article, we have shown that when developing an API that accepts file uploads, it is critical to consider the content type, HTTP method, file encoding, file size limits, and security measures.
Lastly, with the help of Apidog's robust API and Request designing and testing tools, setting up a file upload in APIs and Requests eases the process, which is accomplished in very few steps.


