WebSocket Tutorial: Test WebSocket Connection Using Curl
In this section, we will explore how to use curl, a command-line tool for making HTTP requests, to establish a WebSocket connection, and communicate with a WebSocket server.
WebSocket is a communication protocol that provides full-duplex communication channels over a single TCP connection. It allows for real-time, bi-directional communication between a client and a server.
In this section, we will explore how to use curl, a command-line tool for making HTTP requests, to establish a WebSocket connection, and communicate with a WebSocket server.
Sending WebSocket Responses in curl
To send a WebSocket request using curl, we need to follow these steps:
Install curl: If you don't have curl installed on your system, you need to install it first. Curl is a command-line tool for making HTTP requests and supports WebSocket communication as well.
Set the request headers: WebSocket requests require specific headers to be set. We need to set the Upgrade header to websocket and the Connection header to Upgrade. Additionally, we need to set the Sec-WebSocket-Key header to a randomly generated value. We can use the -H option in curl to set these headers.
Specify the WebSocket URL: We need to specify the WebSocket URL in the curl command. The WebSocket URL typically starts with ws:// or wss:// for secure WebSocket connections.
Send the request: Once we have set the headers and specified the WebSocket URL, we can send the WebSocket request using the curl command line.
Here is an example of sending a WebSocket request using curl:
In this example, we are setting the required headers (Upgrade, Connection, and Sec-WebSocket-Key) and specifying the WebSocket URL (ws://example.com/websocket). Replace example.com with the actual WebSocket server URL.
After sending the request, the WebSocket server will respond with a WebSocket handshake response. To receive the WebSocket response, refer to the next section.
Receiving WebSocket Responses in Curl
In the previous section, we discussed how to send WebSocket requests using curl. In this section, we will focus on how to receive WebSocket responses using curl.
Receiving WebSocket responses using curl involves a slightly different approach compared to regular HTTP requests. WebSocket responses are not received in the same way as HTTP responses, as WebSocket is a full-duplex communication protocol.
To receive WebSocket responses using curl, we need to use the -N or --no-buffer option. This option tells curl to disable the buffering of the output, which is necessary for WebSocket communication.
Here is an example command to receive WebSocket responses using curl:
Let's break down the command and understand each part:
-N or --no-buffer: Disables the buffering of the output, allowing us to receive WebSocket responses.
-i: Includes the response headers in the output. This helps us understand the WebSocket response and its status.
-H "Connection: Upgrade": Specifies the "Upgrade" header, indicating that the connection should be upgraded to WebSocket.
-H "Upgrade: websocket": Specifies the "Upgrade" header value as "websocket", indicating that the connection should be upgraded to WebSocket.
-H "Sec-WebSocket-Key: <WebSocket Key>": Specifies the "Sec-WebSocket-Key" header with the WebSocket key generated for the connection.
-H "Sec-WebSocket-Version: 13": Specifies the "Sec-WebSocket-Version" header with the WebSocket version being used (version 13 is the most common).
<WebSocket URL>: Specifies the WebSocket URL to connect to.
By executing this curl command, we can establish a WebSocket connection and start receiving WebSocket responses. The responses will be displayed in the terminal, and we can process them as needed.
Through the above steps, you might find the process to be quite intricate and encounter several challenges, especially for beginners who might struggle to execute it successfully on the first attempt.
However, by utilizing Apidog, an emerging yet powerful API tool, you can effortlessly establish WebSocket connections and send messages with just a few simple steps.
button
WebSocket Feature in Apidog
Effortless Connection Establishment: With a simple handshake process, you can effortlessly input the URL in Apidog and click the "Connect" button to quickly establish a WebSocket connection.
Seamless Message Exchange: Once connected, you can seamlessly send and receive messages under the "Message" tab. Whether it's text, JSON, XML, HTML, or binary format, the editor offers syntax highlighting and formatting for smooth message exchange.
Intuitive Timeline View: Apidog's new timeline view presents connection status, sent messages, and received messages in an intuitive chronological order, making it easy to understand the sequence and details of messages.
Powerful Interface Documentation and Collaboration: The WebSocket interface documentation is enhanced within Apidog. You can set interface status, assign responsible personnel, add tags, and use Markdown formatting to create detailed interface explanations. After debugging, you can save the WebSocket interface within the project for collaboration with team members. Additionally, you can share the interface documentation with external teams for easy viewing in web browsers.
Using Apidog to Send WebSocket Message
If you have developed a WebSocket service and want to debug it, we suggest using API debugging tools like Apidog, which has the ability to debug WebSocket services.
button
Google Chrome extension
Apidog has both a web version and a client, if you are using the web version and want to debug a local service, you need to install Apidog's Google Chrome extension. Download link: Apidog Google Chrome extension
Step 1. Creating a WebSocket Request
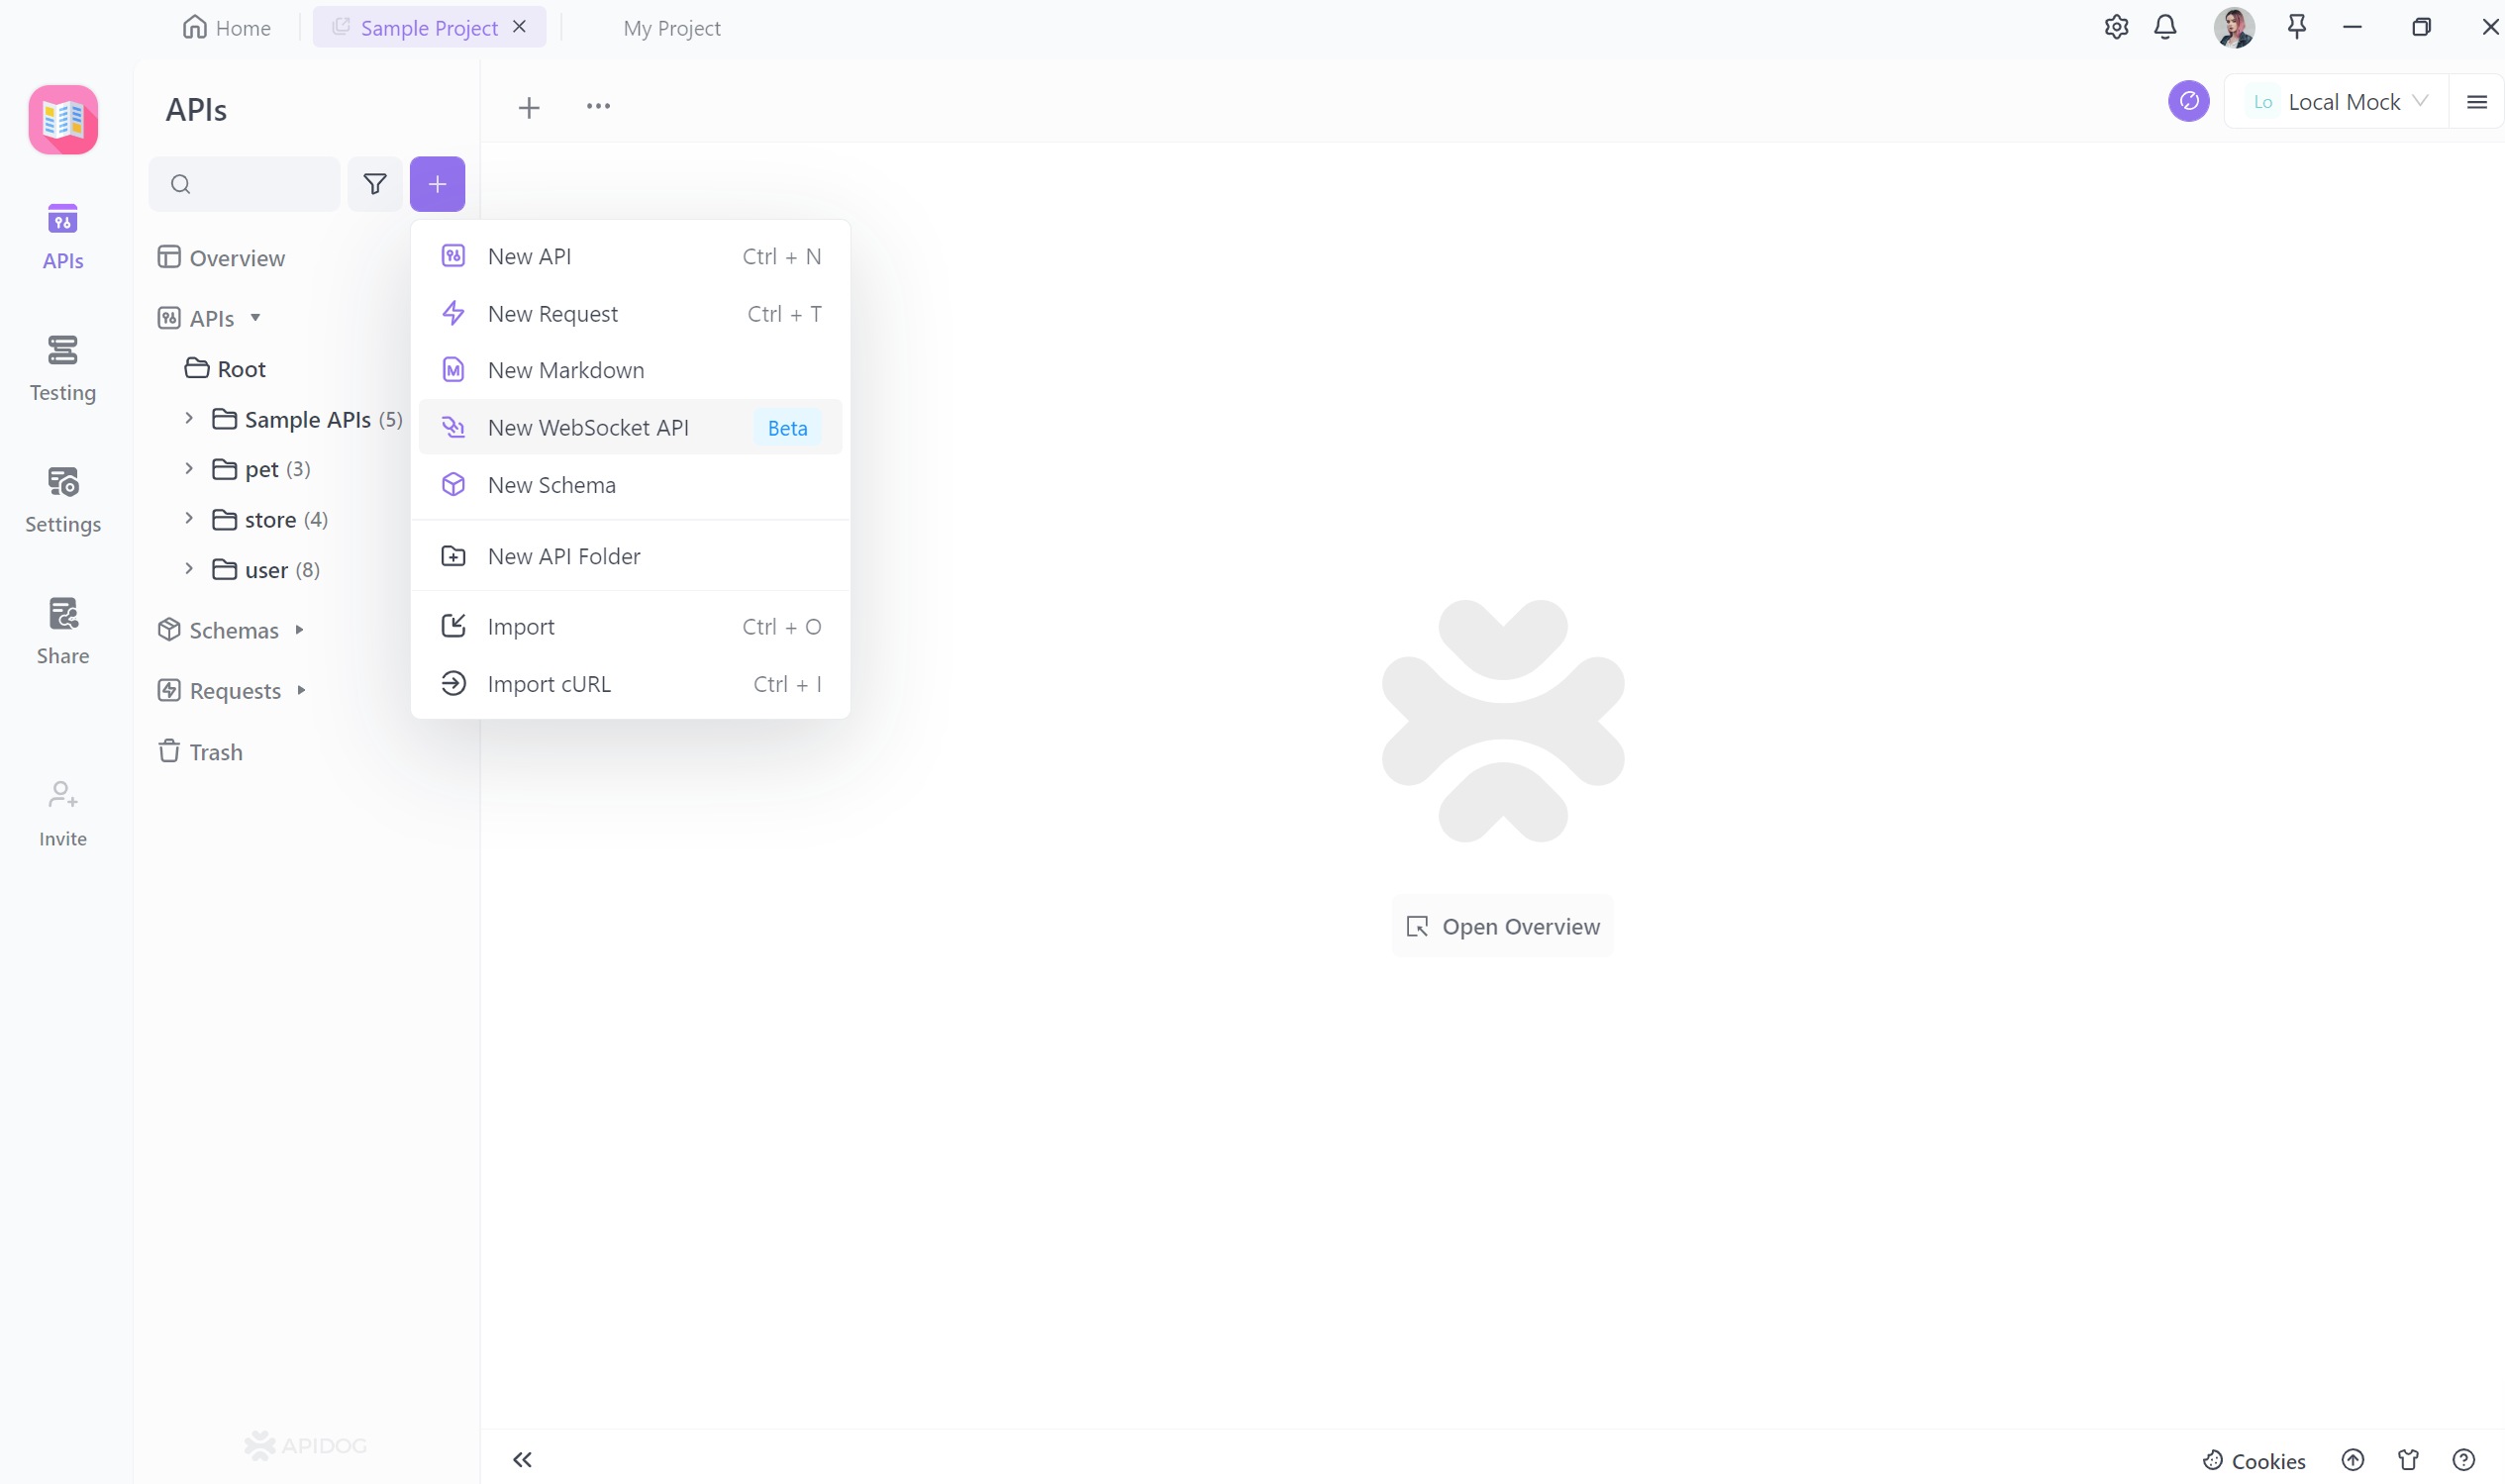
In the most recent update of Apidog, accessing a WebSocket interface is made easy by simply clicking the "+" button on the left side of your project and selecting "New WebSocket API(Beta)".
From there, you can enter the URL of your WebSocket interface to establish a connection and seamlessly send and receive messages. Below, we will provide more detailed instructions.
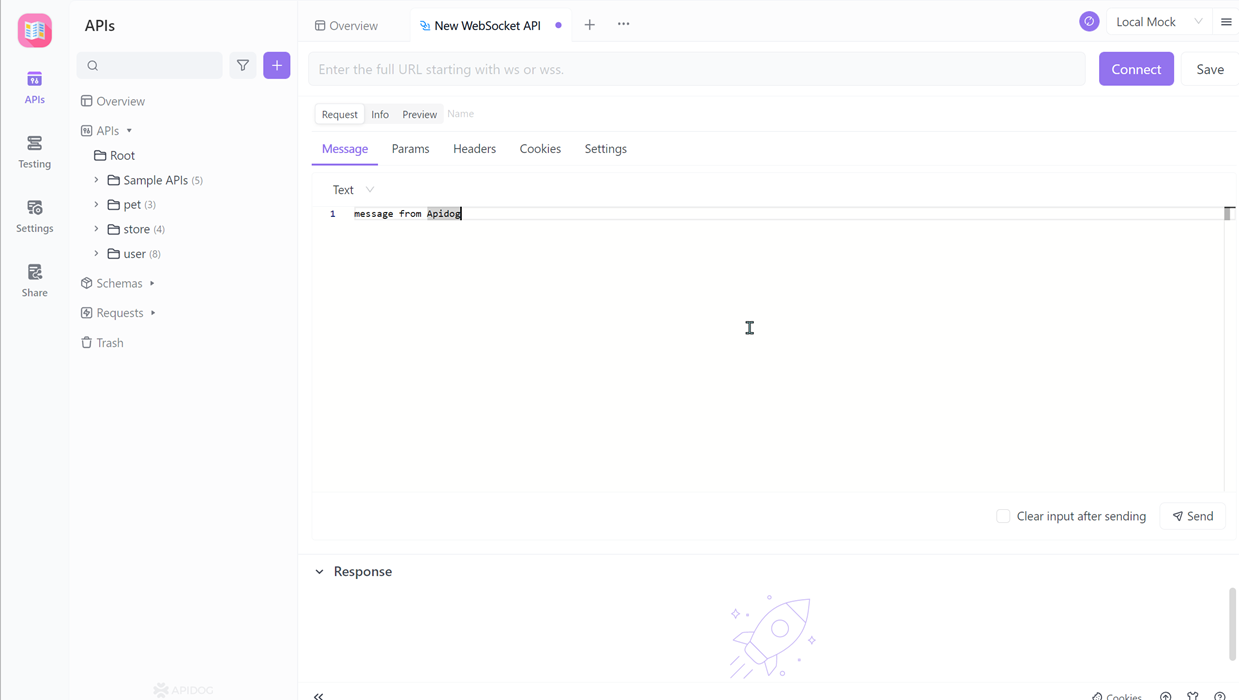
Step 2. Setting Message and Params
In the Message section, you can fill in the information you want to send to the server side, and the server will receive the information you transmit.
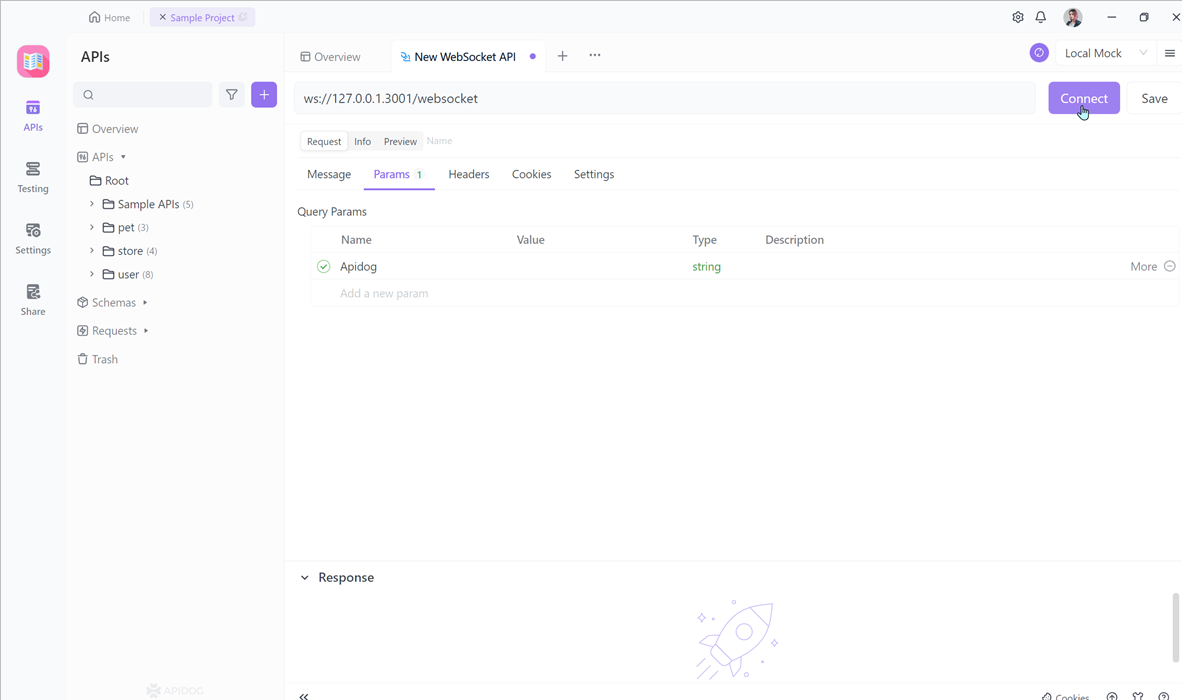
During the transmission process, parameters can also be carried out. Query parameters can be carried on the address, and the data types that can be carried include string, integer, number, array.
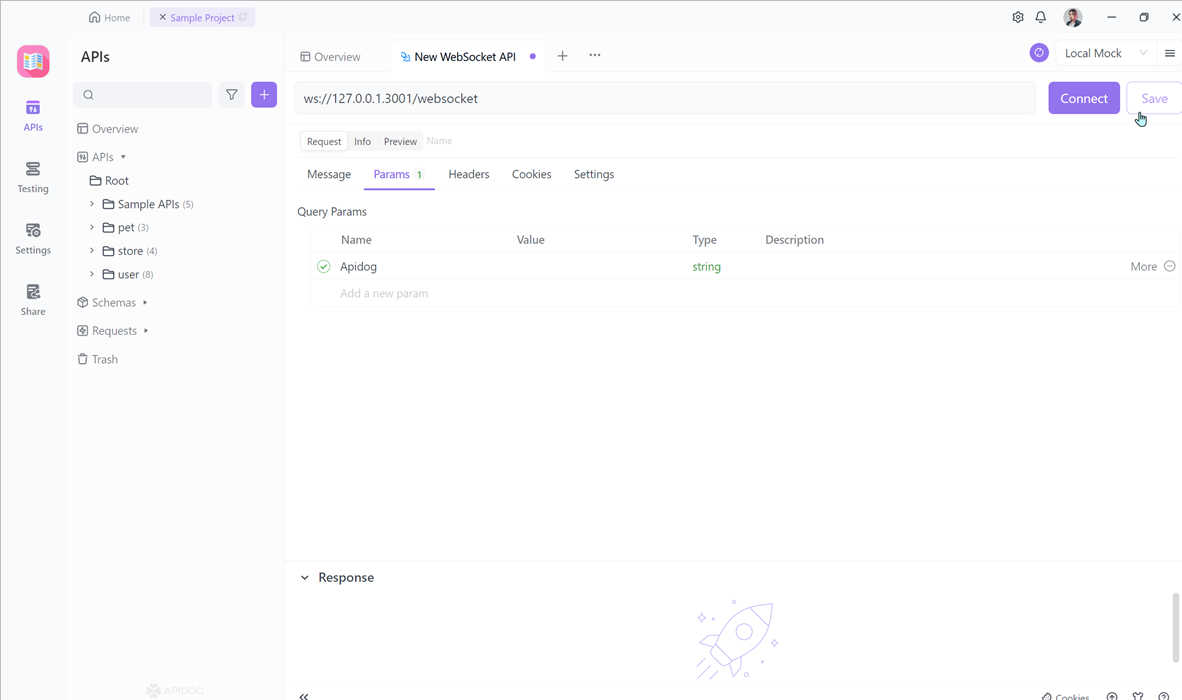
Step 3. Saving Request
After completing the required information, you can click the save button to save it for future use, making it easy to access again next time.
Step 4. Connect and Send WebSocket Requests
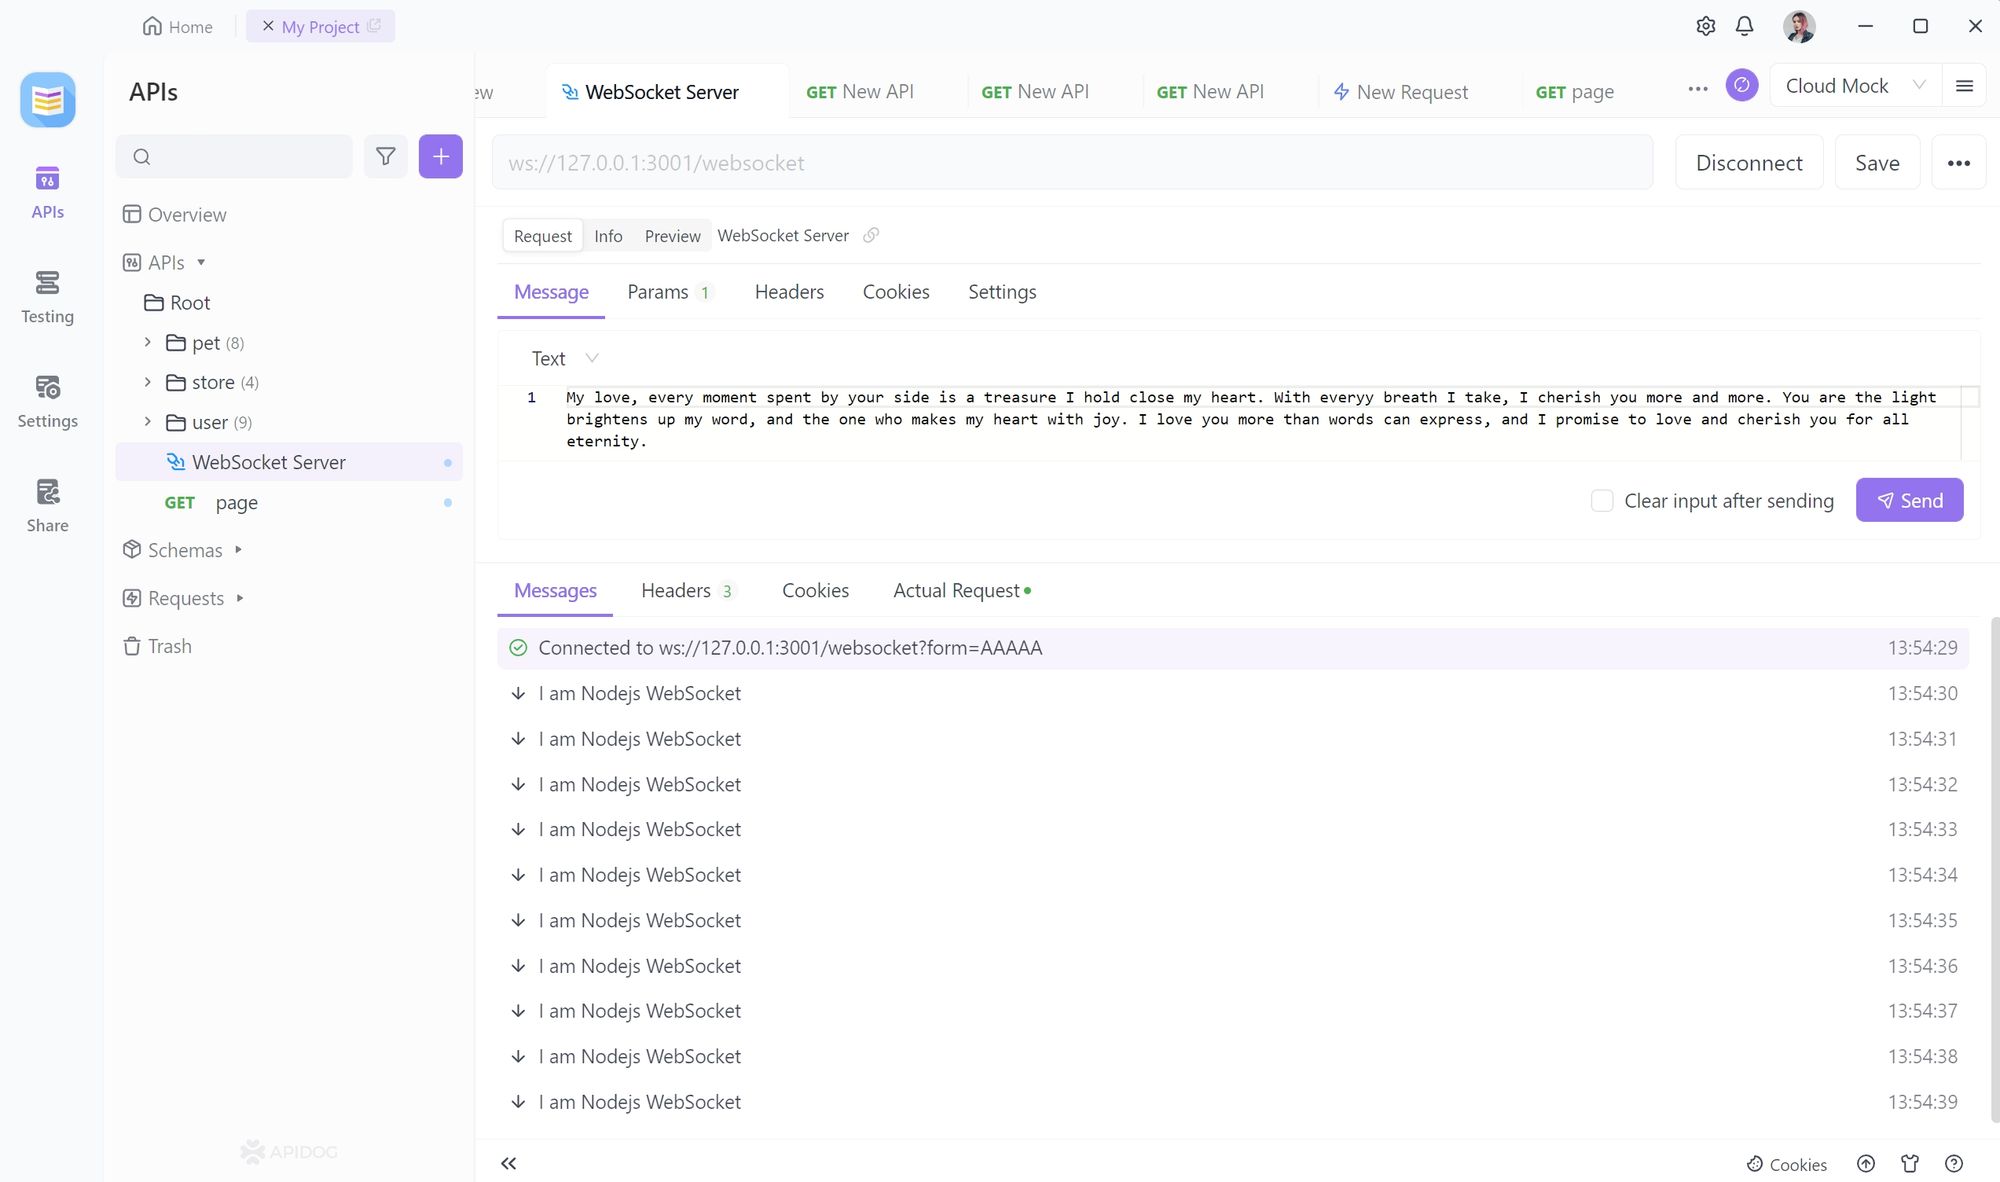
To communicate with the WebSocket server, we need to establish a WebSocket connection. We can simply click the "connect" button to do so.
After a successful connection, Apidog will display a success promptly. On the server side, a response will also be made due to a successful connection.
Step 5. Sending WebSocket Request
Then we can communicate with the server via WebSocket. We can use Apidog to click the send button to send messages and parameters to the server.
Step 6. Communicating with the WebSocket service
After sending, the server can also send information to the client. For example, in my case, I set the server to send the current timestamp to the client every second. This is the WebSocket function of Apidog, which is very convenient.