How to Send Axios PUT Request
Axios can handle various HTTP methods, including GET, POST, and PUT. In this text, we will focus on the PUT method and introduce how to make PUT requests with Axios.
Apidog
All-in-one Collaborative API Development Platform
API Design
API Documentation
API Debugging
API Mock
API Automated Testing
Axios is a JavaScript HTTP client library that is widely used for making API requests when working with JavaScript. In this article, we will provide a detailed introduction to Axios and then show you how to implement GET requests using Axios.
Axios is a JavaScript HTTP client library that is widely used for making API requests when working with JavaScript. In this article, we will provide a detailed introduction to Axios and then show you how to implement GET requests using Axios. Additionally, we'll introduce a more intuitive way to send API requests and retrieve responses. If you don't quite know send Axios PUT Request, click here.
Axios is a JavaScript HTTP client library. It provides a simple and intuitive interface by wrapping native HTTP communication methods like XMLHttpRequest and the fetch API.
It is designed with a Promise-based architecture, making it easy to handle asynchronous operations.
Axios supports various HTTP methods such as GET, POST, PUT, and DELETE, and it allows for easy parameter configuration and header customization. The response data is automatically converted to JSON, making it easy to work with the retrieved data. Sometimes, you may encounter " Method Not Allowed", Here is a guide to help you fix HTTP error 405.
The axios.get() method in Axios is used to initiate an HTTP GET request to retrieve data from a specified URL. It is one of the core methods provided by the Axios library for making HTTP requests from a web application.
Here's a brief explanation of the axios.get() method:
axios.get(url[, config])
url (required): The URL from which you want to retrieve data.config (optional): An object containing configuration options for the request, such as headers, parameters, and other settings.The axios.get() method returns a Promise that resolves with the server's response data upon successful completion or rejects with an error if the request fails.
To use Axios, you first need to install it. Axios can be installed using the npm or yarn package manager. Here are the installation commands for Axios:
Install Axios using npm:
npm install axios
Install Axios using yarn:
yarn add axios
Implementing GET Requests with Axios
After installing Axios with the above commands, you can follow these steps to execute GET requests using Axios.
Basic Axios GET Request
Here's a sample code for a basic GET request using Axios:
// Import Axios
import axios from 'axios';

// Define the GET request
axios.get('https://example.com/api/endpoint')
  .then(response => {
    // Handle the response
  })
  .catch(error => {
    // Handle errors
  });
In the code above, we use axios.get to specify the API endpoint, and then we use then to handle the response data and catch to handle errors.
If you want to pass parameters in the URL of a Axios GET request, you can directly add them to the API endpoint URL:
const axios = require('axios');

// If there are two parameters: id and category
const id = 123;
const category = 'electronics';

// You can add parameters directly to the URL
axios.get(`https://api.example.com/data?id=${id}&category=${category}`)
  .then(response => {
    console.log(response.data);
  })
  .catch(error => {
    console.error(error);
  });
Using the params Object to Pass Parameters in a GET Request
Axios also provides the params object option for passing parameters in a GET request:
axios.get('/api/endpoint', {
  params: {
    id: 123,
    category: 'electronics'
  },
  headers: {
    'X-Requested-With': 'XMLHttpRequest'
  }
})
In the code above, Axios GET request with parameters are defined in the params object, and headers can be set using the headers object.
If you want to implement RESTful GET requests, Axios can be used as follows:
// Get a list of users
axios.get('/users')
  .then(res => {
    console.log(res.data);
  });

// Get a specific user by ID
axios.get('/users/12345')
  .then(res => {
    console.log(res.data);
  });

// Filter users with a query
axios.get('/users?name=john')
  .then(res => {
    console.log(res.data);
  });

// Catch 404 errors
axios.get('/users/98765')
  .catch(err => {
    if (err.response.status === 404) {
      console.log('User not found');
    }
  });
Axios allows you to design RESTful API requests with the following steps:
Additionally, you can set options like cache control in the second argument:
axios.get('/users', {
  params: {...},
  headers: {
    'Cache-Control': 'max-age=3600'
  }
});
To provide a more detailed explanation of implementing GET requests with Axios, we'll create a simple Node.js server using the Express.js framework to handle requests. Before proceeding, make sure you have Axios and Express.js installed.
Step 1: Create a server.js file in your project folder and add the following code:
const express = require('express');
const app = express();
const port = 3000;
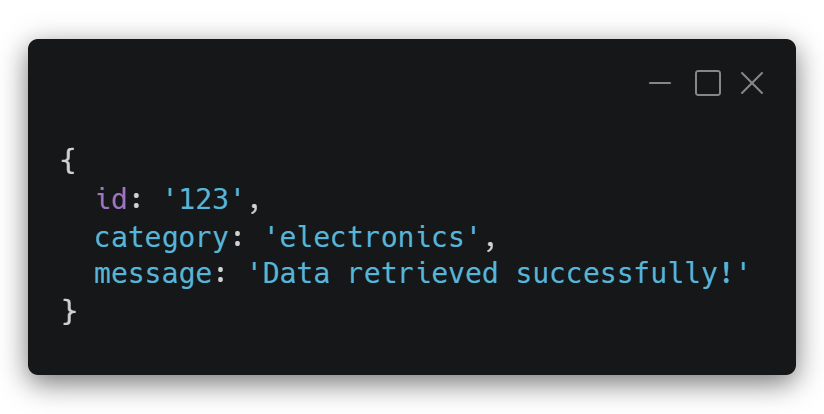
app.get('/data', (req, res) => {
// Mock data
const data = {
id: req.query.id,
category: req.query.category,
message: 'Data retrieved successfully!'
};
res.json(data);
});
app.listen(port, () => {
console.log(`Server is running on http://localhost:${port}`);
});
Step 2: Start the server using the following command in the terminal:
Note: If you encounter any errors, make sure that Express is installed correctly using the command npm install express.Now, the server will be running at http://localhost:3000 and can handle GET requests.
Step 3: Implement the Axios GET request on the client side. Create a client.js file in your project folder and add the following code:
const axios = require('axios');

// If there are two parameters: id and category
const id = 123;
const category = 'electronics';

axios.get('http://localhost:3000/data', { params: { id, category } })
  .then(response => {
    console.log(response.data);
  })
  .catch(error => {
    console.error(error);
  });
Step 4: Run the following command in the terminal:
node client.js
You will now see the data retrieved from the server in the console.
If you prefer to make API requests without writing code, you can use Apidog, a powerful API management tool. Apidog allows you to easily send requests for HTTP methods such as GET, PUT, POST, and DELETE with an intuitive UI. Apidog also includes a built-in mock server, so you can immediately receive responses without setting up your own server.
Step 1: Launch Apidog and go to the Execute API page. Enter the HTTP method, API endpoint, and parameters, then click the "Send" button to send the request.
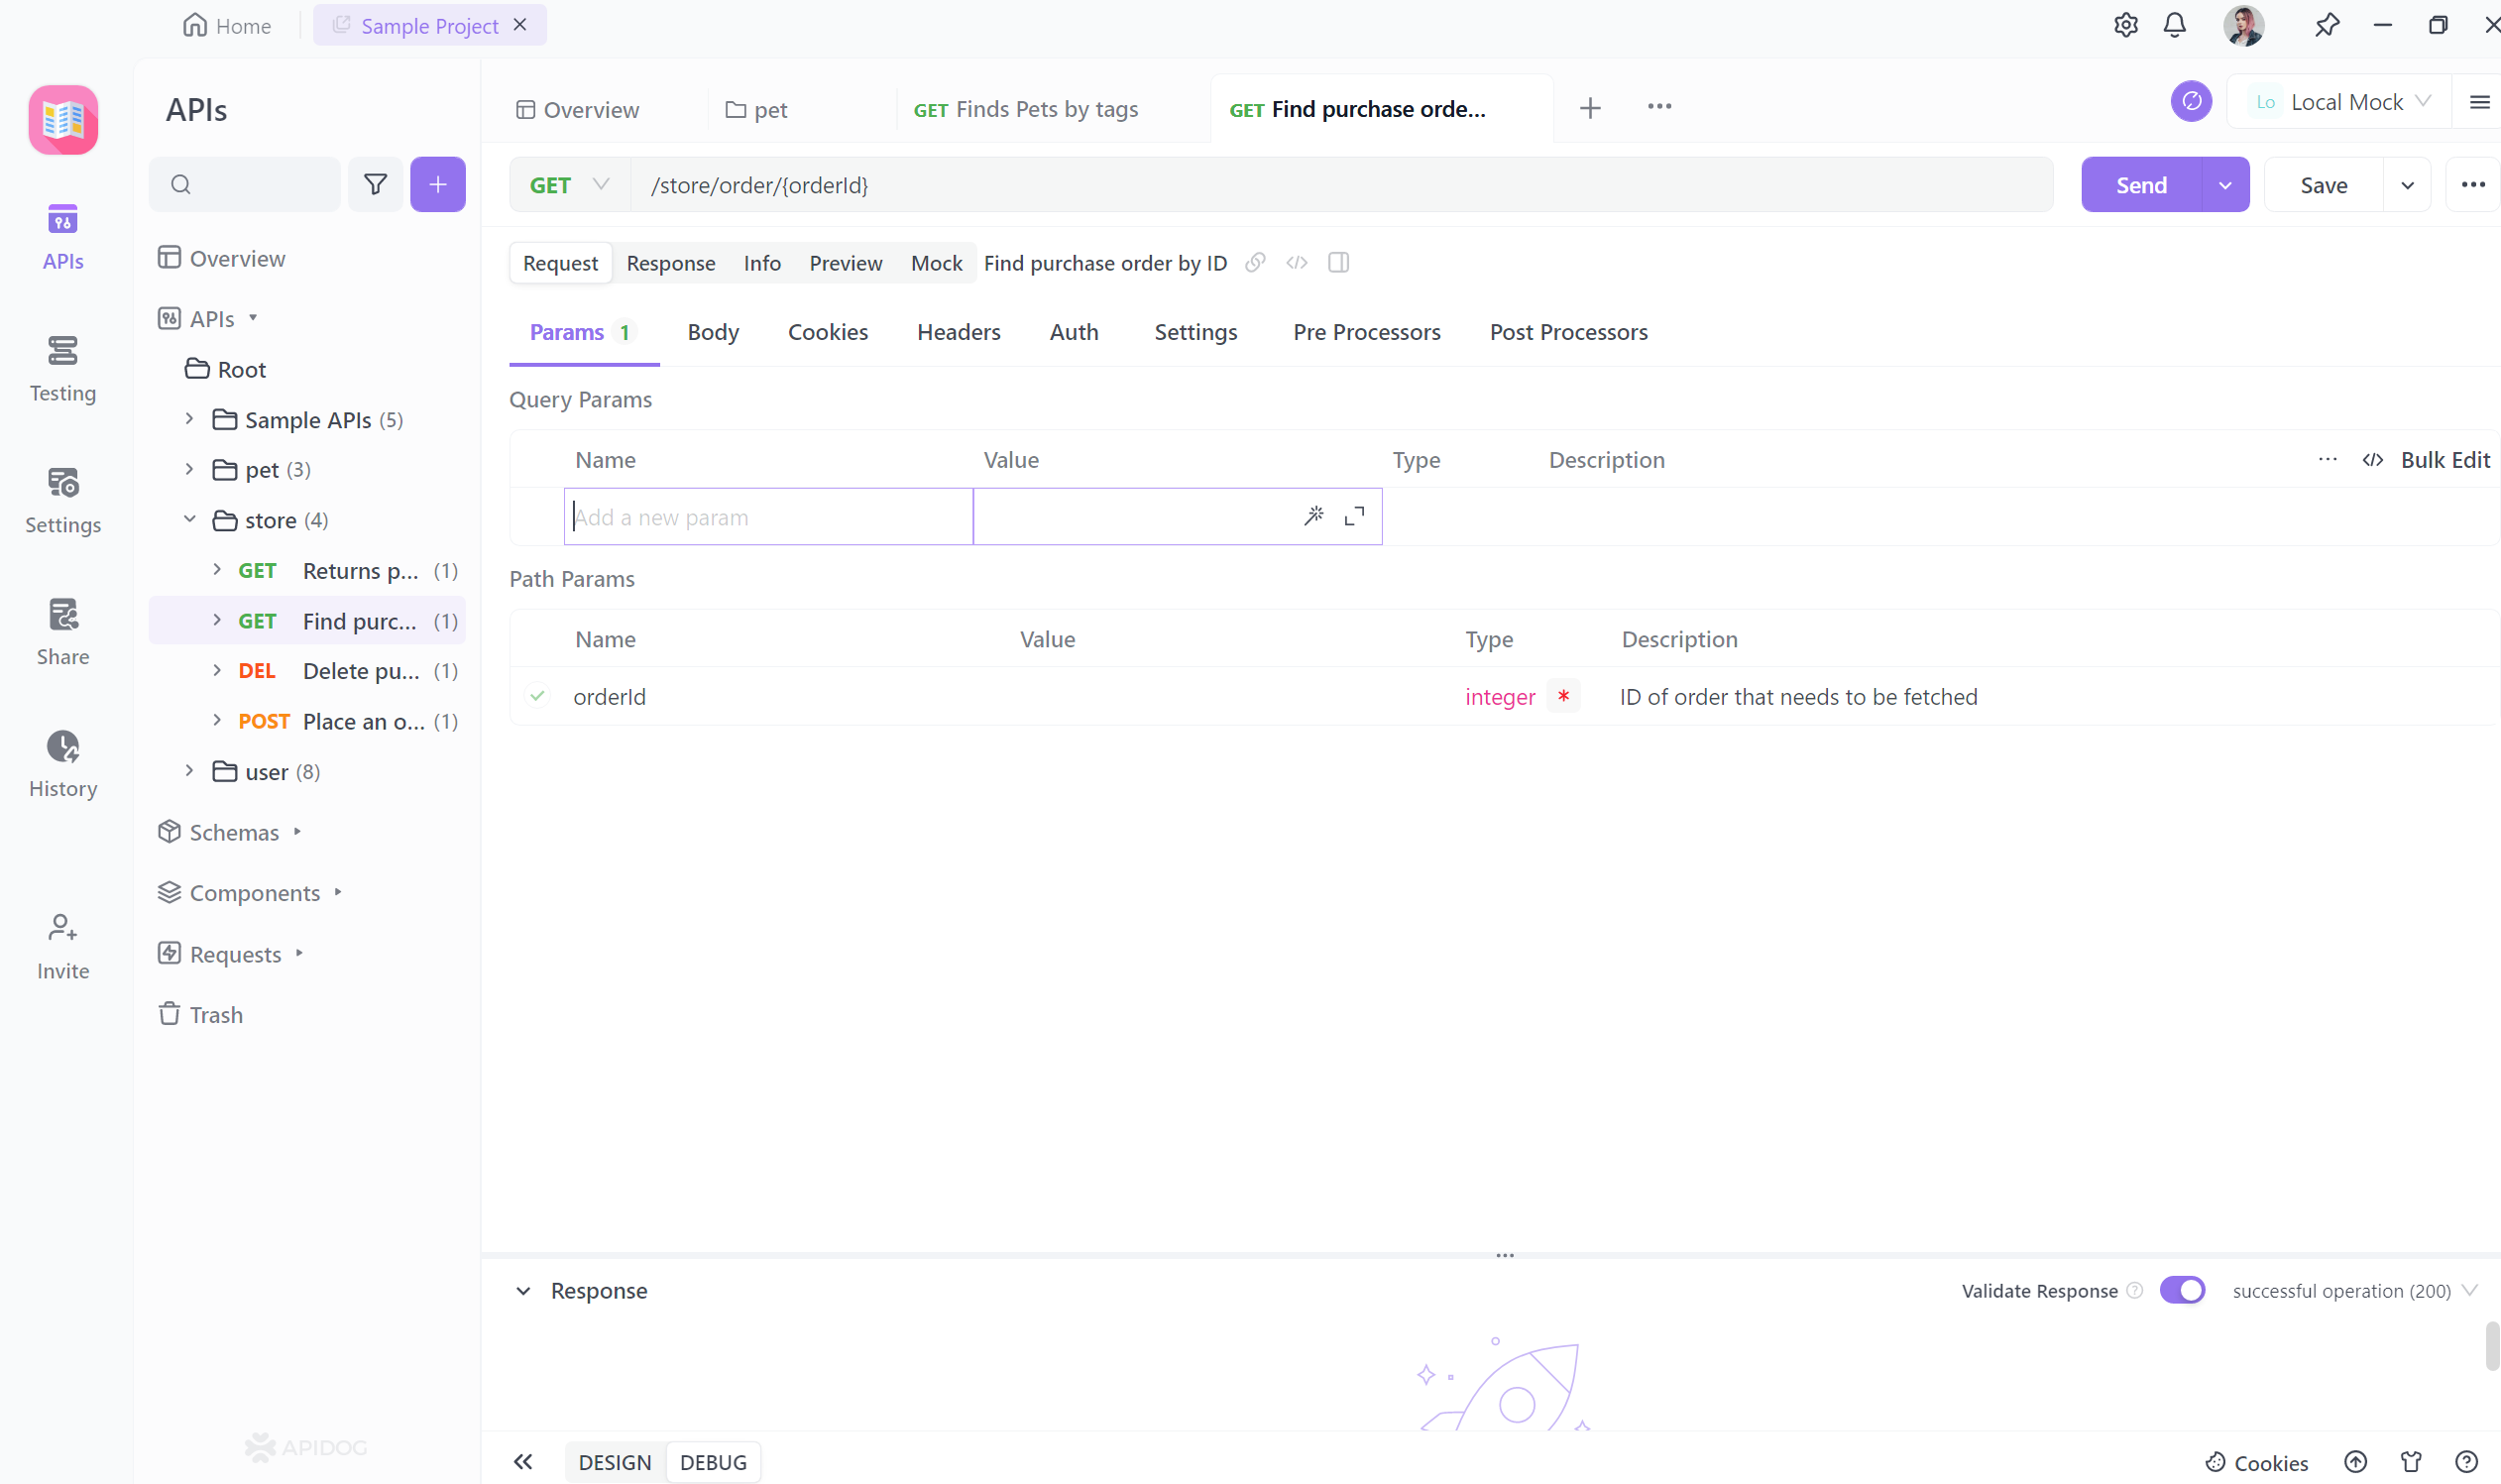
Note: You can also specify the HTTP method and fill in the required parameters using the intuitive UI.
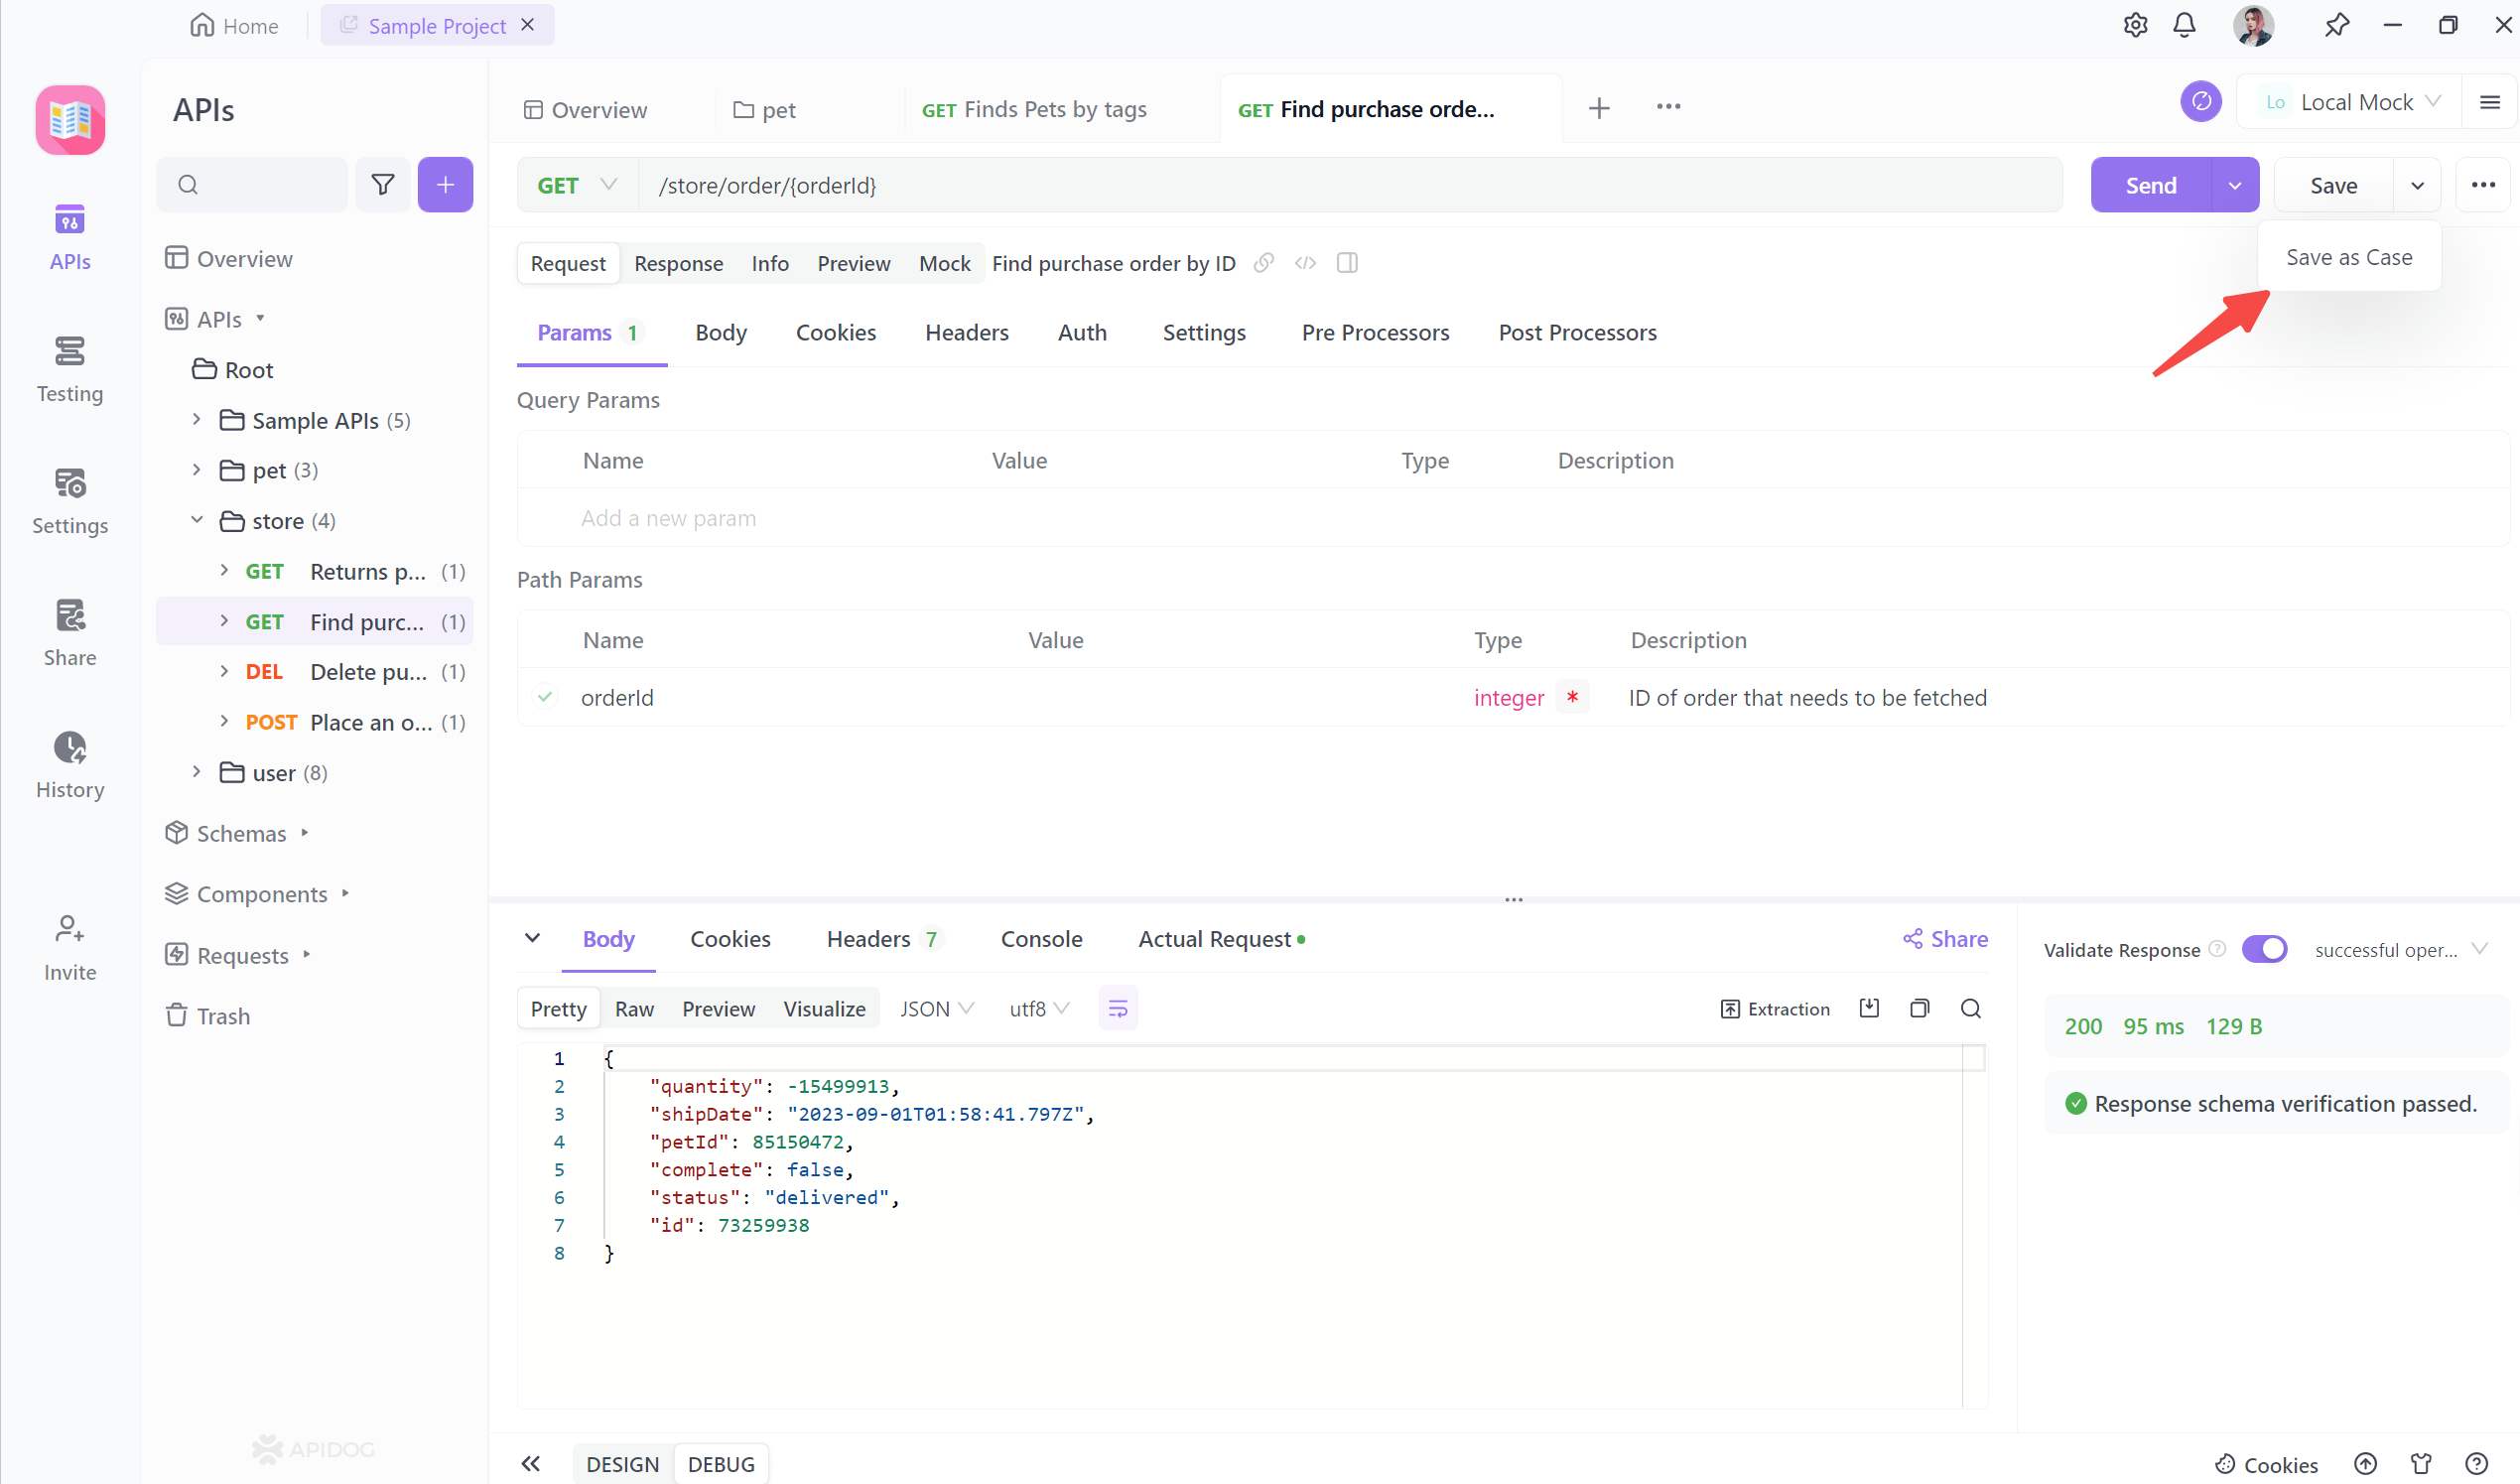
Step 2: You can instantly receive the response. Apidog automatically verifies the accuracy of the retrieved response, as shown in the screenshot below.

Note: Apidog provides a built-in mock server, so you don't need to set up your own server, and it returns real data.Receiving the Response
Step 3: You can also click the "Save as case" button to save the result of this request. This allows you to easily reference or reuse this case in the future, making it a convenient feature.
With Apidog, you can quickly and easily send API requests for various HTTP methods without writing code, making it a highly useful tool.