
API documentation serves as a vital component in software development, providing users with insights on how to interact with APIs and their services. In this guide, we explore leveraging Swagger, a tool, to document APIs built with Node.js, enabling the automatic generation of interactive API documentation and facilitating API testing.
Additionally, we introduce Apidog as a powerful integration for enhanced API management, encompassing testing across various protocols and seamless collaboration. With step-by-step instructions and insights, developers can streamline API development and ensure robustness and efficiency in their applications.
An Ultimate Guide on Document API in Swagger
With Swagger, developers can define API endpoints, request parameters, response formats, and authentication methods using a simple and intuitive YAML or JSON format. This standardized documentation format not only facilitates communication between development teams but also simplifies API consumption for clients.
Setting Up the Node.js Environment
Before we dive into creating our Node.js API with Swagger, let's ensure that our development environment is set up properly. Make sure you have Node.js installed on your machine. You can download and install Node.js from the official website or use a package manager like npm or yarn for installation.
Installing Swagger Tools
To get started with Swagger, we'll need to install the necessary Swagger tools. The Swagger ecosystem provides various tools for different stages of API development, including:
- Swagger Editor: A web-based editor for designing and testing Swagger specifications.
- Swagger UI: A user-friendly interface for visualizing and interacting with Swagger documentation.
- Swagger Codegen: A tool for generating server stubs and client libraries based on Swagger specifications.
You can install these tools globally using npm or yarn:
npm install -g swagger-cli swagger-ui-express
Designing Your API with Swagger
With the development environment set up and Swagger tools installed, we can now start designing our Node.js API using Swagger. The first step is to create a Swagger specification file (typically in YAML or JSON format) that describes our API endpoints, request parameters, response schemas, and any other relevant details.
Here's a basic example of a Swagger specification for a simple Todo API:
openapi: 3.0.0
info:
  title: Todo API
  version: 1.0.0
  description: A simple Todo API
paths:
  /todos:
    get:
      summary: Get all todos
      responses:
        '200':
          description: A list of todos
          content:
            application/json:
              schema:
                type: array
                items:
                  type: object
                  properties:
                    id:
                      type: integer
                    title:
                      type: string
                    completed:
                      type: boolean
    post:
      summary: Create a new todo
      requestBody:
        required: true
        content:
          application/json:
            schema:
              type: object
              properties:
                title:
                  type: string
                  example: Buy groceries
                completed:
                  type: boolean
                  example: false
      responses:
        '201':
          description: Created
In this Swagger specification:
- We define the API title, version, and description under the
infosection. - We specify two endpoints (
/todos), one for retrieving all todos (GET) and another for creating a new todo (POST). - Each endpoint includes a summary, request body (if applicable), and response schema.
Testing APIs on Swagger
Once we've completed our API documentation, we should be able to view the Swagger documentation and use it to test our APIs. If you've followed the steps outlined earlier, you should see a similar interface as described below. Our documentation will be served on the /docs route.
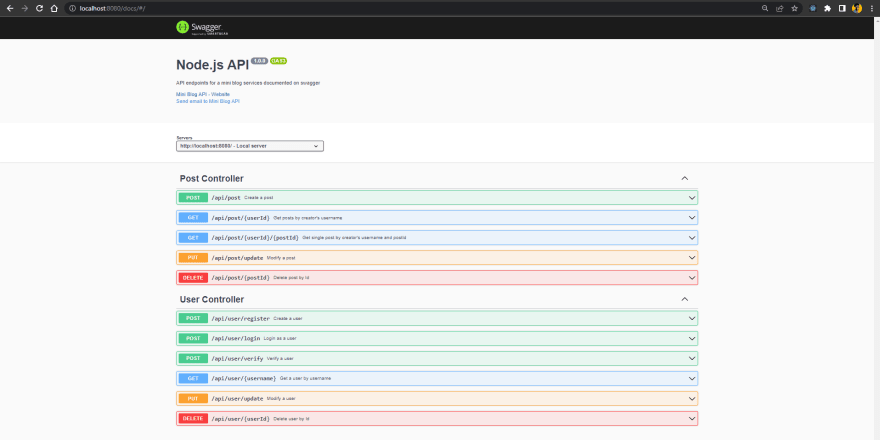
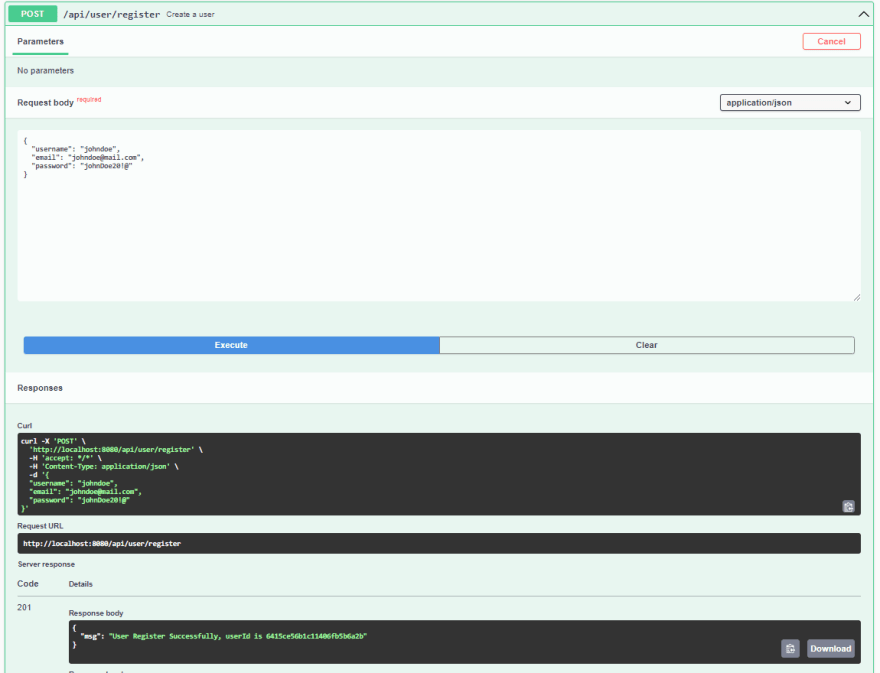
We will use the Swagger document UI to make some requests and observe the results.
Creating user:
Creating post:
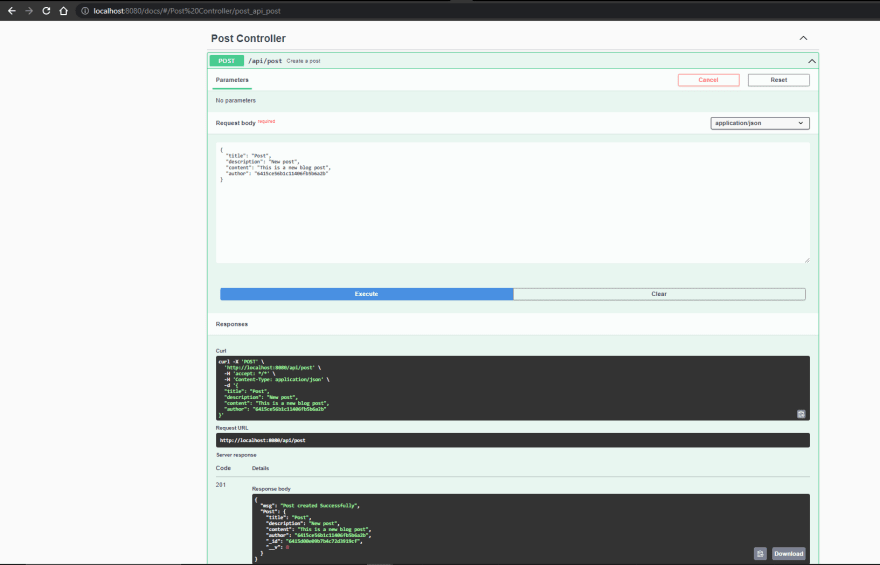
As we can see from the examples above, we can use the Swagger document to test our API, allowing us to create, read, and modify data in the database. This helps make the API easier to understand and integrate.
Following these examples, we can continue testing other request methods such as using PUT to update users or posts, using GET to read users or posts, and using DELETE to remove them from the database.
In conclusion, it is evident that API documentation plays a pivotal role in the software development lifecycle, facilitating collaboration and ensuring smooth user experiences. The advantages of Swagger, among others, encompass:
- Synchronization of API documentation with both servers and clients.
- Facilitation of REST API documentation generation and interaction. Utilizing the Swagger UI framework allows for comprehensive insights into API responses to parameters.
- Provision of responses in JSON and XML formats.
- Versatility for implementation across diverse technologies.
Managing API Documentation with Apidog
Managing APIs with Swagger can sometimes be cumbersome and lack collaboration among teams, so I suggest using Apidog instead.
Apidog is a more robust API testing tool compared to Postman. It supports debugging interfaces for protocols like HTTP(s), WebSocket, Socket, gRPC, and integrates with IDEA plugins.
Once you've developed the API, you can easily generate API documentation across multiple platforms with Apidog's IDEA plugin, making testing and maintenance very convenient.
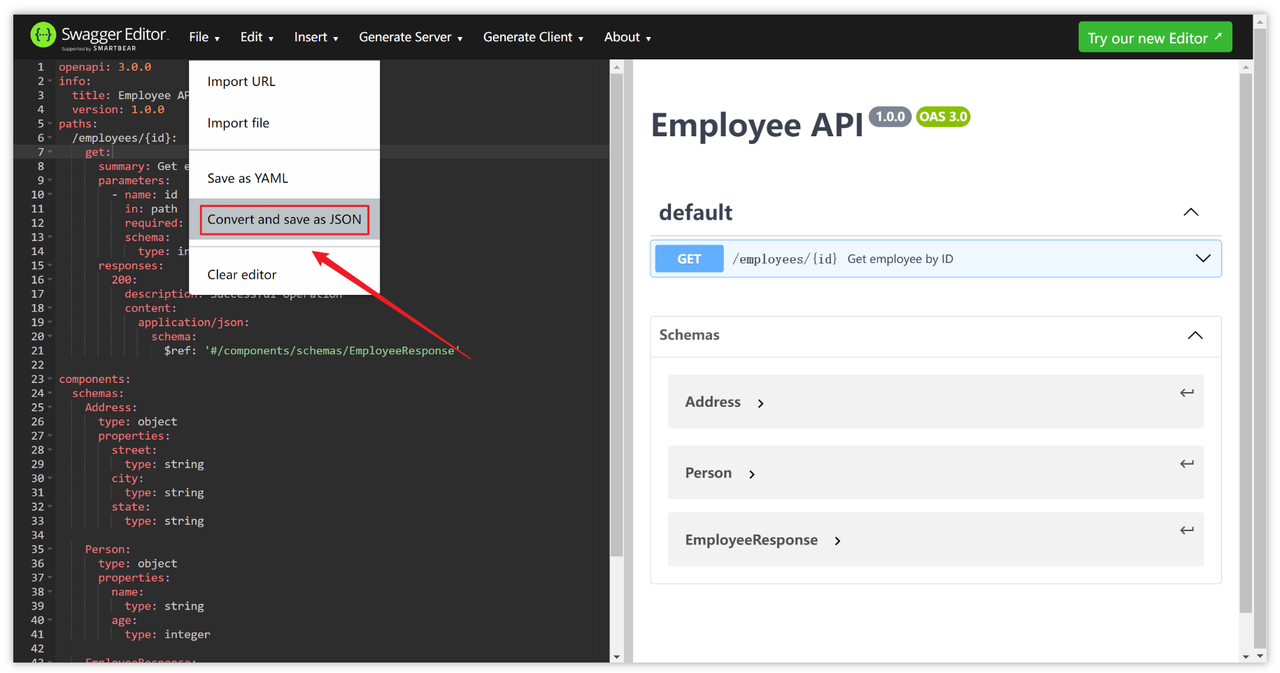
Exporting Swagger to JSON
As depicted below, select "Convert and save as JSON" to export the Swagger document as a JSON file.
Importing Swagger Files into Apidog
Open Apidog, create a project, then navigate to "Project Settings->Import Data->OpenAPI/Swagger->File Import" and import the Swagger-formatted JSON file that you previously exported.
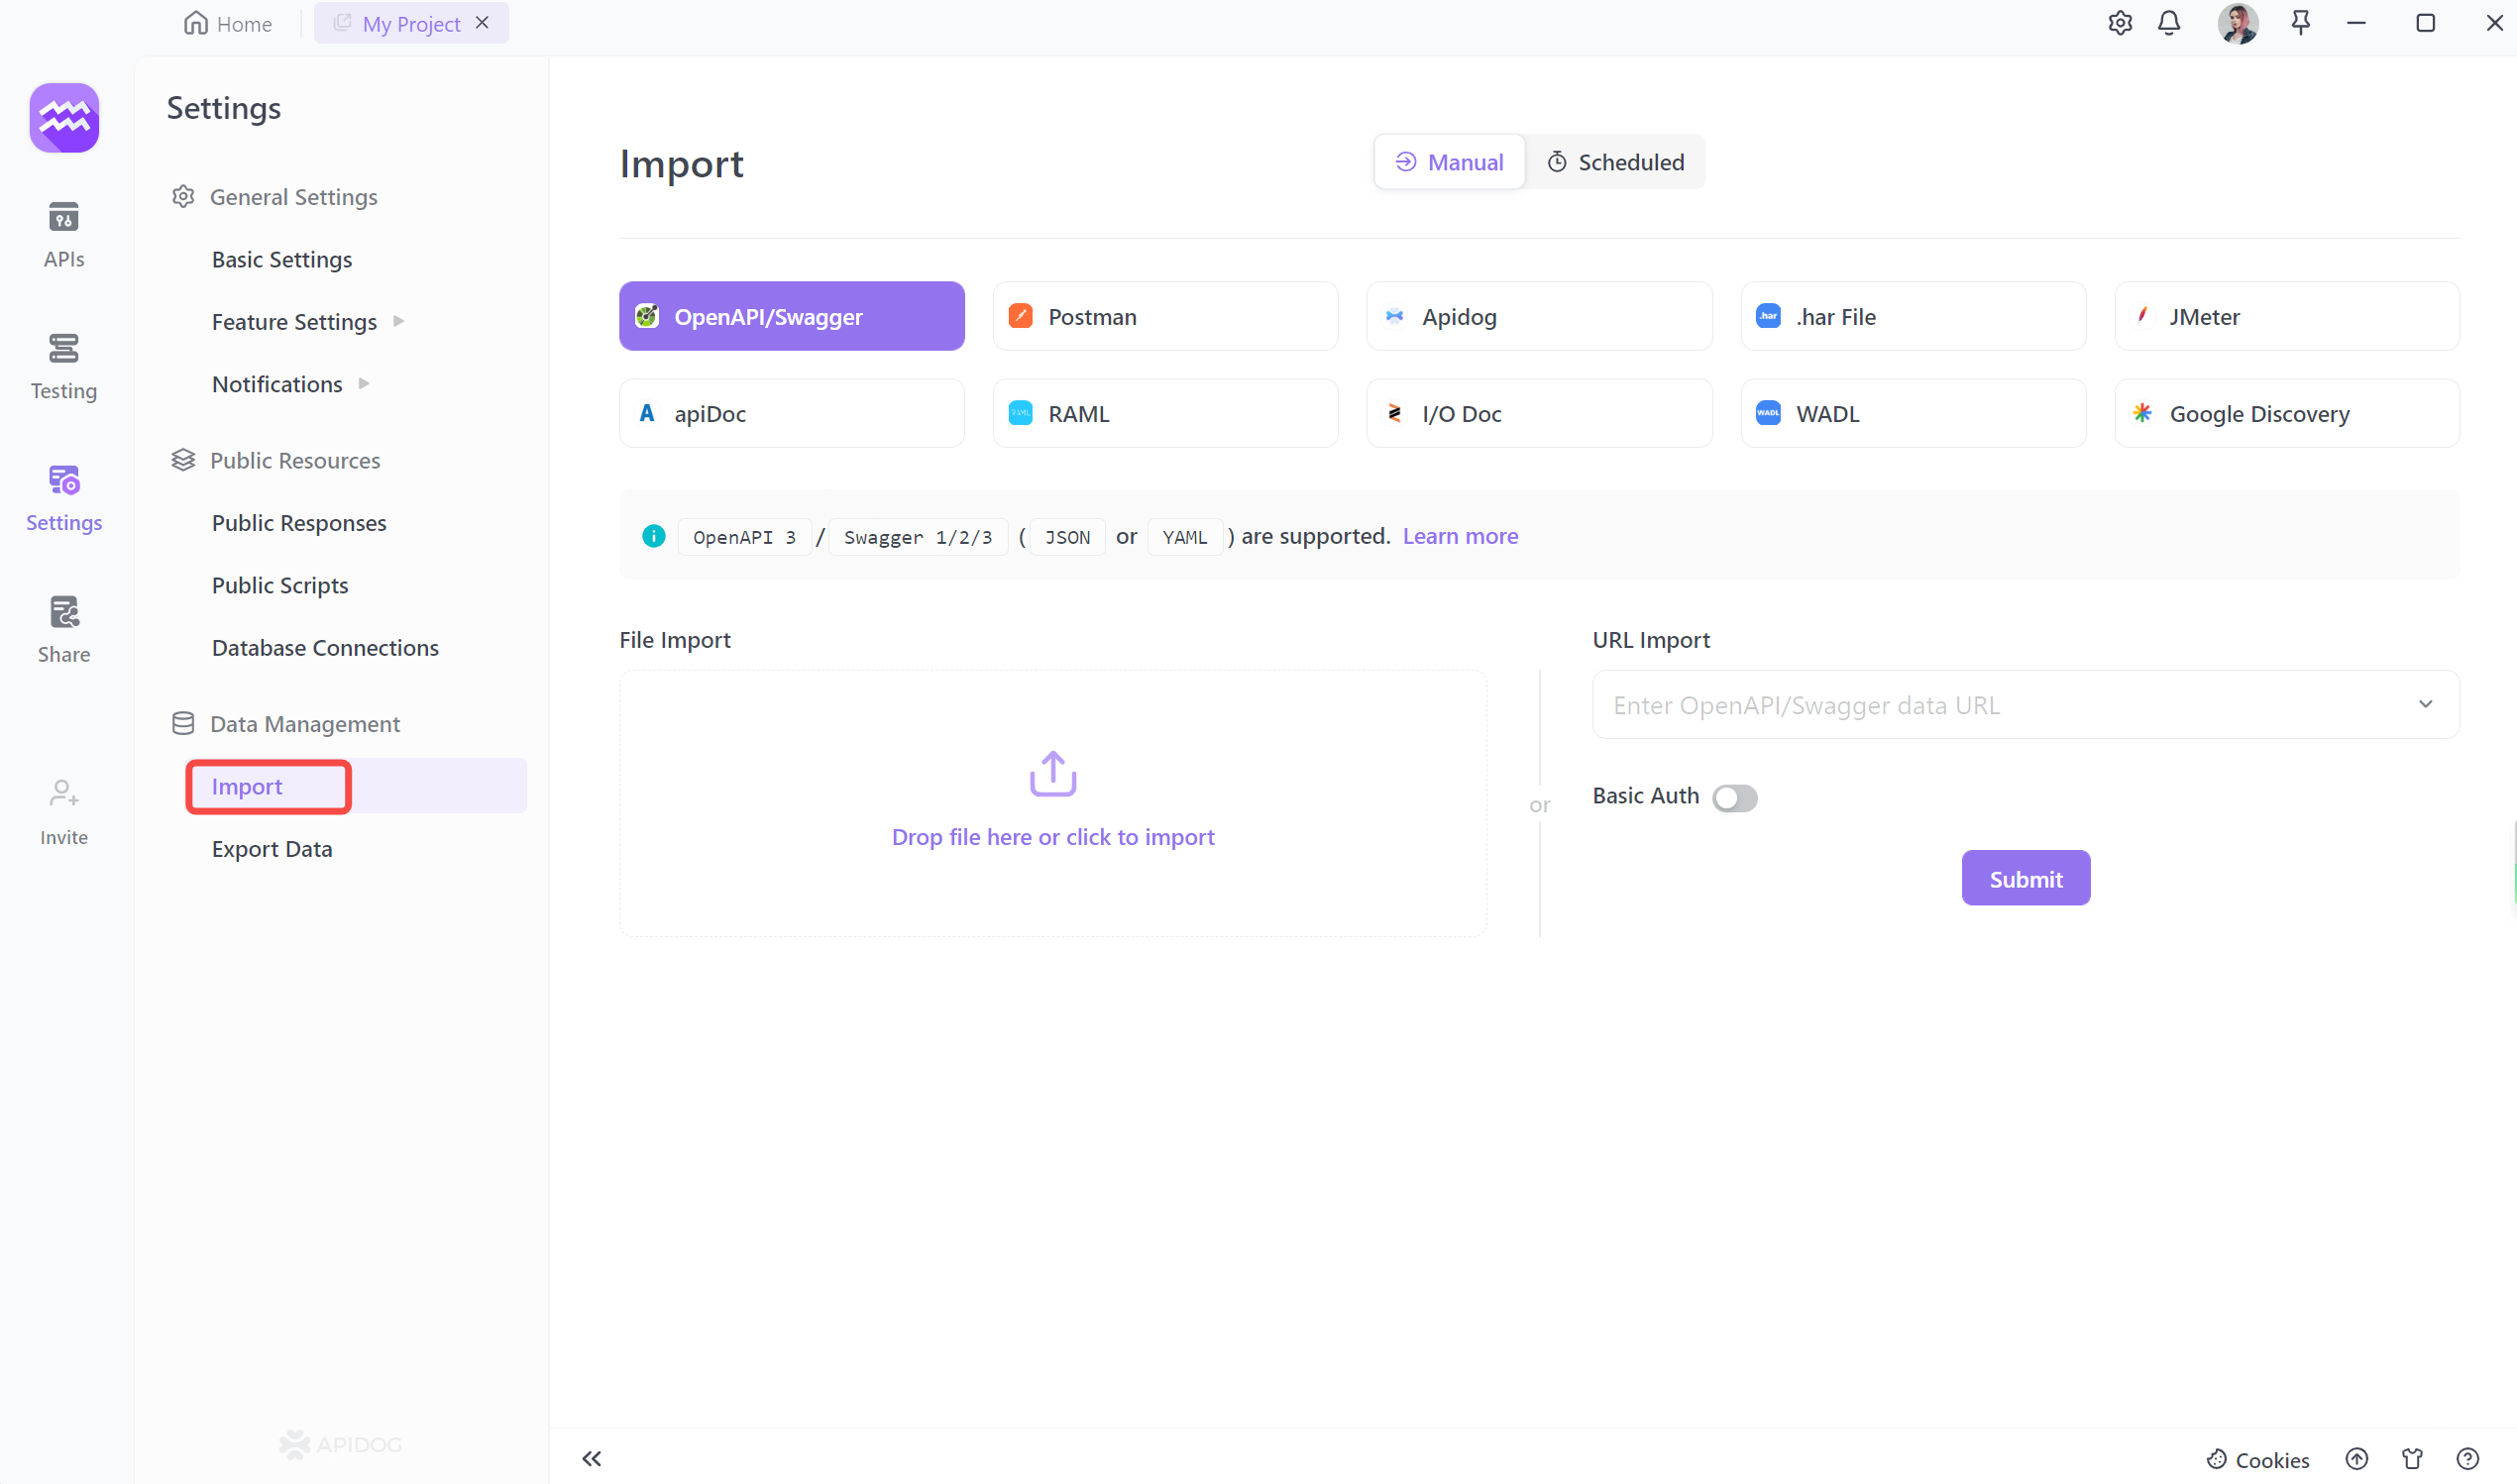
When importing, there will be a preview, and you can choose to import all, or selectively import API. After the import is successful, you can select an environment to test the API.
Check this link to learn more: https://apidog.com/help/importing-and-exporting-data/importing-data/importing-openapi-specification


