
Do you want to learn how to make GET requests in Node.js? If yes, then you are in the right place. In this blog post, I will show you how to use the built-in http module and the popular axios library to make GET requests in Node.js. I will also explain what GET requests are, why they are important, and how to handle the response data. By the end of this post, you will be able to make GET requests in Node.js like a pro.
What is a GET Request?
A GET request is one of the most common types of HTTP requests. HTTP stands for Hypertext Transfer Protocol, which is the standard protocol for communication between web browsers and web servers. HTTP requests are messages that web browsers send to web servers to request or submit data. HTTP responses are messages that web servers send back to web browsers to deliver the requested data or confirm the submission.
A GET request is a type of HTTP request that asks the web server to send back a specific resource. For example, when you type a URL in your web browser, you are making a GET request to the web server to send you the web page associated with that URL. A GET request can also include some query parameters, which are key-value pairs that provide additional information or filter the requested resource. For example, when you search something on Google, you are making a GET request to the Google web server with some query parameters that specify your search term, language, and other options.
Why are GET Requests Important?
GET requests are important because they are the primary way of retrieving data from web servers. You can use GET requests to access various types of data, such as HTML, JSON, XML, images, videos, and more. You can also use GET requests to interact with web APIs, which are interfaces that allow you to access data and services from other web applications. For example, you can use GET requests to get weather information from the OpenWeatherMap API, get movie information from the IMDb API, or get dog images from the Dog API.
GET requests are also important because they are easy to use and test. You can make GET requests using any web browser, without any special tools or libraries. You can also use tools like Postman or Apidog to make and test GET requests with different parameters and headers. You can also inspect the response data and headers using the browser's developer tools or the tool's interface.
What is NodeJs ?
Node.js is a JavaScript runtime environment that allows you to run JavaScript code outside of a web browser. Node.js is based on the Google Chrome V8 JavaScript engine, and it is used for building web applications, especially data-intensive and real-time ones. Node.js also has a large library of modules and packages that you can use to add functionality to your projects. Some of the benefits of Node.js are:
- It is fast and scalable, thanks to its asynchronous and event-driven nature.
- It is cross-platform and open-source, meaning you can run it on various operating systems and contribute to its development.
- It is consistent and unified, as you can use the same language for both the front-end and the back-end of your web application.
How to Make GET Request in Node.js Using the http Module?
Node.js is a JavaScript runtime environment that allows you to run JavaScript code outside the web browser. Node.js is often used to create web servers, web applications, and web APIs. Node.js also provides a built-in http module that allows you to make HTTP requests and responses.
To make a GET request in Node.js using the http module, you need to follow these steps:
- Import the
httpmodule using therequirefunction. - Create a
optionsobject that contains the information about the GET request, such as the hostname, port, path, and headers. - Use the
http.getmethod to make the GET request, passing theoptionsobject as the first argument and a callback function as the second argument. The callback function will be executed when the response is received, and it will have aresponseobject as its parameter. - Use the
responseobject to handle the response data and headers. Theresponseobject is an instance of thehttp.IncomingMessageclass, which implements theReadableStreaminterface. This means that you can use theresponseobject as a stream of data, and listen to events likedata,end, anderror. You can also use theresponse.statusCodeproperty to get the status code of the response, and theresponse.headersproperty to get the headers of the response. - Use the
response.onmethod to register event listeners for theresponseobject. For example, you can use theresponse.on('data', callback)method to listen to thedataevent, which will be emitted when a chunk of data is received. The callback function will have achunkobject as its parameter, which is a buffer of data. You can use thechunk.toString()method to convert the buffer to a string, and append it to a variable to store the whole response data. You can also use theresponse.on('end', callback)method to listen to theendevent, which will be emitted when the response is complete. The callback function will not have any parameters, and you can use it to perform any final actions, such as logging or parsing the response data. You can also use theresponse.on('error', callback)method to listen to theerrorevent, which will be emitted when an error occurs during the response. The callback function will have anerrorobject as its parameter, and you can use it to handle the error, such as logging or throwing it.
Here is an example of how to make a GET request in Node.js using the http module:
// Import the http module
const http = require('http');

// Create an options object
const options = {
  hostname: 'api.openweathermap.org',
  port: 80,
  path: '/data/2.5/weather?q=Los%20Angeles&appid=YOUR_API_KEY',
  headers: {
    'User-Agent': 'Node.js'
  }
};

// Make the GET request
http.get(options, (response) => {
  // Initialize a variable to store the response data
  let data = '';

  // Listen to the data event
  response.on('data', (chunk) => {
    // Append the chunk to the data variable
    data += chunk.toString();
  });

  // Listen to the end event
  response.on('end', () => {
    // Log the status code and the headers
    console.log(`Status code: ${response.statusCode}`);
    console.log(`Headers: ${JSON.stringify(response.headers)}`);

    // Parse the data as JSON
    const weather = JSON.parse(data);

    // Log the weather information
    console.log(`City: ${weather.name}`);
    console.log(`Temperature: ${weather.main.temp}`);
    console.log(`Description: ${weather.weather[0].description}`);
  });

  // Listen to the error event
  response.on('error', (error) => {
    // Throw the error
    throw error;
  });
});
How to Make GET Request in Node.js Using the axios Library?
The http module is a low-level module that provides basic functionality for making HTTP requests and responses. However, if you want to use a higher-level and more user-friendly module, you can use the axios library. Axios is a popular and powerful library that allows you to make HTTP requests and handle responses using promises and async/await syntax. Axios also supports features like interceptors, transformers, timeouts, cancel tokens, and more.
To make a GET request in Node.js using the axios library, you need to follow these steps:
- Install the
axioslibrary using thenpmcommand:npm install axios. - Import the
axioslibrary using therequirefunction. - Use the
axios.getmethod to make the GET request, passing the URL of the resource as the first argument and an optionalconfigobject as the second argument. Theconfigobject can contain information about the GET request, such as the headers, parameters, timeout, and more. Theaxios.getmethod will return a promise, which will resolve to aresponseobject or reject to anerrorobject. - Use the
thenmethod to handle the resolved promise, passing a callback function as the first argument. The callback function will have aresponseobject as its parameter, which contains the response data, status, headers, and more. You can use theresponse.dataproperty to access the response data, and theresponse.statusproperty to access the status code of the response. You can also use thecatchmethod to handle the rejected promise, passing a callback function as the first argument. The callback function will have anerrorobject as its parameter, which contains the error message, code, request, and response. You can use theerror.responseproperty to access the response object, and theerror.requestproperty to access the request object. - Alternatively, you can use the
async/awaitsyntax to make the GET request and handle the response. To do this, you need to use theasynckeyword before the function that contains the GET request, and theawaitkeyword before theaxios.getmethod. This will allow you to write asynchronous code in a synchronous manner, and assign theresponseobject to a variable. You can then use thetry/catchblock to handle any errors that may occur during the GET request.
Here is an example of how to make a GET request in Node.js using the axios library:
// Import the axios library
const axios = require('axios');

// Make the GET request using the then method
axios.get('http://api.openweathermap.org/data/2.5/weather?q=Los%20Angeles&appid=YOUR_API_KEY', {
  headers: {
    'User-Agent': 'Node.js'
  }
}).then((response) => {
// Log the status code and the headers
  console.log(`Status code: ${response.status}`);
  console.log(`Headers: ${JSON.stringify(response.headers)}`);

  // Log the weather information
  console.log(`City: ${response.data.name}`);
  console.log(`Temperature: ${response.data.main.temp}`);
  console.log(`Description: ${response.data.weather[0].description}`);
}).catch((error) => {
  // Log the error message and code
  console.log(`Error message: ${error.message}`);
  console.log(`Error code: ${error.code}`);

  // Log the response status and data if available
  if (error.response) {
    console.log(`Response status: ${error.response.status}`);
    console.log(`Response data: ${JSON.stringify(error.response.data)}`);
  }

  // Log the request method and path if available
  if (error.request) {
    console.log(`Request method: ${error.request.method}`);
    console.log(`Request path: ${error.request.path}`);
  }
});

// Make the GET request using the async/await syntax
async function getWeather() {
  try {
    // Await the GET request and assign the response object to a variable
    const response = await axios.get('http://api.openweathermap.org/data/2.5/weather?q=Los%20Angeles&appid=YOUR_API_KEY', {
      headers: {
        'User-Agent': 'Node.js'
      }
    });

    // Log the status code and the headers
    console.log(`Status code: ${response.status}`);
    console.log(`Headers: ${JSON.stringify(response.headers)}`);

    // Log the weather information
    console.log(`City: ${response.data.name}`);
    console.log(`Temperature: ${response.data.main.temp}`);
    console.log(`Description: ${response.data.weather[0].description}`);
  } catch (error) {
    // Log the error message and code
    console.log(`Error message: ${error.message}`);
    console.log(`Error code: ${error.code}`);

    // Log the response status and data if available
    if (error.response) {
      console.log(`Response status: ${error.response.status}`);
      console.log(`Response data: ${JSON.stringify(error.response.data)}`);
    }

    // Log the request method and path if available
    if (error.request) {
      console.log(`Request method: ${error.request.method}`);
      console.log(`Request path: ${error.request.path}`);
    }
  }
}

// Call the getWeather function
getWeather();
How to Handle the Response Data in Node.js?
Once you make a GET request in Node.js and receive the response, you may want to do something with the response data. For example, you may want to display the data on the console, save the data to a file, parse the data as JSON or XML, or use the data for some other purpose.
Depending on the type and format of the response data, you may need to use different methods and modules to handle the data. Here are some common scenarios and how to handle them:
- If the response data is a string, you can simply use the
console.logmethod to display the data on the console, or thefs.writeFilemethod to save the data to a file. Thefsmodule is a built-in module that allows you to work with the file system in Node.js. You can import thefsmodule using therequirefunction, and use thefs.writeFilemethod to write data to a file, passing the file name, the data, and a callback function as arguments. The callback function will have anerrorobject as its parameter, and you can use it to handle any errors that may occur during the file writing process. - If the response data is a buffer, you can use the
buffer.toStringmethod to convert the buffer to a string, and then use the same methods as above to display or save the data. A buffer is a binary data type that represents a sequence of bytes. Buffers are often used to handle binary data, such as images, videos, or compressed files. You can use thebuffer.toStringmethod to convert a buffer to a string, passing an optional encoding argument to specify the character encoding of the string. The default encoding isutf8, which is the most common encoding for text data. - If the response data is JSON, you can use the
JSON.parsemethod to parse the data as a JavaScript object, and then use the object properties and methods to access and manipulate the data. JSON stands for JavaScript Object Notation, which is a standard format for exchanging and storing data. JSON data is a string that follows a specific syntax, which consists of key-value pairs enclosed by curly braces, and arrays enclosed by square brackets. You can use theJSON.parsemethod to parse a JSON string as a JavaScript object, passing the JSON string as the argument. The method will return a JavaScript object that you can use like any other object. - If the response data is XML, you can use the
xml2jslibrary to parse the data as a JavaScript object, and then use the object properties and methods to access and manipulate the data. XML stands for Extensible Markup Language, which is another standard format for exchanging and storing data. XML data is a string that follows a specific syntax, which consists of elements enclosed by tags, attributes enclosed by quotes, and text content. Thexml2jslibrary is a third-party library that allows you to convert XML data to JavaScript objects and vice versa. You can install thexml2jslibrary using thenpmcommand:npm install xml2js. You can import thexml2jslibrary using therequirefunction, and use thexml2js.parseStringmethod to parse an XML string as a JavaScript object, passing the XML string and a callback function as arguments. The callback function will have anerrorobject and aresultobject as its parameters, and you can use them to handle any errors or access the parsed object.
How to Test NodeJs HTTP GET Request Using Apidog?
To Test HTTP Get request using Apidog, you need to follow these simple steps:
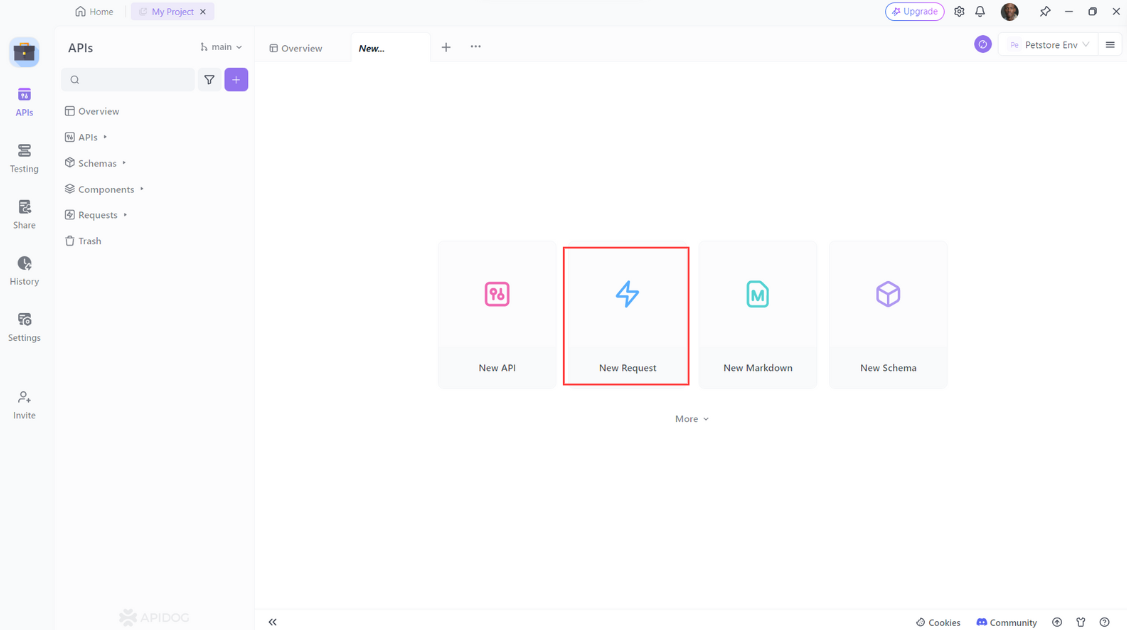
- Open Apidog and click on the "New Request" button to create a new request.
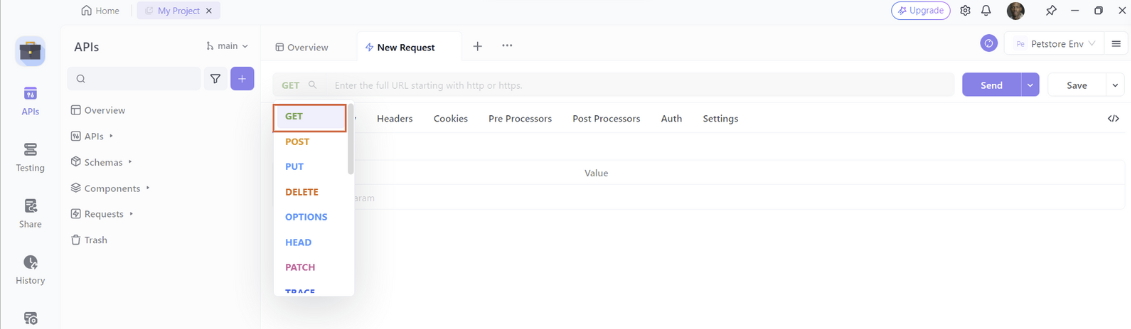
2. Select "GET" as the method of the request.
3. Enter the URL of the API endpoint
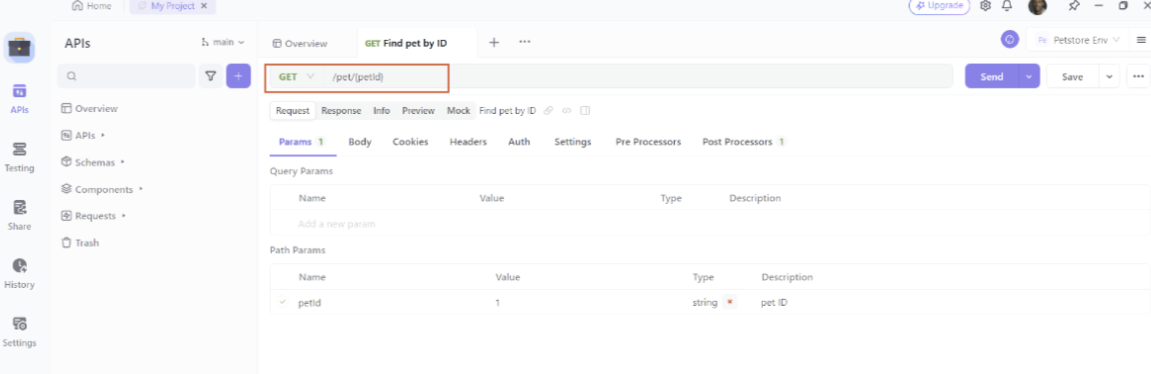
Then click on the “Send” button to send the request to the API.
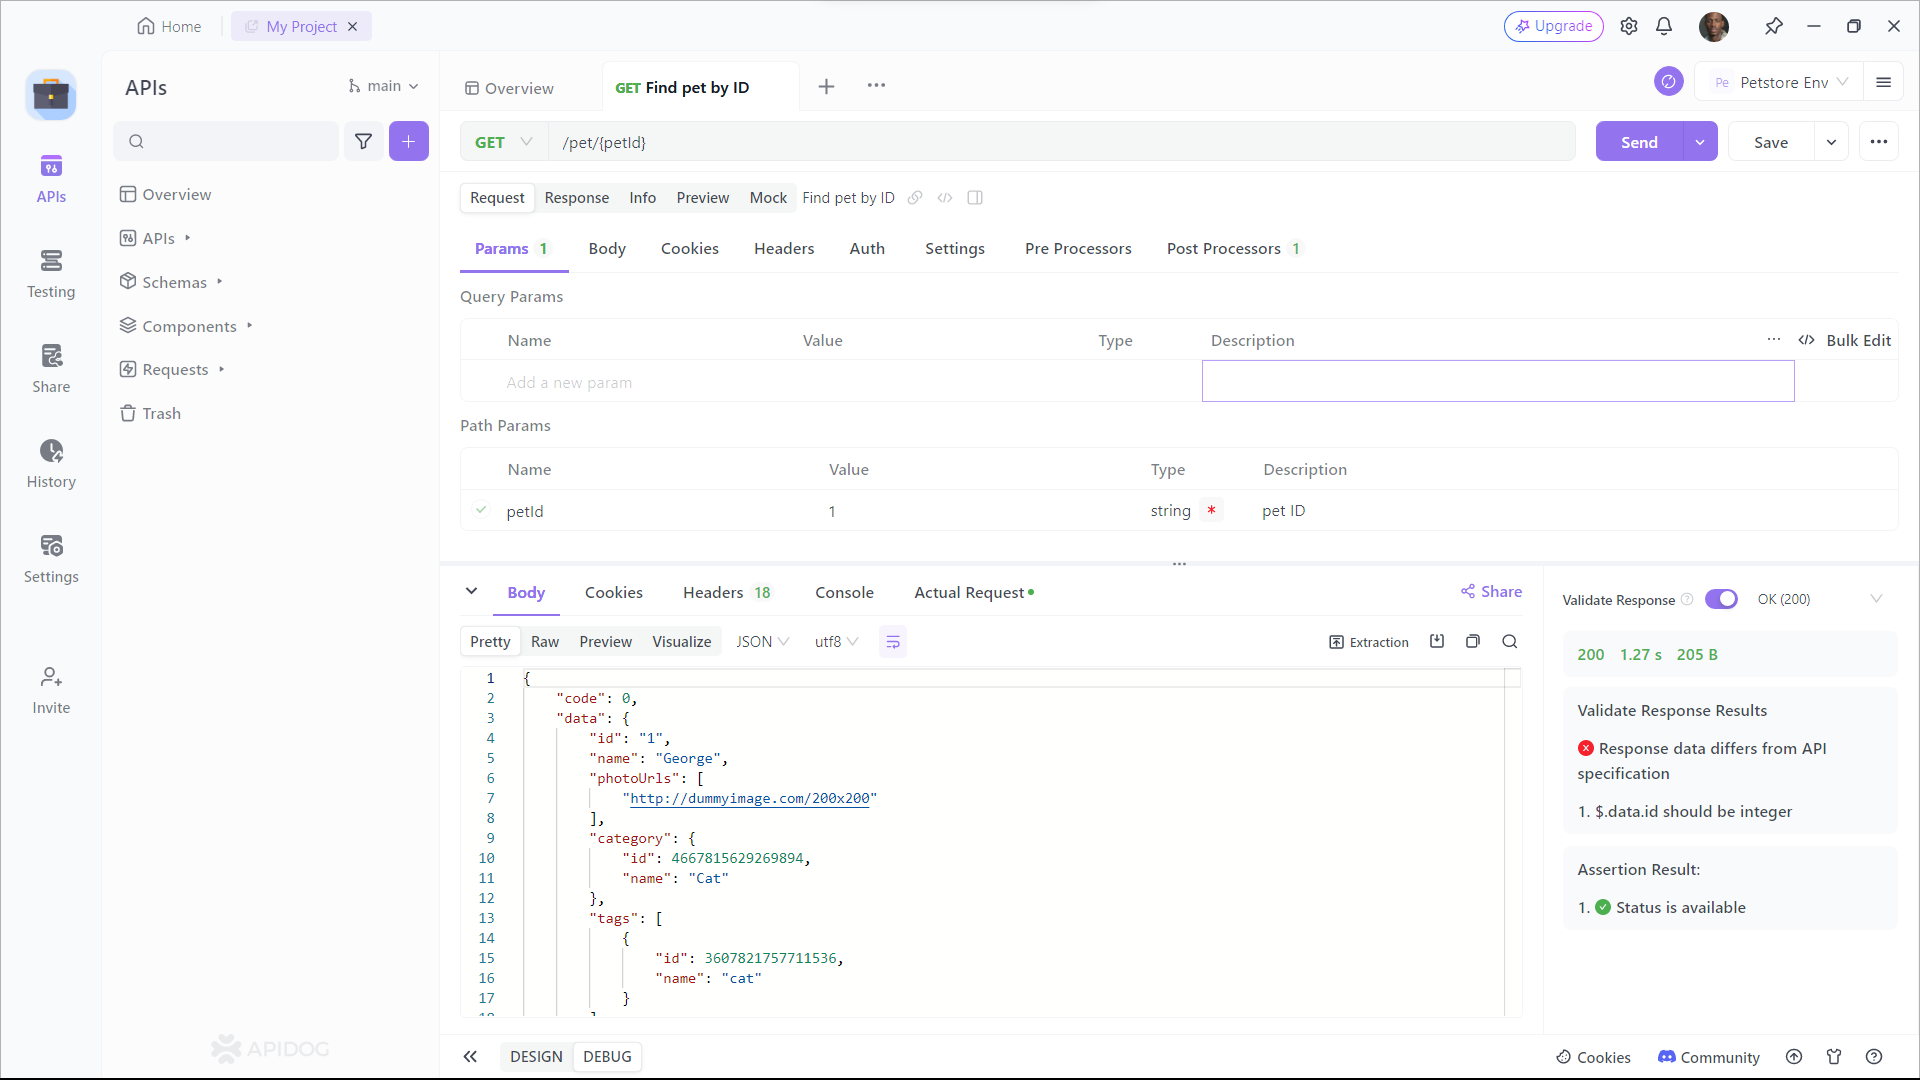
As you can see, Apidog shows you the URL, parameters, headers, and body of the request, and the status, headers, and body of the response. You can also see the response time, size, and format of the request and response, and compare them with different web APIs.
Conclusion
In this blog post, I have shown you how to make GET requests in Node.js using the http module and the axios library. I have also shown you how to handle the response data in different formats and scenarios. I hope you have learned something useful and enjoyed reading this post.
Thank you for reading and happy coding!


