
Hello, fellow web developers! In this blog post, I will show you how to use axios and typescript to build awesome APIs that are fast, secure, and easy to maintain. Whether you are a beginner or a pro, you will find something useful and interesting in this post. So, grab a cup of coffee and let’s get started!
What is Axios?
Axios is a popular JavaScript library that allows you to make HTTP requests from your browser or Node.js server. It has a simple and elegant syntax, supports promises and async/await, and can handle various scenarios such as interceptors, timeouts, cancelations, and more. Axios is also compatible with most browsers and platforms, making it a versatile and reliable tool for web development.

Definition of Typescript
Typescript is a superset of JavaScript that adds static typing and other features to the language. It helps you catch errors and bugs early, improve code quality and readability, and enhance your development experience with tools like IntelliSense and code completion. Typescript also compiles to plain JavaScript, so you can use it with any framework or library that you like.
What is an API and Why Do You Need One?
An API, or Application Programming Interface, is a set of rules and protocols that allows different applications to communicate and exchange data. For example, when you use a weather app on your phone, it sends a request to an API that provides the current weather information for your location. The API then responds with the data in a format that the app can understand and display.
APIs are essential for modern web development, as they enable you to create dynamic and interactive web applications that can access data from various sources and services. For instance, you can use APIs to integrate social media, maps, payment systems, authentication, and more into your web app.
How to Create an API with Node.js and Express
One of the most popular and powerful ways to create an API is to use Node.js and Express. Node.js is a runtime environment that allows you to run JavaScript code on the server-side, while Express is a framework that simplifies the process of creating web servers and handling HTTP requests and responses.
To create an API with Node.js and Express, you need to follow these steps:
- Install Node.js and Express on your machine. You can download Node.js from here and install Express using the command
npm install express. - Create a folder for your project and initialize it with
npm init. This will create a package.json file that contains the metadata and dependencies of your project. - Create an index.js file that will serve as the entry point of your app. In this file, you need to import Express, create an app instance, and define some routes that will handle the requests to your API. For example, you can create a route that returns a simple message when someone visits the root path of your app:
// Import Express
const express = require('express');

// Create an app instance
const app = express();

// Define a route that returns a simple message
app.get('/', (req, res) => {
  res.send('Hello, world!');
});

// Listen on port 3000
app.listen(3000, () => {
  console.log('Server is running on port 3000');
});
4. Run your app with the command node index.js and visit http://localhost:3000 in your browser. You should see the message “Hello, world!” displayed on the screen.
Congratulations, you have just created your first API with Node.js and Express!
How to Use Axios to Make HTTP Requests to Your API
Now that you have tested your API, you need to use it in your web app. One of the easiest and most elegant ways to make HTTP requests to your API is to use axios, a JavaScript library that simplifies the process of fetching data from the web.
To use axios to make HTTP requests to your API, you need to follow these steps:
- Install axios on your project using the command
npm install axios. - Import axios in your JavaScript file where you want to use it. For example, you can import it in your index.js file:
// Import axios
const axios = require('axios');
3. Use the axios methods to make HTTP requests to your API endpoints. For example, you can use the axios.get method to get the data from the route that returns a simple message that we created earlier:
// Make a GET request to the root path of the API
axios.get('http://localhost:3000')
  .then(response => {
    // Handle the success response
    console.log(response.data); // Prints "Hello, world!"
  })
  .catch(error => {
    // Handle the error response
    console.error(error);
  });
You can also use other Axios methods to make different types of HTTP requests, such as POST, PUT, PATCH, DELETE, etc. You can also pass headers, parameters, or body data to your requests, and handle the response status, data, headers, etc.

How to Use Typescript to Add Static Typing to Your API
One of the drawbacks of JavaScript is that it is a dynamically typed language, which means that the types of variables and values are not checked until runtime. This can lead to errors and bugs that are hard to detect and fix, especially in large and complex projects.
Typescript is a solution to this problem, as it adds static typing and other features to JavaScript, making it more robust and reliable. Typescript also compiles to plain JavaScript, so you can use it with any framework or library that you like.
To use Typescript to add static typing to your API, you need to follow these steps:
- Install Typescript on your project using the command
npm install typescript. - Create a tsconfig.json file that contains the configuration options for Typescript. You can use the command
npx tsc --initto generate a default file, or customize it according to your needs. For example, you can set the target, module, strict, and outDir options:
{
  "compilerOptions": {
    "target": "es6", // Specify the target version of JavaScript
    "module": "commonjs", // Specify the module system
    "strict": true, // Enable strict mode
    "outDir": "./dist" // Specify the output directory
  }
}
3. Rename your index.js file to index.ts, and add type annotations to your variables, parameters, and return values. For example, you can add types to the route that returns a simple message that we created earlier:
// Import Express
import express, { Request, Response } from 'express';

// Create an app instance
const app = express();

// Define a route that returns a simple message
app.get('/', (req: Request, res: Response) => {
  res.send('Hello, world!');
});

// Listen on port 3000
app.listen(3000, () => {
  console.log('Server is running on port 3000');
});
4. Compile your Typescript code to JavaScript using the command npx tsc. This will create a dist folder that contains the compiled JavaScript files.
5. Run your app with the command node dist/index.js and visit http://localhost:3000 in your browser. You should see the same message “Hello, world!” displayed on the screen.
By using Typescript, you can benefit from the advantages of static typing, such as catching errors and bugs early, improving code quality and readability, and enhancing your development experience with tools like IntelliSense and code completion. Typescript also supports advanced features such as generics, interfaces, enums, decorators, and more, that can help you write more expressive and elegant code.
How to Use Axios and Typescript Together to Make Type-Safe HTTP Requests
One of the challenges of using axios and typescript together is that axios does not provide type definitions for the response data that it returns.
This means that you have to manually define the types of the data that you expect from your API, and cast the response data to those types. This can be tedious and error-prone, especially if your API has complex or dynamic data structures.
Fortunately, there is a solution to this problem, and that is to use a library called axios-typescript. Axios-typescript is a wrapper around axios that adds type definitions and generics to the axios methods, making them type-safe and easy to use with typescript.
To use axios-typescript to make type-safe HTTP requests to your API, you need to follow these steps:
- Install axios-typescript on your project using the command
npm install axios-typescript. - Import axios-typescript in your typescript file where you want to use it. For example, you can import it in your index.ts file:
// Import axios-typescript
import axios from 'axios-typescript';
3. Define the types of the data that you expect from your API endpoints. For example, you can define a type for the user object that we created earlier:
// Define a type for the user object
type User = {
  name: string;
  email: string;
  password: string;
};
4. Use the axios-typescript methods to make HTTP requests to your API endpoints, and pass the type of the data as a generic parameter. For example, you can use the axios.post method to create a new user on your API, and pass the User type as a generic parameter:
// Make a POST request to the /users path of the API, and pass the User type as a generic parameter
axios.post<User>('http://localhost:3000/users', {
  // Pass the user data as the request body
  name: 'John Doe',
  email: 'john.doe@example.com',
  password: '123456'
})
  .then(response => {
    // Handle the success response
    console.log(response.status); // Prints 201
    console.log(response.data); // Prints the created user object, with the User type
  })
  .catch(error => {
    // Handle the error response
    console.error(error);
  });
By using axios-typescript, you can make type-safe HTTP requests to your API, and benefit from the type checking and auto-completion features of typescript.
You can also avoid the hassle of manually defining and casting the types of the response data, and rely on the type inference and generics of typescript. Axios-typescript also supports all the features and options of axios, such as interceptors, cancelations, timeouts, etc.
How to Test Your API with Apidog
Now that you have created your API, you need to test it to make sure it works as expected and meets the requirements of your clients or users. One of the best tools for testing APIs is Apidog, a web-based platform that allows you to create, run, and share API tests in a simple and intuitive way.
To test your API with Apidog, you need to follow these steps:
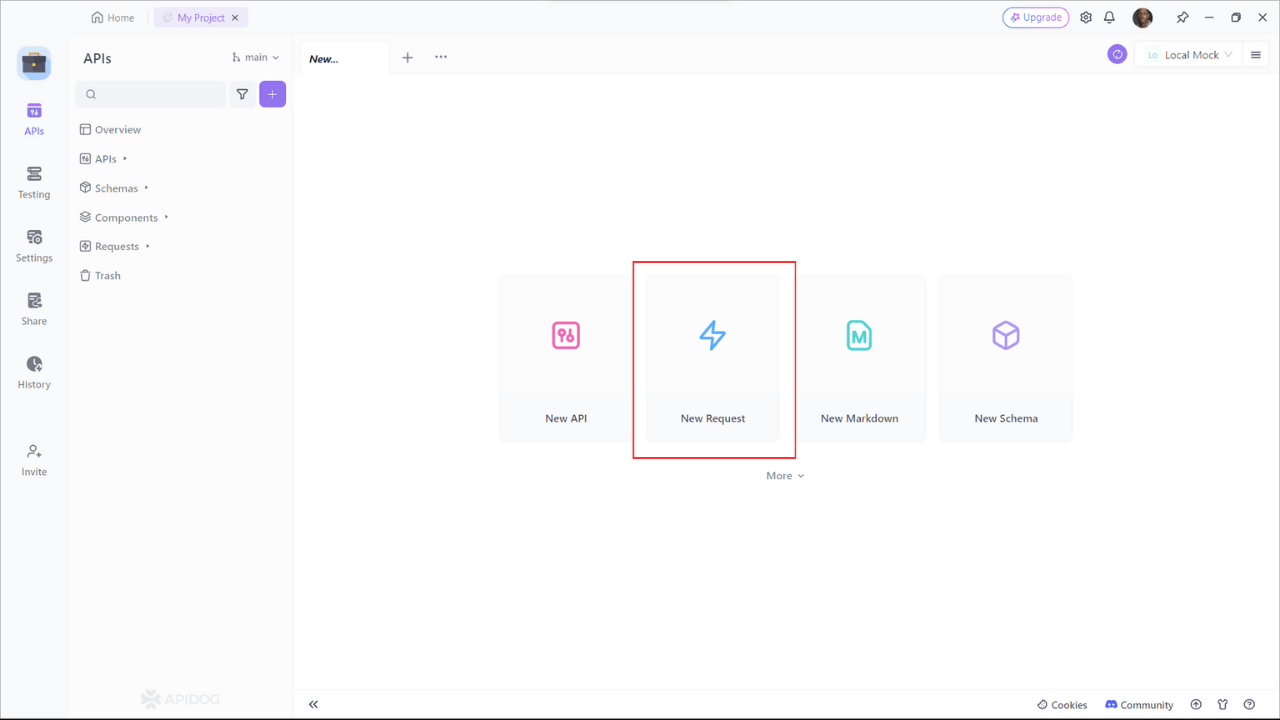
Step 1: Open Apidog and create a new request.
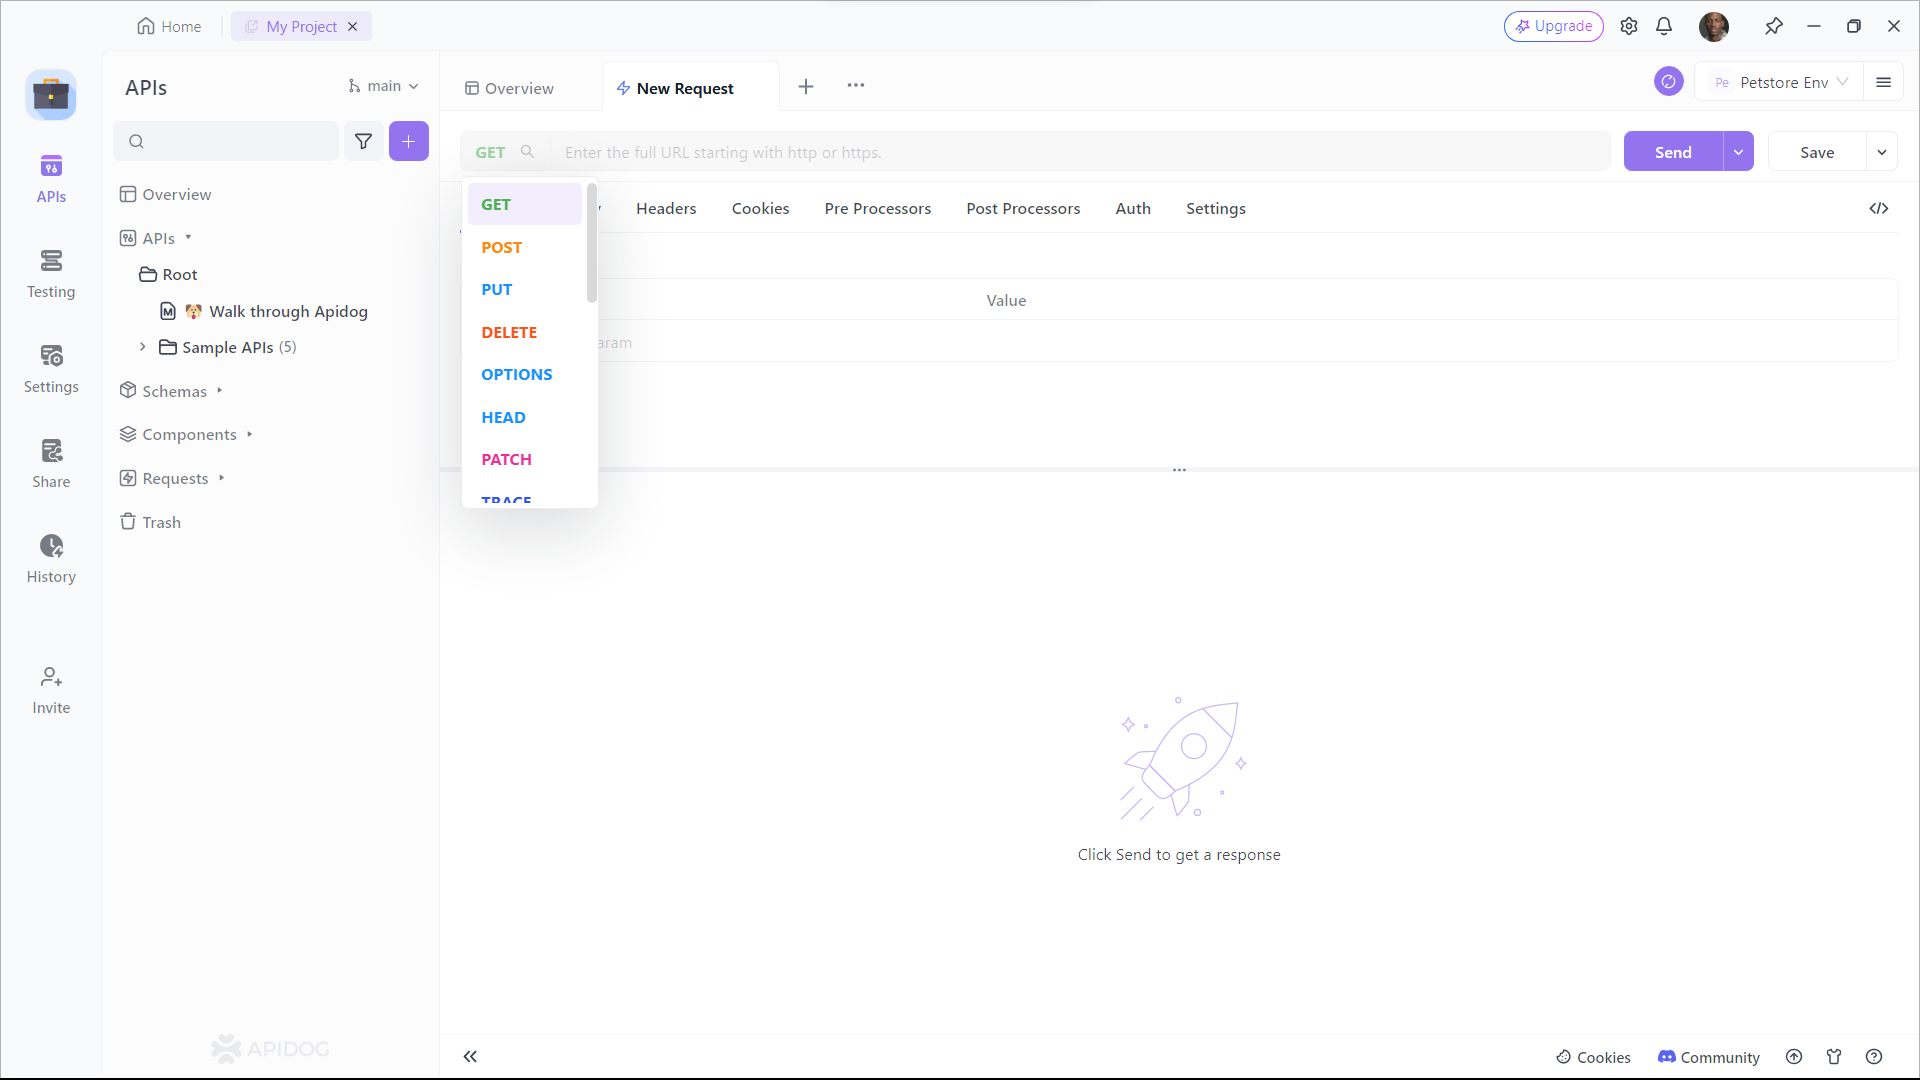
Step 2: In the test editor, enter the URL of your API endpoint, select the HTTP method, and add any headers, parameters, or body data that you need. For example, you can test the route that returns a simple message that we created earlier:
Step 3: Click on the Send button and see the result of your test. You should see the status code, the response time, and the response body of your API. For example, you should see something like this:
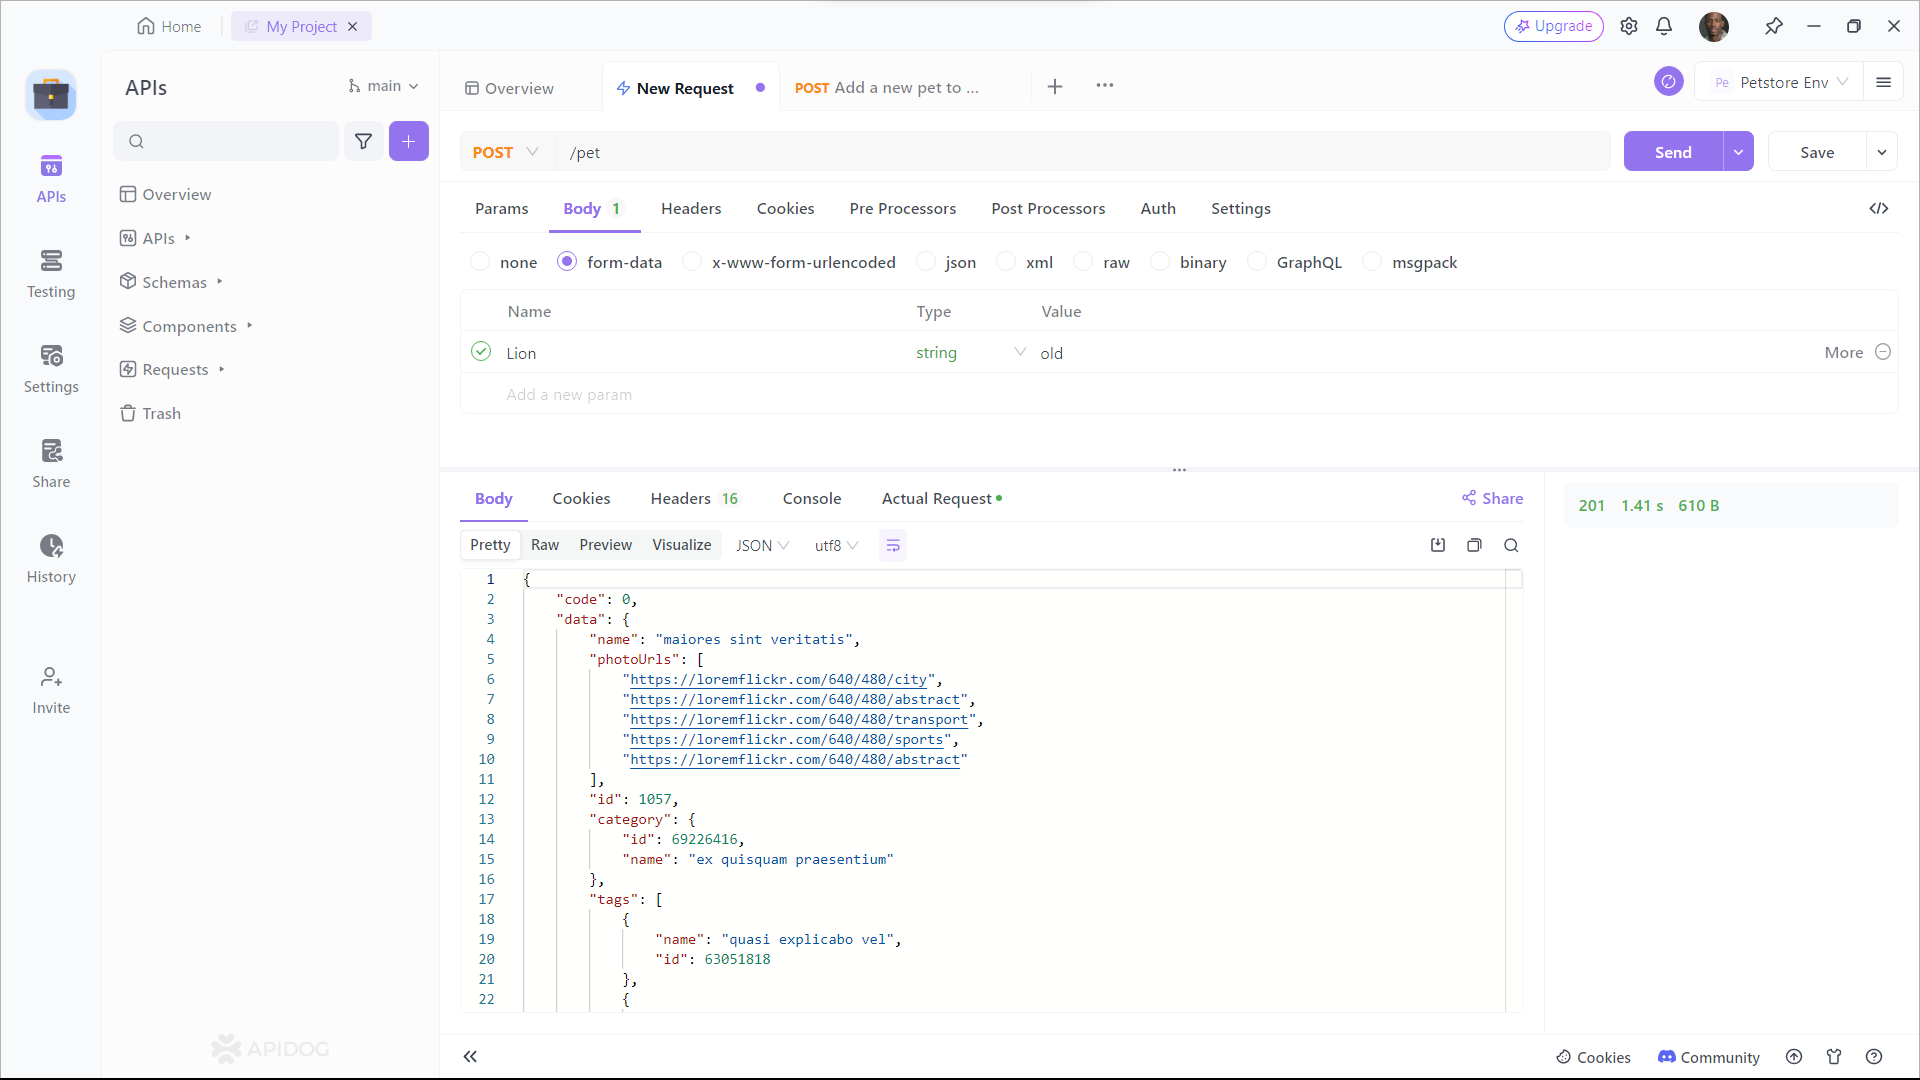
Apidog is a great tool for testing your APIs, as it helps you ensure the quality, reliability, and performance of your web services. It also saves you time and effort, as you don’t need to write any code or install any software to test your APIs. You can just use your browser and enjoy the user-friendly interface and features of Apidog.
Wrap Up
You’ve just learned how to use axios and typescript to create amazing APIs that are fast, secure, and easy to maintain. In this post, you’ve discovered:
- The benefits of using APIs for web development
- The steps to create an API with Node.js and Express
- The tools to test your API with Apidog
- The methods to use axios to fetch data from your API
- The advantages of using typescript to add static typing to your API
- The techniques to use axios-typescript to make type-safe requests
We hope that this post has inspired you to use axios and typescript for your next web project. If you have any questions, comments, or feedback, please feel free to share them below. We would love to hear from you and help you with your web development journey.
Thank you for reading and happy coding! 😊


