API documentation is the task everyone agrees is important and nobody wants to own. A new endpoint ships, the reference lags a week behind, and the getting-started guide describes an auth flow you replaced two sprints ago. The work is real, but it’s repetitive and easy to defer.
That combination (important, repetitive, deferrable) is exactly what an AI agent is good at. If your agent can run a terminal command, it can author endpoints, write the prose guides around them, and publish a docs site, all from a plain-language request. The Apidog CLI is what makes that possible: every documentation action is a scriptable command with structured JSON output an agent can read and act on.
Why the CLI, not the GUI or an MCP server
There are three ways an agent can touch your API docs, and they solve different problems. Getting this distinction right is the difference between fighting your tools and using the one built for the job.
| Approach | Direction | Who drives it | Reviewable diff? |
|---|---|---|---|
| GUI | Human edits in a browser | A person, clicking | No |
| MCP server | Reads your spec → writes code | An agent, in your editor | In your code repo, not the docs |
| CLI | Writes the docs themselves | An agent, in a terminal | Yes, every command is logged |
An MCP server is excellent when you want an agent to read your API definition and generate client code against it. The Cursor doc-through-MCP flow is the canonical example. But that’s the reverse of what we want here. We want the agent to produce the documentation: create endpoints, author Markdown guides, and publish a site.
For that, the CLI wins on three counts. It’s deterministic: the same command produces the same result. It’s scriptable: the whole flow drops into CI. And it returns JSON on every call, including an agentHints.nextSteps field that tells the agent what it can do next. That last point matters more than it sounds: it means the agent isn’t guessing its way forward, it’s following the CLI’s own suggestions.
Set up the agent’s environment
Install the CLI and authenticate once. Our installation guide covers Node versions and PATH; the authentication guide covers tokens and CI secrets.
npm install -g apidog-cli
apidog login --with-token <TOKEN>
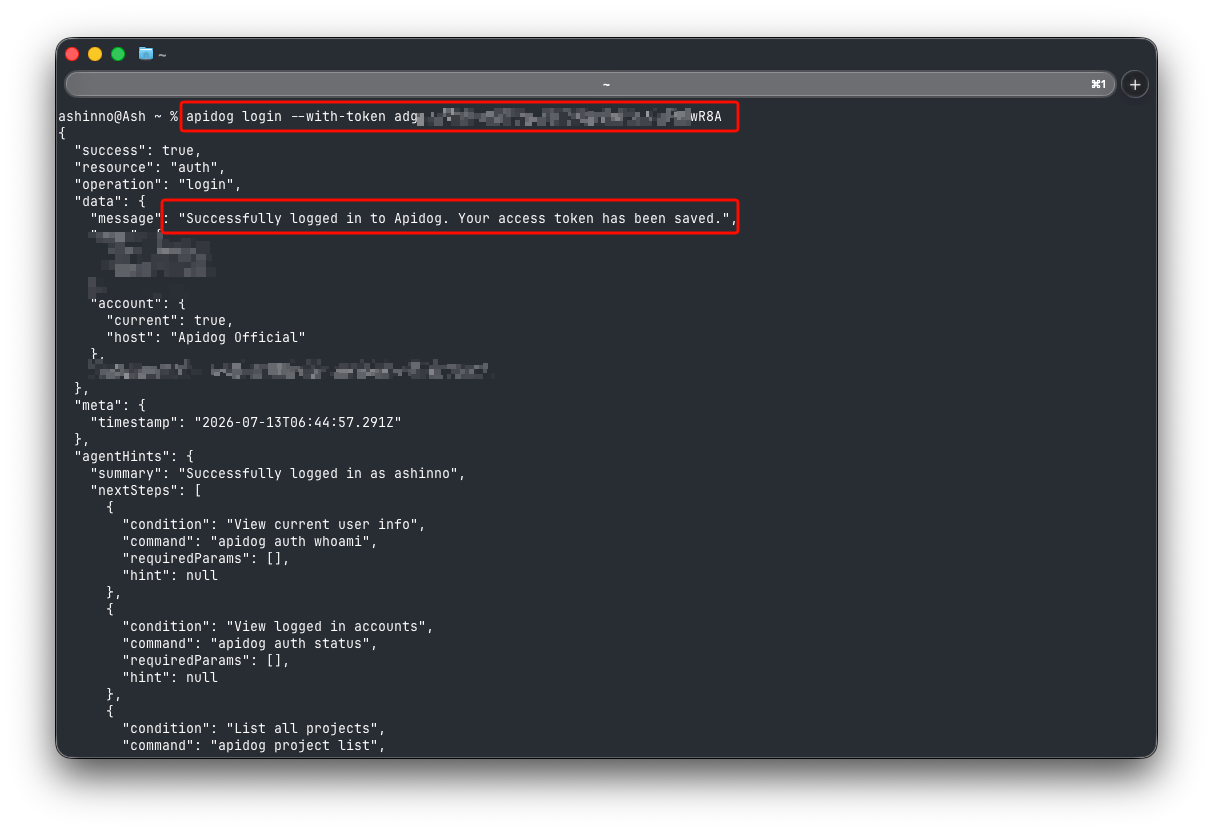
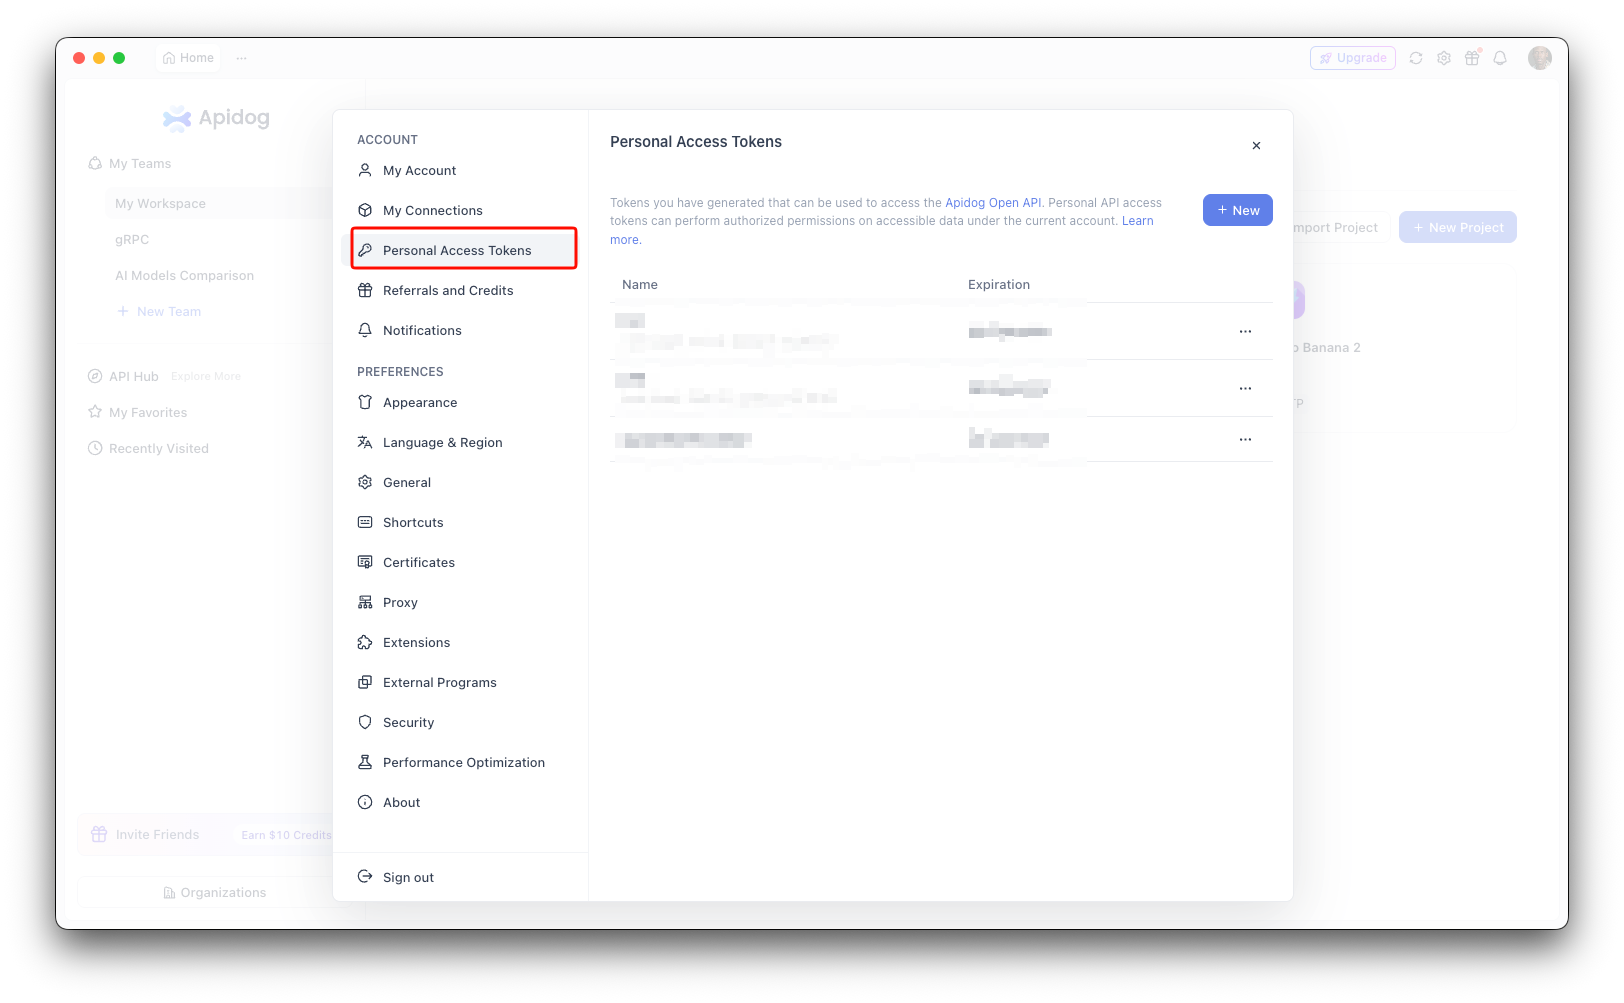
Grab the token from the Apidog app under user avatar → Account Settings → API Access Token. It’s stored locally after login, so the agent doesn’t pass it on every call.
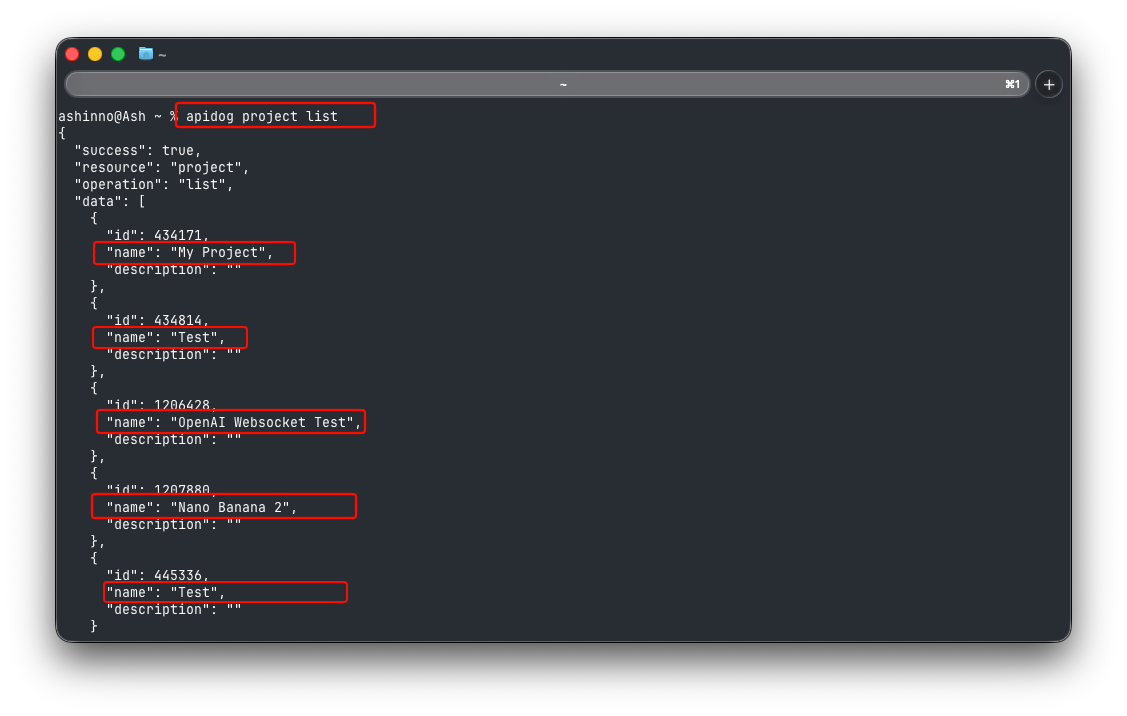
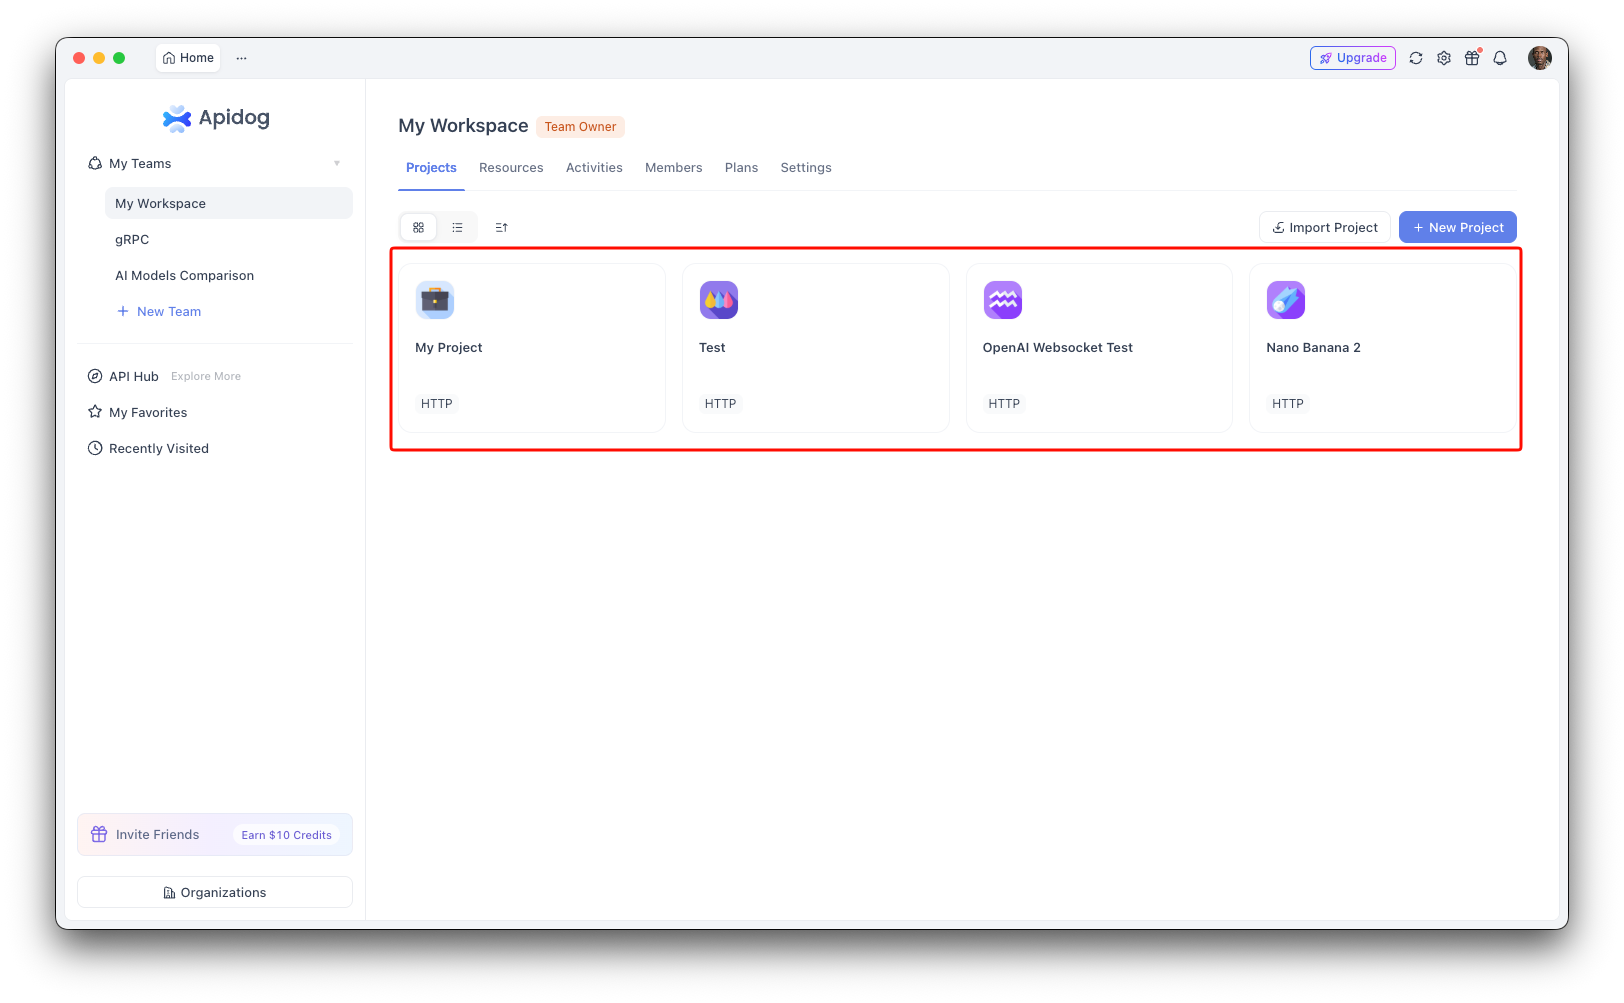
Every write runs against a project ID, which you’ll find in Project Settings → Basic Settings, or by running:
apidog project list
Any coding agent that can run shell commands works here: Claude Code, Cursor, Codex, and others. The CLI doesn’t care which one is calling it; it only cares that the commands and payloads are correct. Which brings us to the one rule that makes the whole thing reliable.
The write ritual an agent must follow
Documentation commands that create resources take a JSON file. Your agent should never hand-build that JSON from memory. Model-invented field names are the number-one cause of failed runs. The CLI ships the exact schema for every write, and the correct sequence is always the same four steps:
# 1. Ask the CLI what the payload looks like
apidog cli-schema get doc-create

# 2. Generate the JSON file from that schema

# 3. Validate before you write (catches a missing field locally)
apidog cli-schema validate doc-create --file ./doc.json

# 4. Only now run the real command
apidog doc create --project <projectId> --file ./doc.json
Bake this loop into the agent’s instructions. It turns “the model invented a field” into “the validator rejected it on my machine,” which is the difference between a clean run and a red build. Here’s a rules block you can paste directly into an agent’s system prompt or a CLAUDE.md / .cursorrules file:
Apidog CLI rules:
- Never hand-write a JSON payload. Run `apidog cli-schema get <key>` first and build from that schema.
- Validate every file with `apidog cli-schema validate <key> --file <path>` before any create or update.
- Always pass --project <id> on write commands.
- Read the `agentHints.nextSteps` field in each JSON response to choose the next command.
- If a write comes back blocked by permissions, stop and ask the human; do not pick a workaround.
Those five lines are what separate an agent that reliably ships docs from one that guesses payloads into a wall.
Step 1: Create the reference from endpoints and schemas
In Apidog, your API reference is generated from the endpoints and data schemas in the project. So the agent’s first job is to create those. Suppose you tell it:
“Add a POST /refunds endpoint that takes an order ID and an amount, and document its success and validation-error responses.”The agent creates the reusable data model first, then the endpoint that references it. Running apidog cli-schema get schema-create shows that a data schema takes a name and a standard jsonSchema object. So the agent writes something like refund-schema.json:
{
  "name": "Refund",
  "description": "A refund issued against an order",
  "jsonSchema": {
    "type": "object",
    "required": ["orderId", "amount"],
    "properties": {
      "orderId": { "type": "string" },
      "amount": { "type": "number" },
      "reason": { "type": "string" }
    }
  }
}
Validate and create:
apidog cli-schema validate schema-create --file ./refund-schema.json
apidog schema create --project <projectId> --file ./refund-schema.json
Now the endpoint. The endpoint-create schema requires method and path, and lets you reference the data model you just made with a $ref in the format #/definitions/{schemaId}. The agent writes refunds-endpoint.json:
{
  "name": "Create refund",
  "method": "post",
  "path": "/refunds",
  "status": "developing",
  "requestBody": {
    "type": "application/json",
    "jsonSchema": { "$ref": "#/definitions/<refundSchemaId>" }
  }
}
apidog cli-schema validate endpoint-create --file ./refunds-endpoint.json
apidog endpoint create --project <projectId> --file ./refunds-endpoint.json
The reference documentation for /refunds now exists, rendered from the same definition your team edits. There’s no separate “export the docs” step for the reference; it’s live in the project the moment the endpoint lands. That’s the payoff of a schema-first source: the reference can’t drift, because it is the schema.
Step 2: Write the guides, not just the reference
A reference generated from schemas is only half of good documentation. The other half is prose: a getting-started page, an authentication walkthrough, a migration note. In Apidog those live in the project’s docs tree as Markdown documents, managed by the doc command group.
The doc-create schema requires only a name; content holds the Markdown, and folderId places it in the tree (0 is the root). So a quickstart the agent drafts becomes quickstart.json:
{
  "name": "Quickstart: Your first refund",
  "content": "# Quickstart\n\nThis guide takes you from API key to your first refund in five minutes...",
  "folderId": 0
}
apidog doc list --project <projectId>
apidog cli-schema validate doc-create --file ./quickstart.json
apidog doc create --project <projectId> --file ./quickstart.json
This is where the agent earns its keep. Ask it to “write a quickstart that walks a new developer from API key to first refund,” and it drafts the Markdown, wraps it in the payload the schema expects, validates, and creates the document. No browser, no copy-paste. Because the content is just a string field, the agent can write as long or as detailed a guide as the task calls for.
Step 3: Publish the docs site
With the reference and guides in place, the agent can publish from the terminal too. Two command groups handle this, and one naming distinction trips people up constantly:
doc: a Markdown document inside the project’s API tree (what you created in step 2).docs-site: the hosted, public documentation site.shared-doc: a shareable link to hand a partner, not a full site.
apidog docs-site list --project <projectId>
apidog cli-schema get docs-site-create
apidog docs-site create --project <projectId> --file ./docs-site.json
Reach for docs-site when you want a public site defined from the terminal, and shared-doc when you just need a link to send someone. Because both are commands, publishing becomes a scripted step the agent runs after every doc change; the hosted site reflects the update the moment the command returns.
Step 4 (optional): Export a portable copy
Sometimes you want the docs as a file: an HTML page to host elsewhere, Markdown for a static-site generator, or OpenAPI to hand downstream. The export command produces all three:
apidog export --project <projectId> --format html --output ./api-docs.html
apidog export --project <projectId> --format markdown --output ./api-docs.md
apidog export --project <projectId> --format openapi --oas-version 3.1 --output ./openapi.json
If your project holds several services and you only want part of it documented, apidog export --help shows the --scope, --api-ids, and --folder-ids flags for narrowing the output. A single project can ship one doc file per service that way.
A full example, end to end
Here’s the whole loop as one plain-language request and the commands an agent runs to satisfy it.
You: “We just added a payments service withPOST /refundsandGET /refunds/{id}. Document both, write a short guide explaining idempotency keys, and publish it to our docs site.”
The agent, following its rules, runs:
# Create the shared data model
apidog cli-schema validate schema-create --file ./refund-schema.json
apidog schema create --project $PID --file ./refund-schema.json

# Create both endpoints
apidog endpoint create --project $PID --file ./post-refunds.json
apidog endpoint create --project $PID --file ./get-refund.json

# Author the idempotency guide as a Markdown doc
apidog doc create --project $PID --file ./idempotency-guide.json

# Publish
apidog docs-site create --project $PID --file ./docs-site.json
You review the resulting diff, and the payments service is documented and live. What used to be an afternoon of context-switching is a request and a review.
Wire it into an agent loop or CI
Because every step is a command, the whole flow drops into CI or an agent’s task loop. A minimal step that regenerates and commits your Markdown reference on every push:
- name: Regenerate API docs
  run: |
    npm install -g apidog-cli
    apidog login --with-token ${{ secrets.APIDOG_TOKEN }}
    apidog export --project ${{ secrets.APIDOG_PROJECT }} --format markdown --output ./docs/api-docs.md
For a fuller picture of running an agent against the CLI end to end, see From PRD to Testing Loop and How to Set Up 5 AI Agents to Build a Complete API. The pattern in both is the same one here: describe intent, let the agent translate it into validated CLI calls, review the result.
One permission note
Writing to a project through an agent can be gated. If a create command comes back blocked, the project has External AI Edit Permissions turned off for that branch. You have two honest options: enable direct-edit permission in Project Settings → Feature Settings → AI Feature Settings (Apidog client 2.8.32+), or have the agent work on an isolated AI branch and open a merge request. The companion guide on updating your API spec walks the AI-branch flow in full, and it applies equally when the agent is creating documentation on a protected branch.
Common snags
The agent hand-built the JSON. This is the number-one failure. Enforce cli-schema get → cli-schema validate → create in the agent’s instructions so it works from the real schema, not a guessed one.
Missing project ID. Every doc, docs-site, and export call needs --project <projectId>, the ID from settings, not the readable project name. Most “it errored” reports are this.
Confusing doc, docs-site, and shared-doc. They’re three different things: a Markdown page in the tree, a hosted site, and a share link. Have the agent confirm which one the task means before it writes.
Token not set in CI. apidog login stores the token on the machine that runs it. A fresh CI runner has none, so run login --with-token in the same job before any command, and keep the token in a secret.
A $ref that points nowhere. When an endpoint references a data model with #/definitions/{schemaId}, that schema has to exist first. Create schemas before the endpoints that use them.
FAQ
Which AI agents can drive the Apidog CLI? Any agent that can run shell commands: Claude Code, Cursor, Codex, and similar coding agents. The CLI is agent-agnostic; it only needs correct commands and valid payloads.
Do I need a paid plan? No. Apidog isn’t open source, but the free tier plus apidog-cli covers the create-and-publish flow described here.
Can the agent overwrite existing docs by accident? create adds new resources. Modifying existing ones uses update, which behaves differently and needs its own guardrails; that’s covered in the update-your-API-spec companion guide.
How is this different from an AI docs generator? Generic AI docs tools produce text from your code. This produces structured documentation inside your API platform (endpoints, schemas, guides, and a published site) from one live source that can’t drift from what your team edits.
Wrapping up
An agent that can run the Apidog CLI can own the part of documentation people always defer: it creates the endpoints, writes the guides around them, and publishes the site. All from a plain-language request, with schema validation guarding every write. Your role shifts from writing docs to reviewing a diff.
The one rule that makes it reliable is the write ritual: get the schema, validate, then create. Give your agent that loop, the five-line rules block above, and a project ID, and documentation stops being a chore that trails behind the code. Download Apidog to get the CLI, or read the Apidog CLI complete guide for the full command reference.