Bearer tokens are commonly used in the OAuth 2.0 authentication framework. In this article, we'll explore the process of generating a Bearer token and provide a practical example using GitHub as a reference.
Bearer tokens play a crucial role in securing web applications and APIs by providing a means of authentication. They are commonly used in the OAuth 2.0 authentication framework, where a client obtains a token to access protected resources on behalf of a user. In this article, we'll explore the process of generating a Bearer token and provide a practical example using GitHub as a reference.
What are Bearer Tokens?
Bearer tokens are a type of access token that carries the information necessary for a client to access a protected resource. These tokens are often sent in the HTTP Authorization header of a request and prefixed with the word "Bearer" (e.g., Authorization: Bearer <token>). The server validates the token and grants access to the requested resource if the token is valid.
How to Generate a Bearer Token on GitHub?
Let's walk through an example using GitHub's OAuth 2.0 authentication. In this scenario, we'll use a fictional web application to demonstrate the process.
Step 1: Register your application on GitHub
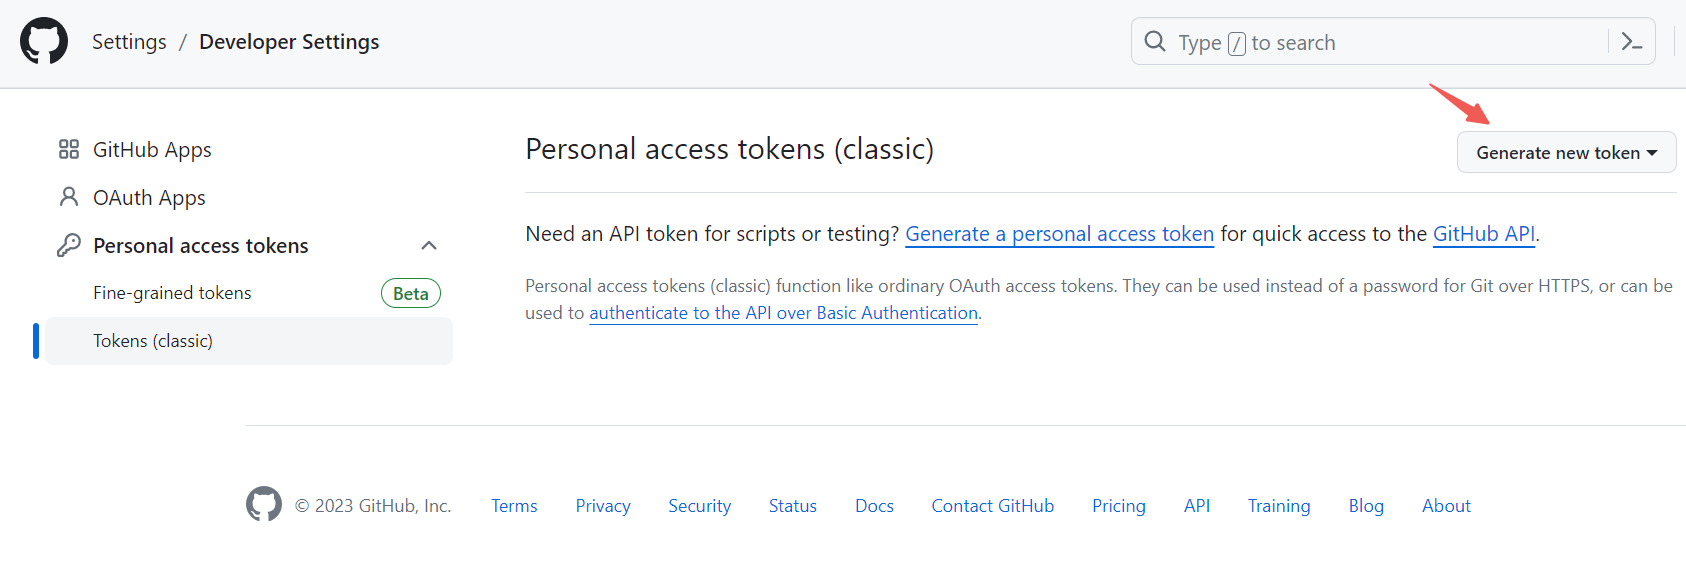
Go to your GitHub account settings.
Navigate to "Developer settings" > "OAuth Apps" > "Tokens."
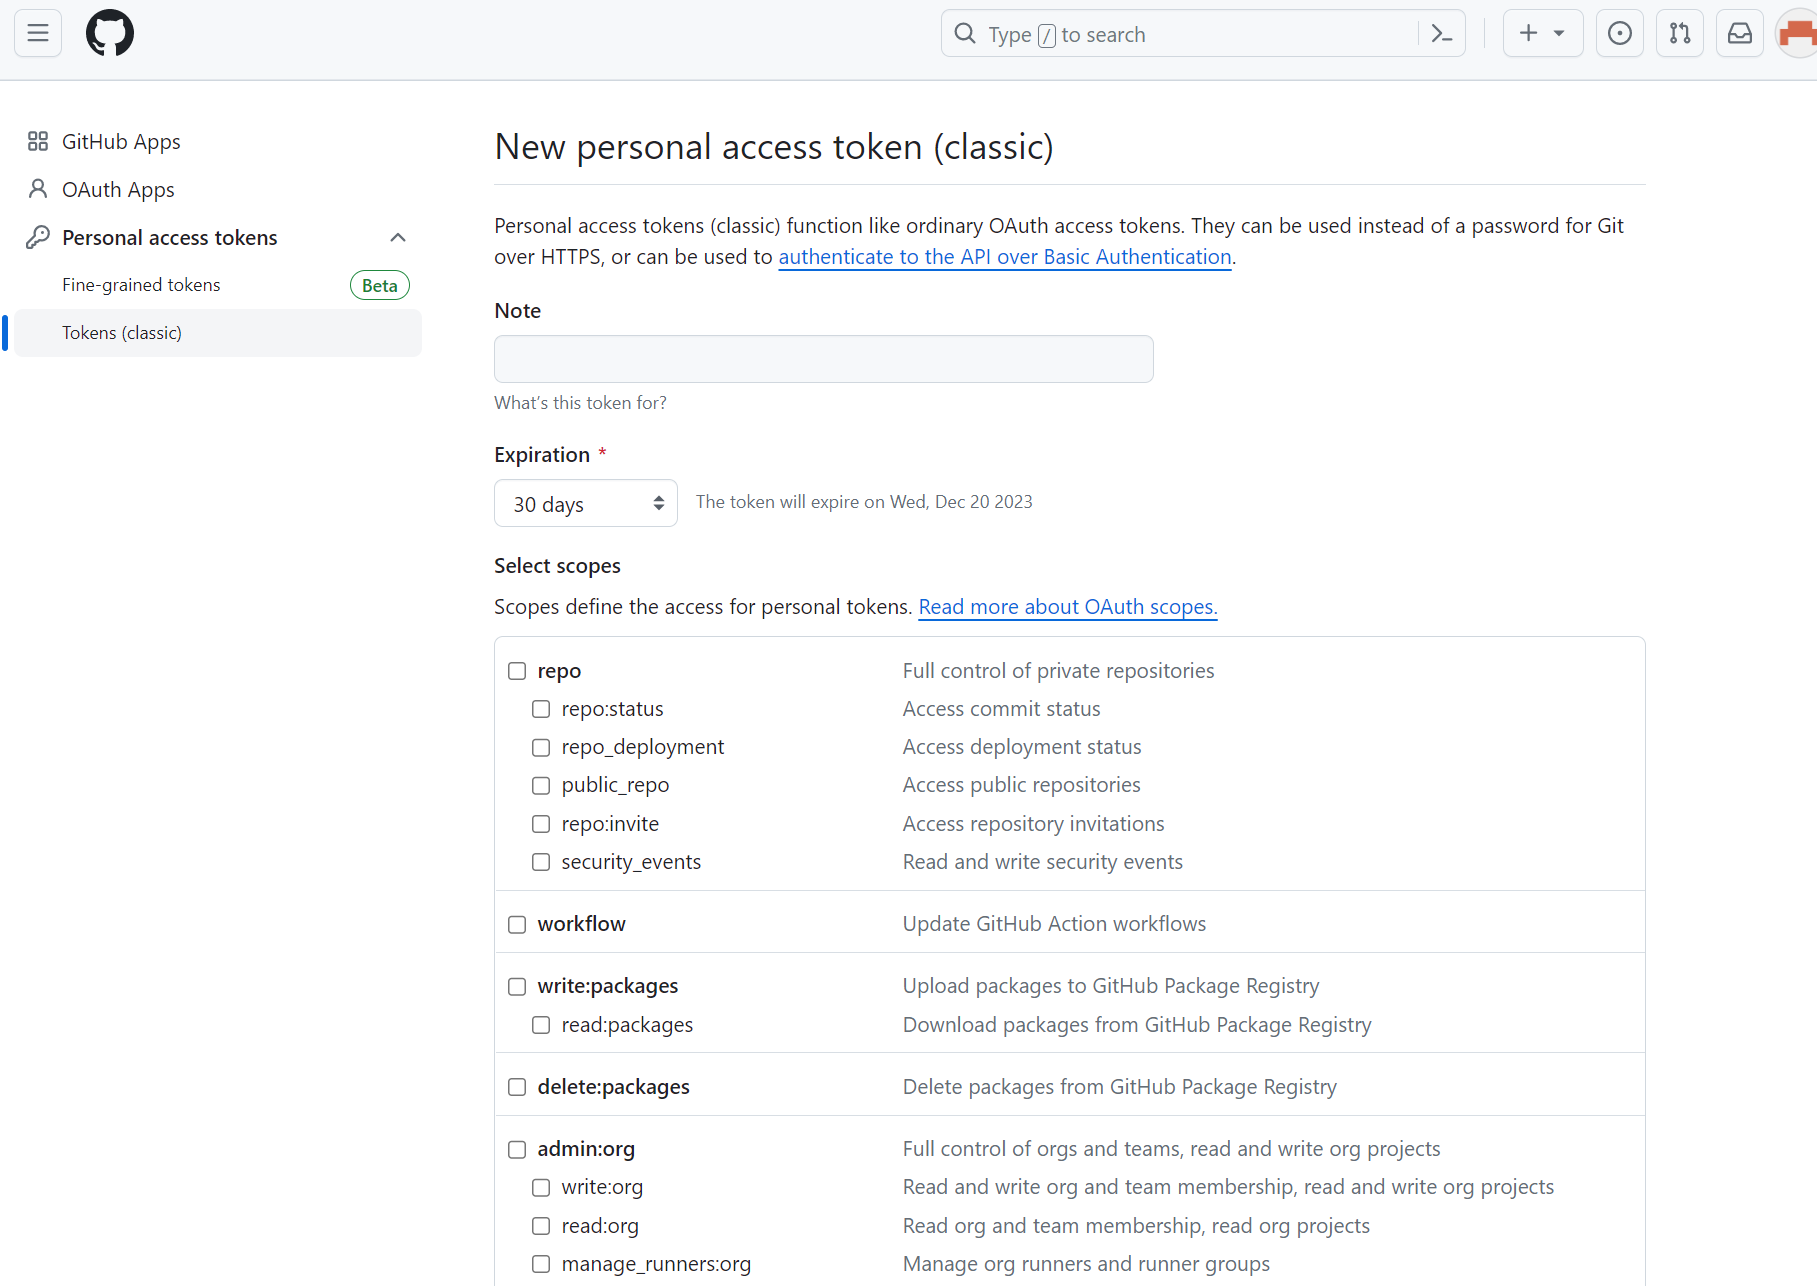
3. Make a new personal access token as an example. Fill in the required information, including the expiration, and scopes. Then click the " Generate token" at the bottom.
4. Once the bearer token is registered, note the generated Client ID and Client Secret.
Step 2: Request authorization from the user
If you are registering a new application and got OAuth applications. Redirect the user to GitHub's authorization endpoint, where they will grant permission to your application.
<a href="https://github.com/login/oauth/authorize?client_id=YOUR_CLIENT_ID&redirect_uri=YOUR_REDIRECT_URI&scope=read:user"Authorize with GitHub</a
Step 3: Exchange authorization code for a token
Once the user grants permission, they are redirected back to your application with an authorization code. Exchange this code for an access token.
Remember to handle token storage securely and to refresh tokens when they expire, as access tokens have a limited validity period.
Pass and Run Bearer Token in Apidog
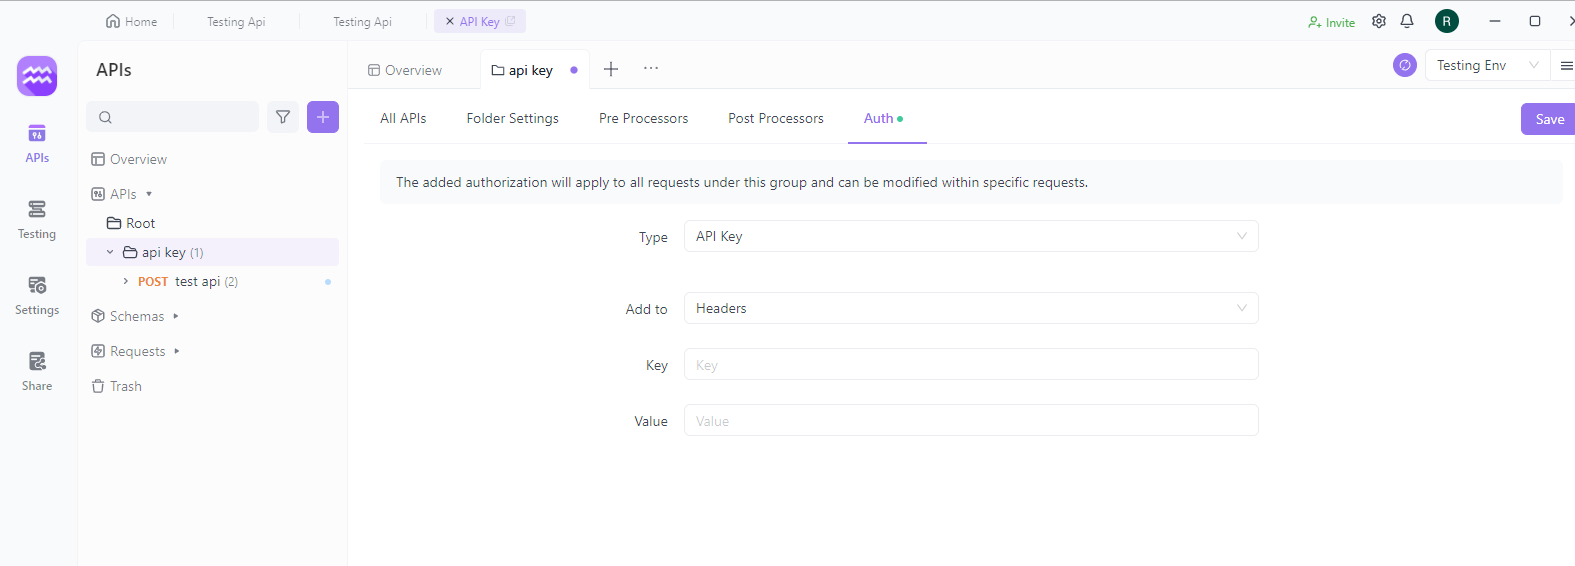
In Apidog, you can configure bearer token authentication for an API request by selecting the "Auth" tab in the request editor, choosing "Bearer Token" as the auth type, and entering your token in the input field below.
When you send the request, Apidog will automatically add an Authorization header with the value "Bearer <your_token>". The API server will then decode this header, validate the token, and allow access to the endpoint if the token is active and valid.
For testing purposes, you can simply generate a random string and use it as your bearer token in Apidog. The API won't actually validate it, but will look for the expected Authorization header.
button
Conclusion
In conclusion, generating Bearer tokens involves a series of steps, from registering your application to making authorized requests. Understanding this process is crucial for developers working with authentication in web applications and APIs.