How to Create and Run a WebSocket Server in Python
This article is the ultimate guide on how to create a WebSocket Server in Python and debug it with Apidog easily.
WebSocket and RESTful are both communication protocols used in web development. While RESTful APIs are widely used for client-server communication over HTTP, WebSocket enables real-time, bidirectional communication between clients and servers. This article is the ultimate guide on how to create a WebSocket Server in Python and debug it with Apidog easily.
What is WebSocket?
WebSocket is a communication protocol that enables real-time, bidirectional data transfer between a client and a server. WebSockets is a library for building WebSocket servers and clients in Python with a focus on correctness, simplicity, robustness, and performance.
Unlike traditional HTTP requests, which follow a request-response model, WebSockets establish a persistent connection that allows for continuous data flow.
💡
Apidog is a powerful WebSocket debugging tool offering real-time message monitoring, request simulation, content manipulation, and advanced configuration capabilities for comprehensive WebSocket application testing.
button
Python and Popular Python Frameworks
Python is a high-level, interpreted, general-purpose programming language renowned for its emphasis on code readability through indentation. Its object-oriented approach and straightforward syntax enable developers to write clear, logical code for projects of all sizes.
Python provides several libraries and frameworks for implementing WebSocket functionality in your applications. One popular library for WebSocket implementation in Python is Tornado. Tornado is a scalable and non-blocking web framework that includes built-in WebSocket support. It allows you to easily create WebSocket handlers and manage WebSocket connections alongside HTTP requests. Another option is the Flask-Sockets library, which integrates WebSocket functionality into the Flask web framework.
Building a WebSocket Server with Python
To get started, it is essential to set up the environment correctly. Please follow the steps below:
Step 1. Installing Tornado Library
Make sure you have Python installed on your system. This can be achieved using the pip package manager, a commonly used tool for installing Python libraries. Open your command prompt or terminal and execute the appropriate pip command to install Tornado. Next, use pip to install the Tornado Library by running the below command.
pip install tornado
Step 2. Writing code in Python
After installing Tornado, you can use it in Python to implement WebSocket services.
Creating a class code called WebSocketHandler, which inherits from tornado.websocket.WebSocketHandler. This class implements methods for handling WebSocket connections, including opening, closing, and receiving messages.
import tornado.ioloop
import tornado.web
import tornado.websocket
import time

class WebSocketHandler(tornado.websocket.WebSocketHandler):
    def open(self):
        print("open success")
        # timer that sends data to the front end once per second
        self.timer = tornado.ioloop.PeriodicCallback(self.send_data, 1000)
        self.timer.start()

    def on_close(self):
        self.timer.stop()

    def send_data(self):
        # send the current time to the front end
        self.write_message('Now is' + str(time.time()))

application = tornado.web.Application([
    (r'/', WebSocketHandler),
])

if __name__ == '__main__':
    application.listen(3001)
    tornado.ioloop.IOLoop.instance().start()
Step 3. Running the Code
In the terminal, type:
python server.py
You can find out that the WebSocket Service address is as follows:
ws://localhost:3001
Step 4. Connecting Frontend Page to WebSocket
Page Design
We need to create an index.html and write the following code:
<!DOCTYPE html>
<html lang="en">
<head>
  <meta charset="UTF-8">
  <meta http-equiv="X-UA-Compatible" content="IE=edge">
  <meta name="viewport" content="width=device-width, initial-scale=1.0">
  <title>Document</title>
  <script>
    window.onload = () => {
        if ('WebSocket' in window) {
            // create websocket connection
            let ws = new WebSocket('ws://127.0.0.1:3001/websocket');
            // push a message when the connection is successful, then the server can start pushing data
            ws.onopen = () => {
                console.log('websocket success---');
                ws.send('success');
            }
            ws.onmessage = (message) => {
                let data = message.data;
                console.log('get websocket message---', data);
            }
            ws.onerror = () => {
                console.error('websocket fail');
            }
        } else {
            console.error('dont support websocket');
        };
    };
</script>

</head>
<body>

</body>
</html>
Launch Page
Right-click on index.html and open this file:
Step 5. Viewing the Results
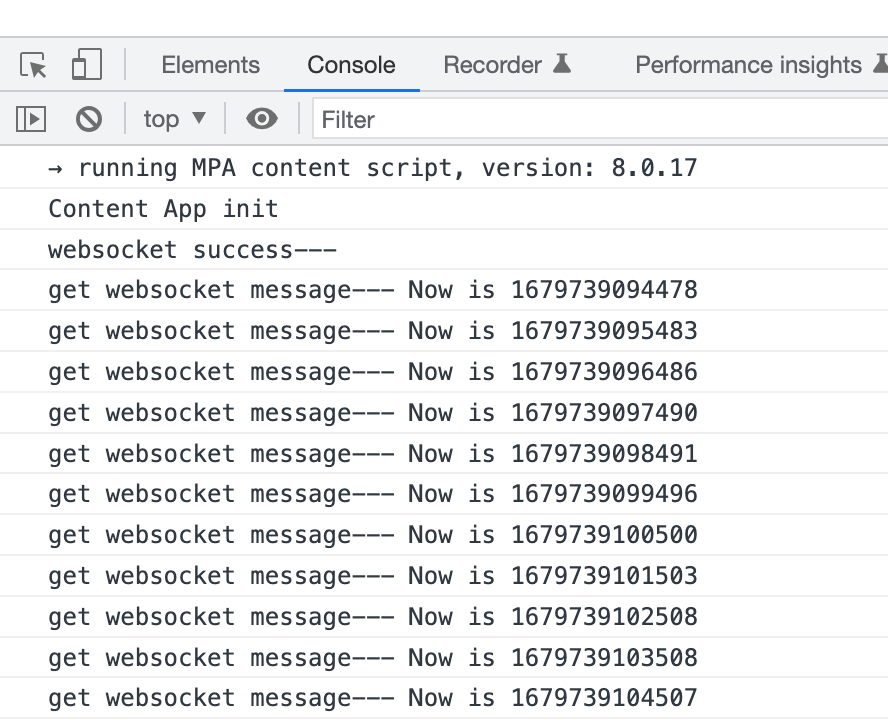
You can see that the back-end receives the front-end message first and the open build is successful:
Then after the connection is established, the backend keeps outputting information for the frontend.
Send and Received WebSocket message with Apidog
If you are building a WebSocket service and need to debug it, we suggest you use some great API debugging tools like Apidog, which is perfect for debugging WebSocket.
Debugging WebSocket with Apidog offers convenient testing capabilities, real-time message monitoring, flexible message manipulation, and advanced configuration options. With its user-friendly interface, you can simulate WebSocket requests, observe message exchanges, modify content, and configure headers and timeouts.
Integrating with other APIs, Apidog streamlines testing for WebSocket and RESTful APIs, enabling efficient issue identification and resolution. By utilizing Apidog, you can ensure the smooth functioning of your WebSocket-based applications.
button
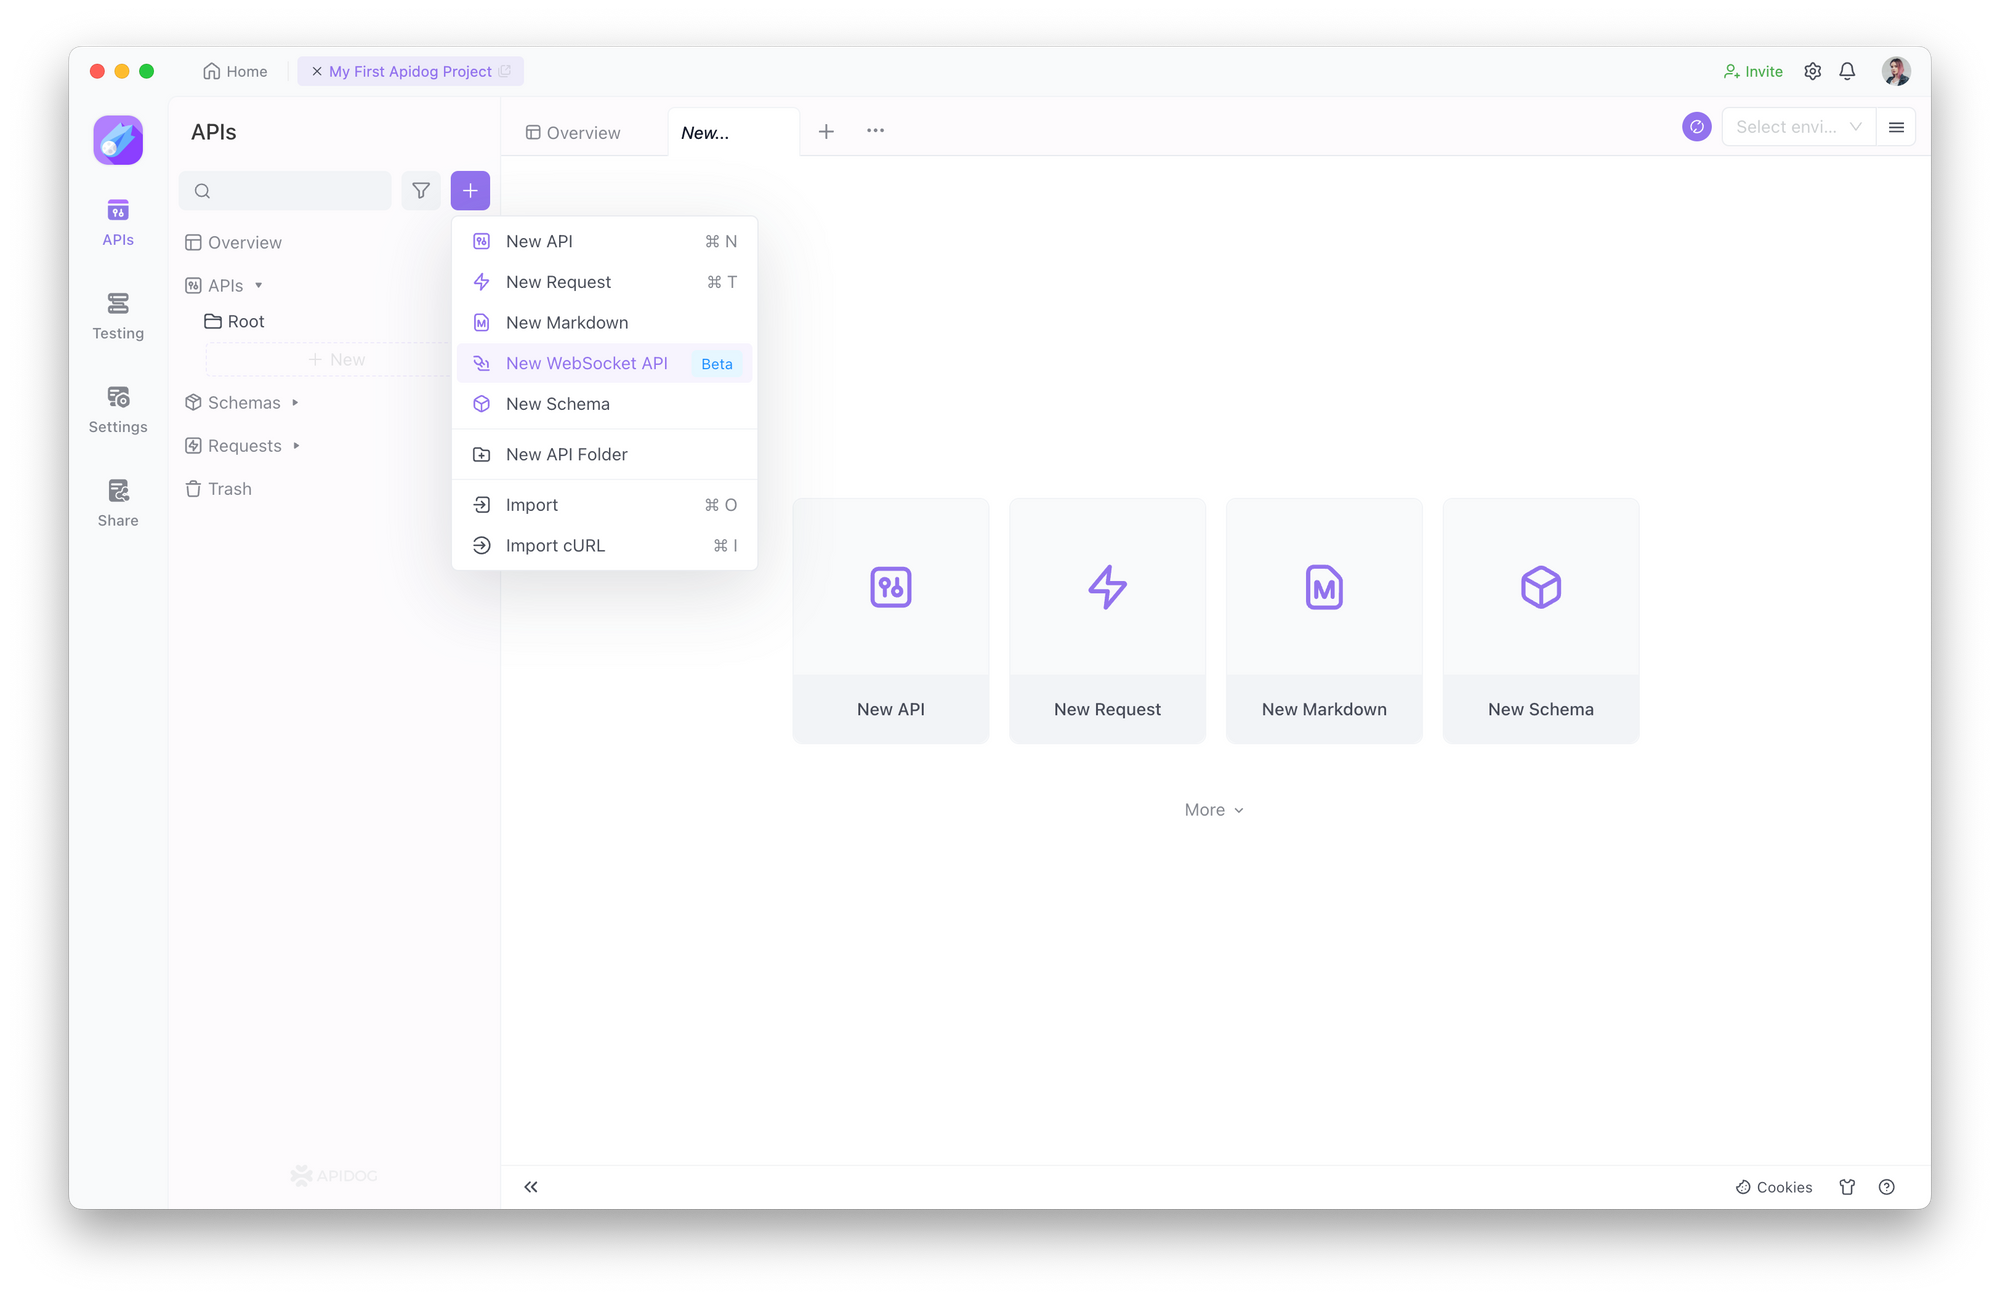
Step 1. Creating WebSocket Request
WebSocket is a long link between the client and the server, so you need to create a WebSocket request in Apidog in order to jump to the Apidog interface and fill in the appropriate request information.
Click the Create button
Fill in the address of the WebSocket service
Optionally, you can fill in Message and Params
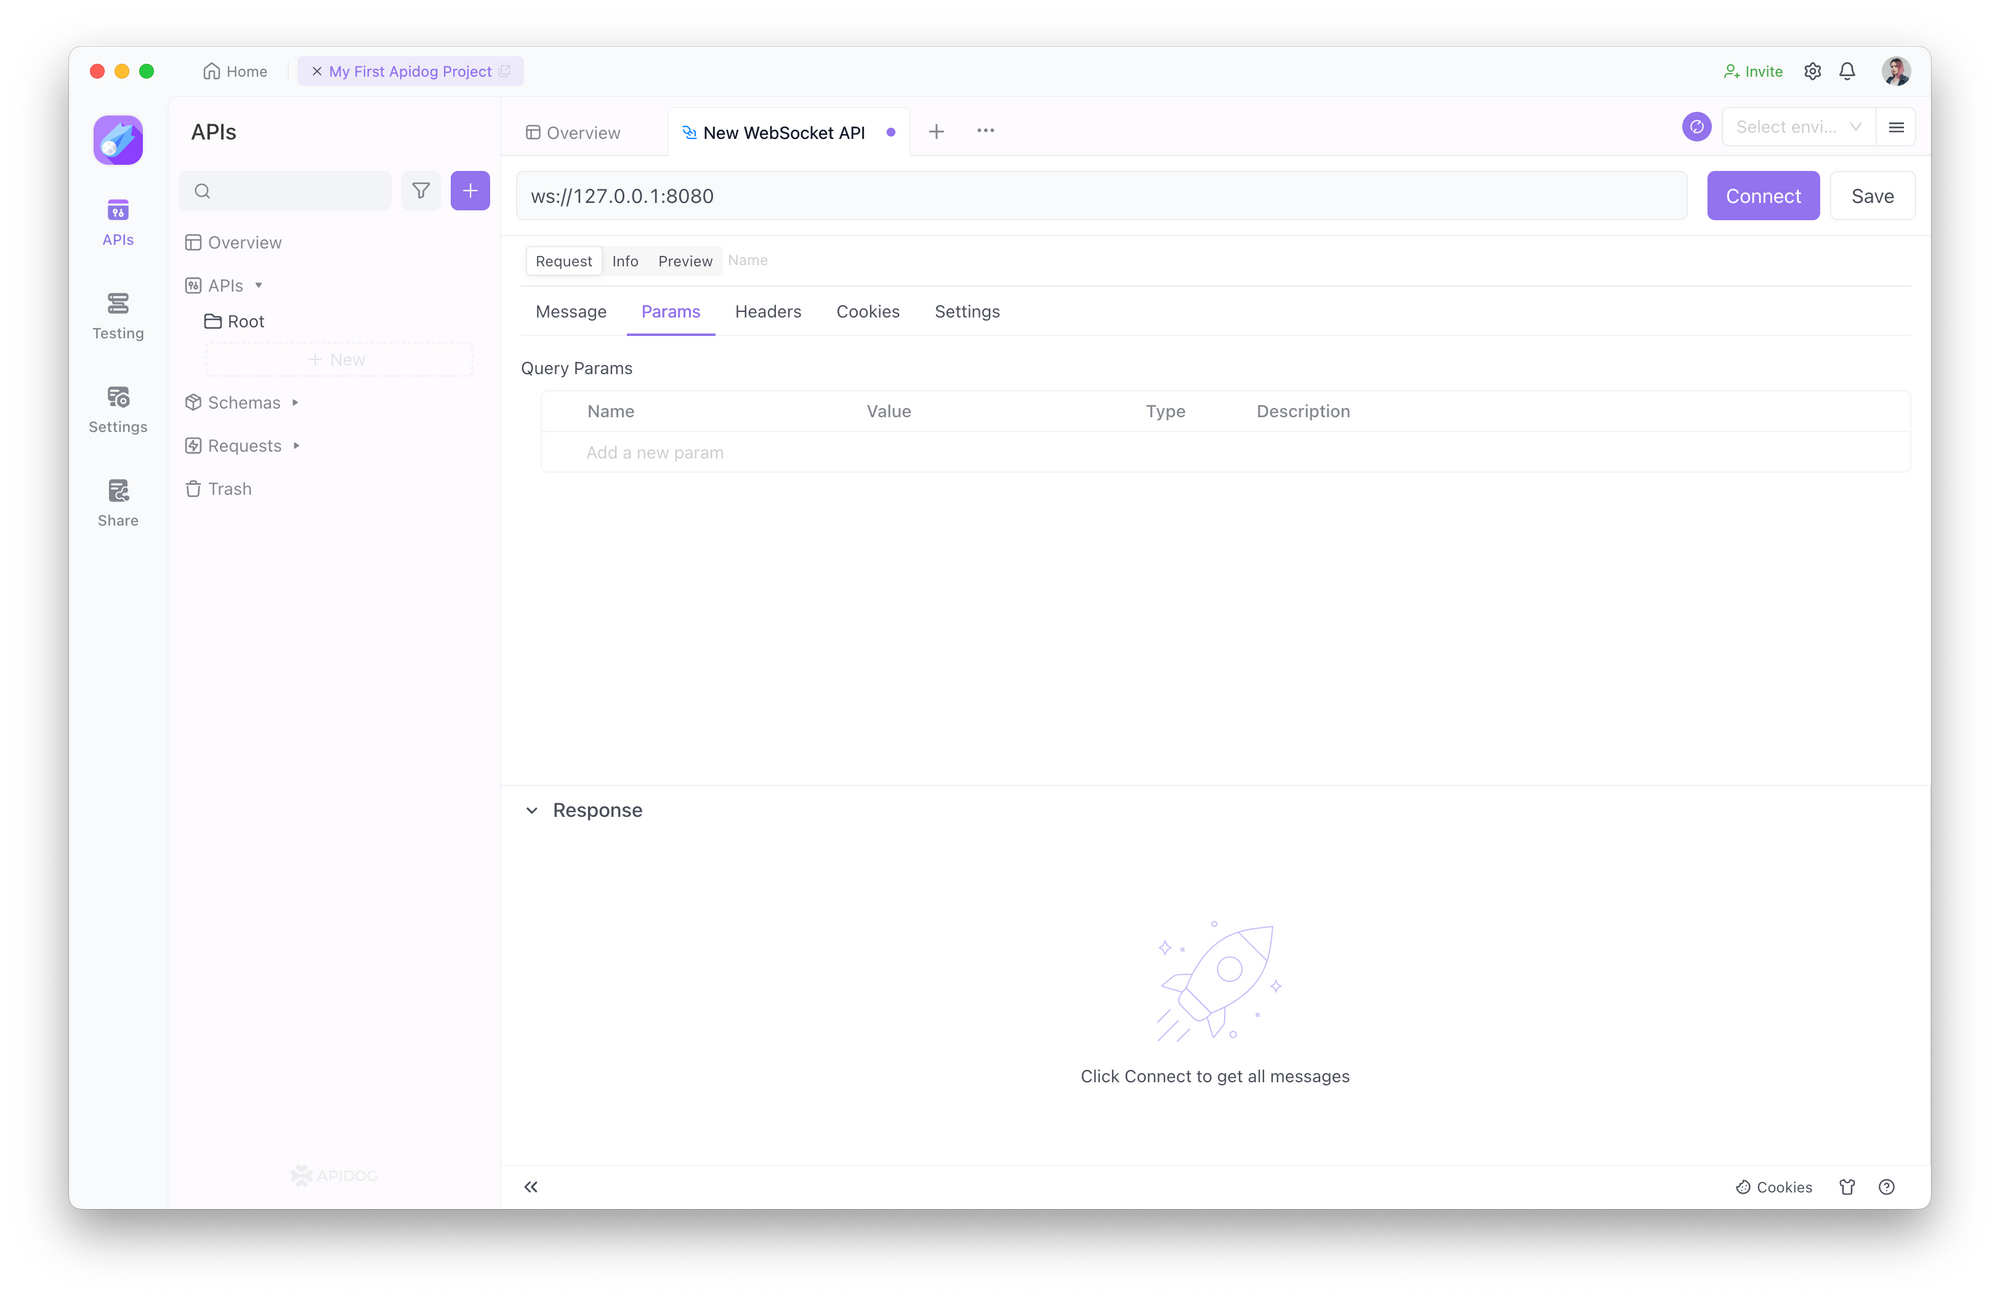
Step 2. Setting up Messages and Params
Message
In Message, you can fill in the message to be delivered to the server. The server side will receive the message you send.
Parameters
During the transmission process, you can also carry parameters, which can be accomplished by adding query parameters to the URL. The data types that can be carried include:
string
integer
number
array
Step 3. Saving WebSocket Request
Once you have entered the necessary information, simply click the Save button to store it for future reference and easy retrieval.
Connecting WebSocket Requests
If we want to communicate with the server via WebSocket, we need to establish a WebSocket connection first. We just need to click the Connect button.
After a successful connection, Apidog has a success message. The server side will also respond because the connection is successful.
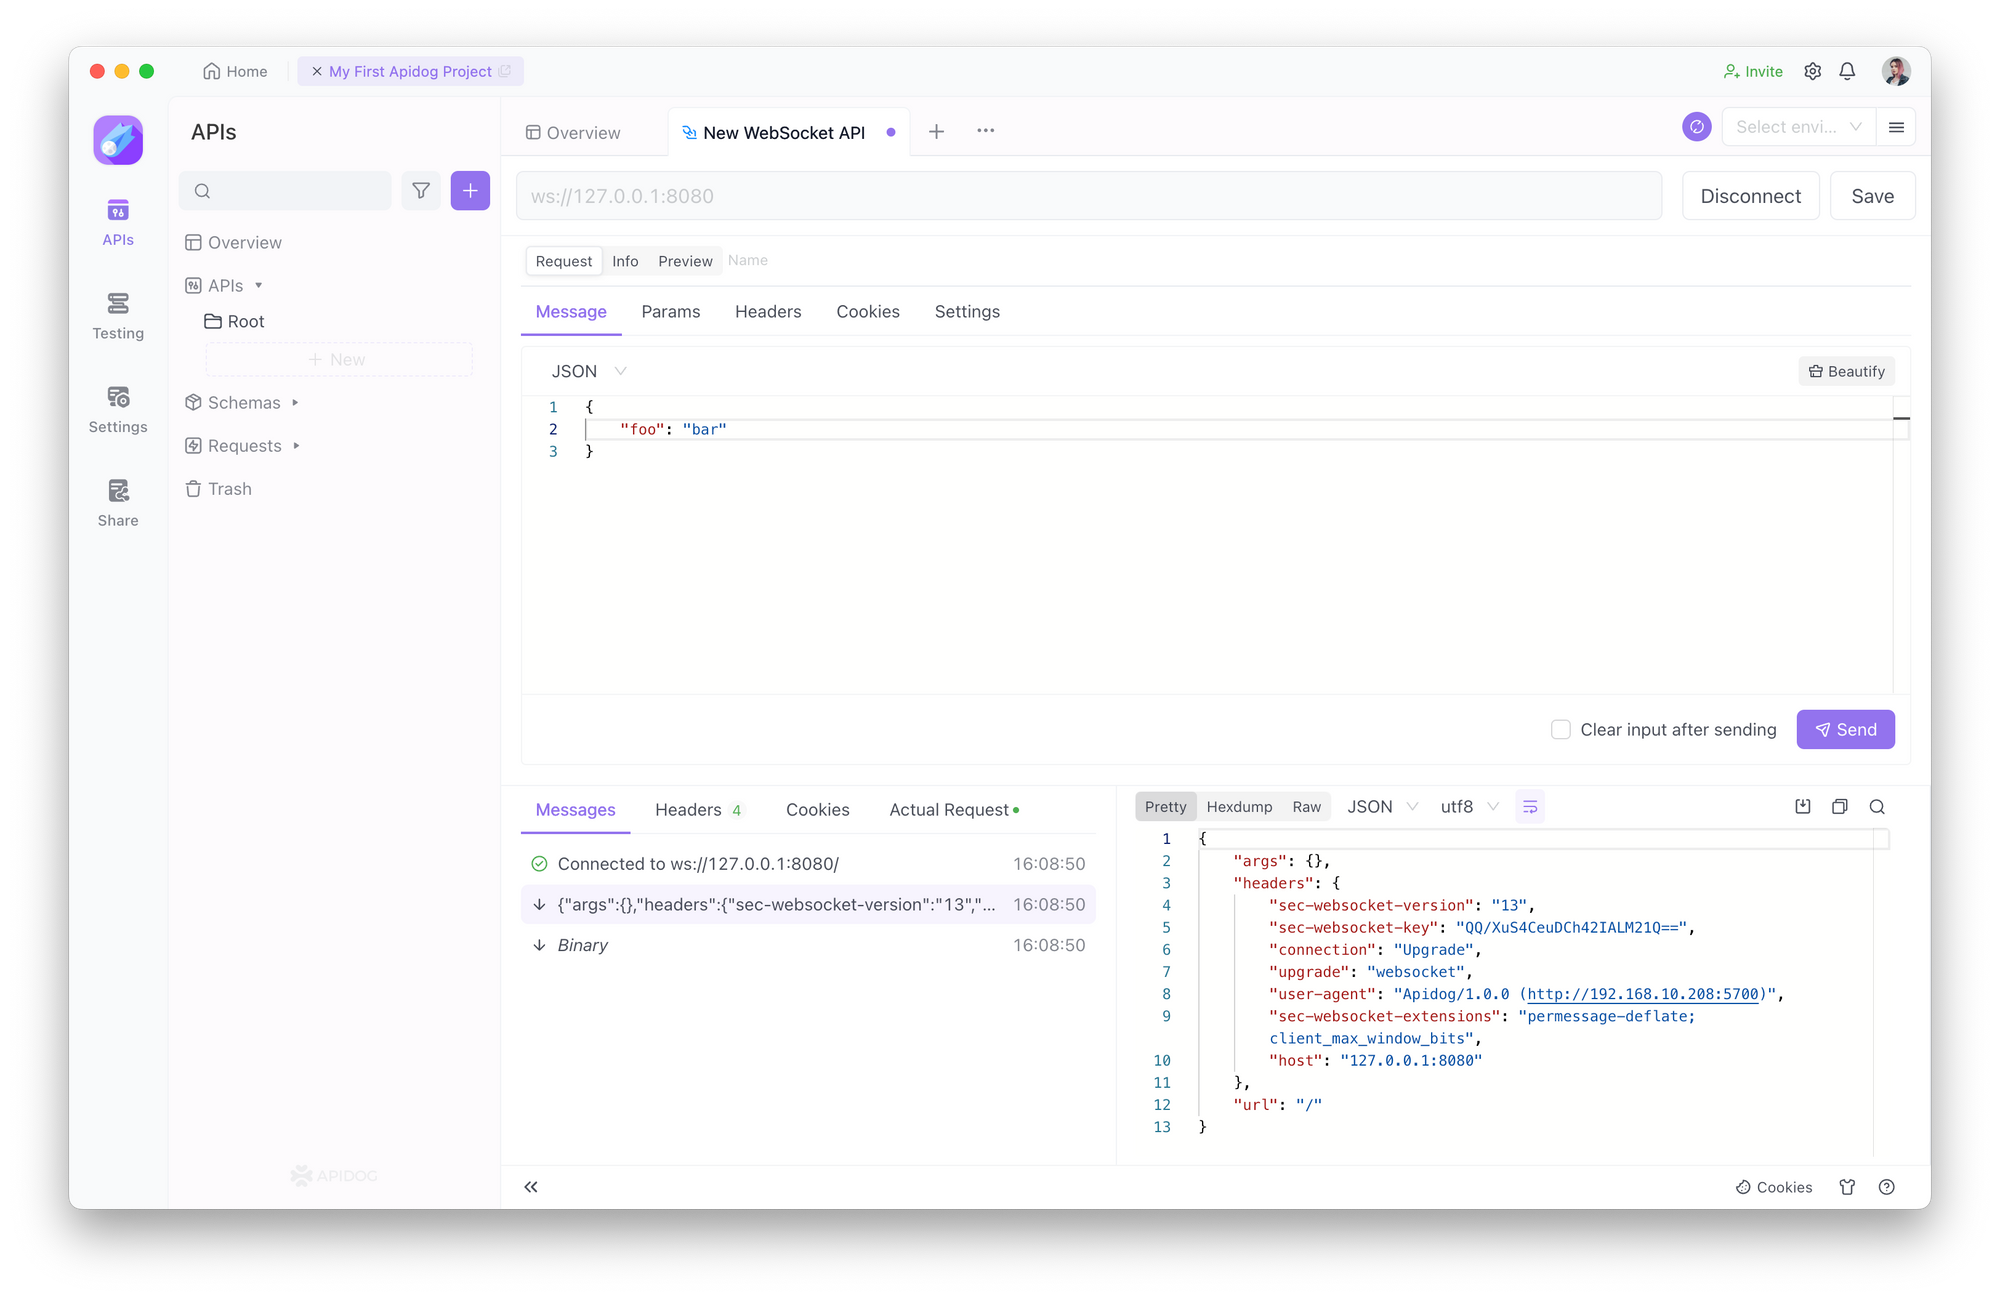
Step 4. Sending WebSocket Requests
Then we can communicate with the server via WebSocket.
We can use Apidog to send messages and Params to the server by clicking the Send button.
Step 5. Communicating with WebSocket Service
After sending, the server can also send information to the client.
For example, I set the server to send the current timestamp to the client every second. This is the WebSocket feature of Apidog, which is very convenient.
Conclusion
To be honest, setting up a WebSocket server with Python is not that hard. If you require debugging and testing for your WebSocket API, utilizing Apidog is a relatively simple and efficient solution.
Apidog effectively addresses the functional challenges of WebSocket APIs. Follow the operating instructions provided in the article to establish a WebSocket API connection and proceed with the debugging and testing process.