12 Best UI Automation Testing Tools
In this article, we will explore the significance of the 12 best UI automation testing tools, their features, and the benefits they bring.
Apidog
All-in-one Collaborative API Development Platform
API Design
API Documentation
API Debugging
API Mock
API Automated Testing
This article will take you through how to use automated testing to improve the reliability and efficiency of your front-end code.
Many companies, in order to pursue product iteration speed, do not require front-End developers to take measures for automated testing. However, generally, larger companies will require developers to do a good job in automated testing to ensure product quality.
If automated testing is not added to the Front-End, code quality will be poor, which will affect product quality. More seriously, it may cause bugs to go undetected after modifying code, and it will not be convenient for subsequent development and maintenance.
Therefore, it is necessary to add automated testing for the Front-End, with the following benefits:
Although Front-End automated testing incurs costs, such as time and learning costs, it is worth it for the reliability, maintainability, and quality of the code. Additionally, doing automated testing as a front-end developer can also broaden your horizons.
Testing can be mainly divided into the following categories:
As a Front-End developer, unit testing and end-to-end testing are essential.
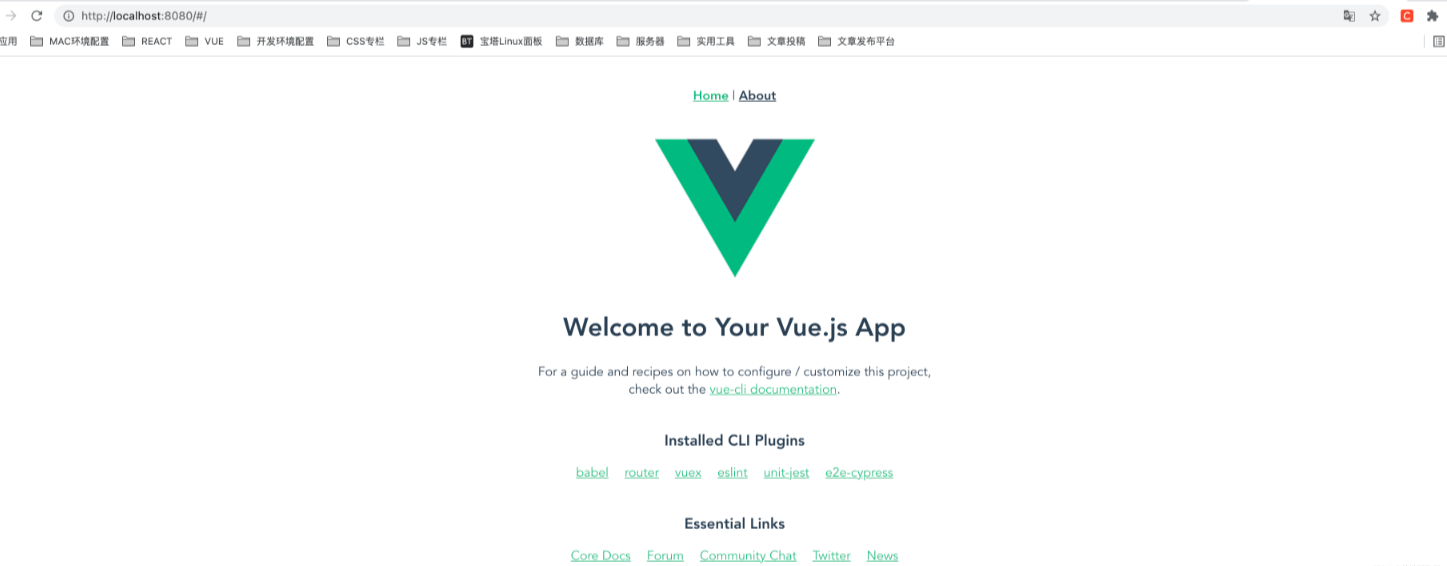
Now, we will conduct a practice of Front-End automated testing using a Vue2 Project.
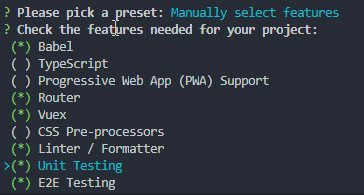
You can use Vue-cli to create a Vue2 project. When creating it, you need to select the following options.
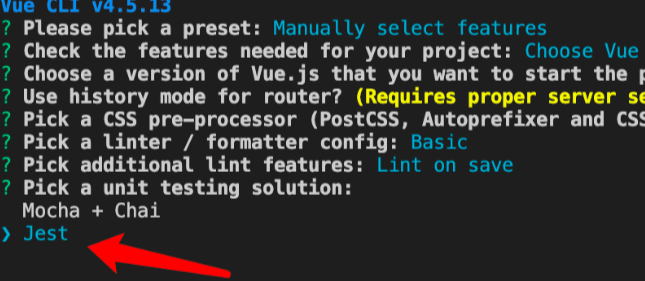
Then choose the test-config.

When you reach the unit testing step, select the Jest library.
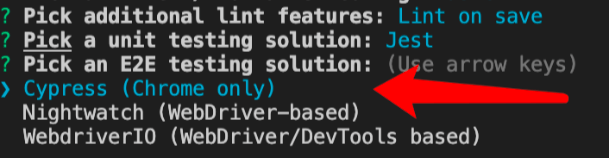
You can choose Cypress for the final test.
Now a new Vue2 project has been built.
You can also use unit testing to test a function, component, or module. If you want to test a function, you can first create a file called index.js and write the function.
export function add(x,y) {
    return x + y
}
Then, you can start testing this function and understand the testing syntax:
The code should be written in test/unit/example.spec.js.
import { add } from "@/utils/index.js";
describe("Test addition function", () => {
// Testing code readability is important
// Grouping
it("A specific functional test that tests adding numbers", () => {
expect(add(1, 2)).toBe(3);
});
it("A specific functional test that tests adding a number and a string", () => {
expect(add("a", 2)).toBe("a2");
});
it("A specific functional test that tests adding a number string", () => {
expect(add("1", 2)).toBe(3);
});
});
Then, you can run it.
npm run test:unit
Before conducting component testing, you need to first create a Vue component.
<template>
  <div>
    <span>{{ msg }}</span>
    <span>{{ msg1 }}</span>
    <button class="btn" @click="changeMsg">Click me</button>
  </div>
</template>
<script>
export default {
  data() {
    return {
      msg: "vue test",
      msg1: "hello",
    };
  },
  created() {
    this.msg = "aftermounted";
  },
  mounted() {
    this.msg1 = "Testing the vue component";
  },
  methods: {
    changeMsg() {
      this.msg = "click over";
    },
  },
};
</script>
After creating the component, you need to import it into the Home component:
<template>
  <div class="home">
    <img alt="Vue logo" src="../assets/logo.png" />
    <hh_comp></hh_comp>
  </div>
</template>

<script>import hh_comp from "@/components/h.vue";

export default {
  name: "home",
  components: {
    h_comp,
  },
};
</script>
Then you need to write test code intest/unit/hh.spec.js :
import Vue from "vue";
import hhComp from "@/components/hh.vue";
import { mount } from "@vue/test-utils";
describe("Testing hh component", () => {
it("tests the initial data", () => {
expect(hhComp.data().msg).toBe("vue test");
});
// Data testing in both created and mounted lifecycles is the same
it("tests the data after the create lifecycle is finished", () => {
// created
let vm = new Vue(hhComp).$mount();
expect(vm.msg).toBe("aftermounted");
});
it("tests the data after the mounted lifecycle is finished", () => {
// mounted
let vm = new Vue(hhComp).$mount();
expect(vm.msg1).toBe("Testing vue components");
});
// Testing click events
it("tests the change of 'msg' after a click event", () => {
// $mount cannot handle user interactions, so we need to use the @vue/test-utils recommended by Vue.js
let wrapper = mount(hhComp);
expect(wrapper.vm.msg).toBe("aftermounted");
// Click the button
wrapper.find(".btn").trigger("click");
expect(wrapper.vm.msg).toBe("click over");
});
});
If you want to test interactions, you will need to use some testing libraries. You can also use @vue/test-units
npm run test:unit
After testing the UI, it is necessary to test the API because APIs are an essential part of the front end. Without APIs, the frontend pages will not be rendered effectively. Using API tools to perform tests can be more efficient, such as Apidog. Apidog is an integrated API collaboration platform where you can design, debug, test, and collaborate on your APIs on a unified platform, eliminating the problem of switching between different tools and inconsistent data. It is a more advanced API testing tool.
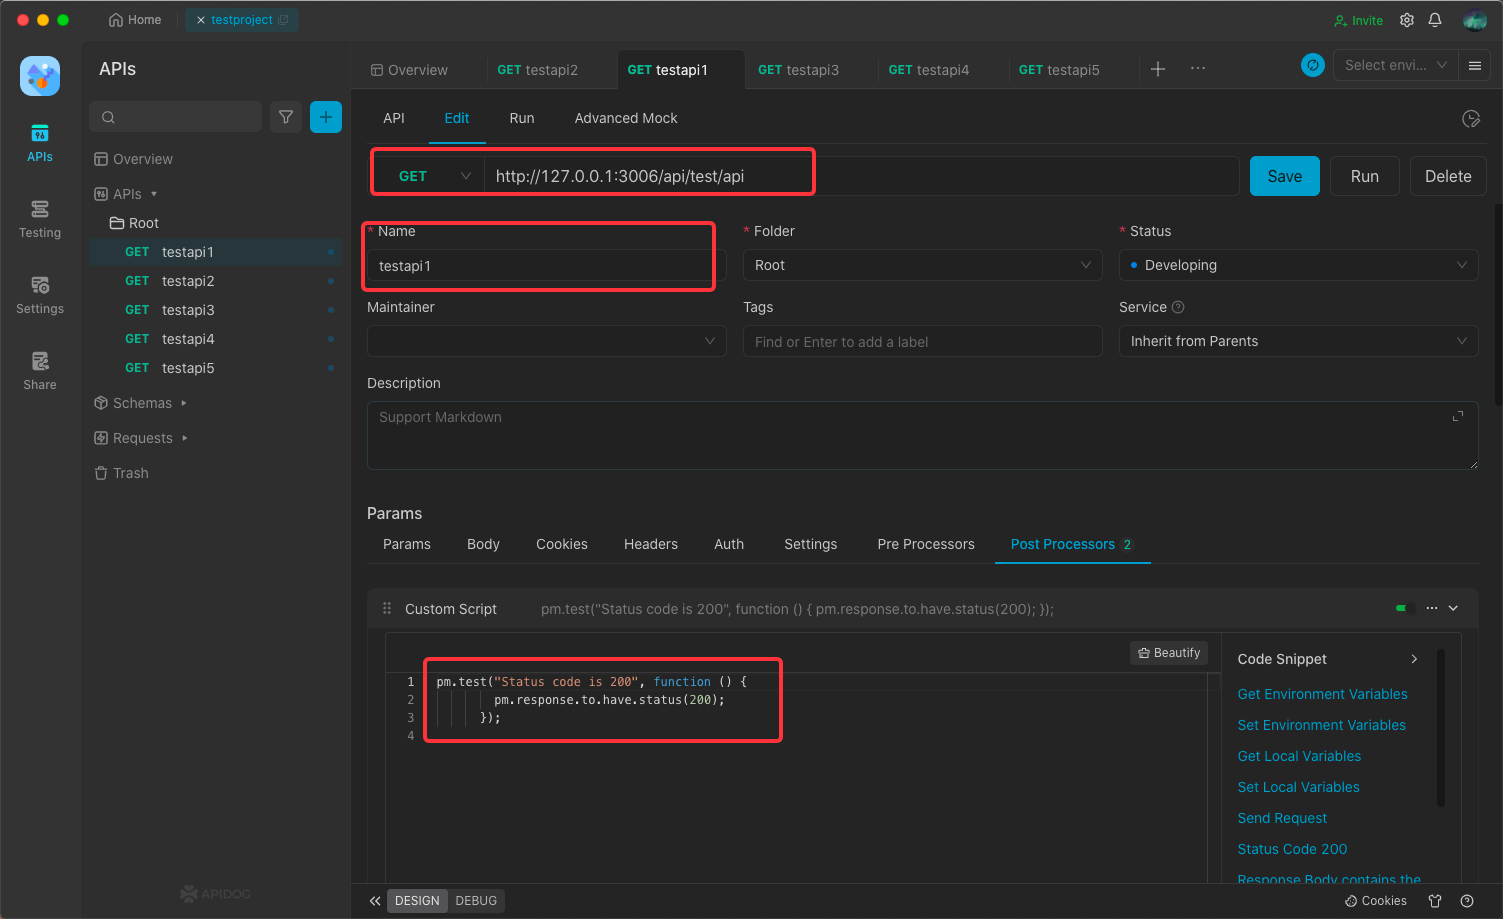
To perform API testing using Apidog, you need to create a request, set expectations, and perform individual tests. You need to set the necessary parameters such as the interface name, interface path, and interface request method.
You also need to set testing conditions such as assertions and scripts. Here, testing is done through scripts to determine the correctness of the data and whether the returned data meets the expected results.
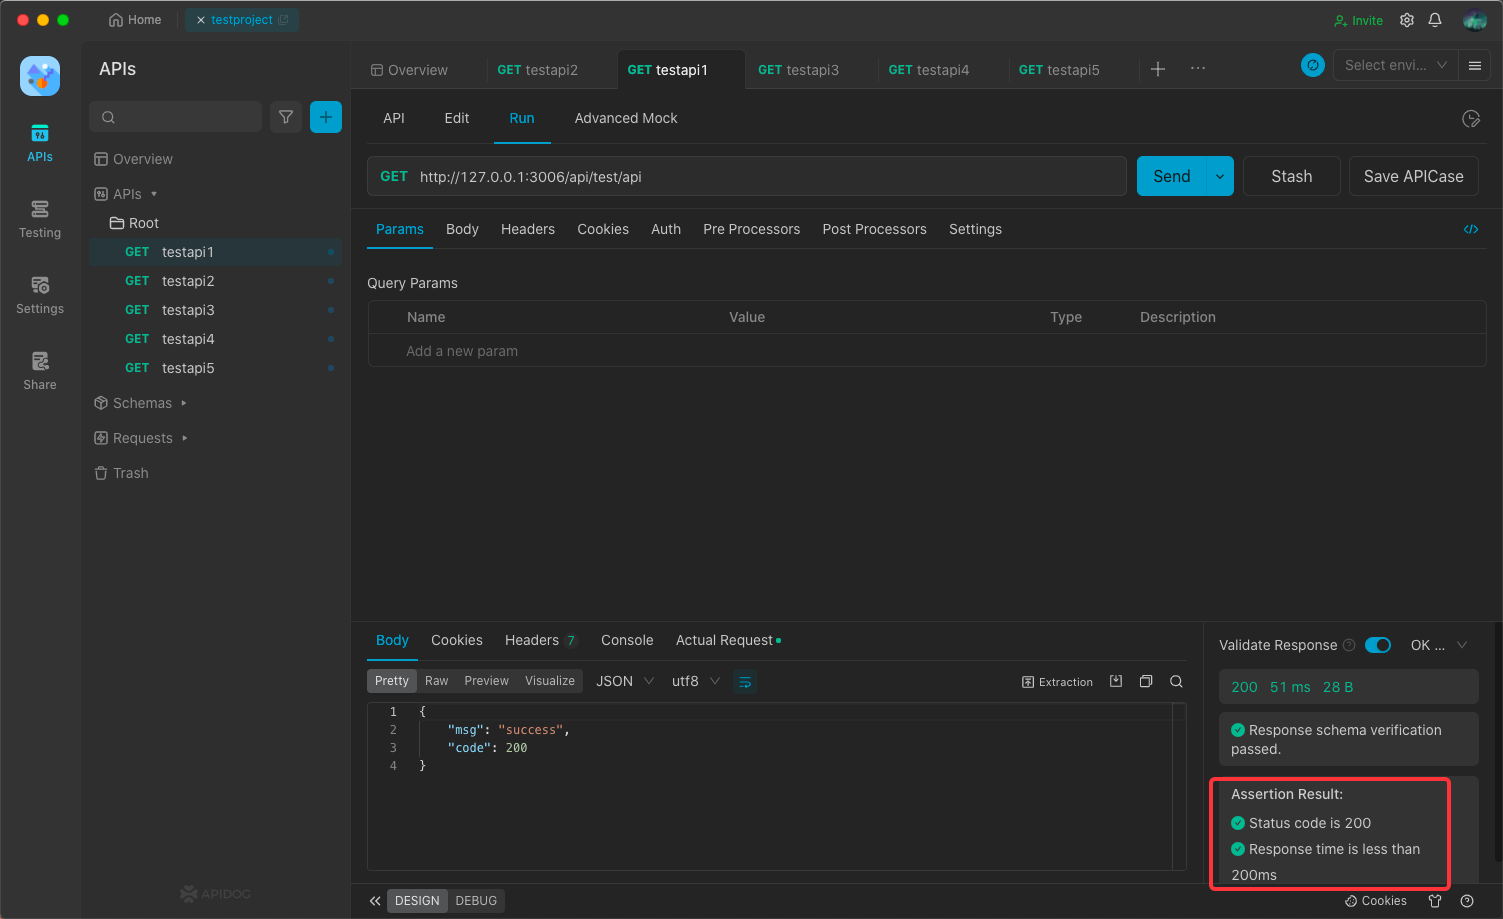
It would be tedious to test interface by interface, for example, by going directly to send a request like the following, but if there are dozens of interfaces, it would be tedious to repeat the steps in this way.
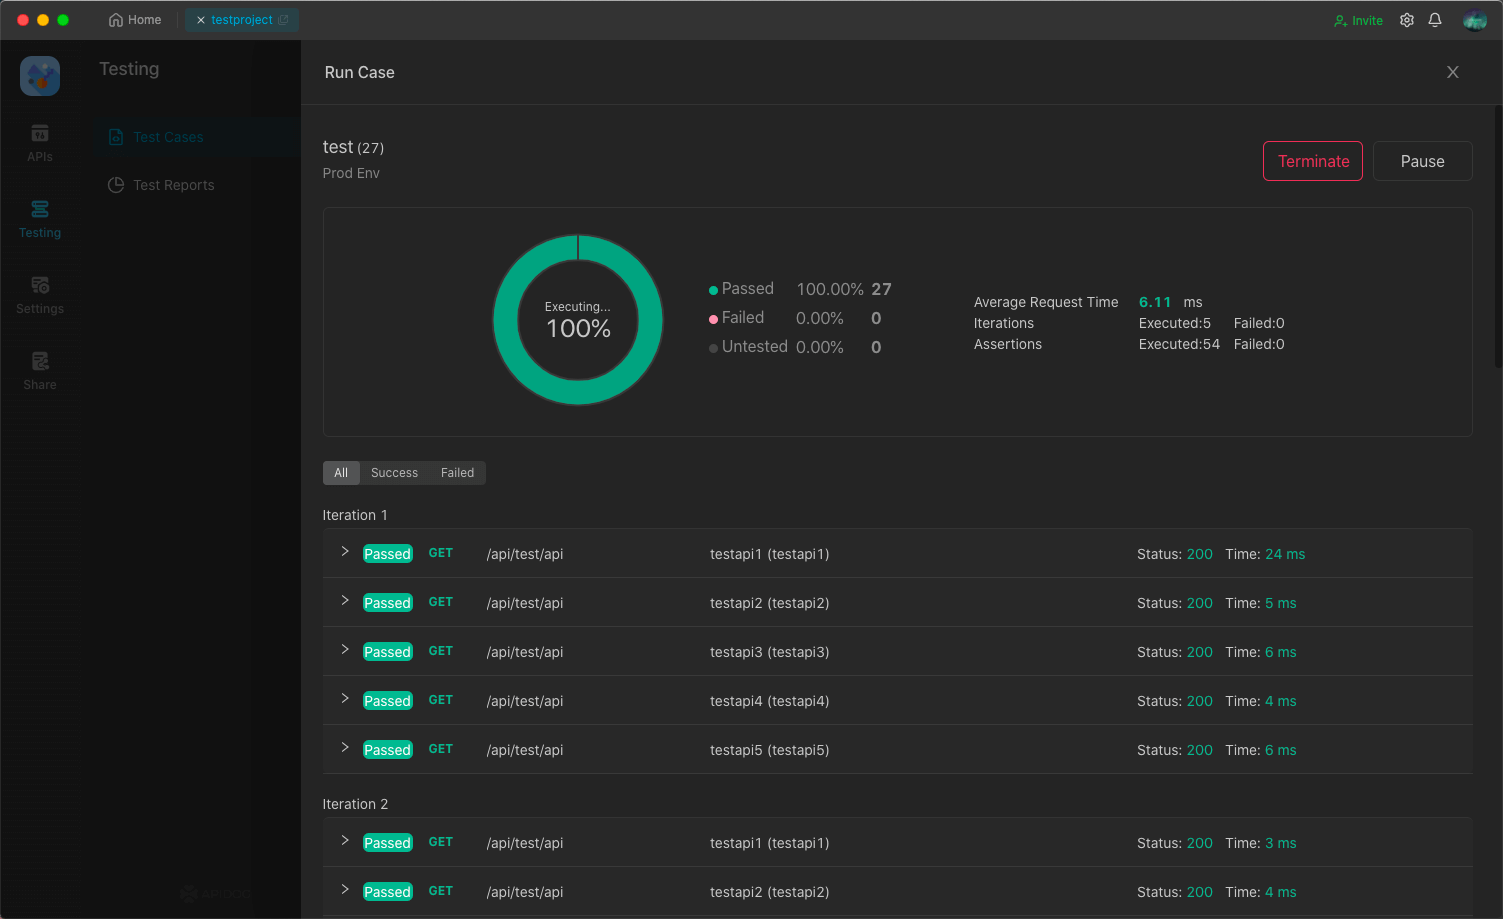
Apidog has the capability of automated testing. All you need to do is to import all your interfaces into the test case, and then run the test case to perform batch interface testing. Of course, you need to fill in some running parameters, such as the number of loops, delay times, environments, number of threads, and so on.
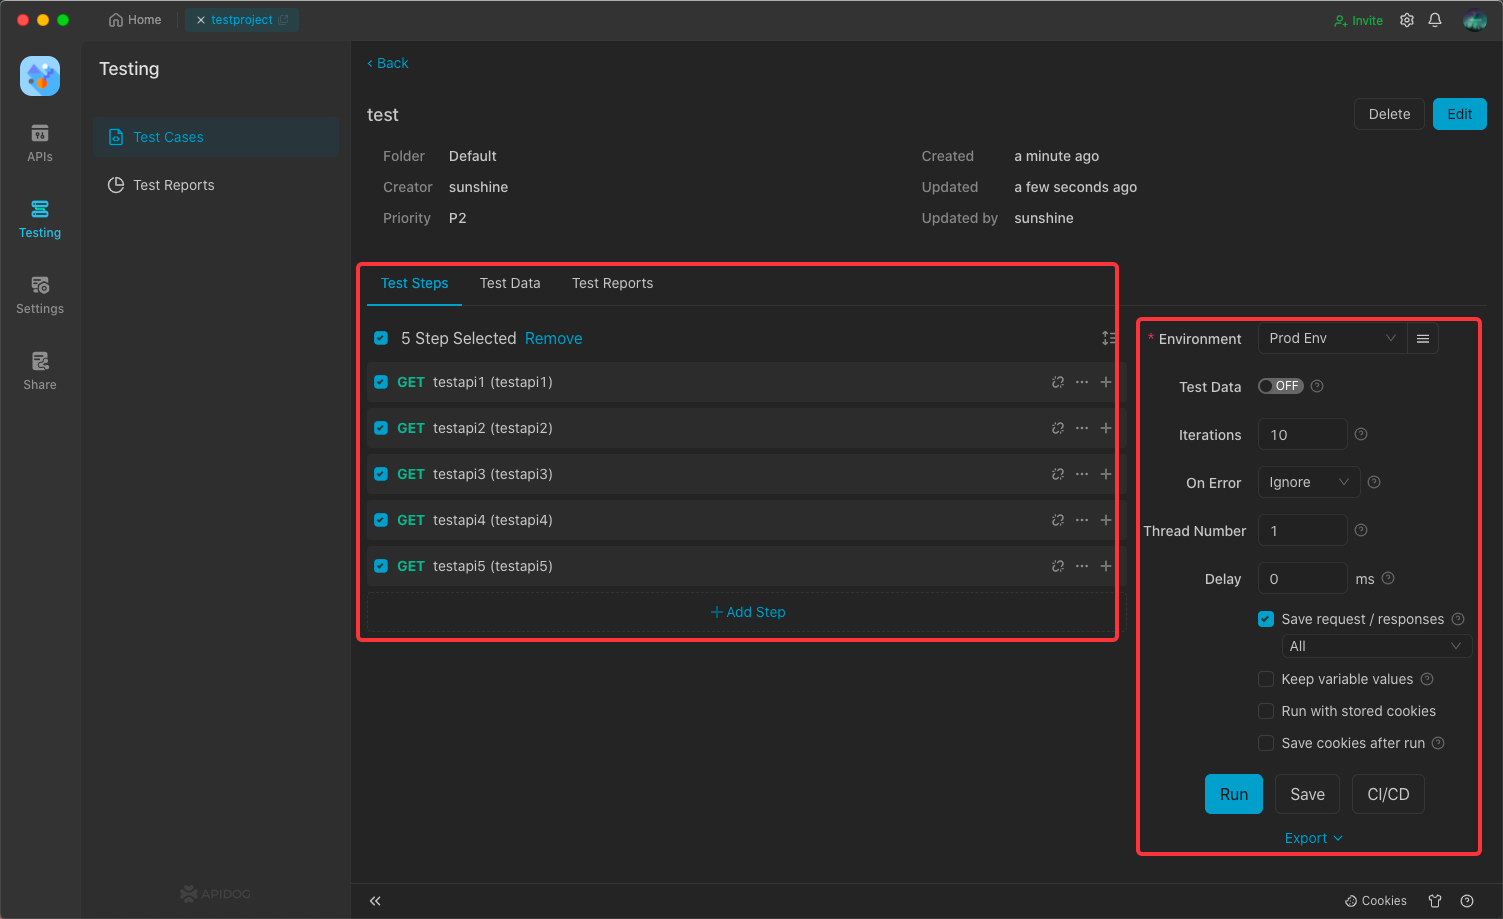
Click the Run button, you can do API testing and get the whole testing results and each API result.