cURL is a useful command-line tool for calling REST APIs directly from your terminal or in scripts and automation. In this guide, we'll cover the basics of using cURL to call with REST APIs.
What is a cURL API Call?
REST (Representational State Transfer) APIs have become the standard for building and accessing web services. cURL is a useful command-line tool for calling REST APIs directly from your terminal or in scripts and automation. In this guide, we'll cover the basics of using cURL to call with REST APIs.
What is a cURL API Call?
A cURL API call is a command using the cURL tool to make HTTP requests to a specified endpoint, commonly a web service or API. It is widely employed for testing and interacting with APIs, enabling actions like data retrieval or submission on remote servers.
💡
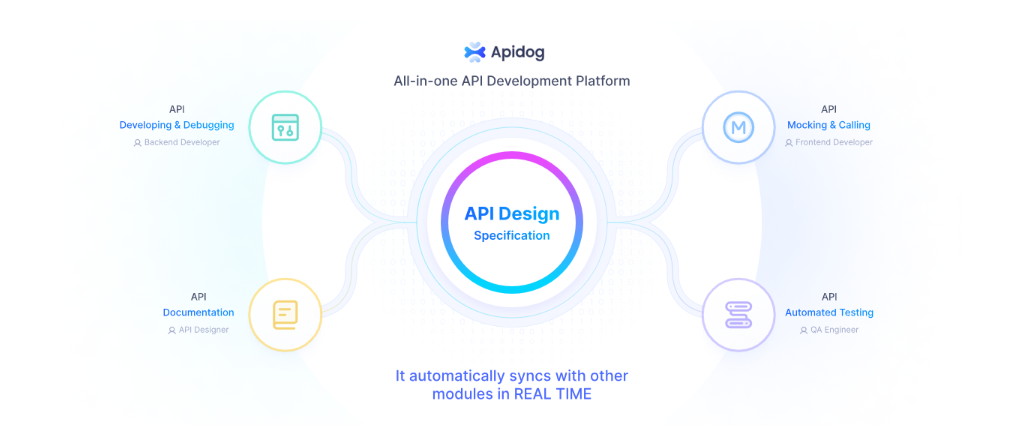
Apidog streamlines the API workflow by offering an intuitive interface for testing, debugging, designing, and documenting APIs. It enables sending REST requests through a visual interface, eliminating the need for complex cURL commands. Download and try it now.
button
Making GET Requests Using cURL
One of the most common uses of cURL is to make GET requests to retrieve data from web servers. Here's the basic syntax for making a GET API with cURL:
curl [options] [URL]
To make a simple GET request to a URL, you can run:
curl http://example.com
This will fetch the content of the web page at http://example.com and print it to the terminal.
You can also include additional options to customize the request. For example:
-i or --include to include the HTTP response headers
This will send a PUT request to http://example.com/api/users/123 with a JSON payload, including an Authorization header for authentication, and will also print the HTTP response headers.
Making DELETE Requests Using cURL
To make a DELETE request using cURL, you can use the following syntax:
curl -X DELETE [options] [URL]
Here's a breakdown of the components:
-X DELETE specifies that you want to make a DELETE request (instead of the default GET).
[options] can include various options like headers, authentication, etc.
[URL] is the URL you want to send the DELETE request to.
For example, let's say you want to delete a resource at http://example.com/api/users/123. You can do it like this:
curl -X DELETE http://example.com/api/users/123
This will send a DELETE request to http://example.com/api/users/123.
You can also include additional options like:
-H or --header to include custom headers (e.g., for authentication)
-u or --user to include username and password for basic authentication
-i or --include to include the HTTP response headers in the output
Here's an example that includes an Authorization header for authentication and shows the response headers:
This will send a DELETE request to http://example.com/api/users/123 with a JSON payload containing {"reason":"no longer needed"}.
cURL is a versatile tool that allows you to make various types of HTTP requests, including DELETE requests, which are commonly used for removing resources in RESTful APIs.
If you find the command-line interface of cURL a bit challenging, especially for beginners, fear not! There's another fantastic and user-friendly tool that can simplify your experience – Apidog.
Why Apidog?
Apidog serves as an excellent alternative, providing a more approachable solution for individuals who may be new to the intricacies of command-line interfaces. With its intuitive user interface and a plethora of features designed for ease of use, Apidog is a go-to option for those looking to streamline the process of calling REST APIs without delving into the complexities of cURL commands.
Key Features for Beginners:
Visual Interface: Apidog offers a visually intuitive interface that eliminates the need for memorizing or typing complex commands. Beginners can navigate through the platform effortlessly, making API interactions a breeze.
Guided Steps: The platform guides users through each step of the process, ensuring that even beginners can capture, import, and debug API requests seamlessly. This step-by-step approach simplifies the learning curve and minimizes the chances of errors.
No Coding Required: Unlike command-line tools, Apidog minimizes the need for coding. Beginners can easily import cURL requests without worrying about syntax errors or command structure, allowing them to focus on learning and understanding the API integration process.
Sending cURL API Using Apidog:
To call a REST API using cURL in Apidog, you can leverage various packet capture tools available online, such as Chrome, Charles, and Fiddler, to capture cURL requests. This facilitates the quick replication of API requests for testing and debugging within the Apidog platform.
button
Using Packet Capture Tools:
Chrome:
Open the developer tools in Chrome by navigating to the three dots, selecting “More Tools,” and clicking “Developer tools.”
Capture network packets by interacting with the web application or service.
Right-click on the API request, choose “Copy,” and then select “Copy as cURL.”
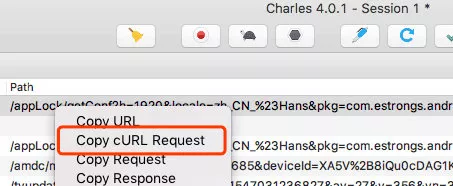
2. Charles:
Use Charles, a web debugging proxy application, instead of Chrome.
Right-click on the request and copy it as cURL.
3. Fiddler:
Choose Fiddler to capture the packets.
Navigate to the top left menu, follow File -> Export Sessions -> Selected Sessions, select curl script, and save it as a .bat file.
Use a text editor to open the .bat file and copy its contents.
Importing Fetched Data in Apidog - A Step-by-Step Guide:
Now that you have captured the data, follow these simple steps to import it into Apidog:
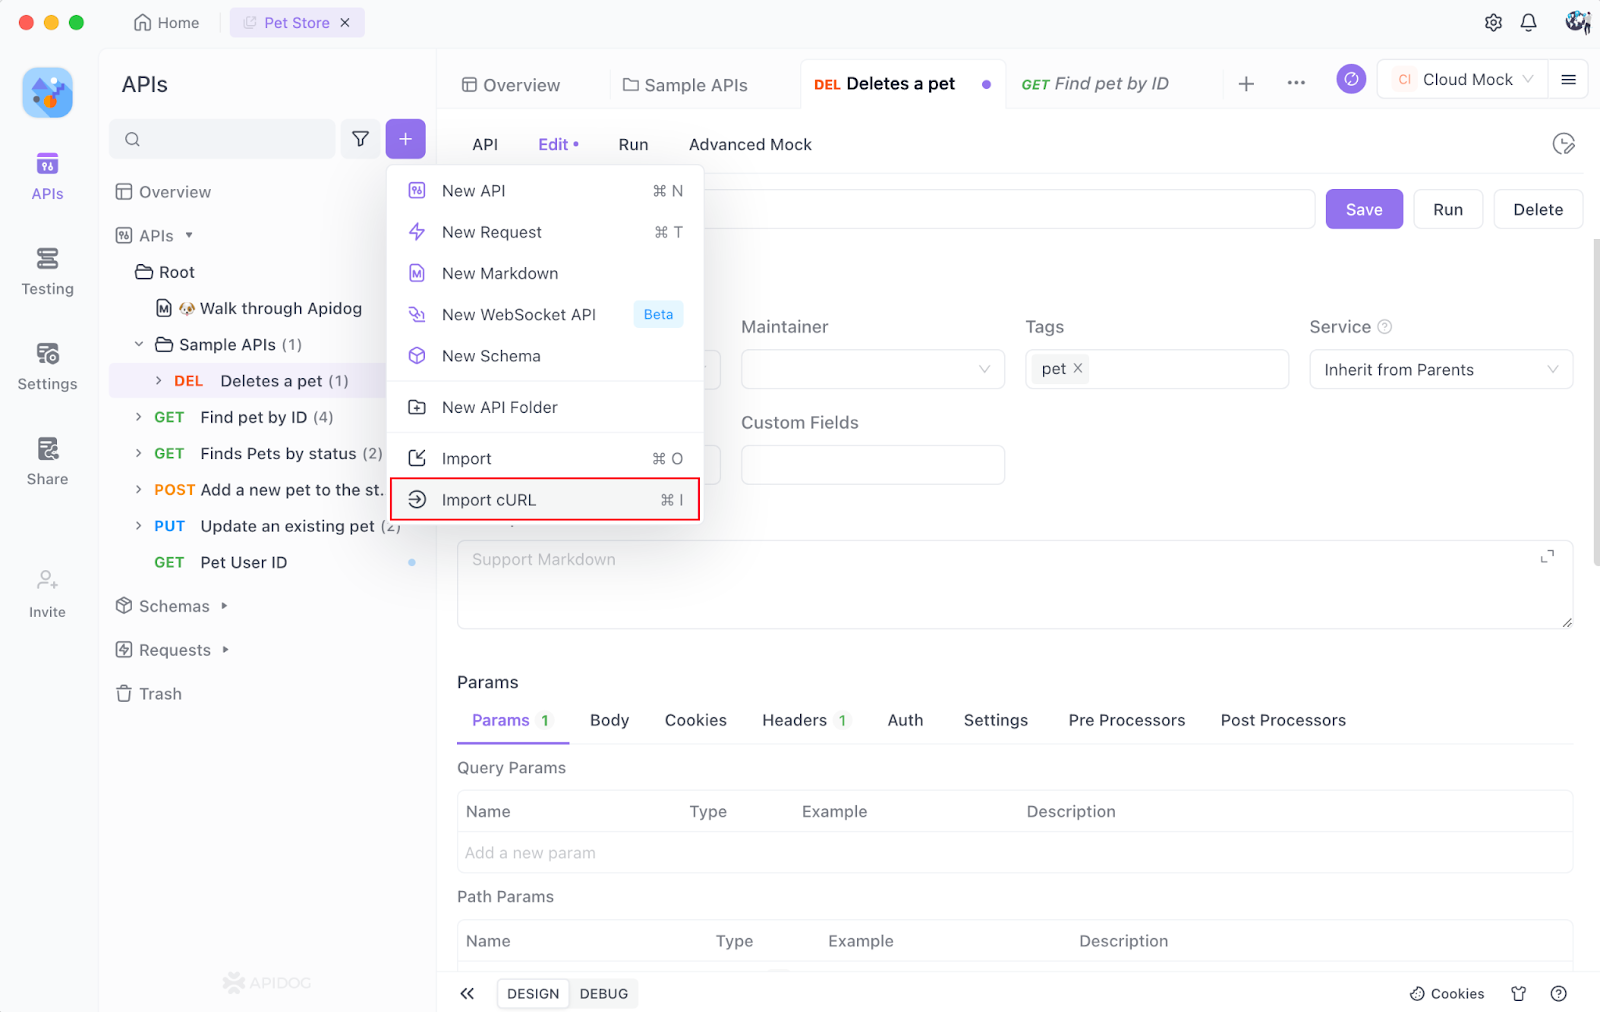
Bring your cursor to the + icon next to the search bar. Choose the option “Import cURL.”
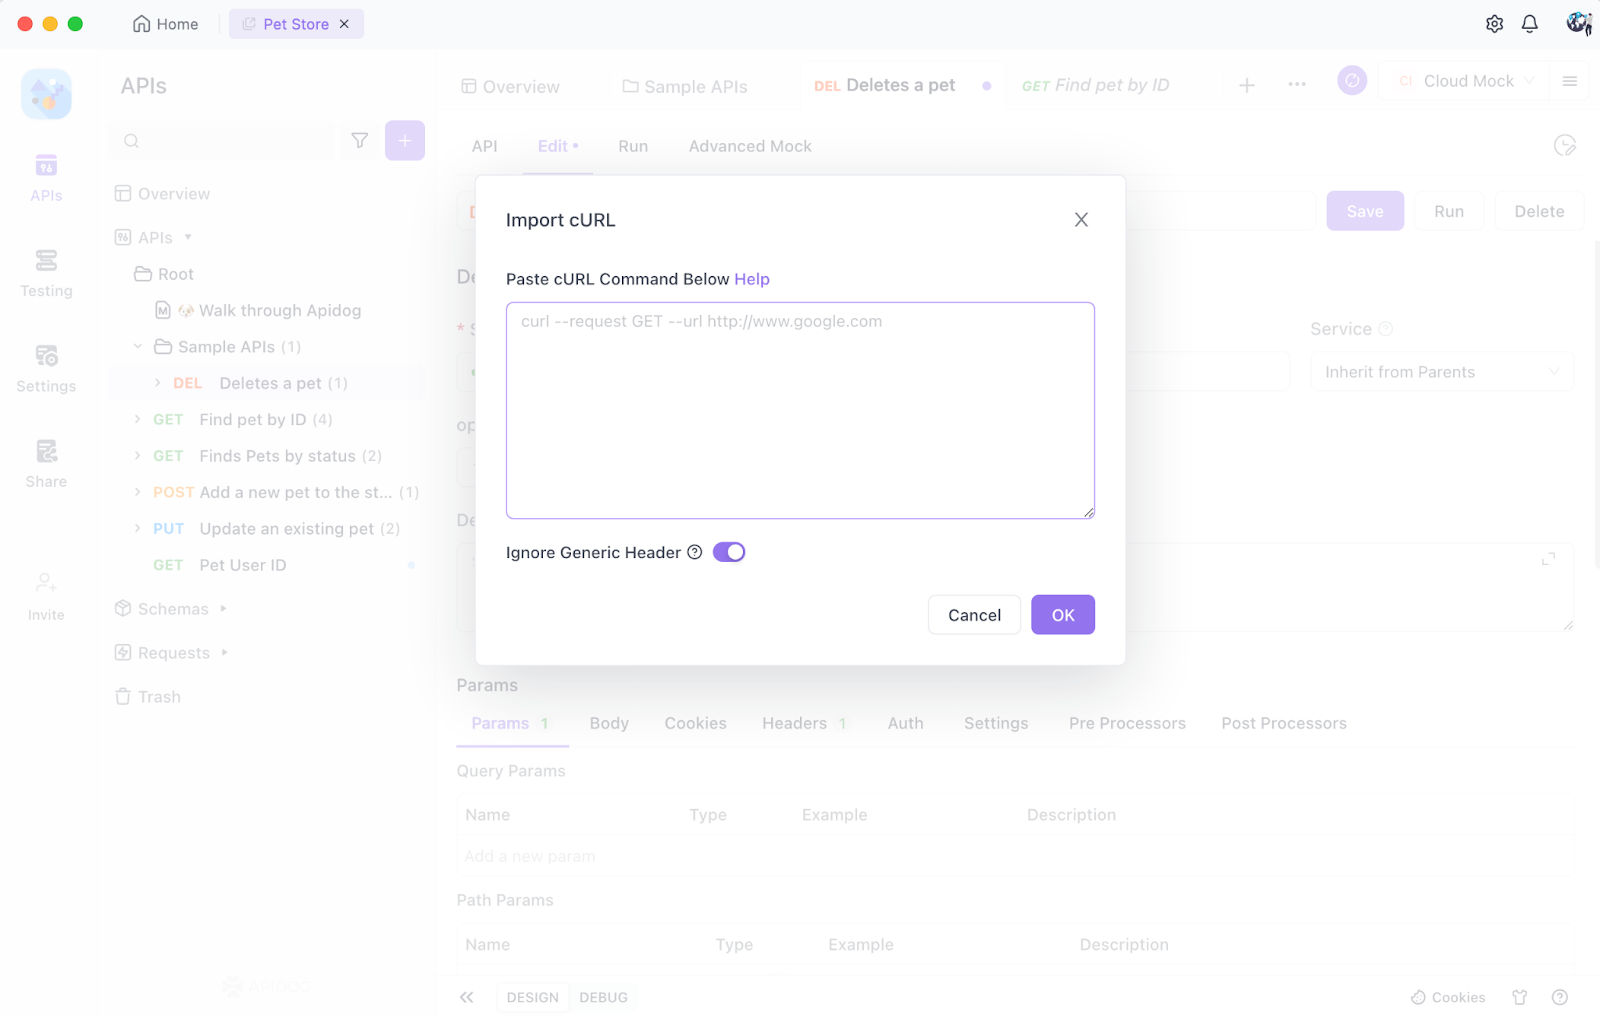
2. A window will open up. Paste the cURL command or the cURL format data into the box captured from the packet capture tool. Click on OK.
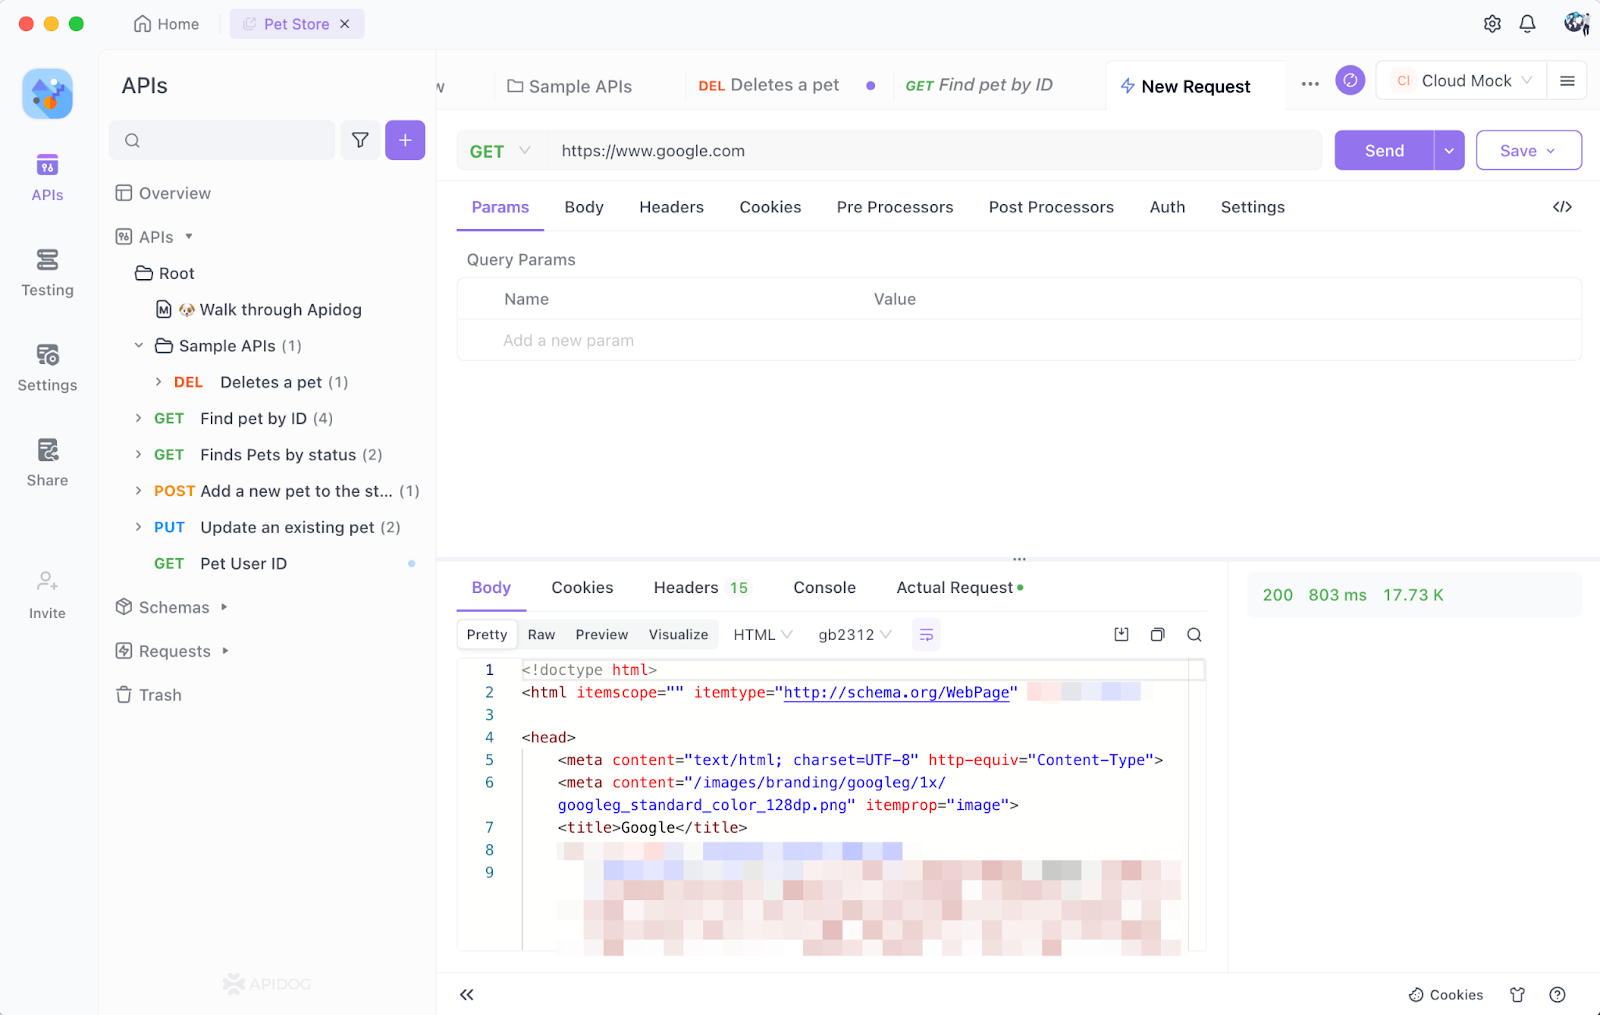
3. After clicking the OK button, you will see that the captured data has been copied to the quick debugging API.
4. Use the shortcut for debugging to debug the API directly.
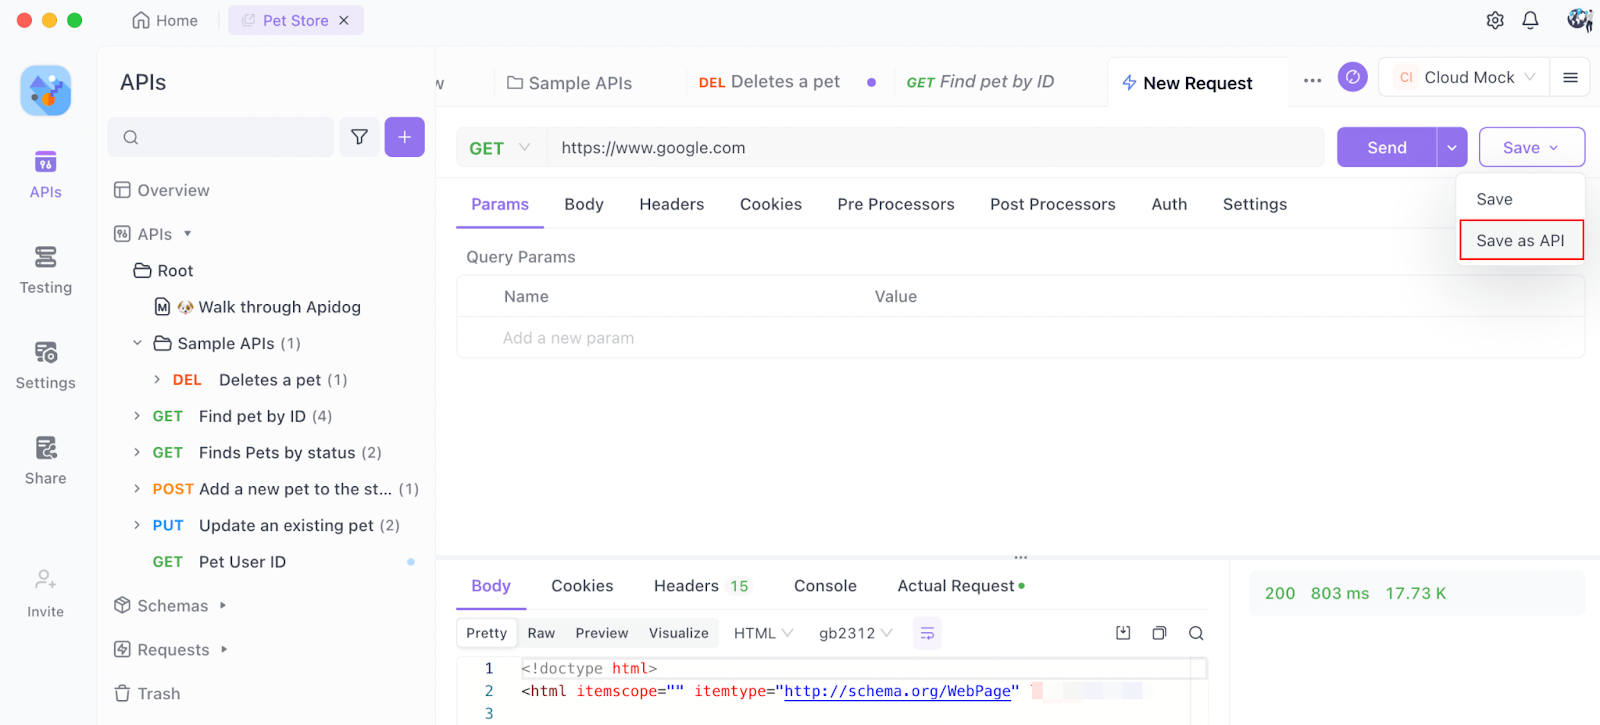
5. Click the "save" button to save the imported data as an API within Apidog for further testing and debugging.
Conclusion
In conclusion, if the command-line approach seems daunting or intimidating, Apidog steps in as a user-friendly alternative tailored for beginners. Its visual interface, guided steps, and minimal coding requirements make it an ideal choice for those taking their first steps into the world of API integration.
Embrace Apidog to enhance your learning experience and confidently call REST APIs without the complexities of traditional command-line tools.