Node.js is the top choice for developers creating fast web apps with RESTful APIs, widely used in the US. We'll take you through the top two approaches, providing valuable insights and practical guidance on harnessing the power of Node.js and Express to craft efficient and scalable APIs.
Node.js is the top choice for developers creating fast web apps with RESTful APIs, widely used. We'll take you through the top two approaches, providing valuable insights and practical guidance on harnessing the power of Node.js and Express to craft efficient and scalable APIs.
Let's embark on this journey together and uncover the best ways for API development using Node.js and Express.
What is Node.js?
Node.js is a robust runtime environment that allows developers to execute JavaScript code on the server side. It has gained immense popularity in recent years. Node.js is known for its exceptional speed, scalability, and efficiency, making it a preferred choice for web development.
One of its standout features is its event-driven, non-blocking architecture, which enables handling many concurrent connections seamlessly. This makes it particularly well-suited for real-time applications, APIs, and high-performance web services.
Node.js is a game-changer for developers as it unifies the language for client and server-side scripting, resulting in a more streamlined and efficient development process. Furthermore, it boasts a vibrant open-source community and a rich library and package ecosystem, simplifying development and allowing for rapid prototyping and deployment.
Method 1. Build API in node.JS & Express in Apidog
What is Apidog?
Apidog is an API documentation and testing platform that can automatically generate API docs and add test cases for your APIs. It provides great support for APIs built with Node.js and Express.
To use Apidog, you just need to install its NPM package and import the Apidog middleware into your Express app. By parsing Express route configs, Apidog can auto-generate API docs showing endpoint paths, methods, request parameters, response schemas etc.
In addition, Apidog allows you to write test cases for your APIs, including unit and integration tests
Building Your First Node.js API in Apidog
Now that your development environment is prepared and you're acquainted with Apidog, let's commence building your initial Node.js API using Apidog.
button
Prerequisites:
Before you begin, ensure you have a GitHub account for cloning the companion repository.
Additionally, you'll require a Postman account to access the user management API template. If you haven't signed up for Apidog yet, you can do so for free here.
Step 1: Installing Node.js and npm
Download Node.js: Visit the official Node.js website and obtain the recommended LTS version for your operating system.
Install Node.js: Run the installer, follow the on-screen instructions, and complete the installation.
Verification: Confirm the successful installation of Node.js and npm by executing specific commands in your command-line interface.
To check the Node.js version:
node-v
To check the npm version:
npm -v
Step 2: Creating Your First Node.js API with Apidog
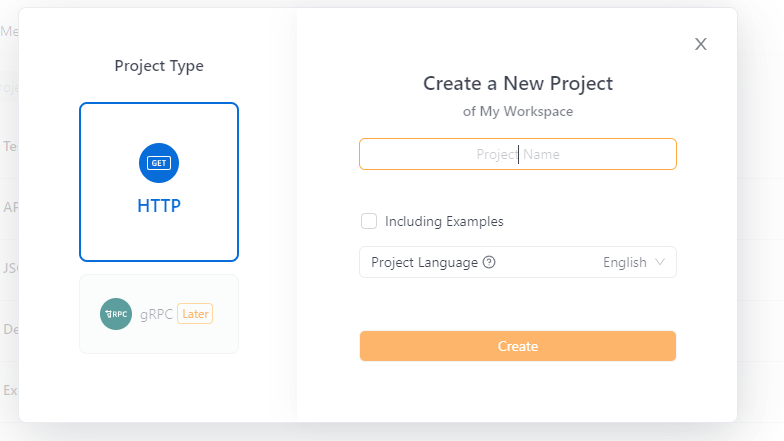
Creating a New Project in Apidog: Open Apidog, initiate a new project and provide it with a name.
Creating a Basic Node.js API: Set up your development environment to build a basic Node.js API. This includes creating a project folder, writing Node.js code, saving it as "app.js," installing Express.js, running the Node.js file, and accessing your API.
Method 2. Build API in node.JS & Express in Postman
Step 1: Installing Node.js and NPM
Start by installing Node.js on your local machine. Download the latest LTS version from the official Node.js website. Follow the Node.js Installer instructions, and feel free to customize the defaults if necessary.
Once done, Node.js and NPM (Node Package Manager) should be installed. You can confirm the installation by executing these commands in your terminal: node -v and npm -v. If you see the versions of Node.js and NPM displayed, your installation was successful.
Step 2: Create a new project folder
Create a fresh folder for your project by executing this command in your terminal: mkdir node-rest-api. To navigate to your project folder, use: cd node-rest-api.
Step 3: Initializing a new Node.js application
Initialize your application by running this command in your terminal: npm init. You'll be prompted to enter details about your project, such as its name, description, and GitHub repository.
You can either accept the default values by pressing Enter/Return or customize them as needed. This command will generate a package.json file, which contains the project information you provided in the terminal. It also outlines how you'll run the project and lists its dependencies, including frameworks and libraries.
Step 4: Installing Express and other dependencies
From this point forward, you can execute all your commands in your editor's terminal. Use the following command to install the Express framework: npm install express.
Step 5: Importing necessary modules
Begin by creating a new file named app.js in the project's root directory. This file will serve as the setup for your app. Import the Express module with the following code:
const express = require('express');
Next, configure Express to handle requests with JSON payloads using the following code:
const app = express();
app.use(express.json());
Step 6: Defining a route
It listens for requests To turn your application into a server and make it listen for connections, create a new file named config.js. In this file, add the following code to set a default port:
const PORT = process.env.PORT || 3000;
This allows the port to be automatically set when deploying the API to cloud platforms like AWS or Azure via the process.env.PORT variable. If the process.env.PORT variable is not set, the default port will be 3000. Now, add the following code to your app.js file to configure the server to listen on the specified port:
app.listen(PORT, () => {
  console.log("Server Listening on PORT:", port);
}
Step 7: Defining an endpoint
Let's begin by creating a status endpoint to verify that the API is functioning. In Express, you define routes using the app.METHOD() function, where METHOD corresponds to HTTP methods such as GET, POST, PUT, and DELETE. You define the route with app. get() for a GET request.
To test the /status endpoint, use a GET request in your Postman account. You should receive a "Running" response if everything is set up correctly.
By following these steps, you've successfully created your first API. Similar approaches can be used with app.post(), app.put(), and app.delete() to handle other request methods.