
Building a robust and efficient REST API with Node.js can be a game-changer for your web development projects. RESTful APIs are the backbone of modern web applications, enabling seamless communication between clients and servers.
In this comprehensive guide, we'll take you through the step-by-step process of creating a REST API in Node.js. We'll explore the fundamentals. So, let's embark on this journey to unlock the power of Node.js and build APIs that drive your web applications to new heights.
What is Node.js
Node.js is a powerful runtime for server-side JavaScript, known for speed, scalability, and event-driven architecture. It unifies client and server-side scripting, simplifies development, and is ideal for real-time applications and APIs.
Its open-source community and rich library ecosystem facilitate rapid prototyping and deployment, making it a game-changer for developers.
Installing Node.js and npm
To begin your Node.js journey, you must install Node.js and npm (Node Package Manager) on your development machine. Follow these steps:
1. Download Node.js
Visit the official Node.js website and download your operating system's recommended LTS (Long-Term Support) version. LTS versions are stable and well-supported, making them a safe choice for most projects.
2. Install Node.js
Run the installer you downloaded and follow the installation instructions. The installation process is straightforward and usually involves clicking "Next" a few times.
3. Verify Installation
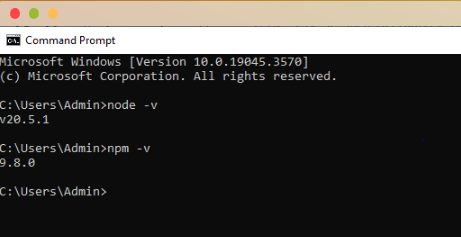
After the installation is complete, open your command-line interface (e.g., Terminal on macOS, Command Prompt on Windows, or a terminal emulator on Linux) and run the following commands to verify that Node.js and npm have been installed successfully:
To check the Node.js version:
To check the npm version:
If you see version numbers displayed, you've successfully installed Node.js and npm on your system.
The output should look similar to this:
Apidog: Simplifying REST API Development
Apidog is a powerful software platform tailored for streamlining REST API development. Its "design-first" methodology encourages planning your API before implementation, ensuring error prevention and saving valuable time. This tool is especially beneficial for newcomers to the world of API development, offering a user-friendly approach to creating effective and error-free APIs.
Here's a quick look at some of its features:
- Design-First Approach: Apidog encourages you to plan your API before writing any code. It's like sketching a blueprint before building a house. This way, you know what your API should do.
- Testing Made Easy: Apidog helps you test your API to ensure it works as expected. It's like checking a new car's parts to ensure it runs smoothly.
- API Documentation: With Apidog, you can create clear and organised documentation for your API. It's like creating a user manual for your software.
- Mocking: Apidog can generate pretend data to test your API before it's finished. It's like trying out a recipe with playdough before making the actual dish.
Building Your API with Node.js with Apidog
Now that your development environment is set up and you know what Apidog is. Let's begin crafting your initial Node.js API using Apidog.
Creating a New HTTP Project in Apidog
- Open Apidog on your computer and find and select the option for "New Project" or "Starting a New API Project."
- Provide a name for your project, much like naming a new folder on your computer.
- Click "Create" or "Save" to establish your new project.
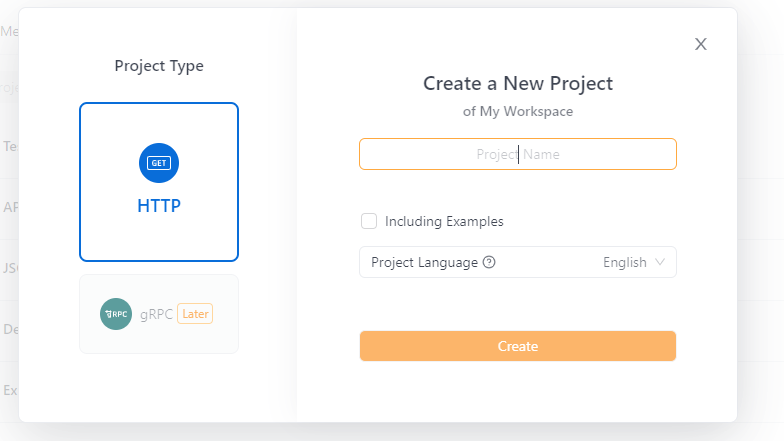
You've now created a new project to initiate your API development journey.
Creating a Basic Node.js API
Now, it's time to handle requests and responses with Node.js. This is where you write the code that makes your endpoint work. In this case, you'll use Node.js to provide a greeting message when someone accesses your API at "/greet."
Here's a simple example of Node.js code for your "getGreeting" function:
1. Create a New Project Folder:
Create a new folder for your project using the mkdir command in your command prompt. Let's name it "my-api" for this example:
2. Navigate to the Project Folder:
Enter the project folder using the cd command:
The commands should look similar to this:

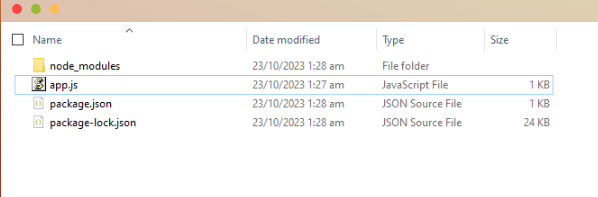
3. Create a Node.js File:
Use a text editor like Notepad or any other code editor to create a new Node.js file. Save it as "app.js" inside the "my-api" folder.
4. Edit the "app.js" File:
Open the "app.js" file and add the following code to create a basic Node.js API:
5. Save the "app.js" File:
Save the changes to the "app.js" file.
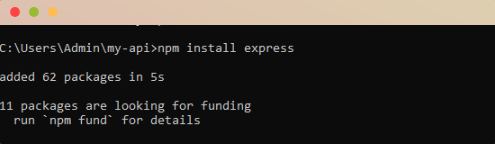
6. Install Express.js:
Ensure you are still in your cmd's "my-api" folder. Run the following command to install the Express.js library for your project:
7. Run the Node.js File:
Stay within your project folder in the cmd. Run your Node.js file with the following command:
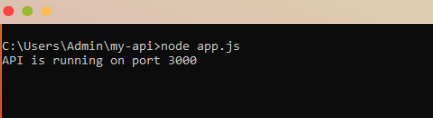
8. Access Your API:
Once the server is running, open a web browser and access your API by entering the following URL:
You should see "Hello, world!" displayed in your web browser, indicating that your simple Node.js API is running.

With these steps, you've successfully created a basic API with functionality and an endpoint. When you access your API at "/greet," it will respond with a greeting message.
Defining API Endpoints
Let's create an endpoint to access it. Here's how to define an endpoint:
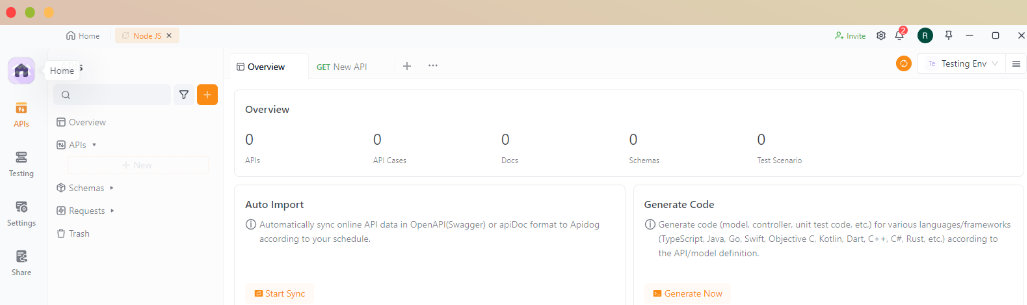
1. Create or Open a Project:
If you're starting a new project in Apidog, look for an option to "New Project." Provide a name for your project and save it. If you already have a project in Apidog, you can open it.
2. Add Endpoints:
Inside your project, you'll work on defining API endpoints. Look for an option like "Add Endpoint" or "Create New Route" within Apidog. Click on it to start defining your endpoints.
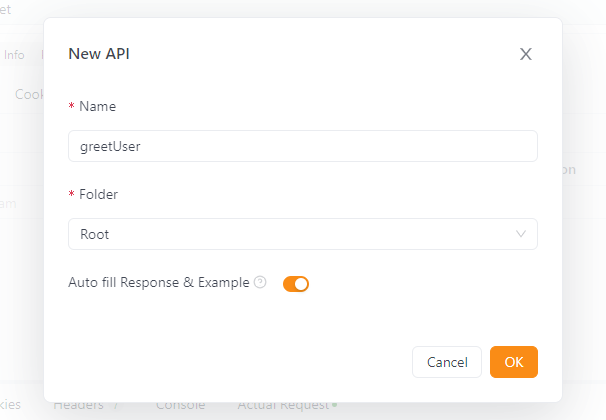
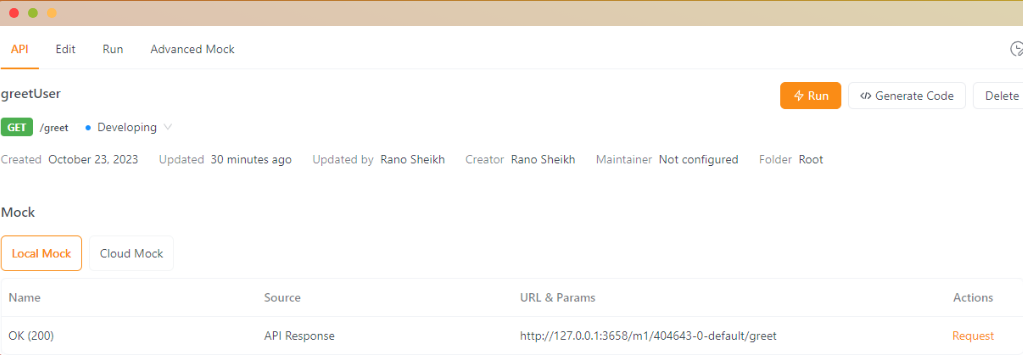
3. Name the Endpoint:
Give your endpoint a descriptive name. You could name it "greetUser" to match the example in your Node.js code.
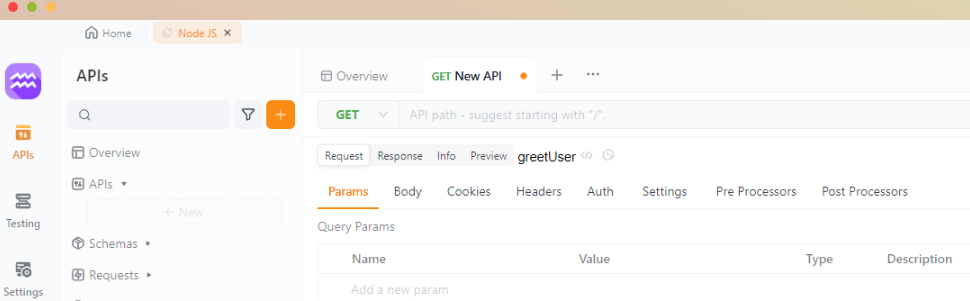
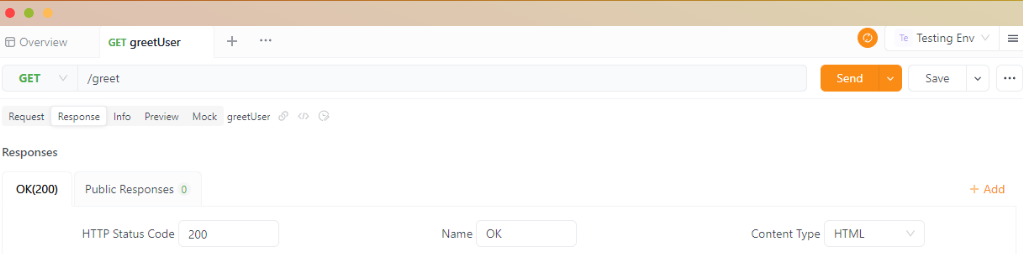
4. Specify the HTTP Method:
Choose the HTTP method your endpoint will use. Since your Node.js code uses app. get for the "greetUser" endpoint, select "GET" for this API endpoint.
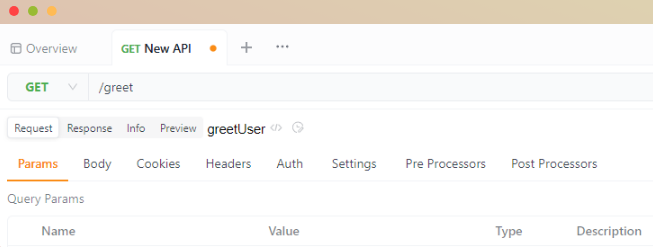
5. Define the Route:
Define the route for your endpoint. In your Node.js code, it's set to "/greet." So, use the same route in Apidog.
6. Save Your Endpoint:
After configuring all the details for your endpoint, save it within Apidog.
7. Repeat for Additional Endpoints:
If you have more endpoints to define for your API, repeat the process for each one.
8. Document Your Endpoints:
Apidog also allows you to document your endpoints with additional information, request parameters, and response details, making your API documentation more comprehensive.
9. Generate API Documentation:
After you've defined your endpoints and documented them as needed, you can generate API documentation in Apidog.
By following these steps in Apidog, you can define and document your API endpoints, making it easier for you and others to understand and use your API.
Debugging and Testing Your Node.js API
Now that your Node.js API is up and running, it's essential to ensure its reliability and functionality. Debugging and testing are crucial steps in this process.
The Debugging Process in Apidog:
Apidog offers a robust debugging environment for your API. With Apidog's debugging tools, you can trace the flow of requests and responses, identify errors or unexpected behaviour, and make necessary adjustments to your API code.
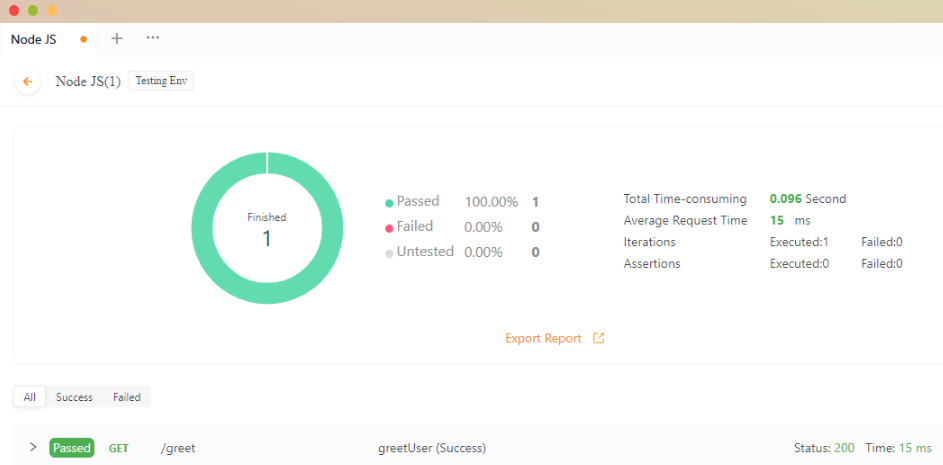
Automated Testing with Apidog's Testing Tools:
Apidog simplifies the testing of your Node.js API through its built-in testing tools. These tools allow you to automate the testing of different endpoints, verifying that they respond correctly and handle various scenarios. Apidog helps you create a suite of test cases that can be run automatically, saving you time and ensuring the stability of your API.
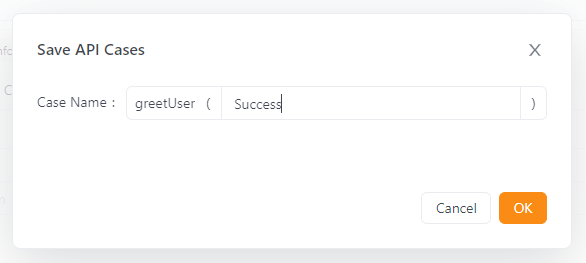
Writing Test Cases and Assertions for Your API:
In Apidog, you can define test cases for your API endpoints. Each test case represents a specific scenario or use case for your API. You can set up assertions within these test cases to check if the API responds as expected. For instance, you can verify the correctness of the response data, the status codes, or the headers.
Using Apidog's debugging and testing features, you can thoroughly evaluate your Node.js API, identify and resolve issues, and guarantee its reliability and performance.
Writing test cases and assertions in Apidog allows you to maintain the quality of your API, even as it evolves and expands.
Smart Mock Server for Node.js APIs
Apidog's Smart Mock Server feature significantly enhances the development and testing of Node.js APIs.
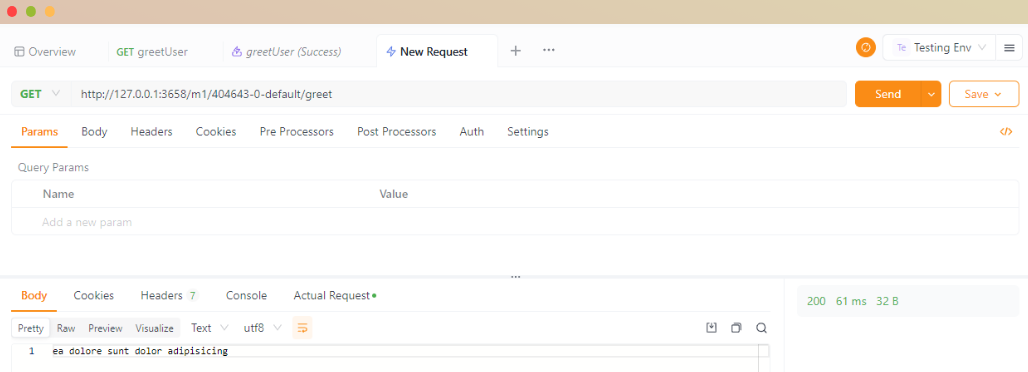
Explaining the Smart Mock Server Feature:
The Smart Mock Server is a powerful tool in Apidog that streamlines the development and testing process. It automatically generates mock data based on field names and specifications, saving you the effort of creating test data manually.
Generating Mock Data in Apidog:
Apidog's Smart Mock Server creates mock data that aligns with the structure of your API's endpoints. It analyses your API's field names and specifications and generates reasonable mock data accordingly. This feature simplifies the testing and validation of your API's responses.
Utilizing Mock Data for Development and Testing:
Mock data generated by the Smart Mock Server is invaluable for development and testing. This data can simulate real API responses during the development phase. This lets you identify and address issues early, creating a more robust and reliable API.
Integrating Node.js API with Databases
Node.js APIs connect to various databases, enhancing their functionality and data management.
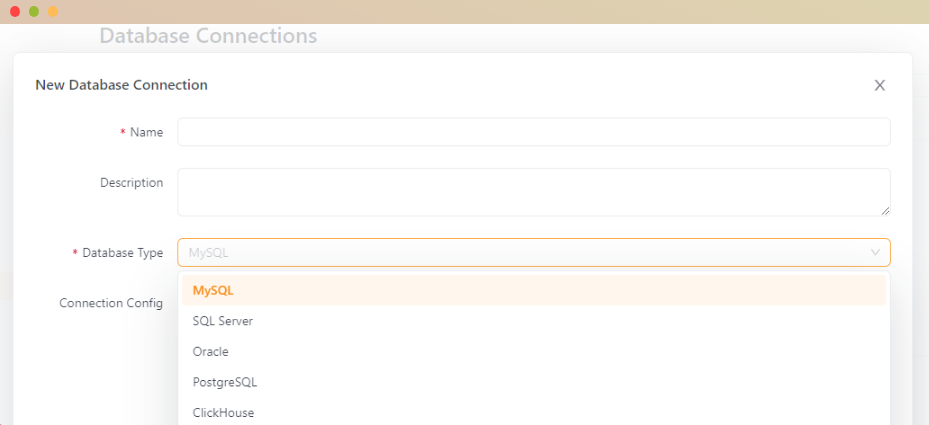
Connecting Node.js APIs to Various Databases:
Apidog provides the capability to connect your Node.js APIs to a wide range of databases, including popular options such as MySQL, SQL Server, Oracle, PostgreSQL, and ClickHouse. This integration allows your APIs to retrieve data from databases and interact with them seamlessly.
Using Retrieved Data in API Requests and Pre-/Post-Processors:
When your Node.js API is linked to a database, you can efficiently retrieve and use data from the database in your API requests. Additionally, Apidog supports pre- and post-processors, enabling you to manipulate data before and after it's sent to or received from the database. This flexibility empowers you to create dynamic and data-driven APIs.
By integrating your Node.js APIs with databases, you can leverage the power of data storage and retrieval to enhance the functionality and versatility of your APIs, making them even more valuable for your projects and applications.
Conclusion:
APIs are like bridges linking different parts of the digital world. Node.js, a quick and versatile tool, plays a significant role in building these bridges. Apidog, a user-friendly platform, makes creating, testing, and sharing APIs easy. Whether you're new to this or have some experience, combining Node.js and Apidog is a great way to make powerful APIs.
In our journey to build APIs with Node.js in Apidog, you have learned the basics of development, testing, and connecting to databases. The Smart Mock Server has been a helpful tool for testing, and the API Hub introduced us to a worldwide community of developers and their valuable APIs.
It's clear that mastering API development with Node.js and Apidog isn't just about code; it's about connecting ideas, being creative, and exploring the limitless possibilities of modern software development.


