How to Add Bearer Token Authorization in Postman
In Postman, you can use a Bearer Token for authorization by including it in the "Authorization" header of your HTTP request.
Apidog
All-in-one Collaborative API Development Platform
API Design
API Documentation
API Debugging
API Mock
API Automated Testing
In Postman, you can use a Bearer Token for authorization by including it in the "Authorization" header of your HTTP request.
Bearer tokens play a crucial role in securing API requests, and managing them efficiently is essential for developers. However, some users might encounter issues, such as the absence of the Bearer Token option in the authentication dropdown in Postman. In this article, we will explore how to set a bearer token in Postman and address common concerns.
Bearer Token authentication is a token-based scheme where an access token issued by an authentication server is included in API requests as proof of authentication and authorization. The token contains no user information itself but acts as a bearer credential for the party possessing it.
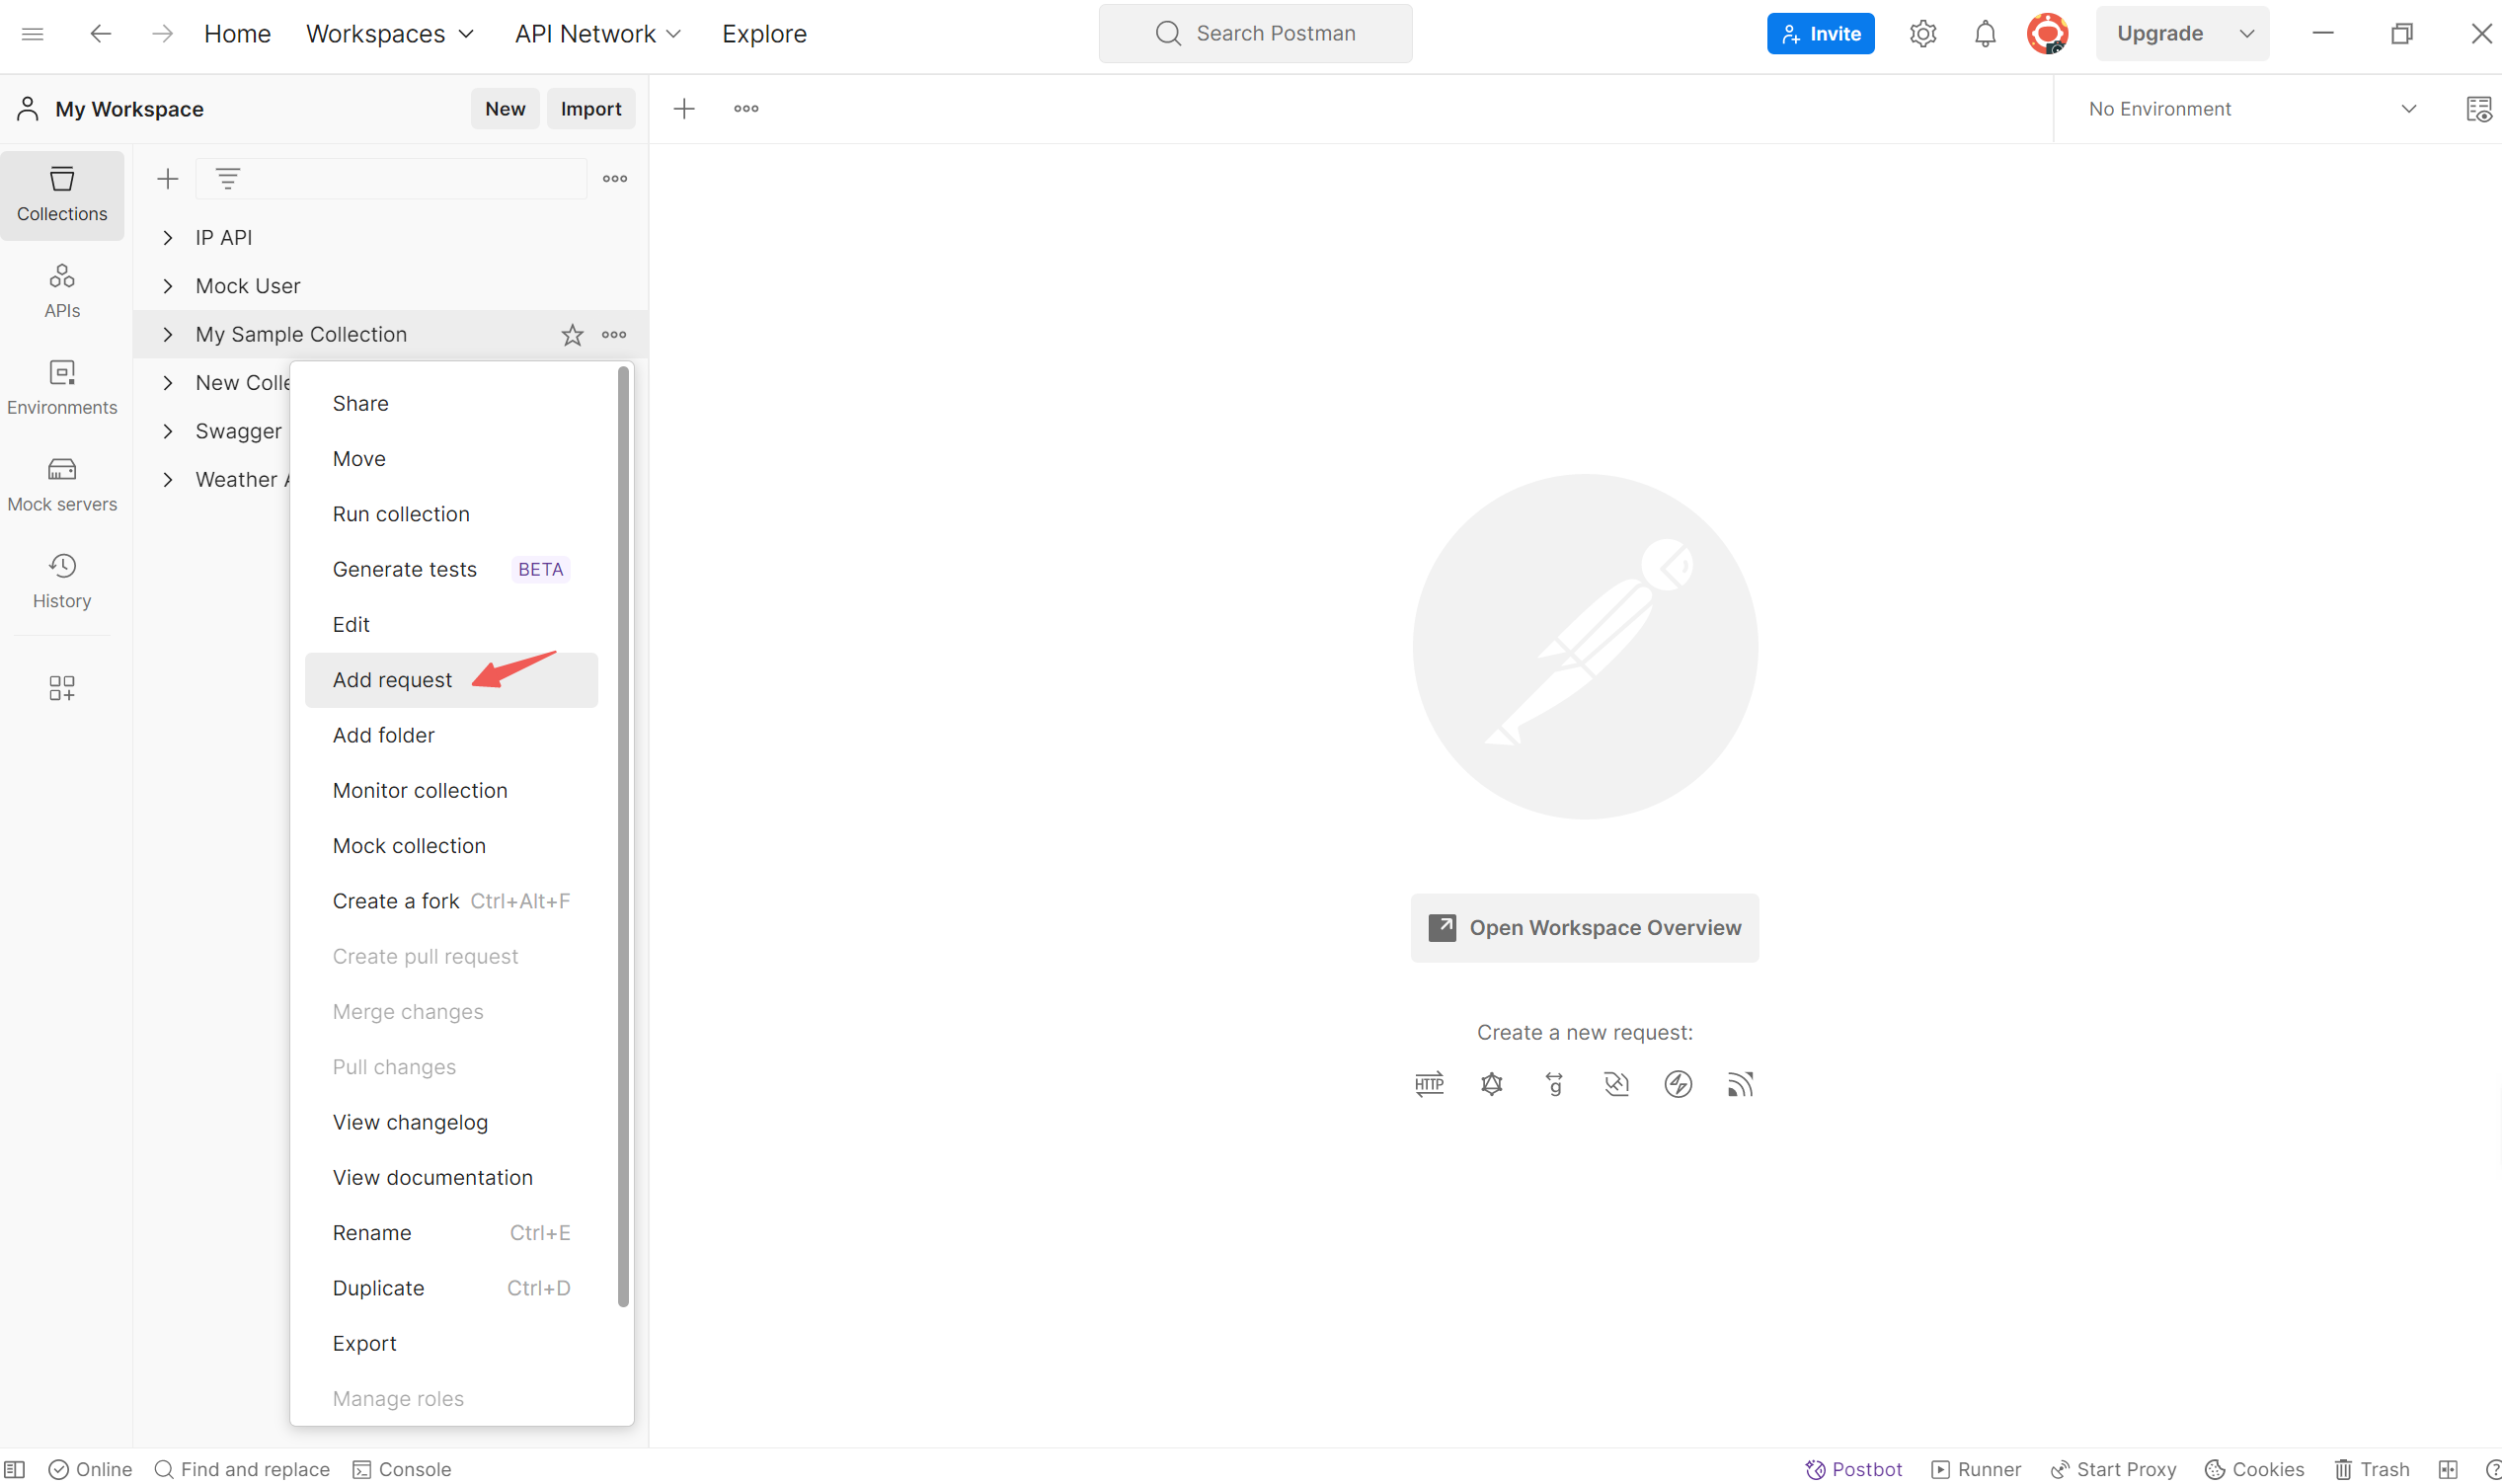
You can use a Bearer Token in Postman for authorization by including it in the "Authorization" header of your HTTP request. Here's a step-by-step guide on how to do this:
In the request pane, go to the "Authorization" tab. Choose "Bearer Token" as the type of authorization.
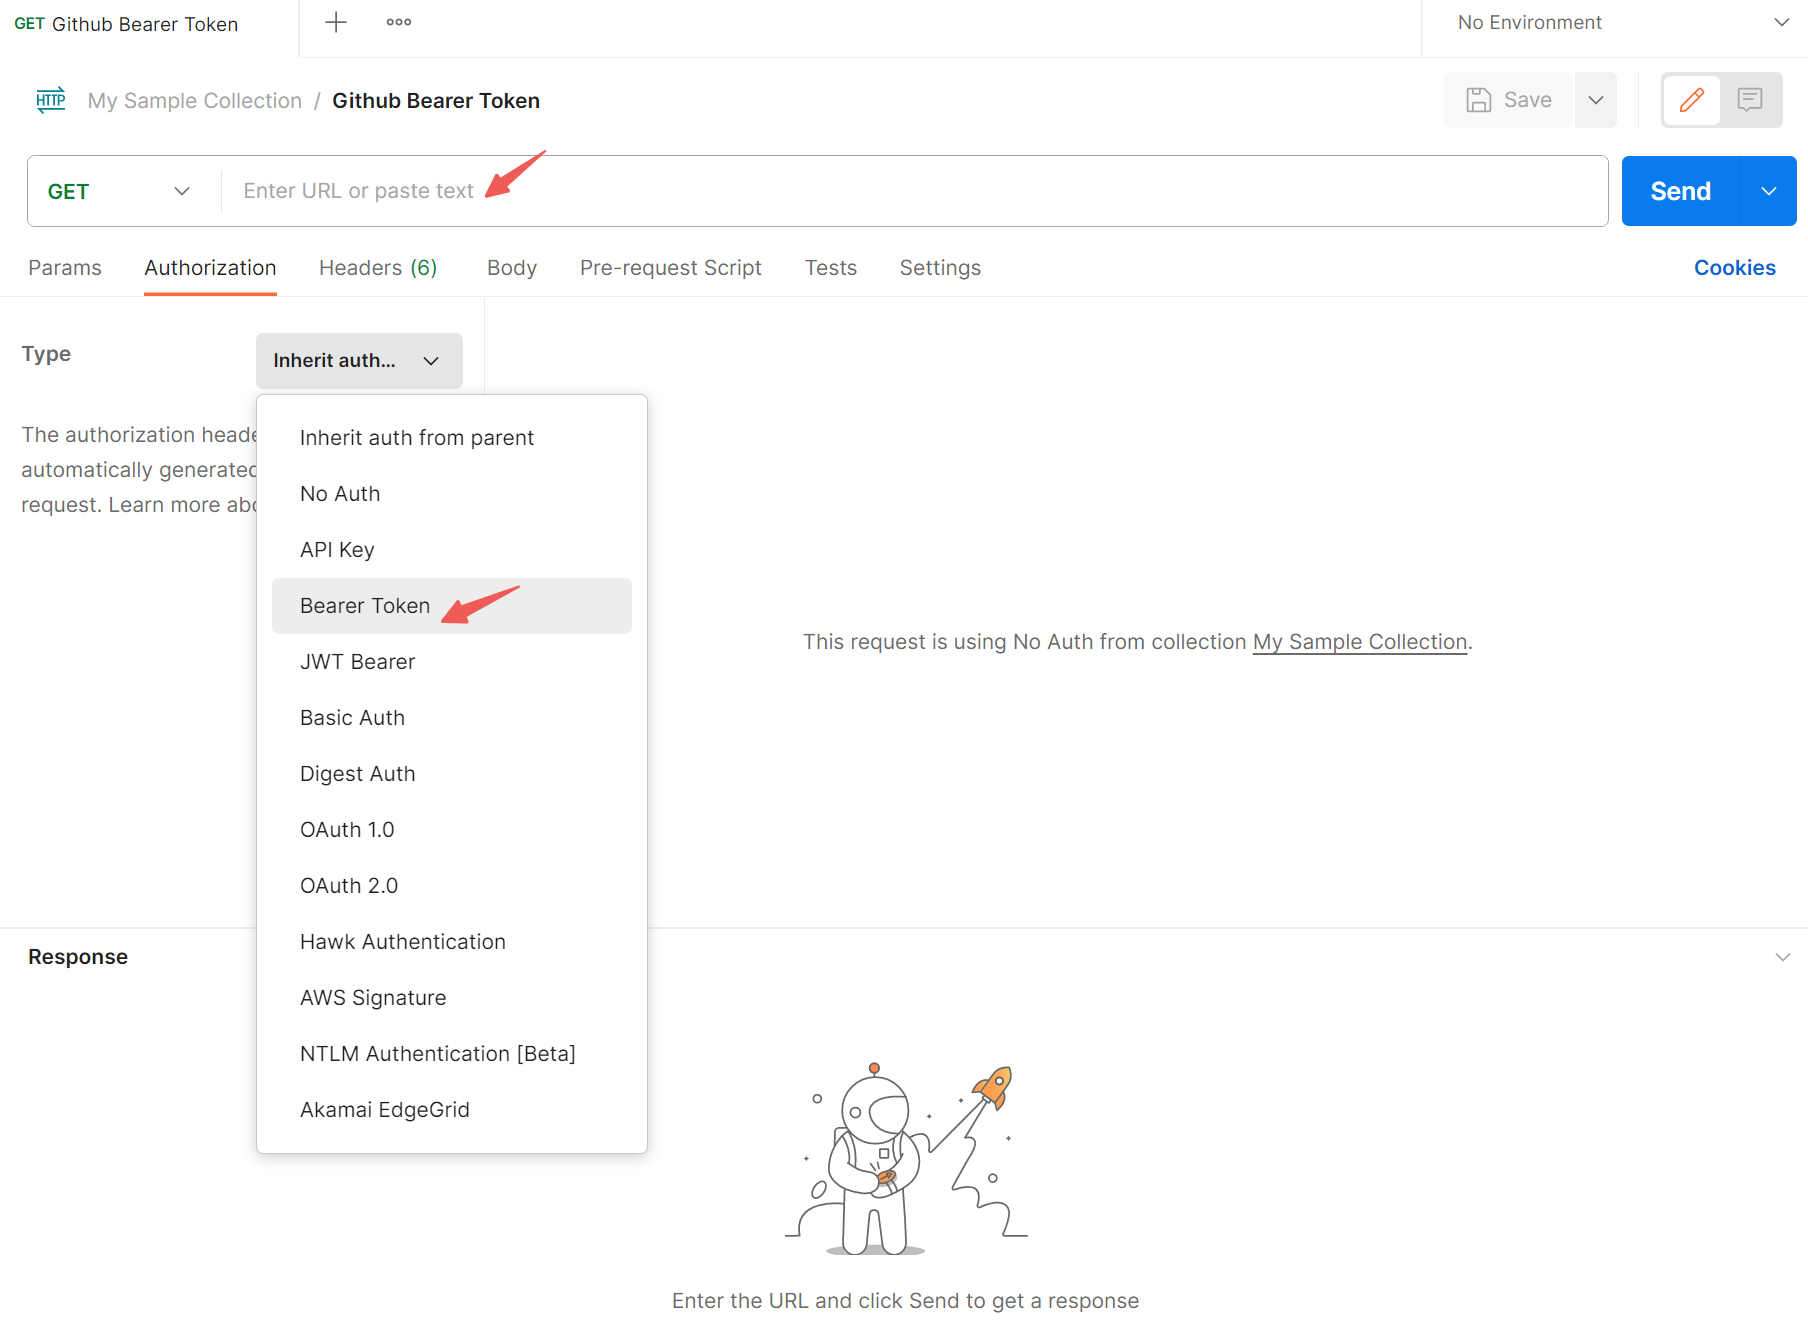
Enter the Bearer Token you received from the authentication server or provider in the "Token" field.
Include Token in the Request Header:
If the "Bearer Token" authorization type doesn't automatically add the token to the request header, make sure to include it manually. To do this:
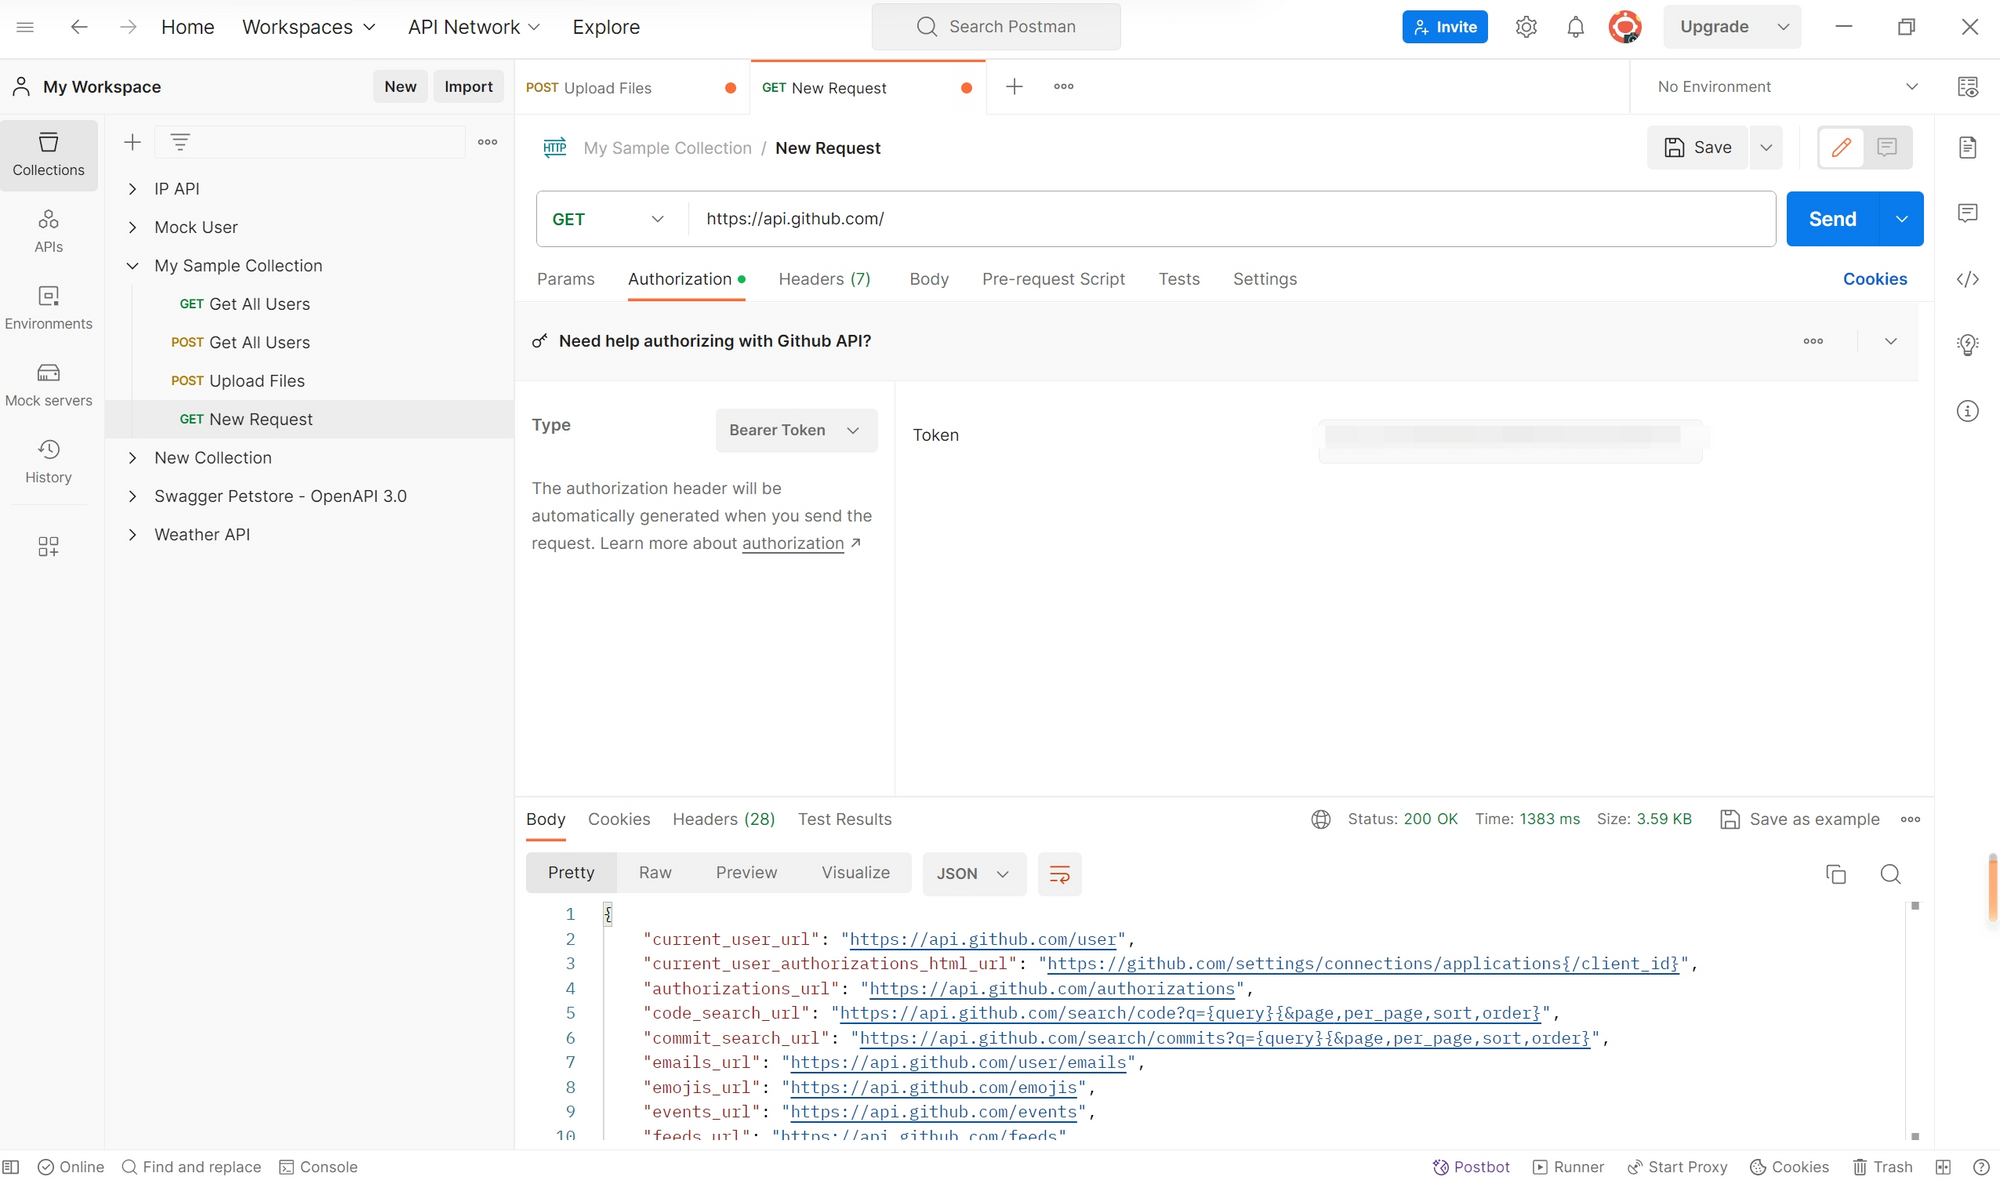
Click the "Send" button to execute the request with the Bearer Token included in the authorization header.
Check the response to see if the request was successful or if there are any error messages.
Apidog, presented as an all-in-one workspace for APIs, streamlines the development process with its intuitive interface. Practical examples within Apidog demonstrate the implementation of Basic Authorization, API Key Authorization, and OAuth 2.0. Best practices, including strong authentication and regular monitoring, are highlighted for a secure API ecosystem.
Here is a step-by-step guide to adding a bearer token in Apidog. Let's get it.
First, you need to obtain a valid bearer token to use in the header. The token encodes information like the user ID, permissions, and expiration time. Here is an example guide on how to create a bearer token.
In Apidog, make an HTTP GET or POST request by clicking the "+" button.
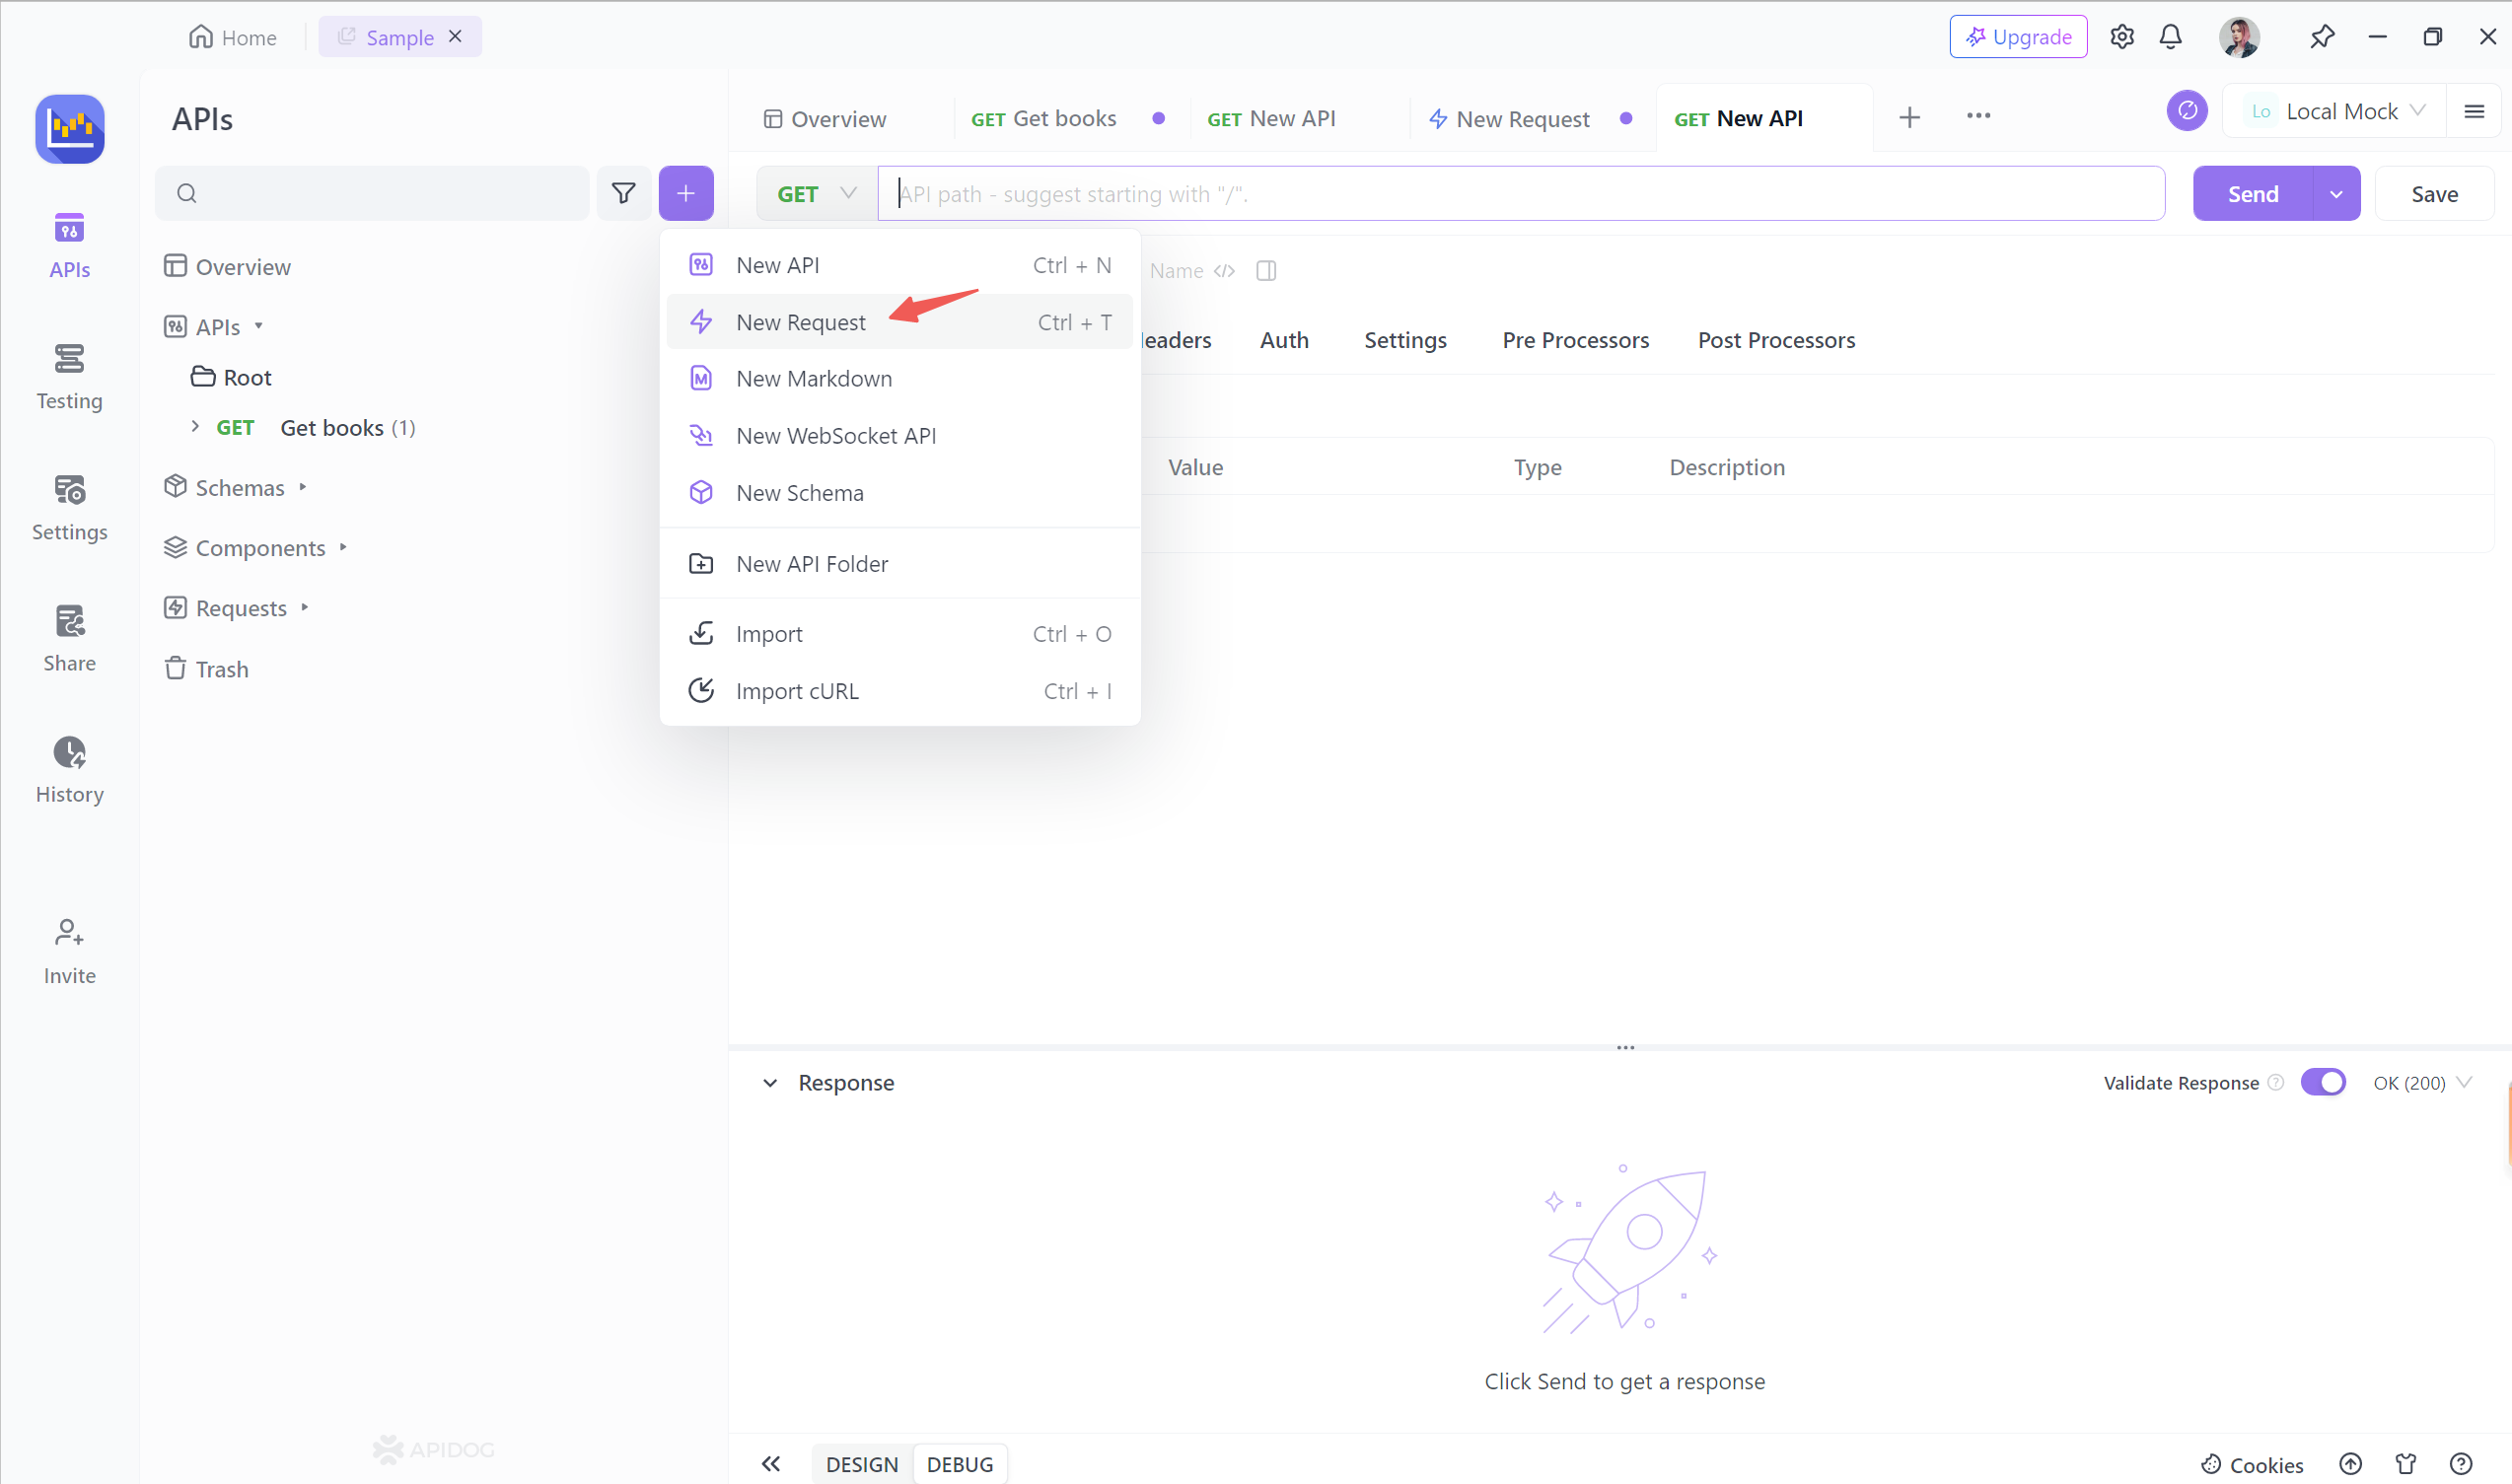
Then input the URL and select the " Bearer Token" from the auth type dropdown list. Fill in your bearer token here.
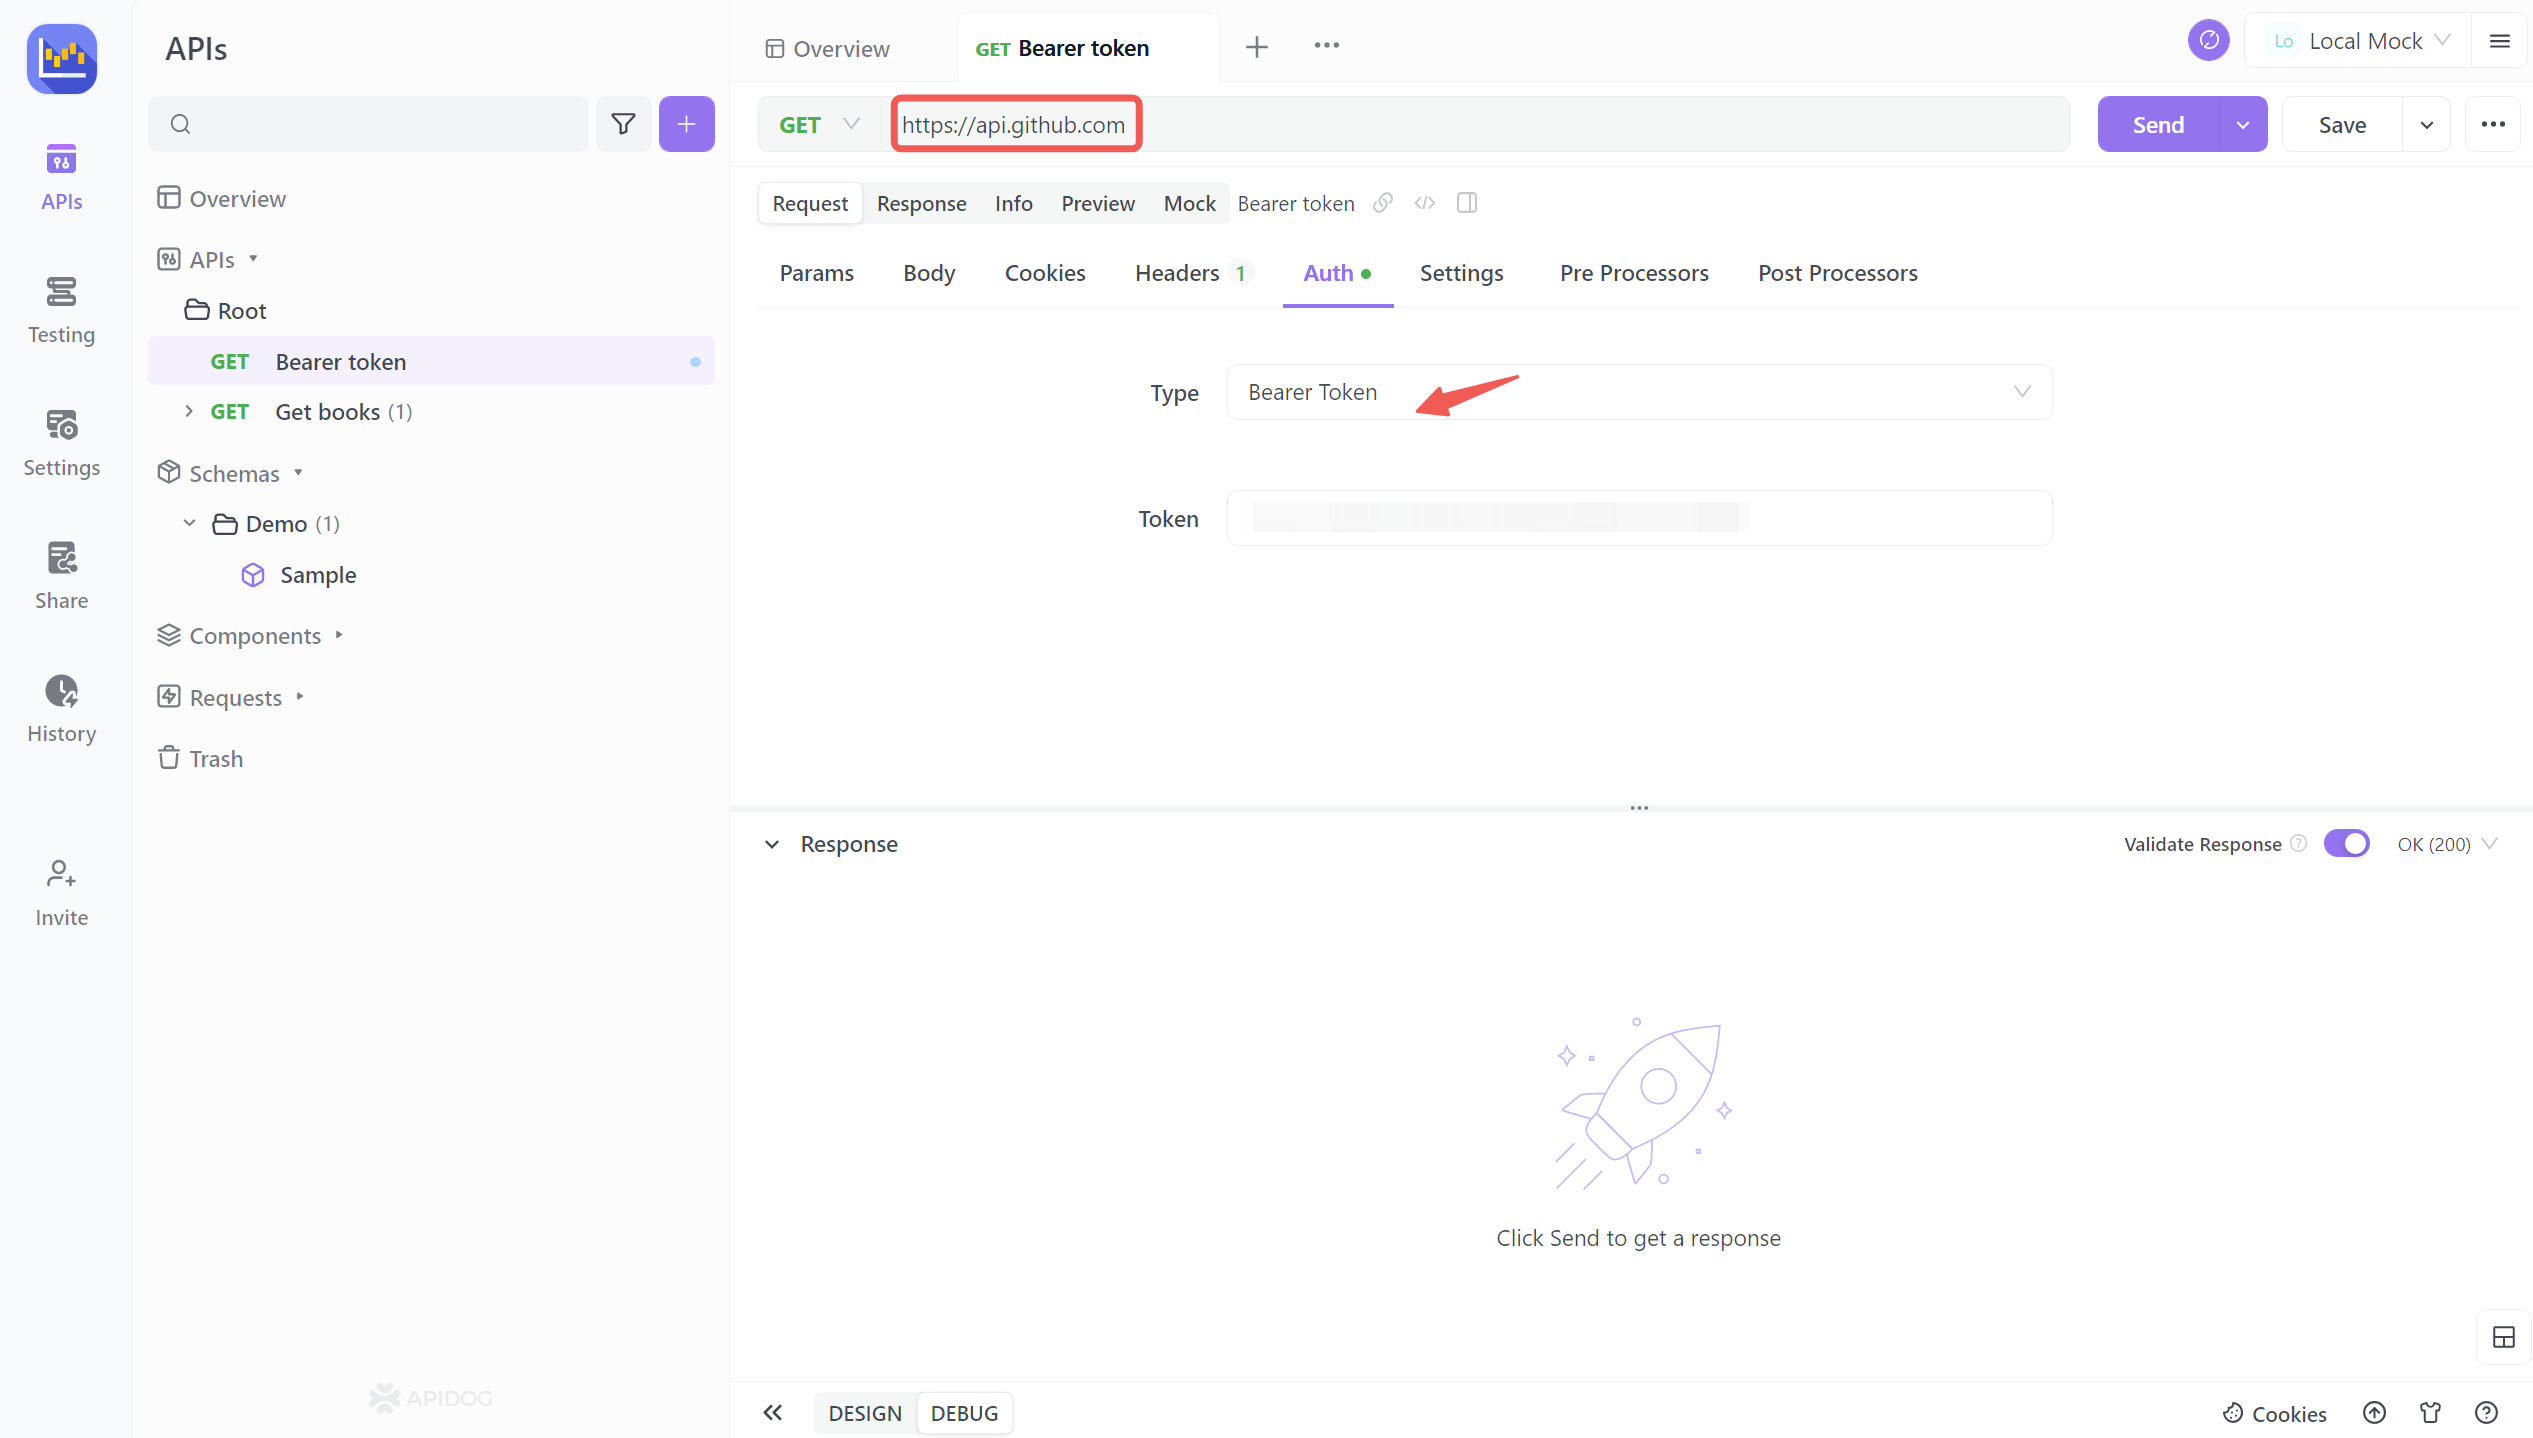
Input your actual bearer token string in "Token". This allows the server to validate the provided token and authorize the GET or POST request. Bearer tokens should only be transmitted over HTTPS for security.
Clicking the " Send" button to The token will be validated by API server. The server will decode the header, extract the token, validate it, and authenticate the request if the token is valid and active.
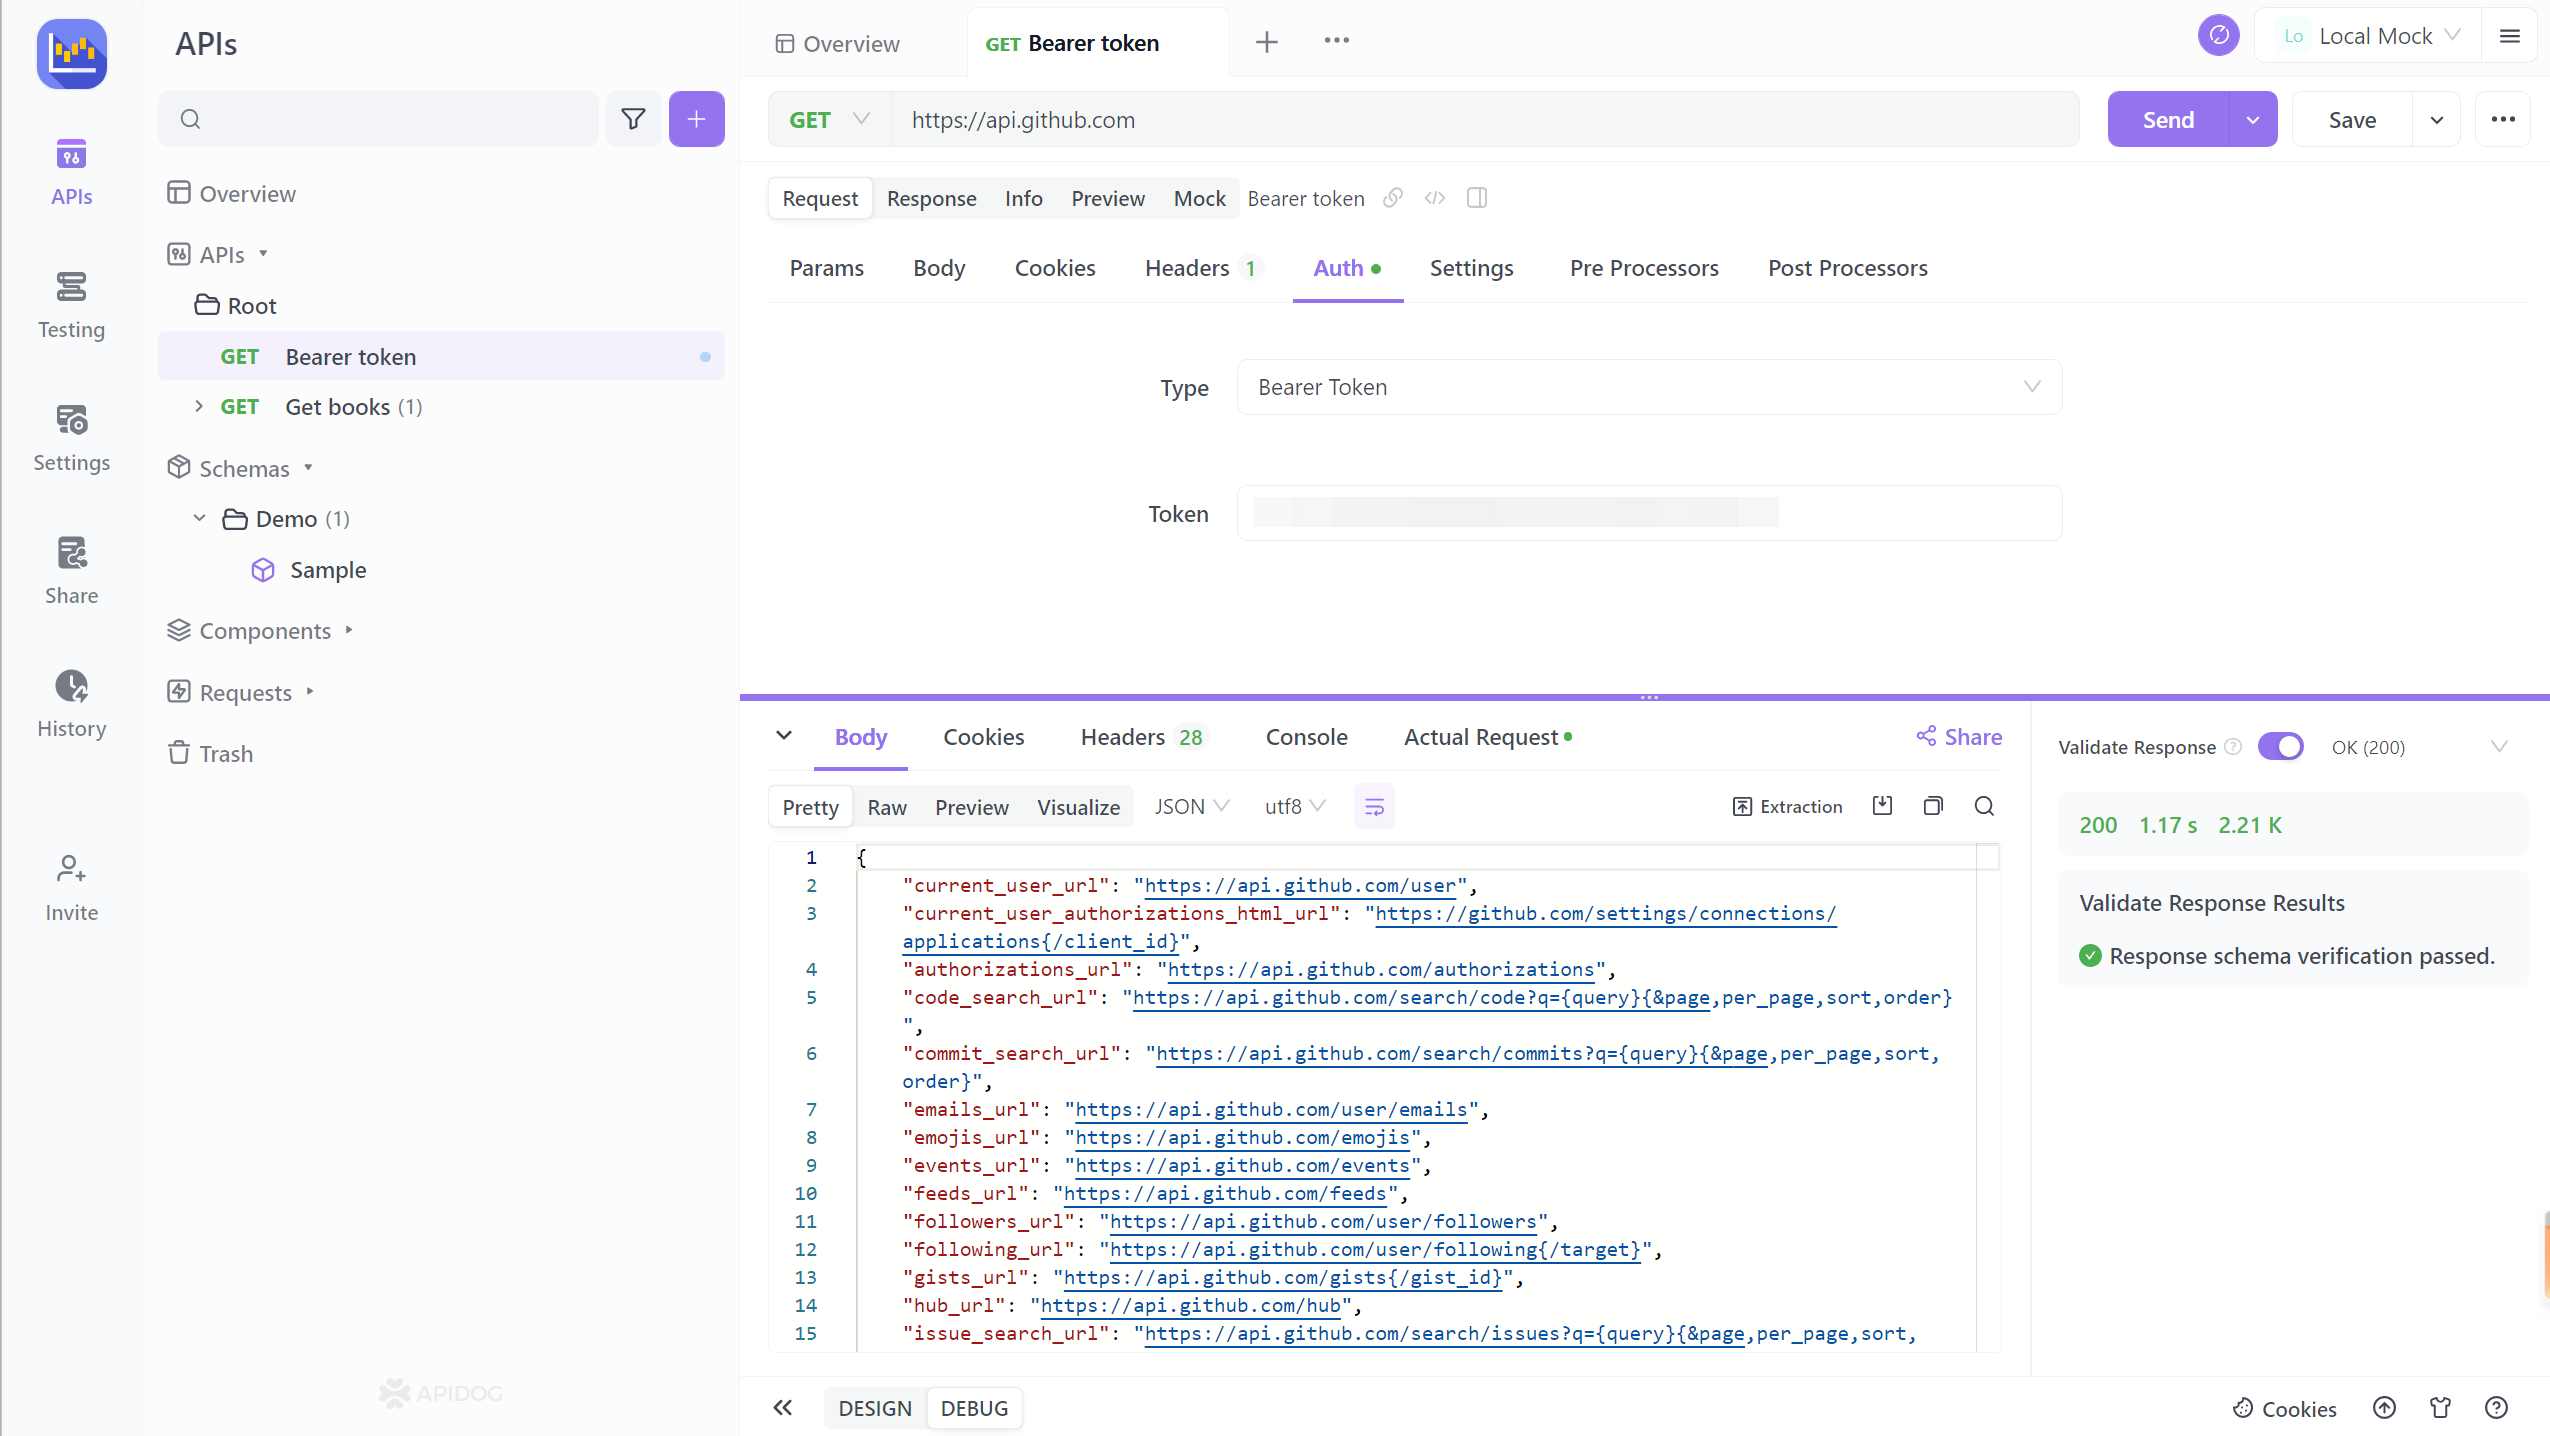
If authorized, the server will return the requested resource in the response. The client can now interact with protected resources using the authenticated request.
Properly formatting and sending bearer tokens in the Authorization header provides a secure and standardized way to implement authentication when consuming APIs and web services. Bearer tokens encapsulate user identity without exposing sensitive credentials on each request.
Following the steps outlined of obtaining tokens, constructing the header value, attaching it to requests, and validating on the server will enable frictionless API authorization in your applications. Make sure to properly manage and rotate tokens to keep user data safe.
Implementing token-based authentication using the Authorization bearer scheme improves security, separates client and server concerns, and makes it easy to integrate APIs and microservices in your architecture. With a solid understanding of how bearer tokens and headers work together, you can build scalable and secure systems.