What Is Selenium
Selenium is an open-source automation testing tool that is primarily used for web application testing. What is Selenium Testing? Selenium Testing refers to the testing conducted using the Selenium tool. Selenium provides a suite of tools for automating web browsers. Selenium is a popular choice for software testing due to its flexibility, cross-platform compatibility, and ability to interact with various web browsers.
The Key Features of Selenium:
- Cross-platform compatibility: Selenium supports various operating systems such as Windows, macOS, Linux, and various browsers including Chrome, Firefox, Safari, and more.
- Multiple language support: Selenium provides support for a wide range of programming languages, including Java, Python, C#, Ruby, and more.
- Integration with other tools: Selenium can be integrated with various tools such as TestNG, JUnit, Maven, Jenkins, and more.
- Browser compatibility testing: Selenium can automate testing across various web browsers, which allows developers to ensure that their web application functions properly on all major browsers.
- Record and playback: Selenium provides a feature that allows you to record and playback user interactions with a web application. This can help in creating test scripts without writing code.
- Support for parallel test execution: Selenium supports parallel test execution, which can help in reducing the time required to run a suite of tests.
- Flexibility: Selenium is a highly flexible framework that allows developers to customize test scripts as per their requirements.
Overall, Selenium is a powerful automated testing tool that is widely used by testers and developers around the world. Its flexibility and extensibility make it a popular choice for web-based testing, and its strong community support ensures that it will continue to evolve and improve in the future.
The Main Components of Selenium
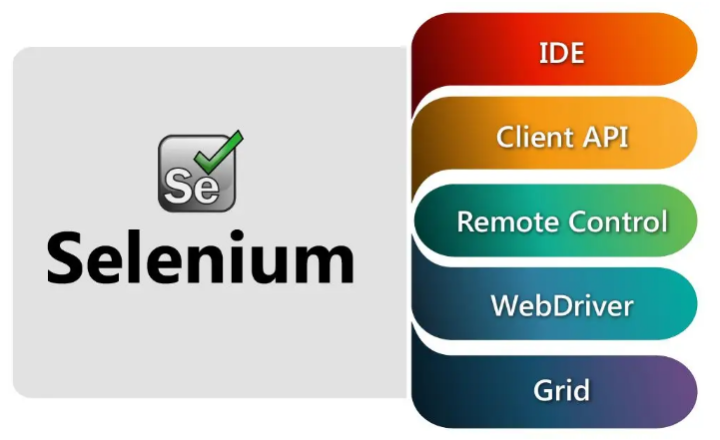
Selenium is composed of several components, including:
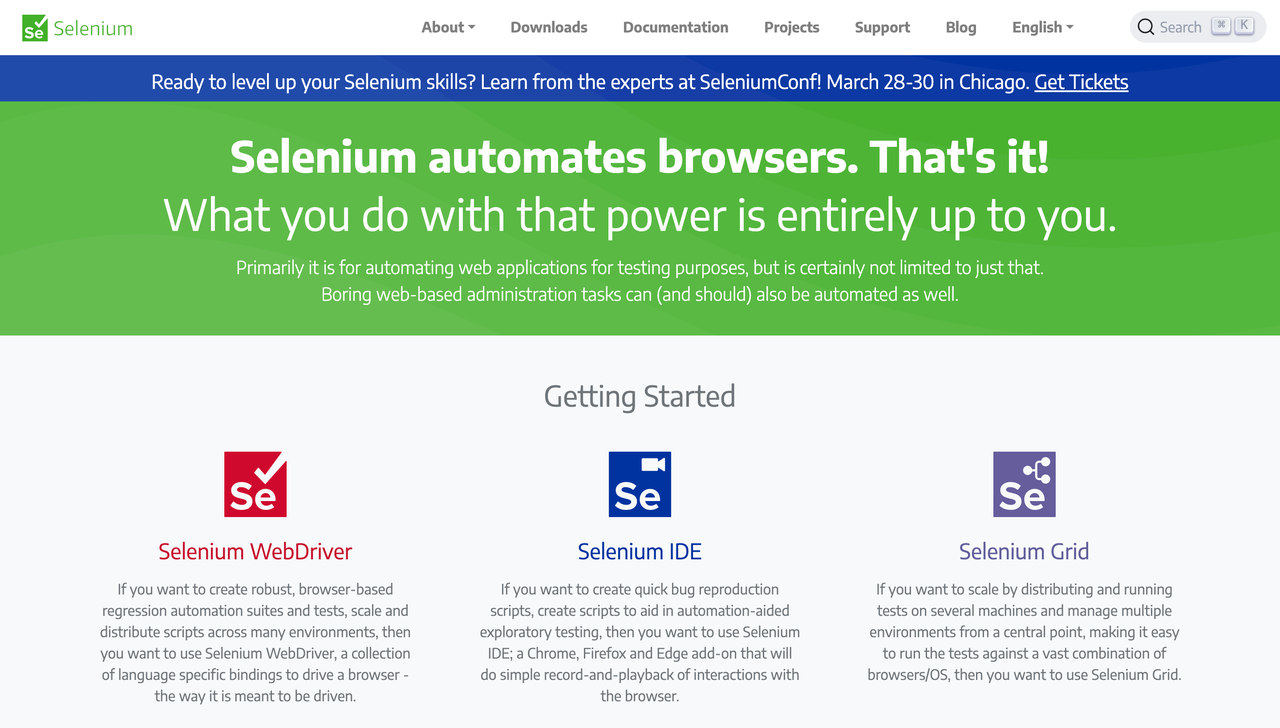
Selenium WebDriver
A tool that allows users to automate web browsers and interact with web applications. It provides a programming interface to control browser behavior and simulate user actions.
Selenium IDE
An integrated development environment for building Selenium tests. It allows users to record, edit, and replay tests using a simple, graphical user interface.
Selenium Grid
A tool that allows users to run Selenium tests on multiple machines in parallel. It enables distributed testing across different browsers, operating systems, and environments.
Selenium Server
A standalone server that allows remote control of the Selenium WebDriver. It provides a way to run Selenium tests in a headless environment or on a remote machine.
Selenium RC
In 2008 the whole Selenium team decided to merge WebDriver and Selenium RC to form a more powerful tool called Selenium 2, where WebDriver is the core. Currently, Selenium RC is still under development but remains in maintenance mode only. Most of the work on the Selenium project is now focused on Selenium 2.
Tutorial: How to Use Selenium
To perform Selenium testing, you can follow these steps:
Step 1. Choose a Programming Language
Selenium supports multiple programming languages, including Java, Python, C#, and Ruby. Choose a language that you are comfortable with and that fits your project requirements.
Step 2. Install and Configure Selenium WebDriver
WebDriver is a core component of Selenium that enables communication between your test scripts and the web browser. Install the WebDriver for the browser you want to test and configure it in your project environment.
Step 3. Write Test Scripts
Once you have set up the environment, you can start writing test scripts. Create test cases that cover the functionalities you want to test. Use WebDriver API methods to interact with web elements and perform actions.
Step 4. Execute Tests
After writing the test scripts, execute them to run the tests. You can run them locally or on a remote server using a test framework.
Step 5. Analyze Test Results
Once the tests are executed, analyze the test results to identify any issues or defects. You can use test reports, logs, and screenshots to help you troubleshoot any problems.
Step 6. Refactor and Repeat
After analyzing the test results, refactor your test cases as necessary and repeat the testing process until all issues are resolved.
By following these steps, you can create and execute Selenium tests to ensure that your web application is functioning as expected.
Alternative Automation Testing Tool
Selenium testing has its limitations and is not suitable for rapid API testing. Selenium testing is widely used for automating web browser interactions, but it is not designed specifically for API testing. It can be time-consuming and challenging to set up and maintain test cases, especially for complex APIs. Therefore, it may not be the most efficient way to test APIs quickly and accurately.
Selenium's browser-based architecture doesn't extend to native mobile apps, so teams adding iOS coverage typically reach forpurpose-built iOS automation tools that can drive the Simulator and physical devices directly.
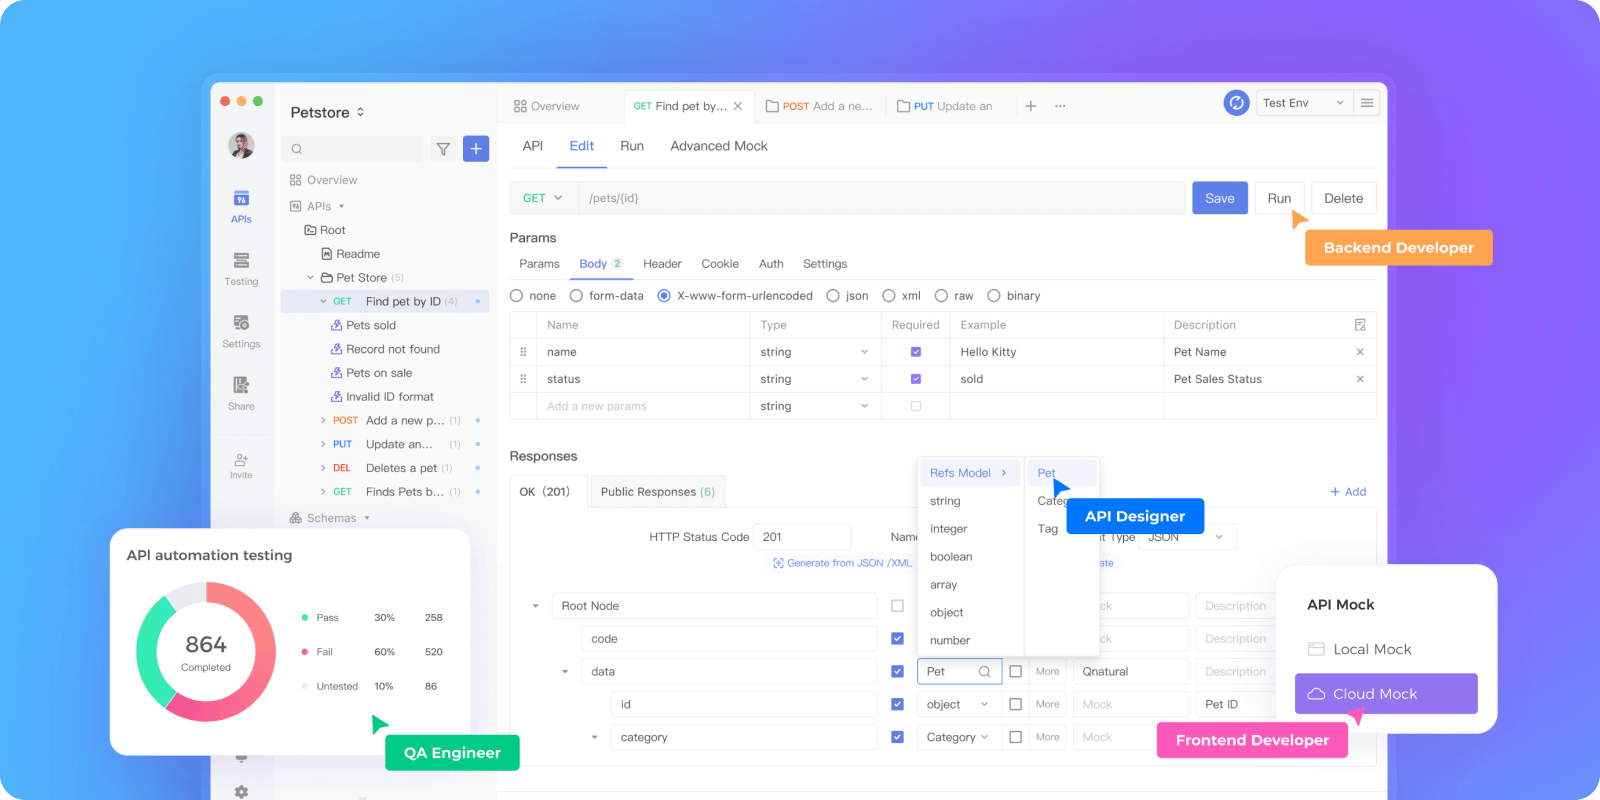
Automate Your API Testing
It is worth mentioning that Apidog is a dedicated tool for API testing that offers a user-friendly interface and powerful features to create, execute and manage test cases. It allows developers and testers to automate your API testing rapidly and thoroughly, enabling them to identify and fix issues early in the development process. The automated testing function of Apidog is very powerful, supporting interface testing, simulating concurrency and stress testing, testing reports, and multi-threaded testing.
Overall, if you want to streamline your API testing process and achieve better results, Apidog is the way to go.
How to Efficiently Complete Automated Testing
Step 1: You need to create a request and set the necessary parameters, such as the interface name, interface path, and interface request method.
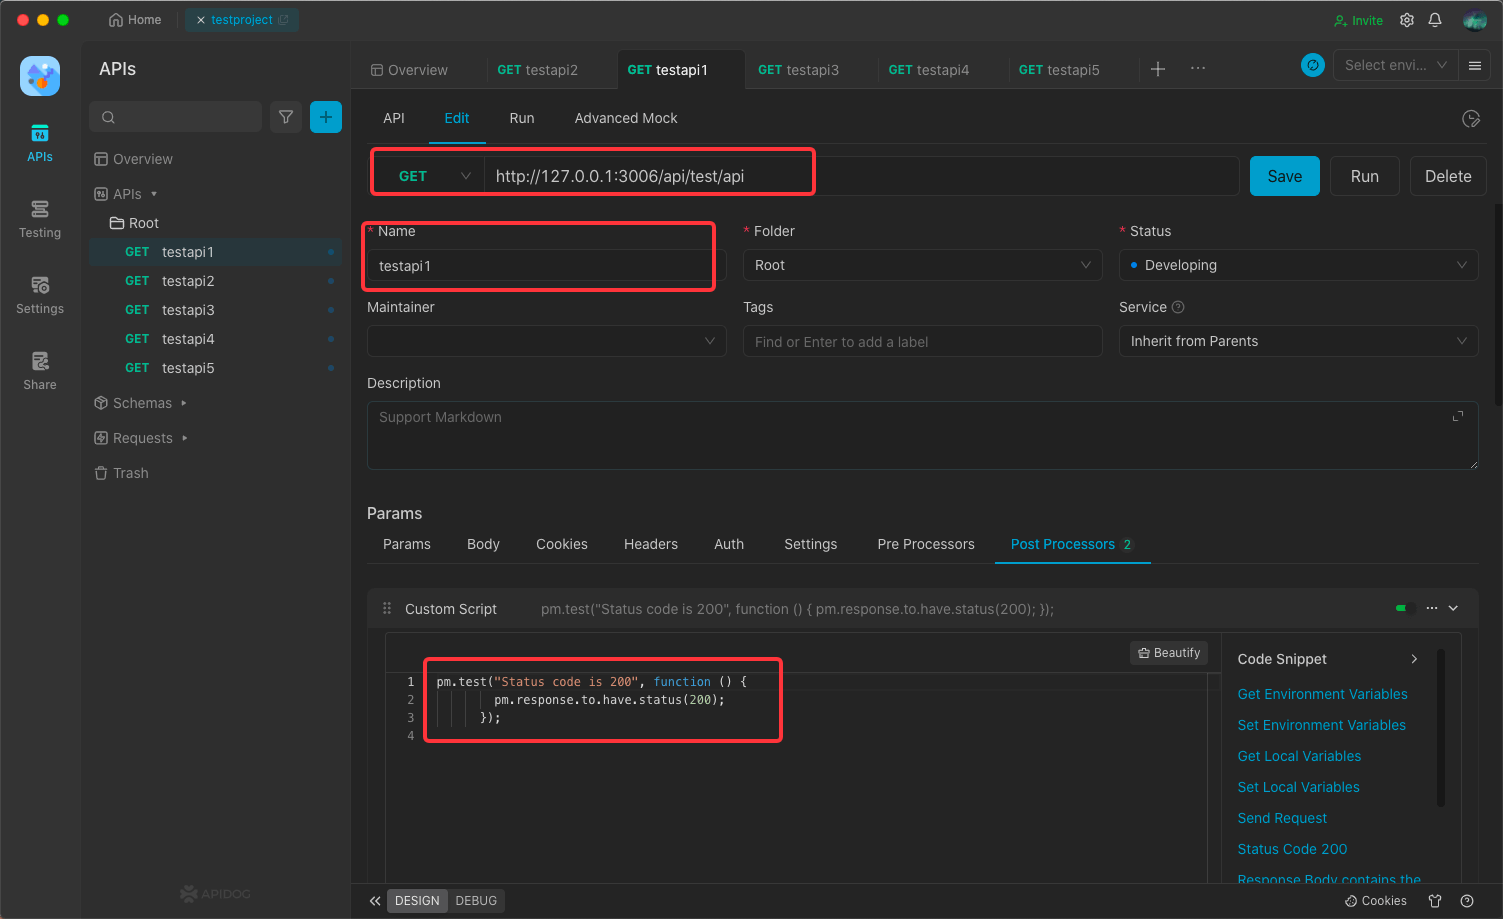
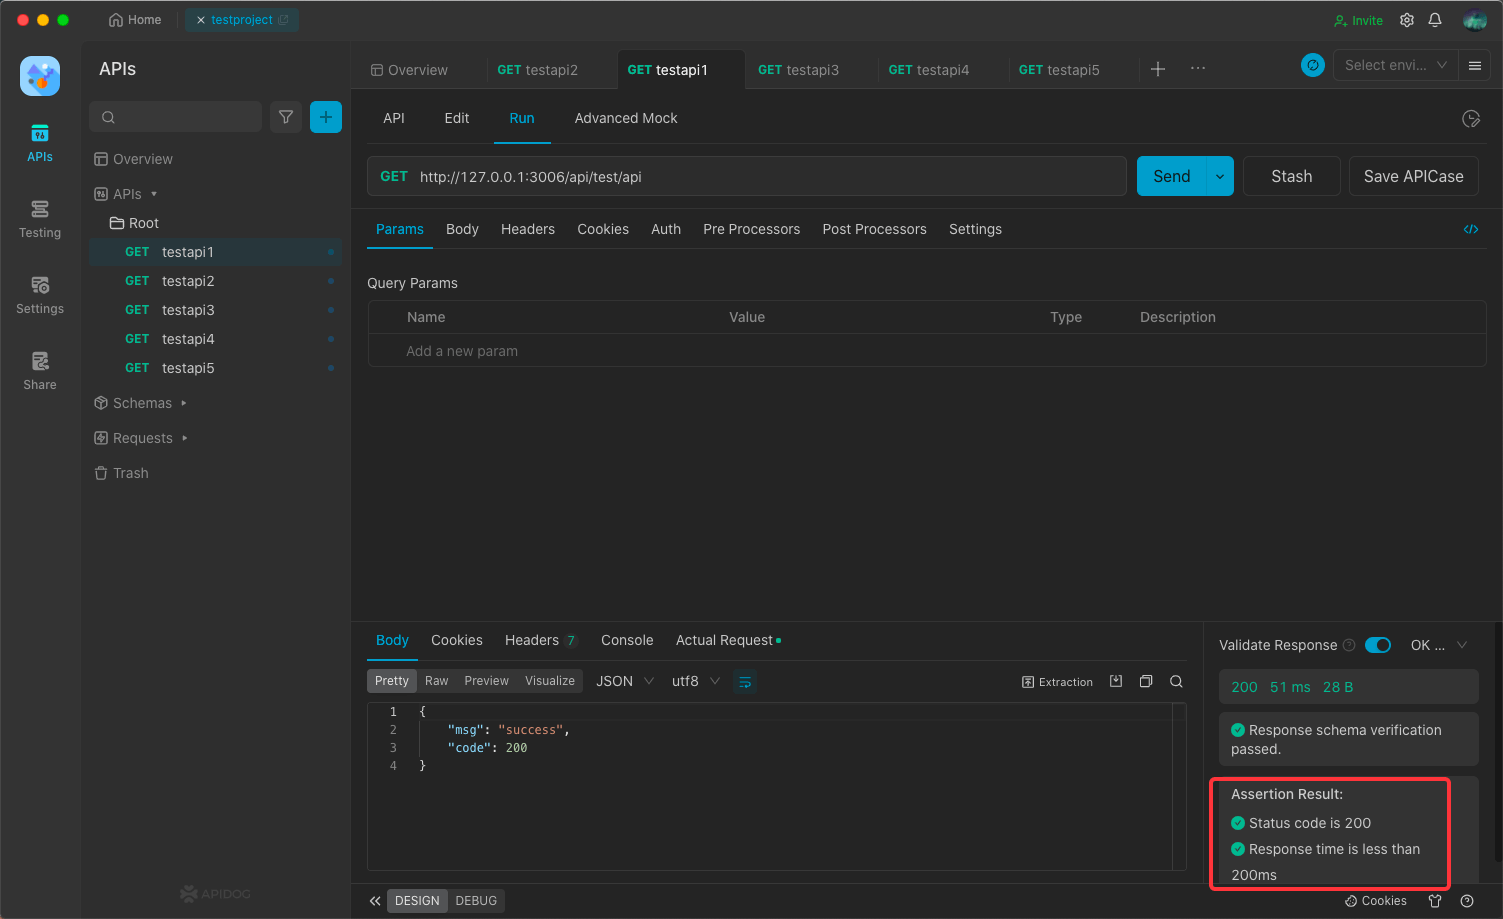
Step 2: Set the expected conditions for testing.
Then, set the testing conditions such as assertions and scripts. Here, testing is done in the form of a script to check the correctness of the data and to see if the returned data meets your expectations.
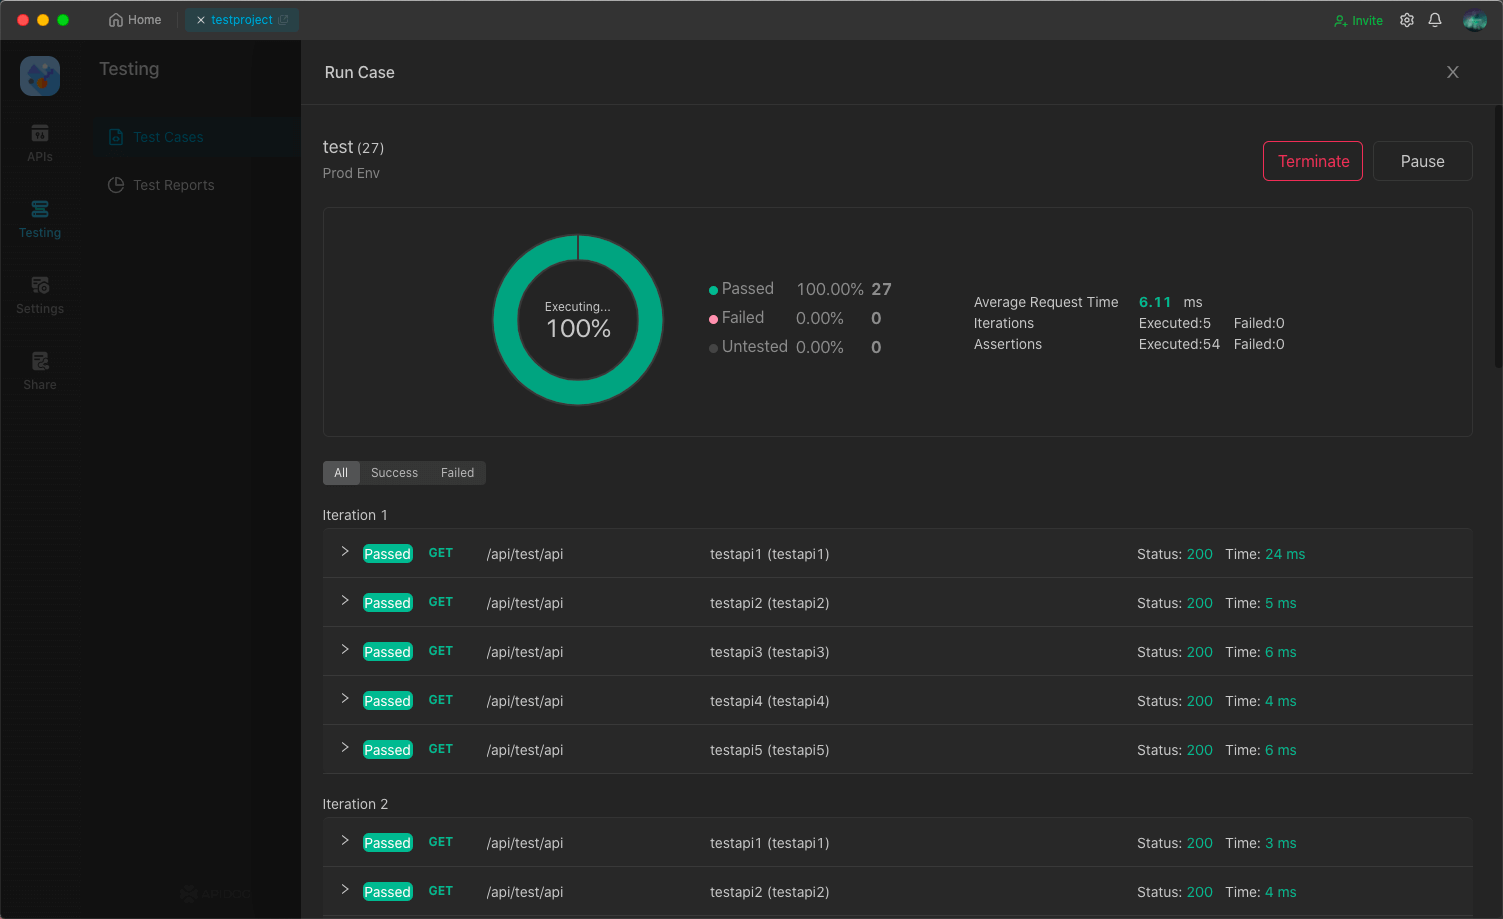
Automated Testing
Testing each individual interface one by one can be tedious and repetitive for many interfaces. Apidog provides a great solution with its automated testing feature. With just a few simple steps, you can complete the automation testing of a large number of interfaces.
Step 1: Import all your interfaces into the test case. Then, you can run the test case to test the interfaces in bulk.
Step 2: Here, you must fill in some running parameters such as loop count, delay count, environment, thread count, etc.
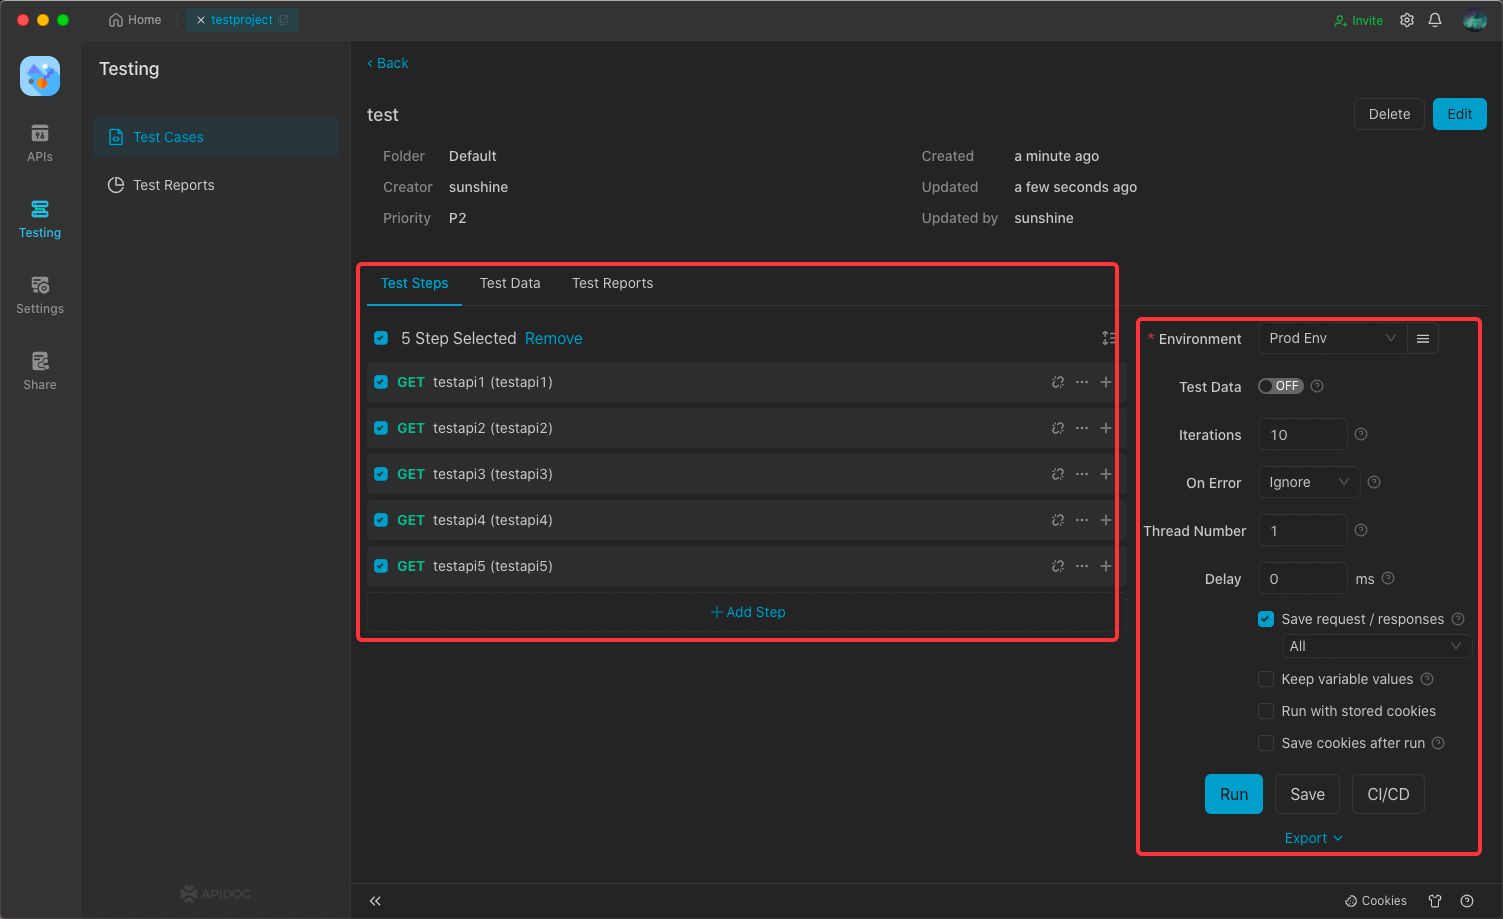
Step 3: After clicking on run, you can conduct batch interface testing and obtain:
- Overall testing results
- Testing results for each interface.