Welcome to our comprehensive guide on how to send GET request headers with PHP. Whether you're an API enthusiast or a developer looking to integrate API functionality into your PHP projects, understanding how to work with GET request headers is crucial. In this blog post, we'll walk you through the process, breaking it down into simple, actionable steps. So, let's dive in!
Introduction to APIs and PHP
Before we get into the nitty-gritty details of sending GET request headers with PHP, let's take a moment to understand the basics.
What is an API?
An API, or Application Programming Interface, allows different software applications to communicate with each other. APIs are everywhere, enabling various functionalities like fetching weather data, processing payments, and integrating social media features into websites and apps. They serve as a bridge between different systems, enabling them to work together seamlessly.
Why Use PHP for API Requests?
PHP, a popular server-side scripting language, is widely used for web development. Its simplicity and robust capabilities make it an excellent choice for interacting with APIs. Whether you're fetching data from a third-party service or sending information to another server, PHP provides the tools you need to get the job done.

Understanding GET Request Headers
What Are GET Request Headers?
When you make a GET request to an API, you're essentially asking the server to send you some data. Headers are a crucial part of this request as they provide additional context and information about the request, such as authentication credentials, content type, and more.
Why Are Headers Important?
Headers play a vital role in ensuring that your request is processed correctly. They can include information about the client (you), specify the type of data you're expecting, and even carry authentication tokens to verify your identity. Without the correct headers, your request might fail, or you might not receive the desired response.
Getting Started with PHP and GET Requests
Setting Up Your PHP Environment
Before we can send GET request headers with PHP, we need to ensure that our environment is set up correctly. If you haven't already, make sure you have PHP installed on your server or local machine. You can download PHP from the official PHP website.
Basic PHP GET Request
To make a basic GET request in PHP, you can use the file_get_contents function or the cURL library. While file_get_contents is simpler, cURL provides more flexibility and control, especially when working with headers.
Here's a simple example using file_get_contents:
<?php
$url = "https://api.example.com/data";
$response = file_get_contents($url);
echo $response;
?>
This code fetches data from the specified URL and prints it to the screen. However, this method doesn't allow you to send headers, which is where cURL comes in handy.
Sending GET Request Headers with cURL
Introduction to cURL
cURL is a powerful tool for making HTTP requests in PHP. It allows you to specify headers, handle cookies, manage sessions, and much more. Let's explore how to use cURL to send GET request headers.
Installing and Enabling cURL
Before you can use cURL, you need to ensure it's installed and enabled in your PHP environment. Most PHP installations come with cURL enabled by default, but you can verify this by checking your php.ini file.
Making a Basic GET Request with cURL
Let's start with a basic GET request using cURL:
<?php
$url = "https://api.example.com/data";
$ch = curl_init();

curl_setopt($ch, CURLOPT_URL, $url);
curl_setopt($ch, CURLOPT_RETURNTRANSFER, true);

$response = curl_exec($ch);
curl_close($ch);

echo $response;
?>
This script initializes a cURL session, sets the URL, and executes the request. The CURLOPT_RETURNTRANSFER option ensures that the response is returned as a string instead of being printed directly.
Adding Headers to Your GET Request
Now, let's add some headers to our GET request. Suppose the API requires an Authorization header and an Accept header.
Here's how you can do it:
<?php
$url = "https://api.example.com/data";
$headers = [
    "Authorization: Bearer YOUR_ACCESS_TOKEN",
    "Accept: application/json"
];

$ch = curl_init();

curl_setopt($ch, CURLOPT_URL, $url);
curl_setopt($ch, CURLOPT_RETURNTRANSFER, true);
curl_setopt($ch, CURLOPT_HTTPHEADER, $headers);

$response = curl_exec($ch);
curl_close($ch);

echo $response;
?>
In this example, we create an array of headers and pass it to the CURLOPT_HTTPHEADER option. This allows us to include the necessary headers in our GET request.
Handling API Responses
Parsing JSON Responses
Most APIs return data in JSON format. To work with this data in PHP, you can use the json_decode function.
Here's an example:
<?php
$response = '{
    "data": {
        "id": 1,
        "name": "John Doe"
    }
}';

$data = json_decode($response, true);

echo "ID: " . $data['data']['id'] . "\n";
echo "Name: " . $data['data']['name'] . "\n";
?>
This script decodes the JSON response into a PHP array and prints the values of the id and name fields.
Handling Errors
When making API requests, it's essential to handle potential errors gracefully. cURL provides several options for error handling.
Here's an example of how to handle errors in your cURL request:
<?php
$url = "https://api.example.com/data";
$headers = [
    "Authorization: Bearer YOUR_ACCESS_TOKEN",
    "Accept: application/json"
];

$ch = curl_init();

curl_setopt($ch, CURLOPT_URL, $url);
curl_setopt($ch, CURLOPT_RETURNTRANSFER, true);
curl_setopt($ch, CURLOPT_HTTPHEADER, $headers);

$response = curl_exec($ch);

if(curl_errno($ch)) {
    echo 'Error:' . curl_error($ch);
} else {
    $httpCode = curl_getinfo($ch, CURLINFO_HTTP_CODE);
    if ($httpCode == 200) {
        echo $response;
    } else {
        echo "HTTP Error: " . $httpCode;
    }
}

curl_close($ch);
?>
This script checks for cURL errors and HTTP status codes, allowing you to handle different scenarios appropriately.
Advanced cURL Features
Setting Timeouts
To prevent your script from hanging indefinitely, you can set timeouts for your cURL requests.
<?php
curl_setopt($ch, CURLOPT_TIMEOUT, 10);
curl_setopt($ch, CURLOPT_CONNECTTIMEOUT, 5);
?>
These options set the maximum execution time and connection timeout, respectively.
Handling Redirects
If the API endpoint redirects to another URL, you can tell cURL to follow the redirect:
<?php
curl_setopt($ch, CURLOPT_FOLLOWLOCATION, true);
?>
This option ensures that cURL follows any Location headers returned by the server.
Managing Cookies
If your API requires cookies for authentication or session management, you can handle them with cURL:
<?php
curl_setopt($ch, CURLOPT_COOKIEFILE, "cookie.txt");
curl_setopt($ch, CURLOPT_COOKIEJAR, "cookie.txt");
?>
These options specify the file to read and write cookies, respectively.
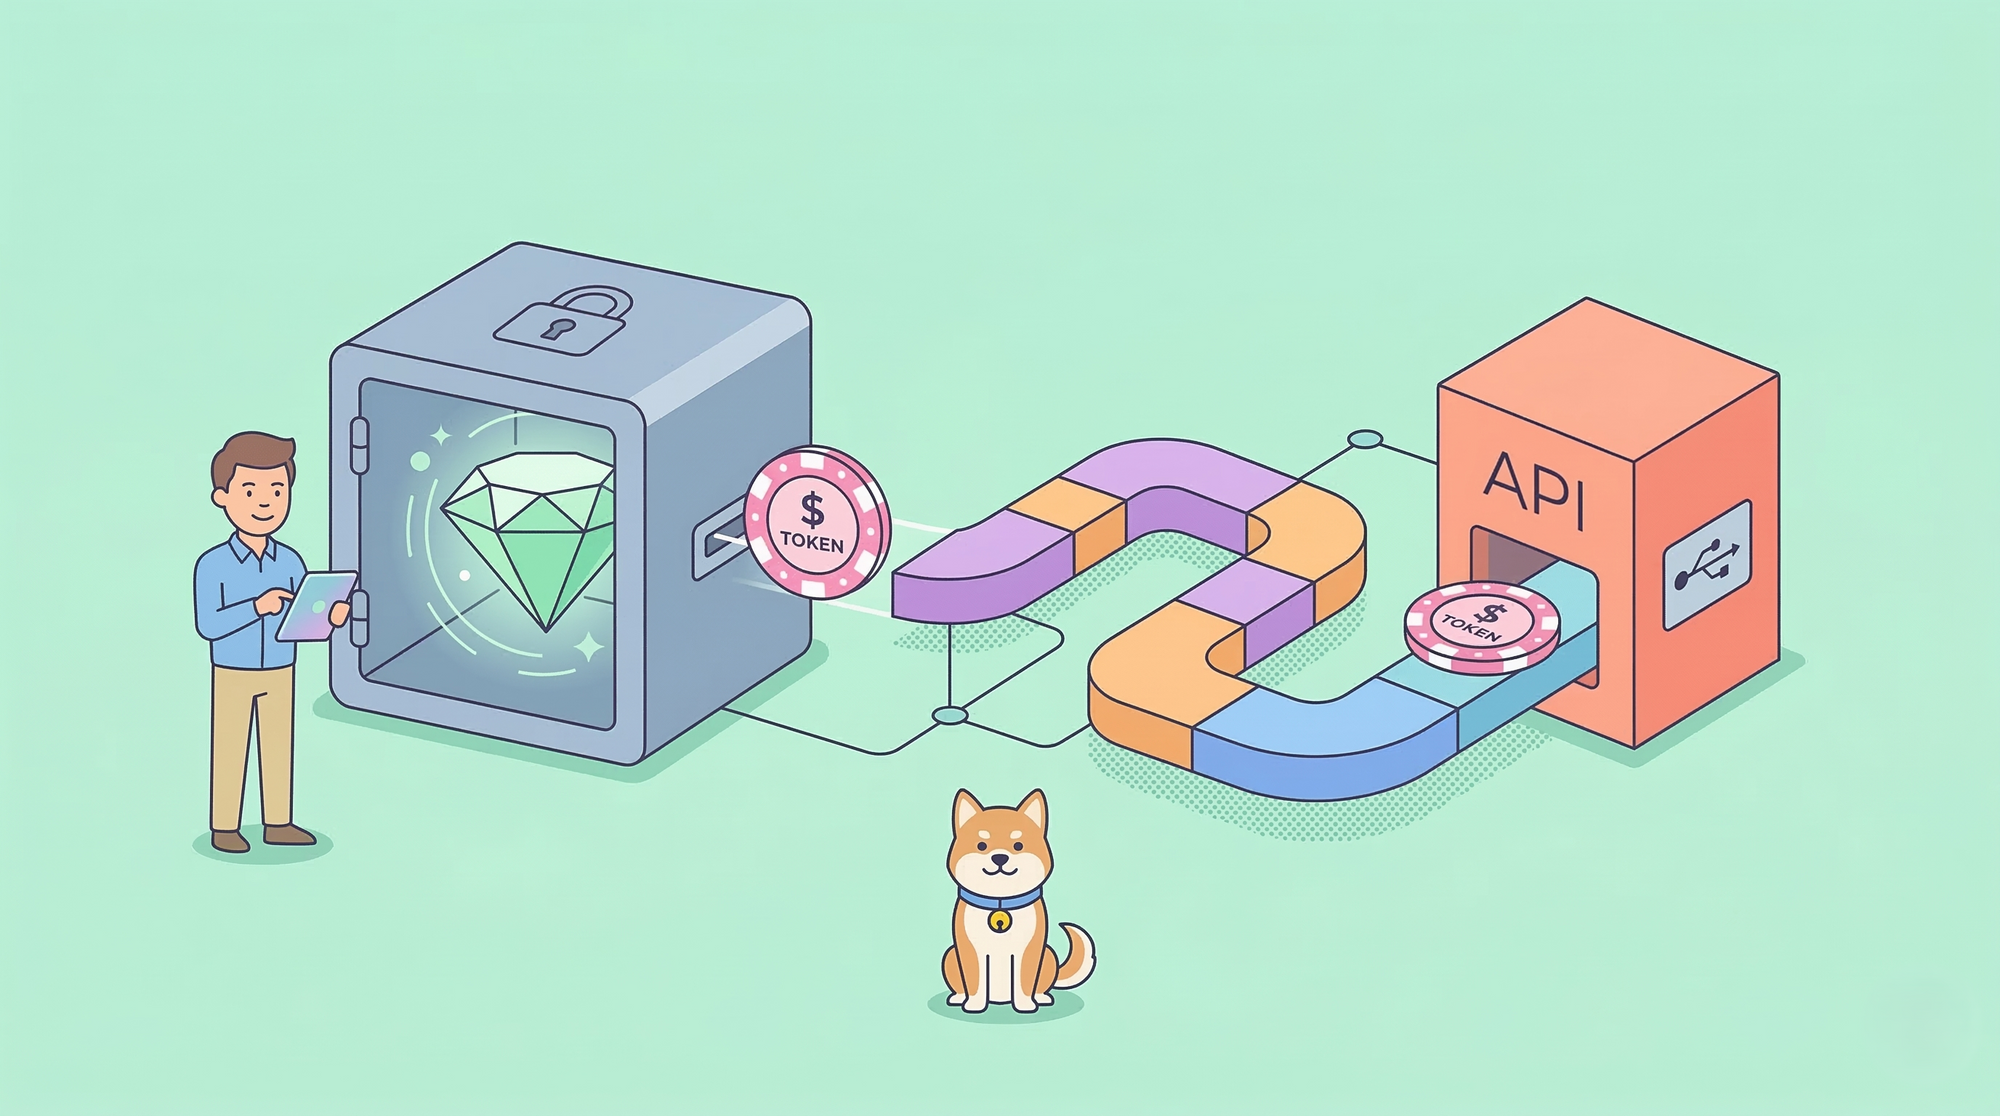
Using apidog for API Testing
What is apidog?
Apidog is a powerful tool for testing and debugging APIs. It allows you to send requests, inspect responses, and manage headers and parameters effortlessly. With apidog, you can simulate various scenarios and ensure your API interactions work as expected.
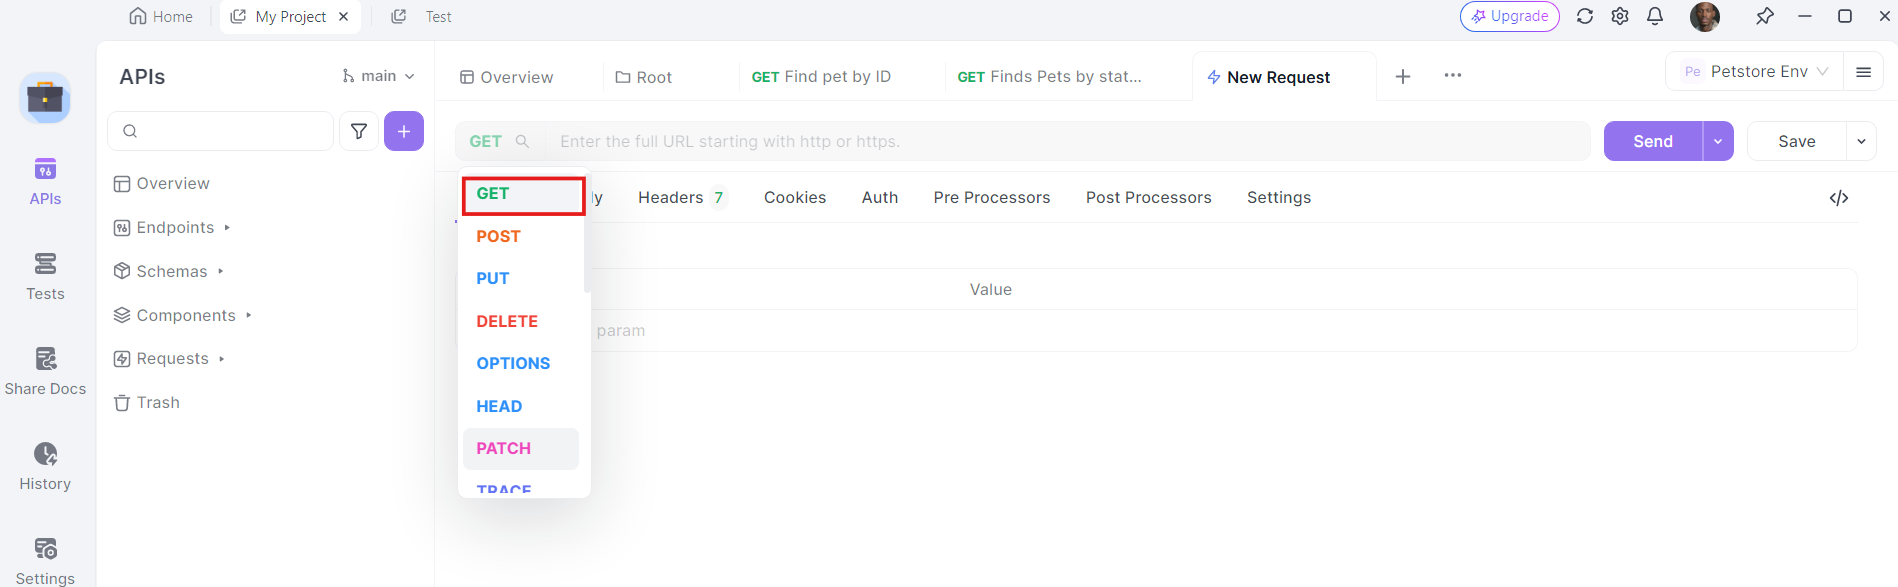
How to Use apidog to send HTTP get request headers
To send a get request with header using Apidog, follow these steps:
- Open Apidog: Launch Apidog and create a new request.
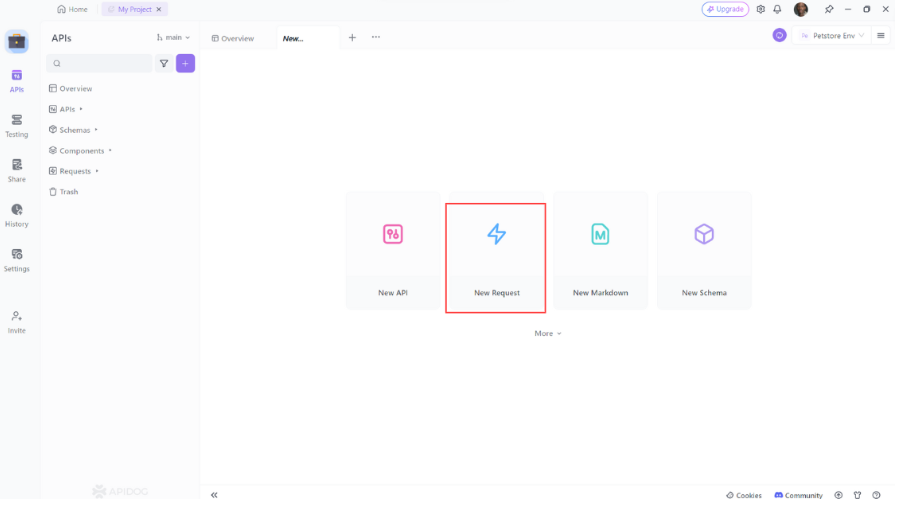
2. Select the HTTP Method: Choose "GET" as the request method since we are working with HTTP GET requests.
3. Enter the URL: In the URL field, enter the endpoint you want to send the GET request to.
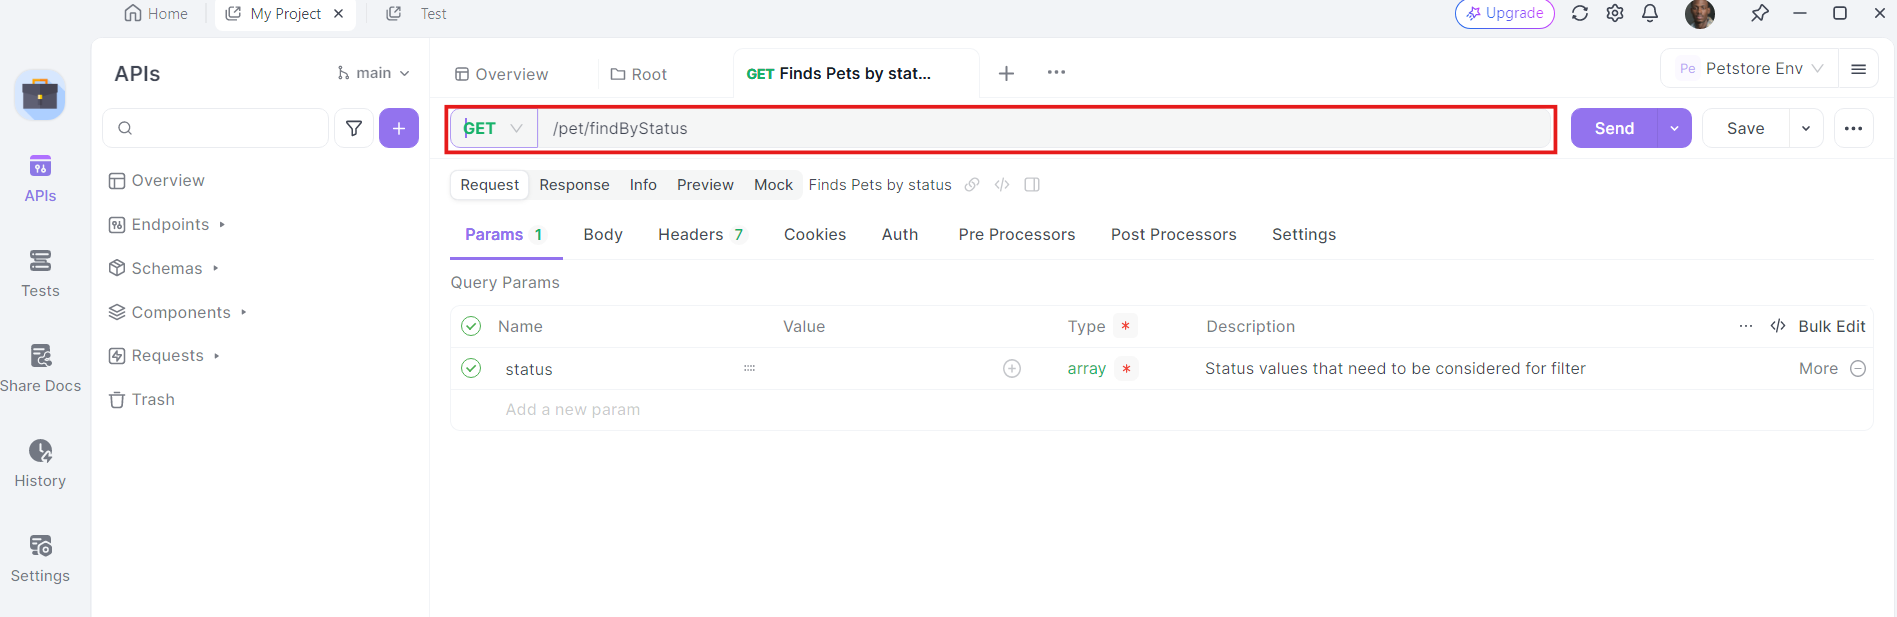
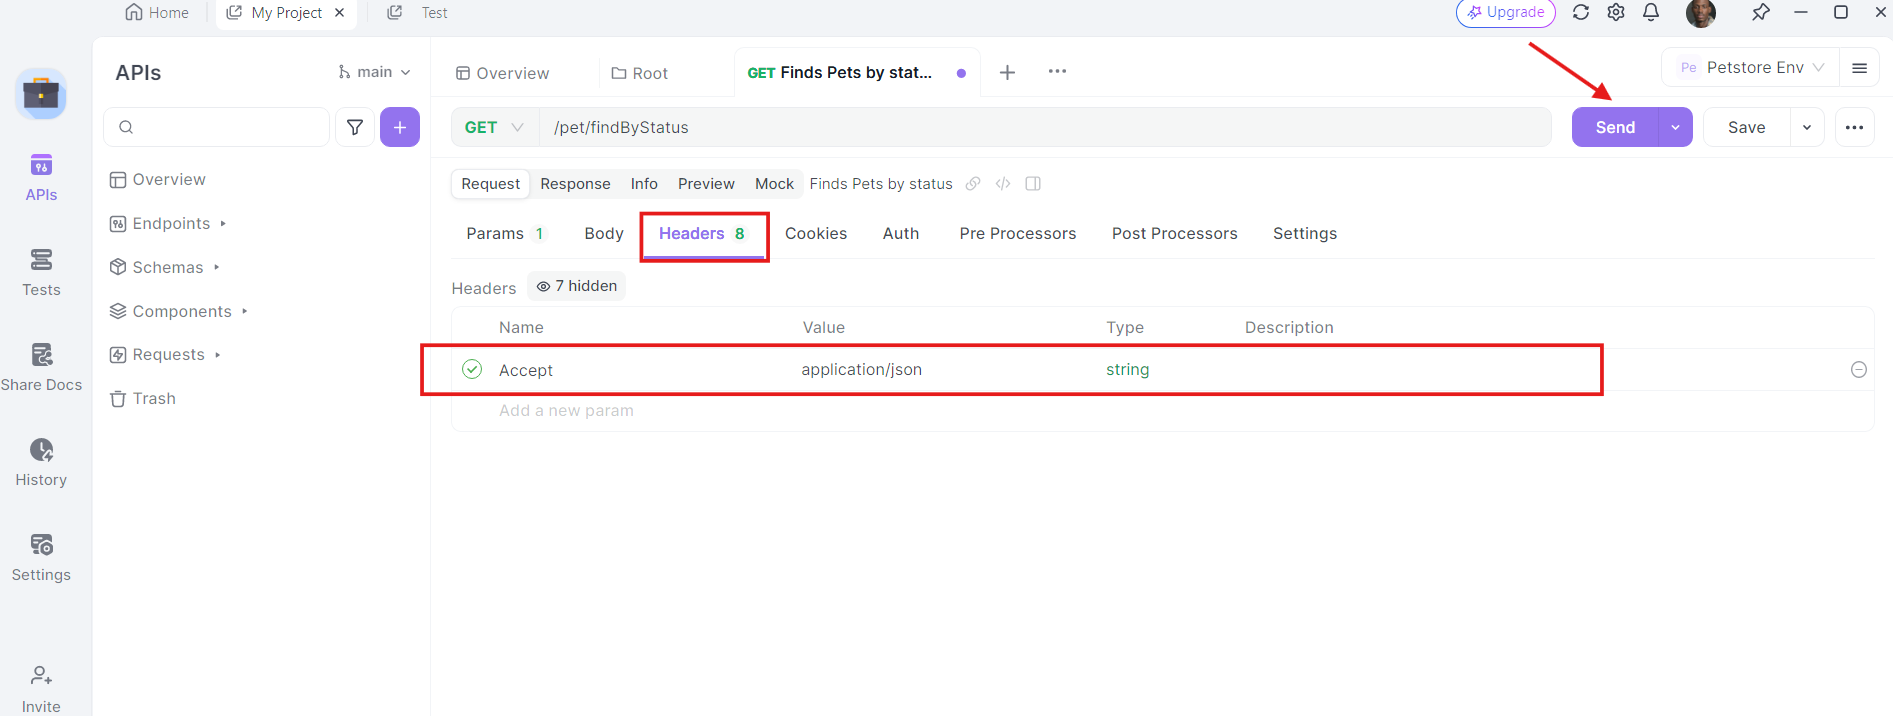
4. Add Headers: Now, it's time to add the necessary headers. Click on the "Headers" tab in apidog. Here, you can specify any headers required by the API. Common headers for GET requests might include Authorization, Accept, and User-Agent.
For example:
- Authorization:
Bearer YOUR_ACCESS_TOKEN - Accept:
application/json
5. Send the Request and Inspect the Response: With the URL, query parameters, and headers in place, you can now send the GET request. Click the "Send" button and apidog will execute the request. You'll see the response displayed in the response section.
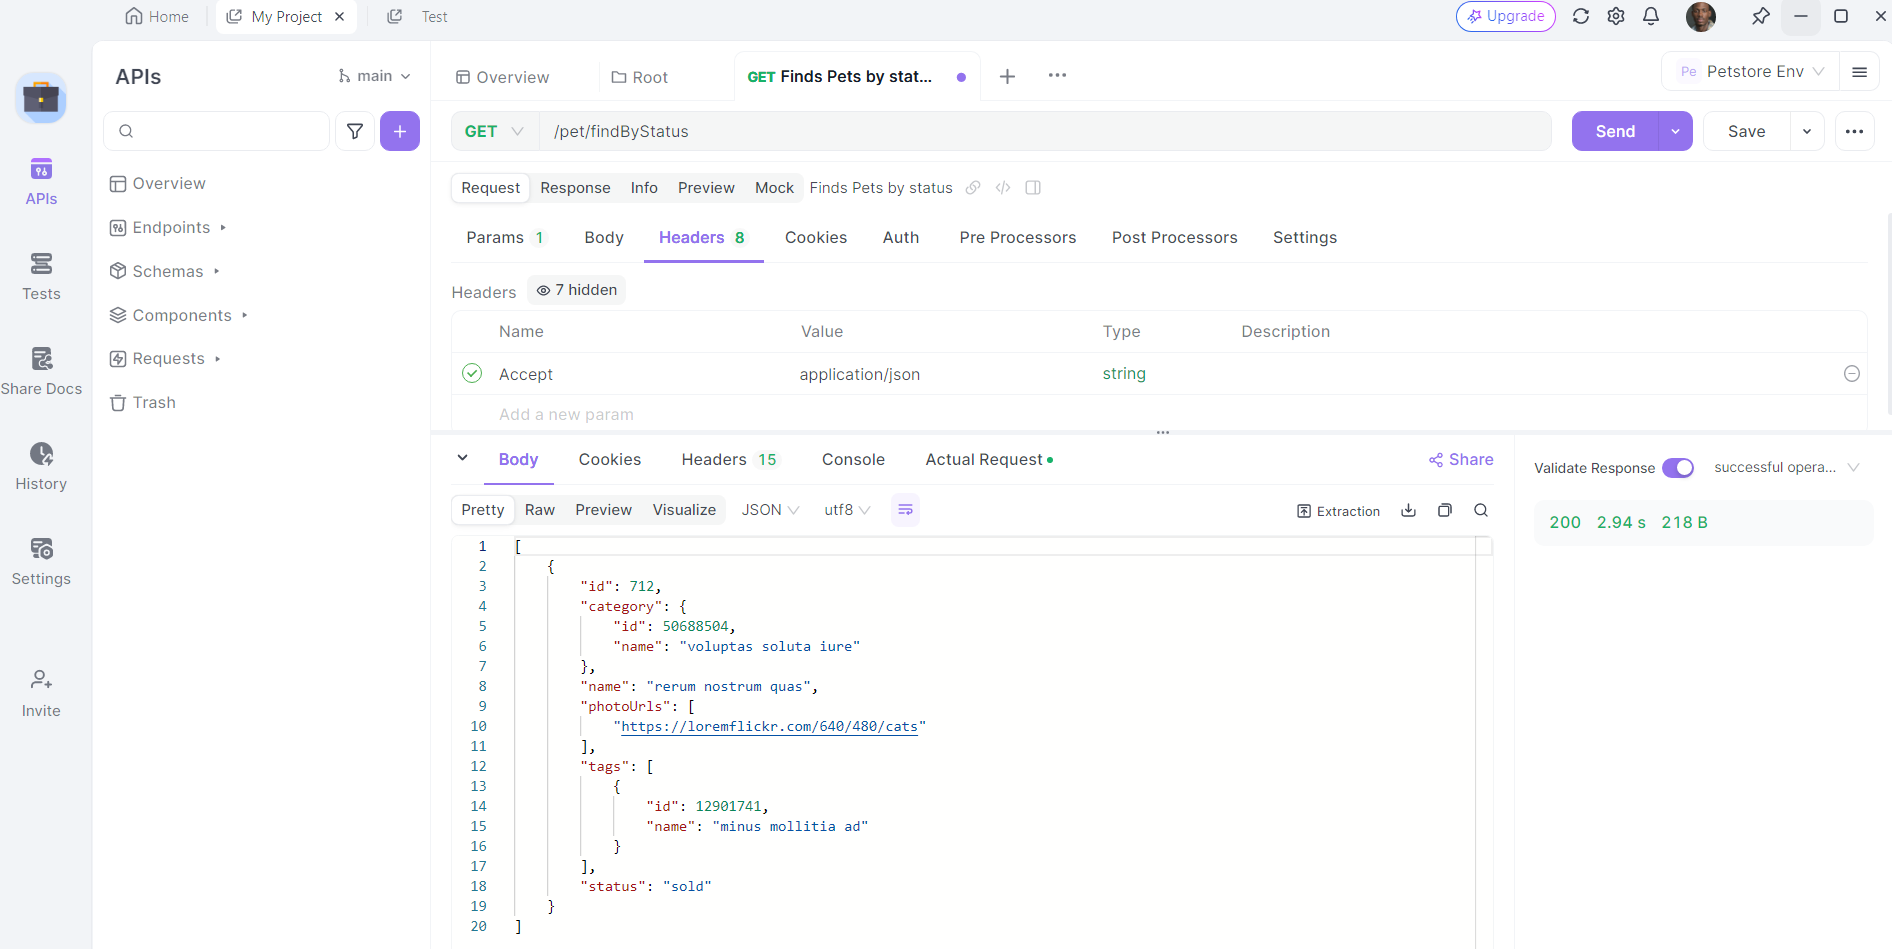
Once the request is sent, Apidog will display the response from the server. You can view the status code, headers, and body of the response. This is invaluable for debugging and verifying that your API calls are working as expected.
Real-World Examples
Example 1: Fetching Weather Data
Let's create a PHP script to fetch weather data from a public API. We'll use the OpenWeatherMap API for this example.
<?php
$apiKey = "YOUR_API_KEY";
$city = "London";
$url = "http://api.openweathermap.org/data/2.5/weather?q=$city&appid=$apiKey";
$headers = [
    "Accept: application/json"
];

$ch = curl_init();

curl_setopt($ch, CURLOPT_URL, $url);
curl_setopt($ch, CURLOPT_RETURNTRANSFER, true);
curl_setopt($ch, CURLOPT_HTTPHEADER, $headers);

$response = curl_exec($ch);

if(curl_errno($ch)) {
    echo 'Error:' . curl_error($ch);
} else {
    $httpCode = curl_getinfo($ch, CURLINFO_HTTP_CODE);
    if ($httpCode == 200) {
        $data = json_decode($response, true);
        echo "Weather in " . $city . ": " . $data['weather'][0]['description'];
    } else {
        echo "HTTP Error: " . $httpCode;
    }
}

curl_close($ch);
?>
Example 2: Sending Data to an API
Sometimes, you may need to send data to an API. Here's an example of sending a GET request with query parameters:
<?php


$url = "https://api.example.com/search";
$params = [
    "query" => "PHP",
    "limit" => 10
];
$queryString = http_build_query($params);
$url .= "?" . $queryString;

$headers = [
    "Authorization: Bearer YOUR_ACCESS_TOKEN",
    "Accept: application/json"
];

$ch = curl_init();

curl_setopt($ch, CURLOPT_URL, $url);
curl_setopt($ch, CURLOPT_RETURNTRANSFER, true);
curl_setopt($ch, CURLOPT_HTTPHEADER, $headers);

$response = curl_exec($ch);

if(curl_errno($ch)) {
    echo 'Error:' . curl_error($ch);
} else {
    $httpCode = curl_getinfo($ch, CURLINFO_HTTP_CODE);
    if ($httpCode == 200) {
        echo $response;
    } else {
        echo "HTTP Error: " . $httpCode;
    }
}

curl_close($ch);
?>
Conclusion
Sending GET request headers with PHP is a powerful skill that enhances your ability to interact with APIs effectively. Whether you're fetching data from an external service or sending information to another system, understanding how to use cURL and handle headers is essential.
In this guide, we've covered the basics of APIs, introduced cURL, and provided practical examples to get you started. We also explored advanced cURL features and how to use Apidog for testing and debugging.
By mastering these techniques, you'll be well-equipped to integrate API functionality into your PHP projects and create robust, dynamic applications.