
As an API development tool, Postman simplifies and streamlines API development workflows. One of its most widely used features, OAuth 2.0, provides a standardized way for users to securely access APIs. In this blog post, we’ll take a closer look at how to use Postman OAuth 2.0 to get a token and an example involving Business Central OAuth2.
What is OAuth 2.0?
OAuth 2.0 is an industry-standard protocol for authorization that allows an application to access resources from a web service on behalf of a user. It provides a way for users to grant limited access to their protected resources without sharing their credentials.
Instead of using the resource owner's credentials directly, the client application receives an access token that grants specific permissions to access resources. This token allows the application to access specific accounts and perform approved actions without the user having to share their account password.
Postman OAuth 2.0 Overview
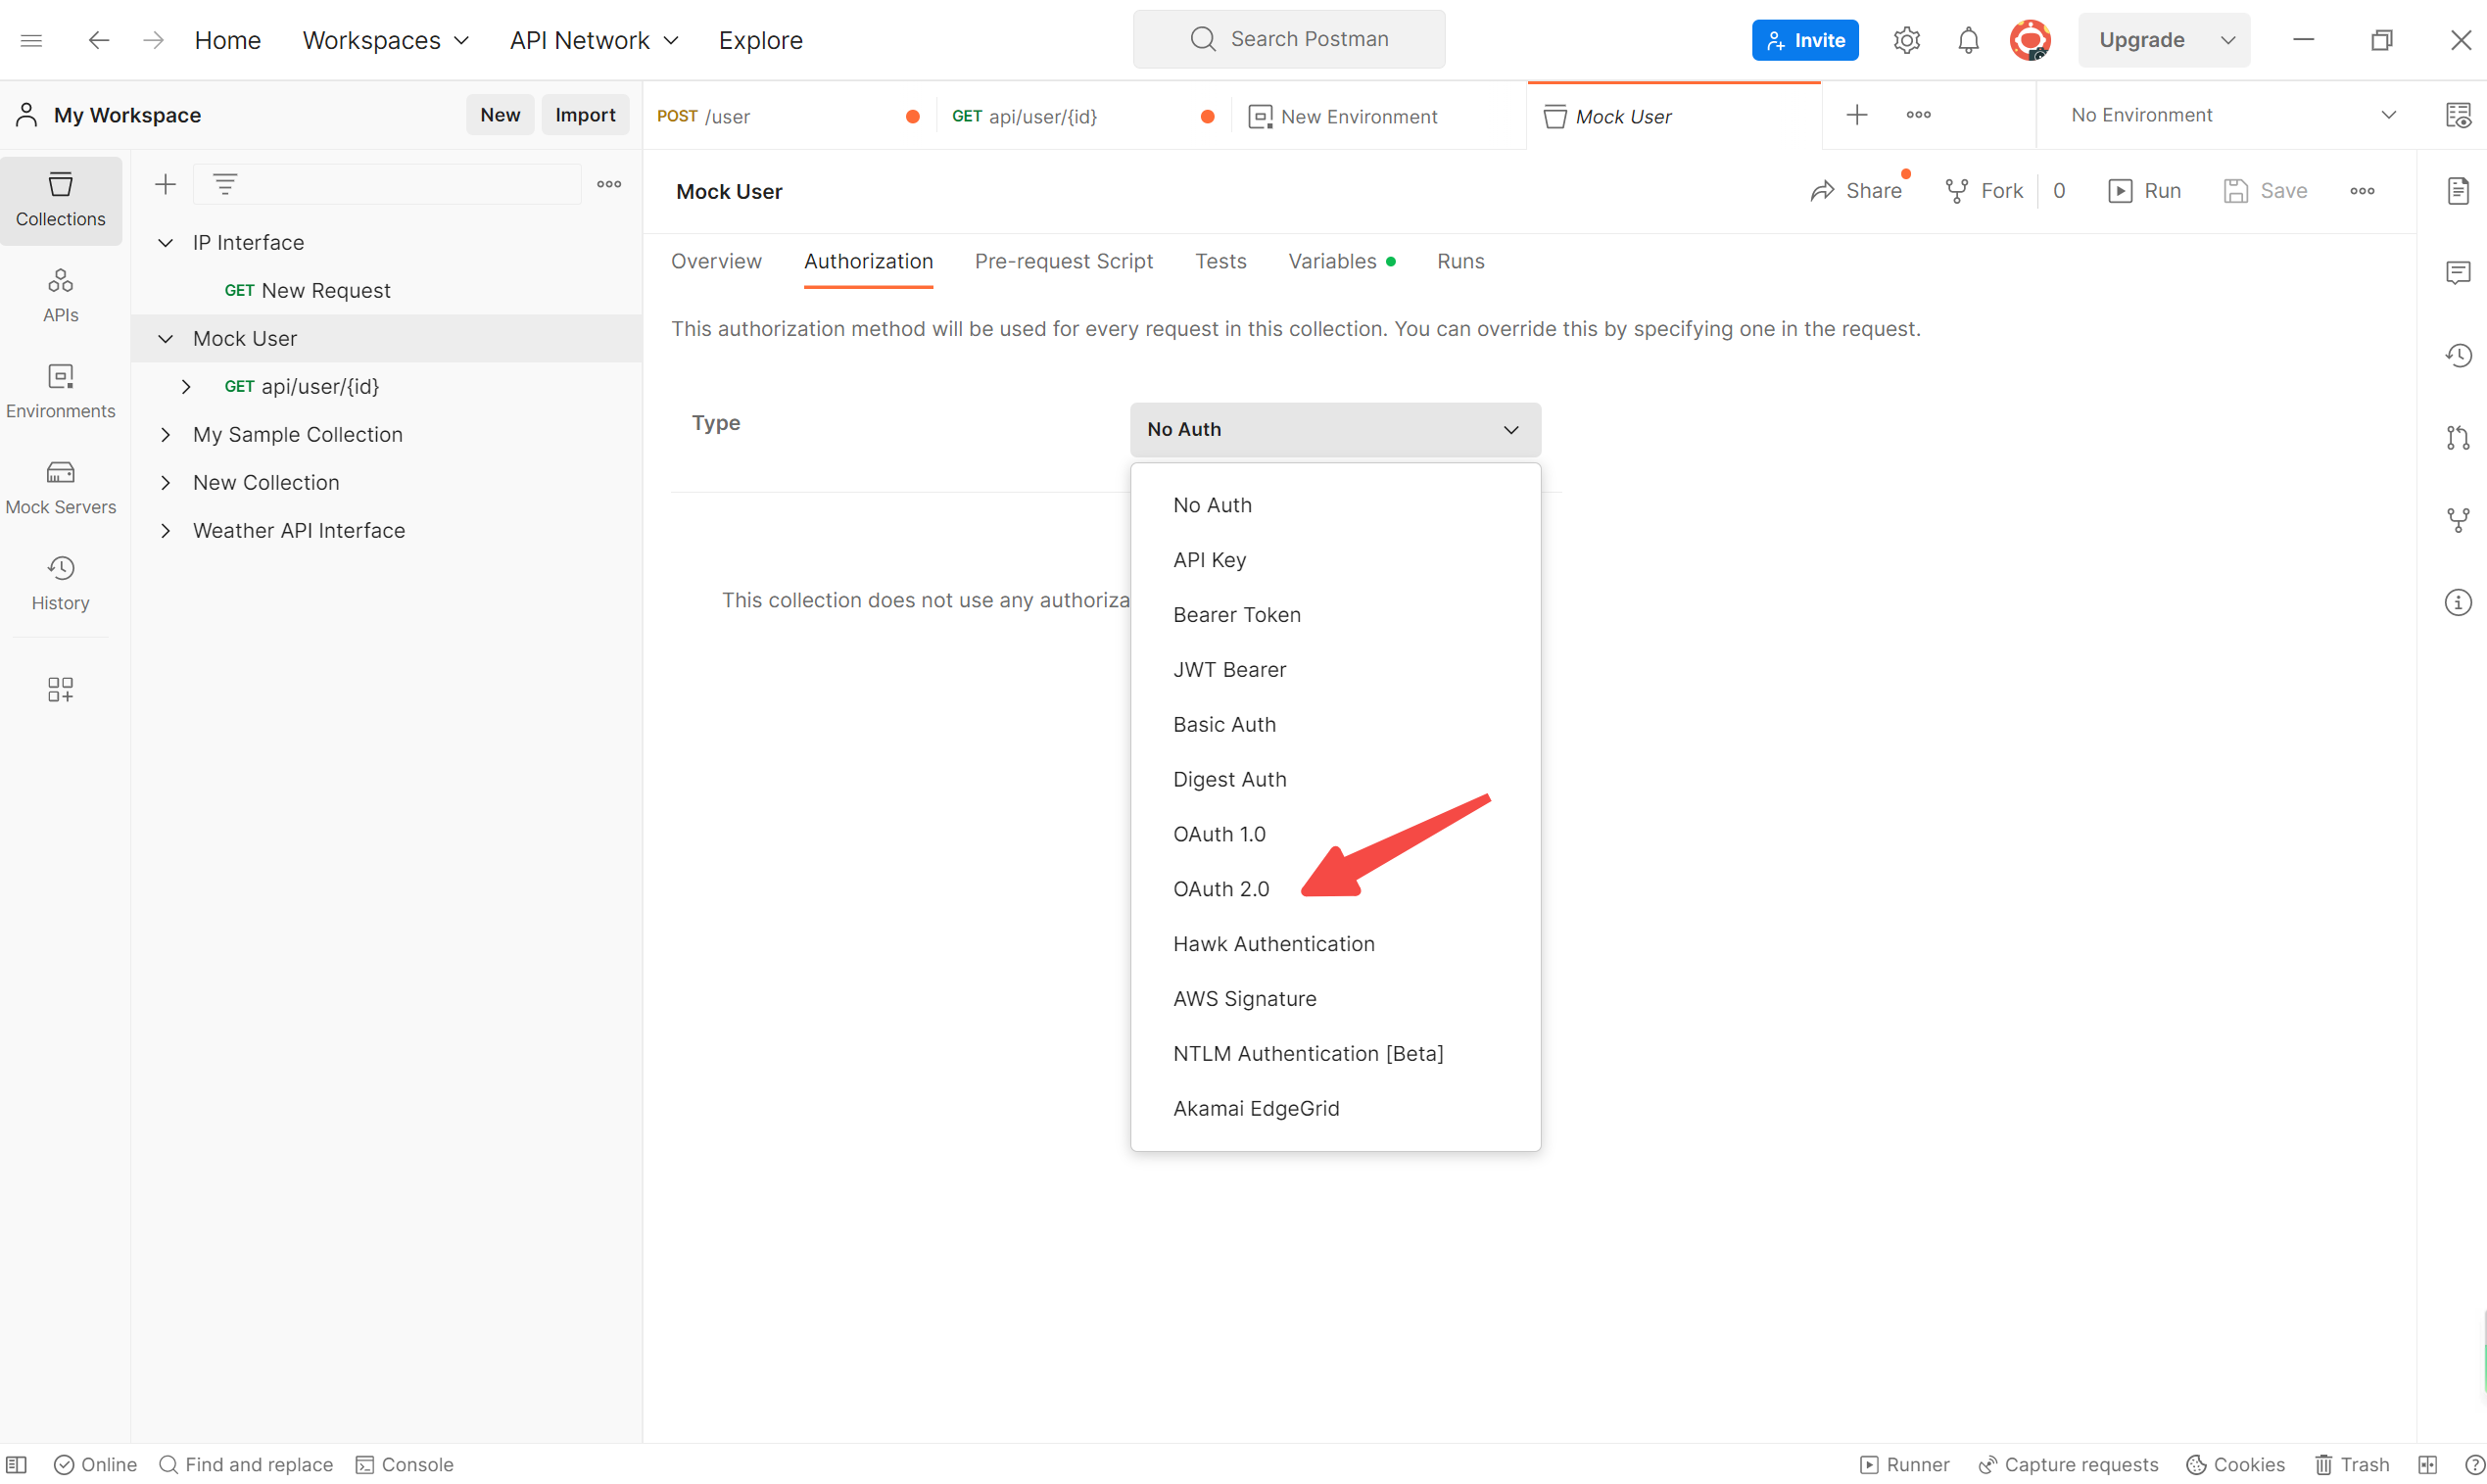
To get started with OAuth 2.0 in Postman, you need to first configure the authorization settings for your API request. This can be done by selecting the "OAuth 2.0" option from the authorization type dropdown menu and filling in the required details, such as the authorization URL and access token URL.
Once the authorization settings have been configured, you can use Postman to obtain an OAuth 2.0 access token. This can be done by sending a POST request to the access token URL with the required parameters, such as the client ID and client secret.
An example of using OAuth 2.0 client credentials in Postman can be found in the Business Central API documentation. This example shows how to obtain an access token using the client ID and client secret provided by Business Central.
How to Set up and Test OAuth2 in Postman?
To configure OAuth 2.0 authentication in Postman, follow these steps:
- Open Postman and create a new request.
- Click on the "Authorization" tab.
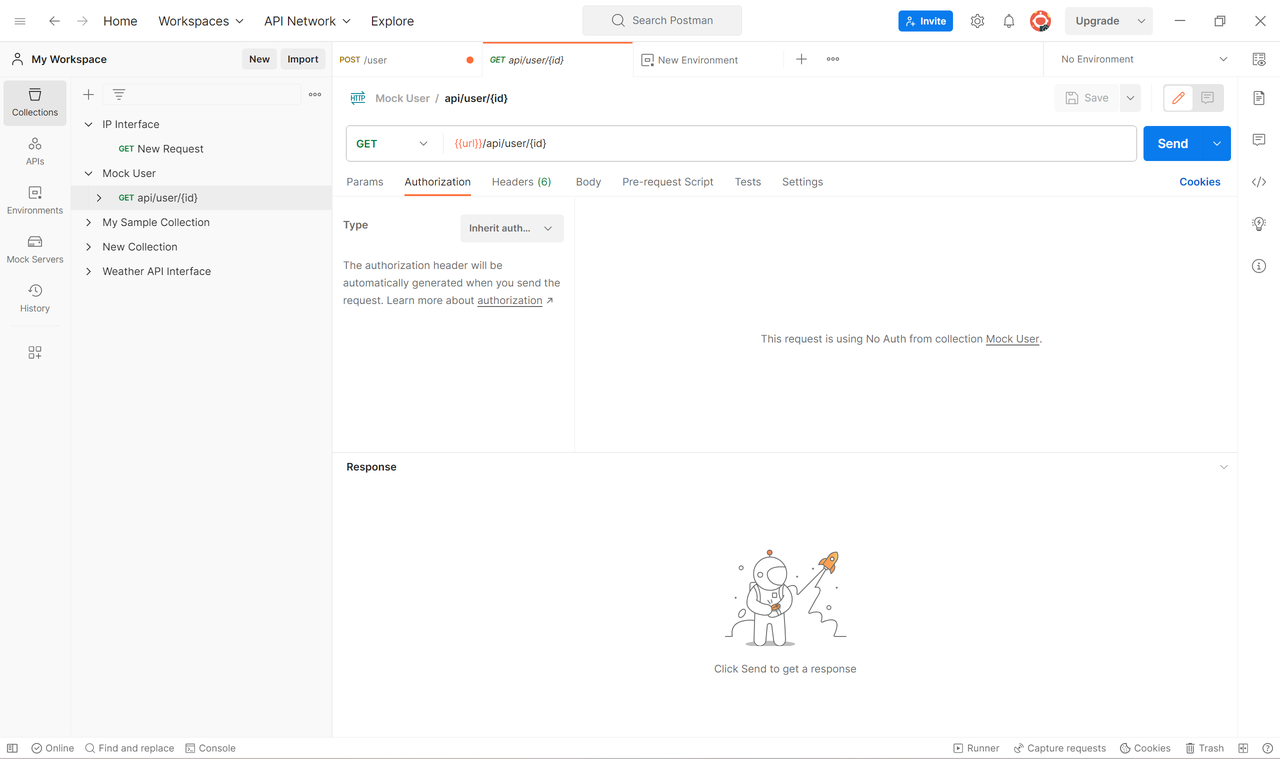
3. Select "OAuth 2.0" as the type of authorization.
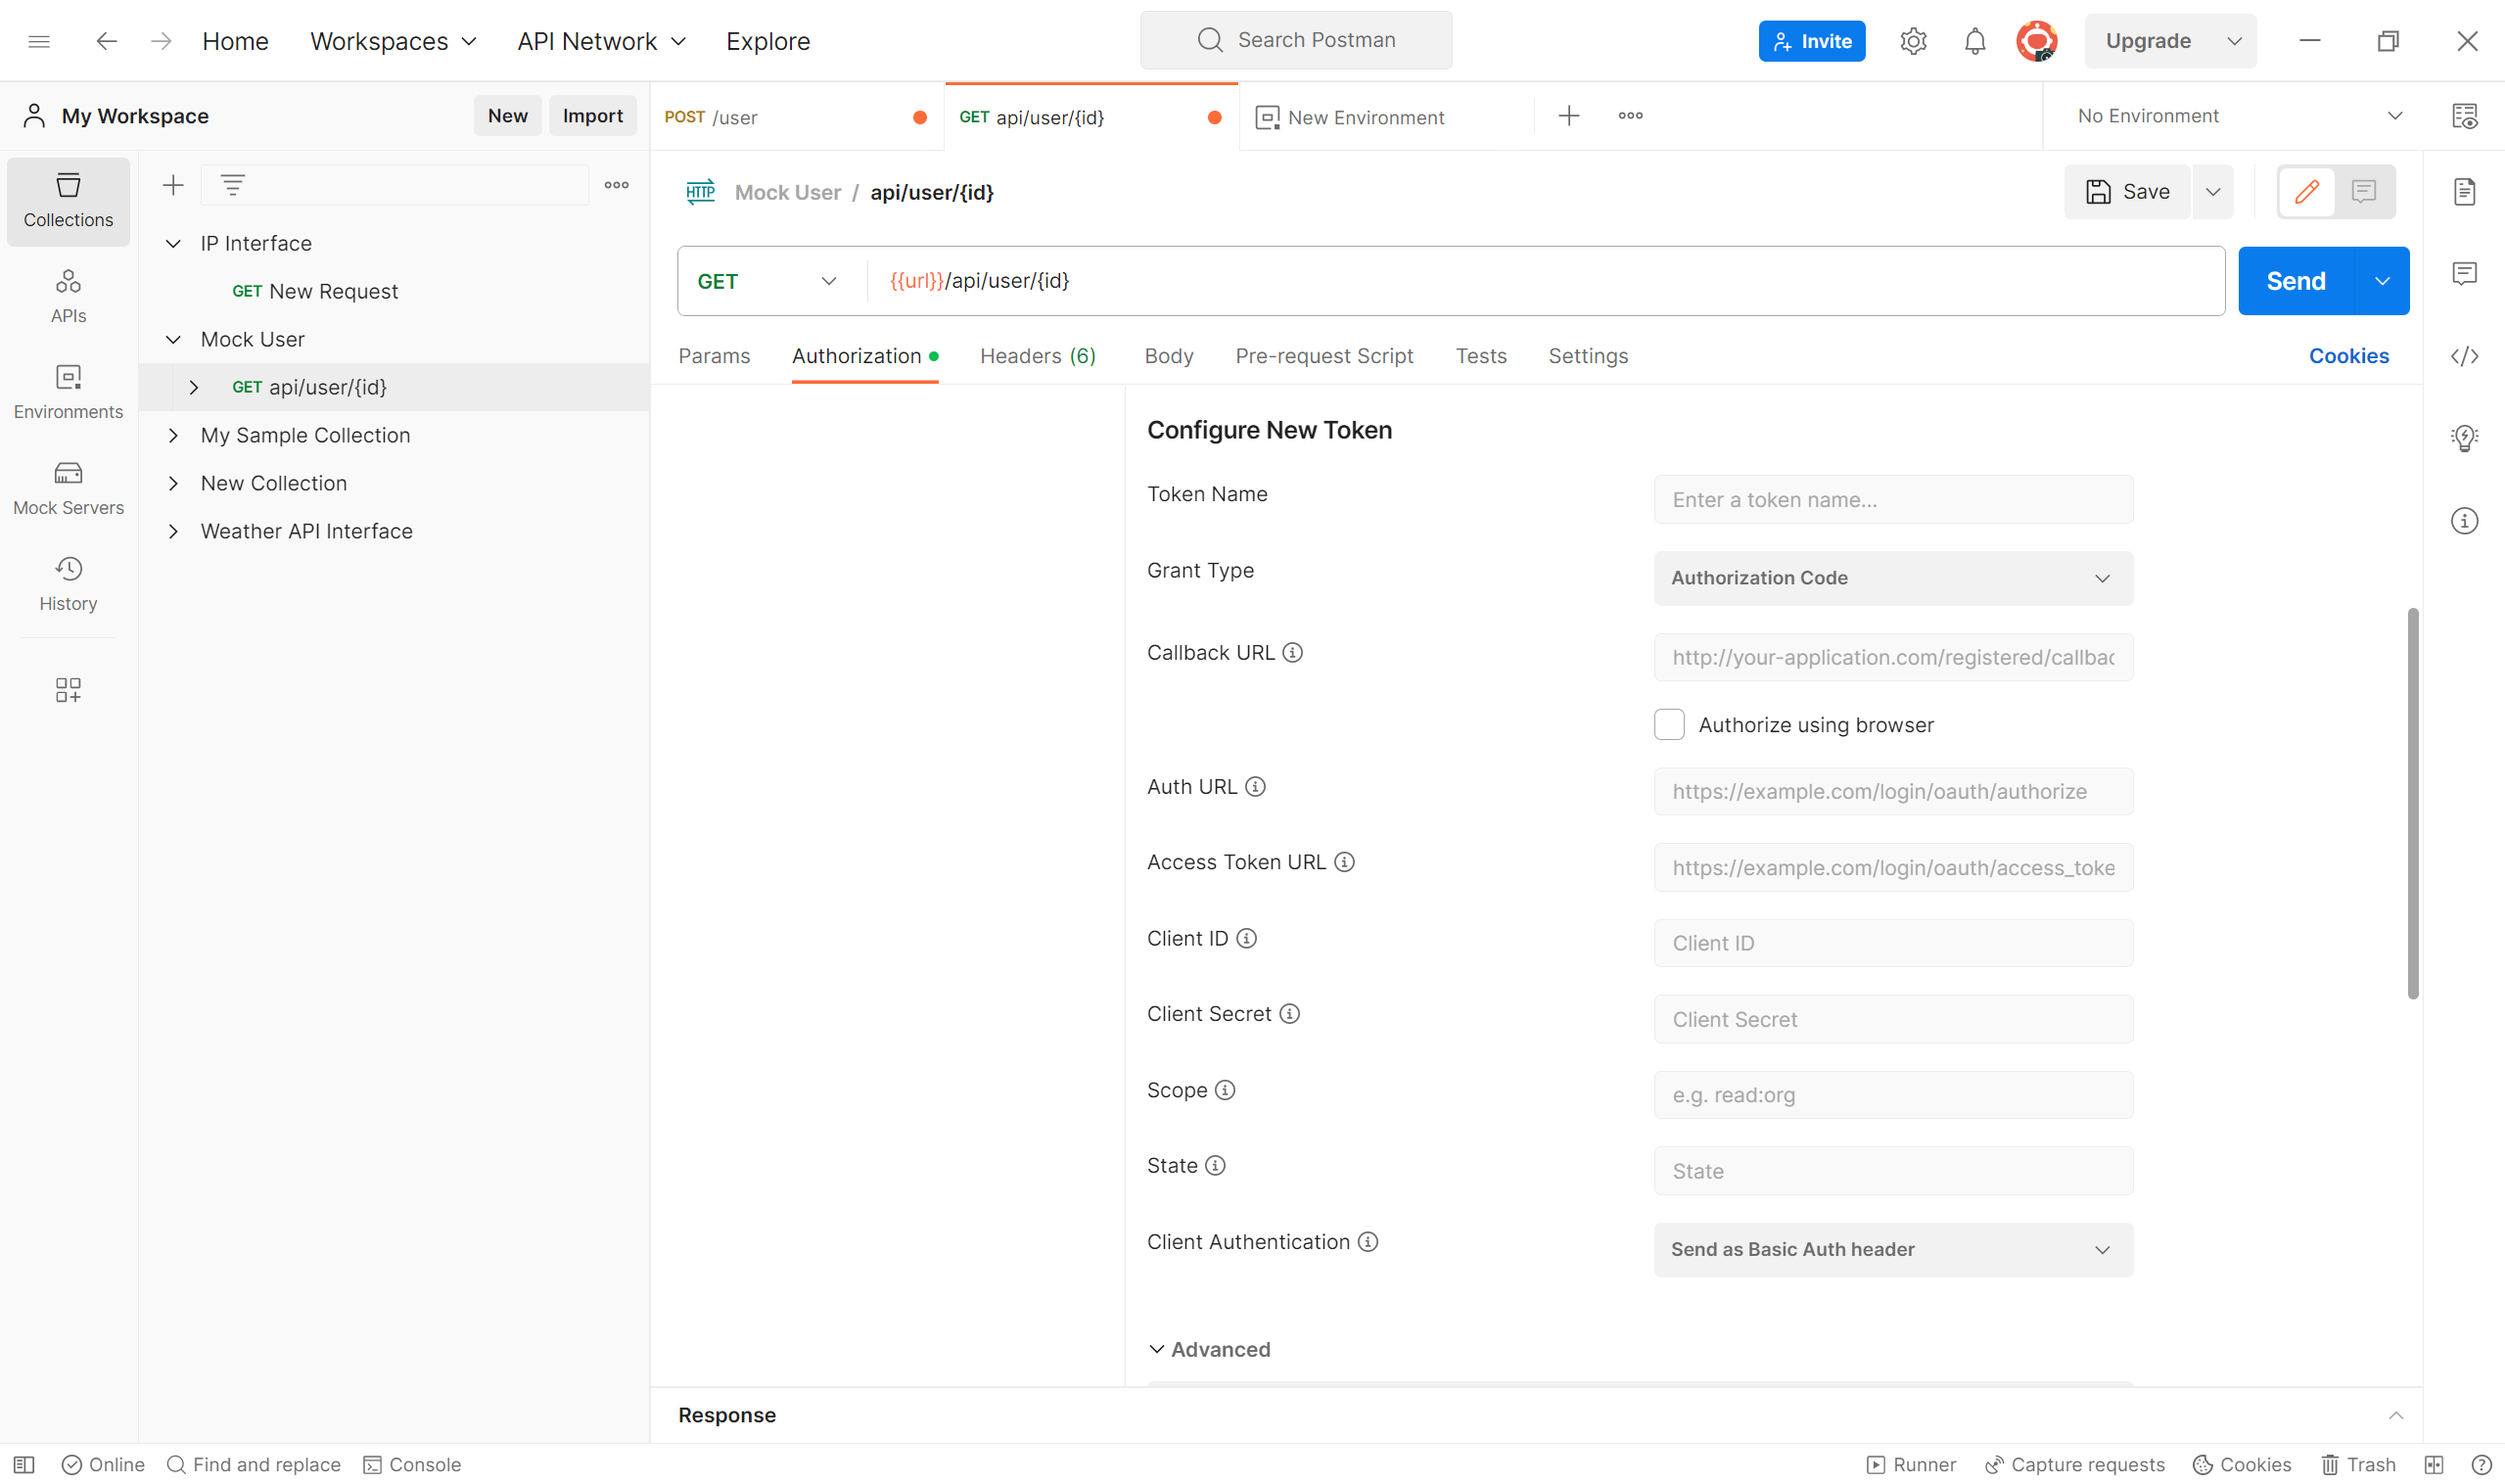
4. Click on the "Configure New Token" button.
5. Click on the "Get New Access Token" button.
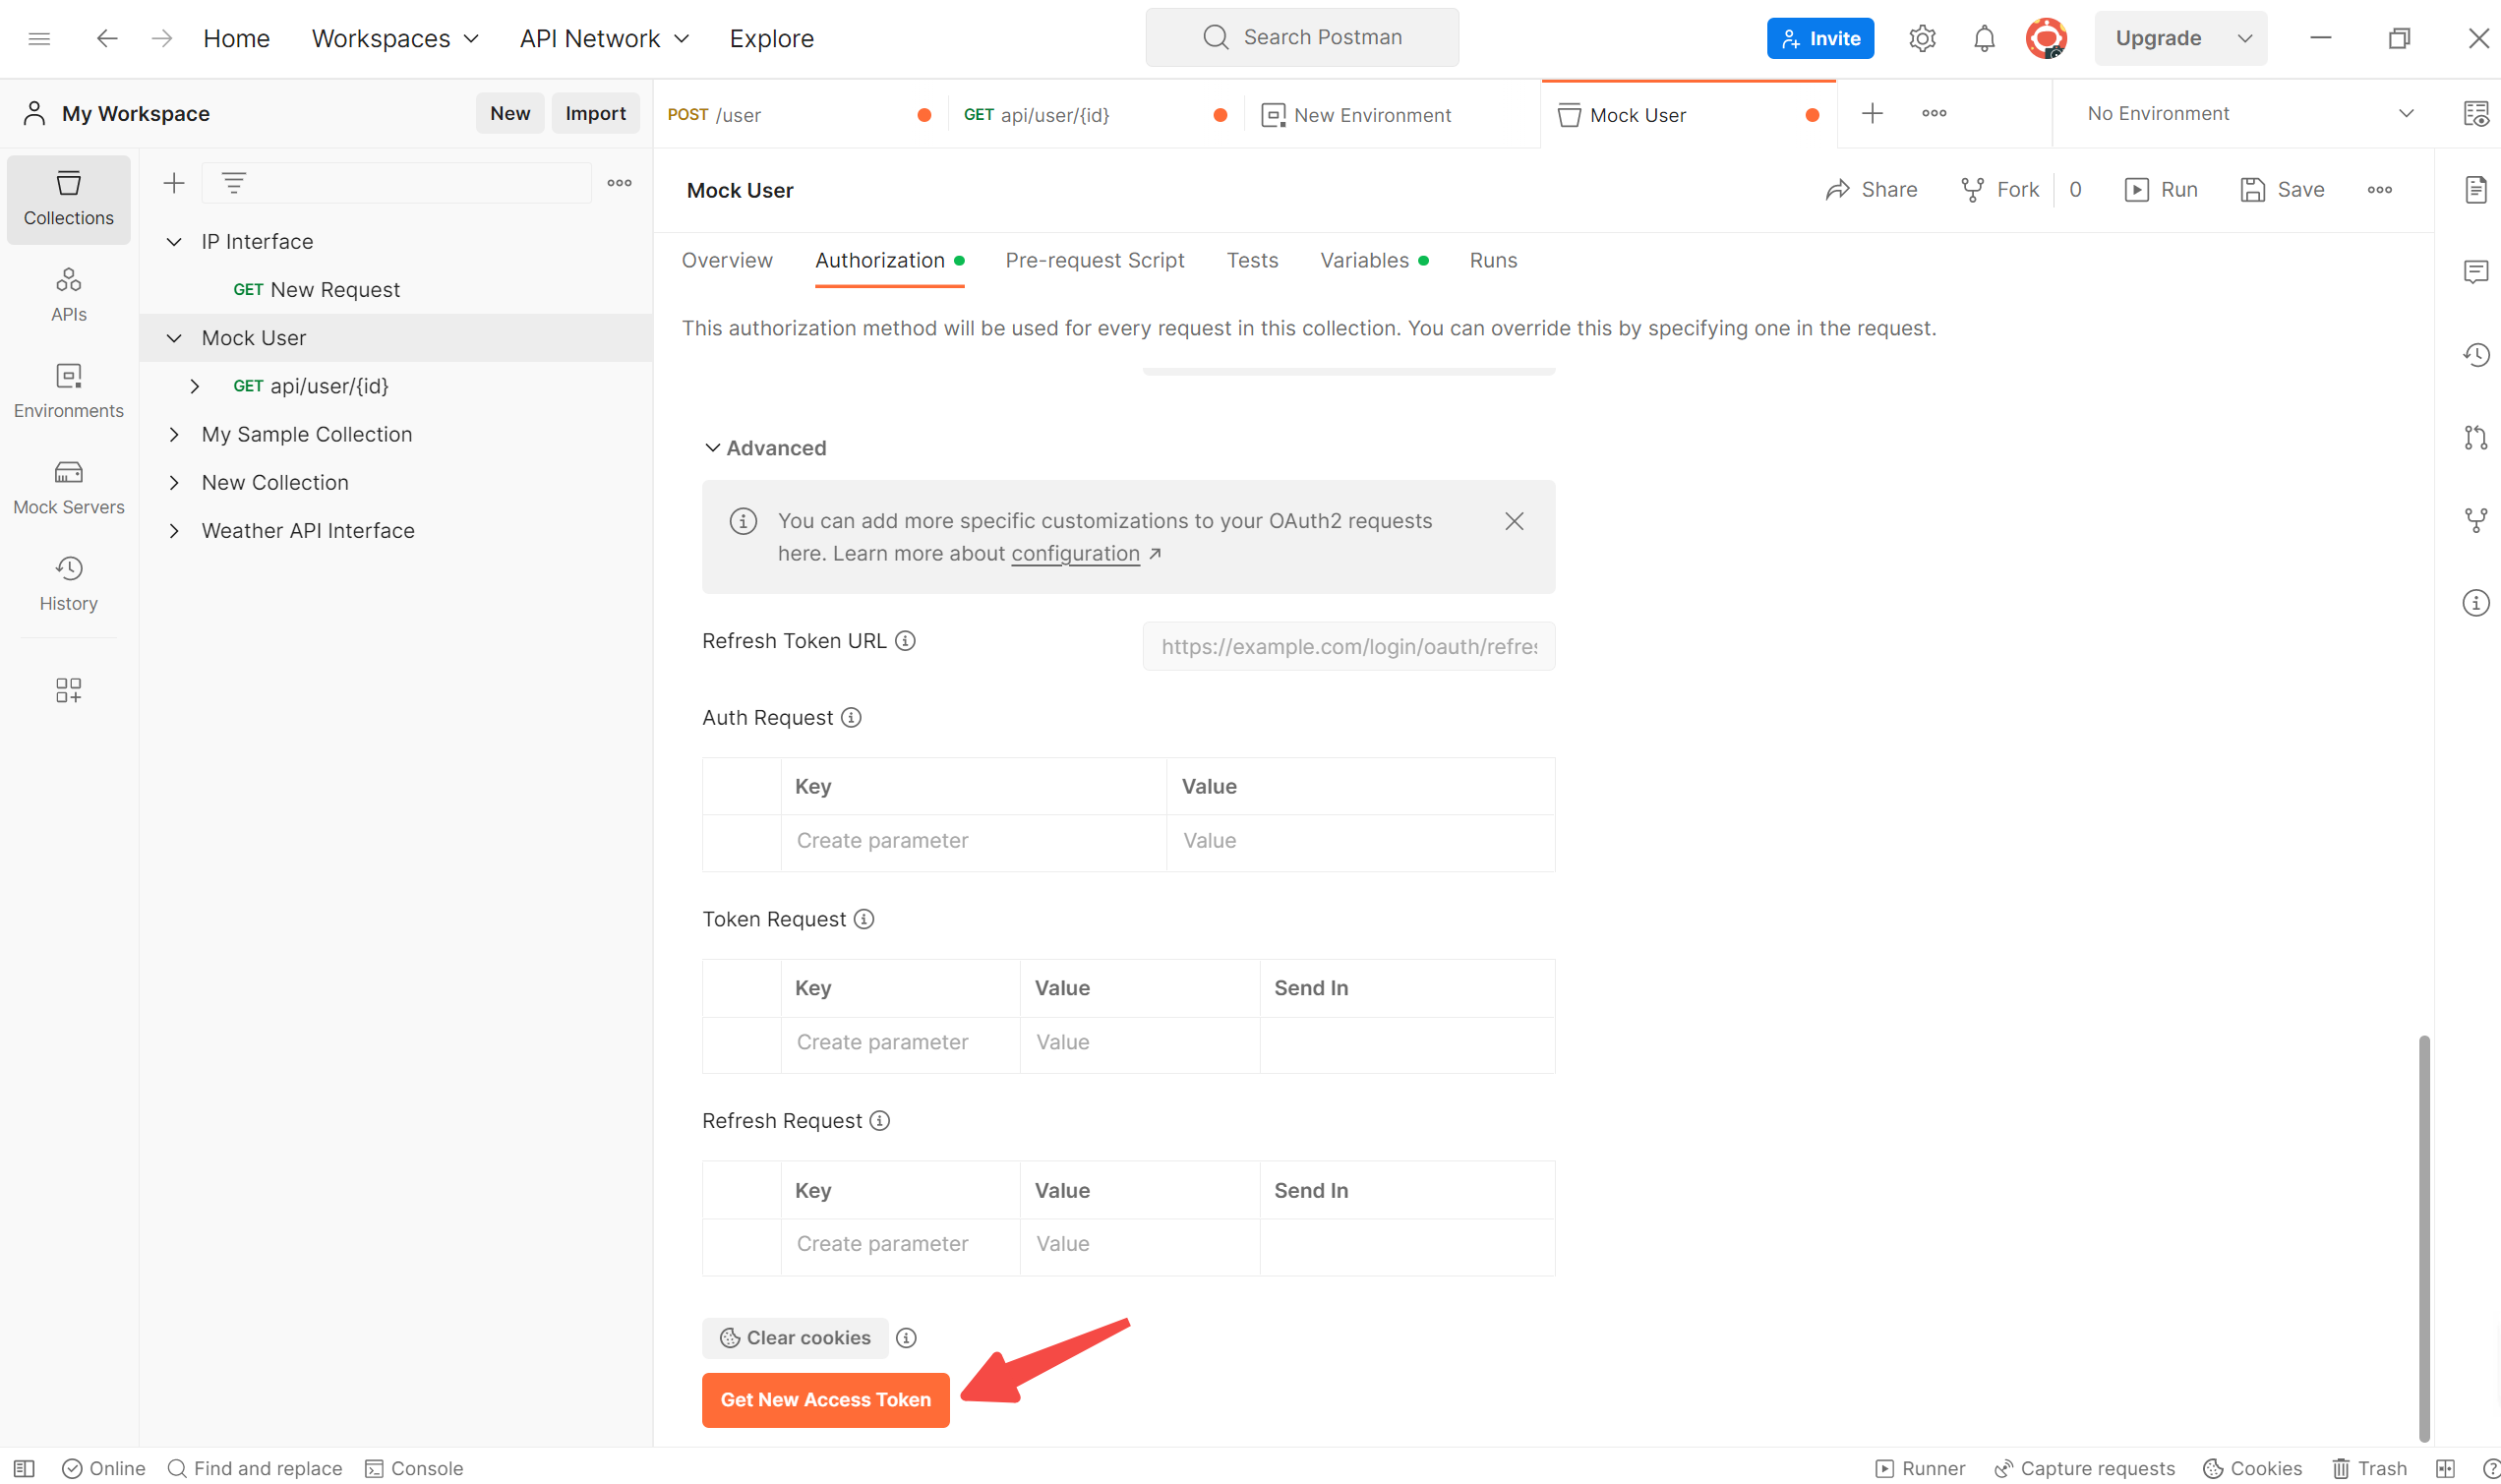
If the authorization is successful, the access token will be displayed in the "Access Token" field.
6. Use the access token to make API requests by adding it to the "Authorization" header of the request.
Examples of OAuth 2.0 Authentication in Postman
Here are some examples of OAuth2 authentication in Postman:
- To configure OAuth2 authentication for Business Central, use the following information:
- Grant Type: Authorization Code
- Callback URL: https://www.getpostman.com/oauth2/callback
- Auth URL: https://login.microsoftonline.com/common/oauth2/authorize
- Access Token URL: https://login.microsoftonline.com/common/oauth2/token
- Client ID: The client ID for the application.
- Client Secret: The client secret for the application.
- Scope: openid
- To configure OAuth2 authentication using client credentials, use the following information:
- Grant Type: Client Credentials
- Auth URL: The URL to authorize the application.
- Access Token URL: The URL to get the access token.
- Client ID: The client ID for the application.
- Client Secret: The client secret for the application.
- Scope: The scope of the access token.
How to Get an OAuth 2 Access Token in Postman?
To make API requests using OAuth2 authentication, we need to obtain an access token first. In this section, we will learn how to get an OAuth2 access token using Postman.
First, we need to configure Postman for OAuth2 authentication. Follow the steps in section 2 to set up the OAuth2 authorization URL, token URL, client ID, and client secret in Postman.
Once we have configured Postman for OAuth2 authentication, we can get an access token by sending a POST request to the token URL with the appropriate parameters. The parameters required for the token request depend on the OAuth2 grant type being used.
For example, if we are using the client credentials grant type, we need to send a POST request to the token URL with the following parameters in the body:
grant_type=client_credentials
client_id=<client_id>
client_secret=<client_secret>
Replace <client_id> and <client_secret> with the actual values for your OAuth2 client.
In the next section, we will learn how to use the OAuth2 access token to make API requests in Postman.
How to Use OAuth 2.0 Access Tokens for API Requests in Postman?
To use OAuth2 access tokens for API requests in Postman, you first need to obtain a token. This can be done by configuring the OAuth2 authorization in Postman.
To do this, go to the Authorization tab in your request and select "OAuth 2.0" as the type. Then, click on "Get New Access Token" and fill in the required fields, such as the authorization URL, token URL, client ID, and client secret.
For example, if you are using Business Central and want to authenticate using OAuth2 in Postman, you would need to enter the authorization URL as "https://login.microsoftonline.com/{tenant}/oauth2/v2.0/authorize" and the token URL as "https://login.microsoftonline.com/{tenant}/oauth2/v2.0/token".
Once you have obtained the access token, you can use it in your API requests by adding it to the Authorization header as a Bearer token.
If you are using the OAuth 2 client credentials flow, where the client itself is authorized to access the API, you can use the "Client Credentials" grant type in Postman. In this case, you would need to enter the client ID and client secret in the appropriate fields and select "Client Credentials" as the grant type.
Here is an example of how to use OAuth 2 access tokens in Postman:
- Configure the OAuth 2 authorization in Postman by entering the required information.
- Click on "Get New Access Token" to obtain the access token.
- Add the access token to the Authorization header as a Bearer token.
- Make your API request using the access token.
By following these steps, you can easily authenticate your API requests using OAuth2 access tokens in Postman.
How to Use Apidog for OAuth 2.0 Authorization
Apidog is a powerful API management platform that supports OAuth 2.0 authorization. With Apidog, you can easily configure and manage OAuth 2.0 authorization for your APIs. It allows you to define authorization scopes, client credentials, and token expiration times. Apidog simplifies the implementation of secure OAuth 2.0 authentication in your applications.
The following is an example of using OAuth 2.0 authorization in Apidog.
Step 1. Open Apidog and create a new API . Select the API request you want to execute, such as GET, PUT, POST, and enter the fields you want to access.
Step 2. In the API interface, go to the Auth tab and select OAuth 2.0.
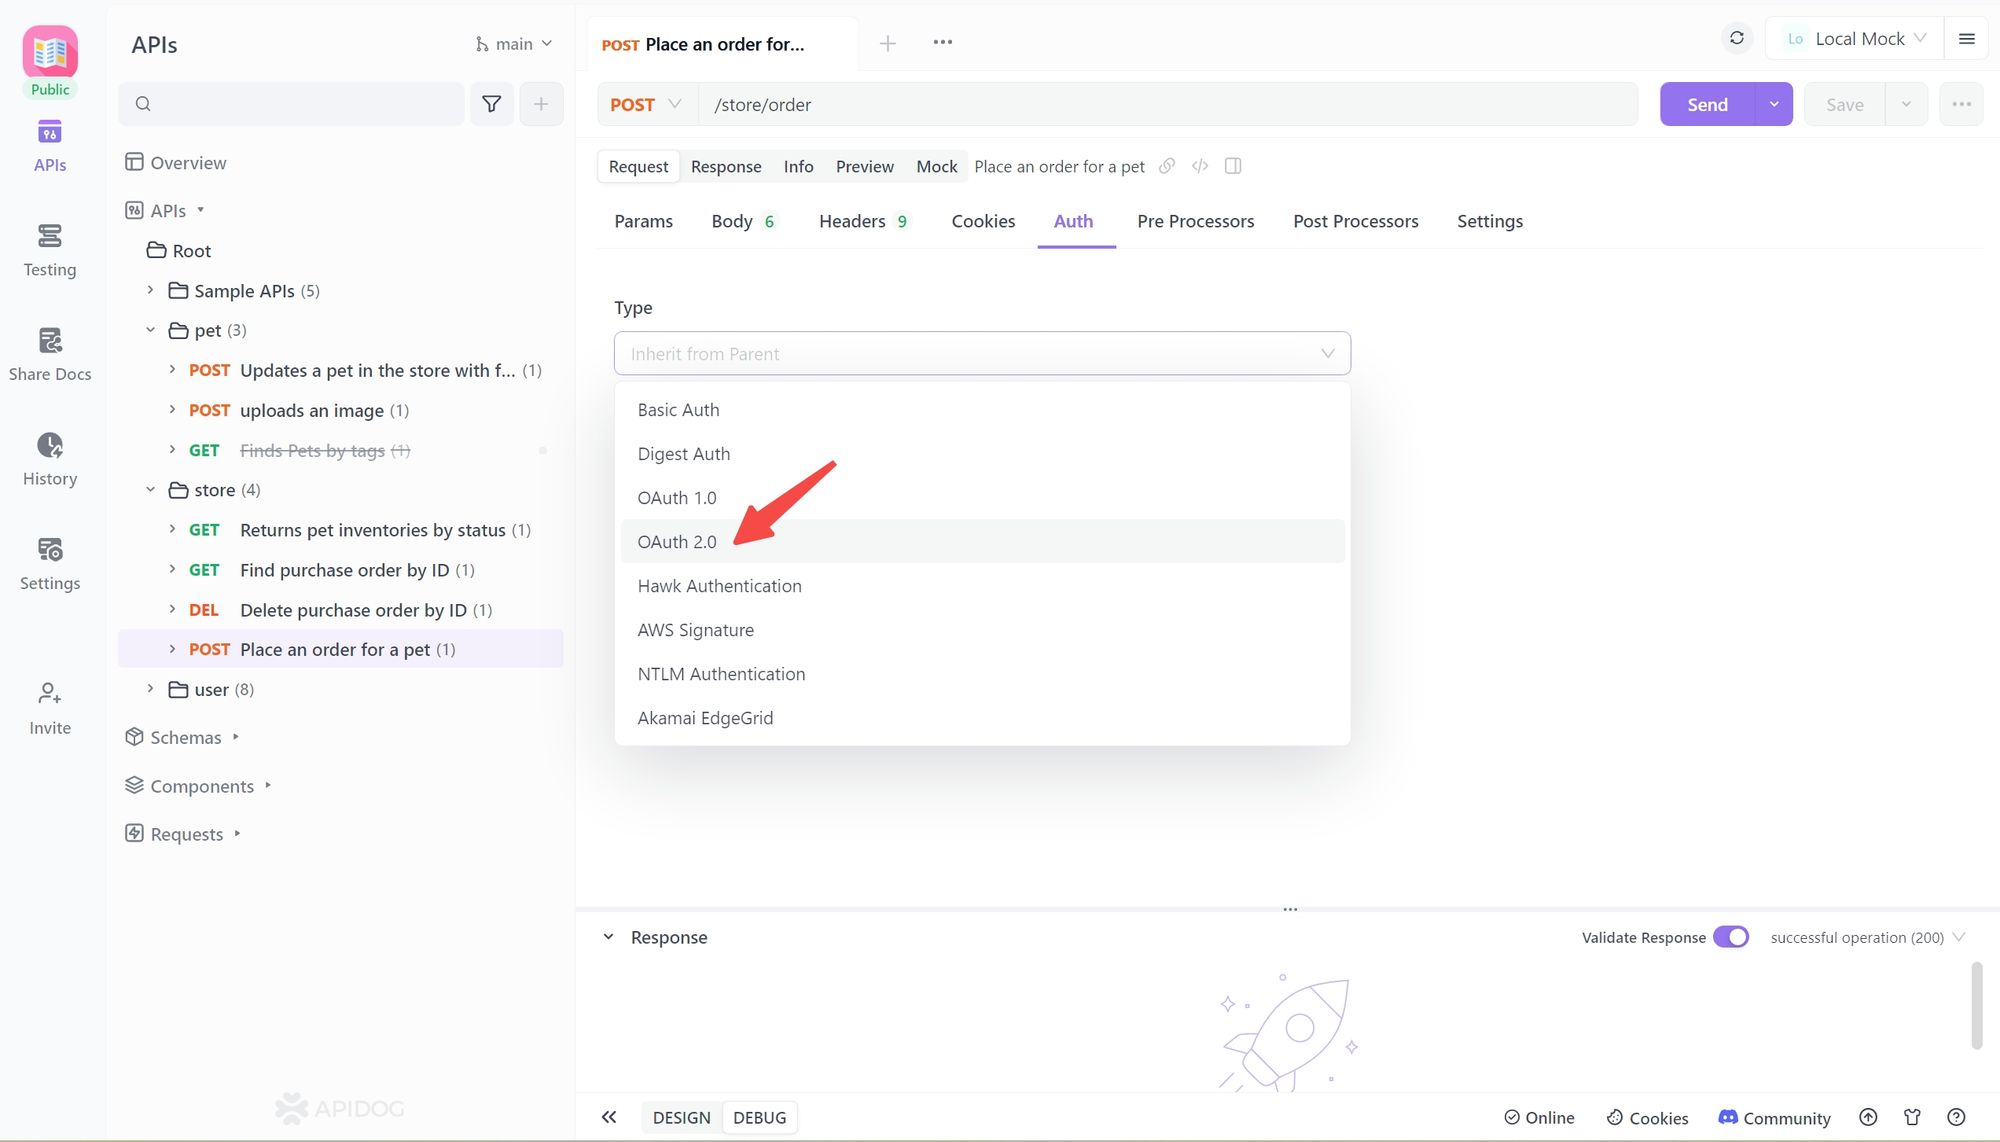
Step 3. Enter the authorization interface (consumer key), token interface (access token), client ID (access token), and client secret (token secret) of the API interface.
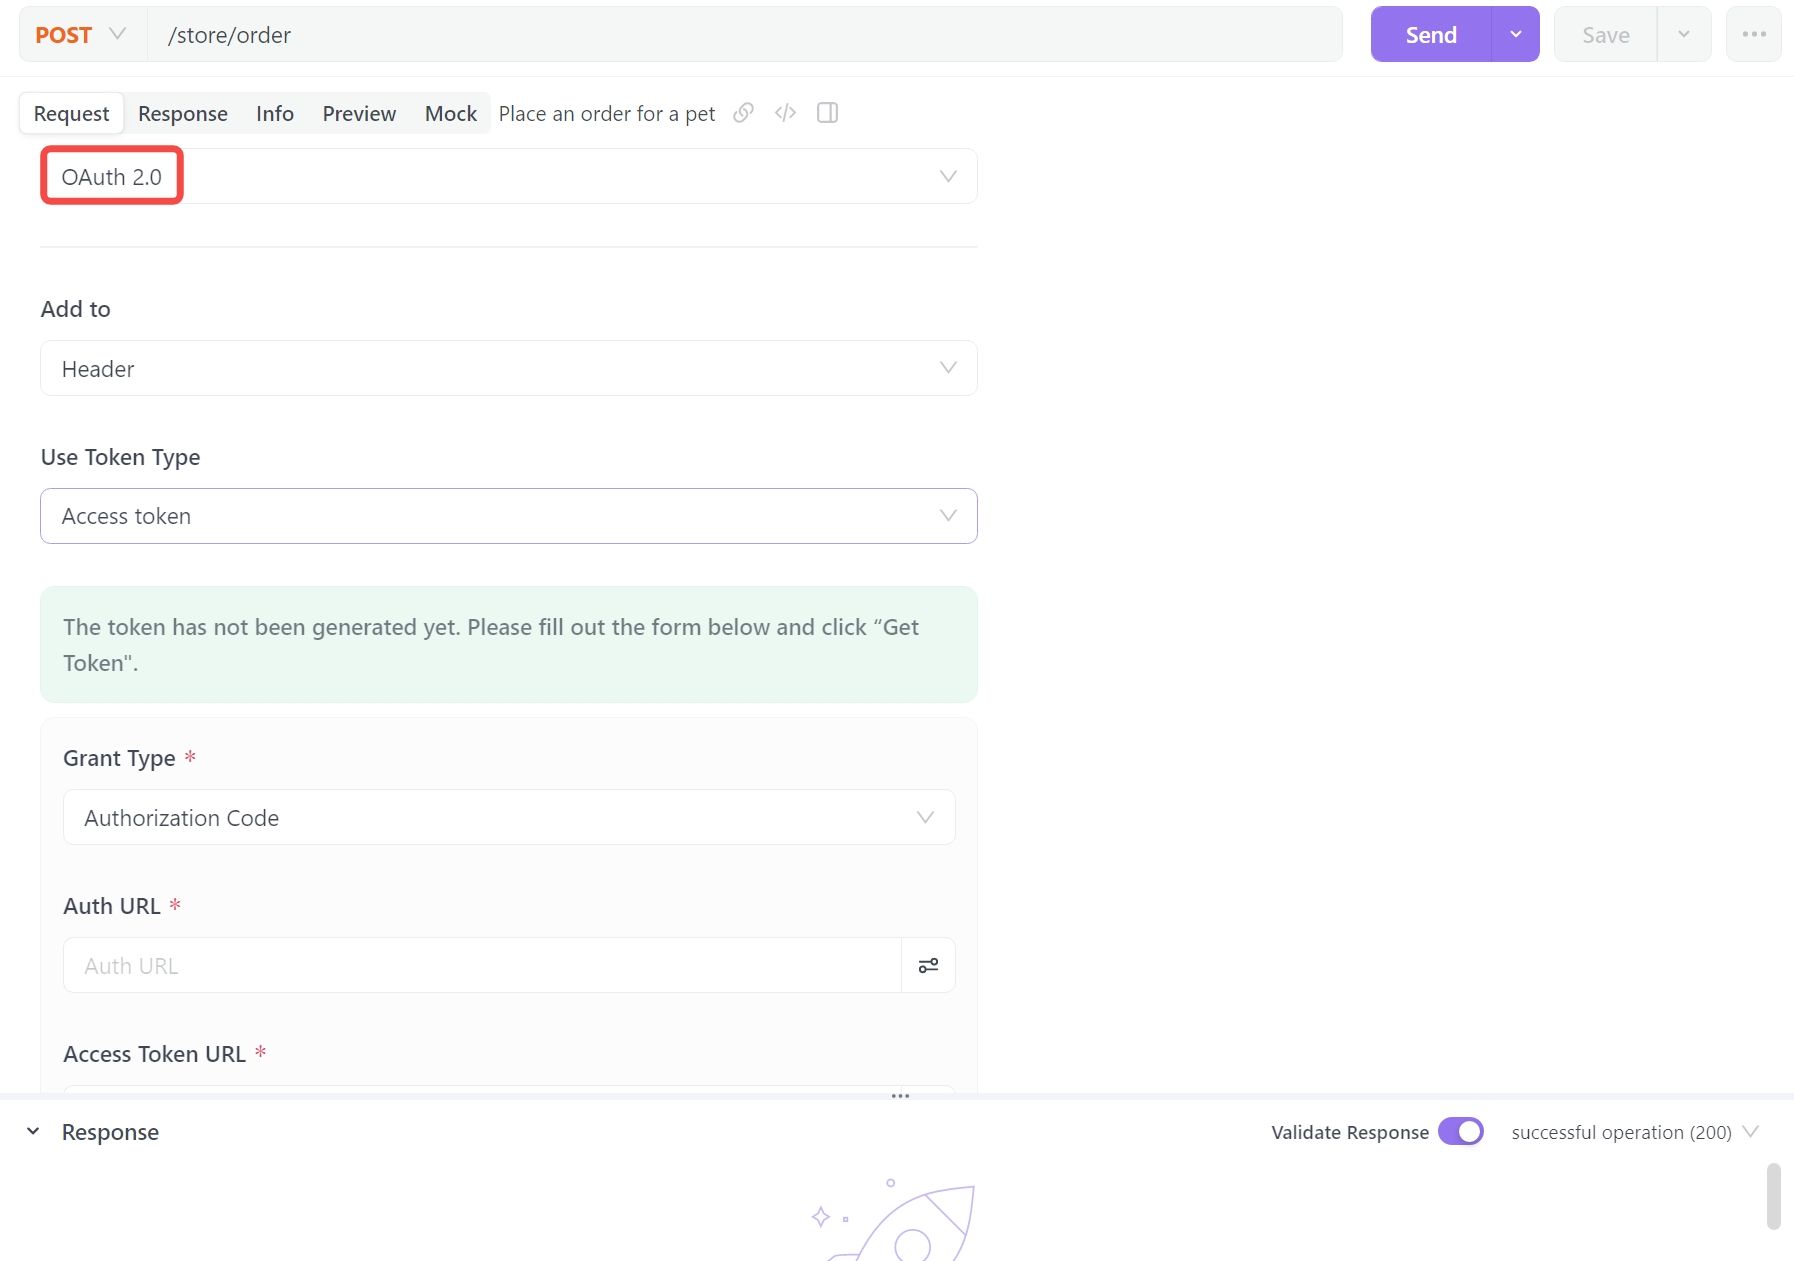
Step 4. Save changes and test the API .
FAQs of OAuth 2.0
How to Use OAuth 2.0 in API?
OAuth 2.0 is used in APIs to authenticate and authorize third-party applications to access protected resources on behalf of a user. The process involves sending an authorization request to an OAuth 2.0 provider, where the user approves permissions, and an access token is generated which the client can use to access protected resources.
How does OAuth 2.0 in API?
OAuth 2.0 separates authorization from authentication. A client application sends an authorization request to an OAuth 2.0 provider, which authenticates the client and asks the user to grant permission. If granted, the provider generates an access token that the client can use to access protected resources.
What is the difference between OAuth 1.0 and OAuth 2.0 in Postman?
The main difference between OAuth 1.0 and OAuth 2.0 in Postman is that OAuth 2.0 provides better support for mobile and web applications with a more streamlined and secure authorization process. OAuth 2.0 also uses SSL/TLS for communication, making it more secure.


