
Do you want to learn how to make GET requests in NextJs? If yes, then you are in the right place. In this blog post, I will show you how to use the built-in http module and the popular axios library to make GET requests in NextJs. I will also explain what GET requests are, why they are important, and how to handle the response data. By the end of this post, you will be able to make GET requests in NextJs like a pro.
What is a GET Request?
A GET request is one of the most common types of HTTP requests. HTTP stands for Hypertext Transfer Protocol, which is the standard protocol for communication between web browsers and web servers. HTTP requests are messages that web browsers send to web servers to request or submit data. HTTP responses are messages that web servers send back to web browsers to deliver the requested data or confirm the submission.
A GET request is a type of HTTP request that asks the web server to send back a specific resource. For example, when you type a URL in your web browser, you are making a GET request to the web server to send you the web page associated with that URL. A GET request can also include some query parameters, which are key-value pairs that provide additional information or filter the requested resource. For example, when you search something on Google, you are making a GET request to the Google web server with some query parameters that specify your search term, language, and other options.
Why are GET Requests Important?
GET requests are important because they are the primary way of retrieving data from web servers. You can use GET requests to access various types of data, such as HTML, JSON, XML, images, videos, and more. You can also use GET requests to interact with web APIs, which are interfaces that allow you to access data and services from other web applications. For example, you can use GET requests to get weather information from the OpenWeatherMap API, get movie information from the IMDb API, or get dog images from the Dog API.
GET requests are also important because they are easy to use and test. You can make GET requests using any web browser, without any special tools or libraries. You can also use tools like Postman or Apidog to make and test GET requests with different parameters and headers. You can also inspect the response data and headers using the browser's developer tools or the tool's interface.
What is NextJs?
Next.js is a React framework that enables developers to build server-rendered React applications with ease. It provides features like automatic code splitting, static generation, server-side rendering, and optimized loading to enhance performance and user experience. Next.js also supports CSS-in-JS, global CSS, and other styling options out of the box.
It’s designed to make the process of building web applications more efficient by handling various tasks such as routing, data fetching, and UI rendering. With Next.js, you can create dynamic web applications that are both fast and SEO-friendly.

How to Make GET Request in NextJs
To make a GET request in Next.js, you can use the fetch API within your React components or API routes. Here’s a basic example of how to fetch data from an API in a Next.js page:
// pages/index.js or any other page component
import React, { useEffect, useState } from 'react';

const MyPage = () => {
  const [data, setData] = useState(null);

  useEffect(() => {
    // Function to fetch data
    const fetchData = async () => {
      const response = await fetch('https://api.example.com/data'); // Replace with your API endpoint
      const result = await response.json();
      setData(result);
    };

    // Call the function
    fetchData();
  }, []); // Empty array ensures this effect runs once on mount

  return (
    <div>
      {/* Render your data here */}
      {data && <pre>{JSON.stringify(data, null, 2)}</pre>}
    </div>
  );
};

export default MyPage;
This code snippet demonstrates how to use the useEffect hook to perform a GET request when the component mounts. The fetched data is then stored in the component’s state using the useState hook and rendered on the page.
For server-side data fetching, you can use getServerSideProps or getStaticProps functions provided by Next.js. These functions run on the server and can fetch data before rendering the page.
How to Handle the Response Data in Nextjs?
Handling response data in Next.js typically involves using the fetch API to make requests and then processing the returned Response object. Here’s a general approach to handling response data:
- Make a
fetchrequest to your desired endpoint. - Use
.then()orawaitsyntax to wait for the promise to resolve. - Check the response status to ensure the request was successful.
- Parse the response data, usually as JSON, to use it in your application.
Here’s an example of how you might handle response data in a Next.js page or API route:
// Example in a Next.js page or API route
fetch('https://api.example.com/data')
  .then((response) => {
    if (!response.ok) {
      throw new Error('Network response was not ok');
    }
    return response.json();
  })
  .then((data) => {
    // Handle your data here
    console.log(data);
  })
  .catch((error) => {
    // Handle any errors here
    console.error('There has been a problem with your fetch operation:', error);
  });
Or using async/await:
// Example with async/await in a Next.js page or API route
async function fetchData() {
  try {
    const response = await fetch('https://api.example.com/data');
    if (!response.ok) {
      throw new Error('Network response was not ok');
    }
    const data = await response.json();
    // Handle your data here
    console.log(data);
  } catch (error) {
    // Handle any errors here
    console.error('There has been a problem with your fetch operation:', error);
  }
}

// Call fetchData where needed
Remember to handle different HTTP status codes and potential network errors to ensure a robust application.
How to Test NextJs HTTP GET Request Using Apidog?
To Test HTTP Get request using Apidog, you need to follow these simple steps:
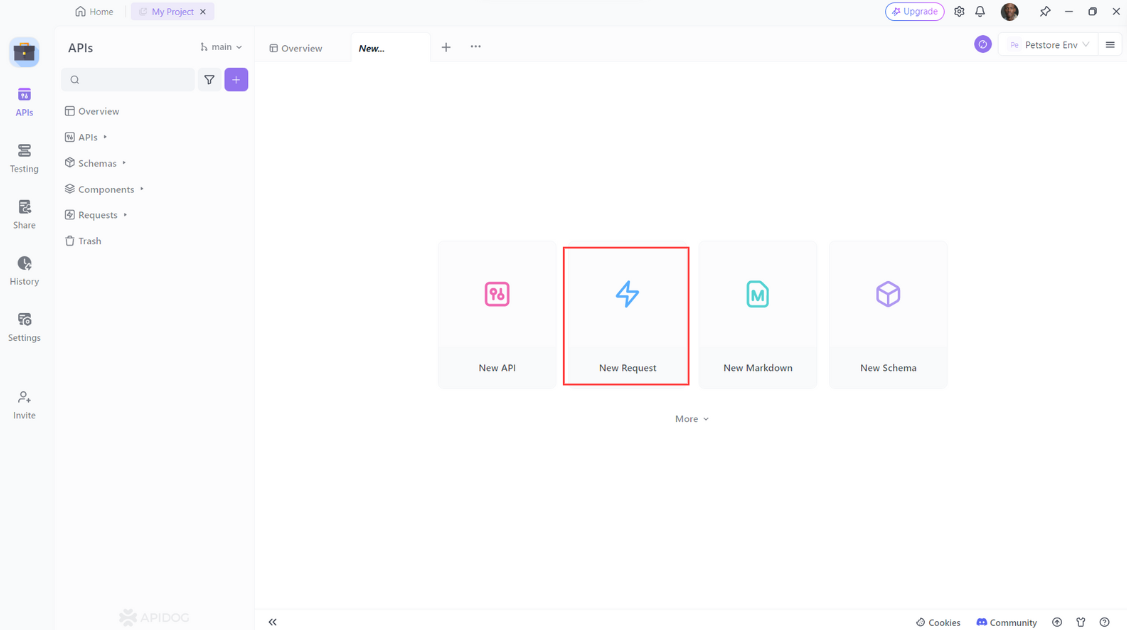
- Open Apidog and click on the "New Request" button to create a new request.
2. Select "GET" as the method of the request.
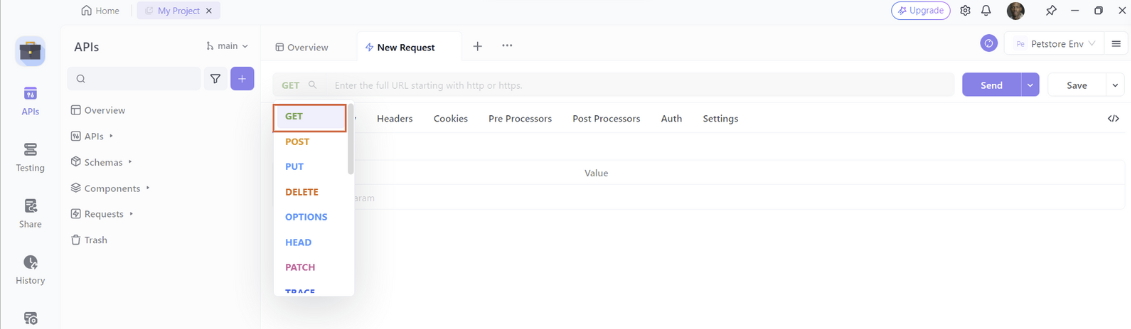
3. Enter the URL of the API endpoint
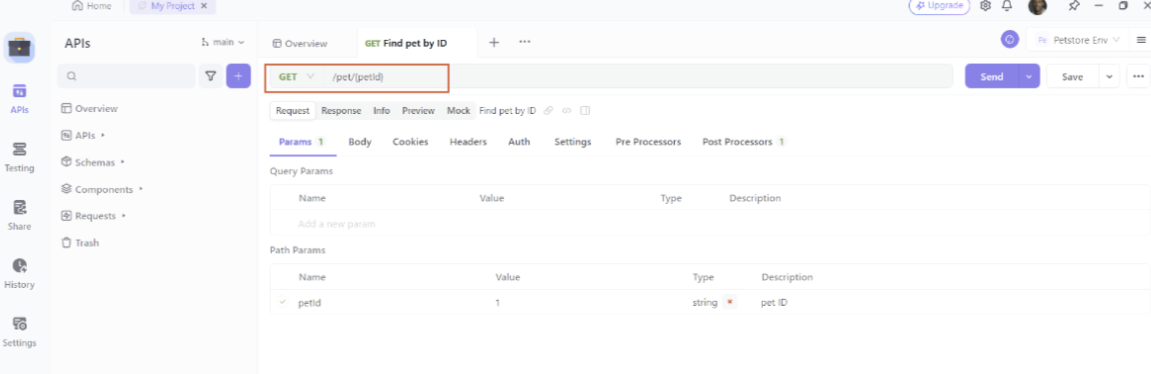
Then click on the “Send” button to send the request to the API.
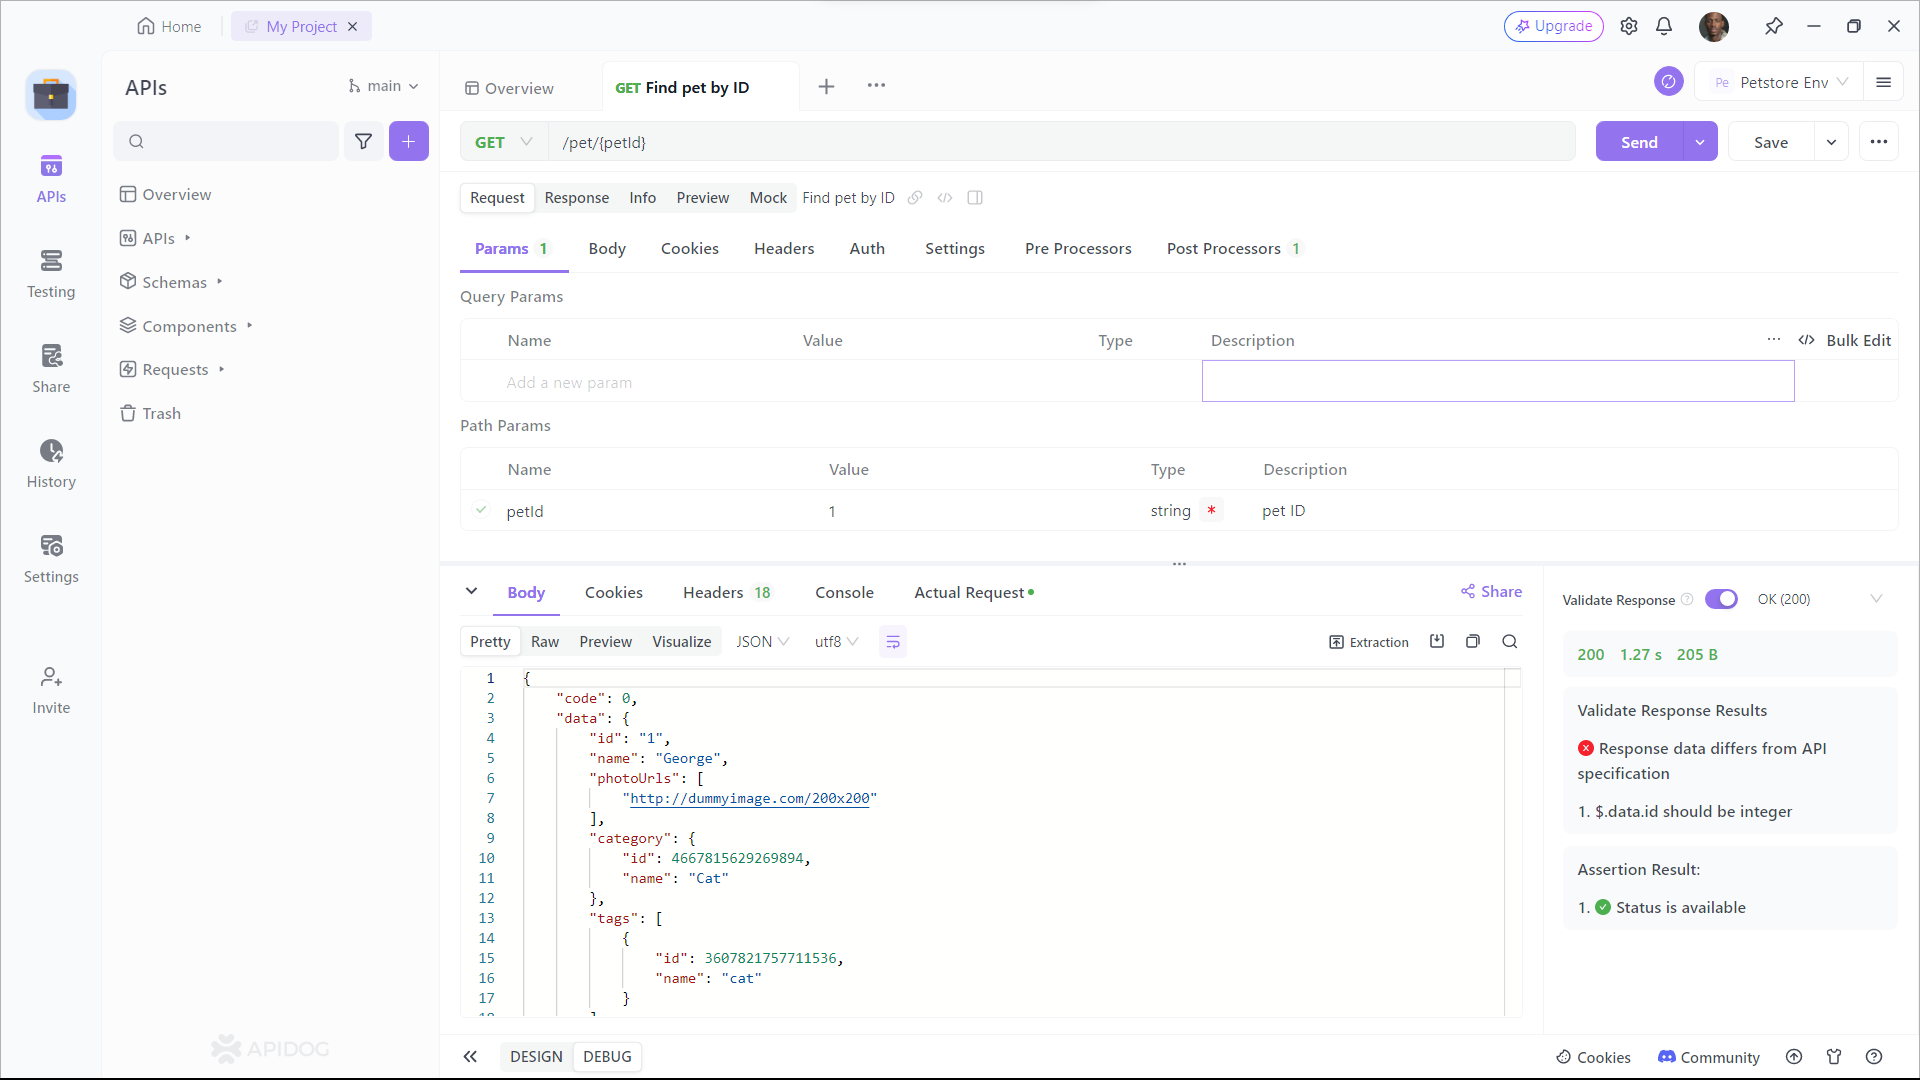
As you can see, Apidog shows you the URL, parameters, headers, and body of the request, and the status, headers, and body of the response. You can also see the response time, size, and format of the request and response, and compare them with different web APIs.
Conclusion
In this blog post, I have shown you how to make GET requests in NextJs. I have also shown you how to handle the response data in different formats and scenarios. I hope you have learned something useful and enjoyed reading this post.
Thank you for reading and happy coding!


