If you've ever wondered how to make your Java applications communicate in real-time, then you've come to the right place. In this guide, we're diving into the fascinating world of Java WebSocket clients. We'll explore what WebSockets are, why they matter, and how you can get started with building your own Java WebSocket client. Plus, we’ll touch on tools like apidog that can make your development process smoother.
What Are WebSockets?
WebSockets are a protocol providing full-duplex communication channels over a single TCP connection. Unlike HTTP, which is request-response-based, WebSockets allow for continuous, bidirectional communication. This makes them ideal for applications requiring real-time updates, such as chat applications, live sports updates, or online gaming.
Why Use Java for WebSocket Clients?
Java is a versatile and widely-used programming language. It's known for its portability, performance, and extensive libraries, which make it a great choice for developing WebSocket clients. Java WebSocket clients can run on various platforms, and integrating them with existing Java applications is straightforward.
Getting Started with Java WebSocket Client
Before we dive into coding, let's go over the basics you'll need to set up your environment.
Setting Up Your Development Environment
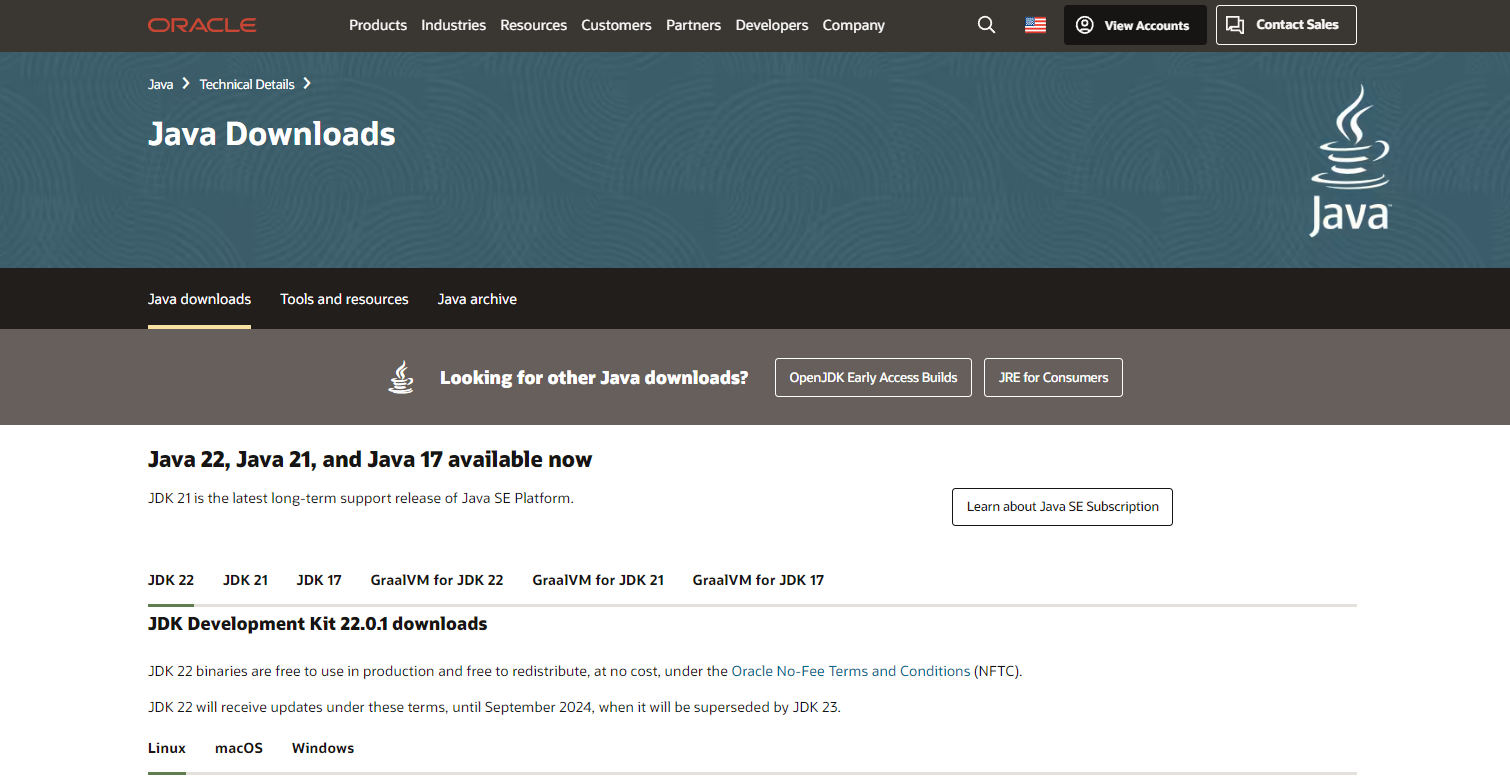
Java Development Kit (JDK): Ensure you have JDK installed on your machine. You can download it from Oracle's official site.
Integrated Development Environment (IDE): While you can use any text editor, using an IDE like IntelliJ IDEA or Eclipse can significantly enhance your development experience.
Dependencies: For building a Java WebSocket client, you’ll need the javax.websocket package. You can add this dependency using Maven or Gradle.
Maven Dependency
<dependency>
    <groupId>javax.websocket</groupId>
    <artifactId>javax.websocket-api</artifactId>
    <version>1.1</version>
</dependency>
Gradle Dependency
implementation 'javax.websocket:javax.websocket-api:1.1'
Writing Your First Java WebSocket Client
Now, let's get our hands dirty with some code. We'll start by creating a simple WebSocket client that connects to a WebSocket server, sends a message, and receives a response.
Creating the WebSocket Client
First, we need to define a client endpoint. This is where we'll handle our WebSocket interactions.
import javax.websocket.ClientEndpoint;
import javax.websocket.OnMessage;
import javax.websocket.Session;
import javax.websocket.WebSocketContainer;
import javax.websocket.ContainerProvider;
import java.net.URI;

@ClientEndpoint
public class MyWebSocketClient {

    @OnMessage
    public void onMessage(String message) {
        System.out.println("Received message: " + message);
    }

    public static void main(String[] args) {
        WebSocketContainer container = ContainerProvider.getWebSocketContainer();
        String uri = "ws://echo.websocket.org"; // Example WebSocket server
        try {
            container.connectToServer(MyWebSocketClient.class, URI.create(uri));
            System.out.println("Connected to server");
        } catch (Exception e) {
            e.printStackTrace();
        }
    }
}
In this example, MyWebSocketClient is our WebSocket client class annotated with @ClientEndpoint. The onMessage method will handle incoming messages from the server.
Connecting to the WebSocket Server
The main method initializes the WebSocket container and connects to the server at ws://echo.websocket.org, a public WebSocket echo server that sends back any message it receives.
Sending Messages
To send messages, you need to keep the session object and use it to send text messages. Let's modify our client to include message sending functionality.
import javax.websocket.*;

@ClientEndpoint
public class MyWebSocketClient {

    private Session session;

    @OnOpen
    public void onOpen(Session session) {
        this.session = session;
        System.out.println("Connected to server");
        sendMessage("Hello, WebSocket!");
    }

    @OnMessage
    public void onMessage(String message) {
        System.out.println("Received message: " + message);
    }

    public void sendMessage(String message) {
        try {
            session.getBasicRemote().sendText(message);
        } catch (Exception e) {
            e.printStackTrace();
        }
    }

    public static void main(String[] args) {
        WebSocketContainer container = ContainerProvider.getWebSocketContainer();
        String uri = "ws://echo.websocket.org";
        try {
            container.connectToServer(MyWebSocketClient.class, URI.create(uri));
        } catch (Exception e) {
            e.printStackTrace();
        }
    }
}
Now, when the connection is established (@OnOpen), the client sends a message to the server.
Enhancing Your WebSocket Client
Once you have the basics down, you might want to explore more advanced features and best practices for building a robust WebSocket client.
Handling Different Message Types
WebSockets can handle more than just text messages. You might need to handle binary messages or even custom protocols.
@ClientEndpoint
public class AdvancedWebSocketClient {

    private Session session;

    @OnOpen
    public void onOpen(Session session) {
        this.session = session;
        System.out.println("Connected to server");
        sendMessage("Hello, WebSocket!");
    }

    @OnMessage
    public void onMessage(String message) {
        System.out.println("Received message: " + message);
    }

    @OnMessage
    public void onBinaryMessage(byte[] message) {
        System.out.println("Received binary message of length: " + message.length);
    }

    @OnClose
    public void onClose(Session session, CloseReason closeReason) {
        System.out.println("Session closed: " + closeReason);
    }

    public void sendMessage(String message) {
        try {
            session.getBasicRemote().sendText(message);
        } catch (Exception e) {
            e.printStackTrace();
        }
    }

    public static void main(String[] args) {
        WebSocketContainer container = ContainerProvider.getWebSocketContainer();
        String uri = "ws://echo.websocket.org";
        try {
            container.connectToServer(AdvancedWebSocketClient.class, URI.create(uri));
        } catch (Exception e) {
            e.printStackTrace();
        }
    }
}
This example includes handling for binary messages and connection closure events.
Debugging Java WebSockets with Apidog
When building a WebSocket client, you might find yourself repeating certain tasks or needing additional features like authentication, message parsing, or error handling. This is where APIs and tools like apidog can be invaluable.
Apidog is a tool that helps streamline API development, making it easier to manage WebSocket connections and interactions. It offers features like automated API documentation, testing, and monitoring, which can save you a lot of time and effort.
Here’s how you can use Apidog to debug a WebSocket client:
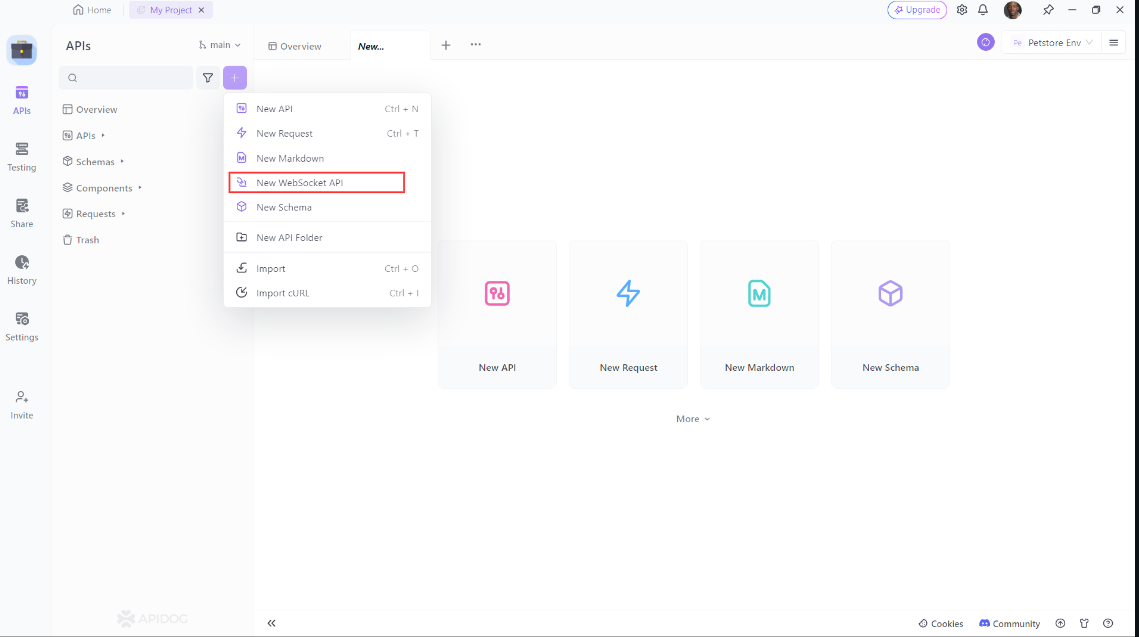
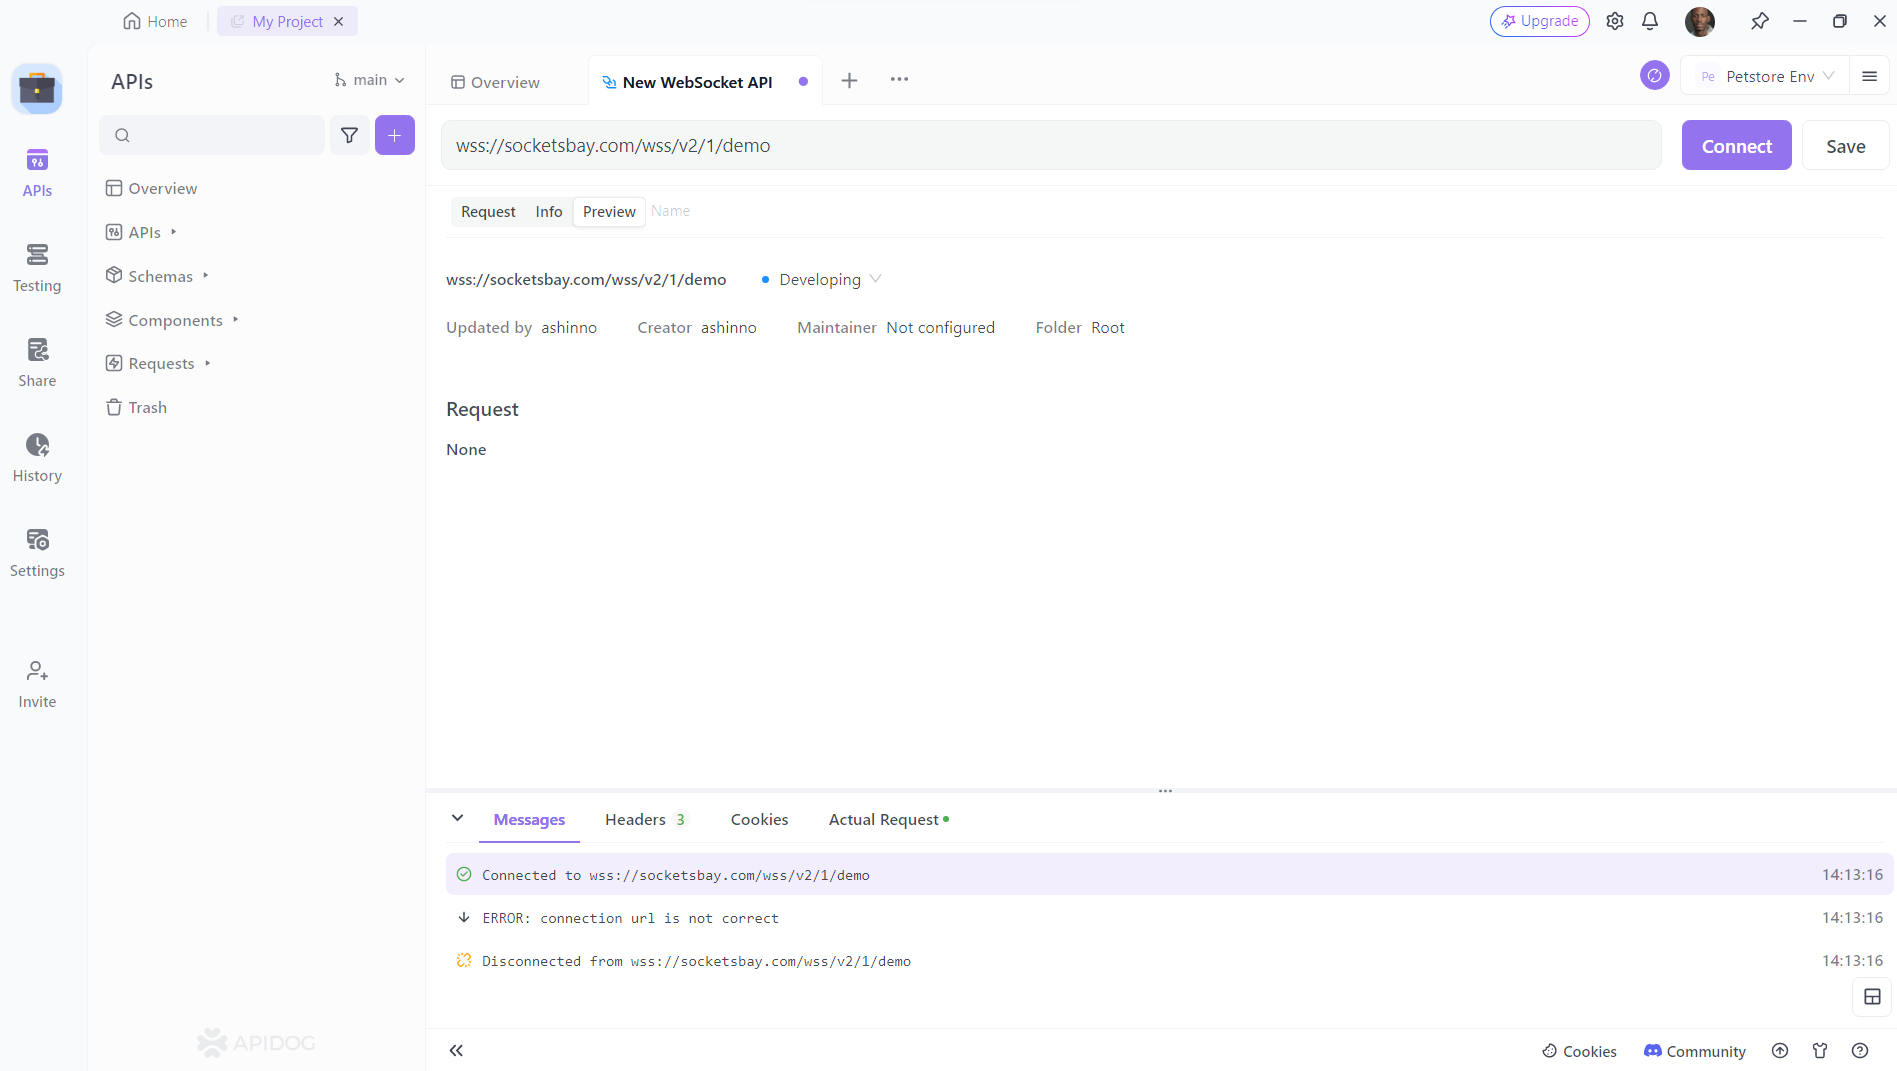
- Open Apidog: First, start the Apidog application and click on the "+" button on the left side, A new drop-down will be opened. From there choose "New WebSocket API":
2. Establish a Connection: Start by entering the WebSocket API URL in Apidog’s address bar. You can then click the “Connect” button to initiate the handshake process and establish a connection. Apidog allows you to customize parameters such as Params, Headers, and Cookies during the handshake.
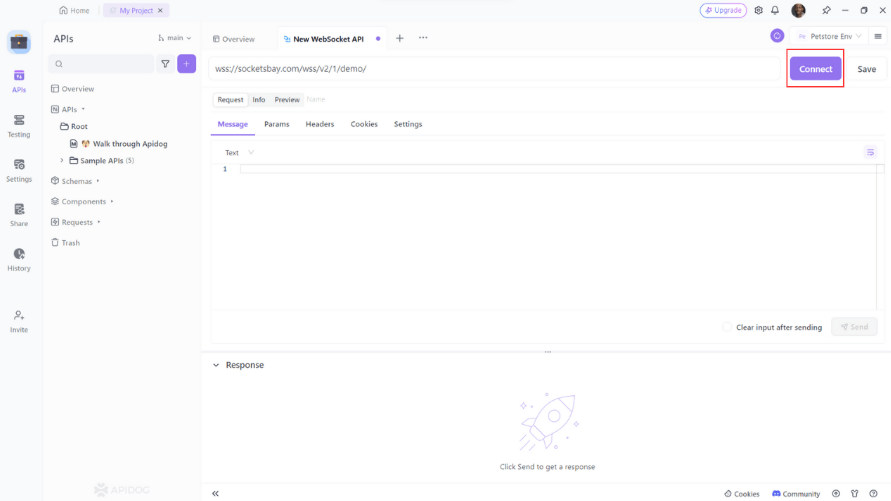
3. Send and Receive Messages: Once the connection is established, you can send messages under the "Message" tab. You can write text, JSON, XML, HTML, and other text format messages, as well as binary format messages using Base64 or Hexadecimal. Apidog's new timeline view shows the connection status, sent messages and received messages in chronological order. When you click on a message, you can easily view its details.

4. API Documentation: Apidog inherits its robust API documentation functionality for WebSocket APIs, allowing you to document your WebSocket interactions effectively.
Remember to check for common WebSocket issues such as connection problems, message format errors, and security concerns during your debugging process.
Best Practices for Building WebSocket Clients
To ensure your WebSocket client is robust and maintainable, follow these best practices:
Error Handling: Always handle potential errors gracefully. Use @OnError to catch exceptions.
Resource Management: Close sessions properly to avoid resource leaks. Implement @OnClose to handle disconnections.
Security: Secure your WebSocket connections using wss:// (WebSocket Secure) and handle authentication tokens securely.
Scalability: Design your client to handle multiple connections if needed. Consider using thread pools or async processing.
Testing: Use tools like Apidog for thorough testing and monitoring of your WebSocket interactions.
For teams working without a managed runtime, where the JVM's abstraction layer is not an option,implementing WebSocket in Cmeans handling the protocol handshake and frame parsing directly — a trade-off that pays off when binary footprint or latency constraints are strict.
Conclusion
Building a Java WebSocket client opens up a world of possibilities for real-time communication in your applications. With the right tools and practices, you can create efficient and scalable solutions that enhance user experiences.
By understanding the basics of WebSockets, setting up your development environment, and leveraging tools like Apidog, you can streamline your development process and focus on building features that matter.
Remember, practice makes perfect. The more you experiment and build, the more proficient you'll become in creating powerful WebSocket clients. Happy coding!


