
How to Use WebSocket in Node.js
With Node.js, a powerful JavaScript runtime, harnessing the capabilities of WebSockets becomes even more accessible and efficient. In this guide, we'll walk through the process of integrating and using WebSockets in Node.js.

WebSockets have revolutionized real-time communication on the web, enabling bidirectional, full-duplex communication channels over a single TCP connection. With Node.js, a powerful JavaScript runtime, harnessing the capabilities of WebSockets becomes even more accessible and efficient.
In this guide, we'll walk through the process of integrating and using WebSockets in Node.js.
What is WebSocket?
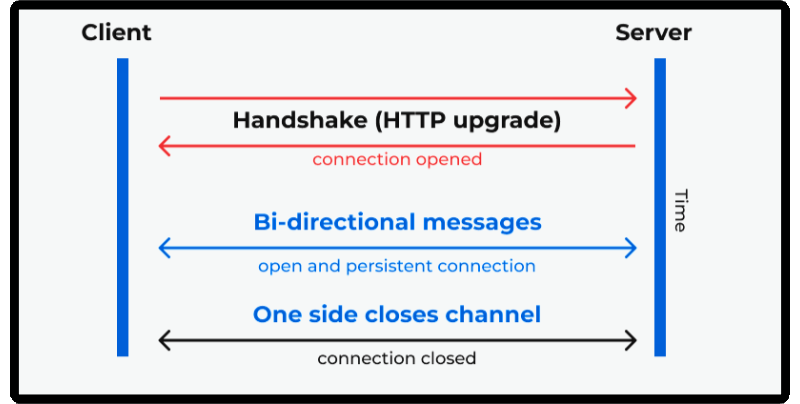
Before diving into implementation, it's crucial to understand what WebSockets are and how they differ from traditional HTTP requests. Unlike HTTP, which follows a request-response model, WebSockets provide persistent connections between clients and servers, allowing for real-time, low-latency data exchange.
This makes them ideal for applications requiring instant updates, such as chat applications, multiplayer games, and collaborative tools.
WebSocket Use Cases
WebSocket is particularly meaningful in the following scenarios:
- Real-time notification systems: Instantly notify clients when new data is available on the server.
- Online chatting: Build real-time chat applications to enable instant communication between users.
- Real-time collaboration tools: Utilize for real-time document sharing, graphic editing, or other collaborative work.
- Online gaming: Enable real-time interaction and synchronization between players.
- Real-time monitoring systems: Monitor system status and instantly notify administrators.
Setting Up a Node.js Project
To get started, ensure you have Node.js installed on your system. You can verify your installation by running node -v in your terminal.

Once confirmed, create a new directory for your project and navigate into it.
mkdir websocket-example
cd websocket-example
Initialize a new Node.js project using npm:
npm init -y
This command creates a package.json file with default settings. Next, install the ws package, a popular WebSocket library for Node.js:
npm install ws
Implementing a WebSocket Server
With the project set up, let's create a WebSocket server using the ws library. Create a new file named server.js in your project directory and add the following code:
const WebSocket = require('ws');

const wss = new WebSocket.Server({ port: 8080 });
wss.on('connection', function connection(ws) {console.log('A new client connected.');
  ws.on('message', function incoming(message) {console.log('Received: %s', message);
  });
  ws.send('Welcome to the WebSocket server!');
});
This code initializes a WebSocket server on port 8080 and listens for incoming connections. Upon connection, it logs a message and sets up an event listener for incoming messages. It also sends a welcome message to the client.
Creating a WebSocket Client
Now, let's create a simple WebSocket client to connect to our server. Create a new file named client.js in the project directory and add the following code:
const WebSocket = require('ws');

const ws = new WebSocket('ws://localhost:8080');
ws.on('open', function open() {console.log('Connected to the server.');
});
ws.on('message', function incoming(data) {console.log('Received from server: %s', data);
});
This code establishes a WebSocket connection to ws://``localhost:8080 and logs a message upon successful connection. It also sets up an event listener to receive messages from the server.
Running the Application
Before running the application, ensure that the WebSocket server (server.js) is running. You can start it by running:
node server.js
Once the server is running, execute the client script (client.js) in another terminal window:
node client.js
You should see messages indicating successful connections from both the server and the client.
Apidog: Streamlining WebSocket API Testing
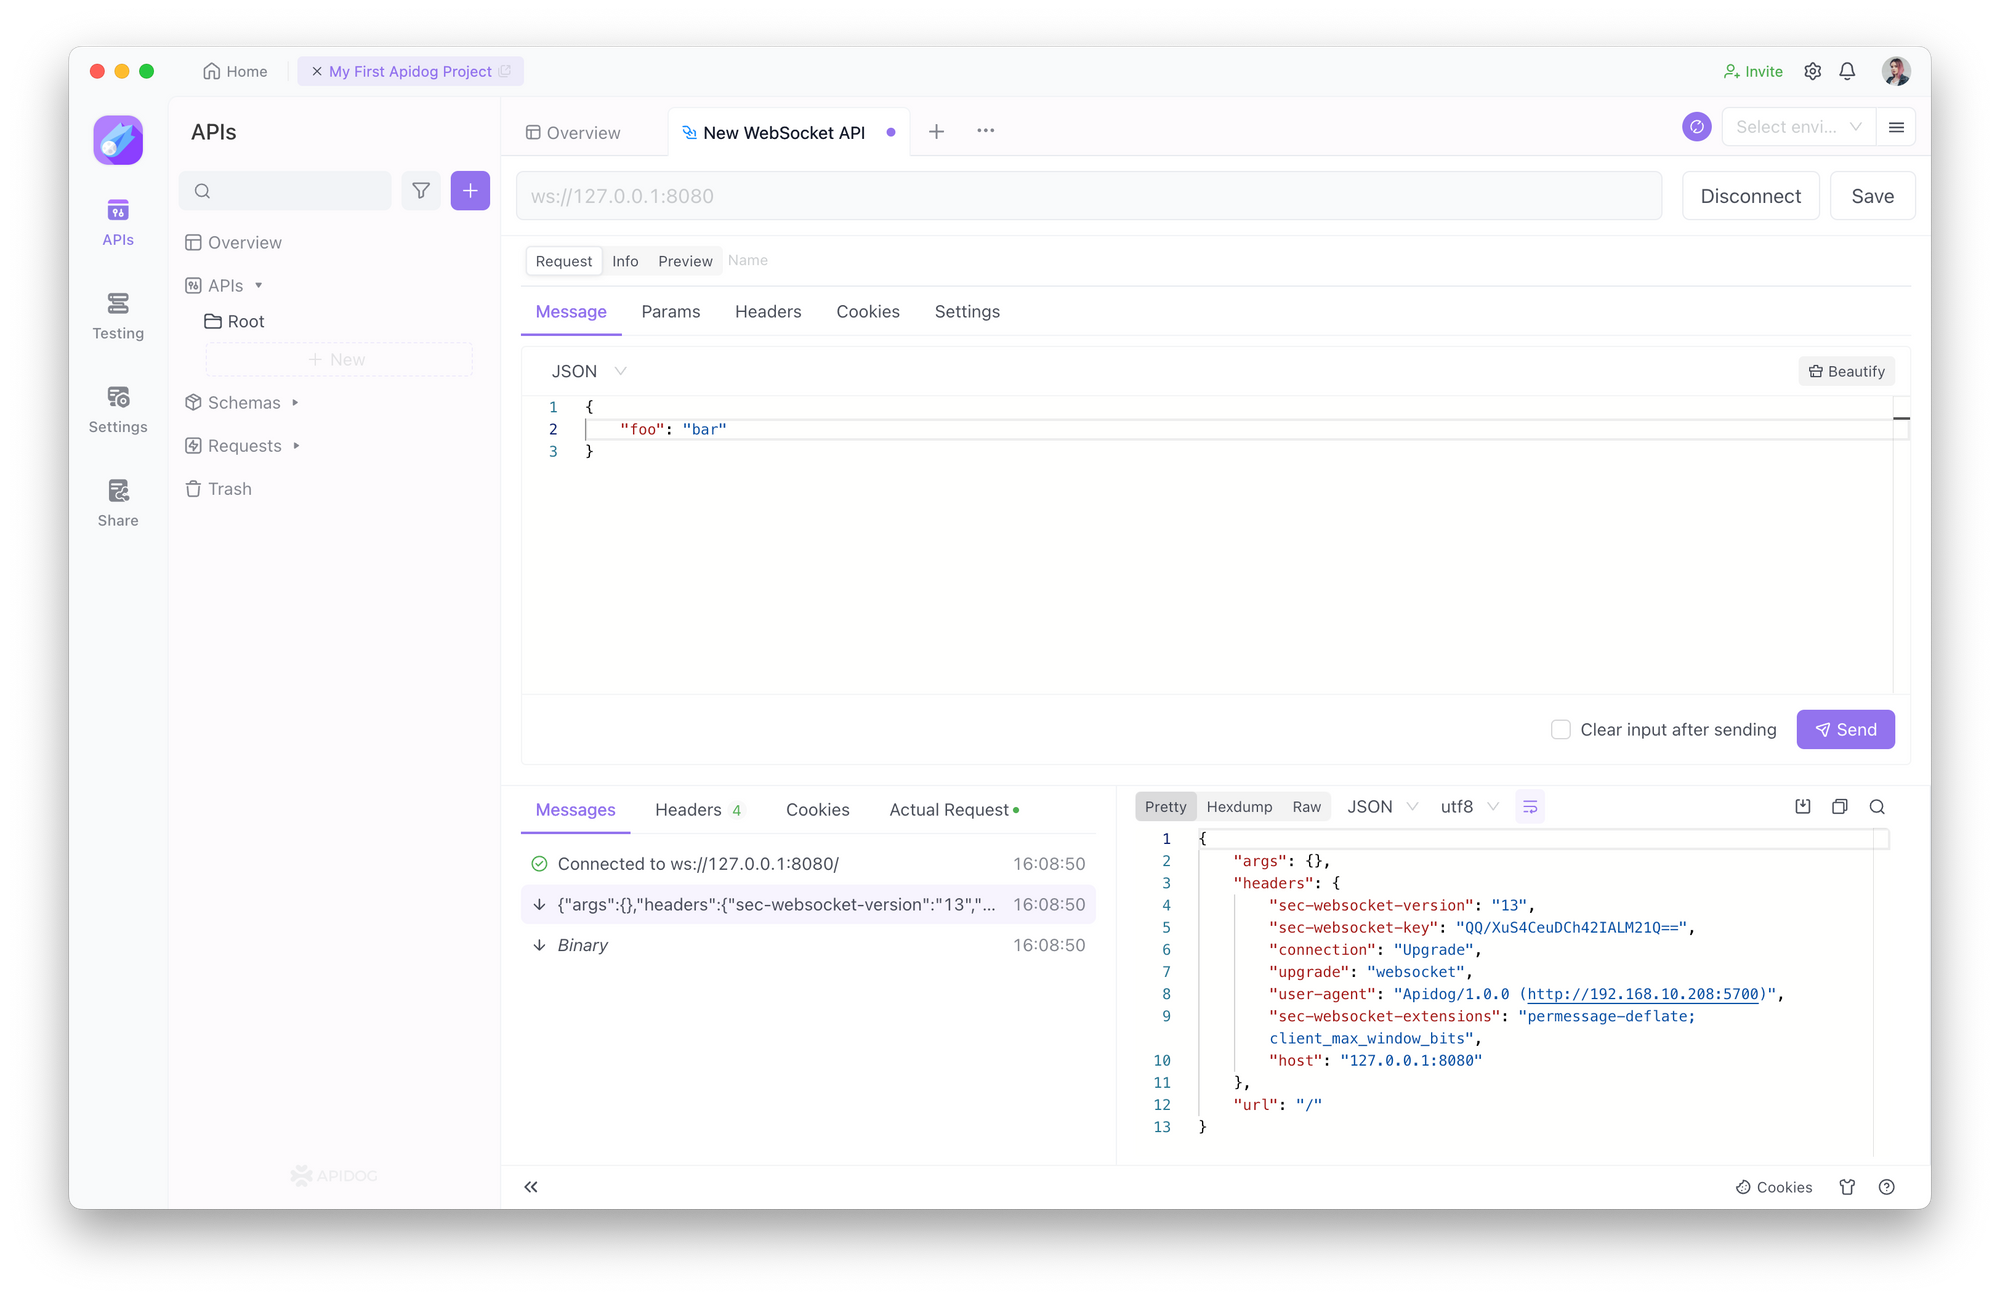
Instead of Node.js, consider using Apidog, an excellent tool similar to Postman for versatile API testing. Apidog supports WebSocket API testing, offering user-friendly interfaces for creating, managing, and testing WebSocket APIs.
