Are you a developer looking to streamline your workflow with APIs? Do you want to harness the power of curl and JavaScript to make your life easier? If so, you've come to the right place! In this post, we’ll dive into how you can effectively use curl and JavaScript for API requests, and how Apidog can be your ultimate tool in this journey.
Introduction: Why API Requests Matter
API (Application Programming Interface) requests are the backbone of modern web development. They allow different software systems to communicate with each other, enabling functionalities like fetching data, updating databases, and more. Whether you are building a web app, a mobile app, or any other software, understanding how to work with APIs is crucial.
What is cURL?
cURL is a command-line tool for transferring data with URLs. It supports various protocols, including HTTP, HTTPS, FTP, and more. It's a versatile tool that developers often use to test and interact with APIs. Here’s why curl is a favorite among developers:
- Simplicity: Curl commands are straightforward and easy to write.
- Flexibility: Curl supports a wide range of protocols and features.
- Power: Curl can handle complex tasks like file uploads, user authentication, and more.

Getting Started with Curl
To start using curl, you need to have it installed on your machine. Most Unix-based systems come with curl pre-installed. For Windows users, you can download it from the official curl website.

Here’s a simple example of how to use curl to make a GET request to an API:
curl https://api.example.com/data
This command sends a GET request to the specified URL and returns the response data.
Introduction to JavaScript for API Requests
JavaScript is a powerful, flexible language that's ubiquitous in web development. It's commonly used for making asynchronous requests to APIs, allowing for dynamic and interactive web pages. Here’s why JavaScript is essential for API requests:
- Asynchronous Nature: JavaScript's asynchronous capabilities make it perfect for API requests without blocking the user interface.
- Wide Adoption: JavaScript is supported by all modern browsers and many back-end environments.
- Rich Ecosystem: There are numerous libraries and frameworks in JavaScript that simplify API requests, such as Axios and Fetch.
Making API Requests with JavaScript
JavaScript provides several ways to make API requests. The Fetch API is a modern, native way to handle HTTP requests. Here’s a basic example of a GET request using Fetch:
fetch('https://api.example.com/data')
  .then(response => response.json())
  .then(data => console.log(data))
  .catch(error => console.error('Error:', error));
Combining Curl and JavaScript: A Powerful Duo
While curl is fantastic for quick tests and simple scripts, JavaScript is indispensable for building interactive applications. Combining these tools allows developers to test APIs with curl and integrate them seamlessly into JavaScript-based applications.
Using Apidog to Simplify API Requests
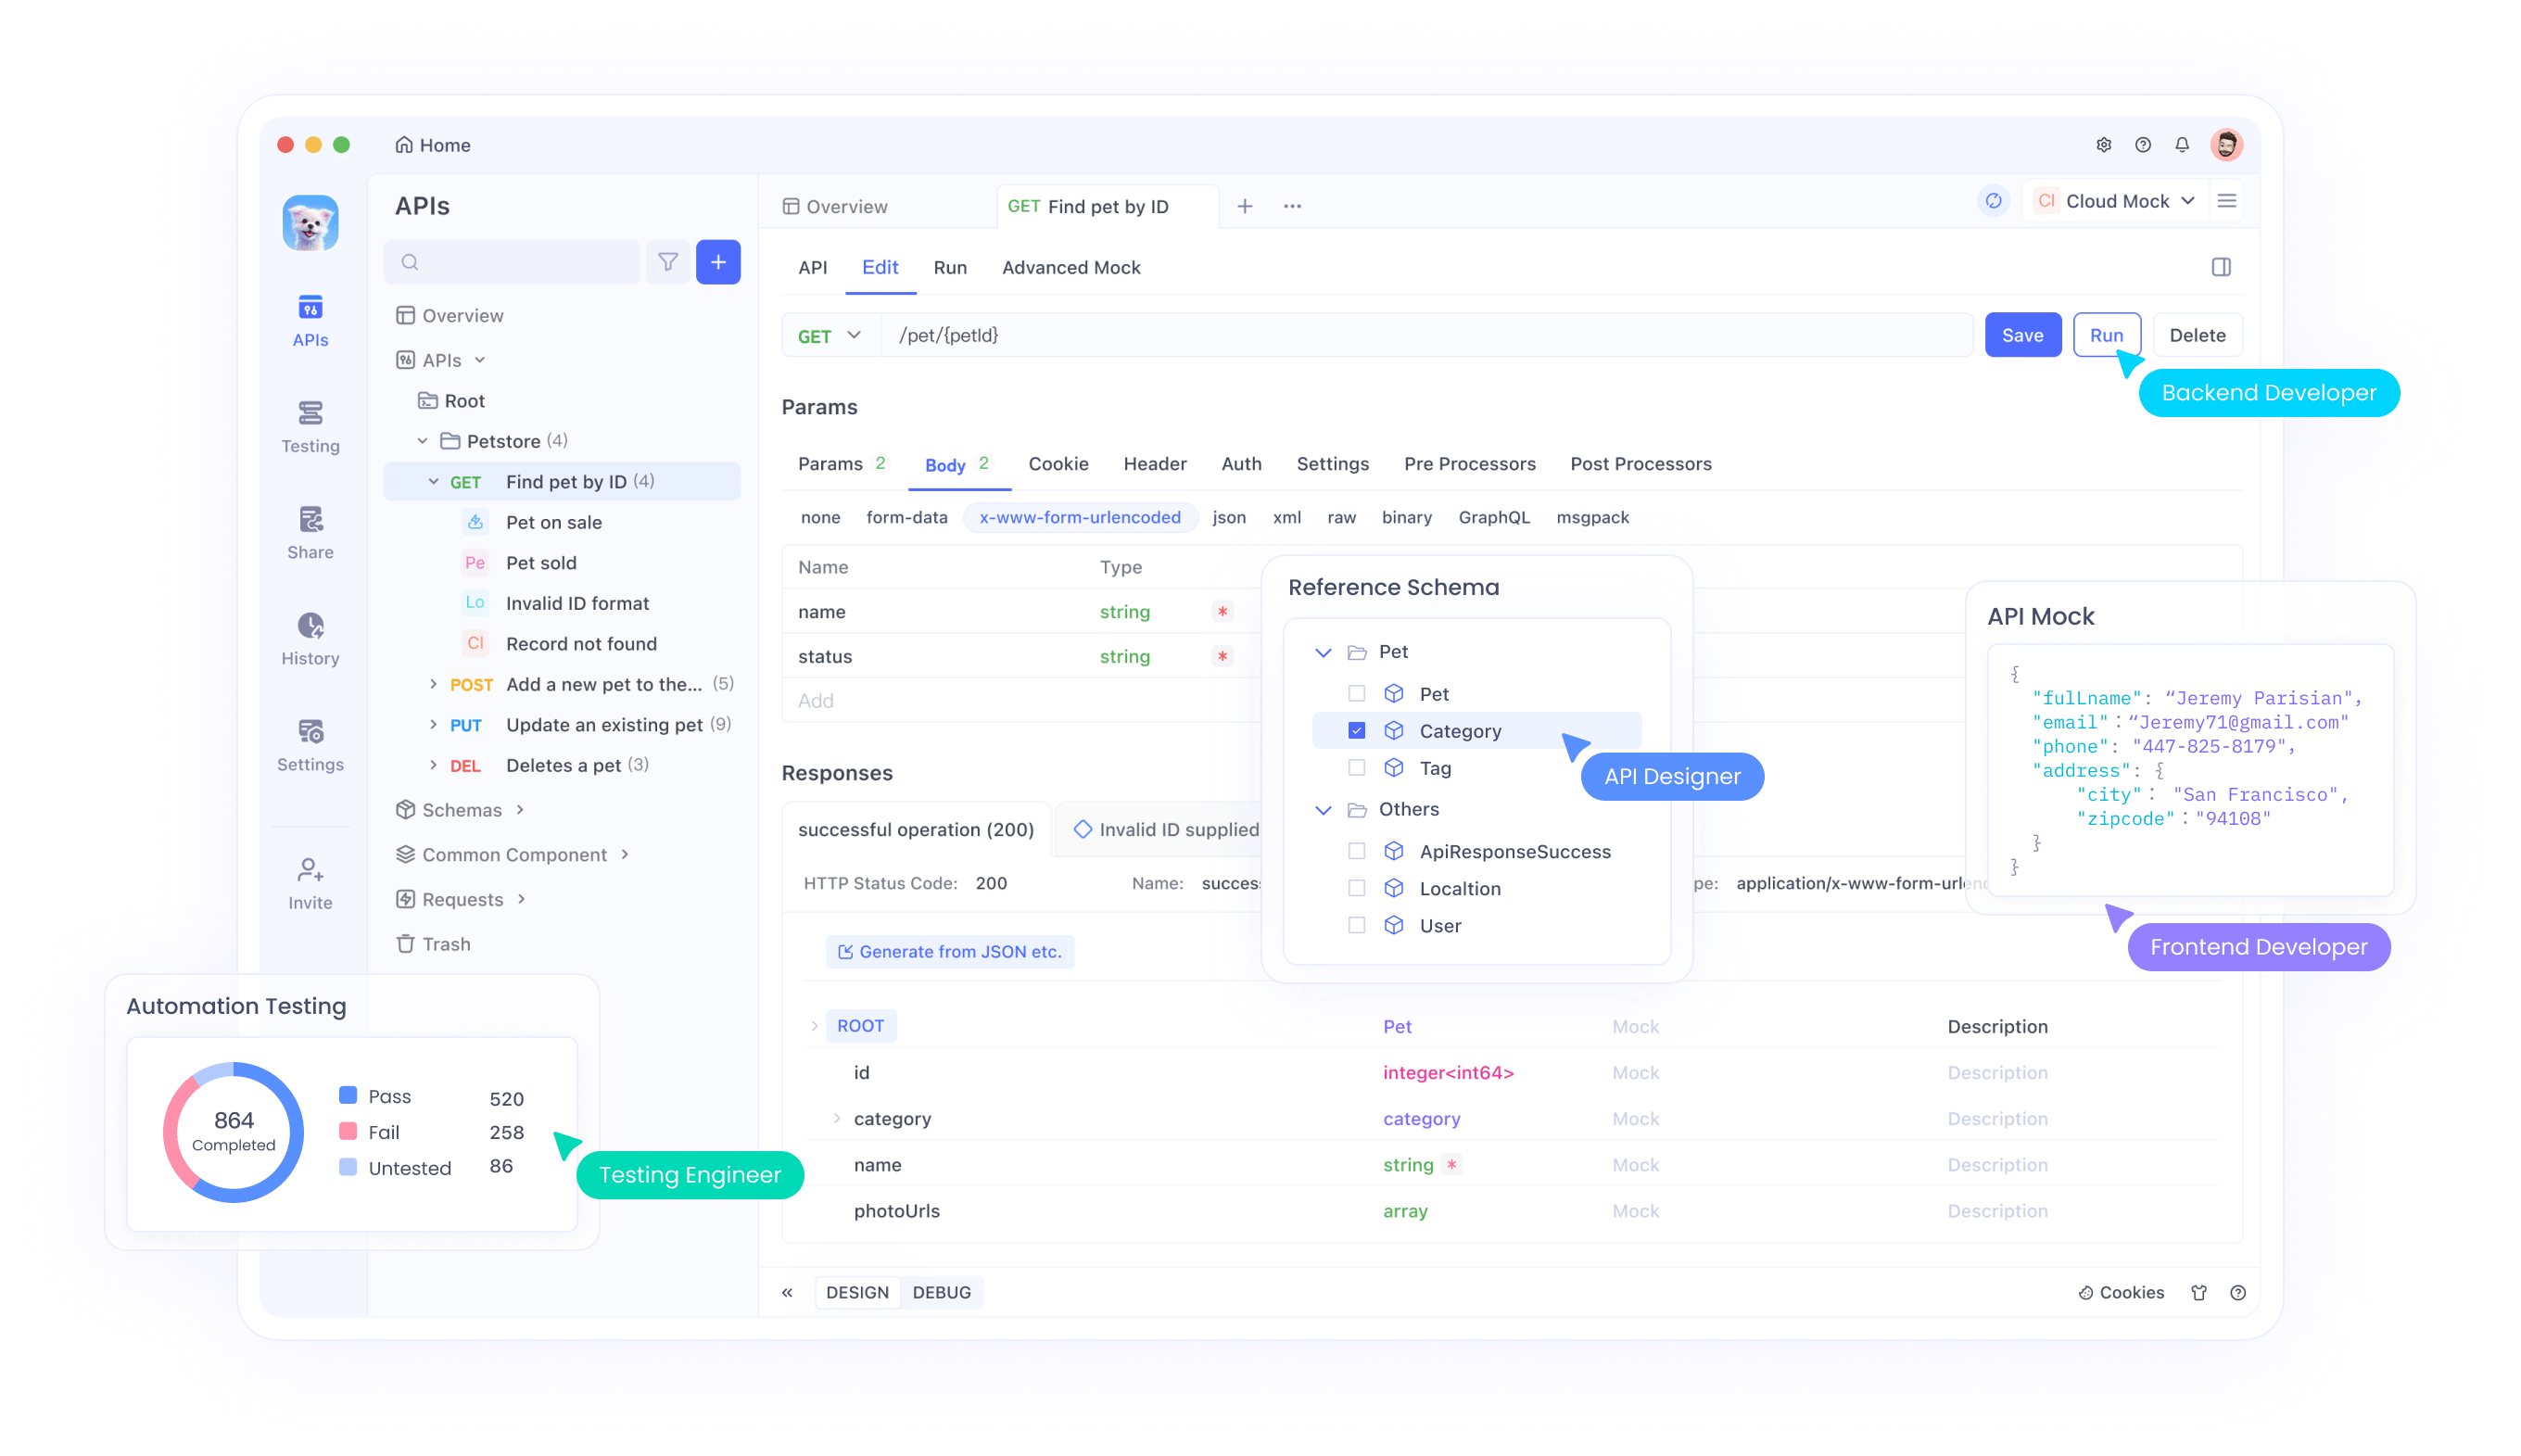
If you want to streamline your API workflows even further, consider using Apidog. Apidog is a powerful tool designed to make API management easy and efficient. It provides features like API documentation, testing, and monitoring in one place.
Why Use Apidog?
- User-Friendly Interface: Apidog offers an intuitive interface that makes API management a breeze.
- Comprehensive Features: From creating and testing APIs to monitoring their performance, Apidog covers all aspects of API management.
- Free to Use: You can download and use Apidog for free, making it accessible to developers of all levels.

Start Working with cURL APIs by Importing them to Apidog

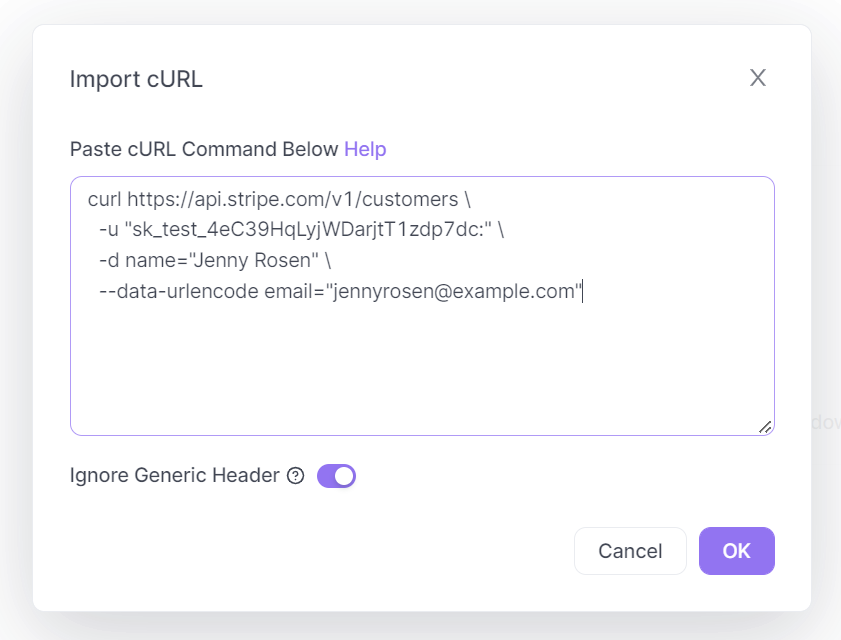
Apidog supports users who wish to import cURL commands to Apidog. In an empty project, click the purple + button around the top left portion of the Apidog window, and select Import cURL.

Copy and paste the cURL command into the box displayed on your screen.

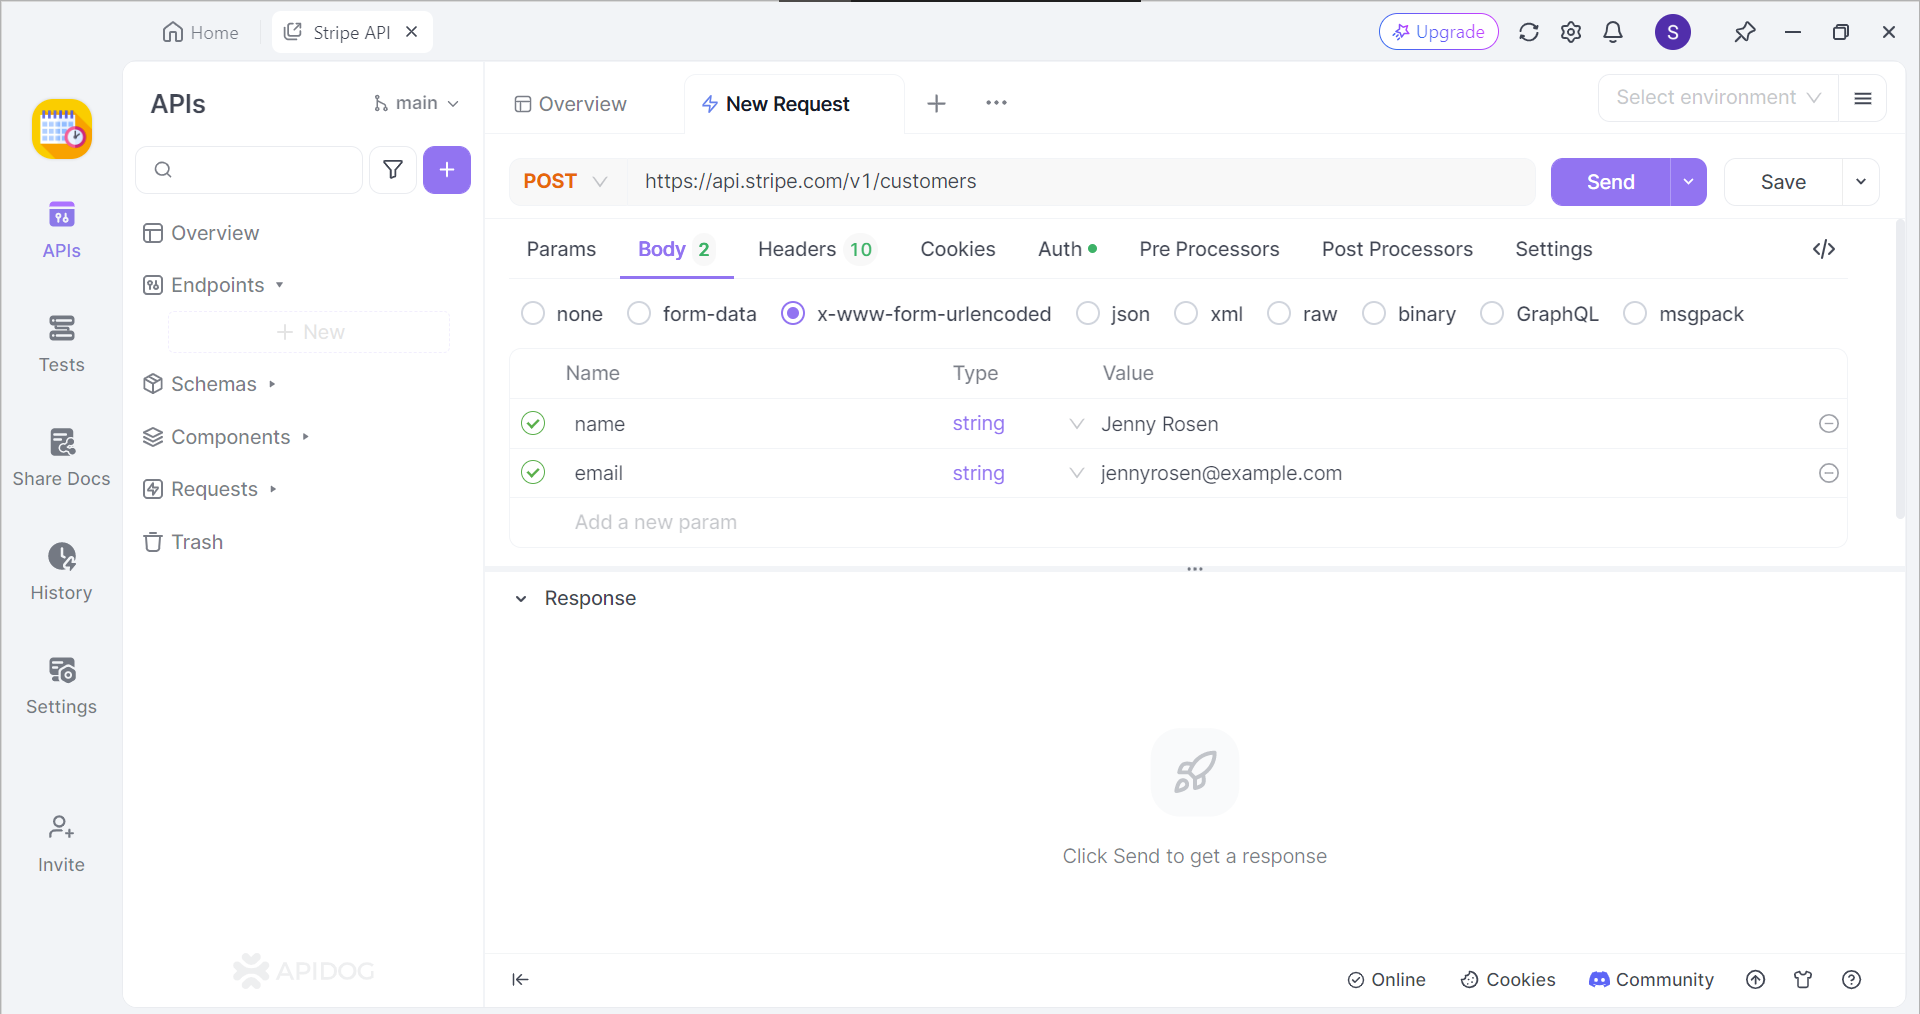
If successful, you should now be able to view the cURL command in the form of an API request.
Detailed Guide: Making API Requests with Curl and JavaScript
Step 1: Setting Up Your Environment
Before diving into making API requests, ensure you have curl installed and a JavaScript environment set up. You can use Node.js for a server-side JavaScript environment or simply use a browser’s console for client-side JavaScript.
Step 2: Making a Simple GET Request with Curl
Let’s start with a basic GET request using curl. Open your terminal and run the following command:
curl https://jsonplaceholder.typicode.com/posts
This command fetches a list of posts from a sample API. You should see a JSON response with the data.
Step 3: Making a GET Request with JavaScript
Now, let’s make the same request using JavaScript. Open your browser’s console or a JavaScript file in your Node.js environment and run the following code:
fetch('https://jsonplaceholder.typicode.com/posts')
  .then(response => response.json())
  .then(data => console.log(data))
  .catch(error => console.error('Error:', error));
This JavaScript code achieves the same result as the curl command, fetching and displaying the list of posts.
Step 4: Making a POST Request with Curl
Next, let's make a POST request to send data to the API. Use the following curl command:
curl -X POST https://jsonplaceholder.typicode.com/posts -H "Content-Type: application/json" -d '{"title":"foo","body":"bar","userId":1}'
This command sends a JSON object with a new post to the API. The -X POST option specifies the request method, and -d sends the data.
Step 5: Making a POST Request with JavaScript
Similarly, you can make a POST request in JavaScript:
fetch('https://jsonplaceholder.typicode.com/posts', {
  method: 'POST',
  headers: {
    'Content-Type': 'application/json'
  },
  body: JSON.stringify({
    title: 'foo',
    body: 'bar',
    userId: 1
  })
})
  .then(response => response.json())
  .then(data => console.log(data))
  .catch(error => console.error('Error:', error));
This JavaScript code sends a new post to the API and logs the response.
Advanced Usage: Authentication and Headers
When working with APIs, you often need to include headers for authentication. Both curl and JavaScript handle headers easily.
Adding Headers with Curl
Here’s an example of a curl request with headers:
curl -H "Authorization: Bearer YOUR_TOKEN" https://api.example.com/data
This command includes an authorization header with a token.
Adding Headers with JavaScript
Similarly, you can add headers in JavaScript:
fetch('https://api.example.com/data', {
  headers: {
    'Authorization': 'Bearer YOUR_TOKEN'
  }
})
  .then(response => response.json())
  .then(data => console.log(data))
  .catch(error => console.error('Error:', error));
Error Handling and Debugging
Handling errors gracefully is crucial for robust applications. Both curl and JavaScript provide mechanisms for error handling.
Error Handling with Curl
Curl provides verbose output to help debug issues. Use the -v option to get detailed information about the request and response:
curl -v https://api.example.com/data
Error Handling with JavaScript
In JavaScript, you can use try...catch blocks for error handling. Here’s an example:
async function fetchData() {
  try {
    const response = await fetch('https://api.example.com/data');
    if (!response.ok) {
      throw new Error(`HTTP error! status: ${response.status}`);
    }
    const data = await response.json();
    console.log(data);
  } catch (error) {
    console.error('Error:', error);
  }
}

fetchData();
Best Practices for API Requests
When working with APIs, following best practices ensures efficient and secure interactions.
Secure Your API Keys
Never hard-code API keys in your code. Use environment variables or secure vaults to store sensitive information.
Optimize API Calls
Minimize the number of API calls to reduce latency and improve performance. Use caching mechanisms where appropriate.
Handle Rate Limits
Respect the rate limits imposed by APIs to avoid being blocked. Implement exponential backoff strategies for retrying failed requests.
Conclusion
By now, you should have a solid understanding of how to make API requests using curl and JavaScript. These tools are powerful on their own but even more so when combined. Additionally, using Apidog can further enhance your workflow, making API management a breeze.


