
If you're a React developer, you've likely encountered the need to integrate APIs into your applications. APIs are the lifeblood of modern web development, providing a way for different software systems to communicate and share data. But how do you ensure that the API you're using is working as expected? That's where APIdog comes in.
In this post, we'll guide you through the process of using an API in a React application. We'll start by explaining what APIs are and why they're important. Then, we'll show you how to integrate an API into your React app. But we won't stop there. We'll also introduce you to APIdog, a powerful tool for testing APIs, and show you how to use it to ensure your API is performing as expected.
What is an API, and why do we need it?
Before we get our hands dirty, let's start with the basics. API stands for Application Programming Interface, and it's essentially a set of rules that define how different software components should interact with each other. In other words, an API acts as a middleman, allowing your React application to communicate with external data sources or services.
Now, you might be wondering, "Why do I need an API in my React app?" Well, imagine you're building a weather application. Without an API, you'd have to manually collect and update weather data for every location on the planet – a task that's not only tedious but also nearly impossible! With an API, however, you can fetch real-time weather data from reliable sources, making your application infinitely more useful and engaging for your users.
Setting the Stage: Installing Dependencies
Alright, let's roll up our sleeves and dive into the fun part! First things first, we'll need to install a couple of dependencies to help us handle API requests in our React application. Don't worry; it's super easy!
Open up your terminal and navigate to your project's directory. Then, run the following command to install the ever-so-popular axios library:
npm install axios
Axios is a promise-based HTTP client that makes it a breeze to send asynchronous HTTP requests to APIs from your React application. It simplifies the process of sending requests and handling responses, saving you from dealing with the complexities of the built-in fetch API.
Alternatively, if you prefer to use the fetch API directly, you don't need to install any additional dependencies. React comes bundled with the fetch API out of the box.
Making API Calls with Axios
Now that we have our trusty axios library installed, let's learn how to use it to fetch data from an API. Imagine we're building a movie app that displays information about popular films. We'll be using the Open Movie Database API (OMDb API) for this example.
First, create a new file called MovieAPI.js (or whatever name you prefer) and import the axios library:
import axios from 'axios';
Next, we'll define a function that makes a GET request to the OMDb API and returns the response data:
export const fetchMovieData = async (movieTitle) => {
  try {
    const response = await axios.get(`http://www.omdbapi.com/?apikey=YOUR_API_KEY&t=${movieTitle}`);
    return response.data;
  } catch (error) {
    console.error('Error fetching movie data:', error);
    throw error;
  }
};
Let's break this down:
- We create an asynchronous function called
fetchMovieDatathat takes amovieTitleparameter. - Inside the
tryblock, we use theaxios.getmethod to send a GET request to the OMDb API. The URL includes our API key (replaceYOUR_API_KEYwith your actual API key) and themovieTitleparameter. - We
awaitthe response from the API and store it in theresponsevariable. - We return
response.data, which contains the actual movie data. - If any errors occur during the API call, we catch them in the
catchblock, log the error to the console, and throw the error to be handled elsewhere in our application.
Using the Fetched Data in a React Component
Great job! We've successfully fetched data from an API using axios. But how do we put this data to use in our React application? Let's create a new component called MovieDetails and see how we can leverage the fetchMovieData function we just created.
import React, { useState, useEffect } from 'react';
import { fetchMovieData } from './MovieAPI';

const MovieDetails = () => {
  const [movieData, setMovieData] = useState(null);
  const [isLoading, setIsLoading] = useState(false);
  const [error, setError] = useState(null);

  useEffect(() => {
    const fetchData = async () => {
      setIsLoading(true);
      setError(null);

      try {
        const data = await fetchMovieData('The Matrix');
        setMovieData(data);
      } catch (error) {
        setError(error.message);
      } finally {
        setIsLoading(false);
      }
    };

    fetchData();
  }, []);

  if (isLoading) {
    return <div>Loading...</div>;
  }

  if (error) {
    return <div>Error: {error}</div>;
  }

  if (!movieData) {
    return null;
  }

  return (
    <div>
      <h2>{movieData.Title}</h2>
      <p>Year: {movieData.Year}</p>
      <p>Plot: {movieData.Plot}</p>
      {/* Add more movie details as needed */}
    </div>
  );
};

export default MovieDetails;
Here's what's happening:
- We import the
useStateanduseEffecthooks from React, as well as ourfetchMovieDatafunction. - We define three state variables:
movieDatato store the fetched movie data,isLoadingto track the loading state, anderrorto handle any errors that might occur during the API call. - Inside the
useEffecthook, we define an async function calledfetchDatathat setsisLoadingtotrue, resets theerrorstate, and then tries to fetch the movie data using thefetchMovieDatafunction. - If the API call is successful, we update the
movieDatastate with the fetched data. If an error occurs, we update theerrorstate with the error message. - Finally, we set
isLoadingtofalsein thefinallyblock, ensuring that the loading state is updated regardless of whether the API call succeeds or fails. - In the component's render function, we check the
isLoading,error, andmovieDatastates and render the appropriate content based on their values. - If
isLoadingistrue, we display a "Loading..." message. - If
erroris notnull, we display the error message. - If
movieDataisnull, we render nothing. - If
movieDatacontains data, we render the movie details using the fetched data.
And there you have it! You've successfully fetched data from an API and displayed it in your React component. Isn't that amazing?
Wrapping Up: Bonus Tips and Tricks
Congratulations! You've made it through the exciting journey of integrating APIs into your React applications. But wait, there's more! Here are a few bonus tips and tricks to help you take your API game to the next level:
Error Handling: While we covered basic error handling in our example, you might want to consider implementing more robust error handling mechanisms, such as displaying user-friendly error messages or implementing retry mechanisms for failed API calls.
Caching: Depending on the nature of your application, you might want to implement caching strategies to improve performance and reduce unnecessary API calls. React's useMemo or useCallback hooks can be useful for this purpose.
Environment Variables: It's generally not a good practice to hardcode API keys or sensitive information in your code. Instead, consider using environment variables to store and manage these values securely.
Pagination and Infinite Scrolling: If you're working with large datasets, you might want to implement pagination or infinite scrolling to improve the user experience and prevent your application from becoming sluggish.
Throttling and Debouncing: When dealing with user inputs or frequent API calls, consider implementing throttling or debouncing techniques to optimize performance and prevent unnecessary API calls.
Testing: Don't forget to write tests for your API integration code! This will help ensure that your application remains reliable and maintainable as you make changes and add new features.
Optimistic Updates: Consider implementing optimistic updates to provide a smoother user experience. With optimistic updates, you can update the UI with the expected result immediately after an API call is made, and then update the UI again with the actual response from the API when it arrives.
API Versioning: As APIs evolve over time, you might need to handle different versions of the API in your application. Make sure to plan for this eventuality and implement version management strategies to ensure your application remains compatible with future API updates.
Authentication and Authorization: If the APIs you're working with require authentication or authorization, you'll need to implement mechanisms for handling access tokens, refresh tokens, and other security measures.
API Monitoring and Logging: Consider implementing monitoring and logging mechanisms to track API usage, performance, and errors. This can be particularly useful when debugging issues or optimizing your application's performance.
Apidog: a free tool to generate your Axios code
Apidog is an all-in-one collaborative API development platform that provides a comprehensive toolkit for designing, debugging, testing, publishing, and mocking APIs. Apidog enables you to automatically create Axios code for making HTTP requests.
Here's the process for using Apidog to generate Axios code:
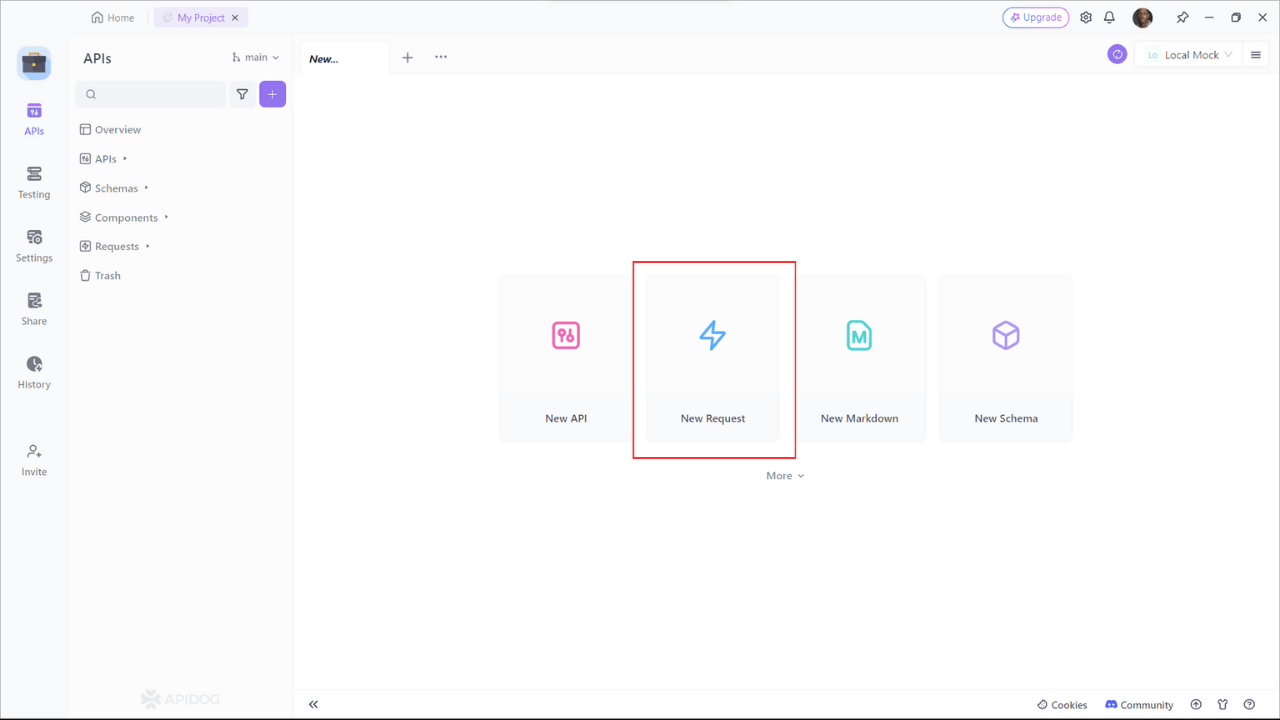
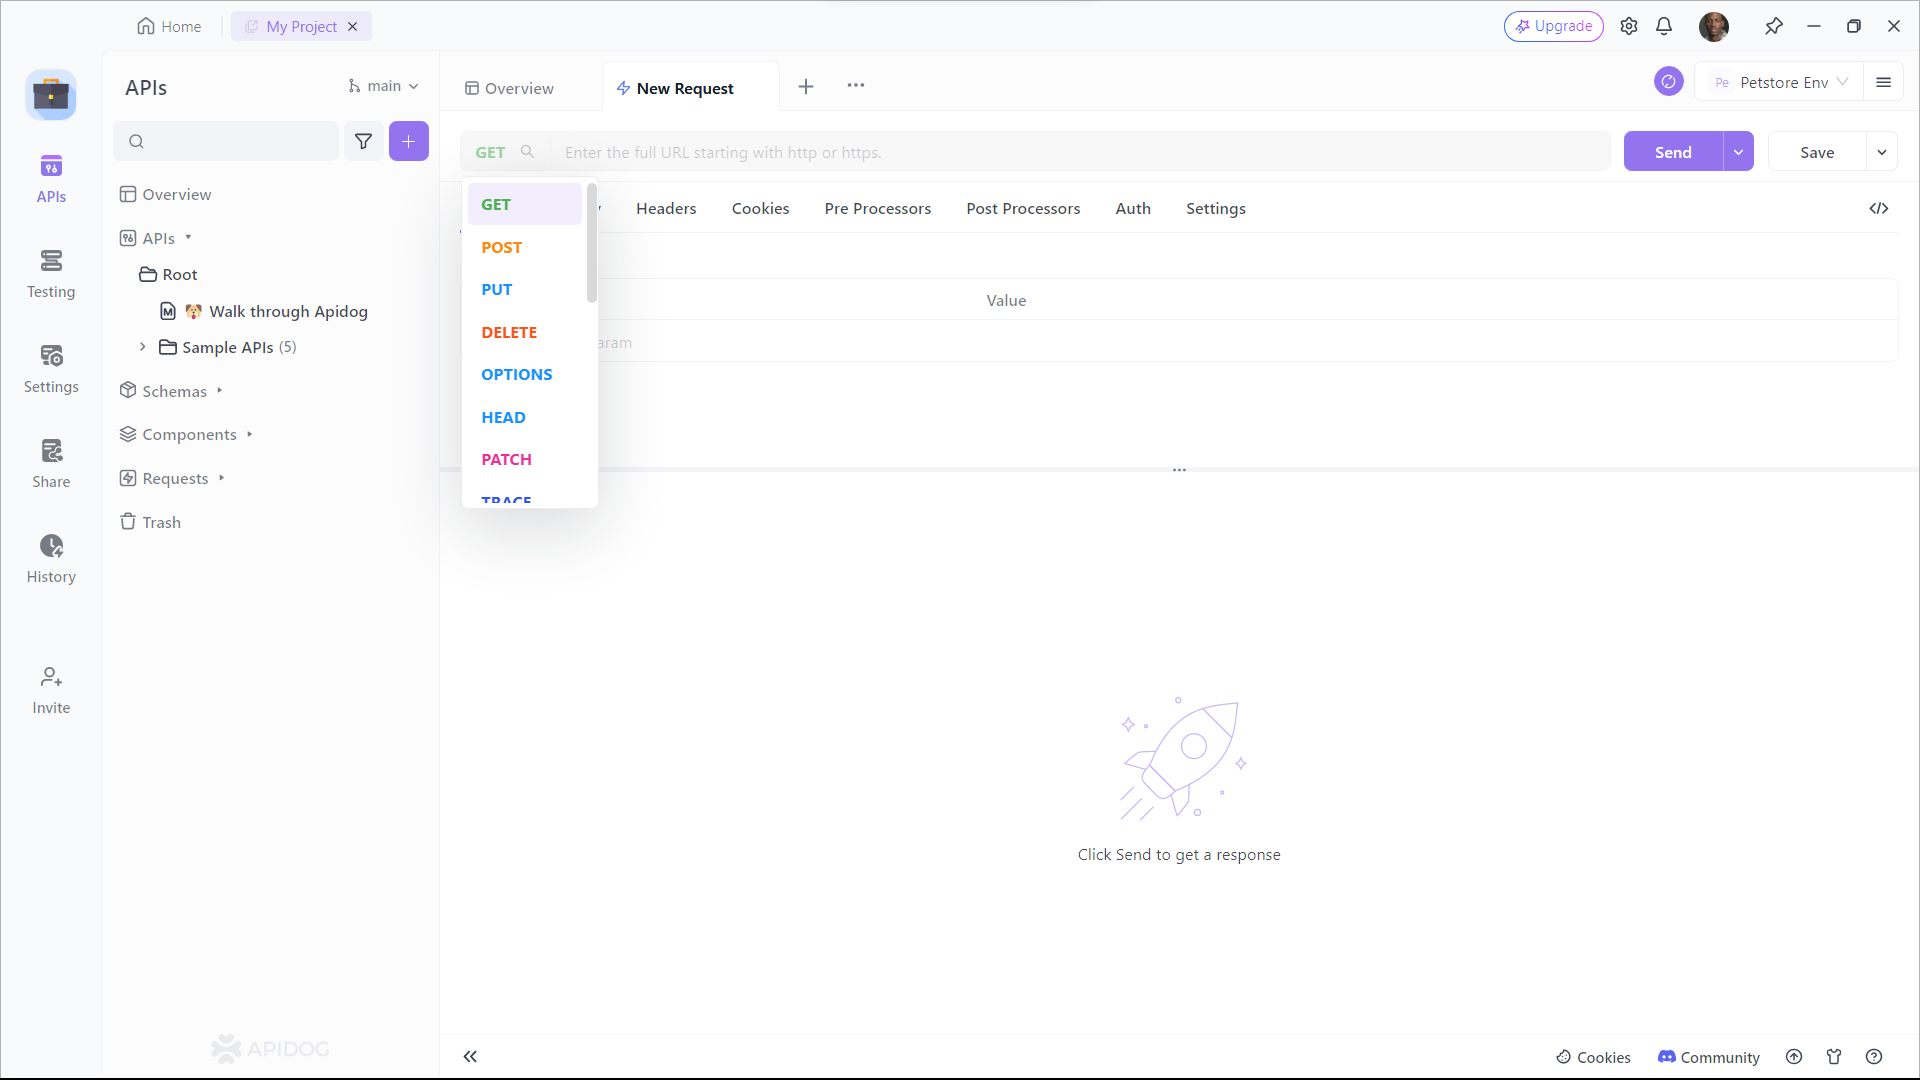
Step 1: Open Apidog and select new request

Step 2: Enter the URL of the API endpoint you want to send a request to,input any headers or query string parameters you wish to include with the request, then click on the "Design" to switch to the design interface of Apidog.

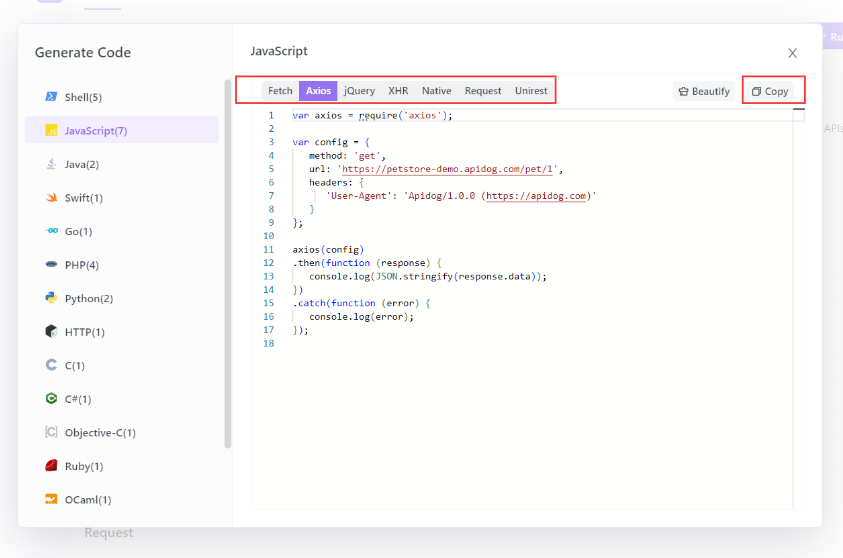
Step 3: Select "Generate client code " to generate your code.
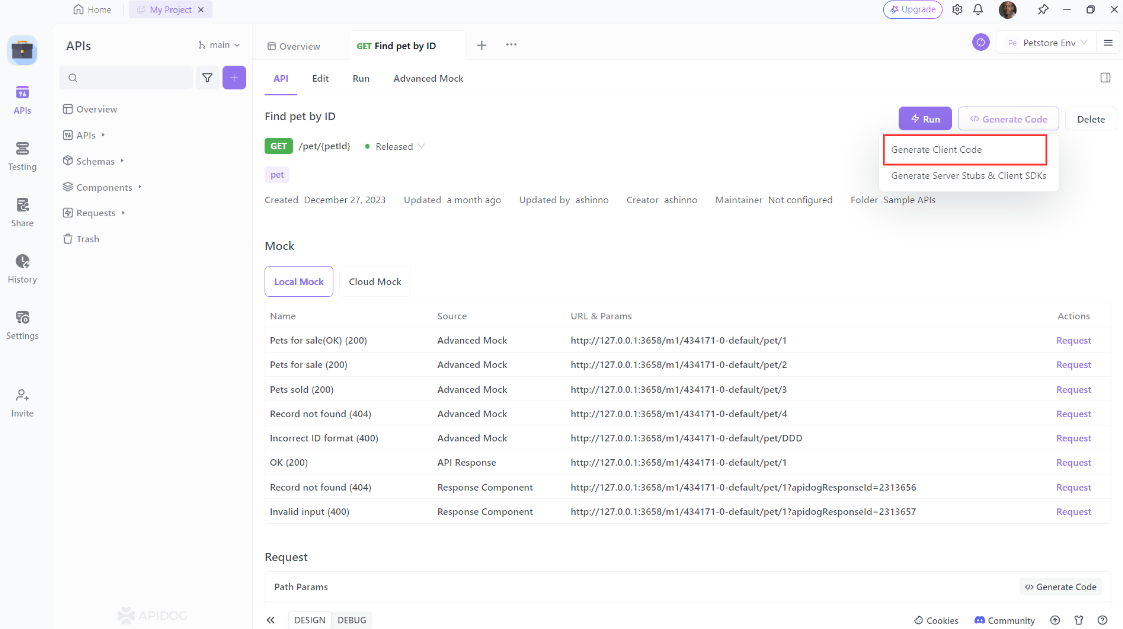
Step 4: Copy the generated Axios code and paste it into your project.
Using Apidog to Send HTTP Requests
Apidog offers several advanced features that further enhance its ability to test HTTP requests. These features allow you to customize your requests and handle more complex scenarios effortlessly.
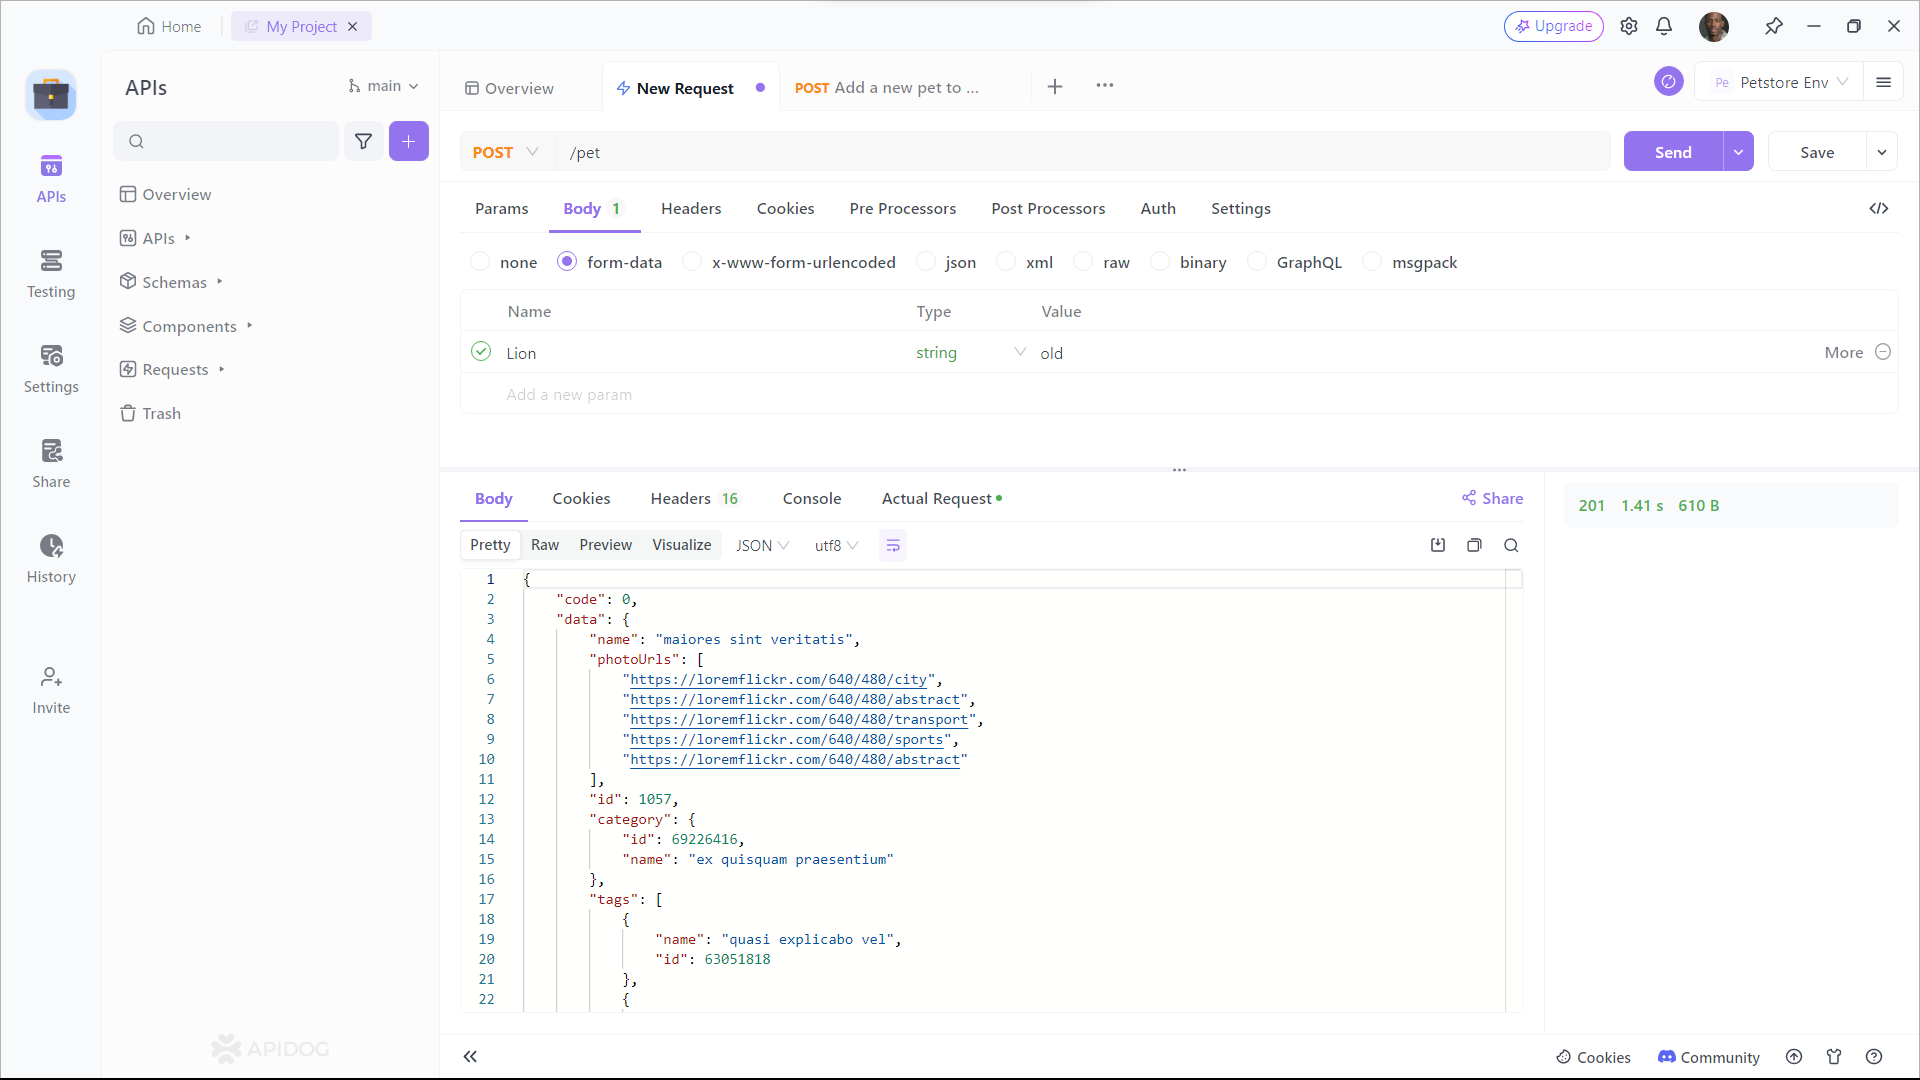
Step 1: Open Apidog and create a new request.
Step 2: Find or manually input the API details for the POST request you want to make.
Step 3: Fill in the required parameters and any data you want to include in the request body.
Conclusion
Axios is highly favored by developers for good reason. In this article, we've covered how to use an API in React for making HTTP requests. We’ve covered the basics of Axios, including what it is, why you should use it, and how to install it.
Using Apidog not only saves you valuable time and effort but also ensures that your code is accurate and error-free. With its user-friendly interface and intuitive features, Apidog is a must-have tool for any developer working with Axios requests.


