
How to Handle Axios Timeout in 2024
Learn how to handle axios timeout like a pro, using the best practices and tools available. Discover how to set, catch, and handle the timeout error in axios, and how to test, debug using Apidog
Have you ever faced the frustration of an API request timing out, resulting in errors like "request failed with status code 408" or "network error"?
The timeout option in Axios allows you to specify how long to wait for a server response before throwing an error, preventing your application from hanging indefinitely.
However, choosing the right timeout value and handling timeouts gracefully can be challenging. This is where Apidog, an API testing and debugging platform, can test and debug your axios requests with timeout.
What is Axios Timeout and Why It Matters
Before we dive into the details of how to handle axios timeout, let’s first understand what it is and why it matters.
Axios timeout is the maximum amount of time that axios will wait for a response from the server before aborting the request and throwing an error. The default timeout value in axios is 0, which means there is no timeout and axios will wait indefinitely for a response.
By setting a timeout value, you can tell axios to give up on the request after a certain period of time, and throw an error. This way, you can handle the error in your code, and provide a fallback or alternative option to the user, such as:
- Showing an error message or a loading indicator
- Asking the user to retry or refresh the page
- Redirecting the user to another page or service
- Logging the error or sending a notification to the developer
By handling the error, you can improve the user experience, save the resource, and prevent the security risk. You can also avoid unnecessary or duplicate requests, and optimize the performance of your application.
But how do you set the timeout value in axios? And how do you handle the error when it occurs? That’s what we will see in the next sections.
How to Set the Timeout Option in Axios
Setting the timeout option in axios is very easy and straightforward. You can specify the timeout value in milliseconds as a property of the config object that you pass to the axios request method, such as axios.get, axios.post, axios.put, etc.
For example, if you want to set the timeout value to 5 seconds (5000 milliseconds) for a GET request to a certain API endpoint, you can write something like this:
axios.get('/api/users', {timeout: 5000})
  .then(response => {
    // handle success
  })
  .catch(error => {
    // handle error
  });
Alternatively, you can also set the timeout value globally for all axios requests, by using the axios.defaults object. For example, if you want to set the timeout value to 5 seconds for all axios requests, you can write something like this:
axios.defaults.timeout = 5000;
You can also create an axios instance with a custom timeout value, and use it for specific requests. For example, if you want to create an axios instance with a timeout value of 10 seconds, and use it for some requests, you can write something like this:
const instance = axios.create({timeout: 10000});

instance.get('/api/products')
  .then(response => {
    // handle success
  })
  .catch(error => {
    // handle error
  });
As you can see, setting the timeout option in axios is very simple and flexible. You can customize it for different requests, depending on your needs and preferences.

But how do you choose the right timeout value for your requests? How long should you wait for a response before giving up? There is no definitive answer to this question, as it depends on many factors, such as:
- The type and purpose of the request
- The speed and reliability of the server and the network
- The expectation and tolerance of the user
- The availability and feasibility of the fallback or alternative option
But what happens when the timeout value is reached, and the request is aborted? How do you catch and handle the timeout error in axios? That’s what we will see in the next section.
How to Catch and Handle the Timeout Error in Axios
When the timeout value is reached, and the request is aborted, axios will throw an error, which you can catch and handle in your code. There are different ways to catch and handle the error, depending on how you write your axios requests, such as using try/catch, promises, or async/await.
Using try/catch
If you are using try/catch to write your axios requests, you can catch the error in the catch block, and handle it accordingly. For example, if you are using a try/catch block to make a GET request to a certain API endpoint, with a timeout value of 5 seconds, you can write something like this:
try {
  const response = await axios.get('/api/users', {timeout: 5000});
  // handle success
} catch (error) {
  // handle error
}
But how do you know if the error is a timeout error, or some other type of error? One way to check is to use the error.code property, which will be set to ‘ECONNABORTED’ if the error is a timeout error. For example, you can write something like this:
try {
  const response = await axios.get('/api/users', {timeout: 5000});
  // handle success
} catch (error) {
  // handle error
  if (error.code === 'ECONNABORTED') {
    // handle timeout error
    console.error('Request timed out');
    // do something else, such as showing an error message or a retry button
  } else {
    // handle other types of errors
    console.error(error.message);
    // do something else, such as logging the error or sending a notification
  }
}
As you can see, using try/catch is a simple and effective way to catch and handle the timeout error in axios. However, it requires using the async/await syntax, which might not be supported by some browsers or environments. If you want to use a more compatible and traditional way to write your axios requests, you can use promises instead.
Using promises
If you are using promises to write your axios requests, you can catch the error in the catch method, and handle it accordingly. For example, if you are using a promise chain to make a GET request to a certain API endpoint, with a timeout value of 5 seconds, you can write something like this:
axios.get('/api/users', {timeout: 5000})
  .then(response => {
    // handle success
  })
  .catch(error => {
    // handle error
  });
To check if the error is a timeout error, you can use the same error.code property as before, and compare it with ‘ECONNABORTED’. For example, you can write something like this:
axios.get('/api/users', {timeout: 5000})
  .then(response => {
    // handle success
  })
  .catch(error => {
    // handle error
    if (error.code === 'ECONNABORTED') {
      // handle timeout error
      console.error('Request timed out');
      // do something else, such as showing an error message or a retry button
    } else {
      // handle other types of errors
      console.error(error.message);
      // do something else, such as logging the error or sending a notification
    }
  });
As you can see, using promises is another easy and familiar way to catch and handle the timeout error in axios. However, it might result in a nested and verbose code, especially if you have multiple axios requests in a sequence or in parallel. If you want to use a more modern and elegant way to write your axios requests, you can use async/await instead.
Using async/await
If you are using async/await to write your axios requests, you can catch the error in a try/catch block, and handle it accordingly. This is the same method that we saw earlier, but I will repeat it here for completeness. For example, if you are using an async function to make a GET request to a certain API endpoint, with a timeout value of 5 seconds, you can write something like this:
async function getUsers() {
  try {
    const response = await axios.get('/api/users', {timeout: 5000});
    // handle success
  } catch (error) {
    // handle error
    if (error.code === 'ECONNABORTED') {
      // handle timeout error
      console.error('Request timed out');
      // do something else, such as showing an error message or a retry button
    } else {
      // handle other types of errors
      console.error(error.message);
      // do something else, such as logging the error or sending a notification
    }
  }
}
As you can see, using async/await is a clean and concise way to catch and handle the timeout error in axios. However, it requires using the async/await syntax, which might not be supported by some browsers or environments. If you want to use a more compatible and traditional way to write your axios requests, you can use promises instead.
These are the three main ways to catch and handle the timeout error in axios, using try/catch, promises, or async/await. You can choose the one that suits your preference and situation best, and use it consistently throughout your code.
But how do you test and debug your axios requests with timeout?
How to Test and Debug Your Axios Requests with Timeout Using Apidog
Apidog is a powerful and easy-to-use platform that helps you design, debug, develop, mock, and test your APIs. It has many features and tools that make it a one-stop solution for all your API needs.
- Open Apidog and click on the “New Request” button to create a new request
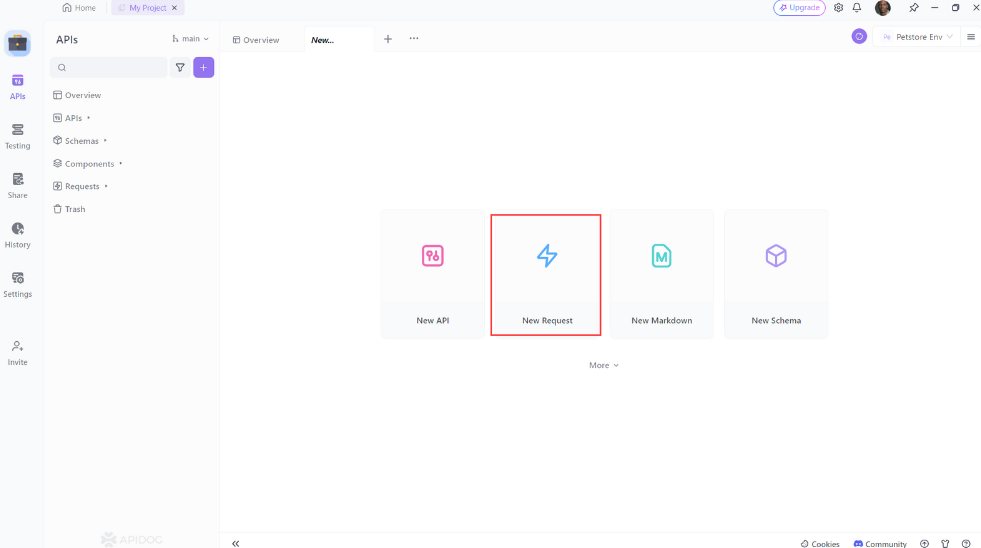
- You will see a request editor, where you can enter the details of your request, such as method, URL, headers, body, etc.

- Click on the “Send” button to send the request
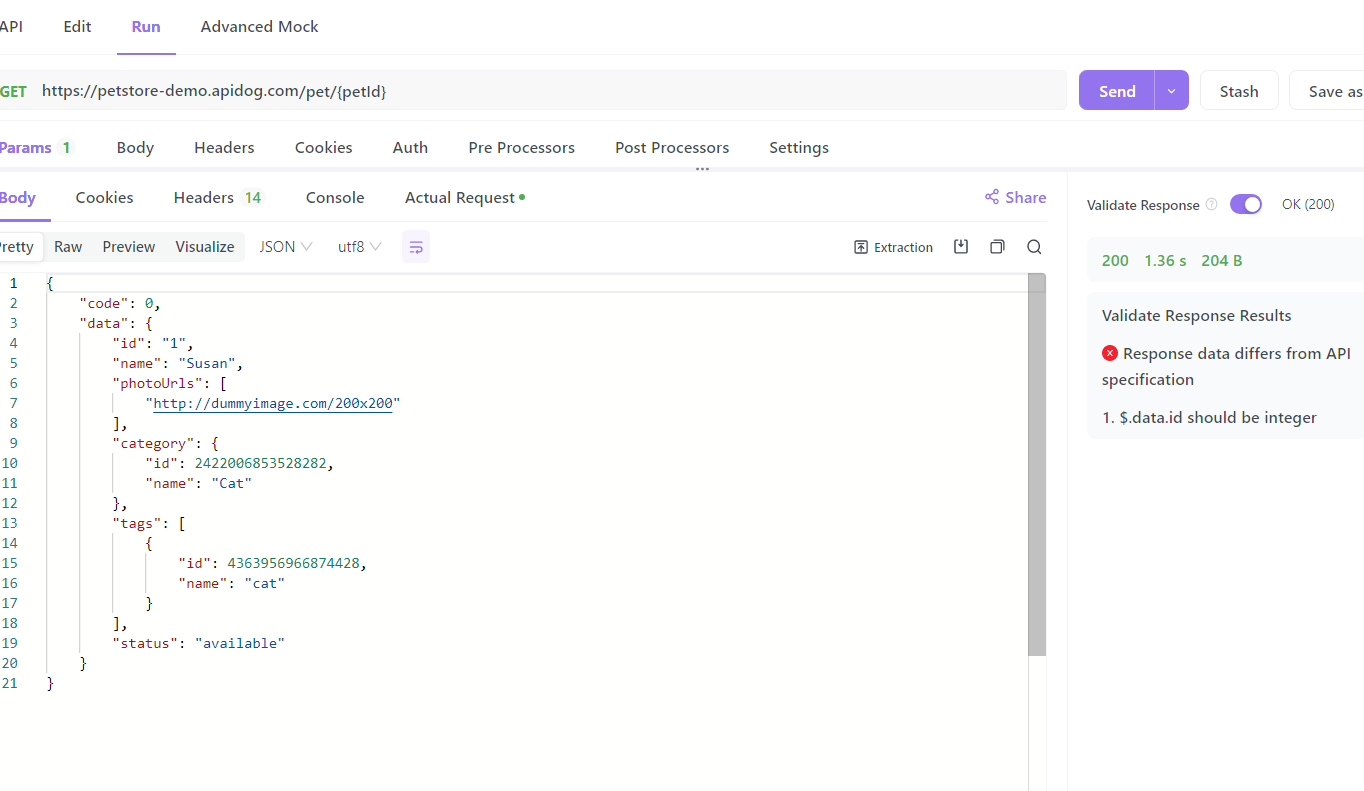
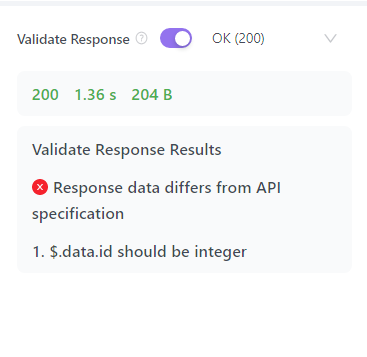
- You will see a response panel, where you can see the details of the response, such as status, headers, body, time, etc.
With Apidog, you can easily test and debug your axios requests with timeout.
Conclusion
In this blog post, we have learned how to handle axios timeout like a pro, using the best practices and tools available. We have seen how to:
- Set the timeout option in axios and customize it for different requests
- Catch and handle the timeout error in axios using try/catch, promises, or async/await
- Test and debug your axios requests with timeout using Apidog, an integrated platform for API design, debugging, development, mock, and testing
By following these steps, you can improve the user experience, performance, and security of your web applications, and avoid the frustration and hassle of waiting indefinitely for a response from the server.
