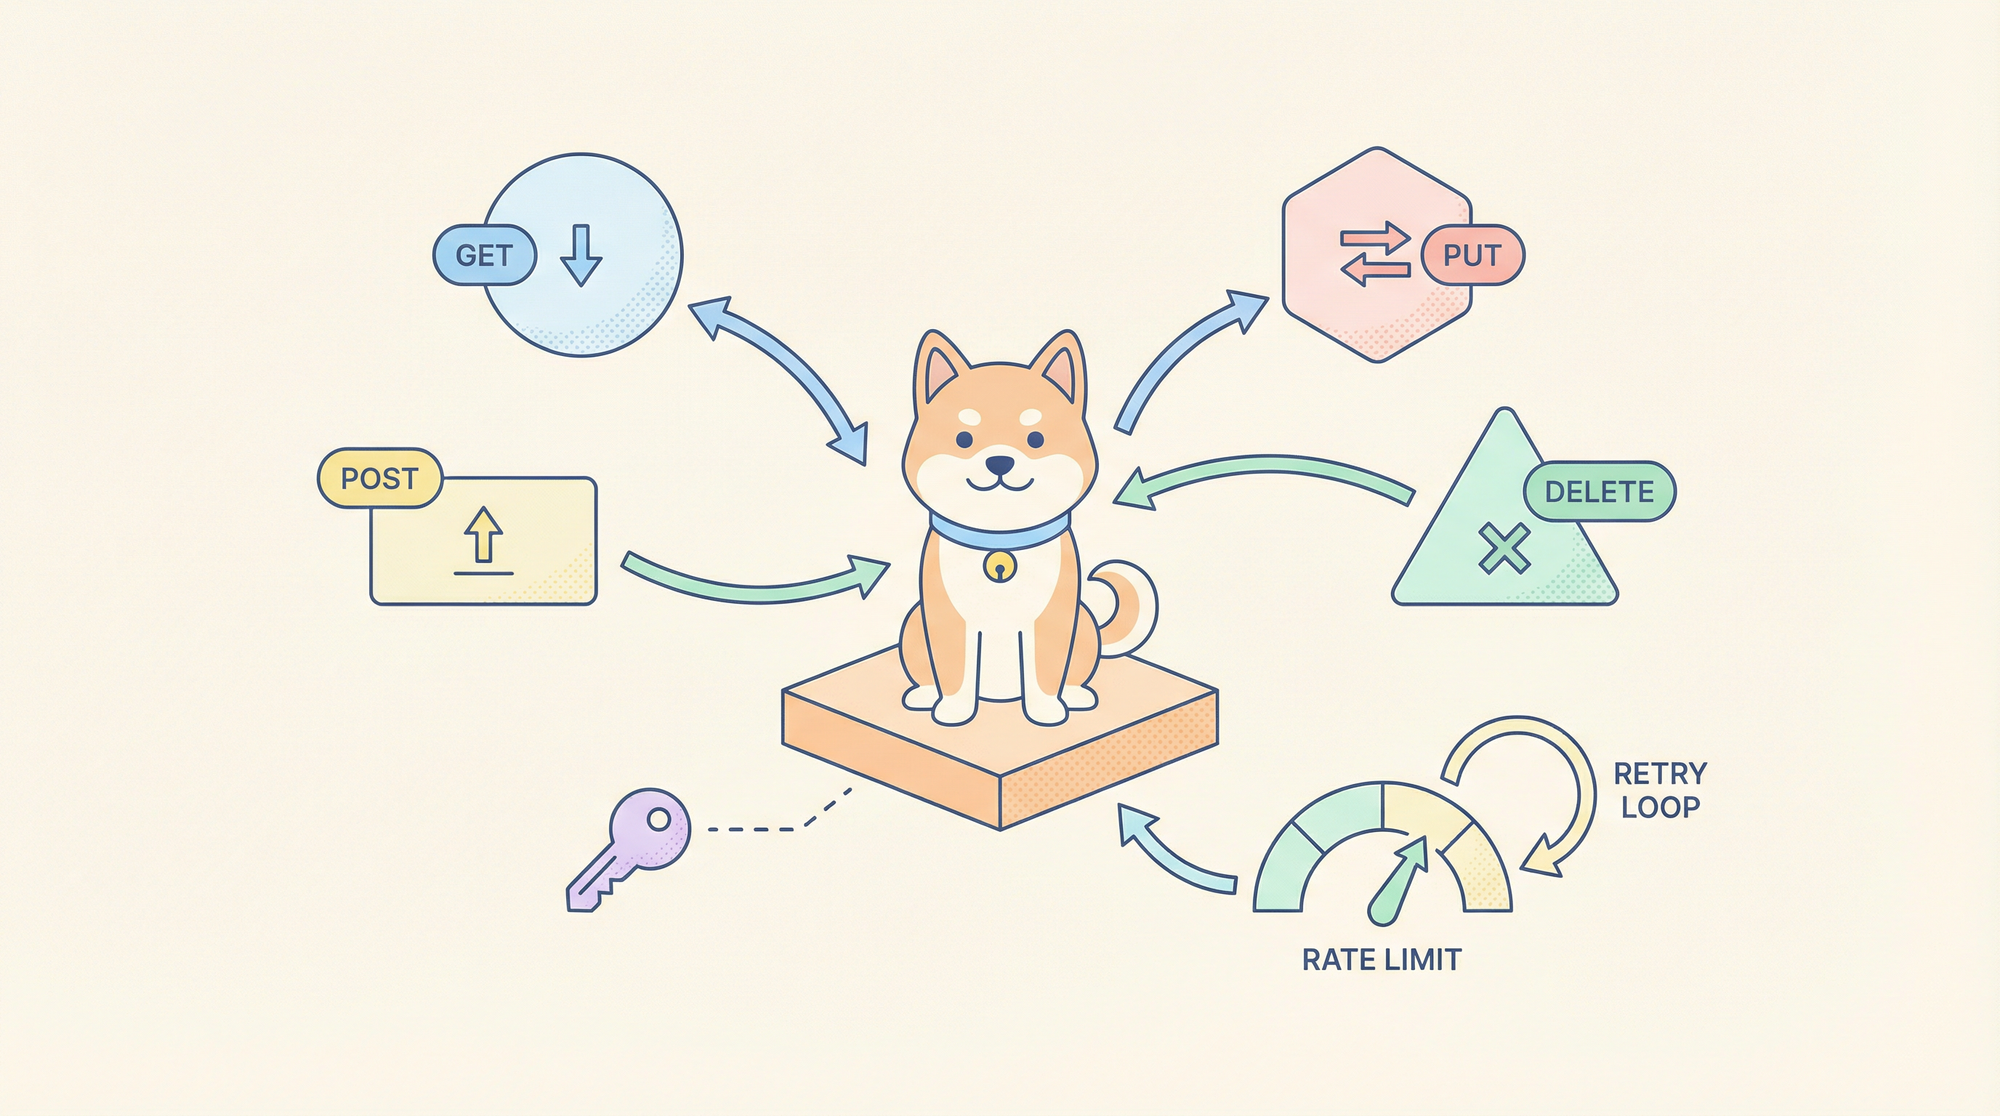
การสร้าง fetch calls ด้วยตนเอง, การจัดการโทเค็นการยืนยันตัวตน, และการแยกวิเคราะห์การตอบกลับของ API สำหรับการเชื่อมโยงแต่ละครั้งนั้นเทียบเท่ากับการเขียนโค้ดภาษาแอสเซมบลีสำหรับเว็บแอปในยุคปัจจุบัน Claude Code Skills สำหรับการดึงข้อมูลเปลี่ยนคำขอ HTTP ให้เป็นเครื่องมือเชิงประกาศที่นำกลับมาใช้ใหม่ได้ ซึ่งเข้าใจรูปแบบการยืนยันตัวตน, การแบ่งหน้า และการตรวจสอบการตอบกลับ ช่วยลดโค้ดส่วนเกินและบังคับใช้ความสอดคล้องทั่วทั้ง codebase ของคุณ
ทำไมทักษะ API Networking จึงมีความสำคัญต่อเวิร์กโฟลว์การพัฒนา
นักพัฒนาทุกคนใช้เวลาหลายชั่วโมงไปกับงาน API ซ้ำซาก: การตั้งค่าส่วนหัวสำหรับ OAuth 2.0, การนำ exponential backoff มาใช้สำหรับเอนด์พอยต์ที่จำกัดอัตรา และการเขียน type guards สำหรับการตอบกลับ JSON ที่คาดเดาไม่ได้ งานเหล่านี้มีแนวโน้มที่จะเกิดข้อผิดพลาดและเชื่อมโยงอย่างแน่นหนากับบริการเฉพาะ ทำให้ยากต่อการทดสอบและบำรุงรักษา Claude Code Skills จะสรุปความซับซ้อนเหล่านี้ให้อยู่ในรูปแบบเครื่องมือที่มีการกำหนดเวอร์ชันและทดสอบได้ ซึ่งผู้ช่วย AI ของคุณสามารถเรียกใช้ได้ด้วยภาษามนุษย์
การเปลี่ยนแปลงคือจากการเรียกใช้ API แบบเชิงคำสั่ง (imperative) ไปสู่การดึงข้อมูลแบบเชิงประกาศ (declarative) แทนที่จะเขียน fetch(url, { headers: {...} }) คุณจะอธิบายความตั้งใจ: “ดึงข้อมูลผู้ใช้จาก GitHub API โดยใช้โทเค็นจาก ENV และส่งคืนผลลัพธ์ที่มีชนิดข้อมูลกำหนด” ทักษะนี้จะจัดการการจัดการข้อมูลรับรอง, ตรรกะการลองใหม่ และการแยกวิเคราะห์การตอบกลับ โดยส่งคืนข้อมูลที่มีชนิดข้อมูลที่แข็งแกร่งซึ่งแอปพลิเคชันของคุณสามารถนำไปใช้ได้ทันที
ต้องการแพลตฟอร์มแบบครบวงจร All-in-One สำหรับทีมพัฒนาของคุณเพื่อให้ทำงานร่วมกันด้วย ประสิทธิภาพสูงสุด หรือไม่?
Apidog ตอบสนองทุกความต้องการของคุณและ แทนที่ Postman ด้วยราคาที่เข้าถึงได้ง่ายกว่ามาก!
การตั้งค่าทักษะการดึงข้อมูลใน Claude Code
ขั้นตอนที่ 1: ติดตั้ง Claude Code และกำหนดค่า MCP
หากคุณยังไม่ได้ติดตั้ง Claude Code CLI:
npm install -g @anthropic-ai/claude-code
claude --version  # Should show >= 2.0.70
สร้างไดเรกทอรีและไฟล์การกำหนดค่า MCP:
# macOS/Linux
mkdir -p ~/.config/claude-code
touch ~/.config/claude-code/config.json

# Windows
mkdir %APPDATA%\claude-code
echo {} > %APPDATA%\claude-code\config.json

ขั้นตอนที่ 2: โคลนและสร้างทักษะการดึงข้อมูล
ทักษะการดึงข้อมูลอย่างเป็นทางการมีรูปแบบสำหรับ REST, GraphQL และคำขอ HTTP ทั่วไป
git clone https://github.com/anthropics/skills.git
cd skills/skills/data-fetching
npm install
npm run build
สิ่งนี้จะคอมไพล์ตัวจัดการ TypeScript ไปยัง dist/index.js
ขั้นตอนที่ 3: กำหนดค่า MCP เพื่อโหลดทักษะ
แก้ไข ~/.config/claude-code/config.json:
{
  "mcpServers": {
    "data-fetching": {
      "command": "node",
      "args": ["/absolute/path/to/skills/data-fetching/dist/index.js"],
      "env": {
        "DEFAULT_TIMEOUT": "30000",
        "MAX_RETRIES": "3",
        "RATE_LIMIT_PER_MINUTE": "60",
        "CREDENTIALS_STORE": "~/.claude-credentials.json"
      }
    }
  }
}
สำคัญ:
- ใช้ absolute paths สำหรับ
args - กำหนดค่าตัวแปรสภาพแวดล้อม:
DEFAULT_TIMEOUT: หมดเวลาคำขอในหน่วยมิลลิวินาทีMAX_RETRIES: จำนวนครั้งที่พยายามใหม่สำหรับข้อผิดพลาด 5xxRATE_LIMIT_PER_MINUTE: เกณฑ์การจำกัดอัตรา (throttle threshold)CREDENTIALS_STORE: เส้นทางไปยังไฟล์ข้อมูลรับรองที่เข้ารหัส
ขั้นตอนที่ 4: ตั้งค่า Credentials Store
สร้างไฟล์ข้อมูลรับรองเพื่อหลีกเลี่ยงการ hardcode โทเค็น:
# Create encrypted credentials store
mkdir -p ~/.claude
echo '{}' > ~/.claude/credentials.json
chmod 600 ~/.claude/credentials.json
เพิ่มโทเค็น API ของคุณ:
{
  "github": {
    "token": "ghp_your_github_token_here",
    "baseUrl": "https://api.github.com"
  },
  "slack": {
    "token": "xoxb-your-slack-token",
    "baseUrl": "https://slack.com/api"
  },
  "custom-api": {
    "token": "Bearer your-jwt-token",
    "baseUrl": "https://api.yourcompany.com",
    "headers": {
      "X-API-Version": "v2"
    }
  }
}
ทักษะจะอ่านไฟล์นี้เมื่อเริ่มต้นและแทรกข้อมูลรับรองลงในคำขอ
ขั้นตอนที่ 5: ตรวจสอบการติดตั้ง
claude
เมื่อโหลดแล้ว ให้รัน:
/list-tools
คุณควรเห็น:
Available tools:
- data-fetching:rest-get
- data-fetching:rest-post
- data-fetching:rest-put
- data-fetching:rest-delete
- data-fetching:graphql-query
- data-fetching:graphql-mutation
- data-fetching:raw-http
รูปแบบคำขอ API หลัก
1. คำขอ RESTful GET
เครื่องมือ: data-fetching:rest-get
กรณีใช้งาน: ดึงข้อมูลจากเอนด์พอยต์ REST พร้อมการยืนยันตัวตน, การแบ่งหน้า และการแคช
พารามิเตอร์:
service: คีย์ที่ตรงกับ credentials store (github, slack, custom-api)endpoint: เส้นทาง API (เช่น/users,/repos/owner/name)params: ออบเจกต์พารามิเตอร์การสืบค้นcache: TTL (เวลาที่ข้อมูลมีชีวิตอยู่) ในหน่วยวินาที (ไม่บังคับ)transform: นิพจน์ JMESPath สำหรับการแปลงการตอบกลับ
ตัวอย่าง: ดึง repository ของผู้ใช้ GitHub
Use rest-get to fetch repositories for user "anthropics" from GitHub API, including pagination for 100 items per page, and return only name, description, and stargazers_count.
การดำเนินการที่สร้างขึ้น:
// Handler executes:
const response = await fetch('https://api.github.com/users/anthropics/repos', {
  headers: {
    'Authorization': 'token ghp_your_github_token_here',
    'Accept': 'application/vnd.github.v3+json'
  },
  params: {
    per_page: 100,
    page: 1
  }
});

// Transform with JMESPath
const transformed = jmespath.search(response, '[*].{name: name, description: description, stars: stargazers_count}');
return transformed;
การใช้งาน Claude Code:
claude --skill data-fetching \
  --tool rest-get \
  --params '{"service": "github", "endpoint": "/users/anthropics/repos", "params": {"per_page": 100}, "transform": "[*].{name: name, description: description, stars: stargazers_count}"}'
2. คำขอ POST/PUT/DELETE
เครื่องมือ: data-fetching:rest-post / rest-put / rest-delete
กรณีใช้งาน: สร้าง, อัปเดต หรือลบทรัพยากร
พารามิเตอร์:
service: คีย์ credentials storeendpoint: เส้นทาง APIbody: เพย์โหลดคำขอ (ออบเจกต์หรือสตริง JSON)headers: ส่วนหัวเพิ่มเติมidempotencyKey: สำหรับความปลอดภัยในการลองใหม่
ตัวอย่าง: สร้างปัญหา GitHub
Use rest-post to create an issue in the anthorpics/claude repository with title "Feature Request: MCP Tool Caching", body containing the description, and labels ["enhancement", "mcp"].
การดำเนินการ:
await fetch('https://api.github.com/repos/anthropics/claude/issues', {
  method: 'POST',
  headers: {
    'Authorization': 'token ghp_...',
    'Content-Type': 'application/json'
  },
  body: JSON.stringify({
    title: "Feature Request: MCP Tool Caching",
    body: "Description of the feature...",
    labels: ["enhancement", "mcp"]
  })
});
3. คำสั่ง GraphQL
เครื่องมือ: data-fetching:graphql-query
กรณีใช้งาน: การดึงข้อมูลที่ซับซ้อนพร้อมความสัมพันธ์ที่ซ้อนกัน
พารามิเตอร์:
service: คีย์ credentials storequery: สตริงคำสั่ง GraphQLvariables: ออบเจกต์ตัวแปรคำสั่งoperationName: การดำเนินการที่ระบุชื่อ
ตัวอย่าง: ดึงปัญหา repository พร้อมความคิดเห็น
Use graphql-query to fetch the 10 most recent open issues from the anthorpics/skills repository, including title, author, comment count, and labels.
query RecentIssues($owner: String!, $repo: String!, $limit: Int!) {
  repository(owner: $owner, name: $repo) {
    issues(first: $limit, states: [OPEN], orderBy: {field: CREATED_AT, direction: DESC}) {
      nodes {
        title
        author { login }
        comments { totalCount }
        labels(first: 5) { nodes { name } }
      }
    }
  }
}
พารามิเตอร์:
{
  "service": "github",
  "query": "query RecentIssues($owner: String!, $repo: String!, $limit: Int!) { ... }",
  "variables": {
    "owner": "anthropics",
    "repo": "skills",
    "limit": 10
  }
}
4. คำขอ HTTP ดิบ
เครื่องมือ: data-fetching:raw-http
กรณีใช้งาน: กรณีพิเศษที่เครื่องมือ REST/GraphQL ไม่ครอบคลุม
พารามิเตอร์:
url: URL แบบเต็มmethod: เมธอด HTTPheaders: ออบเจกต์ส่วนหัวbody: เนื้อหาคำขอtimeout: แทนที่การหมดเวลาเริ่มต้น
ตัวอย่าง: การส่ง Webhook พร้อมส่วนหัวที่กำหนดเอง
Use raw-http to POST to https://hooks.slack.com/services/YOUR/WEBHOOK/URL with a JSON payload containing {text: "Deployment complete"}, and custom header X-Event: deployment-success.
สถานการณ์เครือข่ายขั้นสูง
การจัดการการแบ่งหน้า
ทักษะจะตรวจจับรูปแบบการแบ่งหน้าโดยอัตโนมัติ:
// GitHub Link header parsing
const linkHeader = response.headers.get('Link');
if (linkHeader) {
  const nextUrl = parseLinkHeader(linkHeader).next;
  if (nextUrl && currentPage < maxPages) {
    return {
      data: currentData,
      nextPage: currentPage + 1,
      hasMore: true
    };
  }
}
ขอทุกหน้า:
Use rest-get to fetch all repositories for user "anthropics", handling pagination automatically until no more pages exist.
ทักษะจะส่งคืนอาร์เรย์แบบแบนของผลลัพธ์ทั้งหมด
การจำกัดอัตราและตรรกะการลองใหม่
กำหนดค่าพฤติกรรมการลองใหม่ต่อคำขอ:
{
  "service": "github",
  "endpoint": "/rate_limit",
  "maxRetries": 5,
  "retryDelay": "exponential",
  "retryOn": [429, 500, 502, 503, 504]
}
ทักษะนี้ใช้ exponential backoff พร้อม jitter:
const delay = Math.min(
  (2 ** attempt) * 1000 + Math.random() * 1000,
  30000
);
await new Promise(resolve => setTimeout(resolve, delay));
การจัดการคำขอพร้อมกัน
จัดกลุ่มการเรียกใช้ API หลายรายการอย่างมีประสิทธิภาพ:
Use rest-get to fetch details for repositories: ["claude", "skills", "anthropic-sdk"], executing requests concurrently with a maximum of 3 parallel connections.
ทักษะนี้ใช้ p-limit เพื่อควบคุมการทำงานพร้อมกัน:
import pLimit from 'p-limit';
const limit = pLimit(3); // Max 3 concurrent

const results = await Promise.all(
  repos.map(repo =>
    limit(() => fetchRepoDetails(repo))
  )
);
การดักจับคำขอและการจำลอง
สำหรับการทดสอบ ให้ดักจับคำขอโดยไม่ต้องเรียกใช้ API จริง:
// In skill configuration
"env": {
  "MOCK_MODE": "true",
  "MOCK_FIXTURES_DIR": "./test/fixtures"
}
ตอนนี้คำขอจะส่งคืนข้อมูลจำลองจากไฟล์ JSON:
// test/fixtures/github/repos/anthropics.json
[
  {"name": "claude", "description": "AI assistant", "stars": 5000}
]
การประยุกต์ใช้จริง: การสร้างแดชบอร์ด GitHub
ขั้นตอนที่ 1: ดึงข้อมูล Repository
Use rest-get to fetch all repositories from GitHub for organization "anthropics", including full description, star count, fork count, and open issues count. Cache results for 5 minutes.
ขั้นตอนที่ 2: เพิ่มข้อมูลผู้ร่วมให้ข้อมูล
สำหรับแต่ละ repository ให้ดึงผู้ร่วมให้ข้อมูลอันดับต้นๆ:
Use rest-get to fetch contributor statistics for repository "anthropics/claude", limit to top 10 contributors, and extract login and contributions count.
ขั้นตอนที่ 3: สร้างสถิติสรุป
รวมข้อมูลใน Claude Code:
const repos = await fetchAllRepos('anthropics');
const enrichedRepos = await Promise.all(
  repos.map(async (repo) => {
    const contributors = await fetchTopContributors('anthropics', repo.name);
    return { ...repo, topContributors: contributors };
  })
);

return {
  totalStars: enrichedRepos.reduce((sum, r) => sum + r.stars, 0),
  totalForks: enrichedRepos.reduce((sum, r) => sum + r.forks, 0),
  repositories: enrichedRepos
};
ขั้นตอนที่ 4: เผยแพร่แดชบอร์ด
Use rest-post to create a GitHub Pages site with the dashboard data using the GitHub API to commit to the gh-pages branch.
การจัดการข้อผิดพลาดและความยืดหยุ่น
ทักษะจะจัดหมวดหมู่ข้อผิดพลาดเพื่อการจัดการที่เหมาะสม:
// 4xx errors: Client errors
if (response.status >= 400 && response.status < 500) {
  throw new SkillError('client_error', `Invalid request: ${response.status}`, {
    statusCode: response.status,
    details: await response.text()
  });
}

// 5xx errors: Server errors (retry eligible)
if (response.status >= 500) {
  throw new SkillError('server_error', `Server error: ${response.status}`, {
    retryable: true,
    statusCode: response.status
  });
}

// Network errors: Connection failures
if (error.code === 'ECONNREFUSED' || error.code === 'ETIMEDOUT') {
  throw new SkillError('network_error', 'Network unreachable', {
    retryable: true,
    originalError: error.message
  });
}
Claude Code จะได้รับข้อผิดพลาดที่มีโครงสร้างและสามารถตัดสินใจที่จะลองใหม่, ยกเลิก หรือขอการแทรกแซงจากผู้ใช้
บทสรุป
Claude Code Skills สำหรับ API networking เปลี่ยนคำขอ HTTP ชั่วคราวให้เป็นเครื่องมือดึงข้อมูลที่เชื่อถือได้, ปลอดภัยต่อชนิดข้อมูล และสามารถสังเกตการณ์ได้ ด้วยการรวมศูนย์การจัดการข้อมูลรับรอง, การนำการลองใหม่ที่ชาญฉลาดมาใช้ และการให้การจัดการข้อผิดพลาดที่มีโครงสร้าง คุณจะสามารถขจัดแหล่งที่มาของข้อบกพร่องในการรวม API ที่พบบ่อยที่สุด เริ่มต้นด้วยเครื่องมือหลักสี่อย่าง ได้แก่ rest-get, rest-post, graphql-query และ raw-http จากนั้นขยายออกไปสำหรับกรณีการใช้งานเฉพาะของคุณ การลงทุนในการกำหนดค่าทักษะจะให้ผลตอบแทนทันทีในด้านความสอดคล้องของโค้ดและความเร็วในการพัฒนา
เมื่อทักษะการดึงข้อมูลของคุณโต้ตอบกับ API ภายใน ให้ตรวจสอบเอนด์พอยต์เหล่านั้นด้วย Apidog เพื่อให้แน่ใจว่าการรวมระบบที่ขับเคลื่อนด้วย AI ของคุณใช้สัญญาที่เชื่อถือได้