
The modern web demands an engaging and responsive user experience. In achieving this, the XMLHttpRequest (XHR) object plays a critical role. Functioning as the foundation for asynchronous communication, XHR empowers web applications to seamlessly exchange data with servers in the background, eliminating the need for full-page reloads that disrupt user interaction.
Apidog is an all-in-one API development platform that equips users with all the necessary functionalities for the entire lifecycle. You can build, test, mock, and document APIs - it is the complete package for API development!
If you want to learn more about Apidog's functionalities,
This article delves into the core functionalities of XHR, providing developers with a comprehensive understanding of how to harness its power to create dynamic and engaging web experiences.
To understand this article completely, let us first go through the fundamental framework, which is XHR (XMLHttpRequest).
What is XHR?
XHR, which stands for XMLHttpRequest, is a built-in object in web browsers that allows JavaScript code to communicate with a web server.
XHR works in a few steps:
- Fetch data from a server: Imagine you have a web page that displays live weather updates. XHR allows the JavaScript code in the page to retrieve data from a weather server without reloading the entire page. This makes the user experience smoother.
- Send data to a server: XHR can also be used to send data to a server. For instance, when you submit a form on a web page, XHR can be used behind the scenes to send the form data to the server for processing.
- Receive responses from the server: Once XHR sends data or fetches data from the server, it receives a response. This response can be used by the JavaScript code to update the web page or perform other actions.
In short, XHR enables dynamic web pages that can exchange data with servers without requiring a full page refresh. There's a newer and more modern way to achieve similar functionality called Fetch API, but XHR is still widely used for backward compatibility with older browsers.
The Concept of XHR Requests
The Process
Creation
A web page's JavaScript code initiates an XHR request by creating an XMLHttpRequest object.
Configuration
The script configures the request by specifying details like:
- HTTP method (GET, POST, etc.)
- URL of the server resource to access
- Asynchronous or synchronous nature of the request (asynchronous recommended for responsiveness)
- Data to send to the server (if applicable)
- Event handlers for various request stages
Sending the Request
The open() and send() methods are used to send the request to the server.
Server Processing
The server processes the request based on the HTTP method and provides data.
Response
The server sends a response back to the browser, including data (e.g., JSON, HTML) and status codes (e.g., 200 for success).
Event Handling
The browser's JavaScript code can handle the response through event listeners (particularly onreadystatechange) defined earlier. This allows the script to parse the response data and update the web page accordingly.
Step-by-step Guide on How to Call an XHR Request
This section contains a simplified JavaScript guide on how to call an XHR request. As this involves client coding, you will need to prepare an IDE (Integrated Development Environment)!
1. Create an XMLHttpRequest Object
JavaScript
let xhr = new XMLHttpRequest();
This creates a new object that allows you to interact with the server.
2. Configure the Request
Use the open() method to define the request details:
- HTTP Method (required): Choose the operation you want to perform, where common methods are GET, POST, PUT, and DELETE.
- URL (required): Specify the web address of the server resource you want to access (e.g., "https://api.example.com/data").
- Asynchronous (optional, defaults to true): Set to
truefor asynchronous requests (allows the browser to continue running while waiting for the response),falsefor synchronous (blocks the browser until the response arrives - not recommended).
Example:
xhr.open("GET", "https://api.example.com/data", true); // GET request to the specified URL, asynchronous
3. Set Optional Headers (if Applicable)
Use the setRequestHeader() method to define additional headers for the request. This might be necessary depending on the server's requirements.
Example (specifying data format as JSON):
xhr.setRequestHeader("Content-Type", "application/json");
4. Prepare Data to Send (if Applicable)
For methods like POST or PUT, you might need to prepare data to send to the server. This data format depends on the server. It could be a string, JSON object, or something else. The specific method for setting this data depends on the format.
5. Send the Request
Once everything is configured, use the send() method to initiate the request:
xhr.send(dataToSend); // dataToSend is optional depending on the HTTP method
6. Handle the Response
You will need to handle the server's response using event listeners:
onreadystatechange: This event fires throughout the request's lifecycle. You can check thereadyStateproperty to determine the request's progress and thestatusproperty to get the HTTP status code.- Other events: You can also use events like
onload(for successful completion) oronerror(for errors) for specific actions.
Here's an example using onreadystatechange to handle success and error scenarios:
xhr.onreadystatechange = function() {
  if (xhr.readyState === 4) {  // Request completed
    if (xhr.status === 200) {  // Success
      console.log(xhr.responseText);  // Access response data (usually a string)
      // Process the response data here (e.g., update the web page)
    } else {
      console.error("Error:", xhr.statusText);
    }
  }
};
Apidog - Integrate XHR Framework With APIs
Now that you have the client code sample ready, you can start considering creating an API for other people (or yourself) to use! A perfect tool for the job would be Apidog - a comprehensive API development platform to produce industry-level APIs!

Designing Your Own REST API Endpoints Using Apidog
Apidog provides users with a simple yet intuitive platform to produce the best-quality APIs! It will not take long to get used to the new development environment.
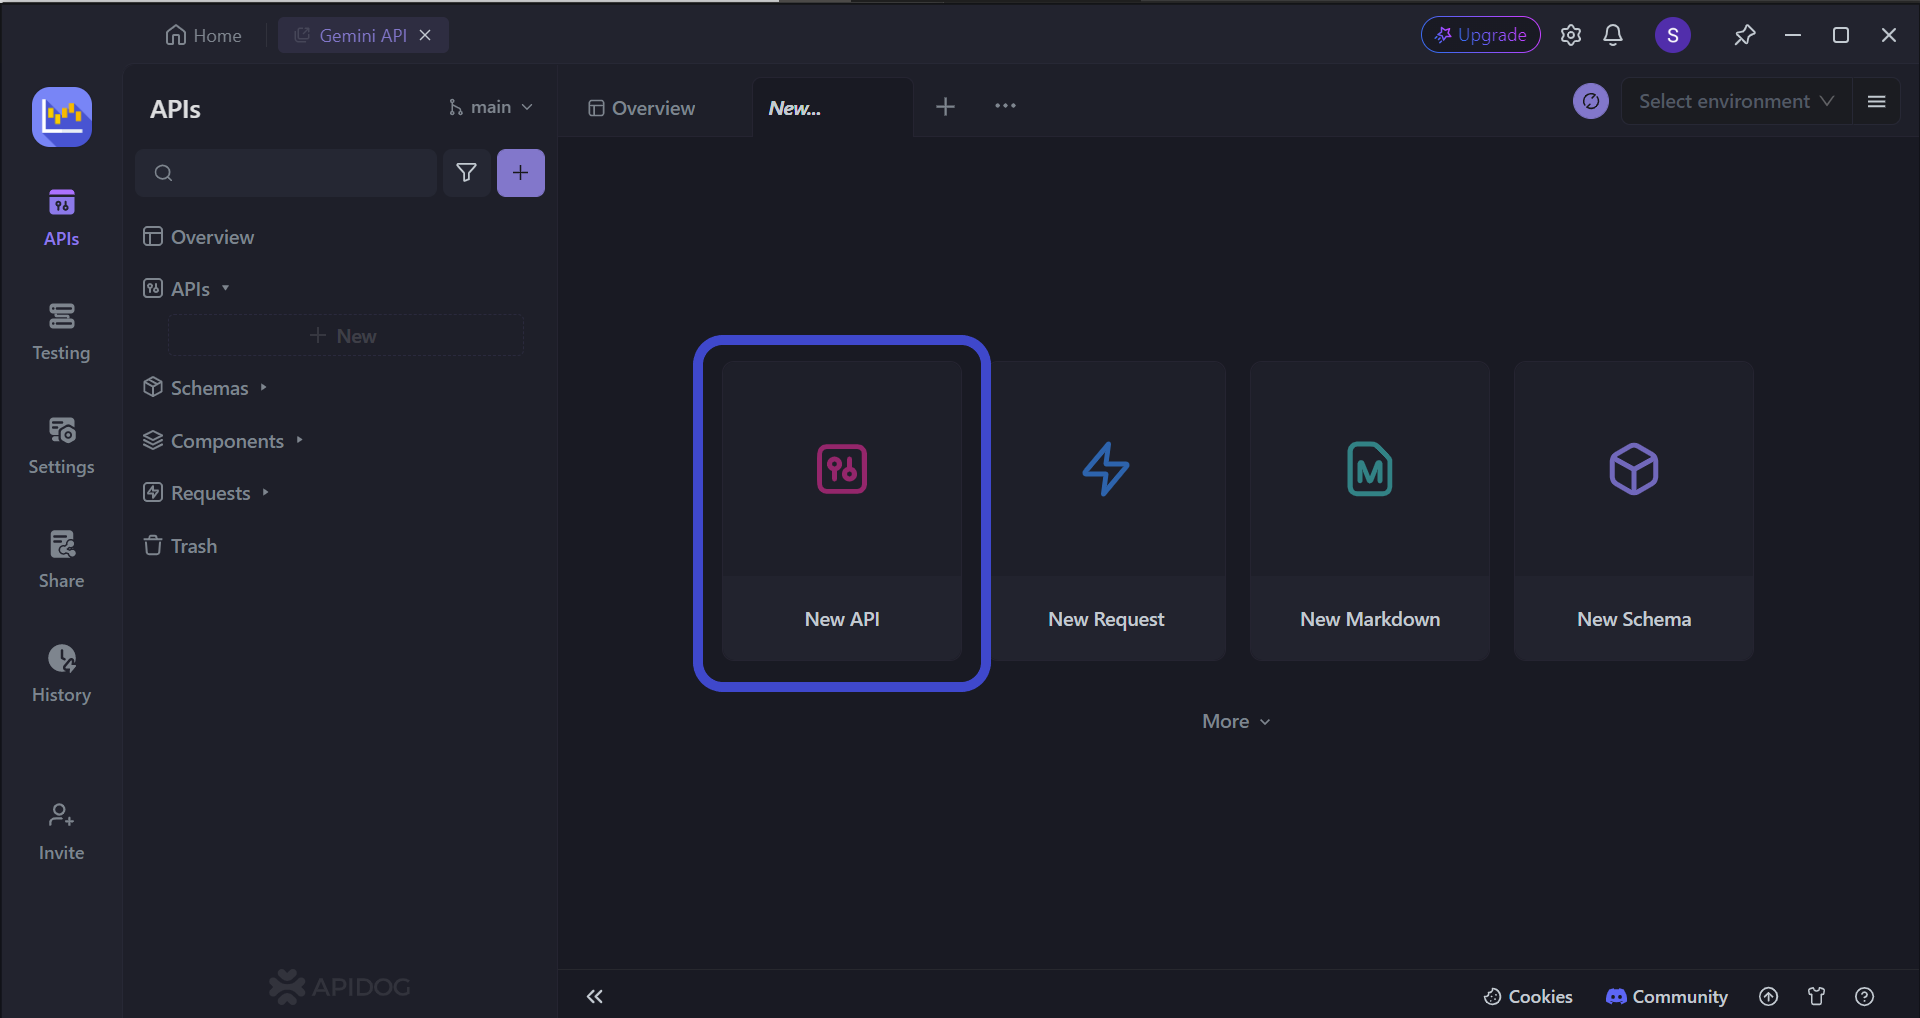
Start by press the New API button, as shown in the image above.
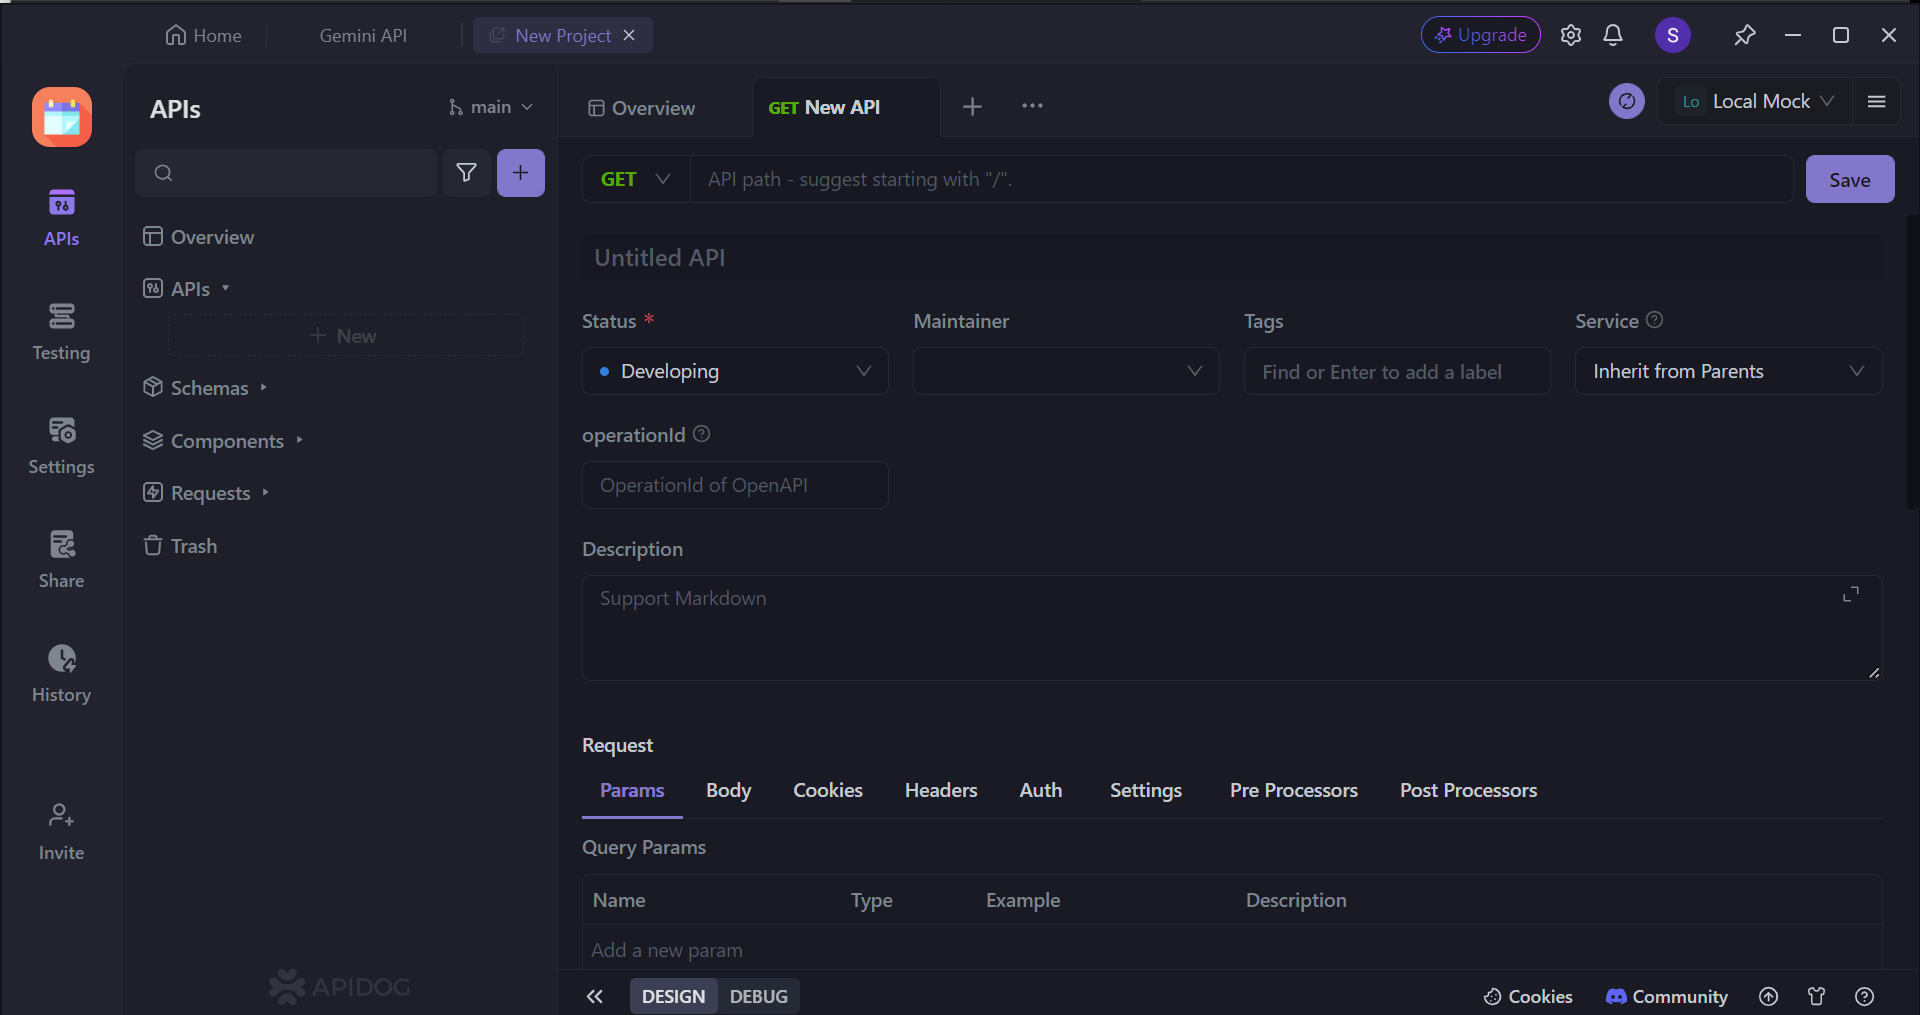
This section allows you to fully design your API's actions. You can detail:
- How applications will "talk" to your API (GET, POST, PUT, DELETE).
- The specific web address (endpoint) where applications will connect.
- Any required details to be included in the web address to reach specific data.
- A straightforward explanation of what that part of your API does.
Testing APIs Using Apidog
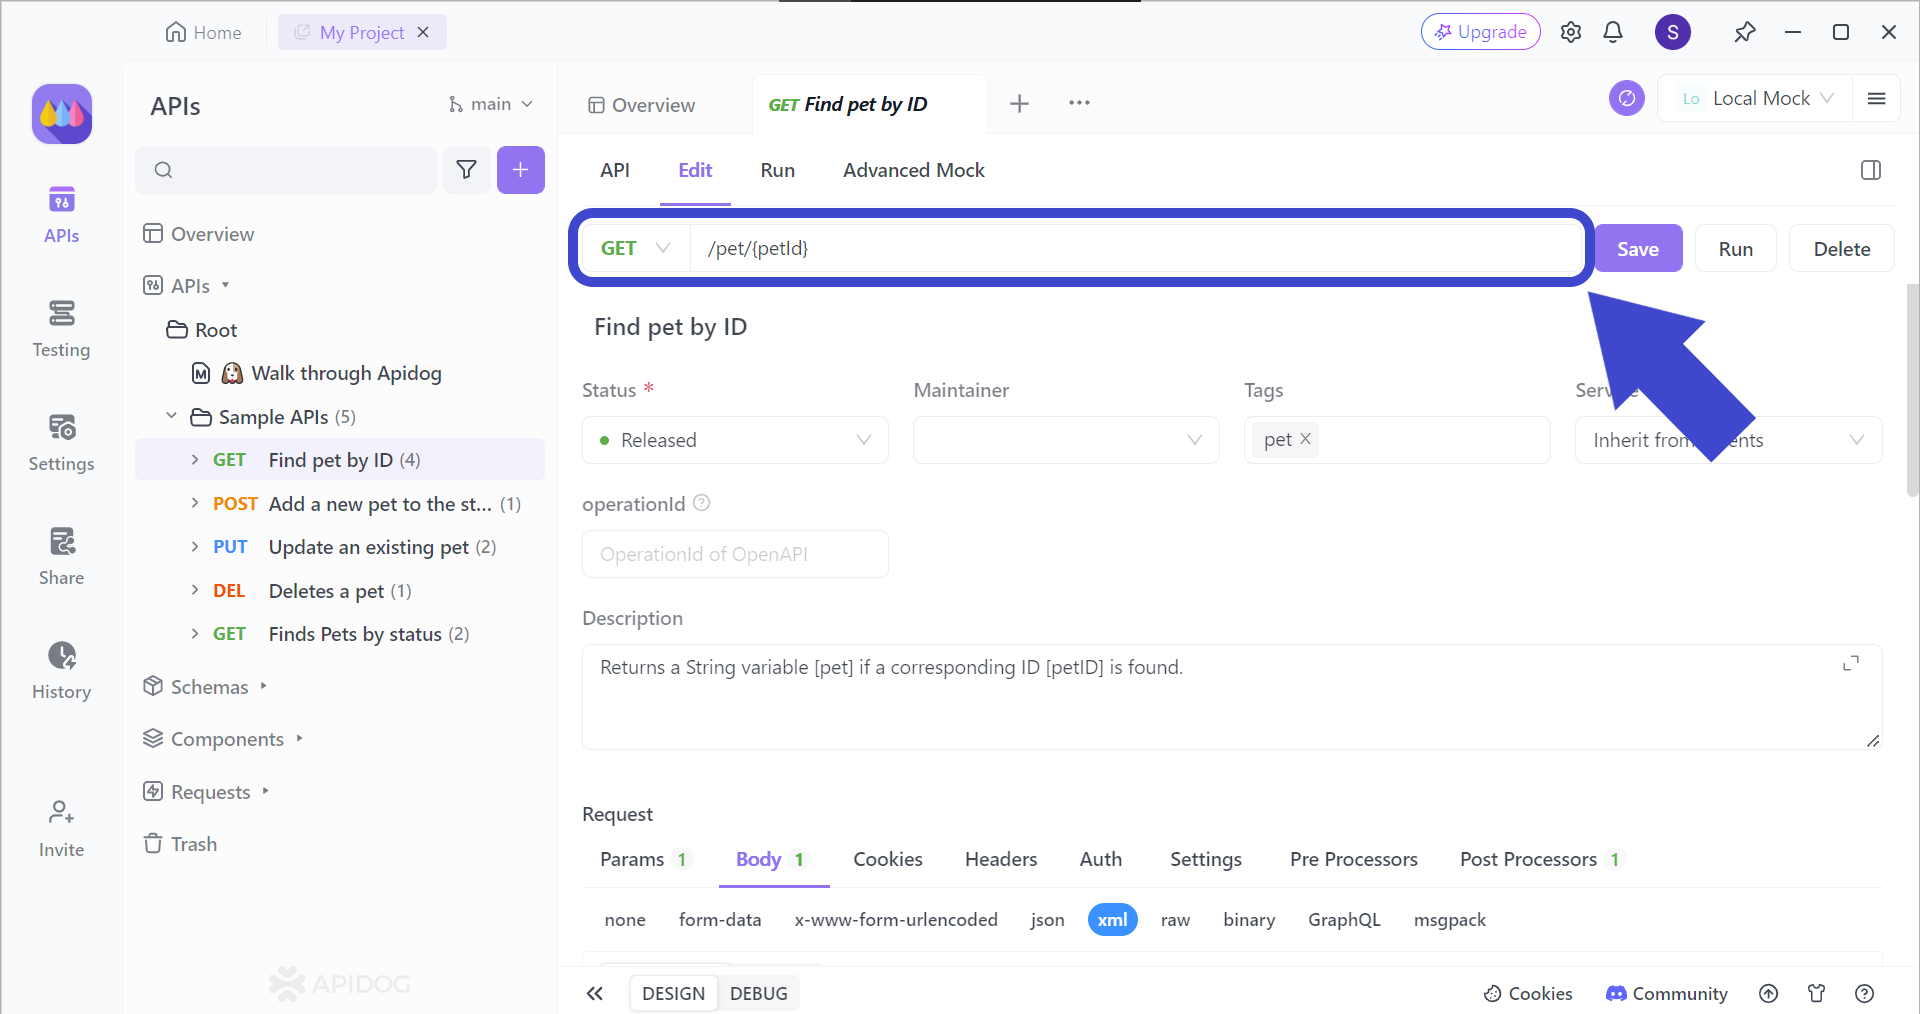
The first step is to enter the specific API endpoint you want to test. Include additional details such as parameters if necessary for the specific API you're testing.
If you're unsure about using multiple parameters in a URL, this article (link not included) can guide you on how to hit the exact resource within larger datasets!

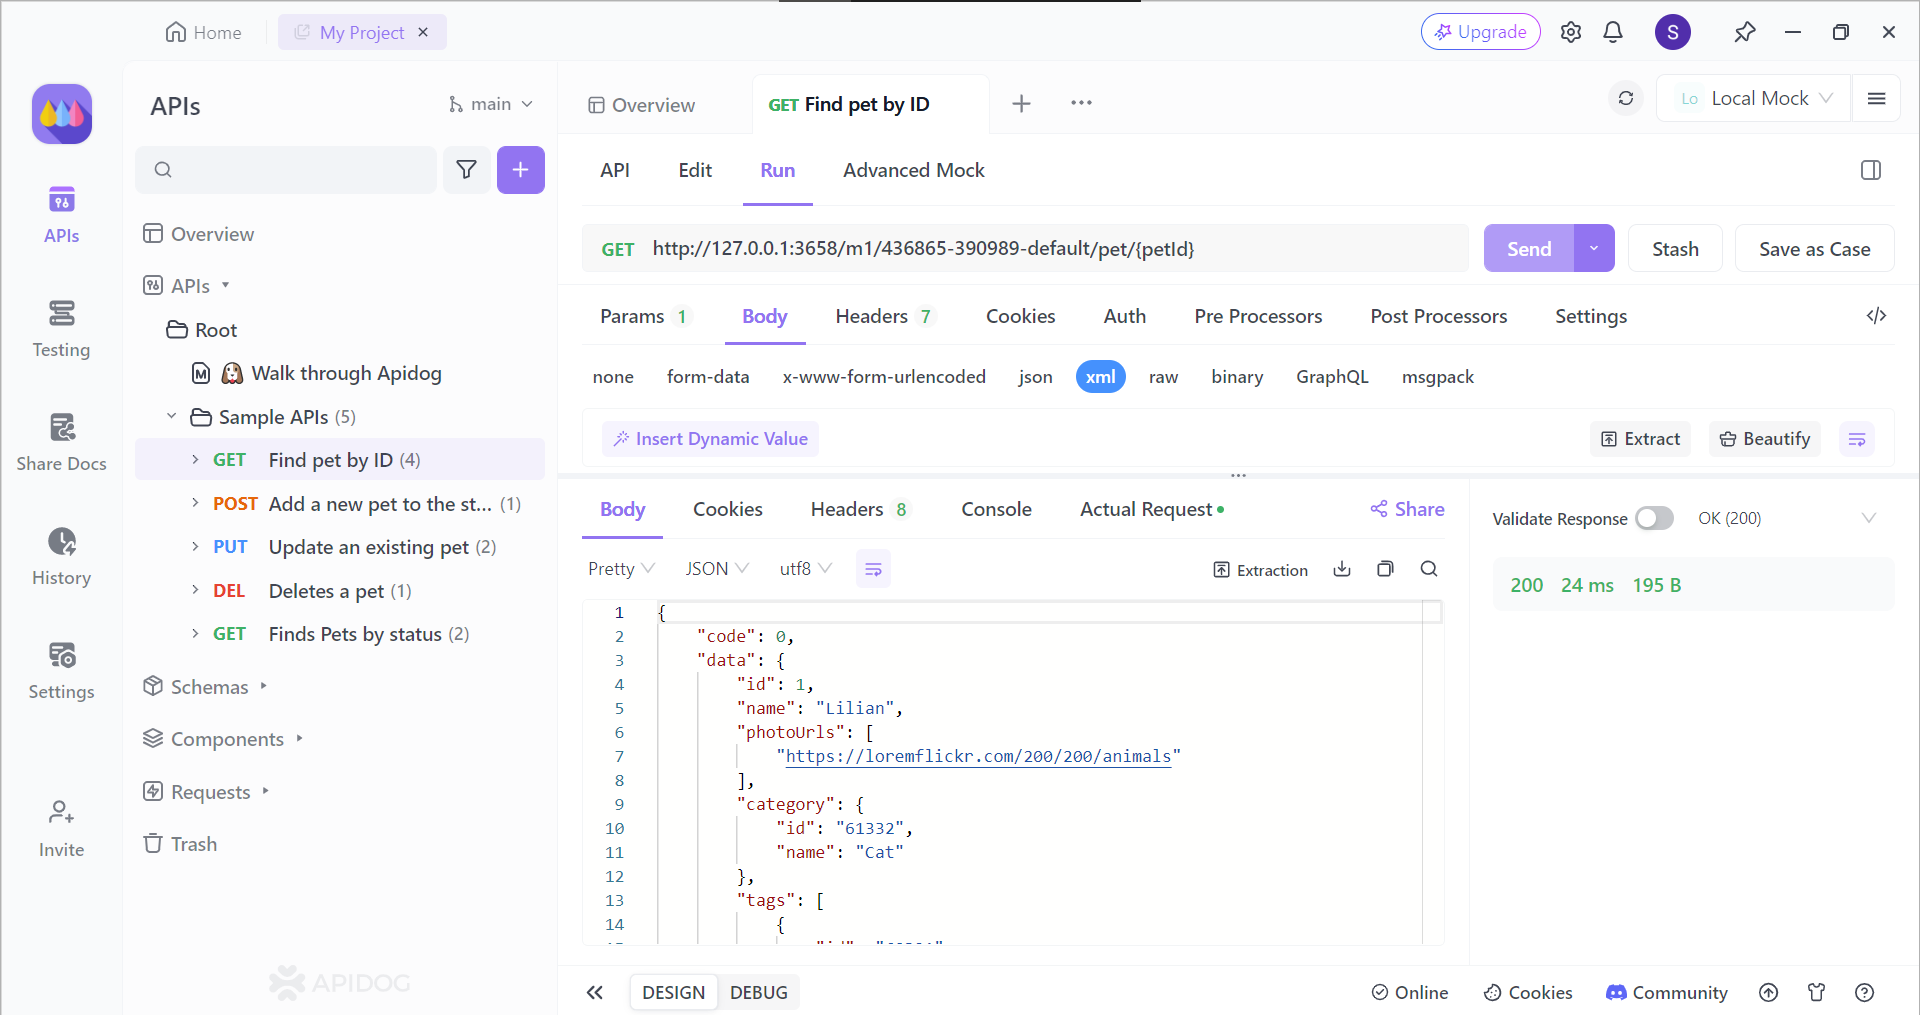
Once you hit the Send button, you can view the API's response in great detail. See if the status code for the API response indicates a successful request, and view the raw request so that your client code can process the data coming from the back-end servers.
Conclusion
XHR requests have played a crucial role in shaping dynamic web experiences. Their ability to fetch data asynchronously without full page reloads has revolutionized how web applications interact with servers. While newer technologies like Fetch API offer advantages, XHR remains widely supported and provides a solid foundation for building interactive web features. Understanding XHR requests empowers developers to leverage this versatile tool and craft user-friendly web applications that deliver a seamless user experience.
As web development continues to evolve, XHR requests will likely continue to coexist with newer advancements. By mastering XHR, developers gain valuable skills applicable to various web development scenarios, allowing them to create rich and engaging web applications.


