
In the realm of API testing and development, Postman serves as a powerful tool for streamlining workflows. A core functionality within Postman is the ability to chain requests together. This guide delves into the process of chaining requests in Postman, outlining the steps involved in creating collections, utilizing environment variables, and extracting data from responses. By effectively chaining requests, users can automate sequential API interactions, enhancing efficiency and facilitating a more robust testing and development experience.
If you wish to try Apidog's interface, click the button below to begin!
What is Postman?
Postman is a comprehensive API development platform. It encompasses the entire lifecycle, streamlining processes for building, testing, and documenting APIs. By simplifying API requests, Postman empowers developers to dedicate their focus to crafting robust and impactful APIs.

What Does Chaining Requests Mean in Postman?
In Postman, chaining requests refers to the process of executing a sequence of API requests in a specific order. This functionality is particularly useful when working with APIs that involve multiple steps or rely on data retrieved from previous requests.
Reasons to Chain Requests in Postman
- Real-world API workflows: Many APIs mimic real-world workflows that involve sequential steps. Chaining requests allows you to mirror these workflows in your testing or development process.
- Data Dependency: Certain API calls might require data obtained from a previous request. Chaining ensures the dependent request is executed only after the initial data retrieval is successful.
- Improved Organization: For complex workflows involving numerous requests, chaining keeps your tests organized and easier to follow.
Step-by-step Guide For Chaining Postman Requests
Here is a complete start-to-finish guide of how you can chain Postman requests!
Step 1 - Create a Postman Account
Create a new Postman account (only if you do not have one.) and start downloading the Postman application onto your device. The application offers more features than its web version.

Step 2 - Create a New API Request on Postman
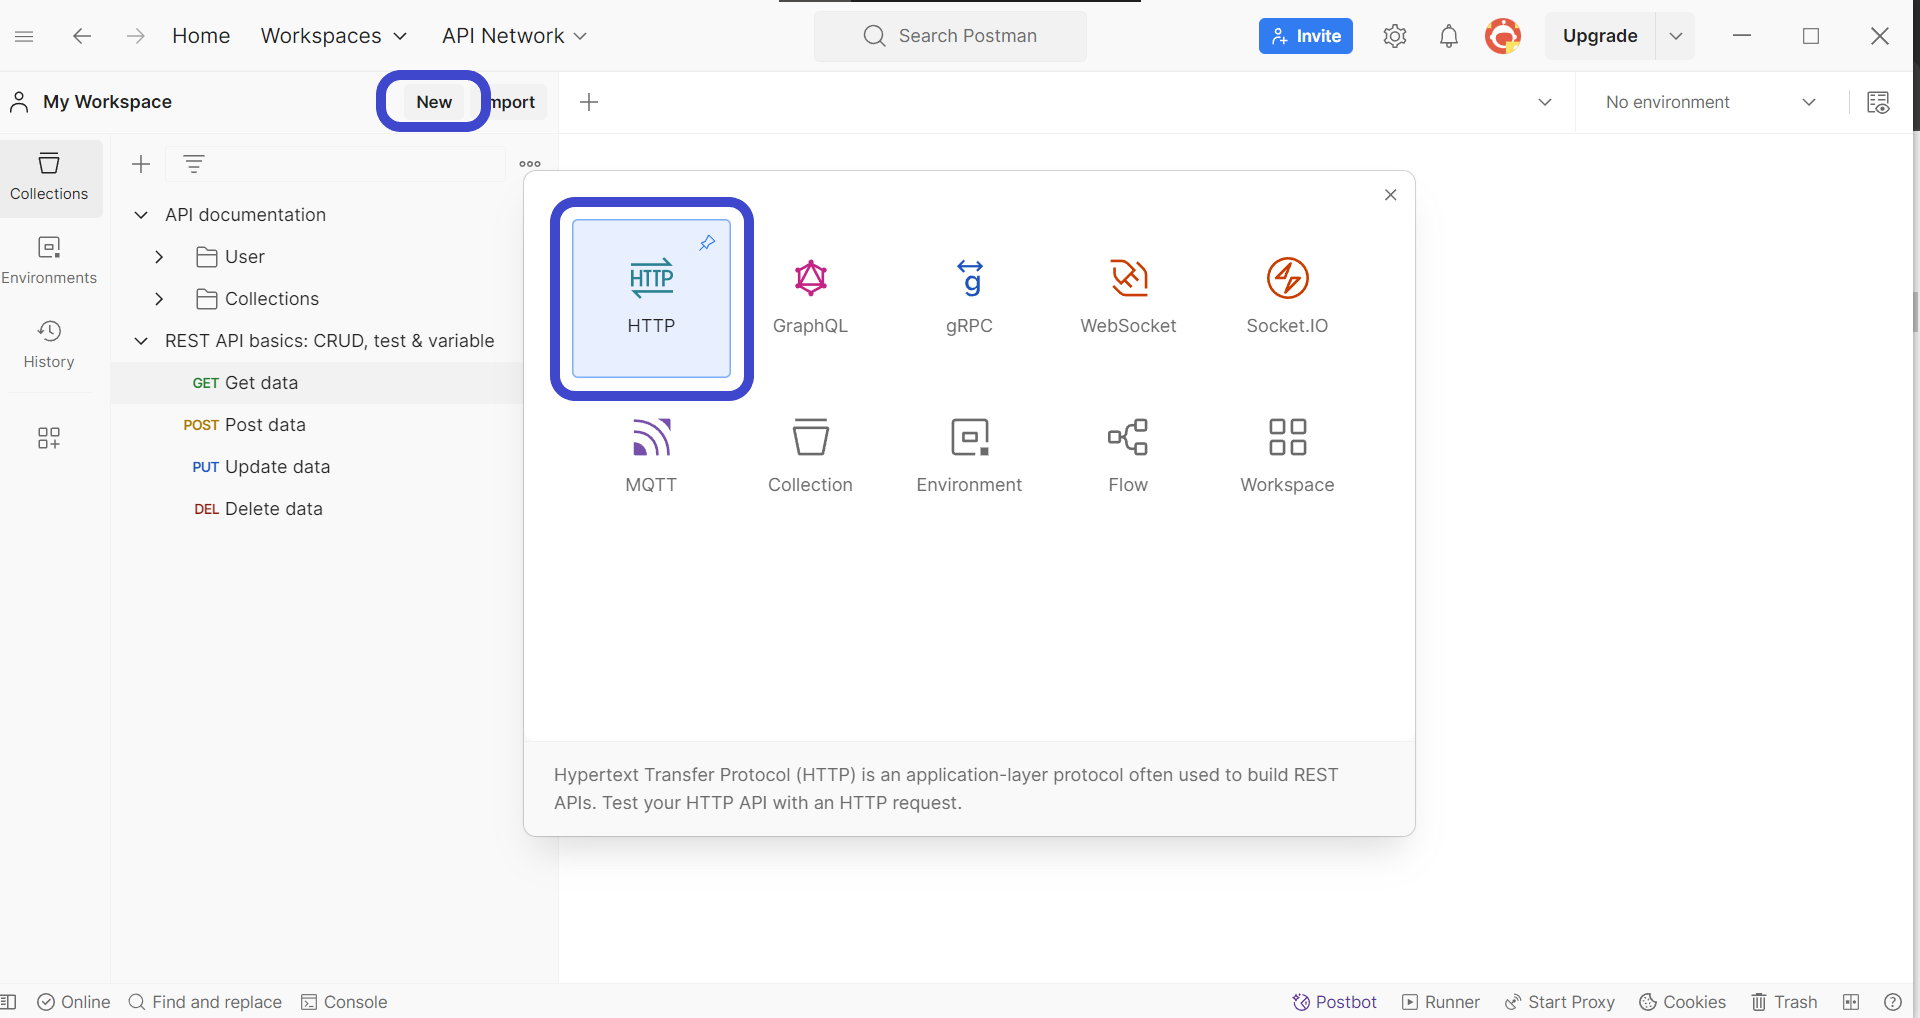
Once you have installed Postman, create a new request by clicking the New button in the top left corner of the Postman window. Select HTTP Request to create a new request, as shown in the image above.
Step 3 - Enter API Method and Details
Next, you need to include the details of the API request you wish to create. It must include components such as the URL, HTTP methods, and additional parameters the API will require.

Step 4 - Create a New Flow on Postman
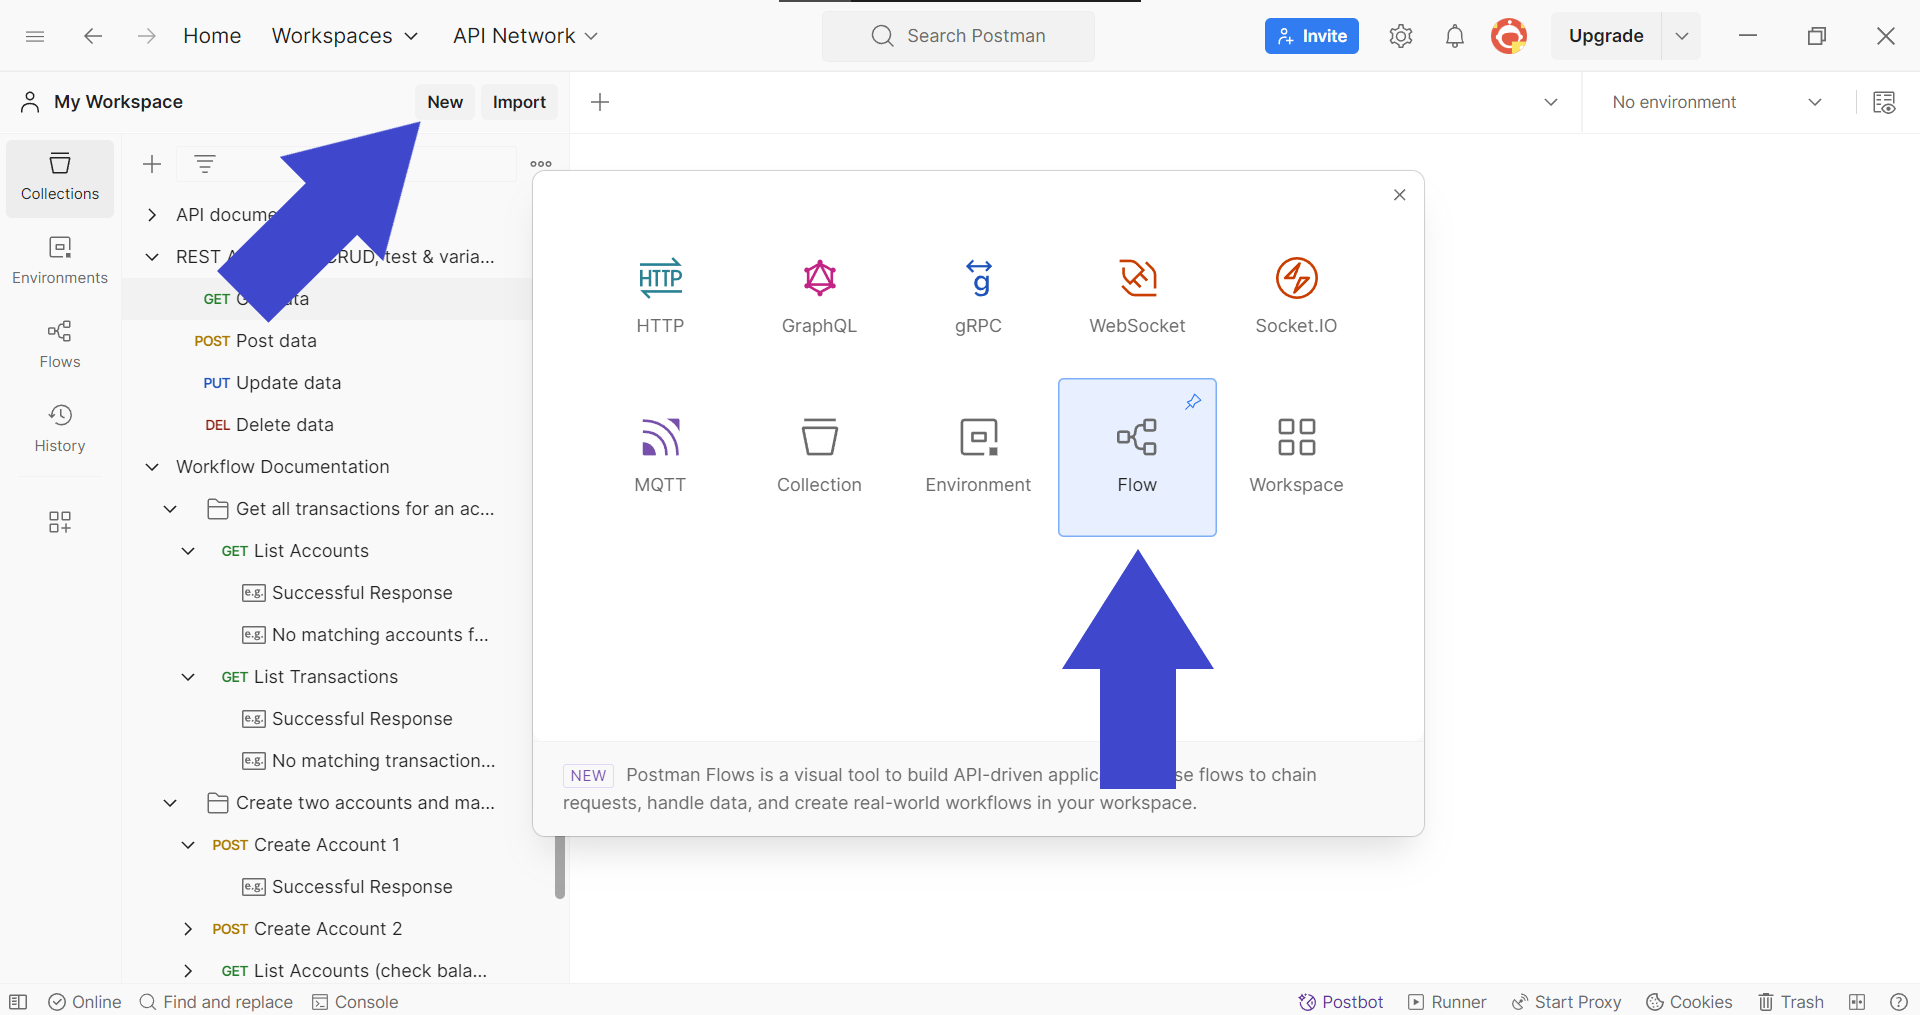
Postman provides users with a function called Flows, where it is possible to check order-important APIs. To create a new Flow, click the New button on the top right, and flick the Flows button as shown in the image above.
Step 5 - Choose First Request to be Sent
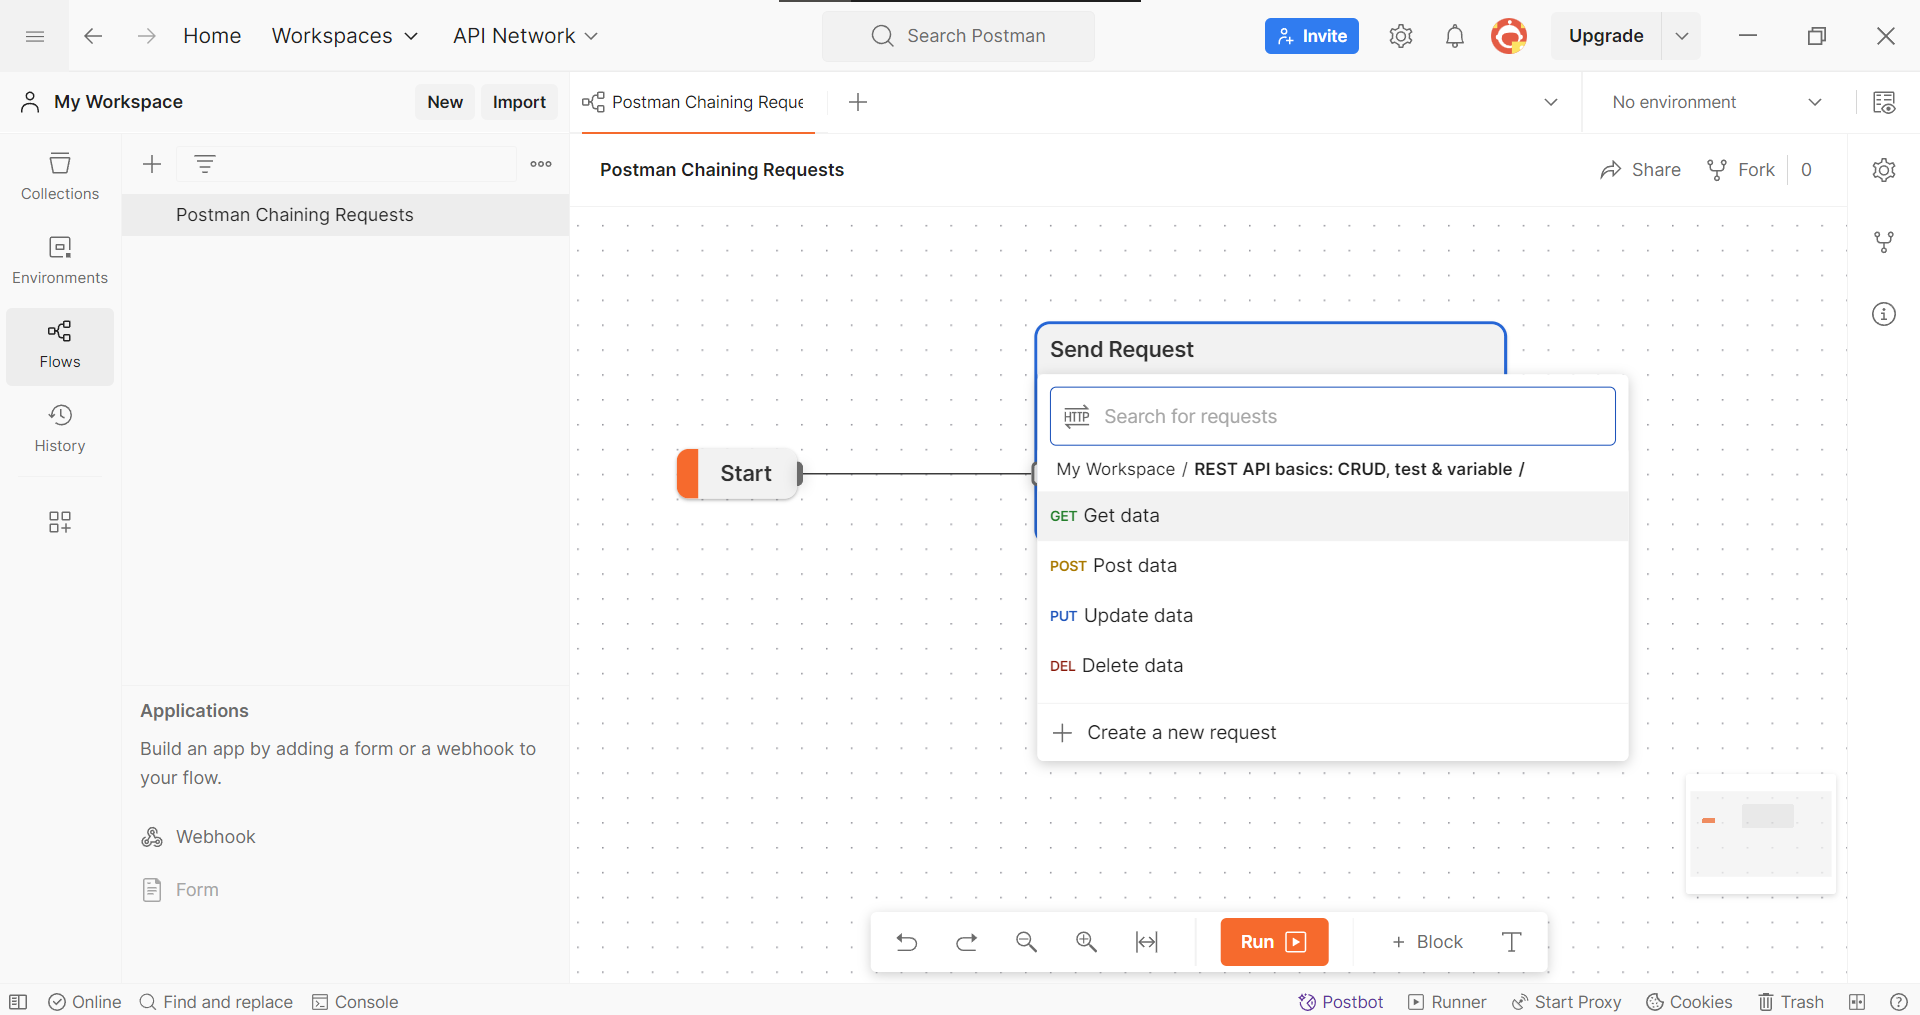
If done properly, you should have a "Start" block that branches out into three options. From this selection, choose Send a request, which should allow you to select a request from your collection.
Step 6 - Repeat for Success or Fail Cases
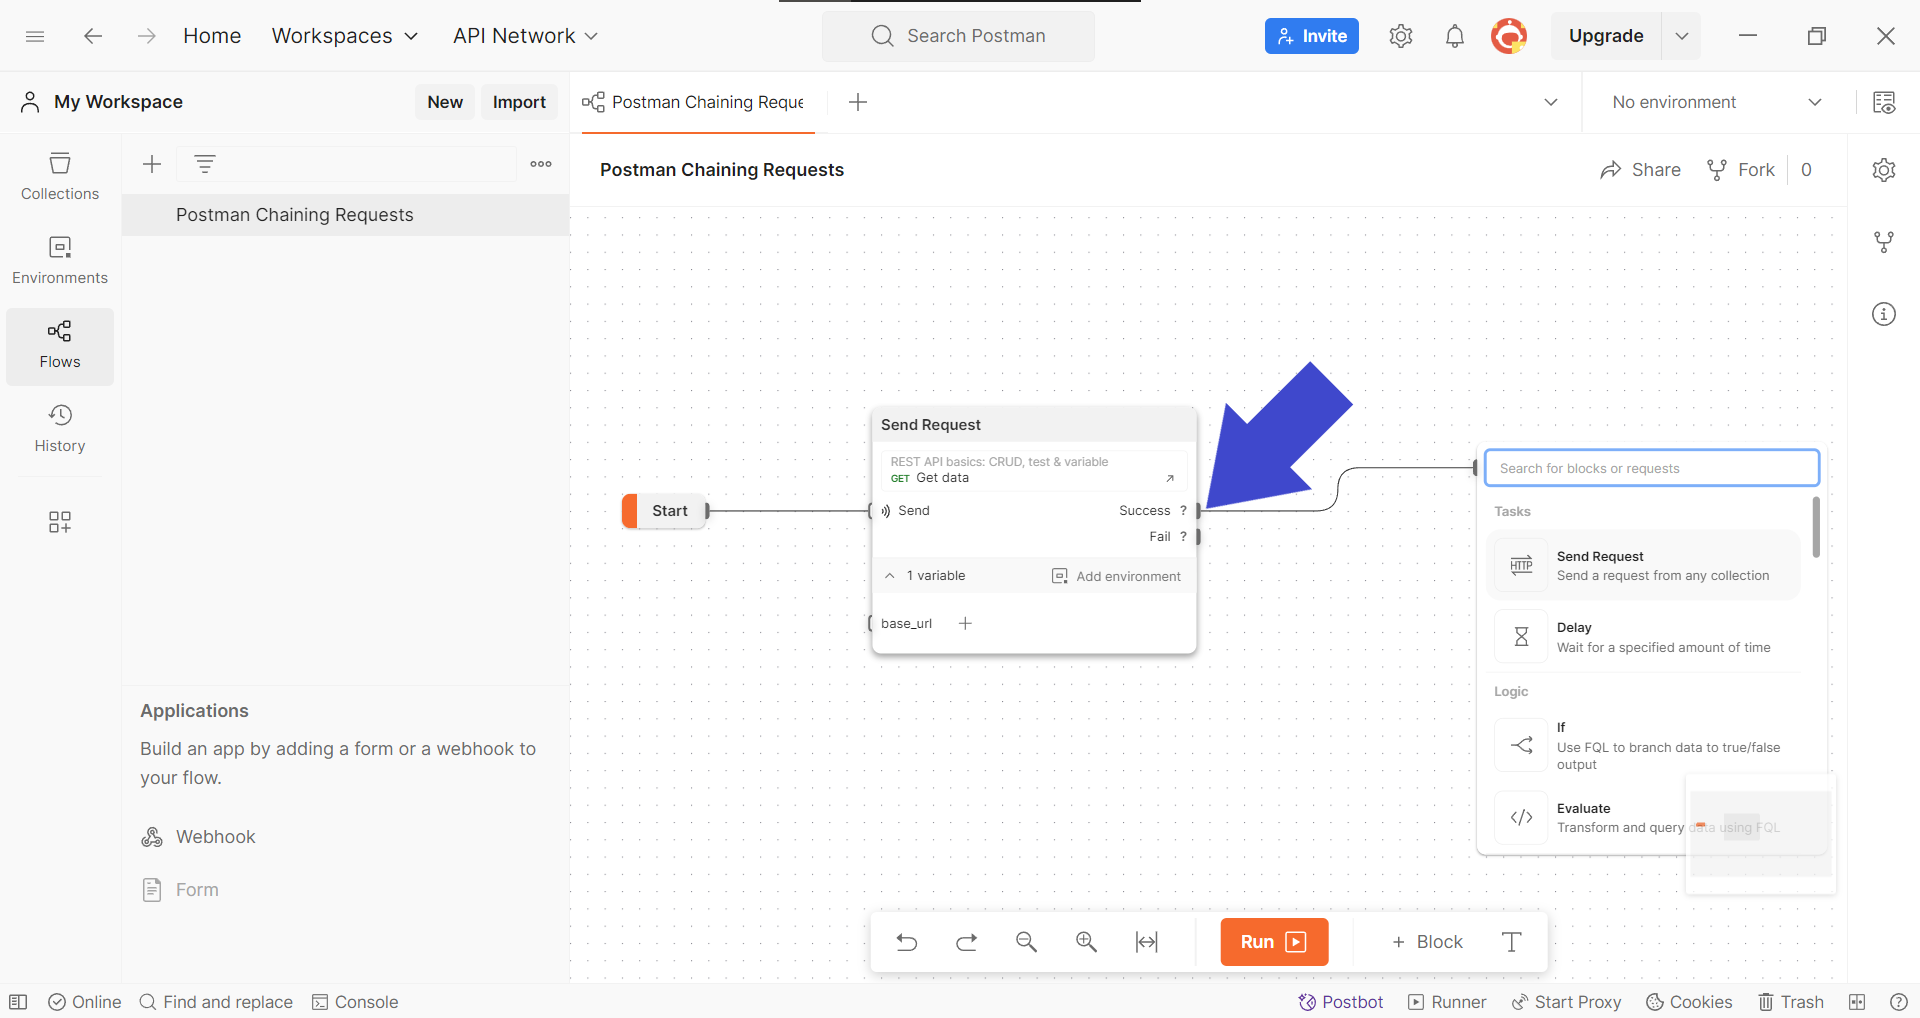
Pull the end of the Success or Fail tail to expand the chain, and select Send Request to create a chain of requests to run. As requests can only be a success or failure, repeat choosing the appropriate requests until all your requests have been exhausted.
Apidog - Chaining Requests Made Simple with Test Scenarios
Apidog is a free API development tool that is the best alternative to Postman. With a simple and intuitive user interface, developers can quickly get accustomed to using the new development environment. Additionally, Apidog has a more straightforward request chaining feature, referred to as test scenarios.
Apidog Testing Scenario - Start to Finish
Postman's Flow charts can quickly become too overwhelming, especially if you have branches for both success and failure scenarios. Apidog's testing scenario feature provides developers with a more friendly approach!
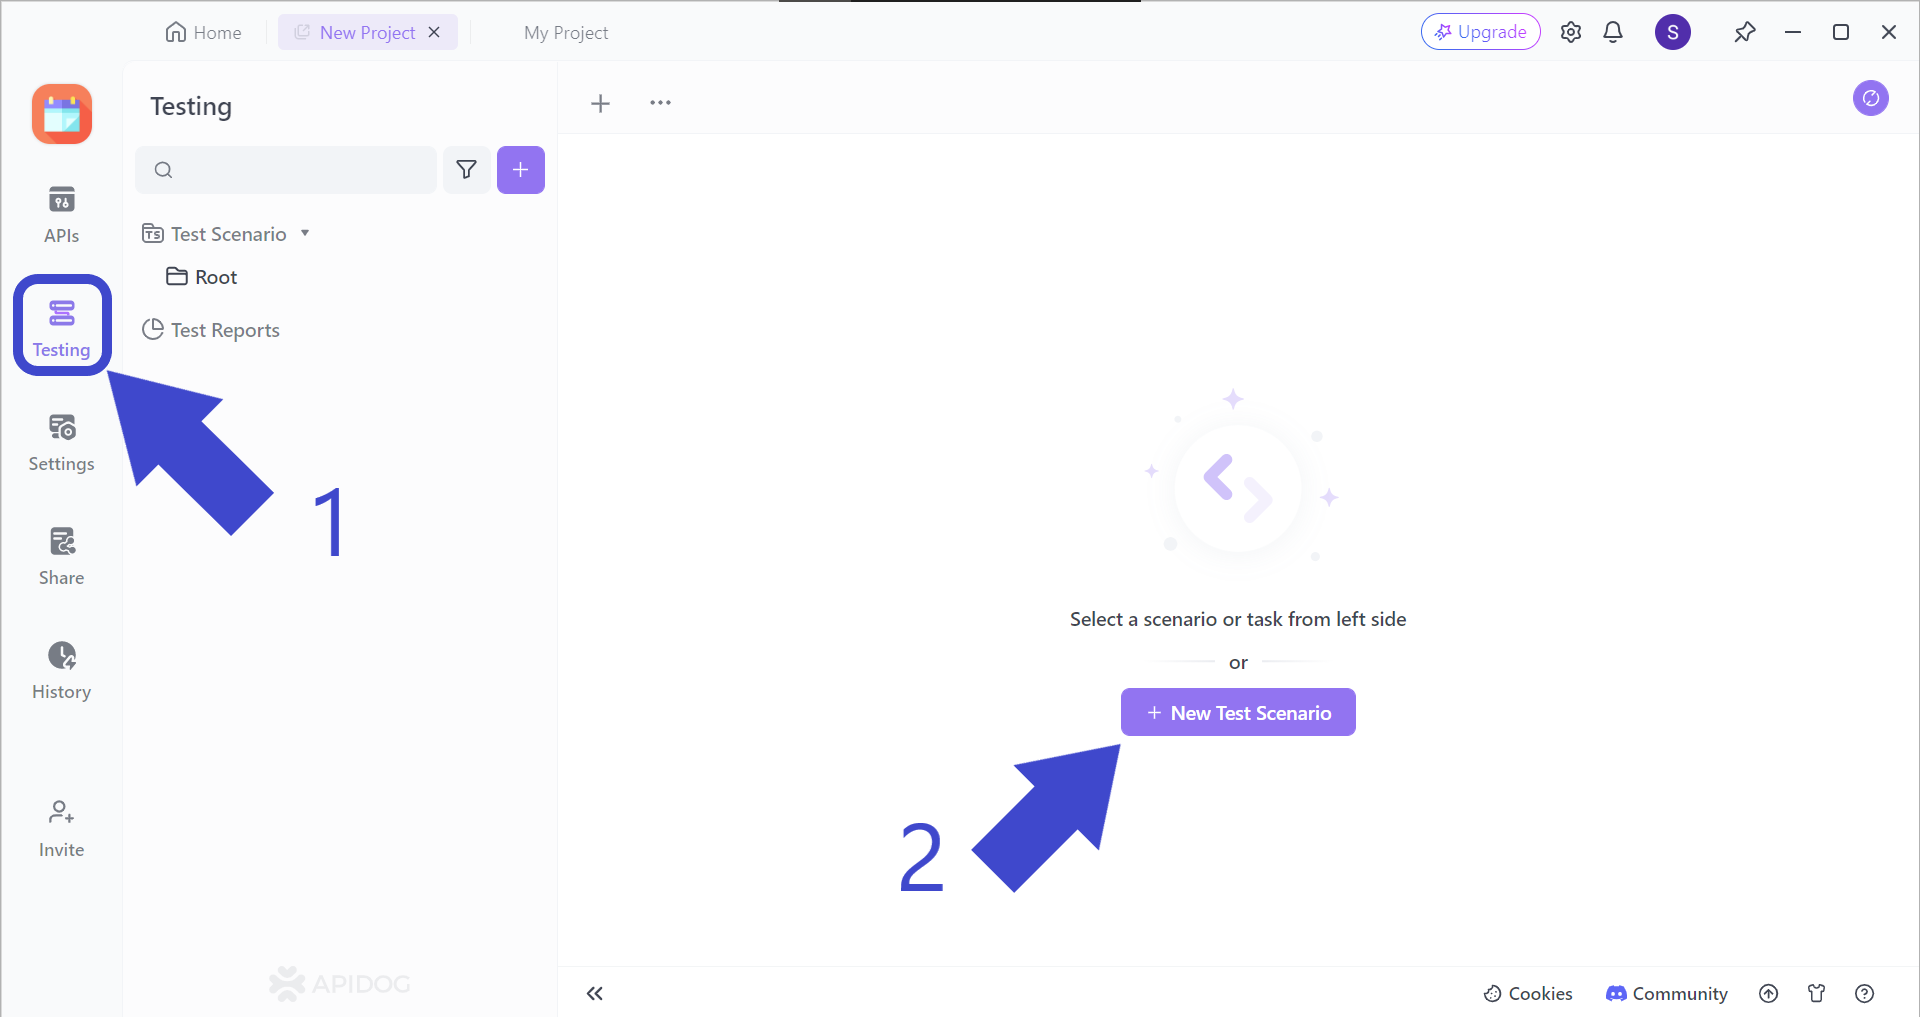
Firstly, hit the Testing button, followed by the + New Test Scenario button.
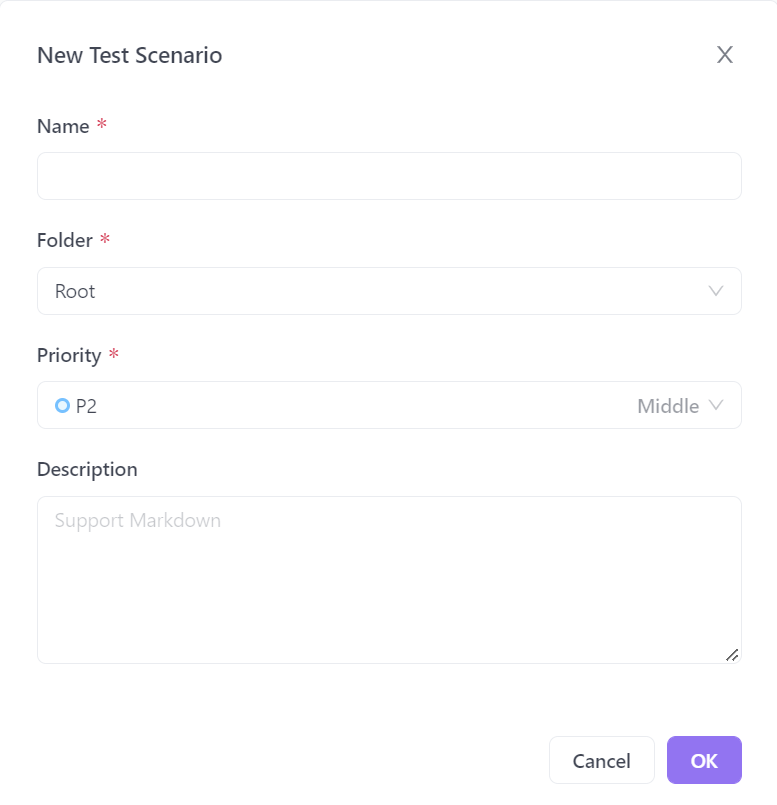
Apidog will prompt you to fill in the details for your new test scenario. Make sure to give it a proper name so its function is predictable.
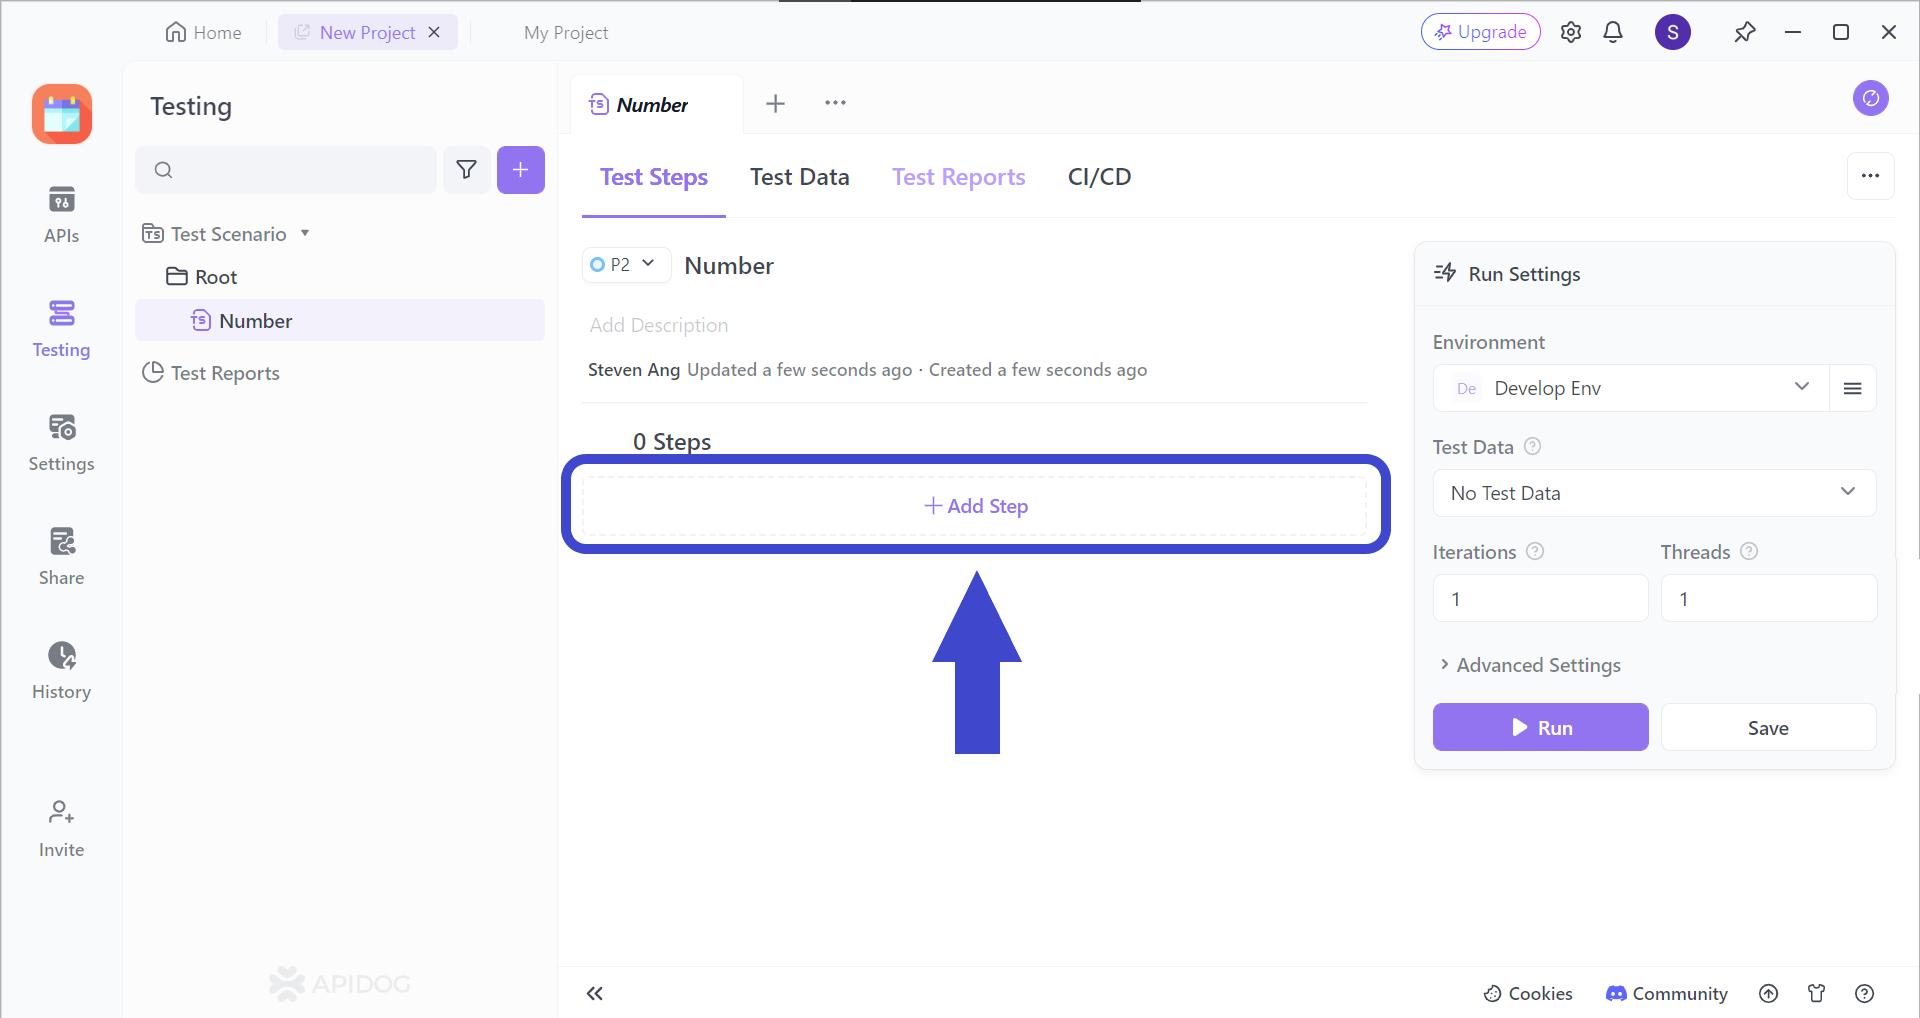
Continue by adding a step (or many more steps) to your test scenarios by clicking on the Add Step section. You should be able to see the image below.
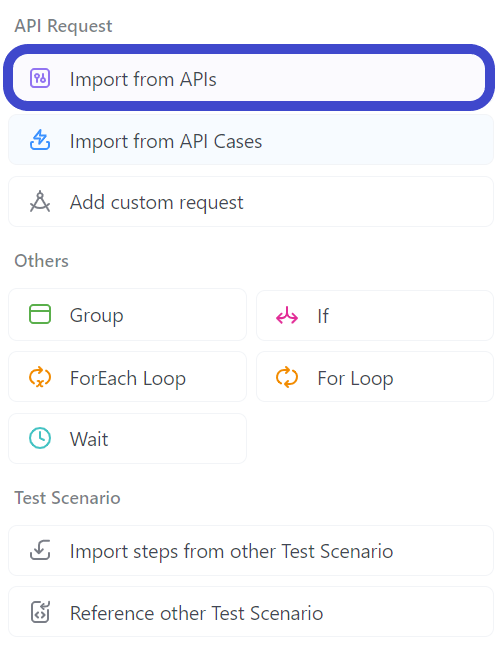
Select "Import from API" from the drop-down menu.

Next, select all the APIs you would like to include in your test scenario. In the example above, the API called NumberConversionSOAP has been included.
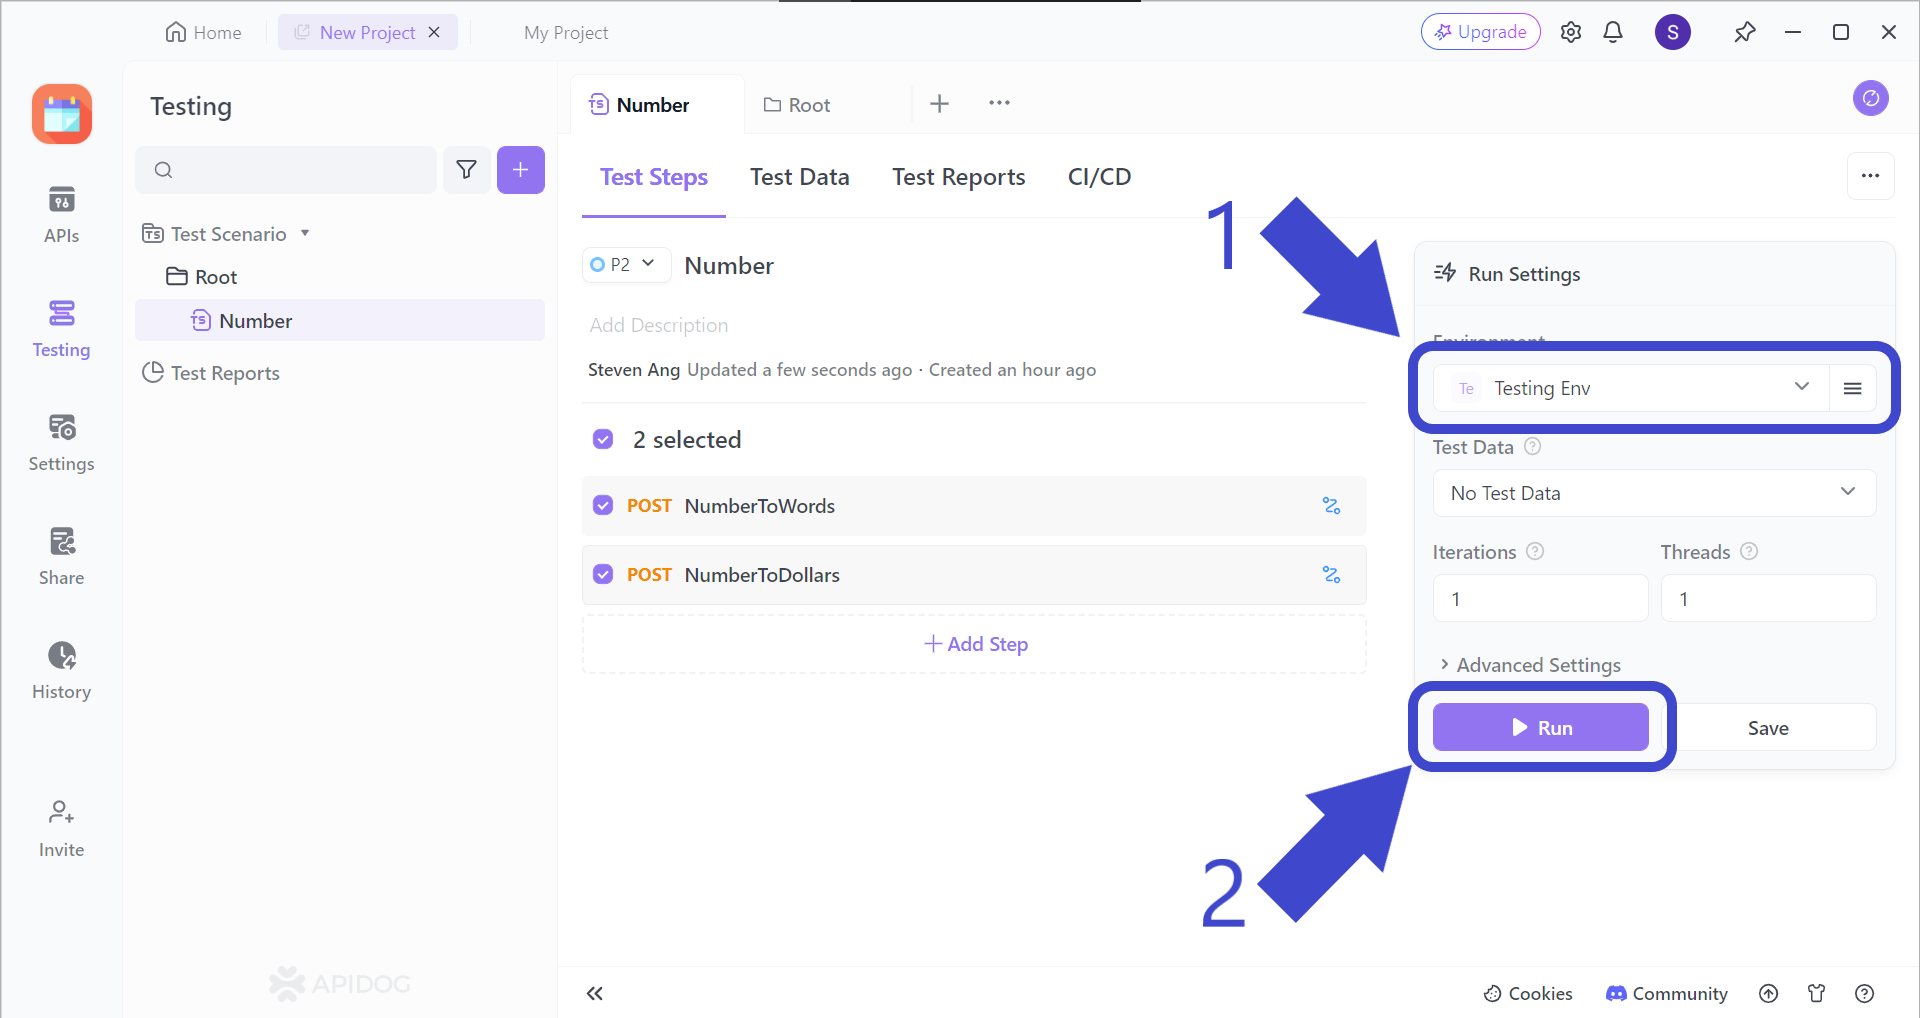
Before hitting the Run button to start your test scenario, make sure to change the test scenario environment, which should be Testing Env, as pointed out by Arrow 1.
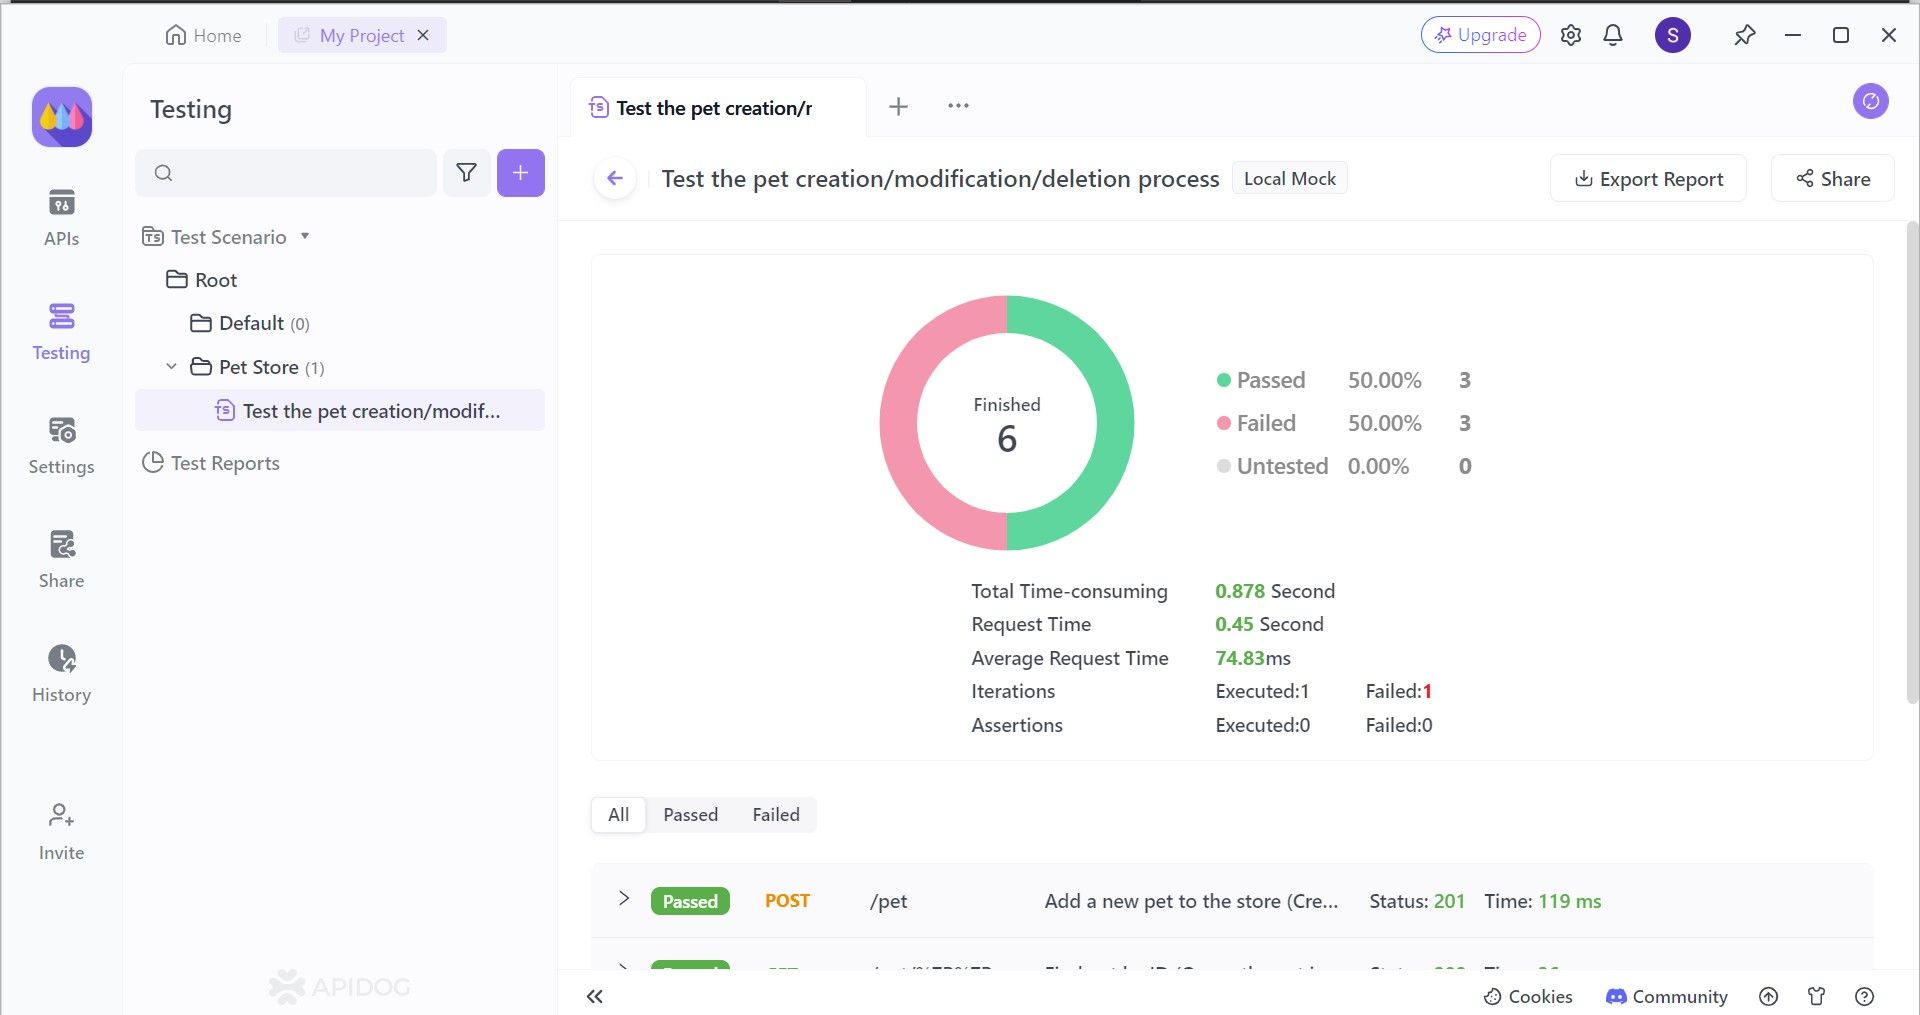
You can get a detailed analysis regarding your API(s) performance, seeing where they lack or excel. You are also notified of how many processes pass or fail, be it an API request or not. By knowing your APIs better, you can therefore assess what you need to do next in your next phase of API development.
Conclusion
Conquering the art of chaining requests in Postman unlocks a new level of efficiency in your API development and testing. By automating sequential interactions, you can streamline complex workflows and eliminate the need for repetitive manual tasks. This not only saves you valuable time but also reduces the risk of human error during testing.
Furthermore, chained requests allow you to mimic real-world user interactions with your API, ensuring a more thorough and realistic testing experience. As you integrate chaining into your development process, you'll witness a significant boost in productivity and create more robust and reliable APIs.


