
Hey there, fellow developers! Today, we're diving deep into the world of building APIs using Node.js, Express, and Axios. Whether you're a seasoned programmer or just getting started, this post will guide you through creating robust APIs efficiently. Plus, I’ll introduce you to an amazing Apidog tool that will streamline your API testing and documentation process.
Introduction
APIs (Application Programming Interfaces) have become the backbone of modern web applications. They enable different software systems to communicate and share data seamlessly. Whether you're developing a web app, a mobile app, or even a desktop app, APIs are essential.
Why Node.js, Express, and Axios?
Node.js, Express, and Axios are a dynamic trio when it comes to building and consuming APIs. Here's why:
- Node.js: Known for its non-blocking, event-driven architecture, Node.js is perfect for creating scalable network applications.
- Express: This minimal and flexible Node.js web application framework provides a robust set of features to develop web and mobile applications.
- Axios: A promise-based HTTP client for the browser and Node.js, Axios makes it easy to send asynchronous HTTP requests to REST endpoints and perform CRUD operations.
By combining these three powerful tools, you can build efficient, scalable, and easy-to-maintain APIs.
Setting Up Your Environment
Before we dive into code, let's set up our environment. You'll need Node.js and npm (Node Package Manager) installed on your machine.
- Install Node.js and npm: Head over to the Node.js website and download the latest version. The npm comes bundled with Node.js.
- Initialize a new project: Open your terminal and run:
mkdir nodejs-express-axios-api
cd nodejs-express-axios-api
npm init -y
This will create a new directory and initialize a new Node.js project with a default package.json file.
- Install Express and Axios:
npm install express axios
Creating Your First API with Node.js and Express
Now that our environment is set up, let's create a simple API.
Setting Up Express
First, we need to set up our Express server. Create a file named server.js and add the following code:
const express = require('express');
const app = express();
const PORT = 3000;

// Middleware to parse JSON
app.use(express.json());

// Start the server
app.listen(PORT, () => {
    console.log(`Server is running on http://localhost:${PORT}`);
});
Defining API Endpoints
Next, let's define some API endpoints. We'll create endpoints for a simple CRUD application that manages a list of books.
- Create a Book: This endpoint will allow users to add a new book to the list.
- Read Books: This endpoint will return the list of all books.
- Update a Book: This endpoint will allow users to update the details of an existing book.
- Delete a Book: This endpoint will allow users to delete a book from the list.
Add the following code to server.js:
let books = [];

// Create a Book
app.post('/books', (req, res) => {
    const book = req.body;
    books.push(book);
    res.status(201).send('Book added successfully');
});

// Read Books
app.get('/books', (req, res) => {
    res.json(books);
});

// Update a Book
app.put('/books/:id', (req, res) => {
    const bookId = req.params.id;
    const updatedBook = req.body;
    books = books.map(book => book.id === bookId ? updatedBook : book);
    res.send('Book updated successfully');
});

// Delete a Book
app.delete('/books/:id', (req, res) => {
    const bookId = req.params.id;
    books = books.filter(book => book.id !== bookId);
    res.send('Book deleted successfully');
});
Running Your API
To run your API, simply use the following command in your terminal:
node server.js
You should see the message: Server is running on http://localhost:3000.
Consuming APIs with Axios
Now that we have our API up and running, let's learn how to consume it using Axios.
Making HTTP Requests with Axios
Axios makes sending asynchronous HTTP requests to REST endpoints and performing CRUD operations easy. We'll demonstrate how to perform each operation (Create, Read, Update, Delete) using Axios.
First, install Axios in your project if you haven't already:
npm install axios
Example: Using Axios to Interact with Our Book API
Create a new file named client.js and add the following code:
const axios = require('axios');
const API_URL = 'http://localhost:3000/books';

// Create a new book
const createBook = async (book) => {
    try {
        const response = await axios.post(API_URL, book);
        console.log(response.data);
    } catch (error) {
        console.error(error);
    }
};

// Read all books
const getBooks = async () => {
    try {
        const response = await axios.get(API_URL);
        console.log(response.data);
    } catch (error) {
        console.error(error);
    }
};

// Update a book
const updateBook = async (bookId, updatedBook) => {
    try {
        const response = await axios.put(`${API_URL}/${bookId}`, updatedBook);
        console.log(response.data);
    } catch (error) {
        console.error(error);
    }
};

// Delete a book
const deleteBook = async (bookId) => {
    try {
        const response = await axios.delete(`${API_URL}/${bookId}`);
        console.log(response.data);
    } catch (error) {
        console.error(error);
    }
};

// Usage examples
const newBook = { id: '1', title: 'Node.js for Beginners', author: 'John Doe' };
createBook(newBook);
getBooks();
updateBook('1', { id: '1', title: 'Advanced Node.js', author: 'John Doe' });
deleteBook('1');
Explanation
- createBook: Sends a POST request to add a new book.
- getBooks: Sends a GET request to retrieve all books.
- updateBook: Sends a PUT request to update an existing book.
- deleteBook: Sends a DELETE request to remove a book.
Advanced Usage of Axios and Error Handling
Error handling is crucial when dealing with HTTP requests. Axios provides several ways to handle errors effectively.
Handling Errors
Modify the client.js file to handle errors more gracefully:
const axios = require('axios');
const API_URL = 'http://localhost:3000/books';

// Create a new book
const createBook = async (book) => {
    try {
        const response = await axios.post(API_URL, book);
        console.log(response.data);
    } catch (error) {
        handleError(error);
    }
};

// Read all books
const getBooks = async () => {
    try {
        const response = await axios.get(API_URL);
        console.log(response.data);
    } catch (error) {
        handleError(error);
    }
};

// Update a book
const updateBook = async (bookId, updatedBook) => {
    try {
        const response = await axios.put(`${API_URL}/${bookId}`, updatedBook);
        console.log(response.data);
    } catch (error) {
        handleError(error);
    }
};

// Delete a book
const deleteBook = async (bookId) => {
    try {
        const response = await axios.delete(`${API_URL}/${bookId}`);
        console.log(response.data);
    } catch (error) {
        handleError(error);
    }
};

// Error handling function
const handleError = (error) => {
    if (error.response) {
        // The request was made and the server responded with a status code
        console.error('Error:', error.response.data);
        console.error('Status:', error.response.status);
        console.error('Headers:', error.response.headers);
    } else if (error.request) {
        // The request was made but no response was received
        console.error('Error: No response received', error.request);
    } else {
        // Something happened in setting up the request
        console.error('Error:', error.message);
    }
};
Setting Custom Headers and Interceptors
Axios allows you to set custom headers and intercept requests or responses. This can be useful for adding authentication tokens or logging.
const axios = require('axios');
const API_URL = 'http://localhost:3000/books';

// Axios instance with custom headers
const axiosInstance = axios.create({
    baseURL: API_URL,
    headers: { 'Authorization': 'Bearer YOUR_TOKEN_HERE' }
});

// Request interceptor
axiosInstance.interceptors.request.use(config => {
    console.log('Request sent at:', new Date().toISOString());
    return config;
}, error => {
    return Promise.reject(error);
});

// Response interceptor
axiosInstance.interceptors.response.use(response => {
    console.log('Response received at:', new Date().toISOString());
    return response;
}, error => {
    return Promise.reject(error);
});

// Example usage with interceptors
const getBooks = async () => {
    try {
        const response = await axiosInstance.get('/');
        console.log(response.data);
    } catch (error) {
        console.error(error);
    }
};

getBooks

();
Testing and Documenting Your API with APIdog
Testing and documenting your APIs is crucial to ensure they work as expected and are easy to use for other developers. This is where APIdog comes in.
What is Apidog?
APIdog is a powerful tool that helps you test and document your APIs effortlessly. With APIdog, you can create comprehensive API documentation, perform automated testing, and share your APIs with your team.
Testing Api with Apidog
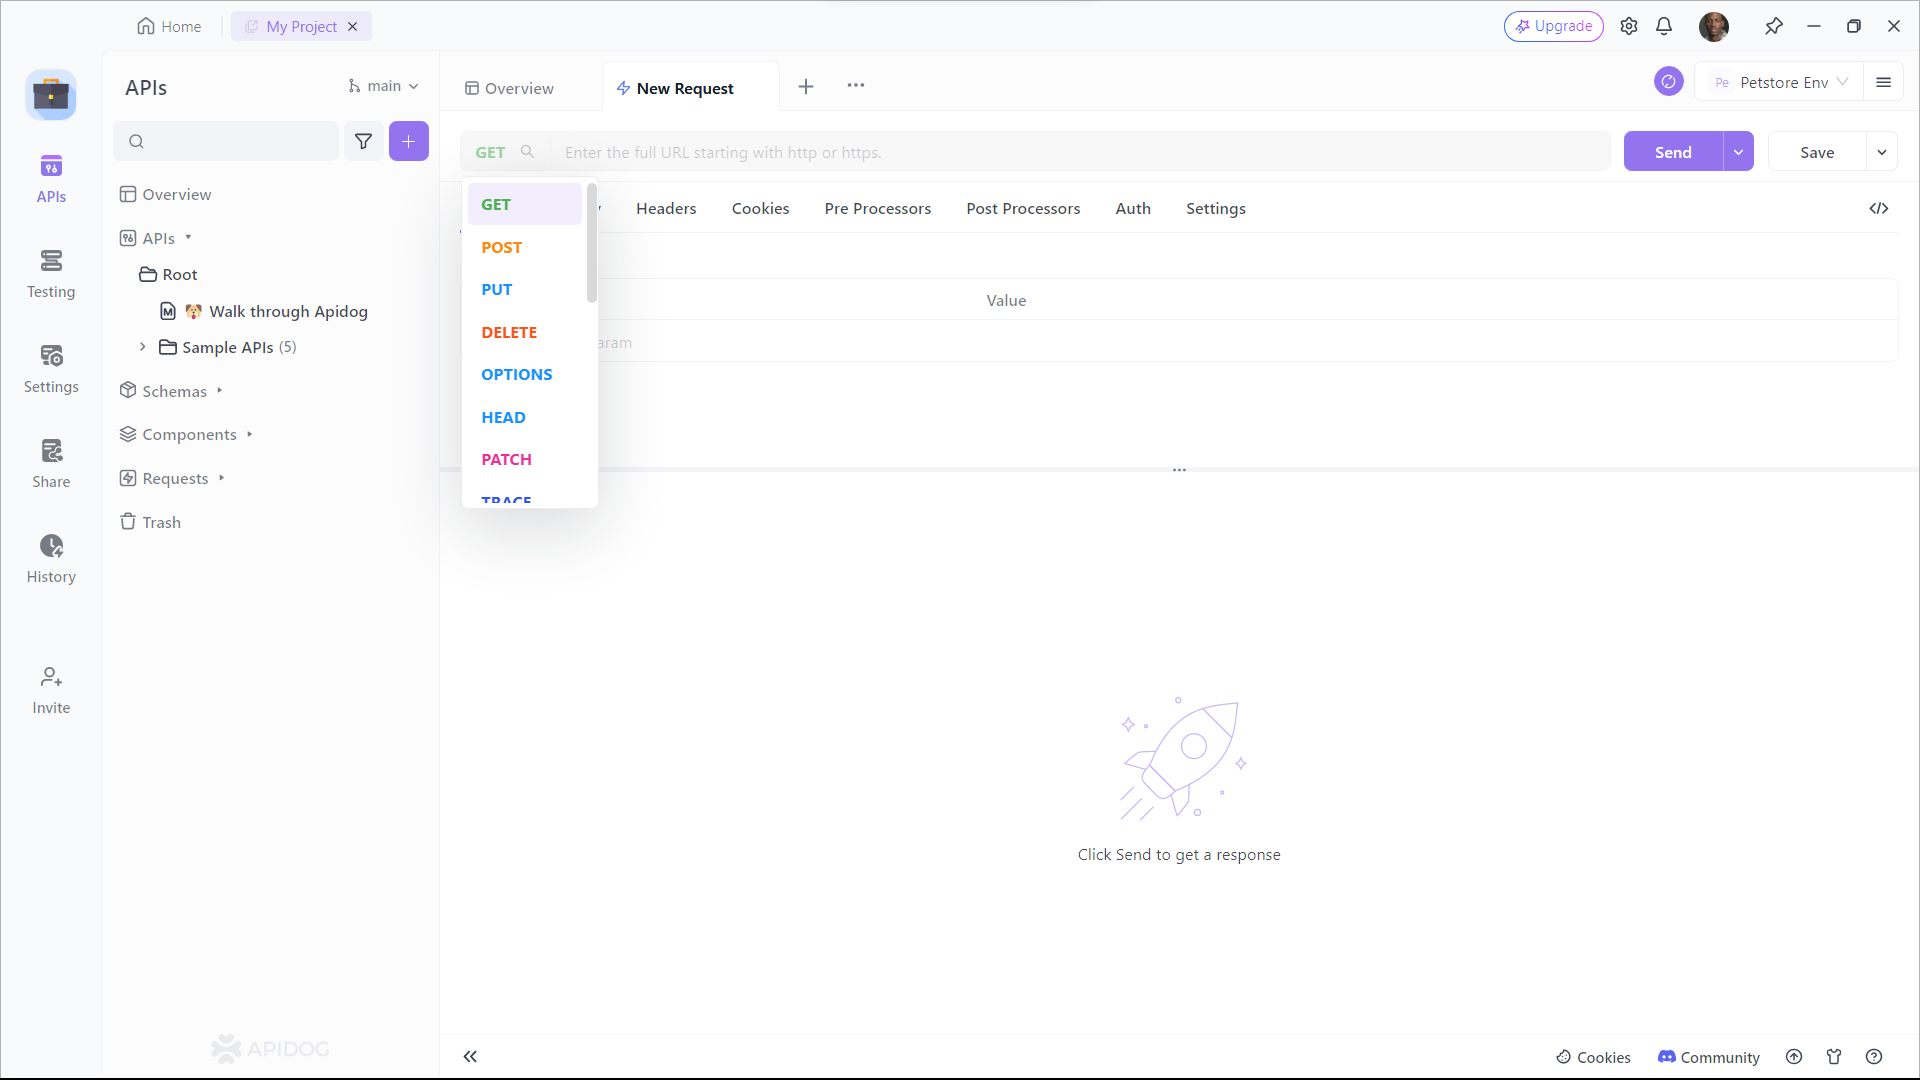
Let's go through a brief tutorial on how to use Apidog for making a [post] request.
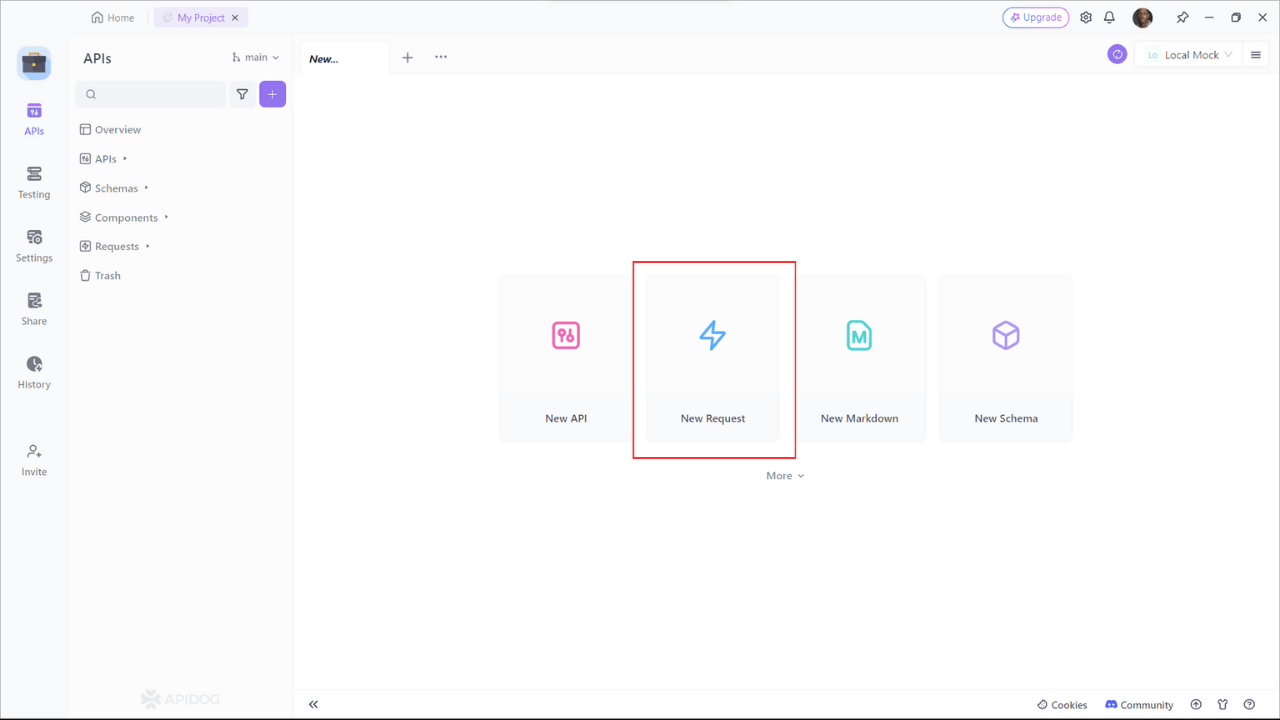
Step 1: Open Apidog and create a new request.
- Start Apidog and select New Request
Step 2: Input the API
- Find or manually input the API details for the POST request you want to make.
Step 3: Input Parameters
- Fill in the required parameters and any data you want to include in the request body.
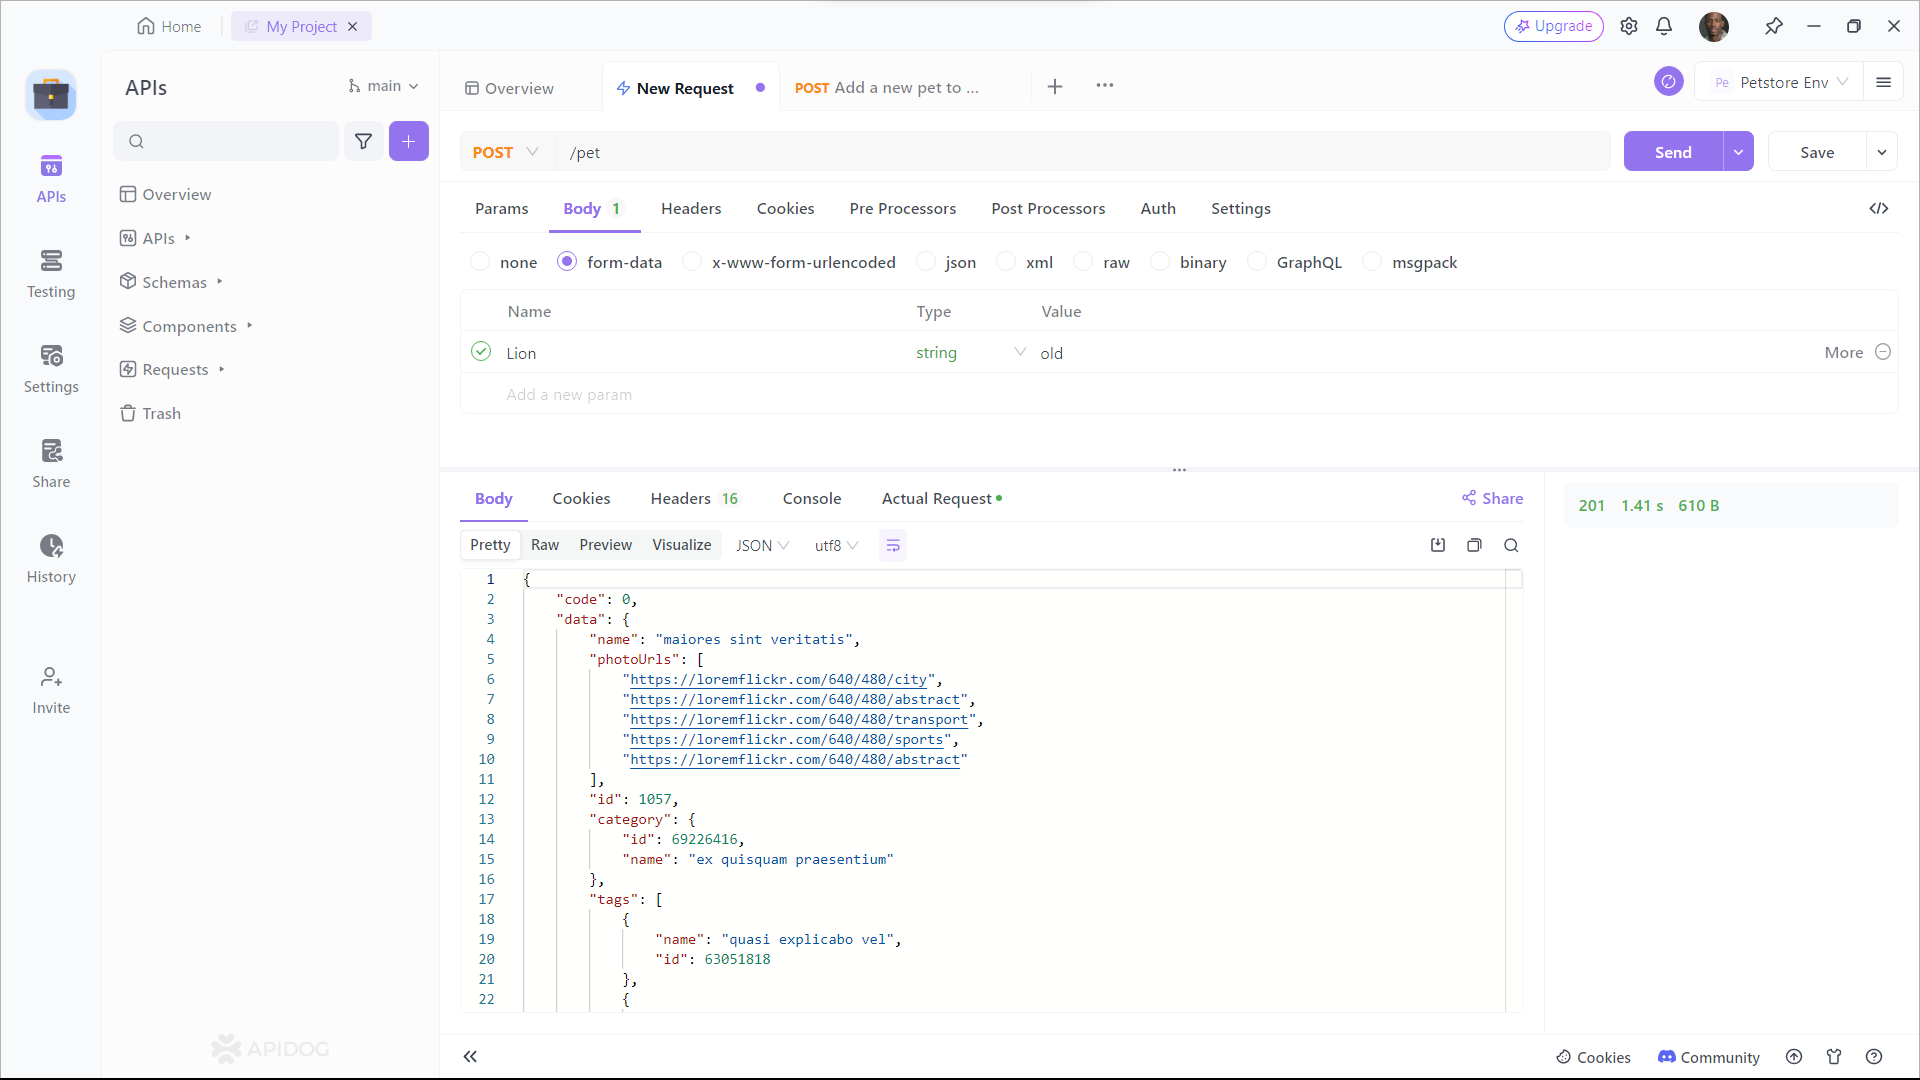
Using Apidog can save you time and effort when working with POST requests.
Documenting Our API with Apidog
To easily generate API documentation, simply follow these step-by-step guides:
Step 1: Sign up for Apidog
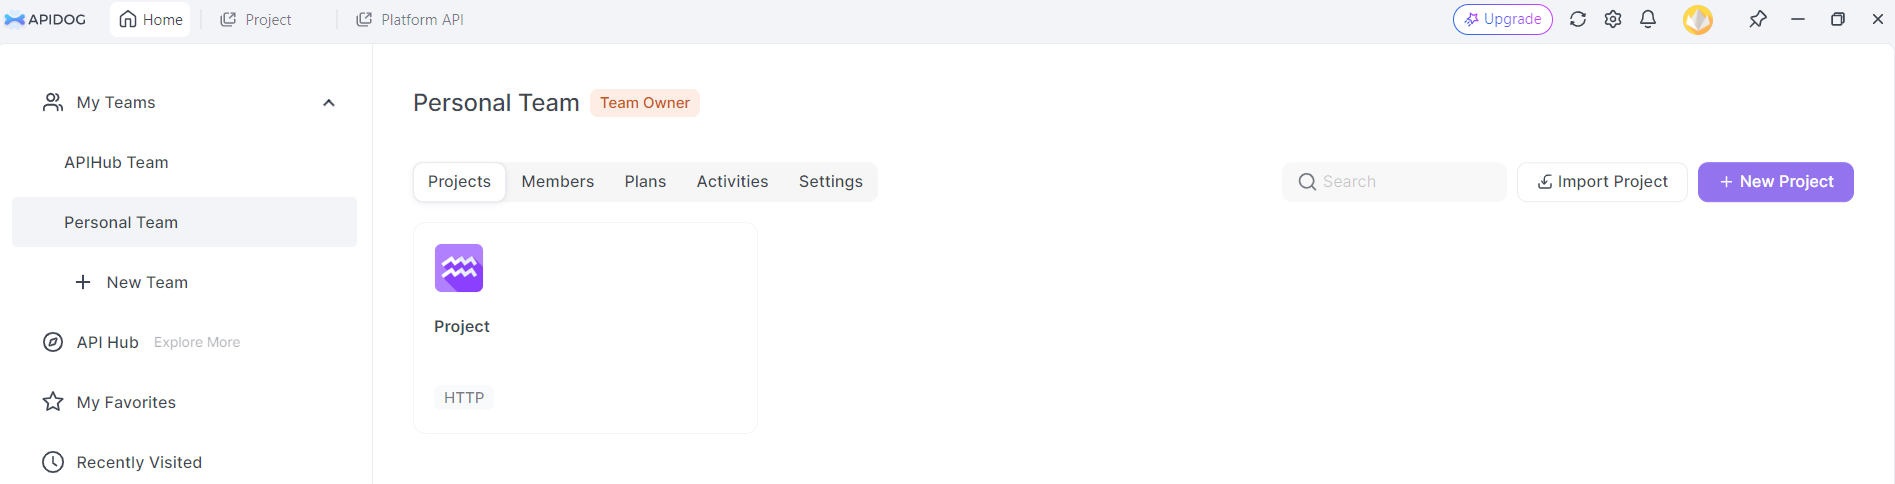
To start using Apidog for API documentation, create an account and log in. Upon logging in, you will be navigated to the Project Center, where you can select the default project or create a new one.
Step 2: Create a New API
Your API project will consist of multiple endpoints. Add an endpoint by clicking the "+" button or "Add Endpoint" within your project.
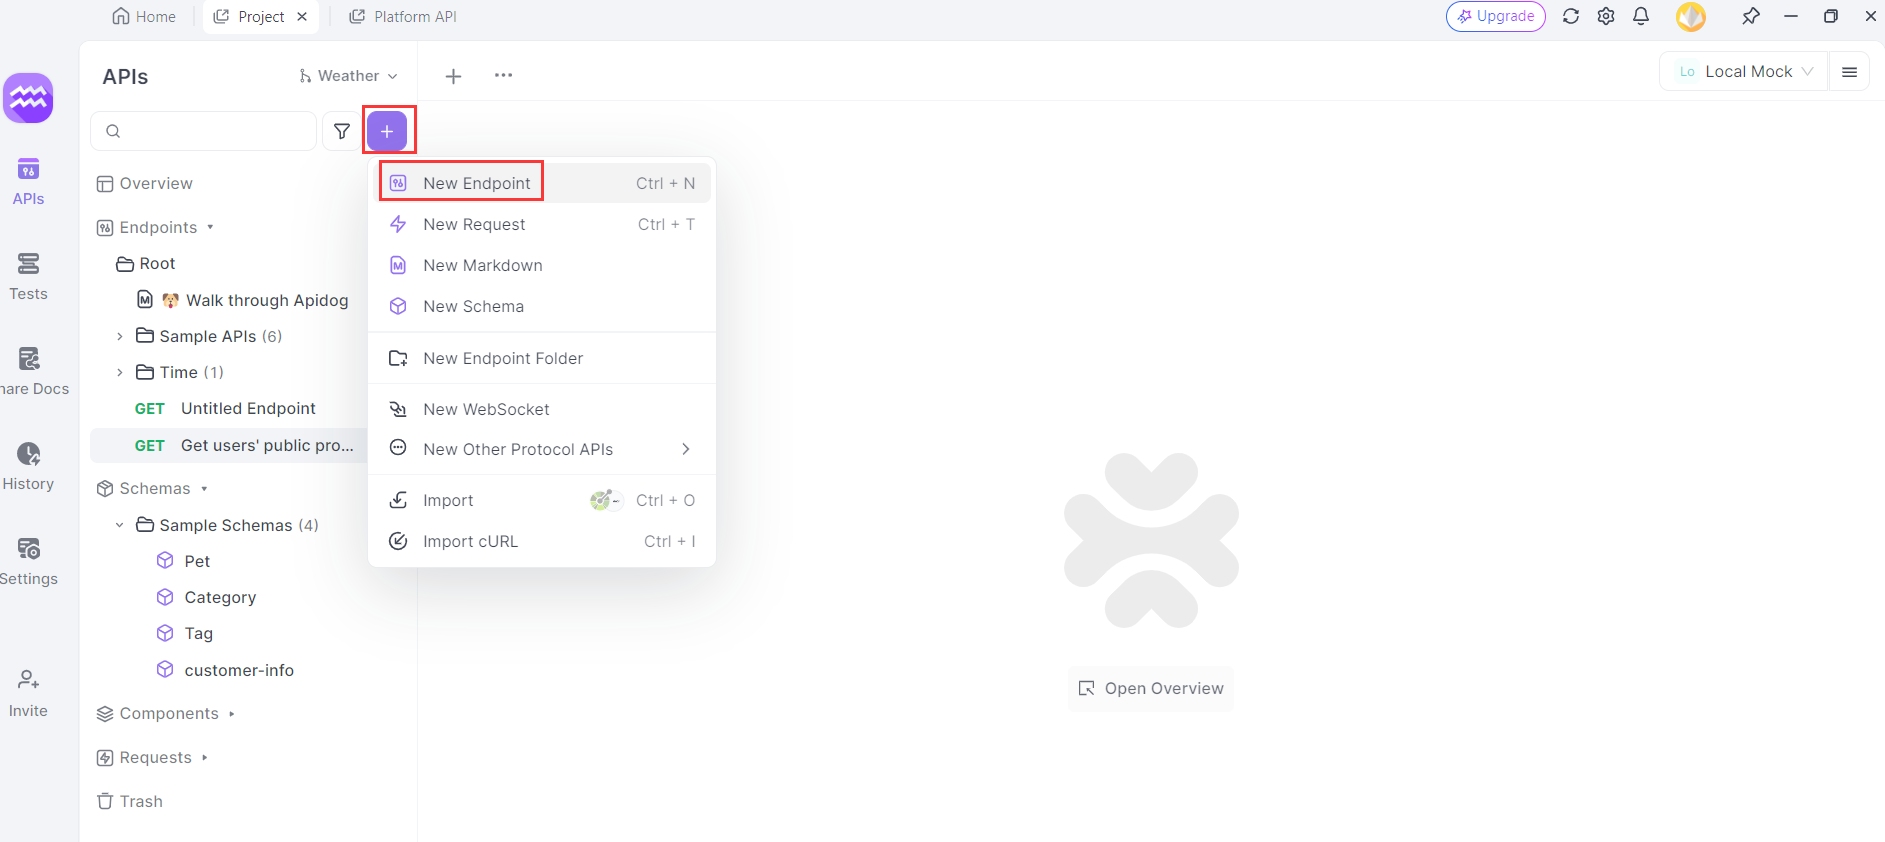
Step 3: Fill in API Information
Provide details like the endpoint URL, description, and request/response specifics. Documenting endpoints include:
- Specifying the HTTP method (GET, POST, PUT, DELETE, etc.) and API request path
- Defining request parameters (names, types, descriptions)
- Describing expected responses (status codes, formats, example responses)
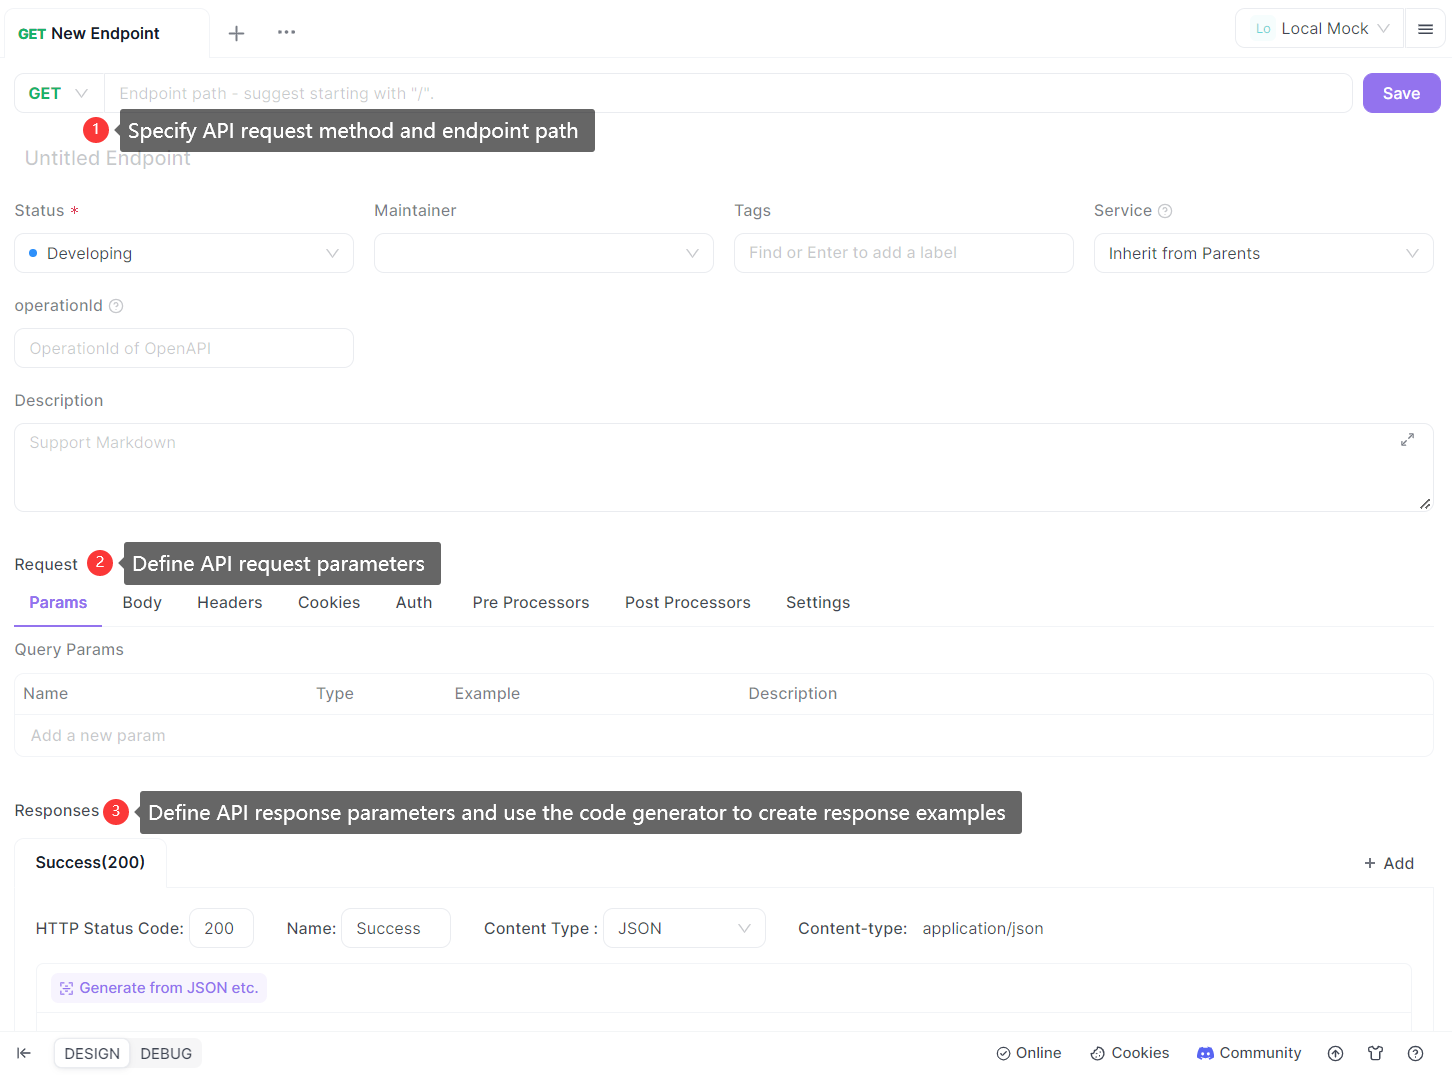
Step 4: Save the API Documentation
After entering the necessary information, click on "Save" to save the API documentation.

Step5: Test API Directly from the Online API Document
Once you save the API documentation, there will be an option to "Run" your API. Clicking on the button "Run" will send an API request and fetch the response for you to test the endpoints. During this process, you can identify any errors and issues that need to be tackled.
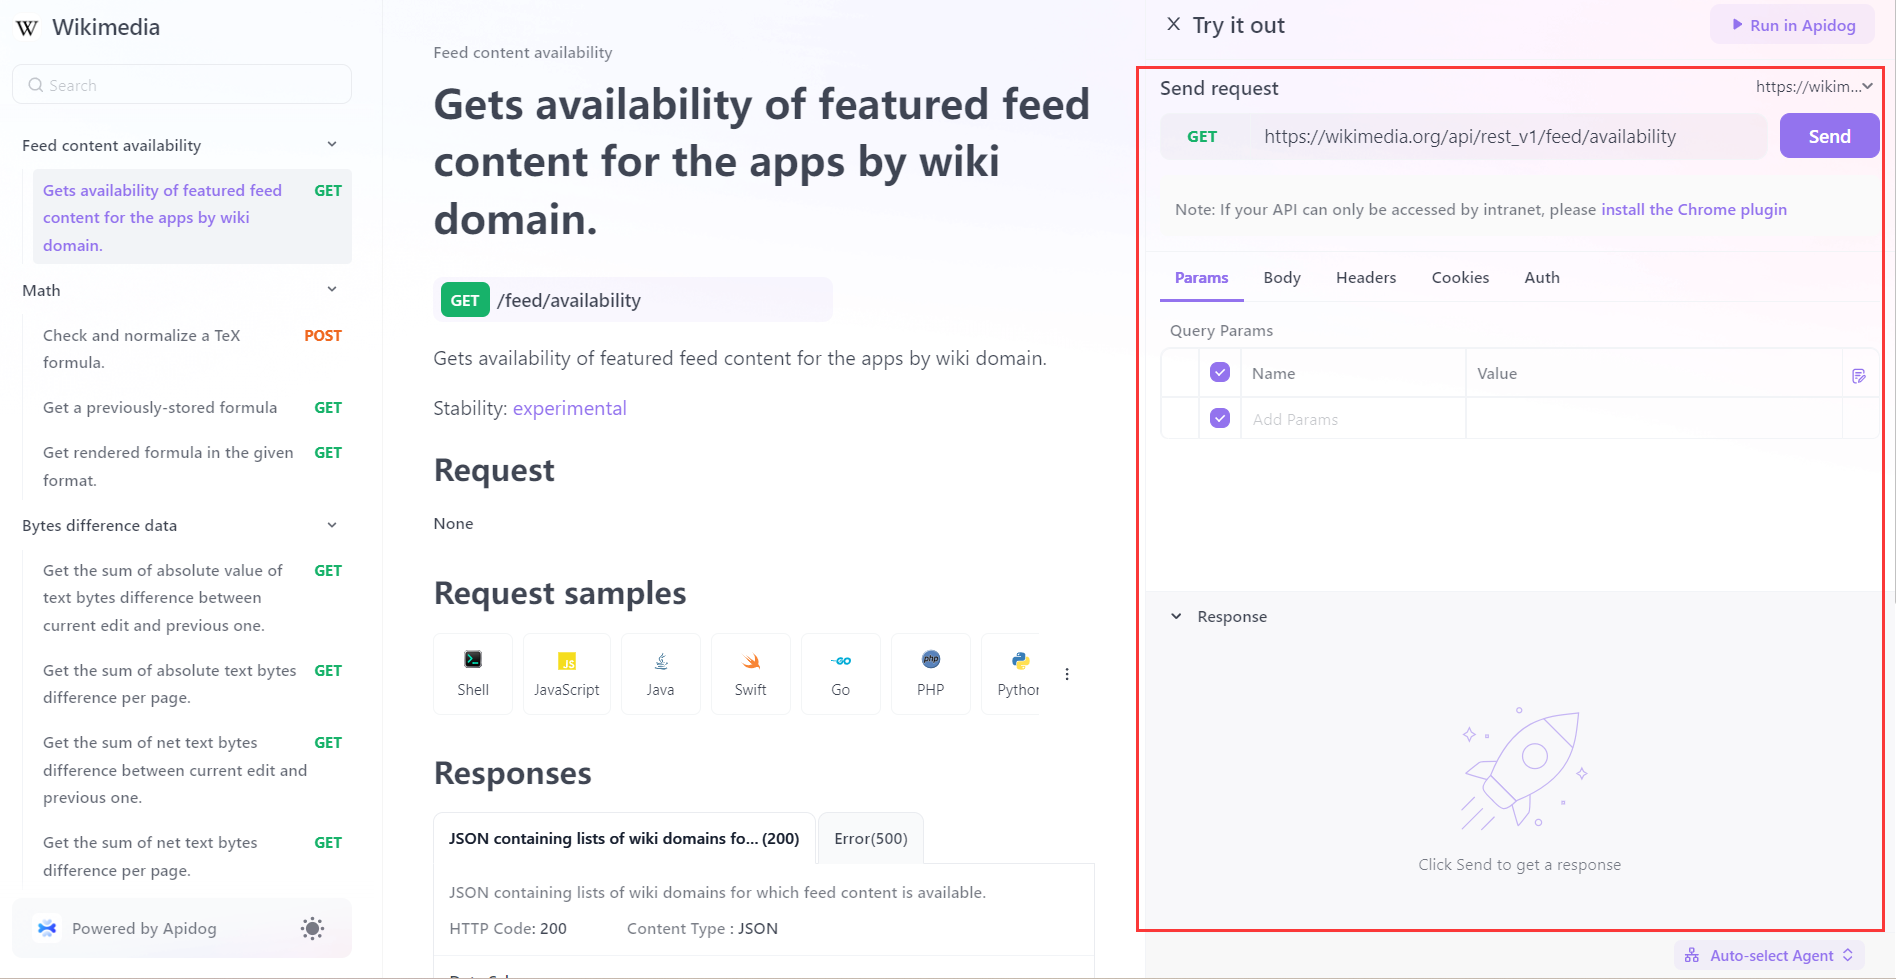
Once the API documentation meets the business needs, you can share it with others via a single link.
Benefits of Generating Online API Documentation Using Apidog
- Online Debugging: Easily debug APIs directly within the documentation by clicking the "Run" button, enabling quick and efficient testing.
- Automatic Documentation Generation: Automatically generate comprehensive API documentation by filling in the necessary information, eliminating the need for extensive manual configuration.
- Code Generation: Instantly generate request and response model code in various languages, such as JavaScript, with options for Fetch, Axios, and JQuery, etc., simplifying the development process.

- Cloud Mock: Utilize Cloud Mock to simulate backend services and create virtual servers for testing without restrictions, enhancing flexibility and reducing dependency on actual backend services.
Conclusion
Congratulations! You've successfully built a robust API using Node.js, Express, and Axios. You've also learned how to consume APIs with Axios, handle errors effectively, and enhance your API testing and documentation with APIdog.
APIs are the backbone of modern web development, and mastering these tools will set you on the path to creating powerful and scalable applications. Don't forget to download APIdog for free to streamline your API development and testing process.


