
Content delivery and security are paramount for businesses operating online. Akamai, a global leader in content delivery network (CDN) services, offers a powerful API that allows developers to harness the full potential of their platform programmatically. This comprehensive guide will explore the Akamai API, its features, implementation, and best practices, helping you optimize your web applications for speed, security, and scalability.

Understanding the Akamai API
The Akamai API provides developers with programmatic access to Akamai's vast array of services and features. By leveraging this API, you can automate tasks, integrate Akamai's capabilities into your existing workflows, and create custom solutions tailored to your specific needs.
Key Features of the Akamai API
- Content Purging: Instantly remove or update cached content across Akamai's global network.
- Configuration Management: Programmatically manage and deploy configurations for your Akamai services.
- Real-time Analytics: Access detailed performance and security analytics for your web properties.
- Security Controls: Implement and manage security features such as Web Application Firewall (WAF) rules.
- Edge Compute: Deploy and manage serverless functions at the edge for improved performance.
Getting Started with the Akamai API
To begin using the Akamai API, you'll need to follow these initial steps:
1. Create an Akamai Account
If you haven't already, sign up for an Akamai account. This will give you access to the Akamai Control Center, where you can manage your services and generate API credentials.
2. Generate API Credentials
Once logged into the Akamai Control Center:
- Navigate to the "Identity & Access" section.
- Click on "API Users" and then "Create API User."
- Follow the prompts to generate your API client credentials, including the client token, client secret, and access token.
3. Choose Your API Client
Akamai provides official API clients for various programming languages, including:
- Python
- Node.js
- Java
- Go
Alternatively, you can use third-party HTTP clients or create your own implementation following Akamai's authentication specifications.
Understanding Akamai API Authentication
Akamai uses a unique authentication method called EdgeGrid for its API requests. This method involves signing your requests with your API credentials to ensure secure communication. While the process can be complex, using official Akamai API clients simplifies this significantly.
Example: Authenticating with Python
Here's a basic example of how to authenticate and make a request using the Akamai Python client:
from akamai.edgegrid import EdgeGridAuth, EdgeRc
from urllib.parse import urljoin
import requests

# Load credentials from .edgerc file
edgerc = EdgeRc('~/.edgerc')
section = 'default'

# Create a session with EdgeGrid authentication
session = requests.Session()
session.auth = EdgeGridAuth.from_edgerc(edgerc, section)

# Make an API request
baseurl = 'https://%s' % edgerc.get(section, 'host')
result = session.get(urljoin(baseurl, '/diagnostic-tools/v2/ghost-locations/available'))

print(result.json())
This script loads your API credentials from a .edgerc file, creates an authenticated session, and makes a simple request to retrieve available ghost locations.
Common Akamai API Use Cases
Let's explore some common use cases for the Akamai API and how to implement them:
1. Purging Content
Content purging is one of the most frequently used API features. It allows you to remove or update cached content across Akamai's network instantly.
# Assuming you've set up authentication as in the previous example
endpoint = '/ccu/v3/invalidate/url'
payload = {
    "objects": [
        "<https://www.example.com/image.jpg>",
        "<https://www.example.com/script.js>"
    ]
}

result = session.post(urljoin(baseurl, endpoint), json=payload)
print(result.json())
This script sends a request to purge specific URLs from Akamai's cache.
2. Retrieving Property Information
You can use the Akamai API to retrieve information about your properties, including their configurations and status.
endpoint = '/papi/v1/properties'
result = session.get(urljoin(baseurl, endpoint))
properties = result.json()

for property in properties['properties']['items']:
    print(f"Property Name: {property['propertyName']}")
    print(f"Property ID: {property['propertyId']}")
    print("---")
This script fetches and displays basic information about all properties in your account.
3. Managing Security Configurations
The Akamai API allows you to manage security configurations, including WAF rules:
endpoint = f'/appsec/v1/configs/{config_id}/versions/{version}/security-policies/{policy_id}/attack-groups'
result = session.get(urljoin(baseurl, endpoint))
attack_groups = result.json()

for group in attack_groups['attackGroups']:
    print(f"Attack Group: {group['groupName']}")
    print(f"Enabled: {group['enabled']}")
    print("---")
This script retrieves and displays information about attack groups configured in a specific security policy.
Best Practices for Using the Akamai API
To make the most of the Akamai API and ensure smooth integration with your systems, consider the following best practices:
- Use Official Clients: Whenever possible, use Akamai's official API clients. They handle authentication and request signing, reducing the likelihood of errors.
- Implement Rate Limiting: Akamai imposes rate limits on API requests. Implement proper rate limiting in your applications to avoid hitting these limits.
- Handle Errors Gracefully: Always include error handling in your API interactions. Akamai provides detailed error responses that can help you troubleshoot issues.
- Secure Your Credentials: Store your API credentials securely. Never hardcode them in your applications or expose them in public repositories.
- Monitor API Usage: Keep track of your API usage to optimize performance and avoid unexpected costs.
- Stay Updated: Akamai regularly updates its API. Stay informed about changes and new features by following their developer documentation and release notes.
- Use Webhooks: For real-time notifications, consider implementing Akamai's webhook functionality instead of polling the API repeatedly.
Advanced Akamai API Features
As you become more comfortable with the basics, explore these advanced features of the Akamai API:
1. Edge Compute
Akamai's EdgeWorkers allow you to run custom JavaScript at the edge, closer to your users. You can use the API to manage and deploy these functions:
endpoint = f'/edgeworkers/v1/ids/{ew_id}/versions/{version}/activate'
payload = {
    "network": "STAGING",
    "note": "Activating new version"
}

result = session.post(urljoin(baseurl, endpoint), json=payload)
print(result.json())
This script activates a specific version of an EdgeWorker on the staging network.
2. Image and Video Management
Akamai's Image and Video Manager (IVM) can be controlled via API, allowing you to optimize and transform media assets programmatically:
endpoint = '/imaging/v0/policies'
result = session.get(urljoin(baseurl, endpoint))
policies = result.json()

for policy in policies['items']:
    print(f"Policy Name: {policy['name']}")
    print(f"Policy ID: {policy['id']}")
    print("---")
This script retrieves and displays information about your IVM policies.
3. Bot Management
Akamai's Bot Manager can be configured and monitored via API, allowing you to programmatically adjust your bot detection and mitigation strategies:
endpoint = f'/appsec/v1/configs/{config_id}/versions/{version}/security-policies/{policy_id}/bot-management-settings'
result = session.get(urljoin(baseurl, endpoint))
bot_settings = result.json()

print(f"Bot Detection: {bot_settings['botDetectionEnabled']}")
print(f"Bot Management Mode: {bot_settings['botManagementSettings']['botManagementMode']}")
This script retrieves and displays bot management settings for a specific security policy.
Integrating Akamai API with Apidog
While Akamai provides powerful tools for API management, integrating with third-party platforms like Apidog can further enhance your API development workflow. Apidog offers a comprehensive suite of tools for API design, testing, and documentation.
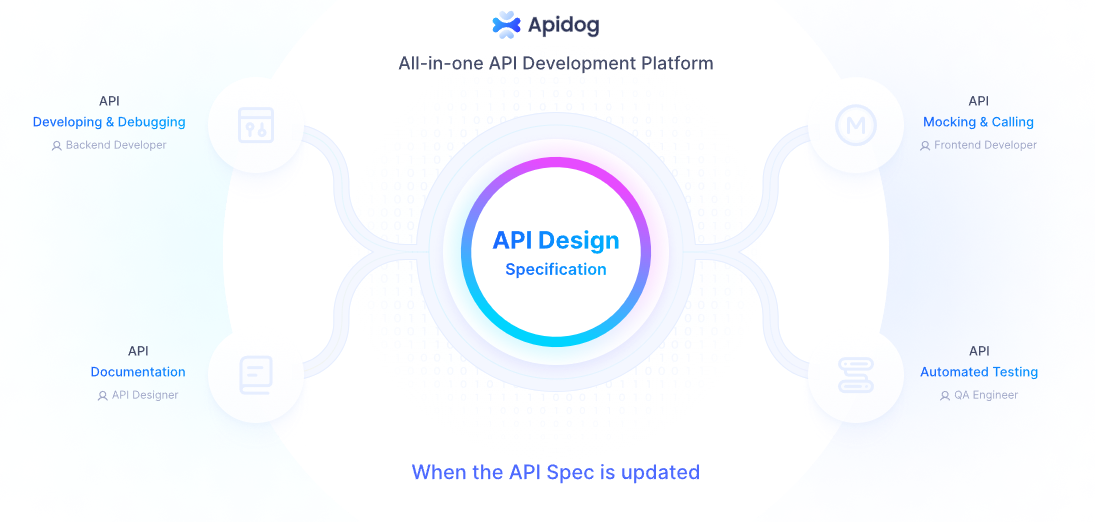
Here's how you can leverage Apidog alongside the Akamai API:
- API Documentation: Use Apidog to create detailed, interactive documentation for your Akamai API integrations. This can be especially useful for teams working on complex Akamai implementations.
- Request Testing: Utilize Apidog's testing features to validate your Akamai API requests before implementing them in your code. This can help catch issues early in the development process.
- Environment Management: Manage different environments (e.g., staging, production) for your Akamai API credentials within Apidog, making it easy to switch between them during development and testing.
- Collaboration: Take advantage of Apidog's collaboration features to share Akamai API configurations and test results with your team members.
- Mock Servers: Use Apidog's mock server functionality to simulate Akamai API responses during development, allowing you to progress even when you don't have immediate access to the live Akamai environment.
To get started with Apidog for your Akamai API projects:
- Sign up for an Apidog account at apidog.com.
- Create a new project for your Akamai API integration.
- Import your Akamai API specifications or create them manually within Apidog.
- Set up environments for your Akamai API credentials.
- Begin creating and testing API requests using Apidog's intuitive interface.
By combining the power of the Akamai API with Apidog's comprehensive API development tools, you can streamline your workflow and ensure robust, well-documented integrations.
Conclusion
The Akamai API opens up a world of possibilities for developers looking to harness the power of Akamai's global network and services programmatically. By mastering this API, you can automate complex tasks, integrate Akamai's capabilities seamlessly into your applications, and create custom solutions that leverage Akamai's infrastructure for optimal performance and security.
Remember to follow best practices, stay updated with Akamai's documentation, and consider integrating tools like Apidog to enhance your API development process. With the right approach and tools, you can fully leverage the Akamai API to build faster, more secure, and highly scalable web applications.
As you continue to explore and implement the Akamai API, don't hesitate to experiment with different features and use cases. The more you engage with the API, the more value you'll be able to extract from Akamai's powerful platform, ultimately leading to better experiences for your users and more efficient operations for your organization.


