
How to send SMS with Twilio API & Node.js
Whether you're developing a notification system, building a customer support chatbot, or simply want to incorporate SMS functionality into your application, this tutorial will guide you through the process step by step.

In today's interconnected world, communication is key, and one of the most ubiquitous forms of communication remains the humble text message. Whether it's sending notifications, alerts, or promotional messages, the ability to send SMS (Short Message Service) messages programmatically opens up a world of possibilities for developers. Enter Twilio, a cloud communications platform that empowers developers to integrate SMS functionality seamlessly into their applications.
Introduction:
In this tutorial, we'll explore how to harness the power of Twilio alongside the flexibility of Node.js to send SMS messages effortlessly. Node.js, with its non-blocking I/O model and rich ecosystem of packages, provides an ideal environment for building scalable and efficient applications, while Twilio simplifies sending and receiving SMS messages, handling delivery, and managing phone numbers.
Whether you're developing a notification system, building a customer support chatbot, or simply want to incorporate SMS functionality into your application, this tutorial will guide you through the process step by step. By the end, you'll have a solid understanding of how to leverage Twilio's API with Node.js to send SMS messages reliably and securely.
So, let's dive in and learn how to supercharge your Node.js applications with Twilio's SMS capabilities!
Setting up a Twilio Account:
Before sending SMS messages with Twilio and Node.js, the first step is to set up a Twilio account.
Twilio offers a free trial that you can use to test out all their services such as sending SMS with a free number that they'd assign to you.
To get started though, sign up for a free account.
Sign Up for a Twilio Free Account:
Navigate to the Twilio website (https://www.twilio.com/) and sign up for a new account if you haven't already done so. The sign-up process is straightforward and only requires basic information such as your email address, full name, and password.
Verify Your Email Address:
According to Twilio, Not verifying users at sign up can lead to bad actors in your system. Twilio Verify stops accounts from being created by bots, and can reduce fraud and associated costs by blocking premium and toll-free numbers.
This verification helps prevent misuse of the Twilio platform and ensures compliance with telecommunications regulations.
After signing up, Twilio will send a verification email to the address you provided during registration. Click on the verification link in the email to confirm your email address and activate your Twilio account.
Phone Number Verification:
This helps Twilio verify your identity and also allows you to send test messages to your phone from your Twilio account while in trial mode.
After verifying your email, you'll be prompted to verify your phone number. Twilio automatically detects your location using your I.P. Make sure to create your account using a number you can verify within your country.
Access Your Twilio Dashboard:
Once your account is verified, log in to your Twilio account to access the Twilio Console. The Console is where you'll manage your Twilio services, phone numbers, and API credentials.
Obtain Twilio API Credentials:
In the Twilio Console, navigate to the "Dashboard" or "Settings" section to find your Account SID and Auth Token. These credentials are essential for authenticating your requests when interacting with the Twilio API.
- Account SID (Account Identifier): This is a unique identifier for your Twilio account. It acts as a username when making API requests.
- Auth Token (Authentication Token): This token will serve as a password to authenticate your API requests. Keep it secure and never share it publicly.
- Twilio phone number: This phone is crucial, this is what you'll use to send SMS and not your phone number.
By completing these steps, you'll have successfully set up your Twilio account, obtained your API credentials, and got your phone number(s) for SMS messaging. Now you're ready to integrate Twilio with your Node.js application and start sending SMS messages programmatically.
N.B: If your free trial account expires, you'll need to buy a phone number that you'll use to send an SMS.

If you don't wanna buy a phone number for tests, make sure to create your account only when you're ready to send your SMS.
Installing Dependencies:
To integrate Twilio's SMS functionality into your Node.js application, you'll need to set up a new Node.js project and install the Twilio Node.js SDK.
Before we continue with the dependencies installations, note that we won't be using any UI or building a front-end application to test this. However, to test this, we'll Apidog a better alternative to Postman.
Apidog is an integrated platform for API design, debugging, development, mock, and testing.
Here's a helpful guide to getting a full understanding of what Apidog is and how to use it to the fullest. Create an account to prepare for the API testing stage of this article.
Now, back to setting up Node.Js and Twilio. Follow these steps to get started:
Setting up a New Node.js Project:
If you haven't already done so, create a new directory for your Node.js project and navigate into it using your terminal or command prompt.
mkdir twilio-sms-demo
cd twilio-sms-demo
Initializing a Node.js Project:
Use the following command to initialize a new Node.js project. This command will create a package.json file that will track your project's dependencies.
npm init -y
This command creates a package.json file with default values. You can customize these values as needed.
Installing the Twilio Node.js SDK:
Now, you'll need to install the Twilio Node.js SDK, which provides a convenient interface for interacting with Twilio's API from your Node.js applications. You can use npm or yarn to install the SDK.
Using npm:
Run the following command to install the Twilio Node.js SDK along with Express framework using npm:
npm install express twilio
Using yarn:
If you prefer using yarn, run the following command instead:
yarn add express twilio
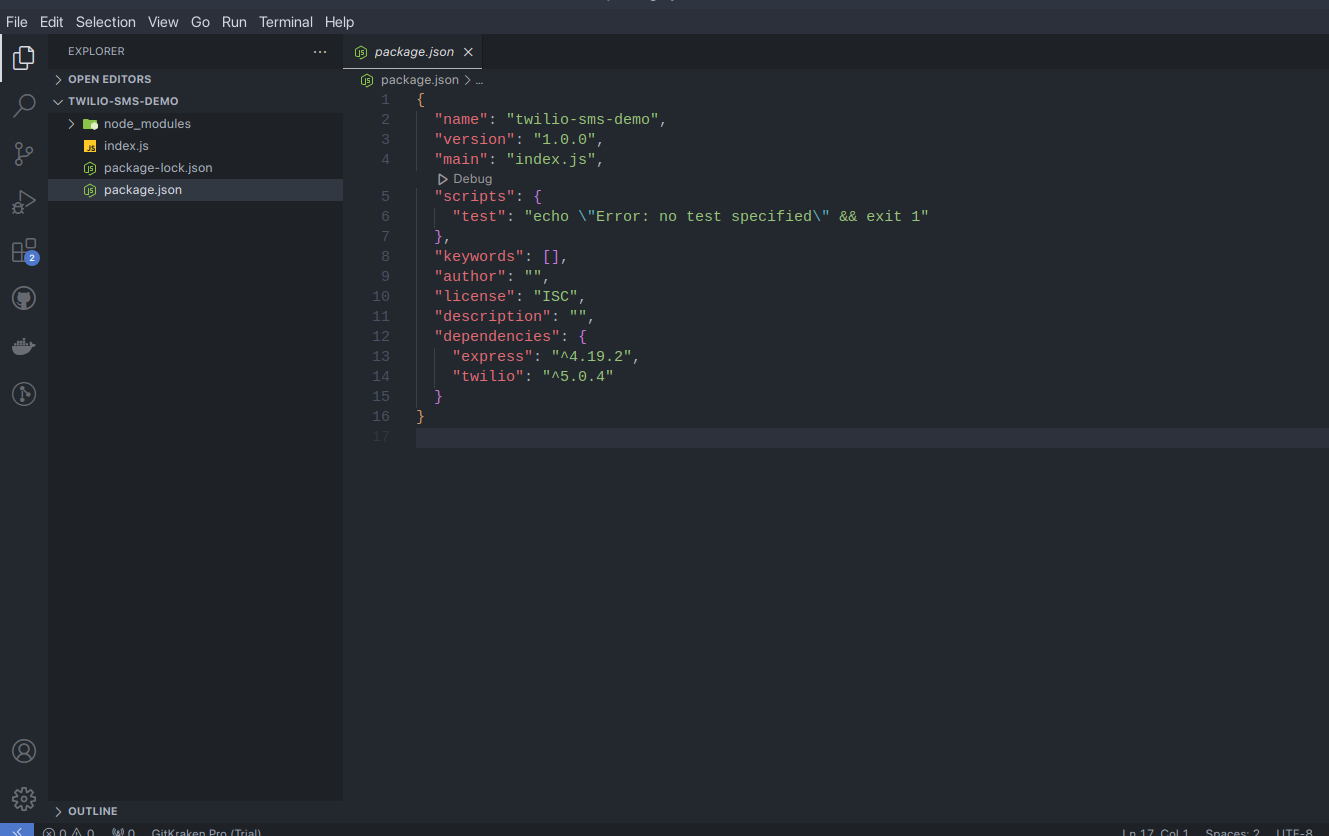
This command will download the Twilio Node.js SDK along with the Express framework and add it as a dependency in your package.json file.
If you don't know, Express is a node.js framework that makes building APIs straightforward.
Verifying Installation:
After installing the Twilio SDK, ensure that it has been added to your package.json file. You should see "twilio": "^x.x.x" listed under the dependencies section.
Additionally, you can verify that the installation was successful by checking for the presence of the node_modules directory in your project. This directory contains all the installed dependencies, including the Twilio SDK.
By following these steps, you've successfully set up a new Node.js project and installed the Twilio Node.js SDK, paving the way for integrating Twilio's SMS functionality into your application. Now, you're ready to start writing the code to send SMS messages with Twilio in your Node.js application.
Writing the Node.js Code:
Now that you've set up your Node.js project and installed the Twilio SDK, let's write the code to send an SMS message using Twilio in combination with Express.
Creating a New JavaScript File:
In your project directory, create a new JavaScript file named index.js (or any other name you prefer) where you'll write the code to send SMS messages.
touch index.js
Once you're done, open the project directory/folder in any IDE of your choice. If you're one of the people who fancy simplicity, you'd probably have VsCode installed. Open the project init and you should see something similar to what I have below;
Open the index.js file and let's start writing some code. Paste the following code into the index.js file.
const express = require('express');

const accountSid = "your_account_sid;
const authToken = "your_auth_token";
const client = require('twilio')(accountSid, authToken);
In the code above, we import the express module at the beginning of the file. We also created two constants ( const) that holds our accountSid & authToken. Lastly, we defined another constant where we imported the Twilio module and passed the accountSid & the authToken to it.
Some people might argue that it's best if we wrap the accountSid and the AuthToken in a .env file. You can do that if you want, but I'm just gonna keep things simple here.
Writing the Code to Send an SMS Message:
Now, let's write the code to send an SMS message using Twilio's messages.create() method.
In that same index.js file, add the following codes under what we first had.
const app = express()

app.post('/send-sms', (req, res) => {


    client.messages
        .create({
            body: 'This is how receving test SMS from Twilio feels like. Init?',
            from: '+122345678', // Replace with your Twilio phone number inclding the country code.
            to: '+123456789'    // the phone number you verified your account with.
        })
        .then(message => {
            console.log('Message sent:', message.sid);
            res.send('SMS sent successfully!');
        })
        .catch(error => {
            console.error('Error sending SMS:', error);
            res.status(500).send('Failed to send SMS');
        });
});

const PORT = 3000;
app.listen(PORT, () => {
    console.log(`Server is running on port ${PORT}`);
});
In this code:
- We create an Express application and define a POST route
/send-smsto handle sending SMS messages. - We then initialize a Twilio client with our Twilio credentials.
- Using the Twilio client, we send an SMS message to the specified recipient phone number (
to) with the provided message body (body).
That's it! You've now written the Node.js code to send SMS messages using Twilio and Express. Don't forget to replace 'from' & 'to' with your Twilio phone number and verified phone number.
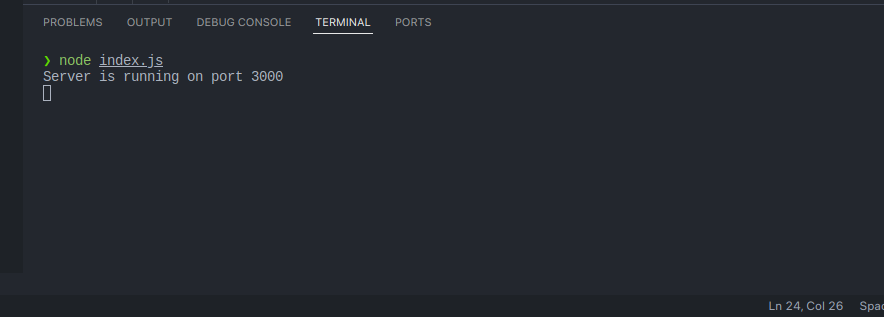
Save the file, open your terminal, and type node index.js and click enter. If everything goes well, you should see something similar to;
Testing our API:
If you can remember, I mentioned that we'll be using Apidog to test our APIs to see if they work as expected. So, please download or use the web version of Apidog to test the API we just created.
Once again, here's a guide that will show you how to get started with Apidog.
Now that you're familiar with Apidog, log in and create your first project - or use the default created automatically for you. After that, click on "New Request"

After that, you'll be shown a page to send a request.
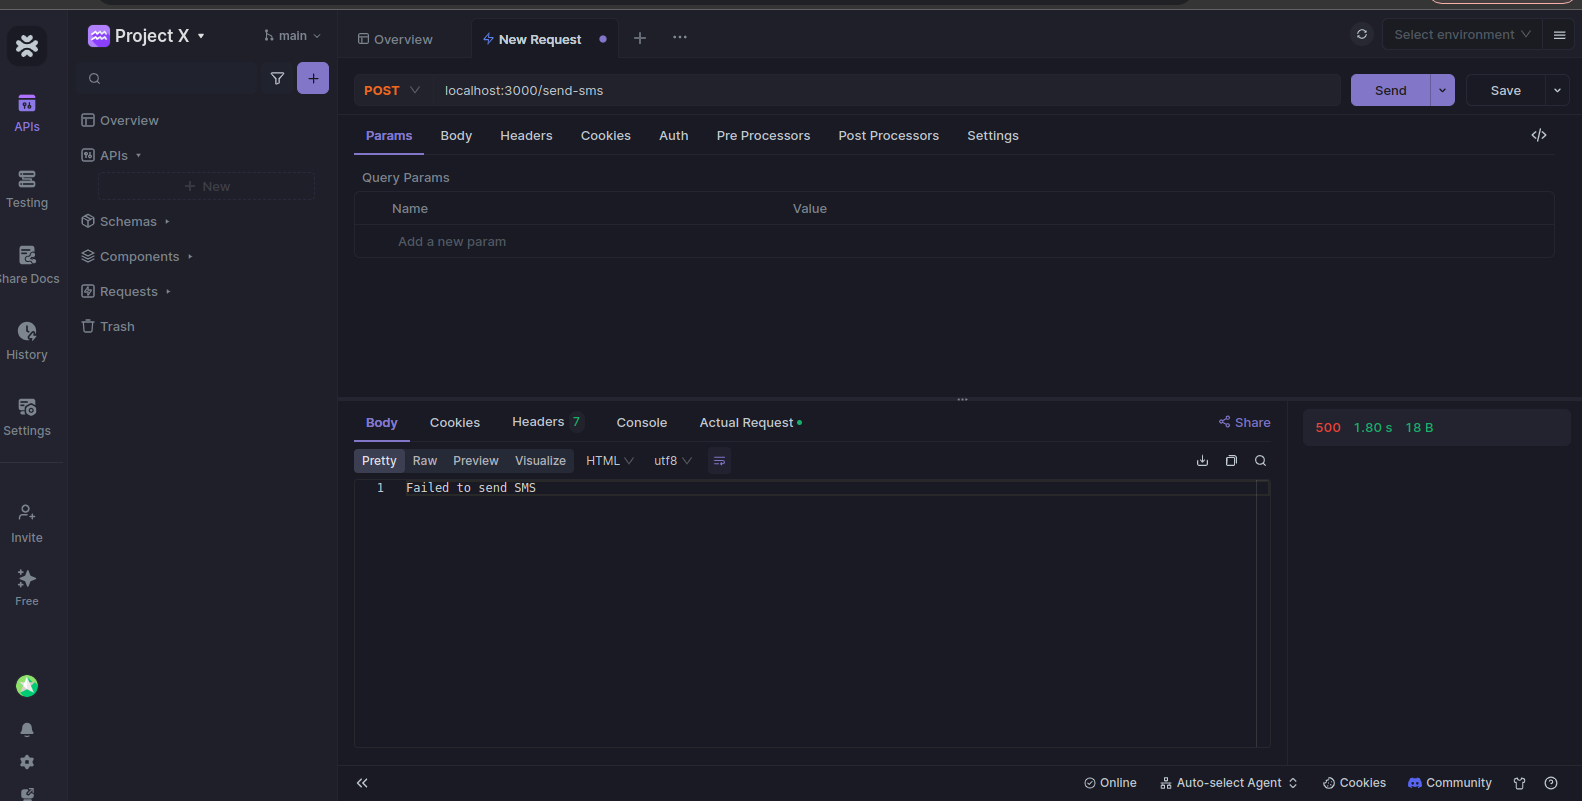
You can see that the I'm sending a POST request to localhost:3000/send-sms and that's because the route we defined on our web app is /send-sms and we're using our local machine.
If you type in the correct route and hit the send button on the top right, you'll receive a response. In my case, I got an error - and the error was logged to me in my terminal.
The error was simple, the phone number I tried sending the SMS to is not verified - because I'm using a trial account, I need to verify my number or upgrade to send SMS to any phone number.
One of the cool features of Twilio is that you can view your logs and history. I viewed mine, and got the following response;
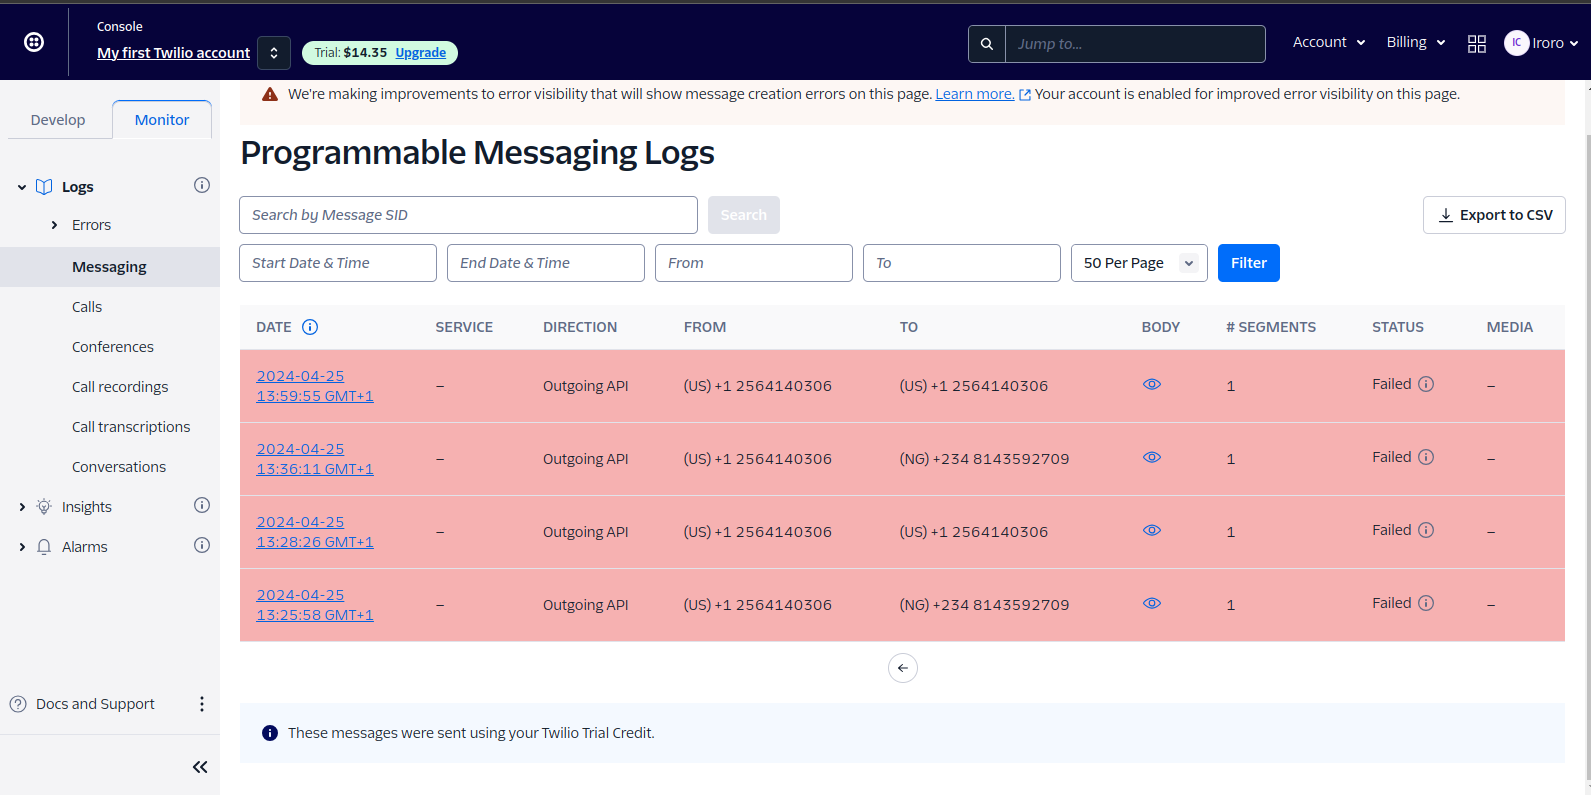
All of my tests' APIs failed. Can you guess why?
My to phone number wasn't verified;

Once you verify or upgrade your account to a paid account, you'll be able to receive an SMS.
Enhancing the Application (Optional):
Once you've successfully implemented sending SMS messages with Twilio and Node.js, you may want to explore additional features and improve the reliability of your application. Here are some optional enhancements you can consider:
Exploring Additional Twilio Features:
Twilio offers a wide range of features beyond simple SMS messaging. You can explore capabilities such as:
- Sending MMS: Enhance your messages by sending multimedia content such as images, videos, and audio files.
- Scheduling Messages: Schedule SMS messages to be sent at a specific date and time, ideal for reminders and notifications.
Conclusion:
In this tutorial, we've explored how to integrate Twilio's SMS functionality with Node.js, allowing you to send SMS messages programmatically from your applications. Let's recap the key steps involved:
Setting up Twilio Account: Sign up for a Twilio account, obtain your API credentials (Account SID and Auth Token), and verify phone numbers for SMS messaging.
Installing Dependencies: Set up a new Node.js project, install the Twilio Node.js SDK, and configure Twilio with your credentials.
Writing the Node.js Code: Create a new JavaScript file for sending SMS messages, import Express and the Twilio module, and write code to send SMS messages using Twilio's messages.create() method.
Testing the code using Apidog: We saw how we can use a dev tool like Apidog to test our Node.js APIs easily without stress.
By following these steps, you've learned how to leverage Twilio's powerful API alongside the flexibility of Node.js to incorporate SMS functionality into your applications. As you continue to develop your projects, don't hesitate to explore further Twilio features and customize your applications to meet the specific needs of your users.
Happy coding!