
APIs (Application Programming Interfaces) play a pivotal role. They allow applications to communicate with external services, retrieve data, and perform various tasks. One popular library for making HTTP requests in JavaScript is Axios.
In this blog post, we’ll delve into the nitty-gritty of using Axios to make GET requests with body and headers. So grab your favorite beverage, and let’s dive in!
What is Axios
Axios is a promise-based HTTP client for the browser and Node.js. It simplifies making HTTP requests, handling responses, and managing errors. Whether you’re building a single-page application or a server-side project, Axios has got your back.

Why Use Axios and How to Install It?
- Clean Syntax: Axios provides a clean and intuitive syntax for making requests.
- Promises: Axios returns promises, making it easy to handle asynchronous operations.
- Browser and Node.js Compatibility: It works seamlessly in both environments.
- Interceptors: You can intercept requests and responses, adding custom logic.
You can install Axios using npm or yarn. Here’s how to install it :
Using npm:
$ npm install axios
Using bower:
$ bower install axios
Using yarn:
$ yarn add axios
Using jsDelivr CDN:
<script src="https://cdn.jsdelivr.net/npm/axios/dist/axios.min.js"></script>
Using unpkg CDN:
<script src="https://unpkg.com/axios/dist/axios.min.js"></script>
What Body and Header Can You Use with GET Request?
When making a GET request using Axios, the HTTP specification does not typically include a request body. However, there are scenarios where you might need to send data along with your GET request. Let’s explore how you can achieve this:
Query Parameters (URL Parameters):
- Instead of including data in the request body, you can pass it as query parameters in the URL.
- Use the
paramsproperty in the Axios config object to send data as query parameters.
Example:
const data = {
  param1: 'value1',
  param2: 'value2',
};

axios.get('https://api.example.com/resource', { params: data })
  .then((response) => {
    console.log('Data received:', response.data);
  })
  .catch((error) => {
    console.error('Error fetching data:', error.message);
  });
- On the server side, you can access these parameters using
req.query.param1andreq.query.param2.
Headers:
- Headers are essential for authentication, authorization, and other purposes.
- You can set custom headers using the
headersproperty in the Axios config object.
Example:
const config = {
  headers: {
    Authorization: 'Bearer YOUR_ACCESS_TOKEN',
    'Custom-Header': 'Custom Value',
  },
};

axios.get('https://api.example.com/protected-resource', config)
  .then((response) => {
    console.log('Protected data:', response.data);
  })
  .catch((error) => {
    console.error('Error fetching protected data:', error.message);
  });
- Replace
'Bearer YOUR_ACCESS_TOKEN'with your actual token.
Avoid Sending Body in GET Requests:
- While it’s technically possible to send a body in a GET request using Axios, it’s generally considered bad practice.
- The HTTP specification doesn’t define a request body for GET requests.
- If you need to send data, prefer using query parameters or other appropriate methods.
Remember that adhering to best practices ensures robust and maintainable code. If you find yourself needing to send complex data with a GET request, consider reevaluating your design to ensure it aligns with standard conventions.
How to Add and Send header and body in Axios GET Request?
When using Axios to make GET requests, it’s important to understand that the HTTP specification typically does not include a request body for GET requests. However, you can still send additional data using query parameters and headers. Here’s how you can add and send headers, and how to work with data in a GET request:
Adding Headers
To add headers to your GET request in Axios, you can pass a configuration object with a headers property. Here’s an example:
const axios = require('axios');

const config = {
  headers: {
    'Authorization': 'Bearer YOUR_ACCESS_TOKEN',
    'Custom-Header': 'Custom Value'
  }
};

axios.get('https://api.example.com/data', config)
  .then((response) => {
    // Handle the response
  })
  .catch((error) => {
    // Handle any errors
  });
Sending Data with GET Requests
While sending a body with a GET request is not standard and generally discouraged, you can send data as query parameters using the params property in the Axios configuration object:
const params = {
  key1: 'value1',
  key2: 'value2'
};

axios.get('https://api.example.com/data', { params })
  .then((response) => {
    // Handle the response
  })
  .catch((error) => {
    // Handle any errors
  });
On the server side, this data will be accessible through request.query, not request.body. It’s also worth noting that these parameters will be appended to the URL.

Common Errors and Troubleshooting Tips
When working with Axios to make GET requests with body and headers, developers might encounter a few common errors. Here are some troubleshooting tips to help you resolve these issues:
Common Errors
1. Error: Axios get is not a function
- Cause: This error typically occurs when there’s a problem with the Axios import or when trying to call
.geton an undefined variable. - Solution: Ensure that Axios is correctly imported and that you are calling
.geton the Axios instance.
2. Error: Network Error
- Cause: This error can happen due to CORS issues, network connectivity problems, or server-side failures.
- Solution: Check the network connection, ensure the server is running, and verify that CORS is configured correctly on the server.
3. Error: Request failed with status code 4xx/5xx
- Cause: These errors are responses from the server indicating client-side issues (4xx) or server-side issues (5xx).
- Solution: For 4xx errors, check the request URL, headers, and parameters. For 5xx errors, investigate the server logs for more details.
4. Error: Timeout
- Cause: The request took longer than the
timeoutspecified in Axios. - Solution: Increase the
timeoutvalue in the Axios request configuration or optimize the server’s response time.
5. Error: Invalid URL
- Cause: The URL provided in the Axios request is incorrect or malformed.
- Solution: Verify the URL’s correctness and ensure it’s properly encoded.
6. Error: Headers Rejected
- Cause: The server may reject requests with certain headers due to security policies.
- Solution: Review the headers being sent and ensure they comply with the server’s expected format and values.
7. Error: Response not received
- Cause: The server didn’t send a response, possibly due to a crash or timeout.
- Solution: Check the server status and logs to identify any potential issues.
Advanced Troubleshooting:
- Axios Interceptors: Use Axios interceptors to log requests and responses for debugging.
- axios-retry: Implement the
axios-retrypackage to handle transient errors automatically. - Debugging Tools: Utilize debugging tools to step through your code and identify where issues are occurring.
Effective troubleshooting involves a systematic approach to identifying the problem, understanding the error messages, and applying the appropriate solutions. By following these tips, you should be able to resolve most issues encountered while making GET requests with Axios.
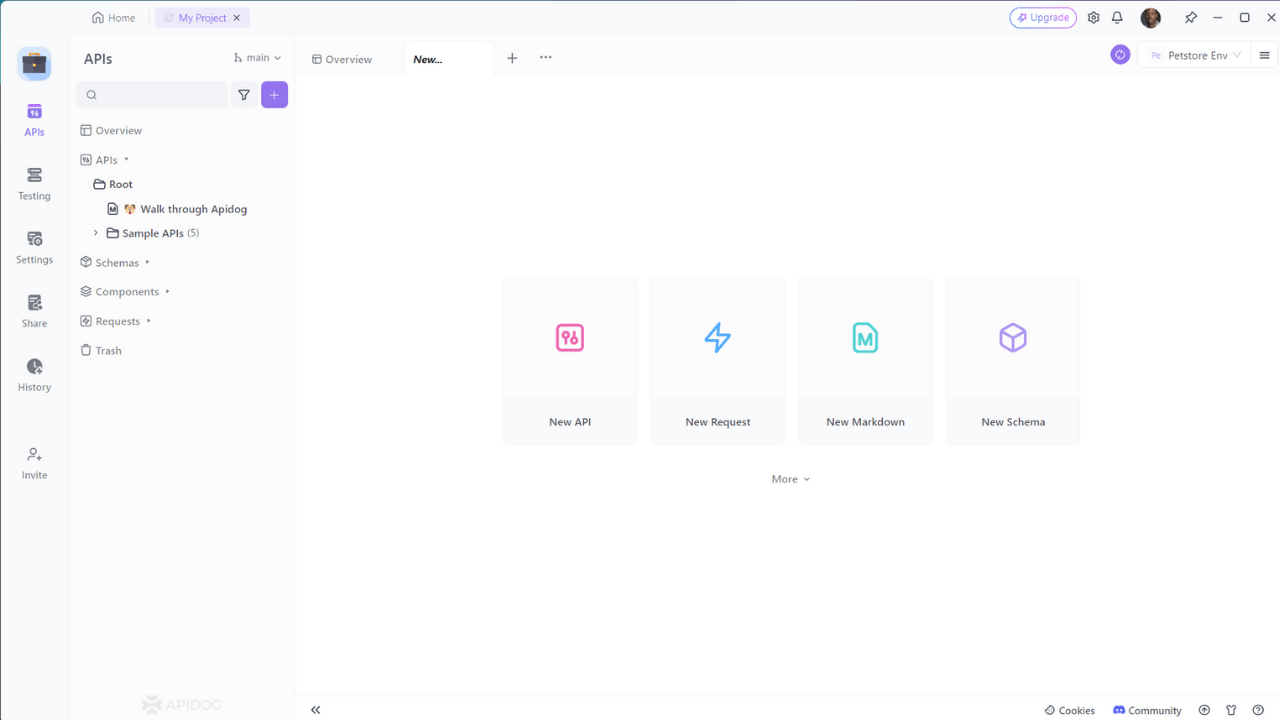
How to Send GET Requests with Body and Header Using Apidog
Apidog is a powerful tool that can help you send GET requests with body and header parameters more easily.
Send GET Requests With header:
Open Apidog and click on the New Request button.
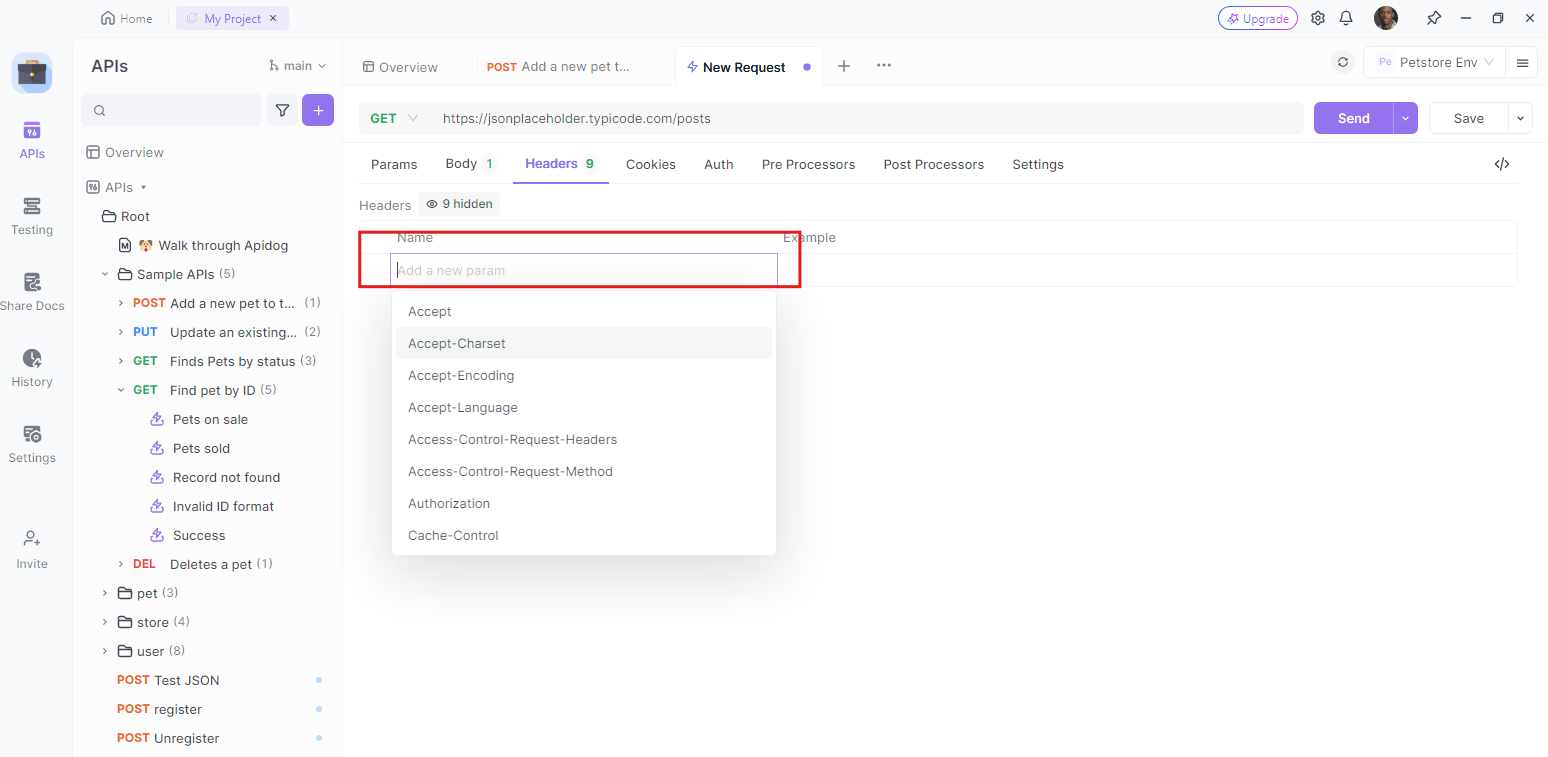
Enter the URL of the API endpoint you want to send a GET request to, then click on the Headers tab and select the option you want. In this example, we're selecting Authorization.
Add your credentials (the actual data needed for server verification e.g., username/password, token, hash)
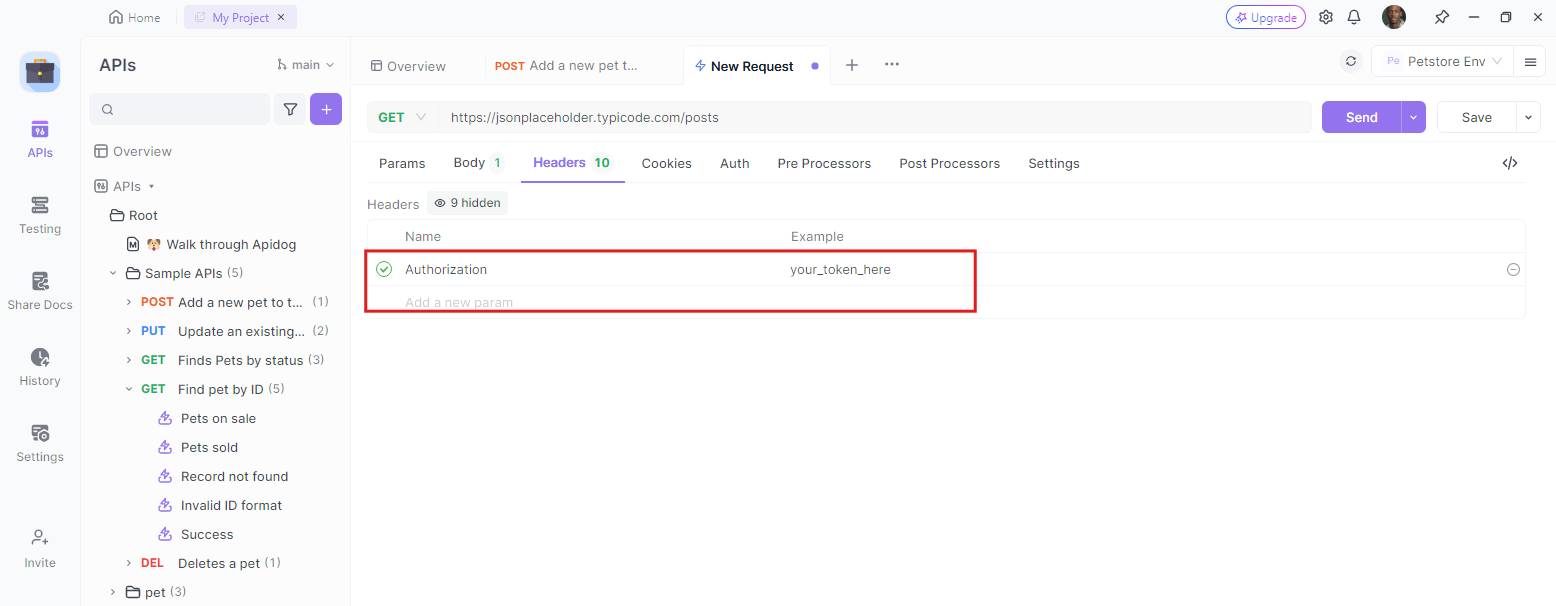
Send the request and analyze the response.
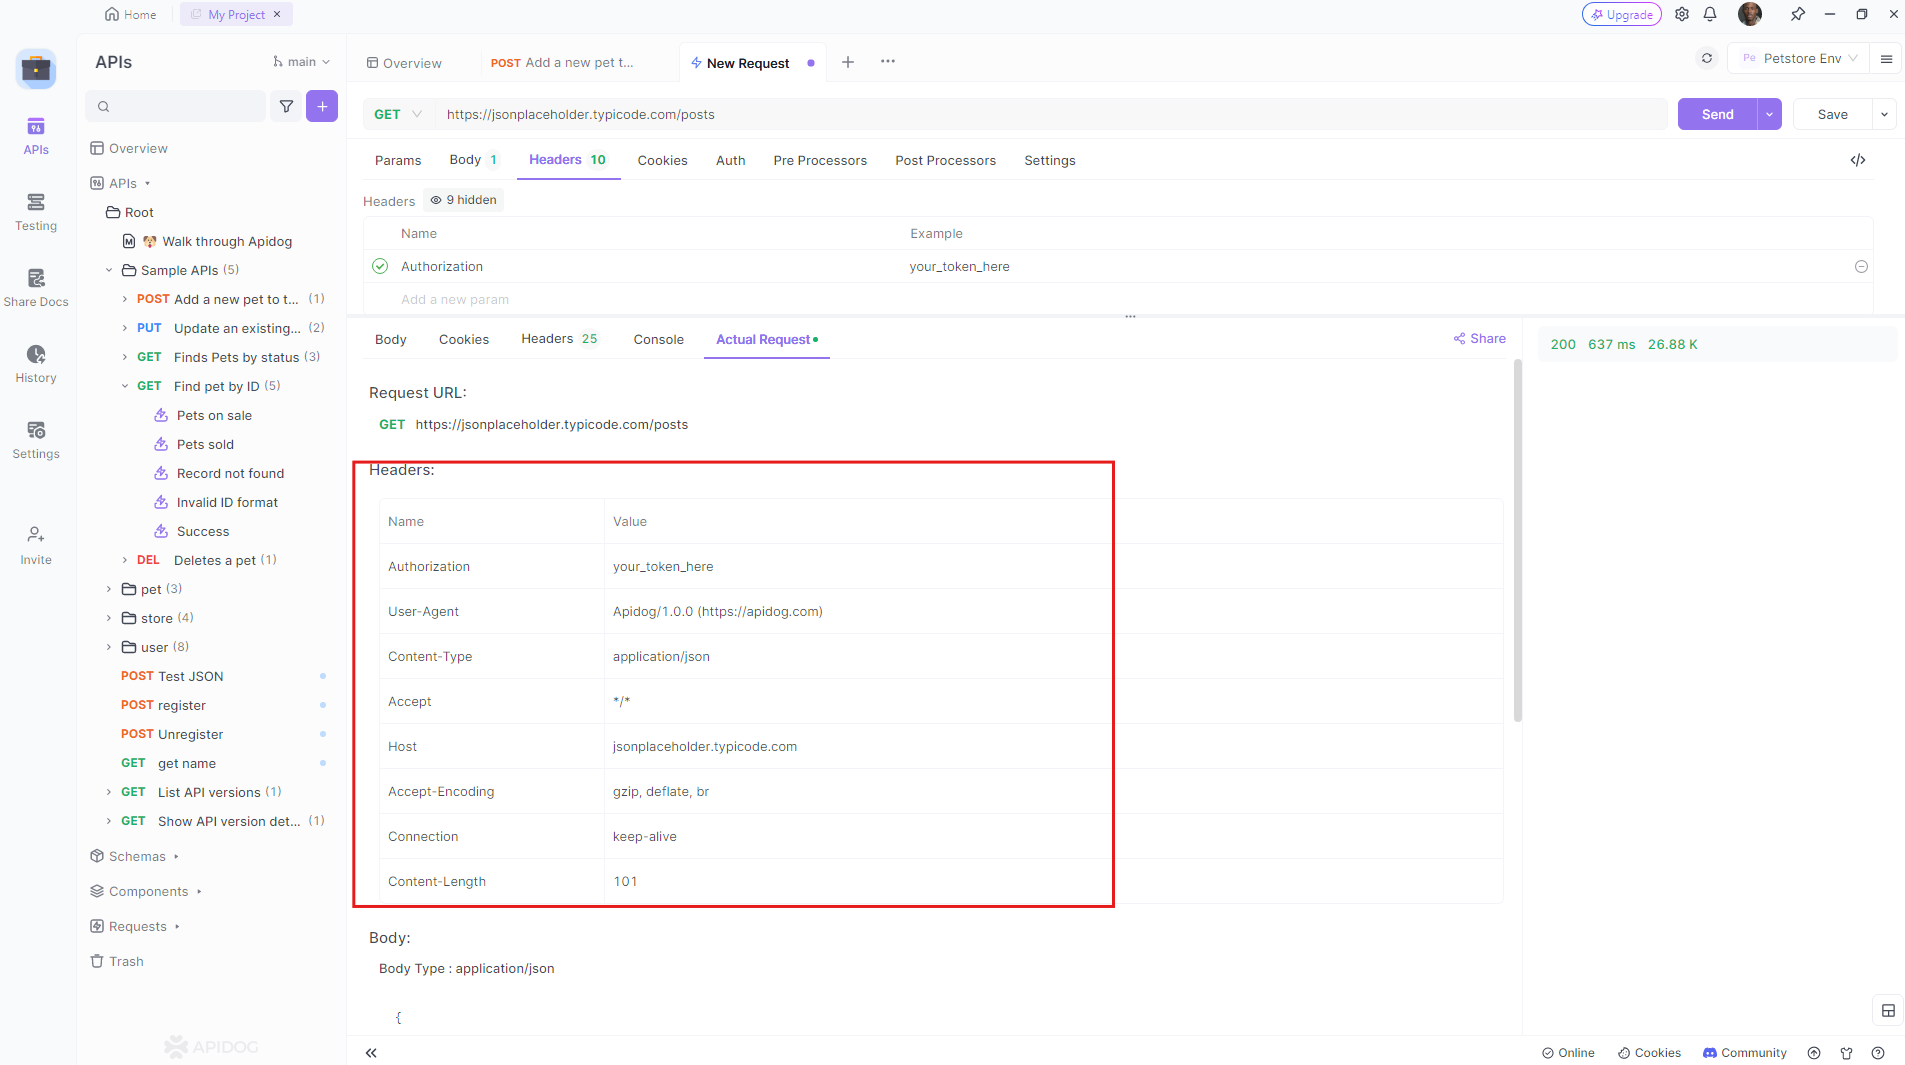
Apidog makes it easy to work with authorization headers, so you can confidently test your APIs!
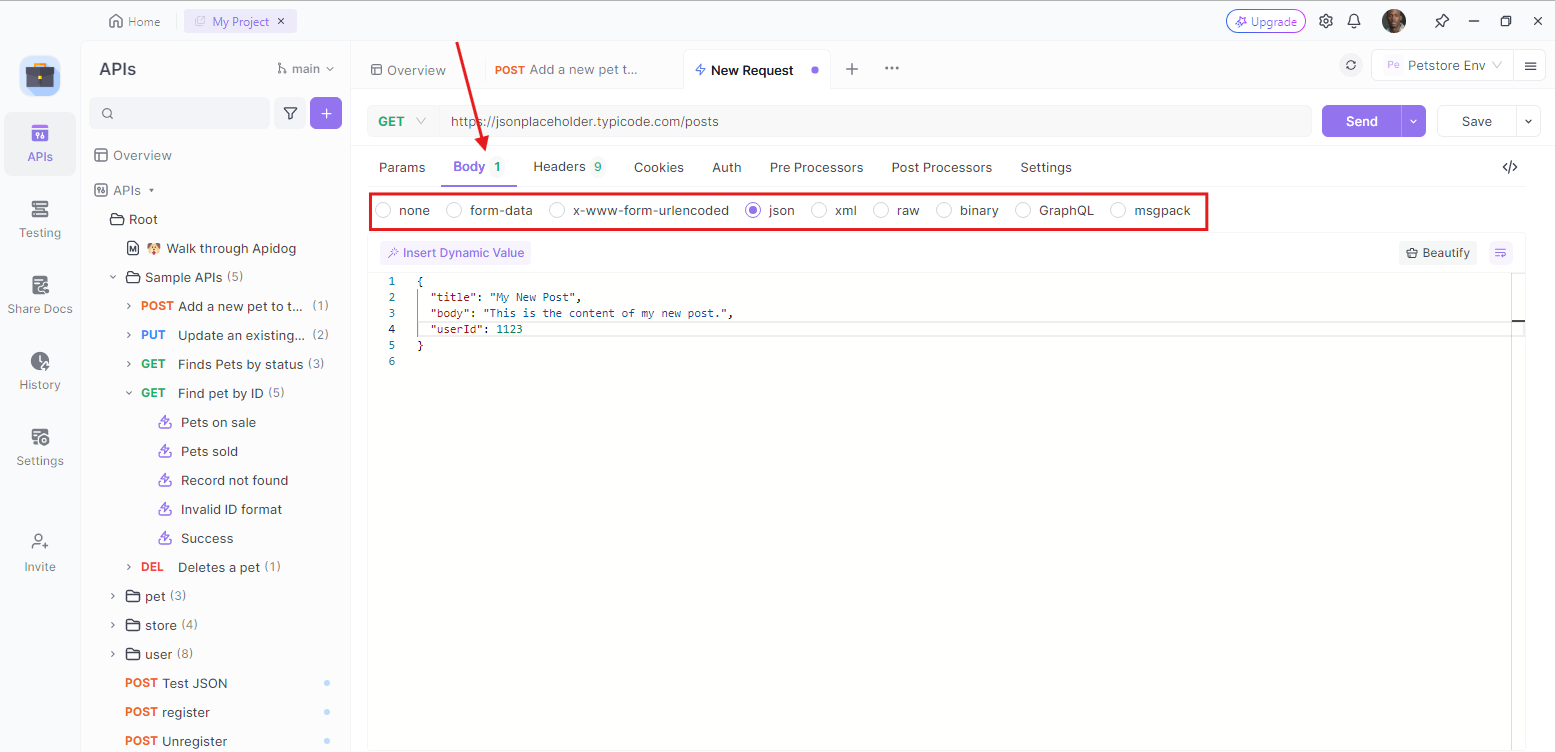
Send GET Requests With Body:
Testing GET requests with a body can be a bit tricky since the HTTP specification traditionally considers GET requests as idempotent (meaning they don’t change the server’s state). However, some APIs might allow for custom behavior where you can include a request body even in GET requests.
Switch to the “Body” tab and select the body specification you want to add.
Send the request and Verify that the response status code is ok.
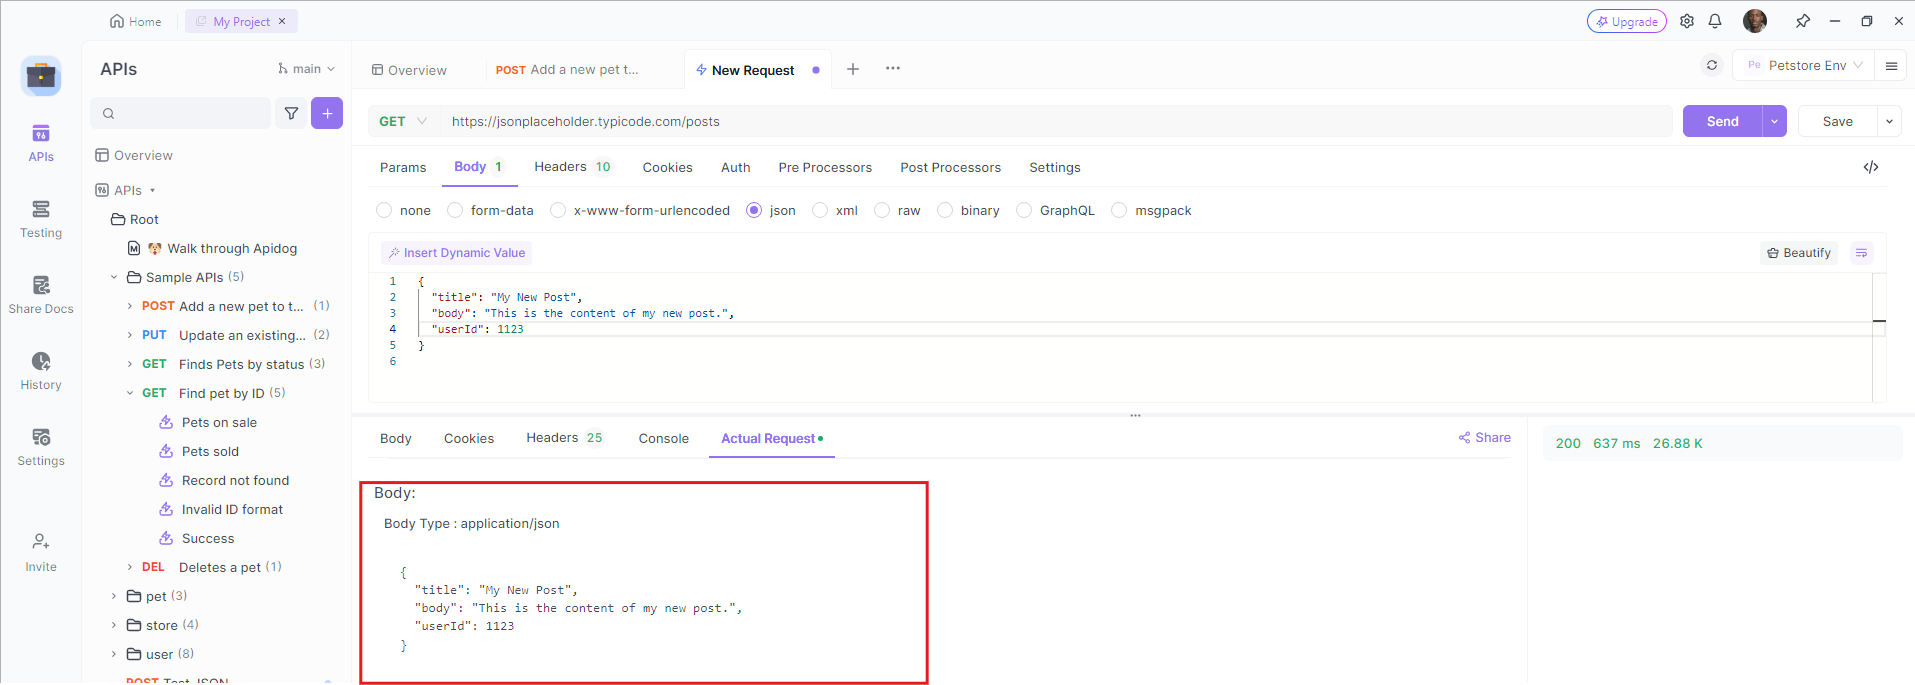
Remember that while testing GET requests with a body might not be common, it’s essential to understand your API’s behavior and ensure thorough testing for all scenarios. Apidog can simplify this process by providing tools for API design, debugging, and testing.
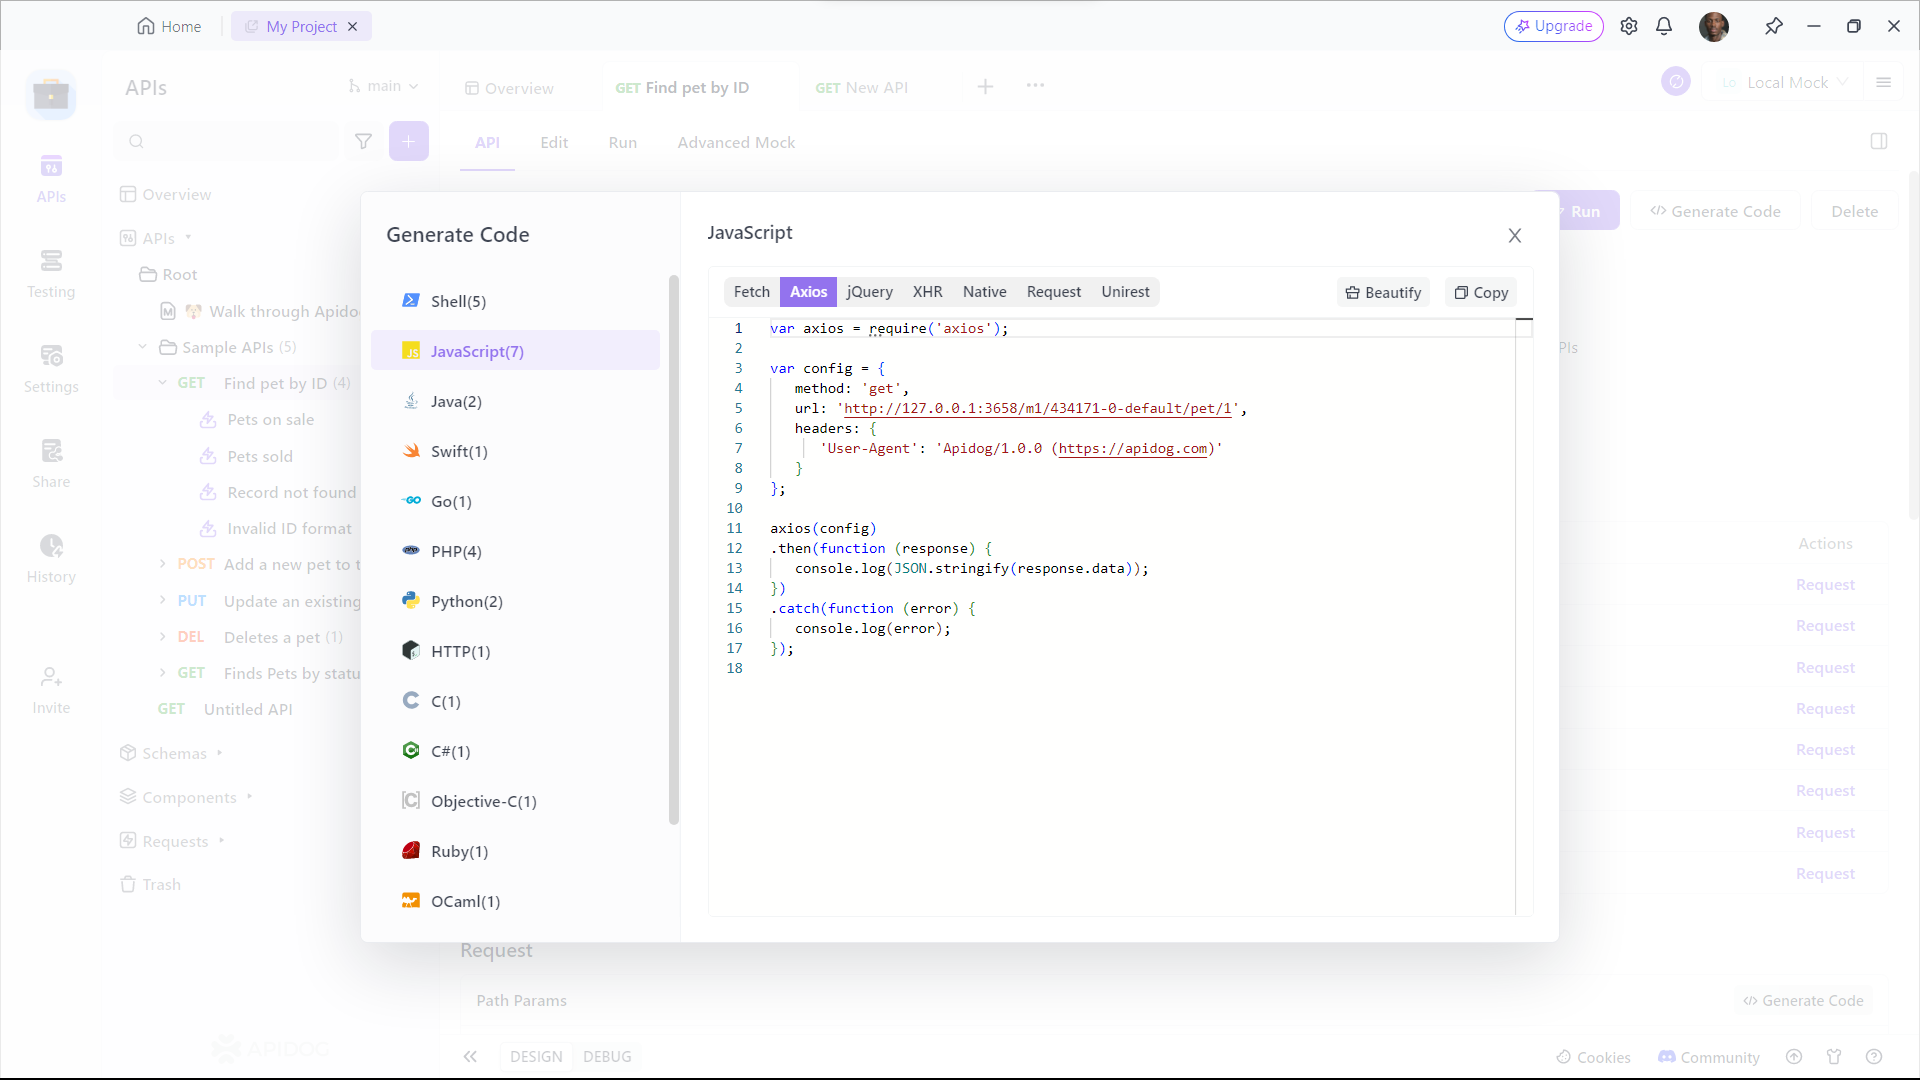
Using Apidog to Automatically Generate Axios Code
Apidog also allows you to automatically generate Axios code for making HTTP requests. Here’s how to use Apidog to generate Axios code:
- Enter any headers or query string parameters you want to send with the request, then click on the Generate Code button.

2. Copy the generated Axios code and paste it into your project.
Best Practices for Axios GET Requests Params
To ensure the effective use of parameters in your Axios GET requests, consider the following best practices:
- Choose descriptive parameter names: Use meaningful names for your parameters to enhance the readability and maintainability of your code. This makes it easier for other developers (including your future self) to understand the purpose of each parameter.
- Validate and sanitize user input: When accepting user input as parameters, validate and sanitize the values to prevent potential security vulnerabilities such as SQL injection or cross-site scripting (XSS). Use server-side validation and sanitization techniques to ensure the safety of your application.
- Handle default or optional parameters: In some cases, you may want to include default or optional parameters in your GET requests. To handle this, you can conditionally add parameters to the
paramsobject based on certain criteria. This allows you to provide a fallback value when a parameter is not explicitly provided. - Consider pagination and limit the data: If you are dealing with a large dataset, consider implementing pagination to limit the amount of data retrieved in each request. This helps improve performance and reduces the load on both the client and server. You can include parameters such as
pageandlimitto control the pagination process.
If you prefer to avoid adding a library dependency, working with headers through the native Fetch API achieves the same result using only what the browser already provides.
Conclusion
Making Axios API GET requests with body and headers is a crucial skill for any developer working with APIs. This blog post has provided you with a comprehensive guide on how to do just that. We’ve covered everything from setting up Axios, crafting the GET request, to handling responses and errors.
With the power of Apidog, you can modify header and body parameters with ease. With this knowledge, you can now confidently interact with APIs, retrieve data efficiently, and build more dynamic and responsive applications. Remember, the key to mastering these concepts is practice. So, don’t hesitate to explore Apidog and start making those requests! Happy coding!


