
When developing an API, whether for internal use or for third-party developers, one of the most important tasks is creating clear, effective, and accurate documentation. A well-documented REST API can make the difference between a successful adoption by developers and users or a tool that is quickly abandoned due to frustration.
This guide covers the essential steps to writing high-quality REST API documentation, ensuring it is both user-friendly and functional.
What is REST API Documentation?
REST (Representational State Transfer) is an architectural style for building web services that interact over HTTP. RESTful APIs are widely used to enable communication between systems. Proper API documentation serves as a reference manual for developers to understand how to interact with your API.
Good REST API documentation explains how to make requests, what responses to expect, how to handle errors, and provides enough context for users to begin integrating the API into their applications without needing additional assistance.
Key Elements of REST API Documentation
Effective API documentation should include the following elements:
1. Overview/Description
This section provides a high-level description of the API. Include the primary use cases, the purpose of the API, and its general features. Mention the protocols (usually HTTP/HTTPS), authentication mechanisms, and any important setup details. If applicable, provide links to related documentation, such as SDKs or client libraries.
2. Authentication
Explain how users authenticate with your API. This is often an OAuth token, API key, or basic authentication. Include clear steps on how to obtain and use authentication credentials.
3. Base URL and Endpoints
Every API request is made to a specific endpoint on the API’s server. Provide a base URL, followed by the available endpoints. Be sure to explain the structure of the endpoints, including any path parameters or query parameters.
Example:
Base URL: https://api.apidog.com/v1/
Available Endpoints:
GET /users– Retrieves a list of users.POST /users– Creates a new user.GET /users/{id}– Retrieves a specific user by ID."
4. Request Methods and Example Requests
Each endpoint typically supports one or more HTTP methods (GET, POST, PUT, DELETE, PATCH). Describe what each method does and provide clear examples for each.
Example:
- API Endpoint: GET /users
- Description: Retrieves a list of all users.
- Request Example:
GET /users HTTP/1.1
Host: api.apidog.com
Authorization: Bearer your_api_key
5. Parameters
Clearly define what parameters are required for each endpoint, including path parameters, query parameters, and body parameters. Provide example values for each parameter, and indicate whether they are optional or mandatory.
Example:
- API Endpoint: POST /users
- Required Parameters:
name(string): The name of the user.email(string): The user's email address.
- Optional Parameters:
role(string): The role assigned to the user (defaults to "user").
6. Response Structure and Example Responses
Document the response format, including the status code, headers, and body. Include typical examples of what the user should expect for both successful and unsuccessful requests. Make sure to explain the structure of the returned data, whether it is in JSON, XML, or another format.
Example:
- Response for GET /users (status code 200)
{
    "data": [
        {
            "id": 1,
            "name": "John Doe",
            "email": "john@example.com"
        },
        {
            "id": 2,
            "name": "Jane Doe",
            "email": "jane@example.com"
        }
    ]
}
- Error Response (status code 404)
{
    "error": "Not Found",
    "message": "The requested resource could not be found."
}
7. Error Handling
Clearly describe common error codes and their meanings. Make it easy for developers to troubleshoot issues by including error codes, their descriptions, and possible solutions.
Error Codes Example:
400 Bad Request: The request was invalid (e.g., missing a required parameter).401 Unauthorized: Authentication failed or was not provided.404 Not Found: The resource was not found.500 Internal Server Error: A generic error occurred on the server.
8. Rate Limiting and Quotas
If your API has rate limits, provide information on how those limits work. Specify the number of requests allowed per time period (e.g., per minute or hour), and what happens when the limit is exceeded.
Example:
The API allows up to 1000 requests per hour. If you exceed this limit, you'll receive a 429 Too Many Requests error. The rate limit is reset every hour.
9. Versioning
Explain how different versions of your API are handled. RESTful APIs often evolve, so it's important to communicate how you manage breaking changes and maintain backward compatibility.
Example:
The current version of the API is v1. Future versions may introduce breaking changes, so we recommend specifying the version in the URL: https://api.apidog.com/v1/.
10. SDKs and Code Examples
If possible, provide SDKs or client libraries for popular programming languages. Include simple code snippets that show how to make requests to your API, handle responses, and work with the API in different environments.
Example:
import requests

headers = {'Authorization': 'Bearer your_api_key'}
response = requests.get('https://api.apidog.com/v1/users', headers=headers)

if response.status_code == 200:
    users = response.json()
    print(users)
Using Apidog to Generate REST API Documentation Easily
Apidog is an intuitive and powerful API design-first development tool that can help streamline the creation and management of REST API documentation. Whether you’re a beginner or an experienced developer, Apidog offers a user-friendly platform that makes it easy to generate, manage, and share your API documentation. If you’re ready to start using Apidog to document your REST API, follow the steps outlined below.
Step 1: Creating an Apidog Account
To get started with Apidog, the first step is to create an account. You have three options for signing up:
- Google Account: Sign in with your Google credentials.
- GitHub Account: Use your GitHub login for easy integration.
- Email: Create a new account using your email address.
The good news is that signing up for Apidog is free! You won’t need to provide any credit card information at this stage. Just choose your preferred sign-up method and you’re ready to go.
Step 2: Create a New REST API Project in Apidog
Once you've logged in, you’ll be directed to the main Apidog dashboard. Here’s how to start creating your API project:
- Create a New Project: Click on the
+New Projectbutton in the top-right corner of the window. This allows you to create a dedicated folder for your API project. - Name Your Project: Give your project a relevant name based on the API you are designing. This name will help you identify the project later.
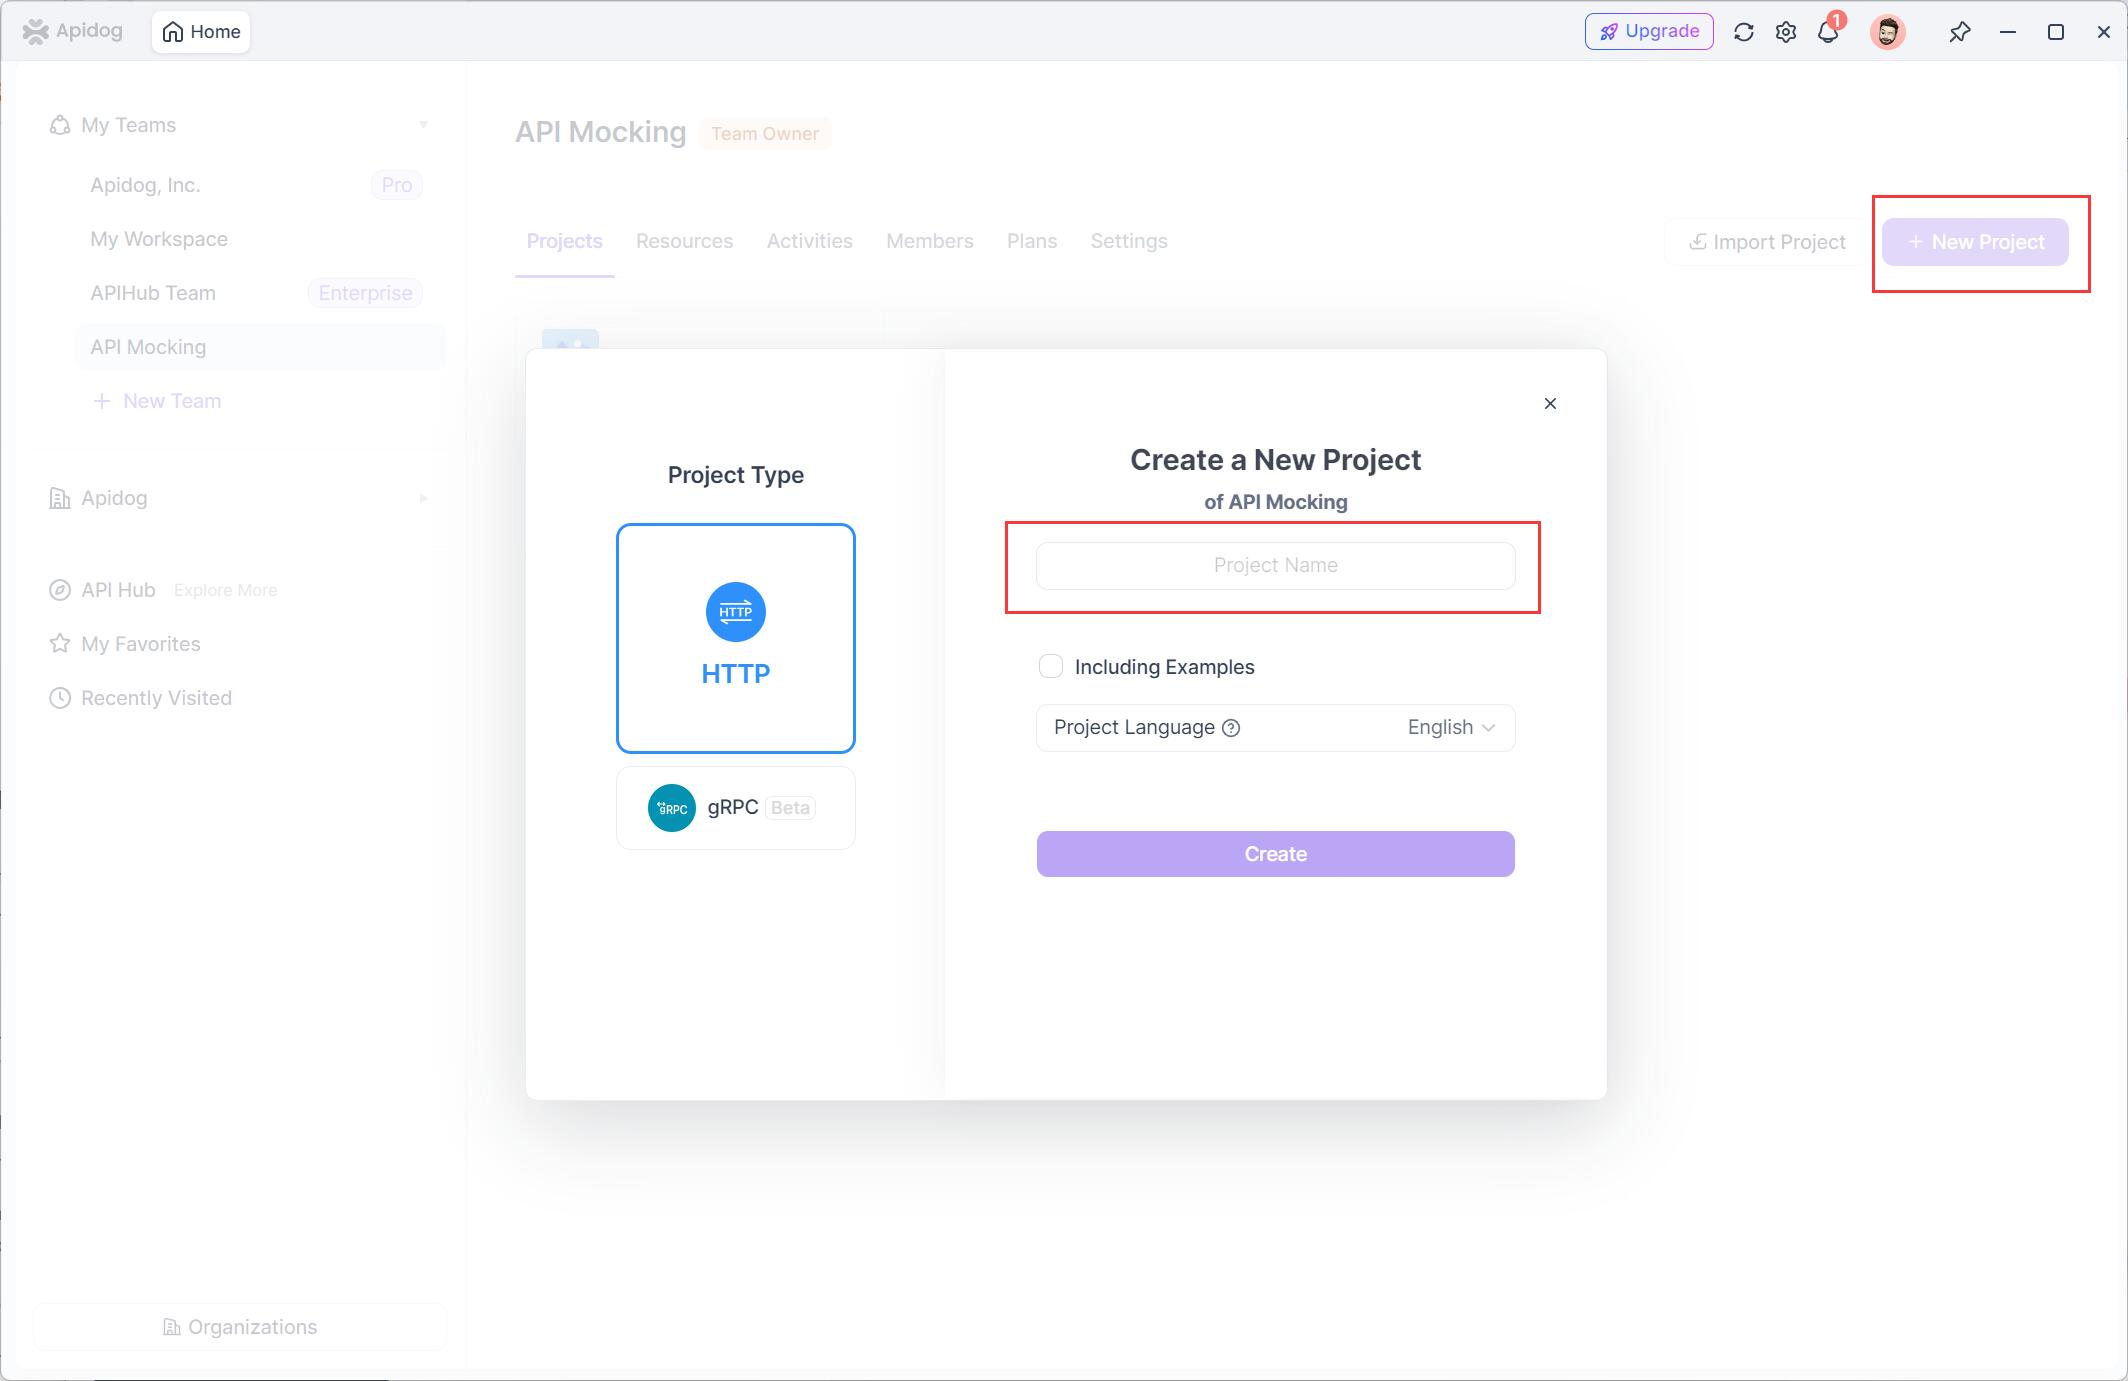
Now, you have a dedicated space to manage all aspects of your REST API development.
Step 3: Design and Generate REST API Documentation
After setting up your project, it’s time to create your REST API within Apidog. Follow these steps:
- Create a New API Endpoint: Click on the option to create a new API within your project.
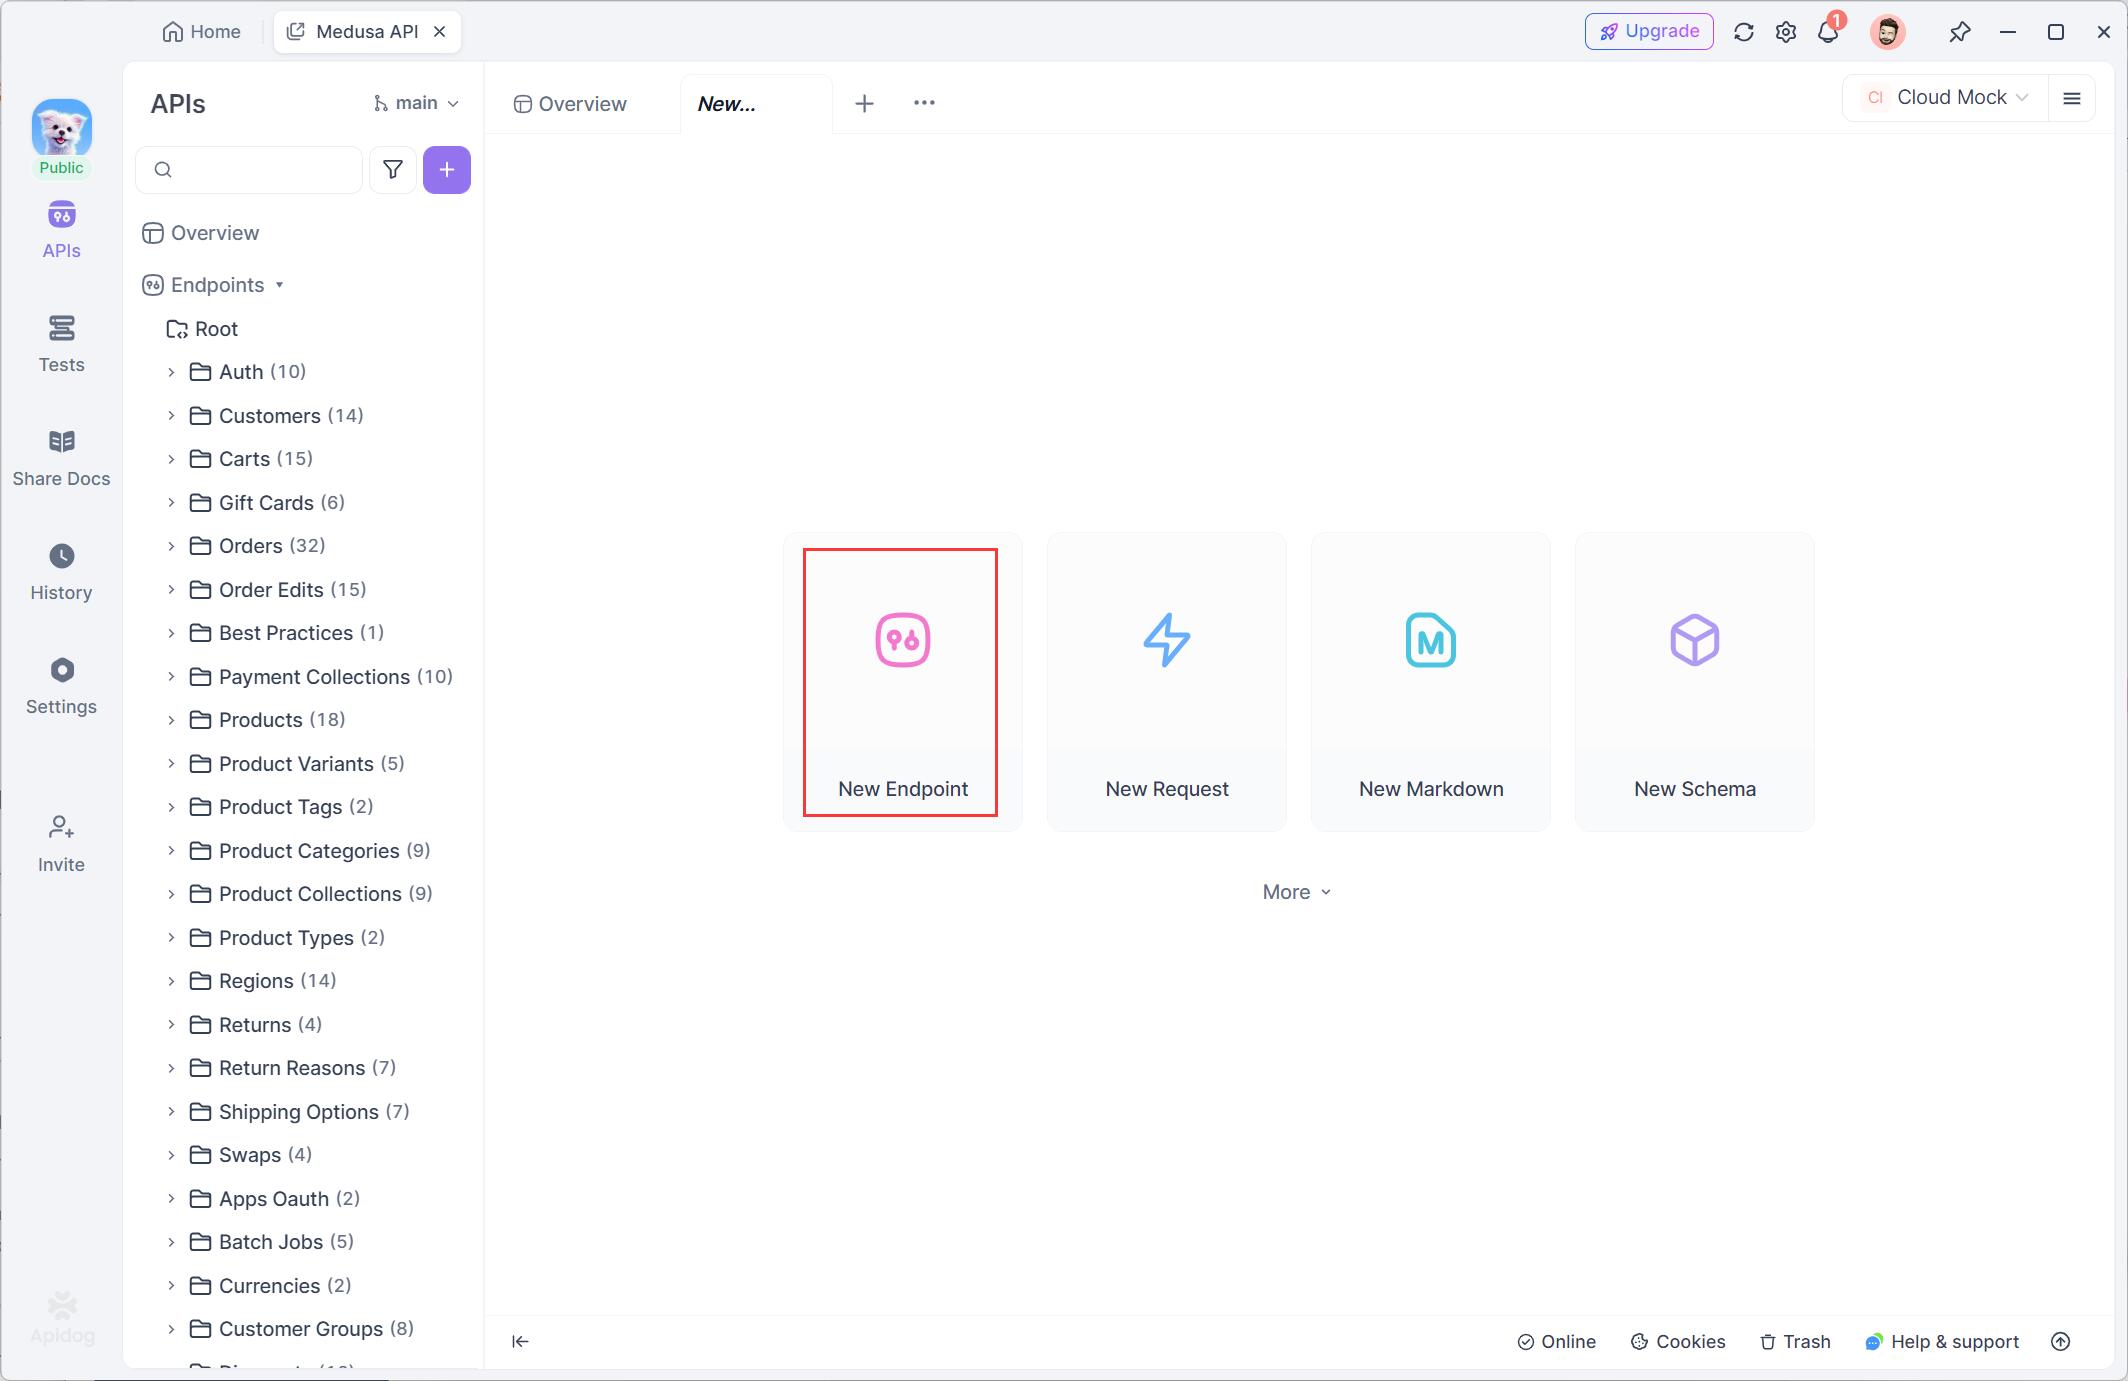
- Design API Endpoint Specifications: When prompted, provide detailed information about your API. This includes the name of the API, description, and any relevant information such as base URL, endpoints, request/response formats & examples, authentication methods, example code etc.
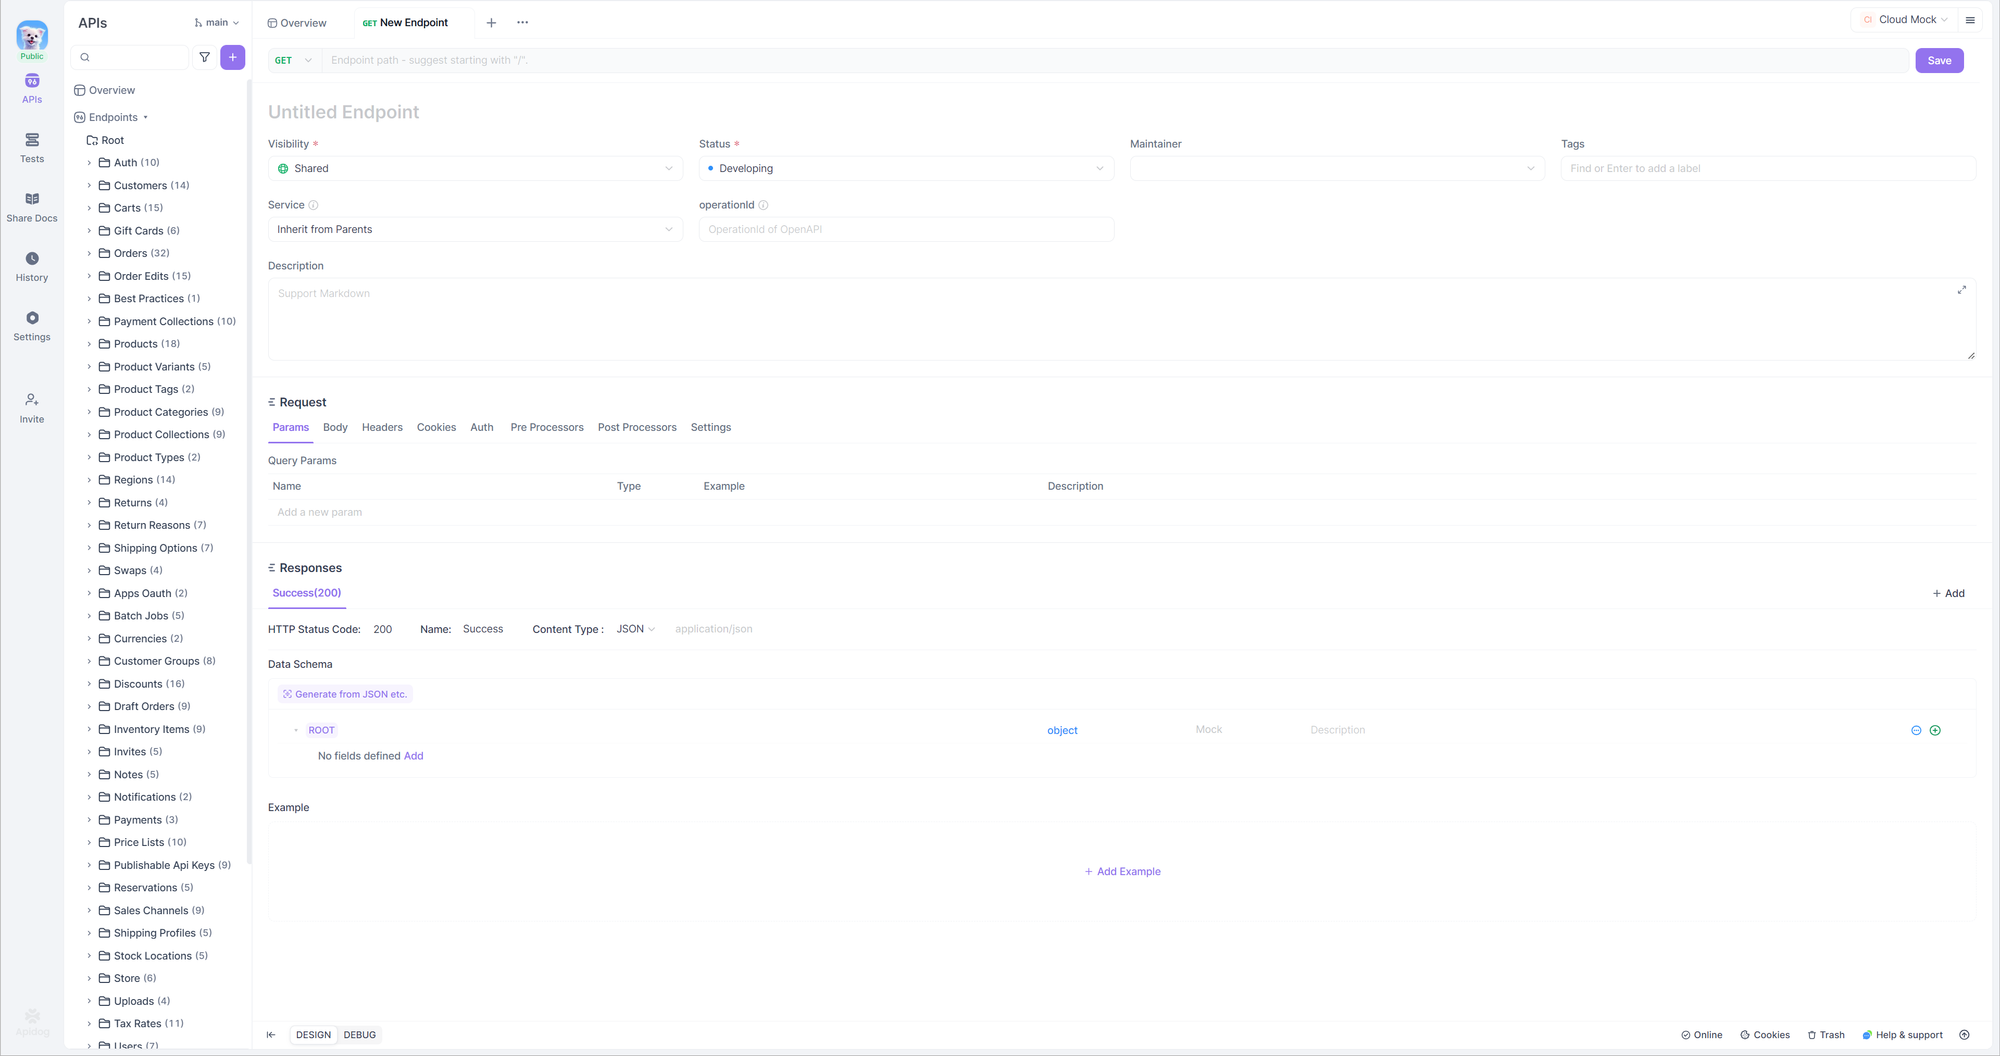
- Generate REST API Documentation Automatically: Clicking on
Saveat the top-right corner will generate a well-structured API documentation automatically.
Step 4: Share and Publish Your REST API Documentation
Now that your API documentation is ready, you can easily publish and share it:
Sharing REST API Documentation:
- Generate a Shareable Link:
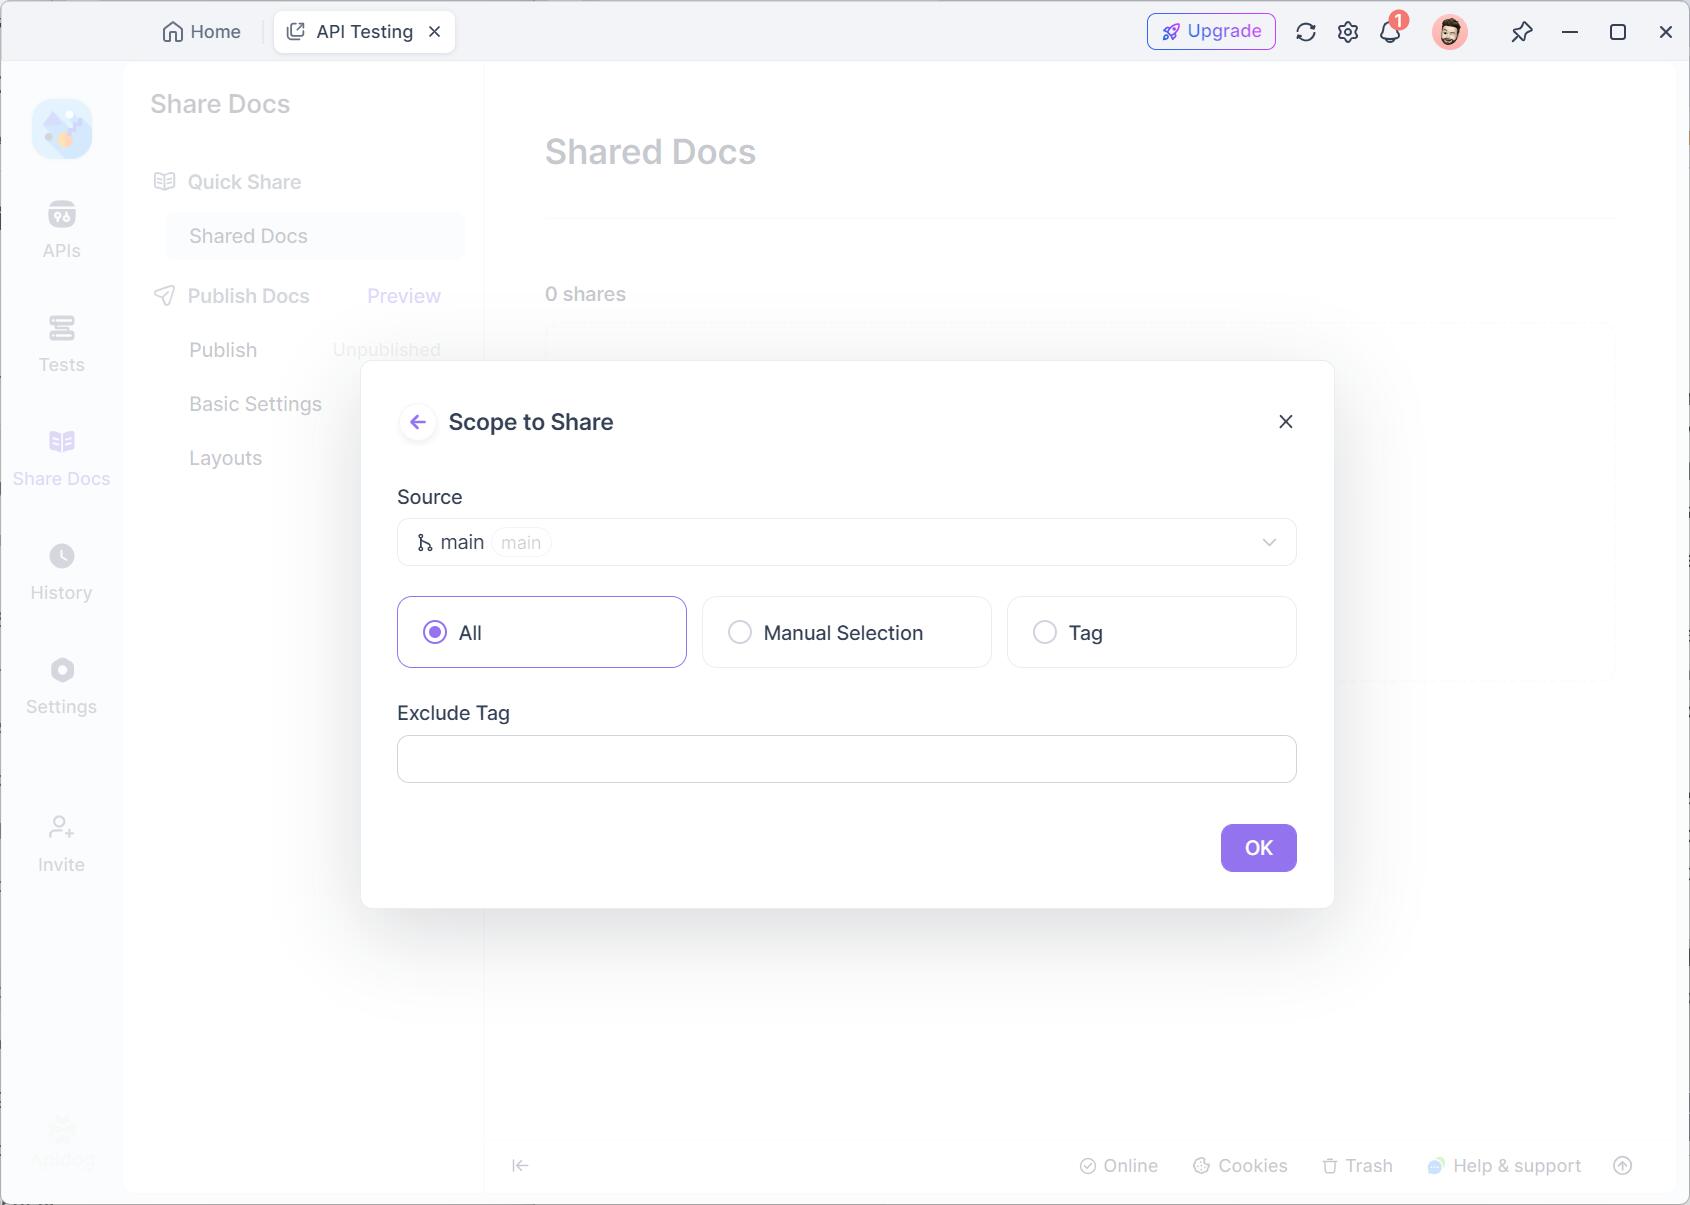
Apidog makes sharing API documentation easy. From your API management dashboard, click on theShare Docs. You will be given a unique, shareable URL that you can send to stakeholders, team members, or clients. This link grants access to your API documentation, making collaboration much simpler.
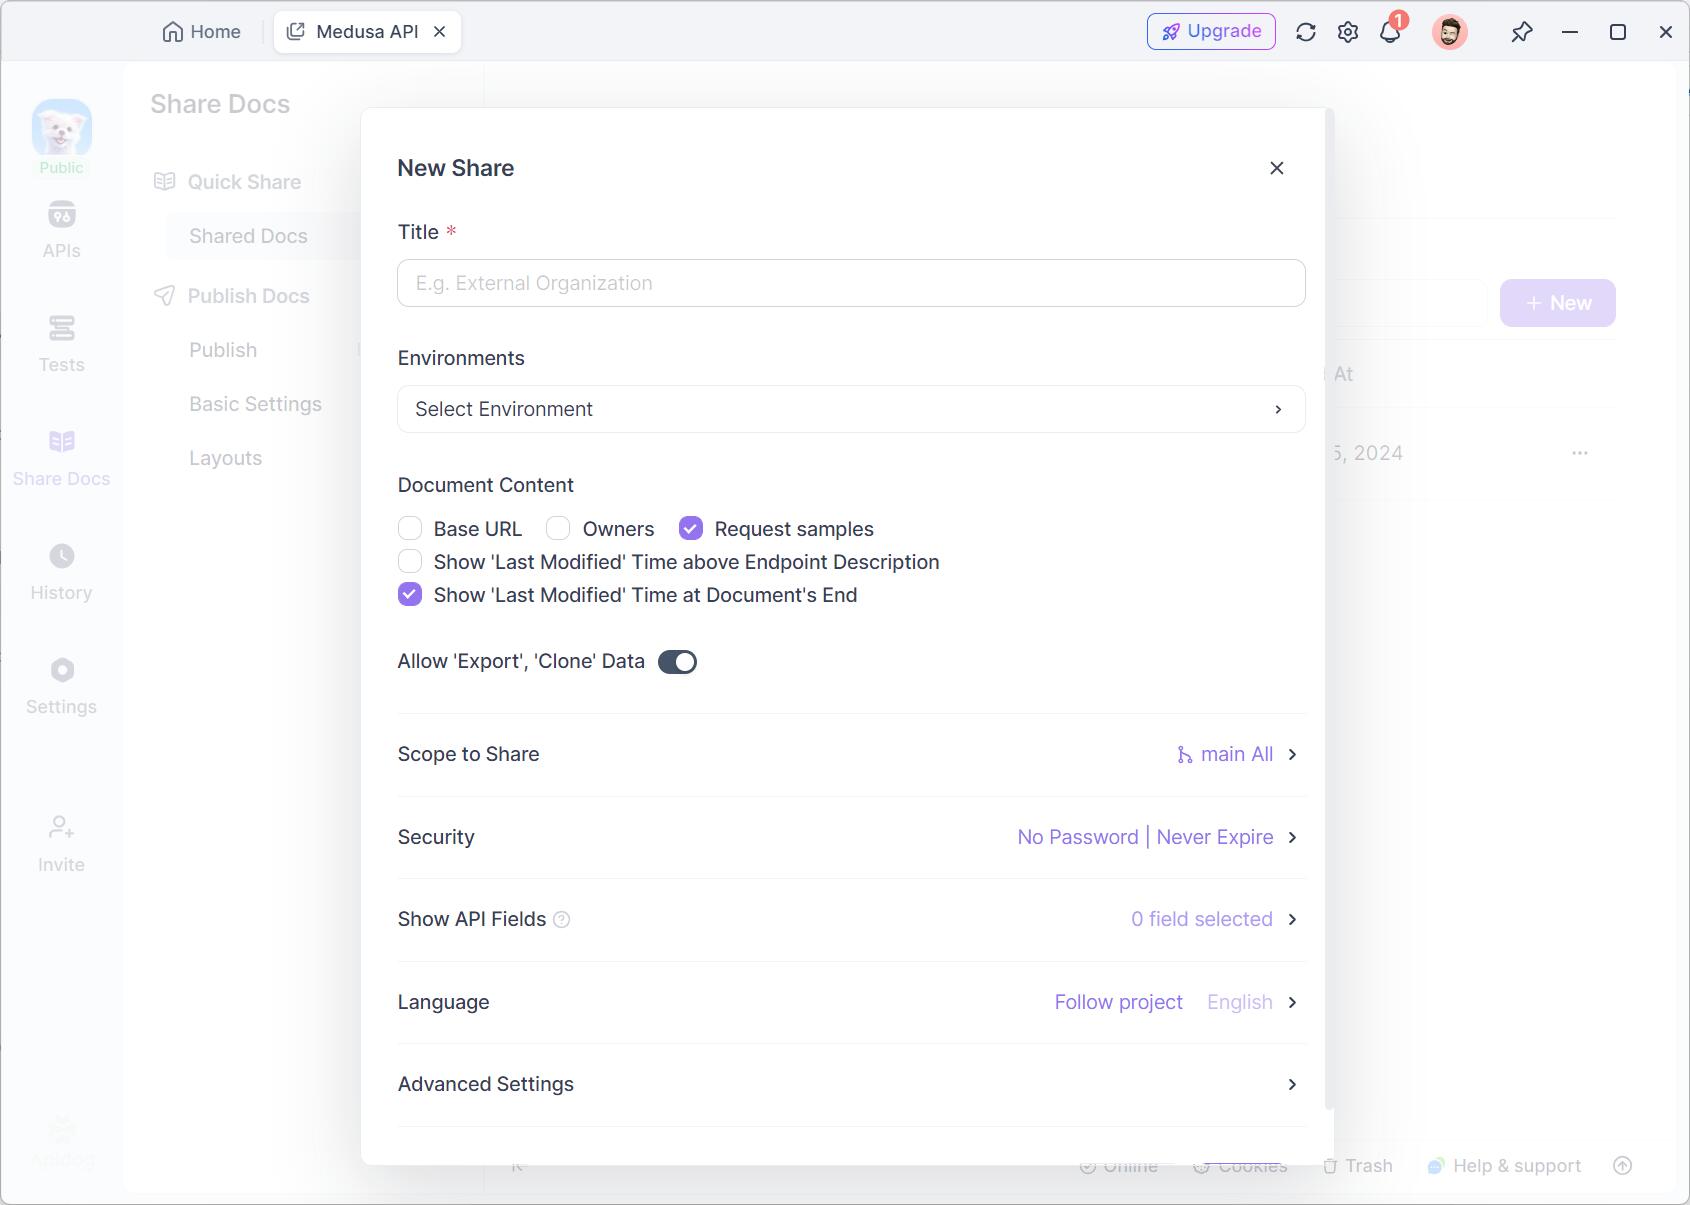
- Permissions and Access Control:
Apidog allows you to control who can view or edit the API documentation. You can set up permissions to restrict access to certain users, ensuring that only authorized individuals can make changes to the documentation or access private projects.
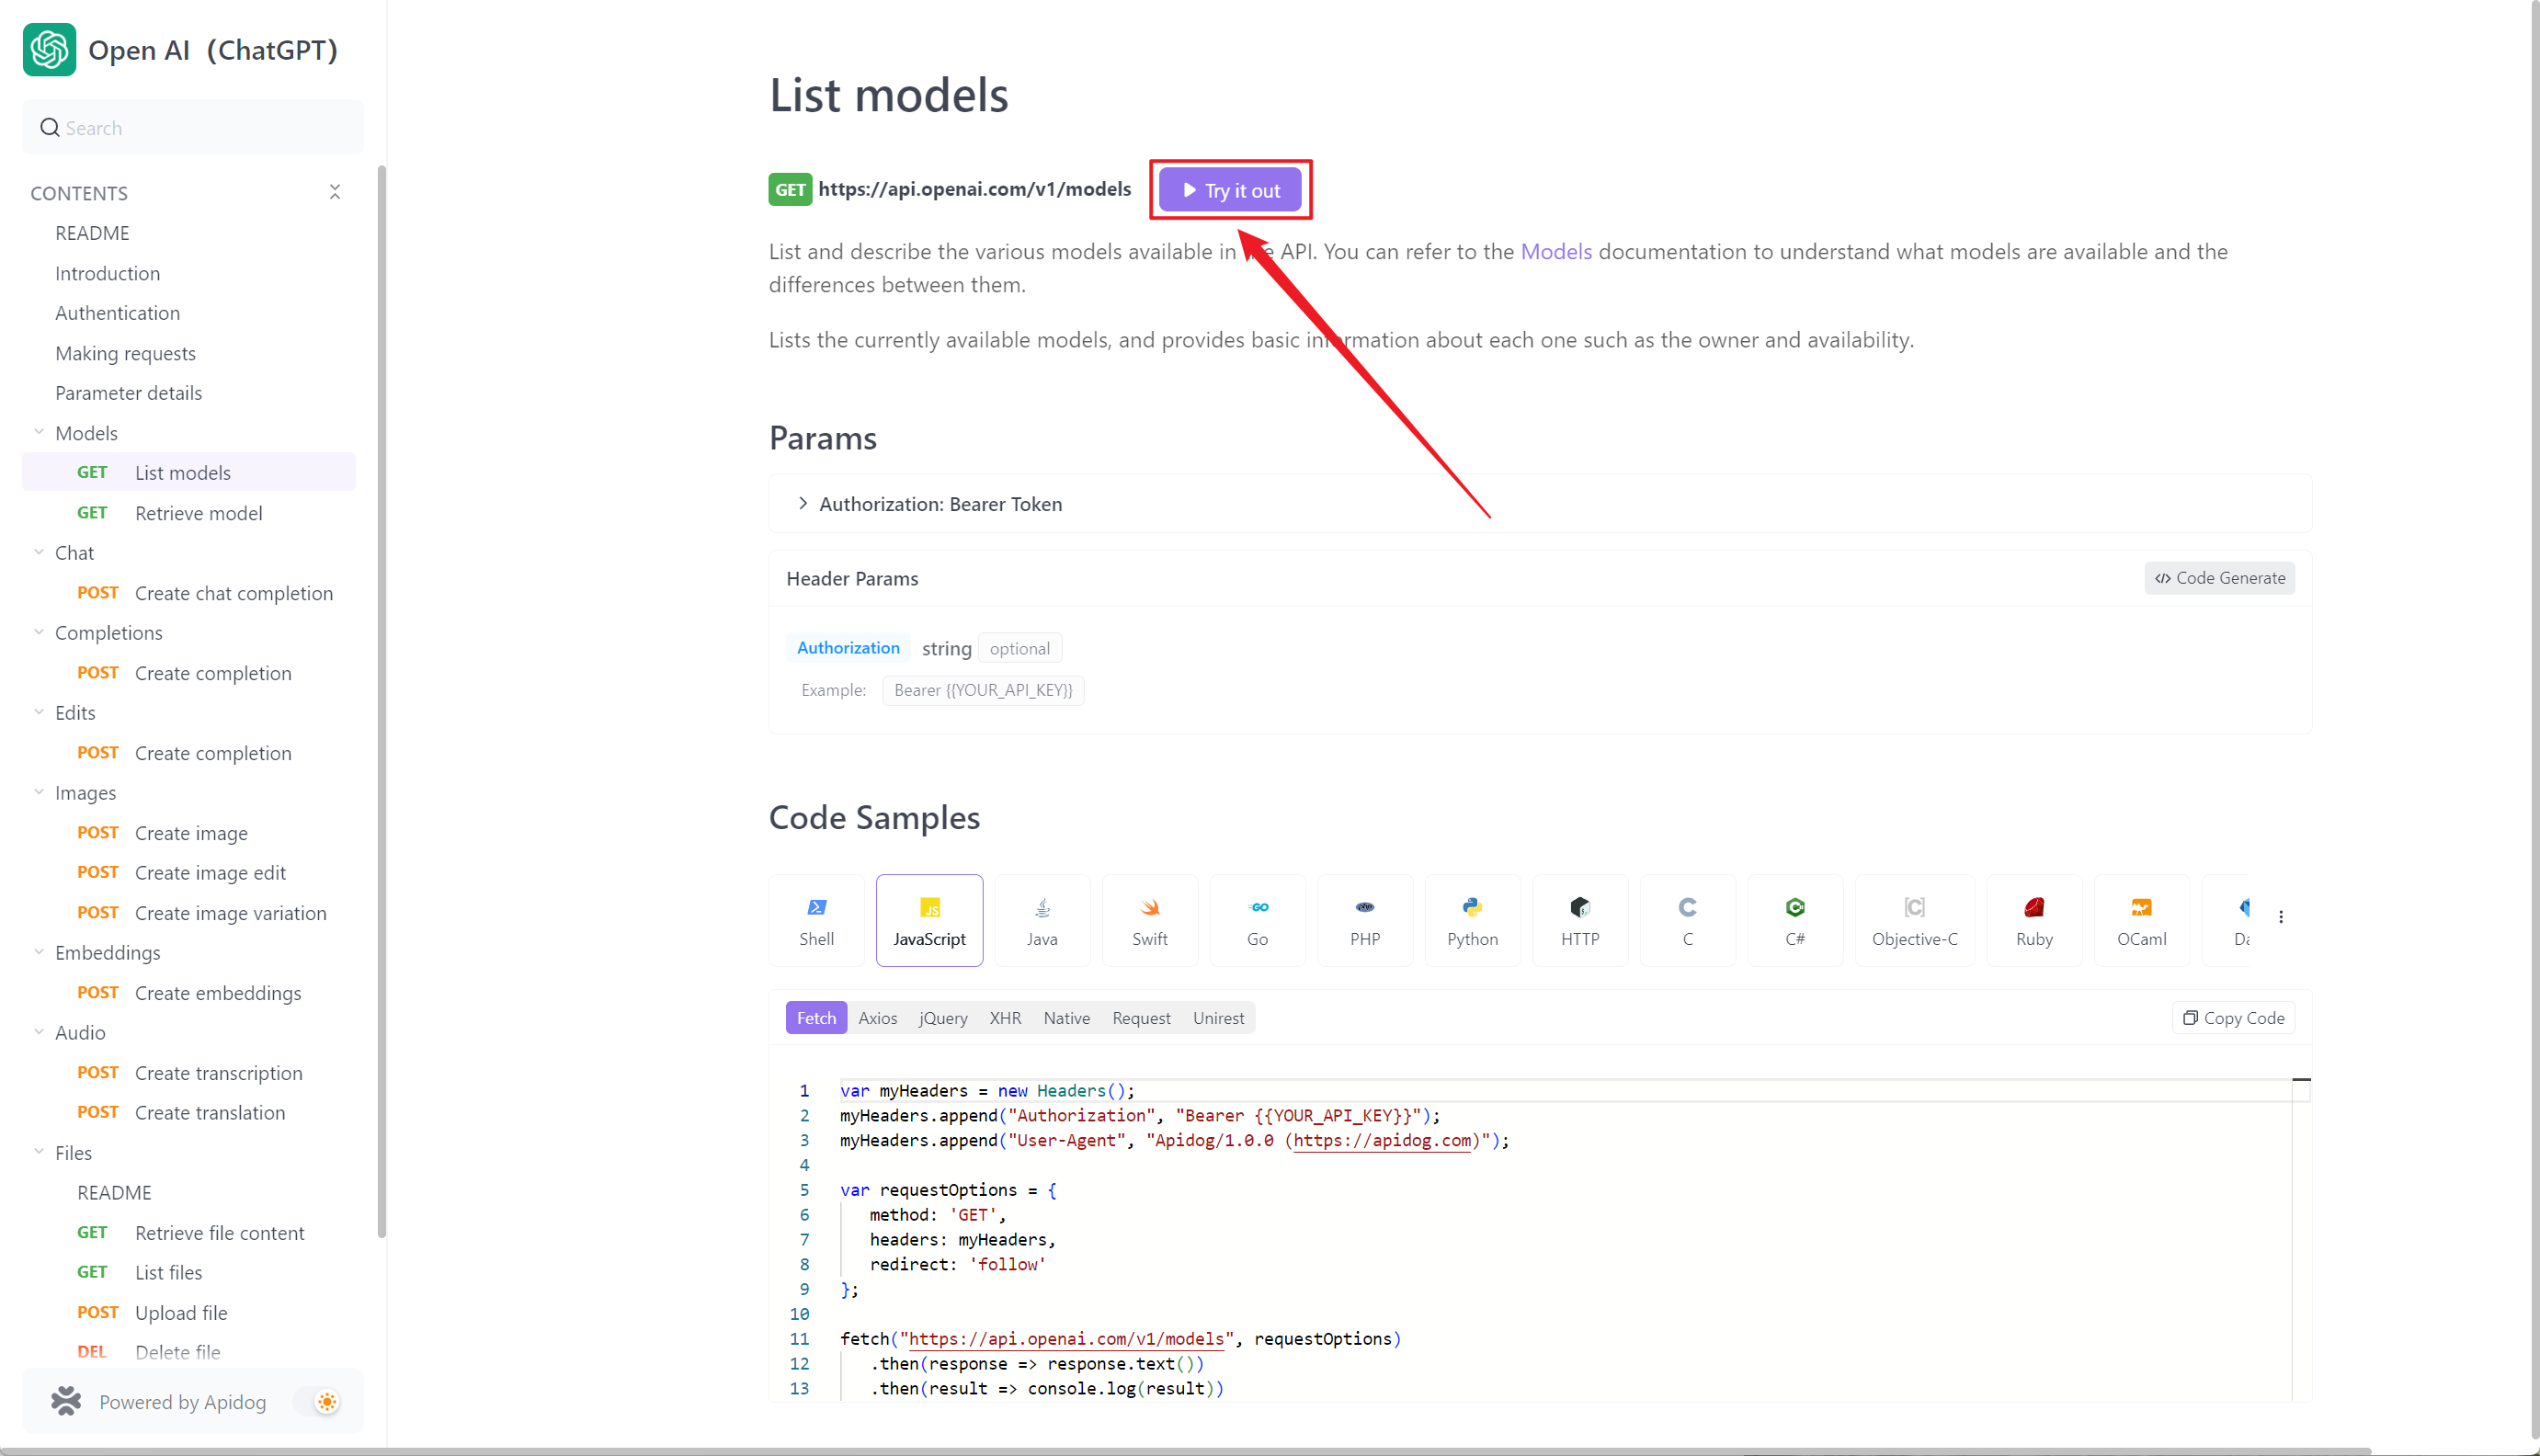
- Interactive API Documentation:
Apidog offers an interactive API documentation feature, allowing users to test API endpoints directly from the documentation page. This feature provides a clear view of the API’s functionality and helps users understand the API’s operations with live examples.
Publishing REST API Documentation:
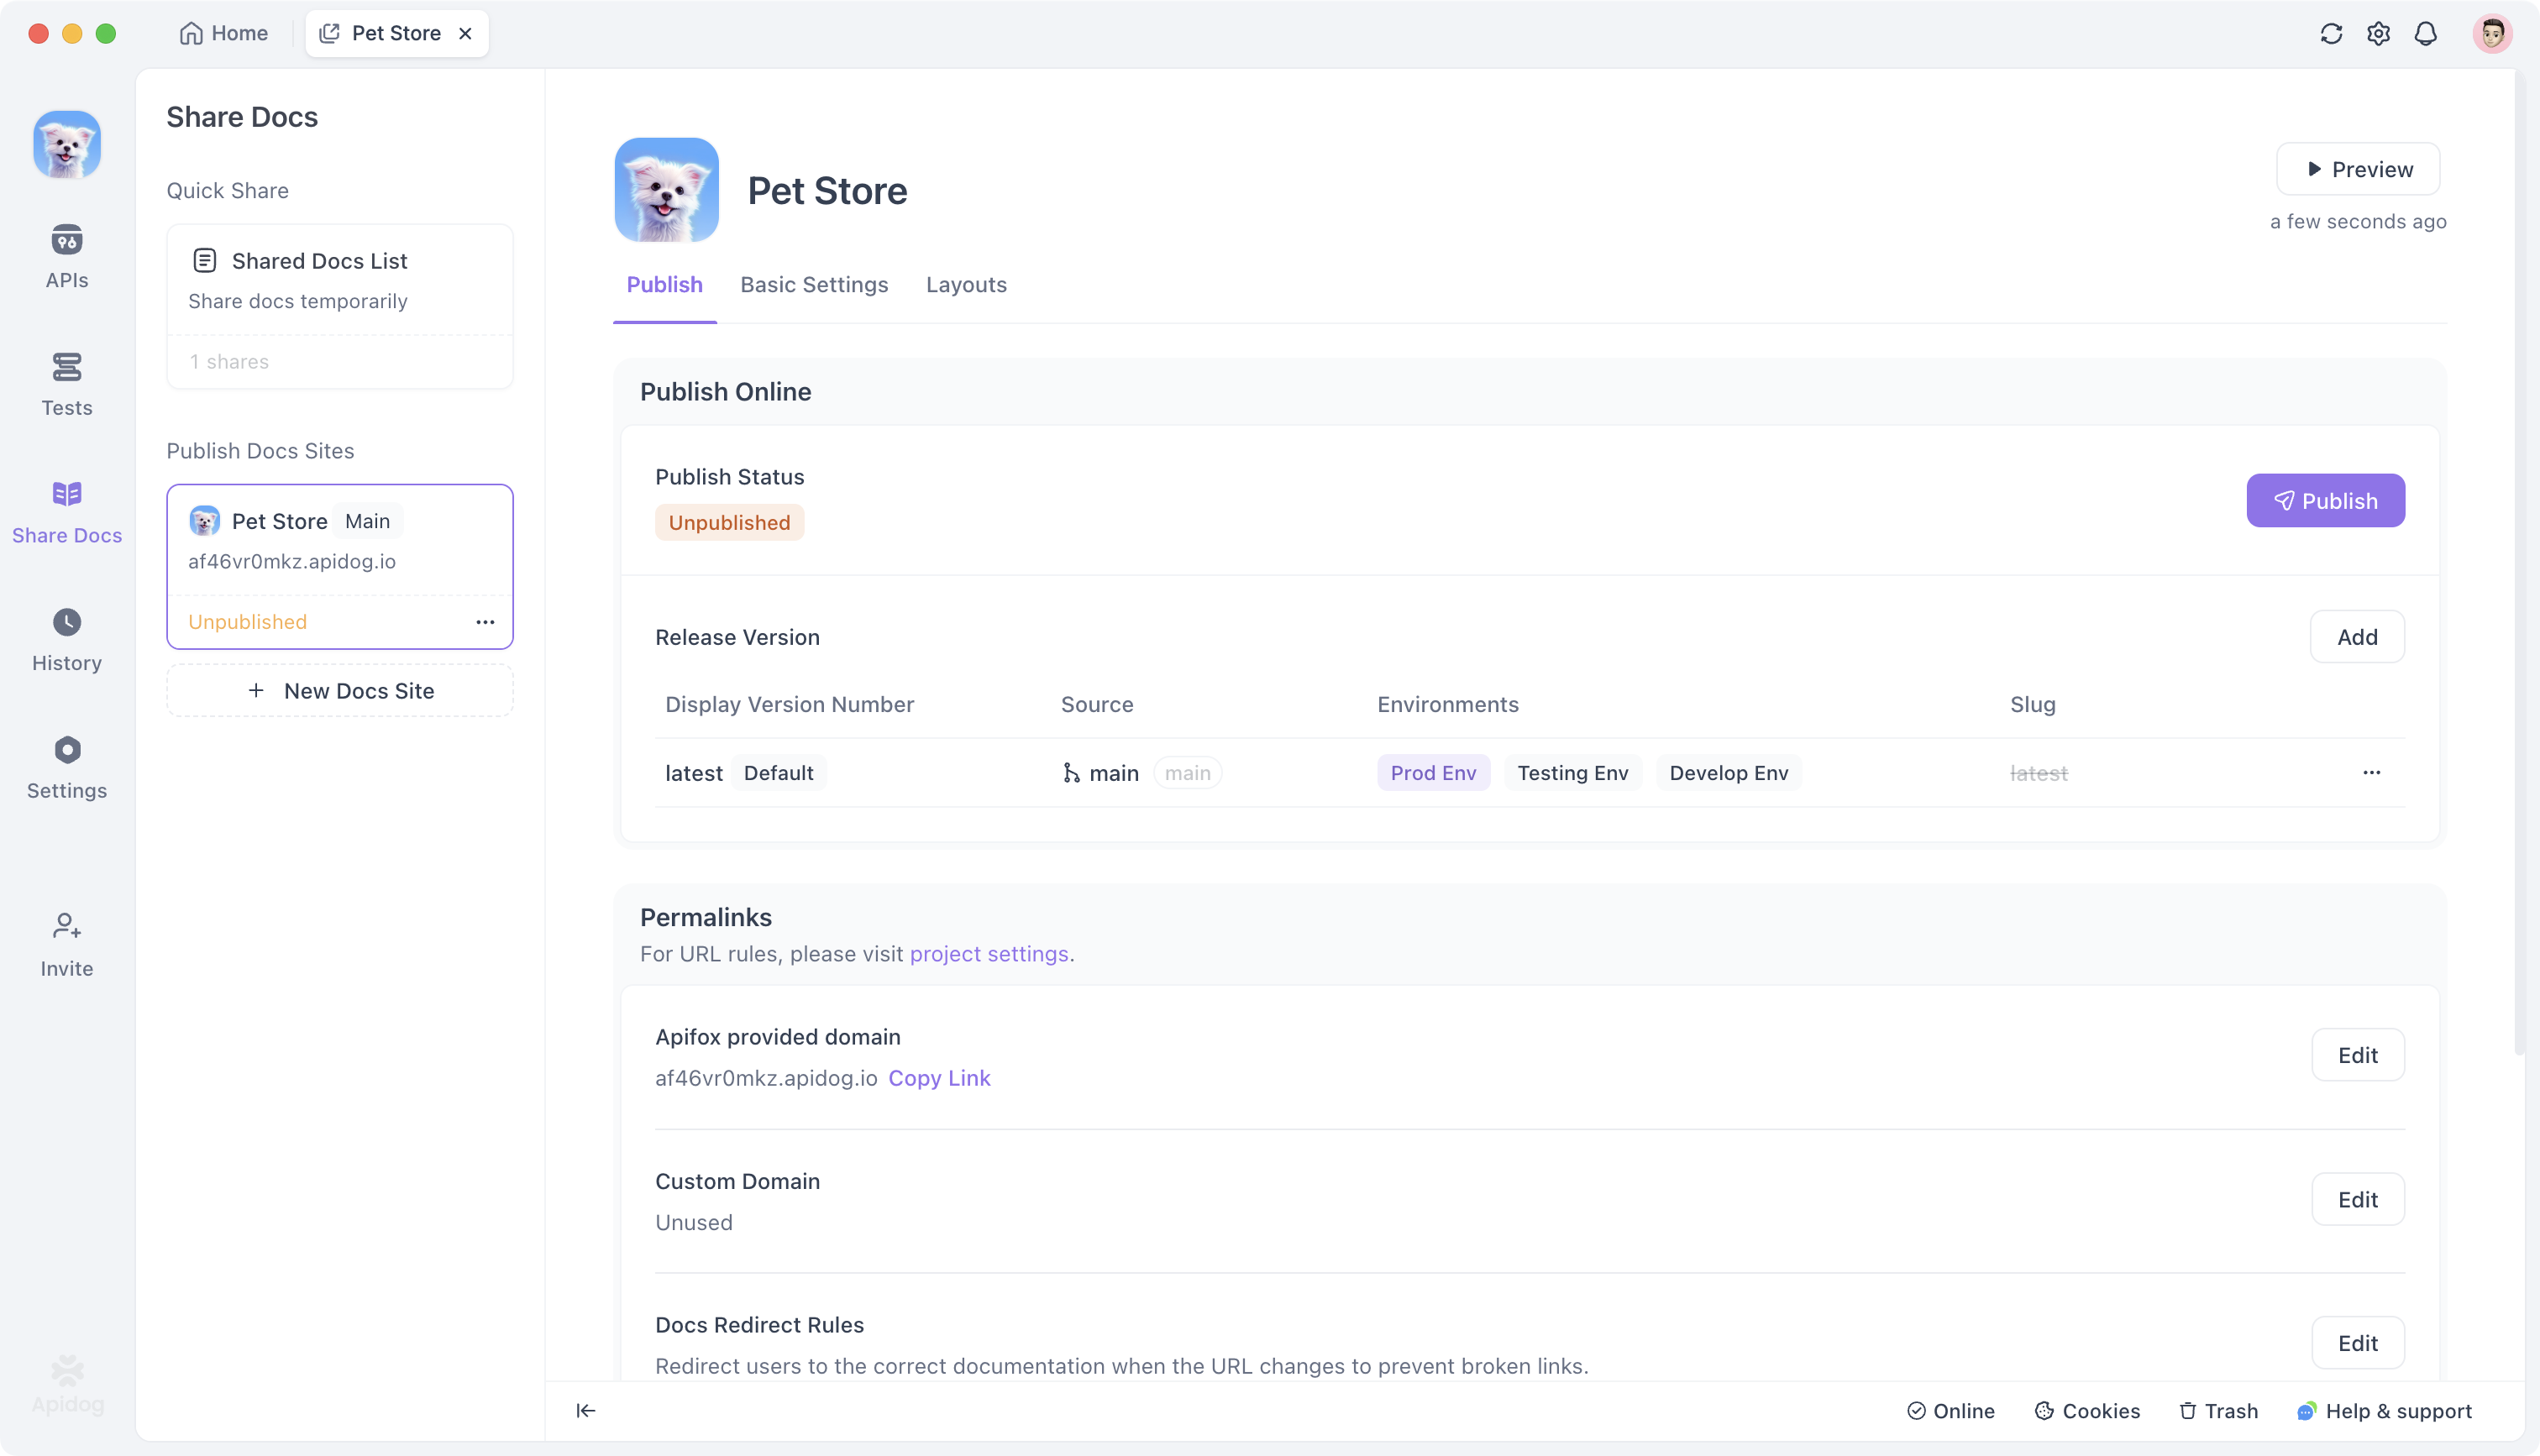
- Publishing the REST API Documentation:
Once your REST API documentation is ready, you can publish it directly from the Apidog platform. To do this, simply go to the API management dashboard, then click onPublish. Apidog will create a live version of your API documentation, making it accessible to anyone with the link.
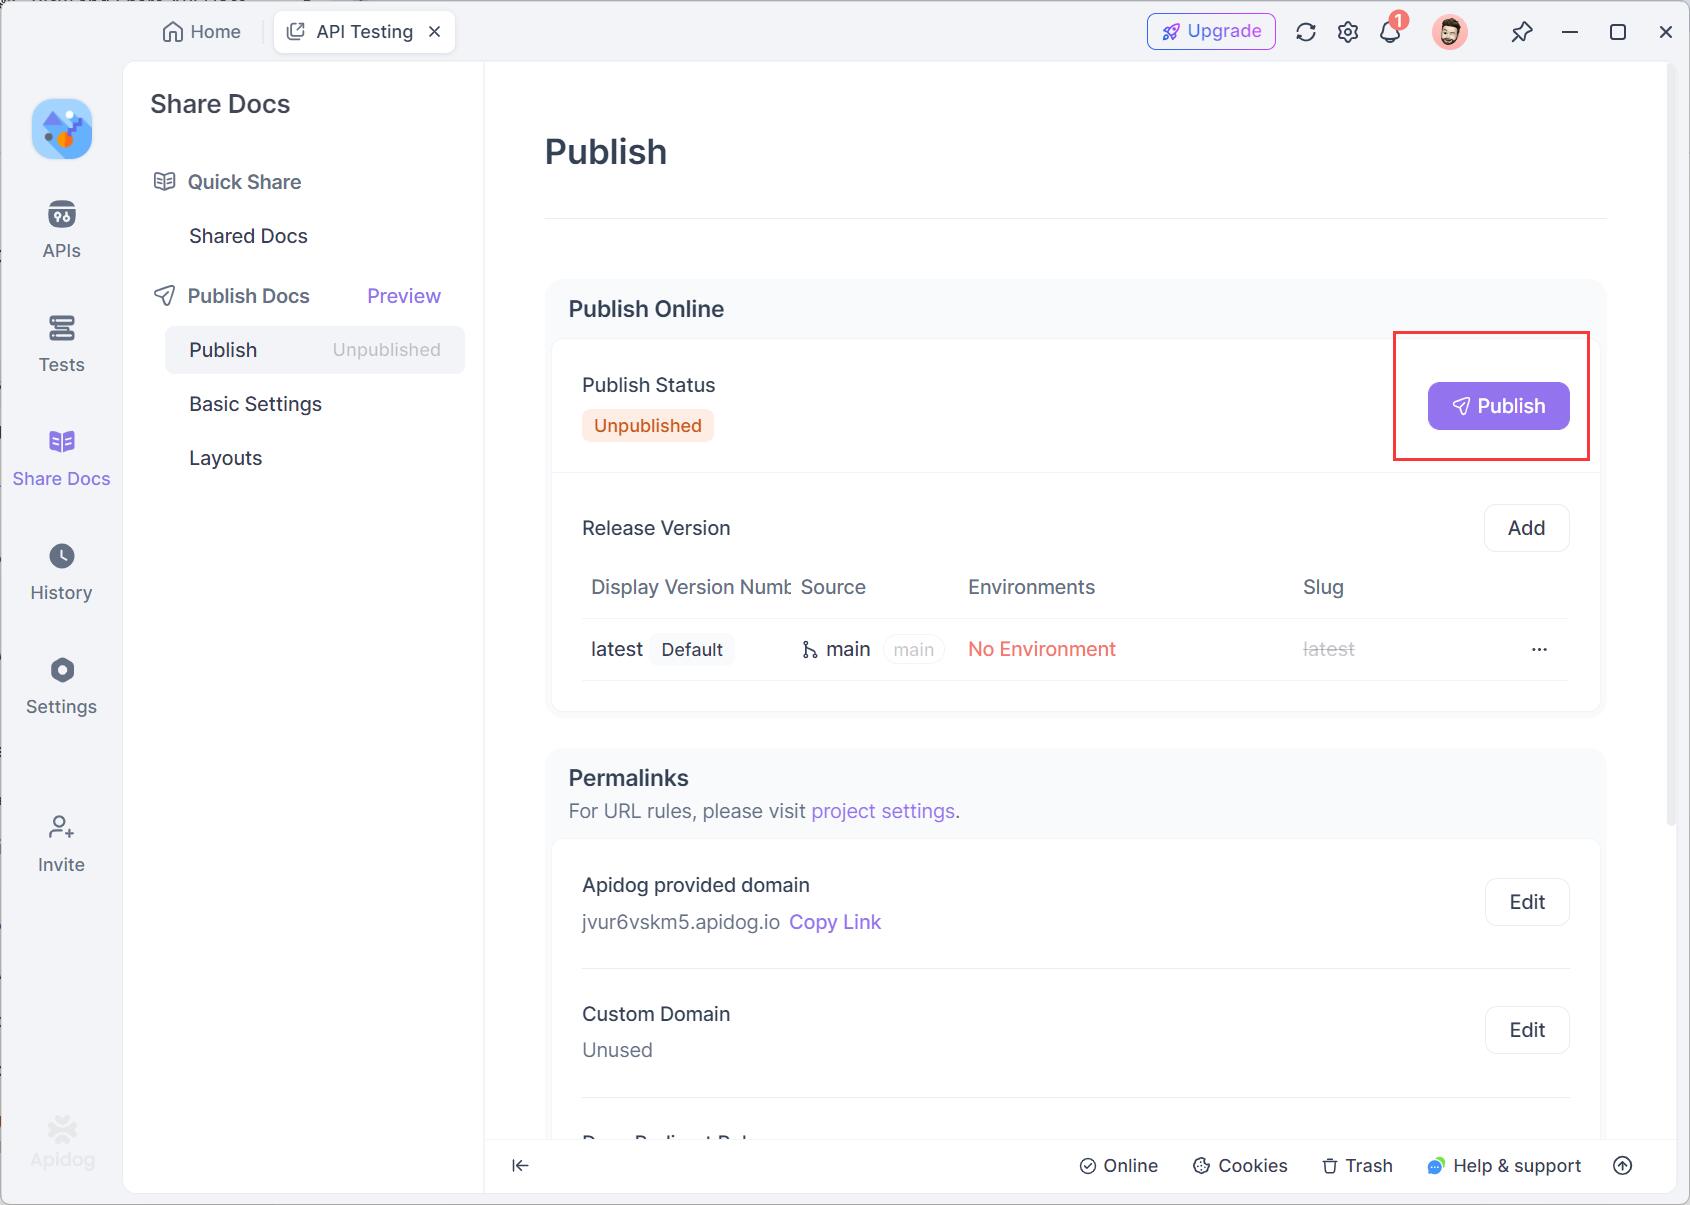
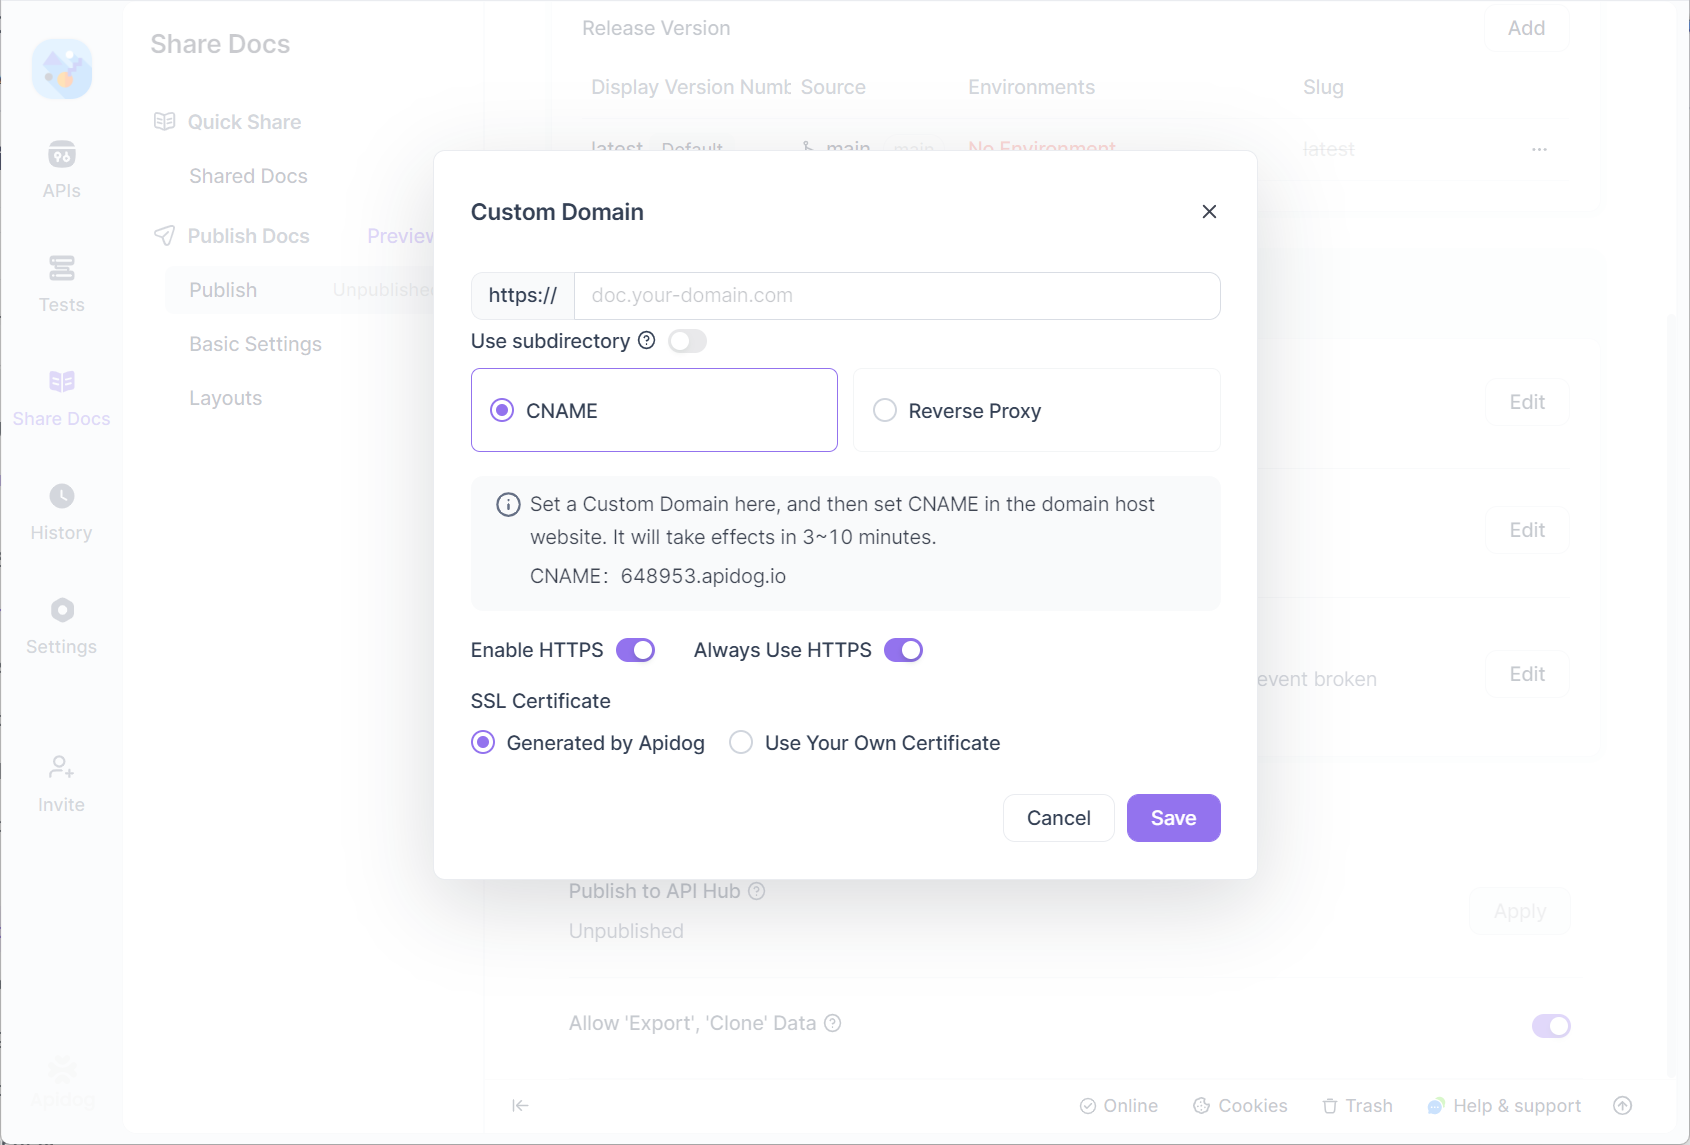
- Custom Domain for API Documentation:
Apidog also supports setting up a custom domain for your API documentation, giving it a more branded or professional appearance.
Best Practices for Writing REST API Documentation
1. Keep it Simple and Consistent: Use clear, concise language. Avoid unnecessary jargon. Consistency is key: Use the same terms and format across all endpoints, parameters, and responses.
2. Use Visual Aids: Where possible, include visual aids such as diagrams or flowcharts to explain complex processes, like authentication or rate limiting.
3. Provide Interactive Tools: If possible, include an interactive API explorer or console, allowing users to test endpoints directly from the documentation. This can dramatically improve the developer experience.
4. Update Regularly: Keep your documentation up-to-date with the latest changes to the API. This includes adding new endpoints, parameters, and handling new edge cases. Versioning your API and keeping a changelog helps ensure that users are aware of updates.
5. Test the Documentation: Before publishing, test the example requests and responses to ensure they are accurate. An API that behaves differently from its documentation can cause confusion and lead to a poor user experience.
Conclusion
Writing clear, thorough REST API documentation is a vital part of any API development process. By following the above steps, you can create documentation that will empower developers to use your API effectively and integrate it seamlessly into their applications. Clear documentation not only improves the usability of your API but also promotes a positive developer experience that fosters adoption and long-term use.


