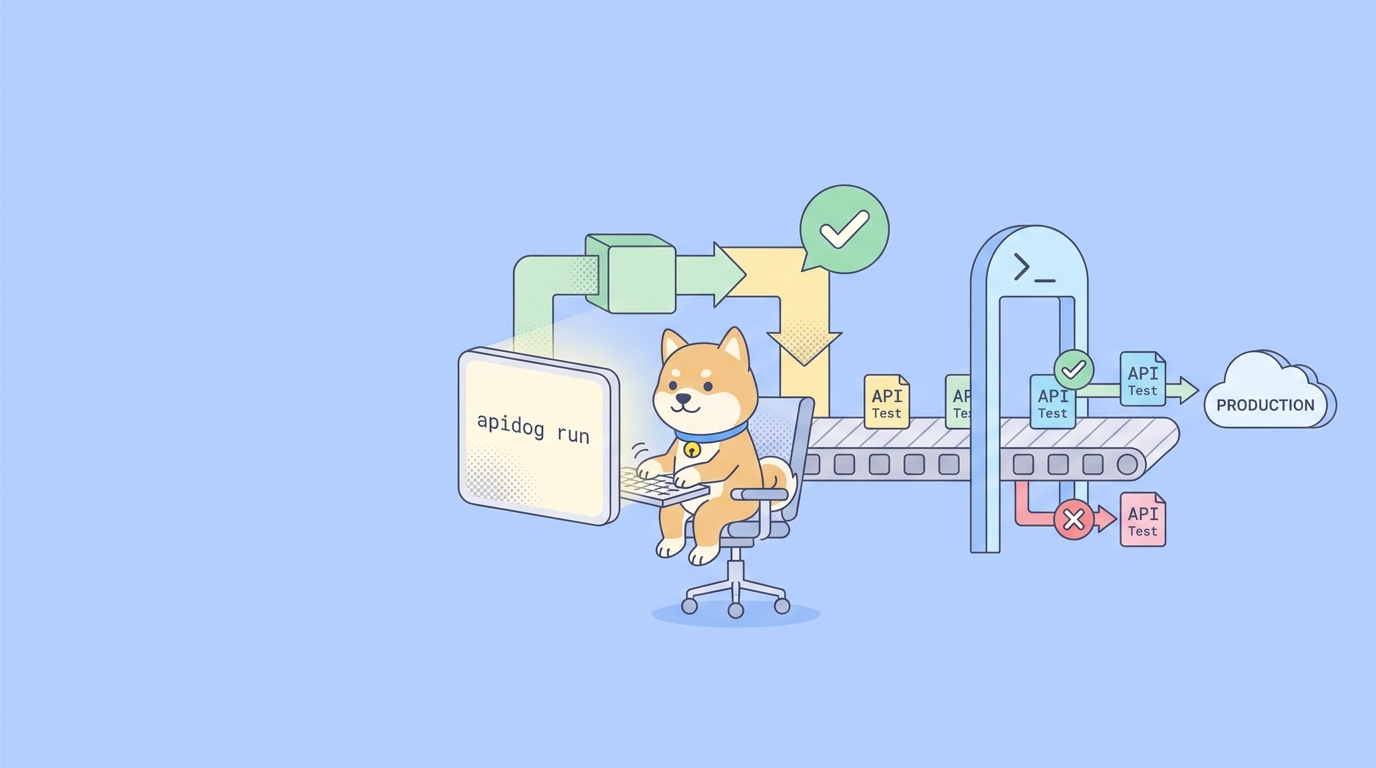
Your API tests pass on your laptop. Then someone merges a change at 2 a.m., the staging endpoint starts returning a malformed payload, and nobody notices until a customer files a ticket the next morning. The tests existed. They just never ran where it mattered: inside the pipeline, on every push, with no human clicking a button.
That gap between “tests that exist” and “tests that run automatically” is exactly what a command-line runner closes. The Apidog CLI takes the test scenarios you already built in the Apidog desktop or web app and runs them headlessly from a terminal. No GUI, no manual clicking. You install it with one npm command, point it at a test scenario, and it exits with a clean status code and a report you can publish in any CI system. That makes it the bridge between the visual test builder and your CI/CD platform.
TL;DR
- The Apidog CLI is an npm package called
apidog-cli. Install it globally withnpm install -g apidog-cli, then run scenarios with theapidog runcommand. - It runs the test scenarios you design in Apidog. You don’t rewrite tests as code; the CLI executes the same scenario by ID, using an access token for authentication.
- Core run:
apidog run --access-token $APIDOG_ACCESS_TOKEN -t <scenarioId> -e <environmentId> -n 1 -r html,cli. - Reporters cover
cli,html,json, andjunit. JUnit XML is what plugs straight into CI test dashboards. - A non-zero exit code on test failure is what makes the CLI a real quality gate. Failing tests fail the build by default.
- It works in any CI runner that has Node.js: GitHub Actions, GitLab CI, Jenkins, CircleCI, Azure Pipelines, and more.
What the Apidog CLI actually is
Apidog is an all-in-one API platform: you design the schema, debug requests, build automated test scenarios, mock endpoints, and publish documentation in one workspace. Most of that work happens in a visual interface. You chain requests into a test scenario, add assertions, pull values from one response into the next, and loop over a data file.
The CLI is the headless executor for those scenarios. It doesn’t have its own test format. It reaches into your Apidog project, finds the scenario you name by ID, and runs it exactly as the app would, then reports back. Think of it as the relationship between a build tool and your source code: the source of truth lives in the project, and the CLI is the thing that runs it without a person present.
This matters because it removes the most common reason API tests rot. When tests live only as clickable steps in a desktop app, they get run when someone remembers. When they run from a one-line command, you can wire them into a pipeline and they run on every commit, every merge, every nightly schedule. The visual builder gives you fast authoring; the CLI gives you automation. You get both without choosing.
If you’re coming from the Postman world, the mental model maps cleanly. The Apidog CLI plays the role that the Postman CLI or Newman plays for Postman collections, except it runs Apidog test scenarios and ships as a single package. We’ve covered that comparison in depth in Postman CLI vs Newman, and the broader question of running collections in CI without Newman if you’re migrating.
Prerequisites
Before you run a single command, you need three things:
- Node.js v16 or later. The CLI ships as an npm package, so a Node runtime is the only system dependency. Check yours with
node -v. Any CI image with Node 16+ already qualifies. - An Apidog test scenario. The CLI runs scenarios, not loose requests. Build one in the Apidog app first: chain your requests, add assertions, set up any data-driven iteration you need. If you’re new to authoring assertions, API assertions: a practical guide walks through validating responses.
- An access token. This authenticates the CLI to your Apidog account so it can fetch and run the scenario. You generate it inside the test scenario’s CI/CD tab; more on that below.
That’s it. No separate Apidog install on the CI box, no GUI, no license file. The package and a token are enough.
Installing the Apidog CLI
Install it globally with npm:
npm install -g apidog-cli
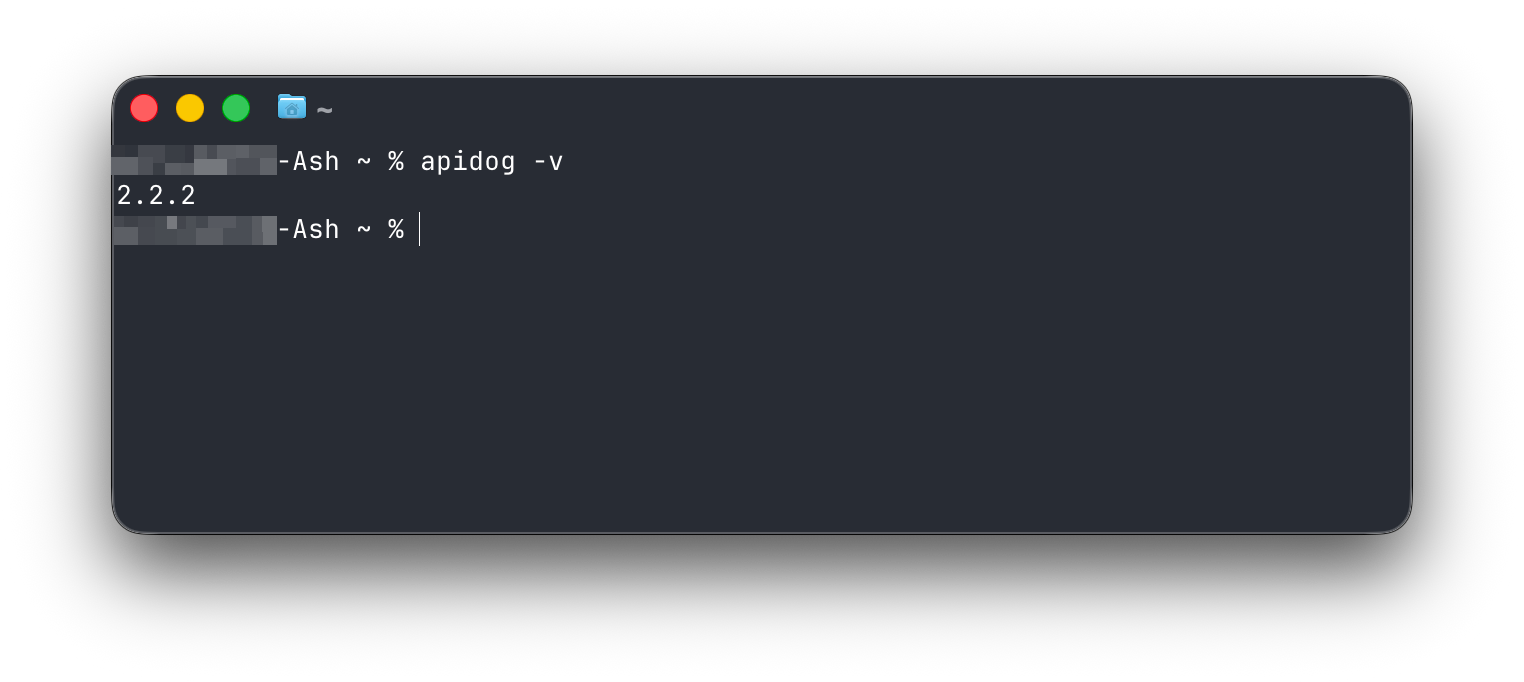
Then confirm everything resolved correctly:
node -v && apidog -v && which node && which npm && which apidog
If that prints version numbers and paths, you’re done. The binary is apidog, so every command starts with apidog run.
On a developer machine, a global install is fine. In CI, you have two reasonable patterns. The first is installing it fresh in each pipeline run, which guarantees you’re on the latest version:
npm install -g apidog-cli
apidog run --access-token $APIDOG_ACCESS_TOKEN -t 605067 -e 1629989 -r cli
The second is running it without a persistent global install via npx, which avoids mutating the runner’s global packages:
npx apidog-cli run --access-token $APIDOG_ACCESS_TOKEN -t 605067 -e 1629989 -r cli
Both work. The npx approach is cleaner for ephemeral CI runners; the global install is marginally faster when you cache it between runs.
Getting your access token and scenario ID
The CLI needs to know two things: which scenario to run, and that it’s allowed to run it. Apidog generates both for you so you don’t have to hunt through the UI.
Open the test scenario you want to automate. Switch to its CI/CD tab. Choose the command-line option, then click Add access token and Generate token. Apidog builds the full apidog run command for you, with the access token, the scenario ID, and the environment ID already filled in. Click the command to copy it.
That generated command is the canonical starting point. It looks like this:
apidog run --access-token YOUR_ACCESS_TOKEN -t 605067 -e 1629989 -n 1 -r html,cli
The numbers are real IDs from your project. 605067 is the test scenario ID. 1629989 is the environment ID. You’ll almost never type these by hand; you copy them from the CI/CD tab once and then parameterize the token.
One rule worth stating early: treat the access token like a password. Don’t paste it into a committed config file or a public pipeline definition. Store it as a secret in your CI system and reference it as an environment variable. Every example below uses $APIDOG_ACCESS_TOKEN for exactly this reason.
The apidog run command, flag by flag
The whole CLI revolves around one command. Here’s the complete option surface, grouped by what each group controls.
Selecting what to run
| Flag | Argument | What it does |
|---|---|---|
-t, --test-scenario |
<testScenarioId> |
Run a single test scenario by ID. |
-f, --test-scenario-folder |
<folderId> |
Run every scenario inside a folder by ID. |
--test-suite |
<testSuiteId> |
Run a test suite by ID. |
--project |
<projectId> |
Specify the project the scenario belongs to. |
--branch |
<branchName> |
Run against a specific branch; defaults to main if omitted. |
You pick one of -t, -f, or --test-suite depending on scope. A single scenario for a focused smoke test, a folder for a feature area, a test suite when you want a curated set of scenarios run together as one logical job.
Authentication
| Flag | Argument | What it does |
|---|---|---|
--access-token |
<accessToken> |
Authenticates the run against your Apidog account. Required for online execution. |
This is the one flag every CI command needs. Pass it from a secret, never inline.
Environment and iteration
| Flag | Argument | What it does |
|---|---|---|
-e, --environment |
<environmentId> |
Choose which environment (dev, staging, prod) the run targets. |
-n, --iteration-count |
<n> |
Run the scenario n times. |
-d, --iteration-data |
<path> |
Drive iterations from a JSON or CSV data file. |
--variables |
<path> |
Load variables from a local file. |
--global-var |
<value> |
Set a global variable inline, key=value. |
--env-var |
<value> |
Override an environment variable inline, key=value. |
The environment flag is how you point the same scenario at staging in a pull-request check and at production in a post-deploy smoke test, without duplicating the scenario. Iteration data is how you run one scenario across fifty rows of input and treat each row as a separate pass. We cover the data-driven pattern more fully in the guide on scaling automated API testing with test suites.
Reports
| Flag | Argument | What it does |
|---|---|---|
-r, --reporters |
[reporters] |
Choose report formats: cli, html, json, junit. Default is cli. |
--out-dir |
<outDir> |
Where reports get written. Defaults to ./apidog-reports. |
--out-file |
<outFile> |
Report filename. Supports {FOLDER_NAME}, {SCENARIO_NAME}, {GENERATE_TIME} placeholders. |
--out-json-failures-separated |
<value> |
Write failures to a separate JSON file. |
--upload-report |
[value] |
Upload a report overview to the Apidog cloud. |
This is where the CLI earns its place in a pipeline. Pass multiple formats at once, comma-separated:
apidog run --access-token $APIDOG_ACCESS_TOKEN -t 605067 -r html,junit --out-dir ./test-reports
cli gives you readable terminal output for humans reading the build log. html produces a self-contained report you can archive as a build artifact and open in a browser. junit emits XML in the standard JUnit format, which nearly every CI dashboard knows how to parse into a pass/fail tree. json gives you the raw structured result if you want to post-process it.
Error handling and exit behavior
| Flag | Argument | What it does |
|---|---|---|
--on-error |
<behavior> |
How to handle a failed step: ignore, continue, or end. |
--ignore-redirects |
Don’t follow HTTP redirects automatically. | |
--delay-request |
[n] |
Wait n milliseconds between requests. |
--timeout-request |
[n] |
Per-request timeout in milliseconds. |
--timeout-script |
[n] |
Script-execution timeout in milliseconds. |
--on-error controls what happens mid-scenario. end stops the run at the first failure, which is what you usually want for a fast-failing smoke test. continue runs every step so you see all failures in one report. ignore is for the rare case where a step is known-flaky and you don’t want it to derail the run.
TLS and certificates
| Flag | Argument | What it does |
|---|---|---|
-k, --insecure |
Disable SSL certificate verification. | |
--ssl-client-cert |
<path> |
Client certificate (PEM). |
--ssl-client-key |
<path> |
Private key for the client cert. |
--ssl-client-passphrase |
<passphrase> |
Passphrase for the client cert. |
--ssl-client-cert-list |
<path> |
Config file mapping certs to hosts. |
--ssl-extra-ca-certs |
<path> |
Additional trusted CA certificates. |
Use these when you test endpoints behind mutual TLS or with internal CA chains. Reach for -k only against trusted internal hosts where the cert is self-signed; never against anything public.
Output and diagnostics
| Flag | Argument | What it does |
|---|---|---|
--verbose |
Print full request and response detail. | |
--silent |
Suppress console output. | |
--color |
<value> |
Force colored output on or off. |
--external-program-path |
<path> |
Point at an external-programs file for custom logic. |
--database-connection |
<path> |
Database config file for steps that query a database directly. |
--preferred-http-version |
<version> |
Set the preferred HTTP protocol version. |
-b, --bigint |
Enable BigInt compatibility for large numeric values. | |
--lang |
<language> |
CLI language. |
-h, --help |
Print help. |
--verbose is your first move when a test passes locally but fails in CI; it shows you the exact request the runner sent and the exact response it got back. --silent is for noisy nightly jobs where you only care about the exit code and the saved report.
Exit codes: the part that makes CI work
A test runner is only useful in a pipeline if it tells the pipeline whether the tests passed. The Apidog CLI does this the way every well-behaved command-line tool does: it exits with code 0 when every assertion passes and a non-zero code when something fails.
That single behavior is what turns apidog run into a quality gate. CI systems read the exit code of each step. A non-zero exit marks the step as failed, which fails the job, which blocks the merge or the deploy. You don’t configure anything extra. As long as the apidog run step is in your pipeline, a failing test stops the line.
You can shape this with --on-error. The default behavior fails on the first broken assertion, which keeps feedback fast. Switch to --on-error continue when you’d rather see every failure in one report before the build goes red. Either way, the run still ends in a non-zero exit if anything failed, so the gate holds.
Running in GitHub Actions
complete workflow that runs an Apidog scenario on every pull request and publishes the report as an artifact.
name: API tests

on:
 pull_request:
 branches: [main]

jobs:
 api-tests:
 runs-on: ubuntu-latest
 steps:
 - name: Checkout
 uses: actions/checkout@v4

 - name: Set up Node.js
 uses: actions/setup-node@v4
 with:
 node-version: '20'

 - name: Install Apidog CLI
 run: npm install -g apidog-cli

 - name: Run API test scenario
 run: |
 apidog run \
 --access-token "$APIDOG_ACCESS_TOKEN" \
 -t 605067 \
 -e 1629989 \
 -n 1 \
 -r html,junit \
 --out-dir ./apidog-reports
 env:
 APIDOG_ACCESS_TOKEN: ${{ secrets.APIDOG_ACCESS_TOKEN }}

 - name: Upload report
 if: always()
 uses: actions/upload-artifact@v4
 with:
 name: apidog-report
 path: ./apidog-reports
The token lives in repository secrets and reaches the step as an environment variable. The if: always() on the upload step means you still get the report even when the tests fail, which is exactly when you want to read it. If a test breaks, the apidog run step exits non-zero, the job goes red, and the PR shows a failing check.
Running in GitLab CI
The same pattern in .gitlab-ci.yml:
stages:
 - test

api-tests:
 stage: test
 image: node:20
 script:
 - npm install -g apidog-cli
 - >
 apidog run
 --access-token "$APIDOG_ACCESS_TOKEN"
 -t 605067
 -e 1629989
 -r junit,cli
 --out-dir ./apidog-reports
 artifacts:
 when: always
 paths:
 - apidog-reports/
 reports:
 junit: apidog-reports/*.xml
Two things to note. Store APIDOG_ACCESS_TOKEN as a masked, protected CI/CD variable under Settings, not in the file. And the reports: junit: block tells GitLab to parse the JUnit XML and render the results in the merge request widget, so a reviewer sees which assertions failed without downloading anything.
Running in Jenkins
In a declarative pipeline, store the token as a Jenkins credential or a global environment variable, then call the CLI in a stage:
pipeline {
 agent any
 environment {
 APIDOG_ACCESS_TOKEN = credentials('apidog-access-token')
 }
 stages {
 stage('API tests') {
 steps {
 sh 'npm install -g apidog-cli'
 sh 'apidog run --access-token $APIDOG_ACCESS_TOKEN -t 605067 -e 1629989 -n 1 -r html,junit --out-dir apidog-reports'
 }
 }
 }
 post {
 always {
 junit 'apidog-reports/*.xml'
 archiveArtifacts artifacts: 'apidog-reports/', allowEmptyArchive: true
 }
 }
}
If your build agents already have the CLI installed and cached, drop the npm install line and call apidog run directly. The junit step in the post block feeds the XML into Jenkins’ test trend graphs; archiveArtifacts keeps the HTML report attached to the build. If you’re weighing Jenkins against other runners, the comparison in ReadyAPI Jenkins CI setup, and a simpler alternative covers the tradeoffs.
Common patterns and recipes
Smoke test after deploy. Run one fast scenario against production right after a release, targeting the prod environment:
apidog run --access-token $APIDOG_ACCESS_TOKEN -t 605067 -e <prodEnvId> -r cli --on-error end
Full regression nightly. Run an entire folder of scenarios on a schedule, with all failures collected into one report:
apidog run --access-token $APIDOG_ACCESS_TOKEN -f <folderId> -r html,junit --on-error continue --out-dir ./nightly-reports
Data-driven run. Loop one scenario over a CSV of test cases:
apidog run --access-token $APIDOG_ACCESS_TOKEN -t 605067 -d ./test-data.csv -r junit
Branch-specific check. Run the scenarios as they exist on a feature branch, not main:
apidog run --access-token $APIDOG_ACCESS_TOKEN -t 605067 --branch feature-payments -e 1629989 -r cli
Debug a CI-only failure. When a scenario passes locally but fails in the pipeline, add --verbose to see the exact wire-level request and response the runner produced.
Troubleshooting
Authentication errors. If the run fails with an auth error, the token is wrong, expired, or not reaching the command. Echo a masked check (never the full token) and confirm your CI secret is actually populated. Regenerate the token from the scenario’s CI/CD tab if needed.
“Scenario not found.” The scenario ID, project ID, or branch doesn’t match. Re-copy the command from the CI/CD tab so the IDs are guaranteed current, and confirm --branch points where you expect.
Tests pass locally but fail in CI. Almost always an environment difference. The CI runner may target a different -e environment, hit a host it can’t reach, or lack a variable your scenario depends on. Run with --verbose and compare the request the CI runner sent against what you send locally.
Network or TLS failures against internal hosts. If your endpoint uses an internal CA, pass --ssl-extra-ca-certs. Use -k only as a last resort on trusted internal hosts where the certificate is self-signed.
The build stays green even when a test should fail. Confirm the apidog run step’s exit code is actually reaching CI. If you’ve wrapped it in a shell pipeline or appended || true, the non-zero exit gets swallowed and the gate stops working. Remove anything that masks the exit code.
How the Apidog CLI fits a real workflow
The CLI is one piece of a loop. You design and debug requests in the Apidog app. You chain them into a scenario with assertions. You commit your work and the CLI runs that scenario in CI on every change. When something breaks, the report tells you which assertion failed and the exit code stops the deploy. You fix it, push again, and the same gate confirms the fix.
The advantage of building tests visually and running them headlessly is that nobody has to maintain two representations of the same test. The scenario in the project is the test. The CLI just runs it where a human can’t be. That’s a different model from script-first runners, where the test and its execution are the same brittle file, and it’s a big part of why teams move to Apidog as a Postman alternative for API testing.
If you haven’t built the tests yet, start in the app, get one scenario passing, then wire up the CLI command from its CI/CD tab. Download Apidog to set up your first automated scenario, and you’ll have it gating your pipeline the same afternoon.
Frequently asked questions
Is the Apidog CLI free? The CLI itself is a free npm package. You install it with npm install -g apidog-cli. It runs the test scenarios from your Apidog project, so what you can run depends on your Apidog plan, but the command-line runner is not a separate paid product.
Do I have to rewrite my tests as code to use the CLI? No. That’s the main difference from script-first runners. You build scenarios visually in Apidog, and the CLI runs them by ID. The scenario is the test; the CLI is just the executor.
What’s the difference between the Apidog CLI and Newman? Newman runs Postman collections from the command line. The Apidog CLI runs Apidog test scenarios. The roles are parallel, but the Apidog runner executes scenarios you authored in the Apidog app and ships as the single apidog-cli package. See Postman CLI vs Newman for the Postman side of that comparison.
Which report format should I use in CI? Use junit for the machine-readable result your CI dashboard parses into a pass/fail tree, and add html if you want a browsable report saved as a build artifact. A common choice is -r html,junit. Keep cli on too if you want readable output in the build log.
How does the CLI make a build fail? Through its exit code. When any assertion fails, apidog run exits non-zero. CI systems read that exit code, mark the step as failed, and block the merge or deploy. You don’t configure anything extra for this to work.
Can I run the CLI without installing it globally? Yes. Use npx apidog-cli run ... to execute it without a persistent global install, which is convenient on ephemeral CI runners.
What Node.js version do I need? Node.js v16 or later. Any modern CI image with Node 16+ already satisfies the requirement.
Where do I get the access token and scenario ID?** Both come from the test scenario’s CI/CD tab in Apidog. Pick the command-line option, generate an access token, and copy the full apidog run command Apidog builds for you with the IDs already filled in. Then move the token into a CI secret.