
How to Change Swagger UI URL Defauth Path
Swagger UI is a great tool for visualizing and interacting with OpenAPI specs. As you work with Swagger UI, you'll notice URLs play an important role in configuring and accessing the API documentation. In this post, we'll demystify Swagger UI URLs to help you use them more effectively.

Swagger UI is a great tool for visualizing and interacting with OpenAPI specs. As you work with Swagger UI, you'll notice URLs play an important role in configuring and accessing the API documentation. In this post, we'll demystify Swagger UI URLs to help you use them more effectively.
What is a Swagger UI?
Swagger UI is a tool that allows the user to interact with APIs using the OpenAPI Specification documentation. It reads the specification document and displays it in a visually interactive format. This helps developers to understand APIs, send test requests, debug, and use your REST APIs.
The Swagger UI URL corresponds to the endpoint where you serve your OpenAPI specification JSON file. This means that you need to provide a web address that points to the location of your OpenAPI JSON file. Swagger UI reads this file to create a user-friendly interface accessible through that URL. The exact URL structure may vary due to varying server configurations.
Swagger UI Features
Swagger UI is a powerful tool that provides a range of features to test, understand, and visualize APIs. Some features are mentioned below:
Key features include:
- Live testing of APIs directly within the docs
- Intuitive controls for request parameters
- Code snippet generation for API calls
- Markdown support for formatting
- Tools for team collaboration
- Automatic data model visualization
- API endpoint organization and search
Swagger UI URL Parameters
Swagger UI has various parameters in the URL to configure its behavior and appearance. These affect how API documentation is displayed using Swagger UI. Some of the most commonly used Swagger UI URL parameters are:
URL:
This specifies the OpenAPI specification file URL that Swagger UI should use to generate the API documentation. The format of the URL is as follows:
http://localhost:8080/swagger-ui/?url=/path/to/your/api-spec.json
ConfigUrl:
configUrl provides the URL of a JSON configuration that customizes and alters the behavior of Swagger UI.
http://localhost:8080/swagger-ui/?configUrl=/path/to/your/config.json
deepLinking:
It enables deep linking to individual operations or tags in the API documentation. It is beneficial when sharing direct links to specific parts of the documentation.
http://localhost:8080/swagger-ui/?url=/path/to/your/api-spec.json&deepLinking=true
oauth2RedirectUrl:
It enables the users to redirect to another URL after successful authentication when your API requires OAuth 2.0 authentication.
http://localhost:8080/swagger-ui/?url=/path/to/your/api-spec.json&oauth2RedirectUrl=https://your-app.example.com/oauth2-redirect
defaultModelsExpandDepth:
It adjusts the default depth of the models in the documentation.
http://localhost:8080/swagger-ui/?url=/path/to/your/api-spec.json&defaultModelsExpandDepth=2
How to Find Swagger UI URL
Some people confused about where is the Swagger UI URL. It is generated based on the configuration of your project. To find the URL, follow these steps:
- Ensure your project is configured to generate Swagger documentation.
- To access the Swagger UI, you need to combine the base URL of your API with the Swagger documentation endpoint. This will result in your Swagger UI URL.
For example, if you are hosting your API at http://localhost:3000 and your swagger endpoint is /swagger-ui/, then your Swagger url will become http://localhost:8080/swagger-ui/.
If you still have trouble finding your Swagger UI url, you can refer to the documentation of the framework or library you are using for generating your APIs. This will help in providing information on how to access the url for your specific setup.
How to Change Swagger UI Defauth Path?
The default path of your Swagger UI depends on your server’s configurations. It is constructed based on location and where you have deployed Swagger UI. The default URL paths can be changed according to user requirements and deployment. The URL parameter in the URL should point to the location of the OpenAPI specification file.
There are many methods to change the default path of the Swagger UI URL.
Changing Swagger configuration file (Apache and Nginx):
If you are using a web server, you can change your server's configurations to handle requests at a specific URL.
Apache:
In the case of Apache, you can modify your configuration file to create a rewrite rule so that requests can be redirected to your Swagger UI path. You must open your configuration file, often named ‘httpd.conf’ or ‘apache2.conf’. Add your rewrite rule for your desired path in this file.
RewriteEngine On
RewriteRule ^/api-docs/(.*)$ /path/to/your/swagger-ui/$1 [L]
You can restart your Apache server for the changes to be reflected.
Nginx:
If you are using Nginx, you must update your server file configuration to define a location for handling your requests. In the server block, add your location.
server {
    listen 80;
    server_name your-domain.com;

    location /api-docs {
        alias /path/to/your/swagger-ui;
        index index.html;
    }
}
Check for any syntax errors after making the changes and reload your Nginx for the changes to be reflected.
Using frameworks like Express.js:
Using Express.js, you can configure your routes to handle Swagger UI requests.
To serve Swagger UI, you must define a route in your Express.js server file.
const express = require('express');
const app = express();

app.use('/custom-path', express.static('swagger-ui'));

app.listen(3000, () => {
  console.log('Server is running on port 3000');
});
This will allow you to access your Swagger UI on your ‘custom-path’.
Leveraging Springboot to change the default path:
In a Spring Boot application, you can modify ‘application.properties’ or ‘application.yml’ files. You can add the following property to change the default Swagger UI path in your ‘application.properties’ or ‘application.yml’ files.
springfox.documentation.swagger-ui.path=/custom-path
You can replace ‘/custom-path’ according to your desired path.
Next, you need to configure bean to customize the path. You can extend ‘WebMvcConfigurerAdapter’ to achieve this.
import org.springframework.context.annotation.Configuration;
import org.springframework.web.servlet.config.annotation.ViewControllerRegistry;
import org.springframework.web.servlet.config.annotation.WebMvcConfigurer;

@Configuration
public class SwaggerUIConfiguration implements WebMvcConfigurer {

    @Override
    public void addViewControllers(ViewControllerRegistry registry) {
        registry.addRedirectViewController("/custom-path", "/swagger-ui.html");
    }
}
Ensure that you have the required dependencies in Swagger to achieve these results.
You then need to configure your application’s main class.
import org.springframework.context.annotation.Bean;
import org.springframework.context.annotation.Configuration;
import springfox.documentation.builders.ApiInfoBuilder;
import springfox.documentation.service.ApiInfo;
import springfox.documentation.spring.web.plugins.Docket;
import springfox.documentation.swagger2.annotations.EnableSwagger2;

@Configuration
@EnableSwagger2
public class SwaggerConfiguration {

    @Bean
    public Docket api() {
        return new Docket(DocumentationType.SWAGGER_2)
                .apiInfo(apiInfo())
                .select()
                .apis(RequestHandlerSelectors.basePackage("your.package.name"))
                .paths(PathSelectors.any())
                .build();
    }

    private ApiInfo apiInfo() {
        return new ApiInfoBuilder()
                .title("Your API Documentation")
                .version("1.0")
                .build();
    }
}
Replace “your.package.name” with the base package of your controllers.
Swagger UI Initialization:
You can adjust the ‘url’ parameter to reflect your desired URL path. This will allow you to change the default path of Swagger UI. When initializing Swagger UI in JavaScript, you can make the following changes.
const ui = SwaggerUIBundle({
  url: "/custom-path/swagger.json",
});
Using Swagger UI to Test APIs
Much like other API testing tools, such as Apidog, Swagger UI provides an efficient and user-friendly way to test APIs. You must follow certain steps to debug and test your APIs using the Swagger site. Click on Live Demo and start exploring Swagger UI. You will see a window like this open up.
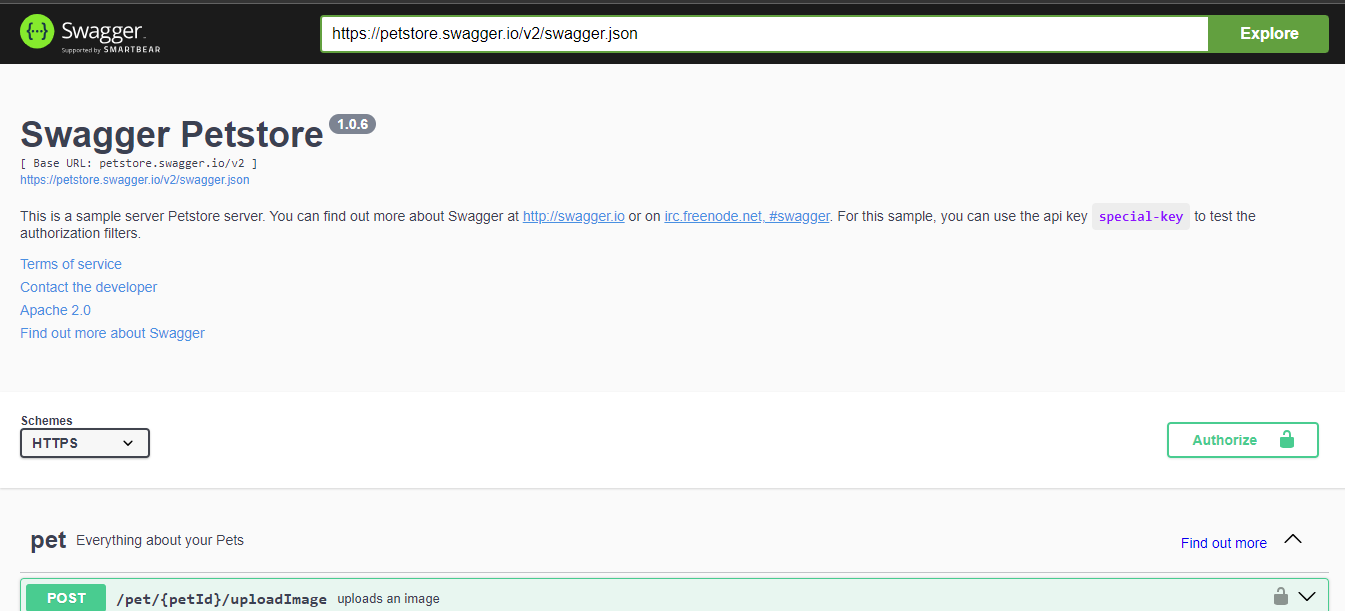
You can explore multiple HTTP/HTTPS methods like POST, GET, PUT, etc.

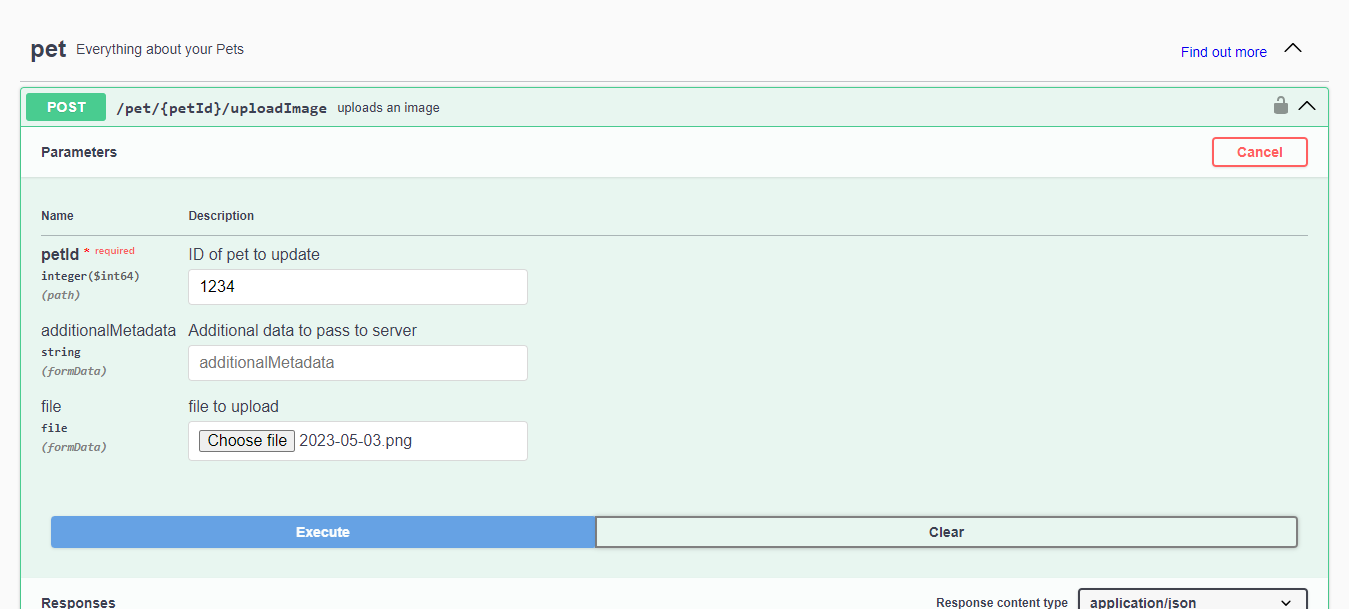
You can click on any method and explore around. If you click on the POST method, you will see an option to upload an image and update the method's parameters. You can press ‘Execute’, and your request will be executed.
You can see the response to the POST request by scrolling down.
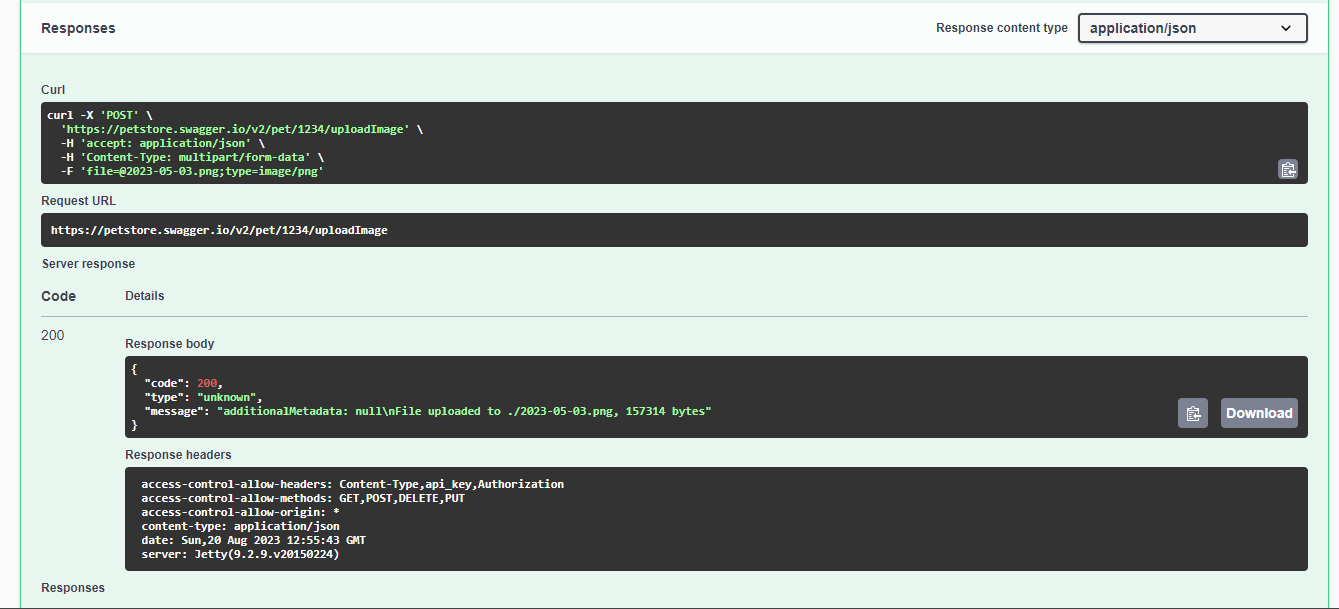
Similarly, you can work around with other methods given and see what they do. This will give you a good idea of how Swagger UI works.
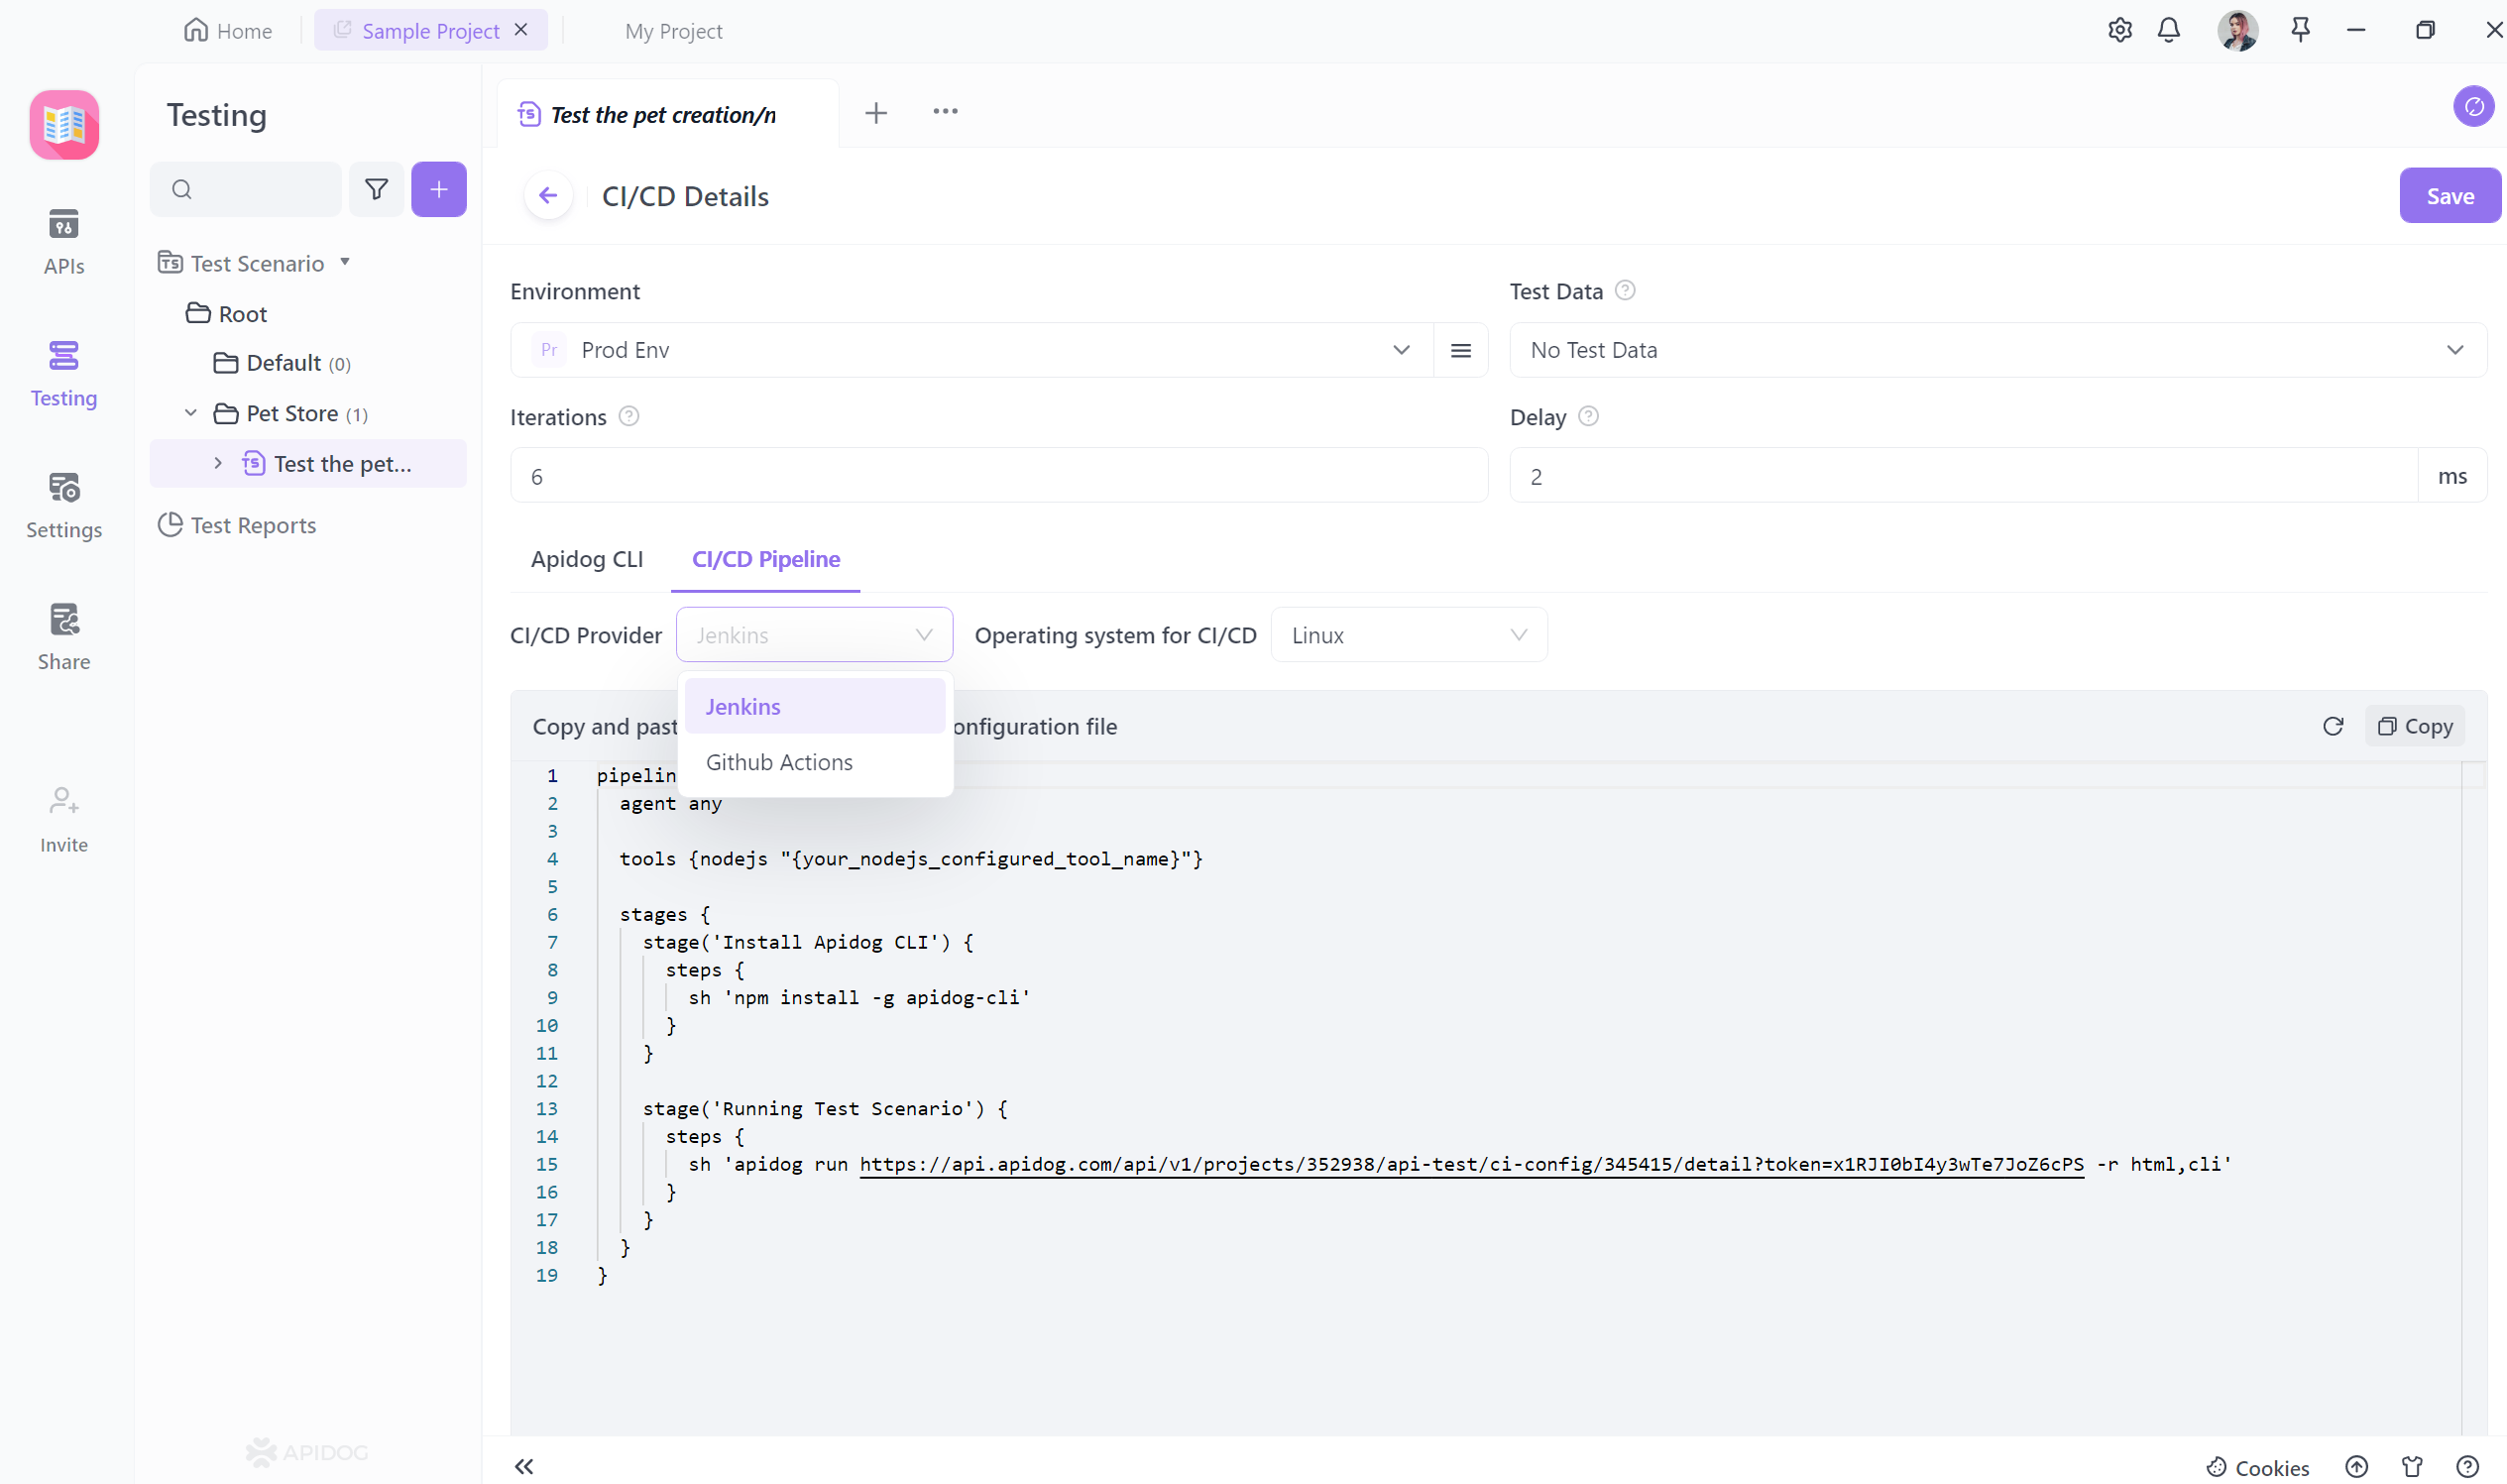
Consider Apidog for more robust API documentation beyond Swagger UI's capabilities. Apidog enables full API lifecycle management including design, mocking, testing, versioning, collaboration, and more.
With advanced features like CI/CD integration and team workflows, Apidog offers a more complete toolkit to streamline API delivery. Its comprehensive platform scales API development and improves productivity.
Troubleshooting Swagger UI Localhost
If you face issues with the Swagger UI URL on localhost, there are several troubleshooting steps you can look into to diagnose and resolve the problem.
- Ensure that your API server is up and running. Swagger UI cannot fetch the documentation if your server has trouble running.
- Check your Swagger configurations to see if they are correctly set up.
- Use the correct Swagger UI URL with the correct endpoints.
- Clear your browser’s cache. Sometimes, unexpected errors can occur with cached data.
- Restart both your API server and browser after making any changes.
- Double-check the URL format you are using to access Swagger UI.
Conclusion
In conclusion, Swagger UI is quickly gaining popularity among developers due to its broad API management techniques. It provides well-structured documentation and a user-friendly interface. Users can also visualize data models while doing live API testing, making it a good choice for API testing and debugging.
While Swagger UI has its advantages, there are also several limitations the user can see while testing APIs. It provides limited collaboration between developers and does not support integration with other API management tools.
