
WebSocket facilitates real-time, bi-directional communication between a client and server over a single, persistent connection. Need to establish WebSocket connections with Postman? Check out our concise step-by-step guide!
What is WebSocket and How Does it Work?
WebSocket is an advanced technology facilitating real-time, bidirectional communication between clients and servers. Unlike traditional HTTP, WebSocket establishes a persistent connection, enabling seamless data flow without continuous polling. This is crucial for applications demanding live updates, such as chat apps, sports tickers, and online games.
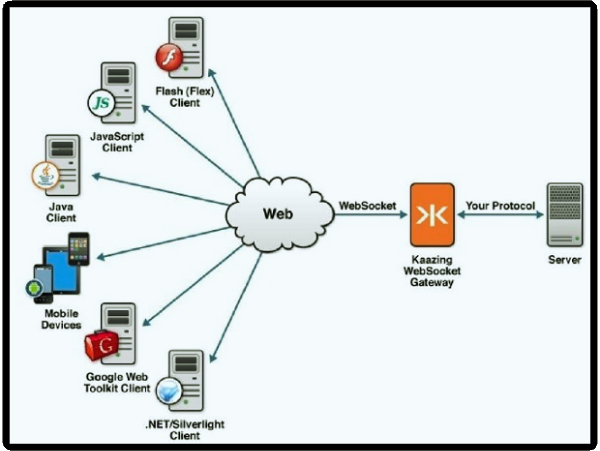
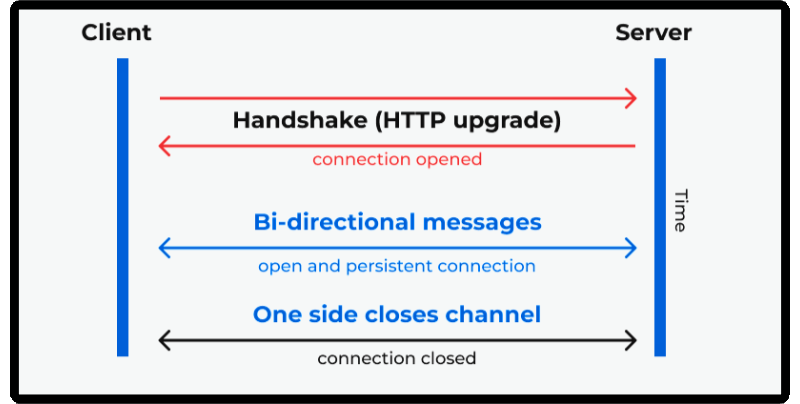
WebSocket works by initiating a simple HTTP handshake, where the client requests a protocol upgrade. Upon agreement, the connection shifts to WebSocket, allowing for real-time data exchange. The communication is framed-based, with data transmitted in portions. This contrasts with HTTP's request-response model, making WebSocket ideal for continuous, instantaneous dialogues and enhancing user experiences in applications requiring timely updates.
WebSockets in Postman
Recognizing the importance of real-time, bidirectional communication in today's web applications, Postman has integrated WebSocket support into its suite of functionalities. Postman allows you to create, send, and analyze WebSocket requests like you'd handle HTTP requests.
WebSocket support in Postman has enabled developers to streamline their workflow and maintain consistency in their testing environment. With WebSocket testing now possible alongside REST, SOAP, and GraphQL API testing, Postman offers a comprehensive toolkit for end-to-end API development and testing.

Postman Tutorial: Send and Test WebSocket Connections
Establishing and sending a WebSocket connection in Postman involves a few simple steps:
Step 1. Open Postman
Launch the Postman application on your machine. If you don't have Postman installed, download Postman from the official website. Make sure the version above is v8.5.0.
Step 2. Create New Request
On the Postman interface's top left corner, click the "New" button. A drop-down menu will appear.
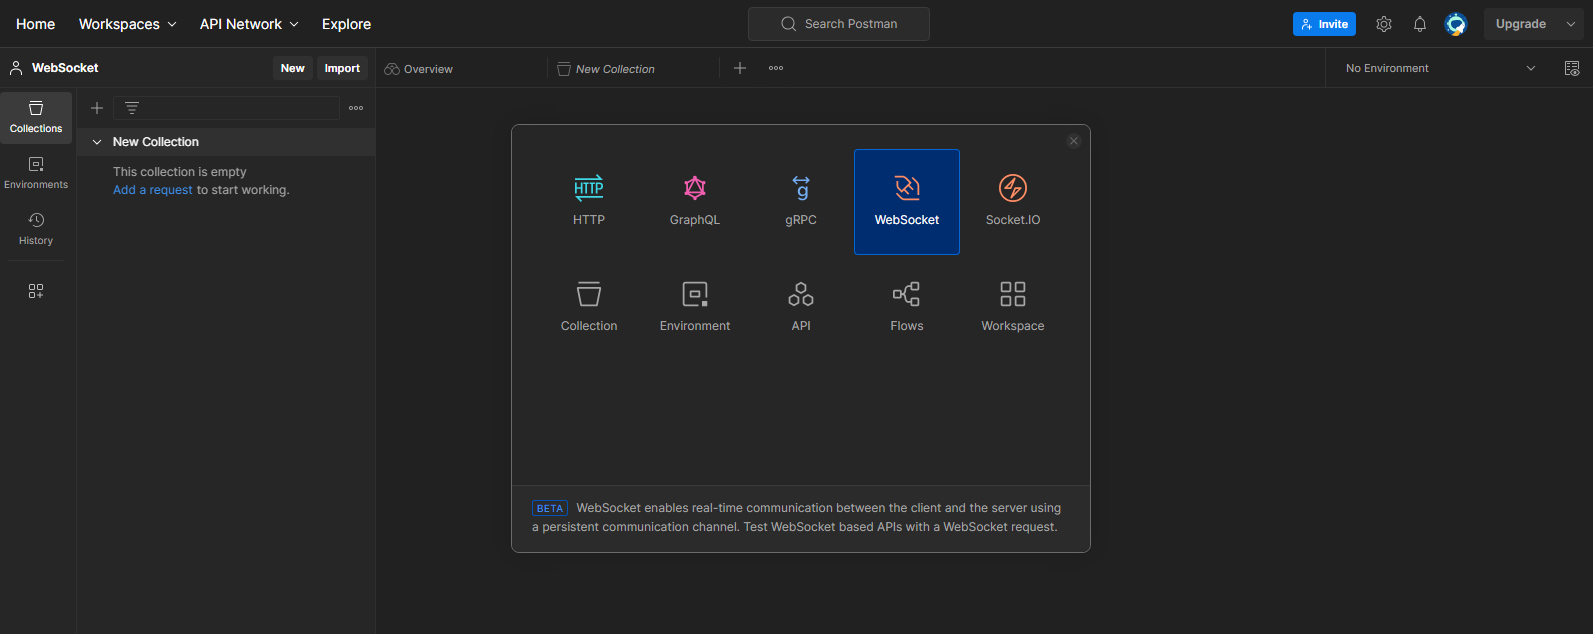
Step 3. Select a WebSocket Request
Select "WebSocket Request" from the dropdown menu. This will open a new tab specifically for WebSocket requests.
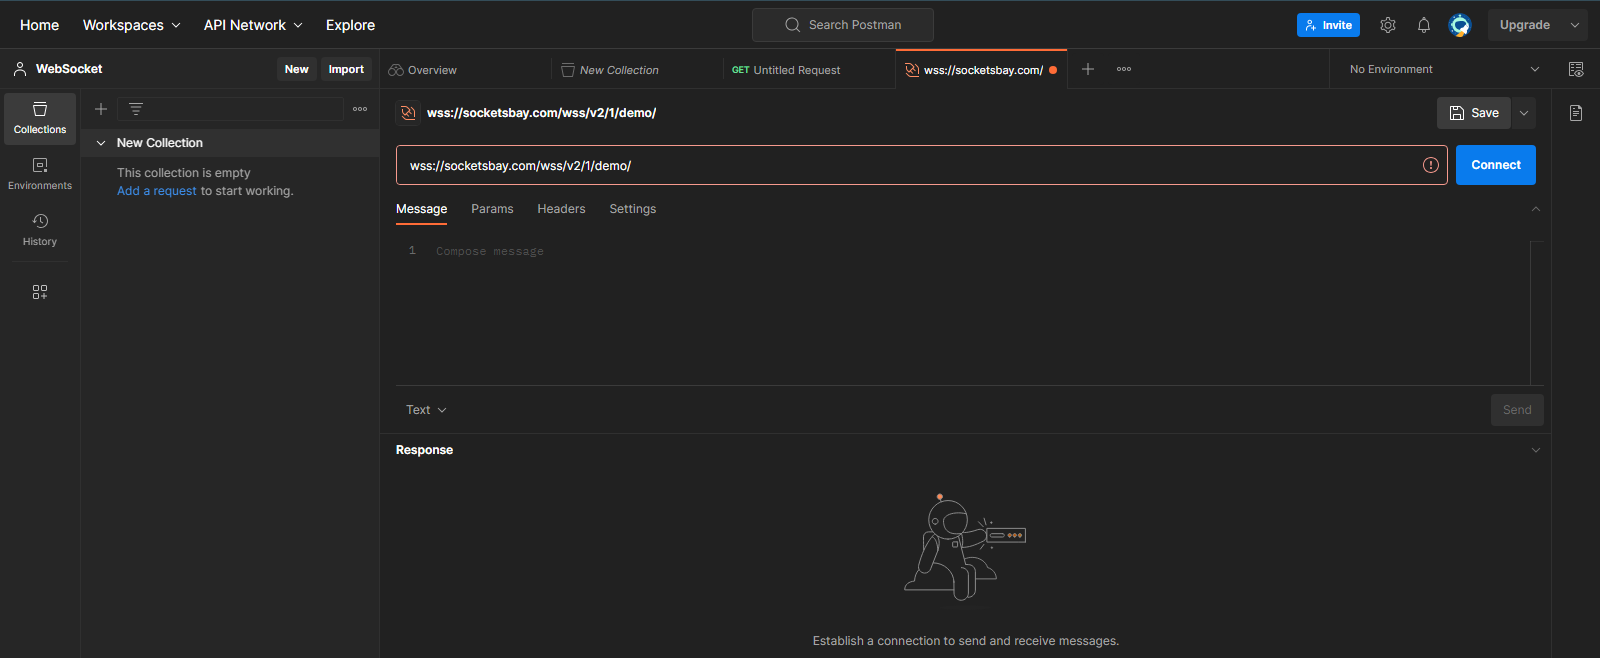
Step 4. Enter WebSocket Server URL
You'll see a request URL field in the new tab. Enter the URL of your WebSocket server here. This URL usually starts with "ws://" for unsecured connections or "wss://" for secured connections.
Step 5. Set Request Headers (optional)
Add them to the Headers tab if your WebSocket server requires specific headers. WebSocket handshake requests use the HTTP protocol to include headers like a normal HTTP request.
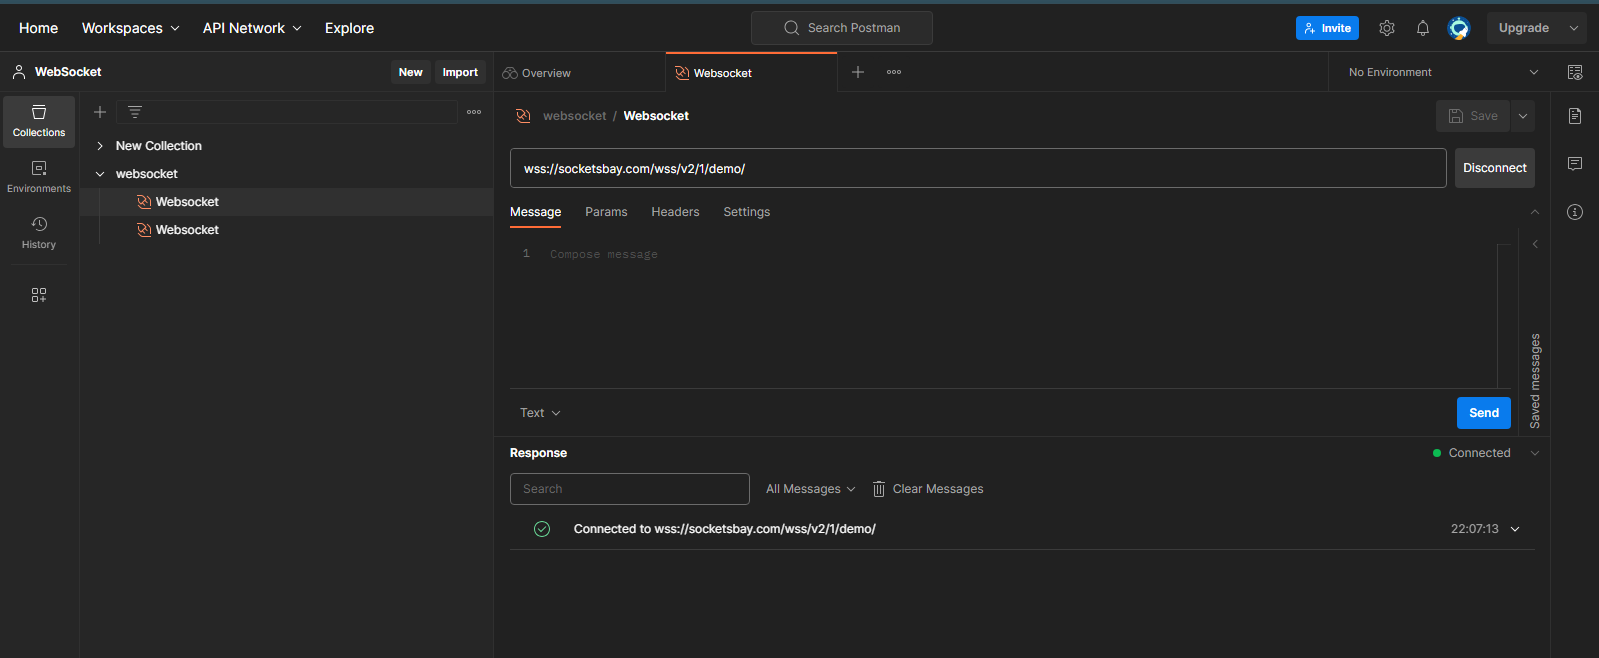
Step 6. Connect to the WebSocket Test Server
Click the "Connect" button on the far right of the request URL field. This will initiate the WebSocket handshake. Postman will automatically handle the upgrade headers to transition from the HTTP protocol to the WebSocket protocol.
Step 7. Check WebSocket Connection
Once the connection is established, the status next to the "Connect" button changes to "Connected" to check the WebSocket connection status. You'll also see a log of the connection status in the console at the bottom.
Step 8. Send Messages to the WebSocket Server
Once connected, you can send messages to the WebSocket server. A text box is at the bottom of the interface to enter your message. These messages can be in JSON, XML, or any other text format your WebSocket server accepts.
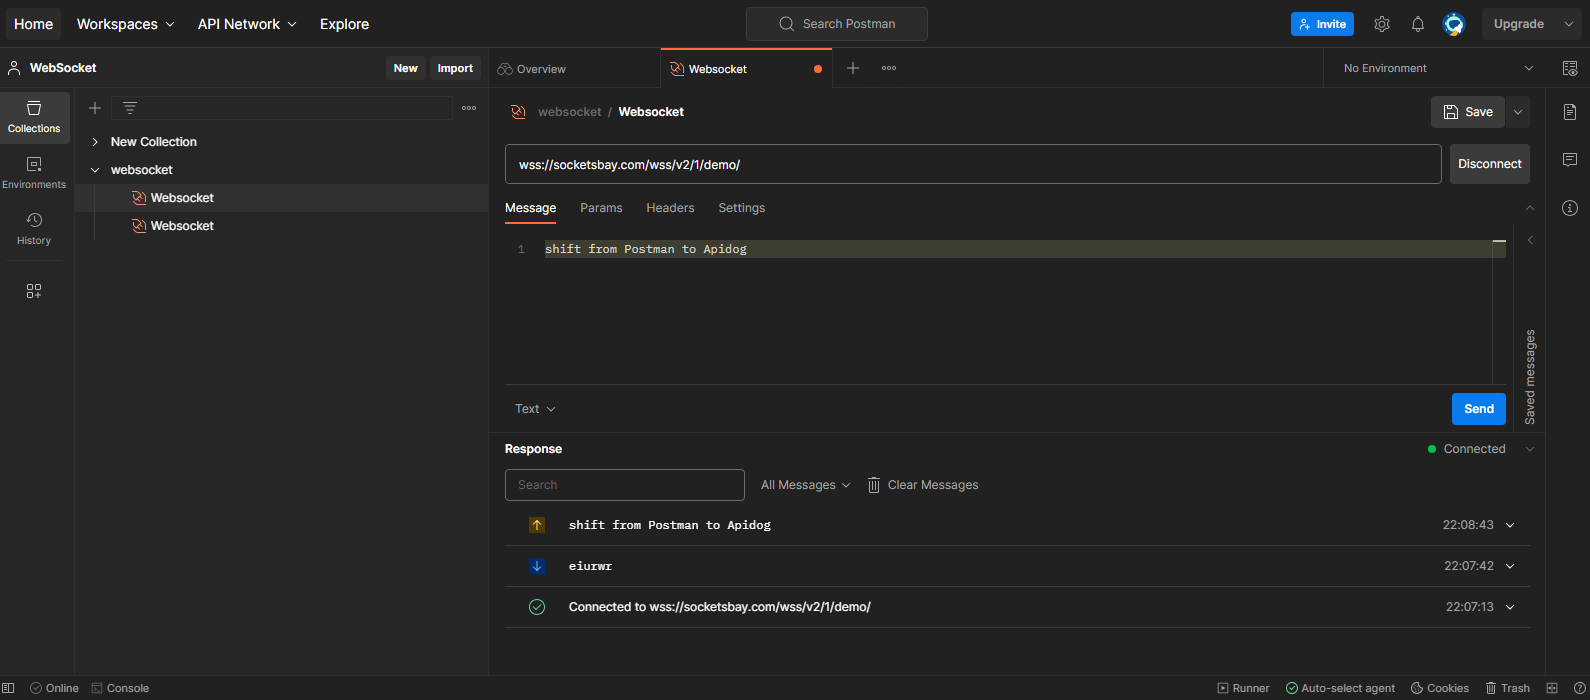
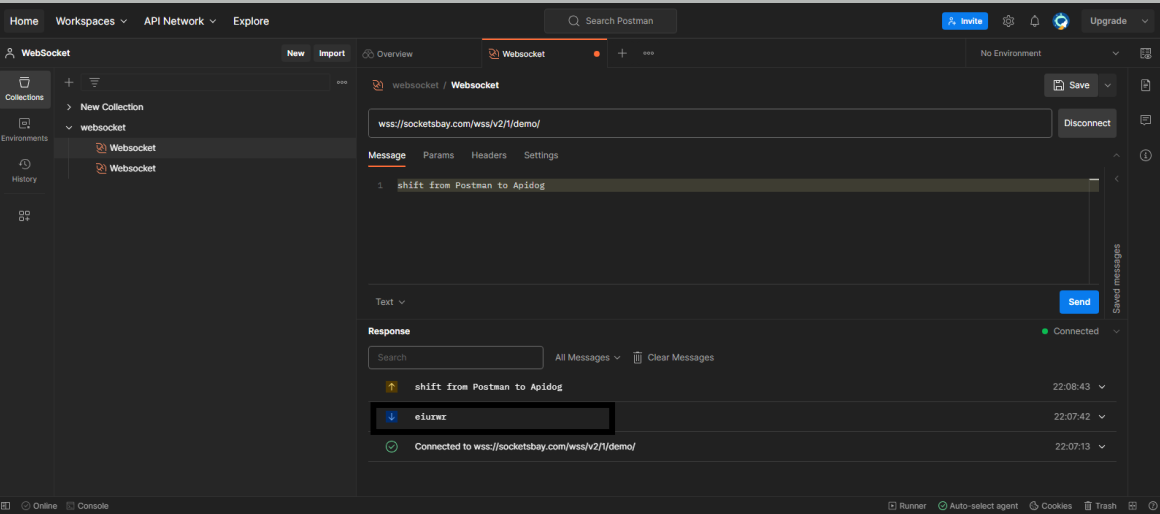
Step 9. View Server Messages
The messages received from the WebSocket server will be displayed in the thread above. This provides a real-time view of the data exchange between the client and server.
Step 10. Disconnect
After completing your test, click the "Disconnect" button to close the WebSocket connection.
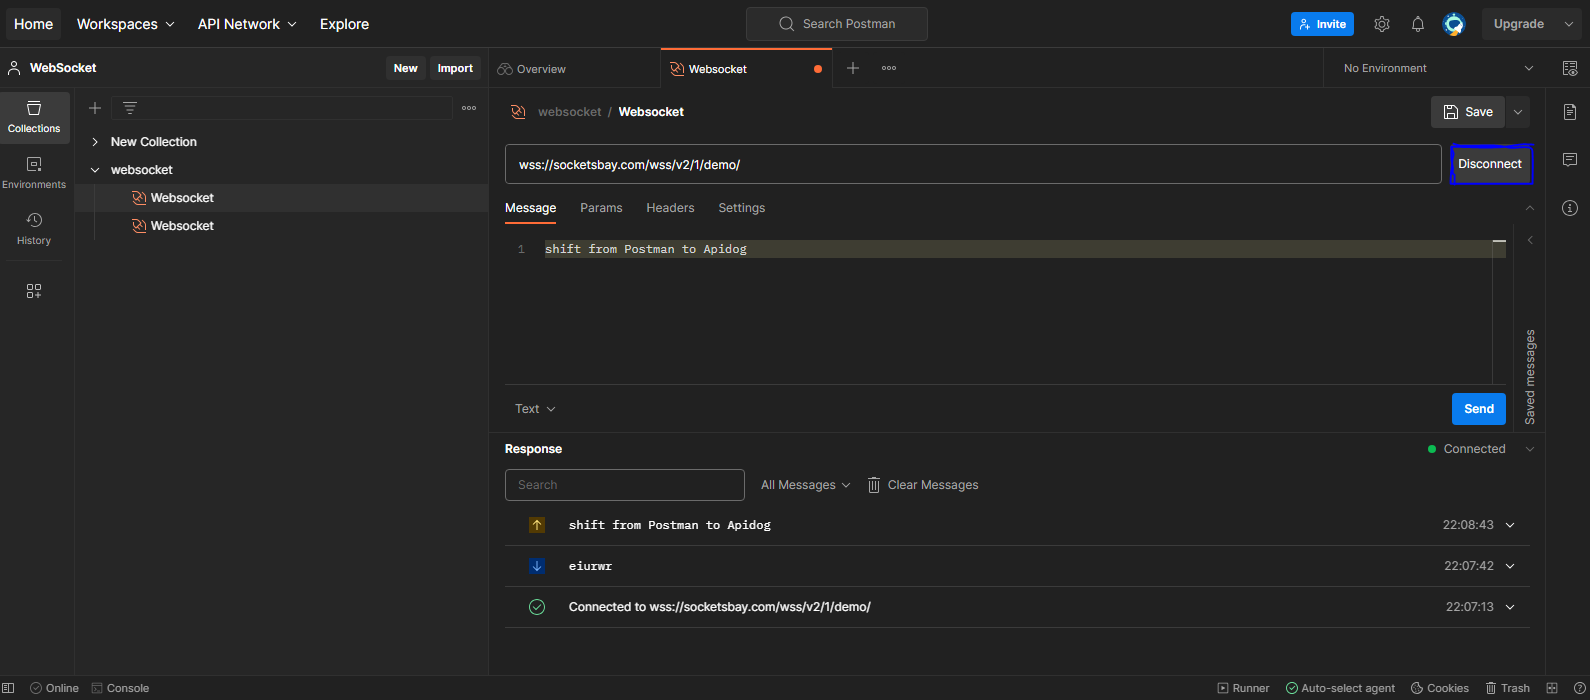
This straightforward process makes Postman an effective tool for testing WebSocket APIs.
If you encounter any issues with Postman, alternative tools like Apidog are also available for WebSocket testing. Apidog has a user-friendly interface that allows you to easily create, send, and test WebSocket requests. You can use Apidog as a web application, a desktop application available for Windows, macOS, and Linux, or a CLI tool for continuous integration.

Postman Websockets Alternative: Apidog
Apidog is a powerful, cloud-based API platform that is designed to simplify the process of testing and debugging APIs. This platform provides an all-in-one solution for API design, testing, and documentation, offering a user-friendly interface that is visually appealing and easy to navigate.
Launched to facilitate an effortless experience for developers while working with APIs, Apidog offers a range of features to make the process of building, testing, and deploying APIs more efficient. It supports WebSocket APIs and allows developers to establish a WebSocket connection with just a few simple steps.
It also offers robust automation testing capabilities and supports customizing version updates and installation reminders. Additionally, it allows for the customization of handshakes by passing parameters like params, headers, and cookies to meet authentication and other complex scenarios.
Apidog: a Solution to Postman's Limitations
Postman is a widely-used tool for API testing. However, it has certain limitations, especially when handling WebSocket APIs. For instance, Postman does not leverage certain Postman features like environments and pre-request scripts available for HTTP requests, and does not support binary data transmission over WebSockets. This limits the types of data that can be tested.
Establishing a WebSocket Connection with Apidog
To establish a WebSocket connection in Apidog, you simply click on the "+" button on the left sidebar and select "New WebSocket API (Beta)".

Then, you enter the URL of the WebSocket API and establish a connection to send and receive messages seamlessly. Once connected, you can draft under the Message tab, writing messages in text, JSON, XML, HTML, and other text formats. Binary messages can also be written using Base64 or hexadecimal.

Apidog vs Postman: A Detailed Comparison for WebSocket Handling
Here is a detailed comparison between Apidog and Postman in terms of WebSocket handling:
| Criteria | Apidog | Postman |
|---|---|---|
| Accessibility | Cloud-based platform accessible anywhere without software installation plus browser extension | Needs to be installed on computer, limiting accessibility |
| WebSocket Support | Offers parameter handling, saving requests, establishing WebSocket connections, and sending WebSocket requests. Supports Base64 or hexadecimal messages | Supports WebSocket testing but lacks automated testing and pre-request scripts. Doesn't support binary data transmission |
| User Interface | Visually appealing and user-friendly interface for easy interface debugging and documentation generation | More complex interface focusing on code |
| Collaboration | Offers collaboration features and team management to share tests and interface documents and work on projects together | Provides collaboration features but may slow down the computer when dealing with large datasets |
| Customisation | Offers unlimited customisation options for greater flexibility | Offers limited customisation options |
| Documentation | Supports online document sharing with customisation options | Doesn't support online documentation |
| Mocking Data | Supports automatic mocking of human-friendly data | Doesn't support automatic mocking of human-friendly data |
While Apidog and Postman offer a range of features for testing APIs, Apidog offers more extensive support for WebSocket testing, a more user-friendly interface, and flexible customization options. It offers a significant edge over platforms like Postman. Its intuitive interface, detailed configuration options, and real-time interaction capabilities make it an exceptional tool for developers building and testing WebSocket APIs.
Whether you're a seasoned developer or just starting your journey in the world of APIs, Apidog provides a comprehensive, user-friendly platform that can significantly enhance your productivity and efficiency.


