
In the ever-evolving landscape of web development, GraphQL has emerged as a powerful alternative to traditional REST APIs, offering a more flexible and efficient approach to data fetching. If you're eager to explore this creative technology and integrate it seamlessly with Spring, you've come to the right place.
Welcome to our comprehensive GraphQL tutorial, where we will embark on a journey to demystify the concepts of GraphQL and guide you through the process of getting started with Spring for GraphQL.
What is Spring GraphQL and its Key Features
Spring GraphQL is an extension of the popular Spring Framework that empowers developers to build GraphQL-based APIs seamlessly. It combines the power of Spring Boot's ease of development with the flexibility and efficiency of GraphQL, making it an ideal choice for developing modern APIs.
Key features of Spring GraphQL include:
- Schema-first development: With Spring GraphQL, developers can start by defining the API's schema using the GraphQL Schema Definition Language (SDL). This schema-first approach ensures that the API's design is clear and well-defined from the outset, promoting a more organized and structured development process.
- Data fetching with resolvers: Spring GraphQL simplifies data fetching by providing resolvers. Resolvers are responsible for fetching the required data for each field in a GraphQL query. Developers can implement resolvers to retrieve data from various sources like databases, external APIs, or any other data repository, enabling greater flexibility and reusability.
- Integration with Spring ecosystem: As part of the Spring family, Spring GraphQL seamlessly integrates with other Spring components, such as Spring Data JPA for database interactions and Spring Security for authentication and authorization. This tight integration ensures a smooth and cohesive development experience.
- Real-time updates with subscriptions: Spring GraphQL supports real-time data updates through GraphQL subscriptions. Subscriptions allow clients to subscribe to specific events and receive real-time data updates as those events occur. This feature is particularly useful for building real-time applications, such as chat systems or live data feeds.
How to Set Up Your Environment?
Before you start your journey with GraphQL and Spring, make sure your setup is ready. Here's how you can prepare your environment to build a Spring Boot project with GraphQL:
Prerequisites:
- JDK 17: Get JDK 17 installed on your system. You can download it from Oracle or OpenJDK.
- Basic Spring Boot Understanding: Know the basics of Spring Boot. It'll help as you blend GraphQL.
Creating a Spring Boot Project:
Spring Initializr: Go to start.spring.io, your starting point for Spring Boot projects.
First, provide project setup details such as naming your project, specifying a group name in reverse domain format (e.g., com.example), and designating a package name for your app's Java code. You can also include metadata like a description and version if required.
Second, add the necessary dependencies. In the Dependencies section, select "Spring Web" to enable support for creating web applications with Spring. Similarly, check "Spring GraphQL" to enable GraphQL-related features. Once you've configured your project and chosen the dependencies, click the "Generate" button to proceed.
Importing Your Project into Your IDE:
First, extract the contents of the ZIP file to access its contents. Second, open your Integrated Development Environment (IDE), such as IntelliJ IDEA. Next, import the project that you previously extracted.
That's it! Your environment is set, you've crafted a Spring Boot project, and you've got GraphQL on board. Your IDE is your playground for coding adventures.
How to Setup Data Layer?
In this section, we'll create a simple example, such as a coffee shop, to demonstrate how GraphQL can enhance data retrieval and management.
Introduction to the Example:
Imagine you're developing an API for a coffee shop to manage its menu and orders. To illustrate this, we'll define basic data models for coffee items and customers, and set up a service to handle this data.
Defining Basic Data Models:
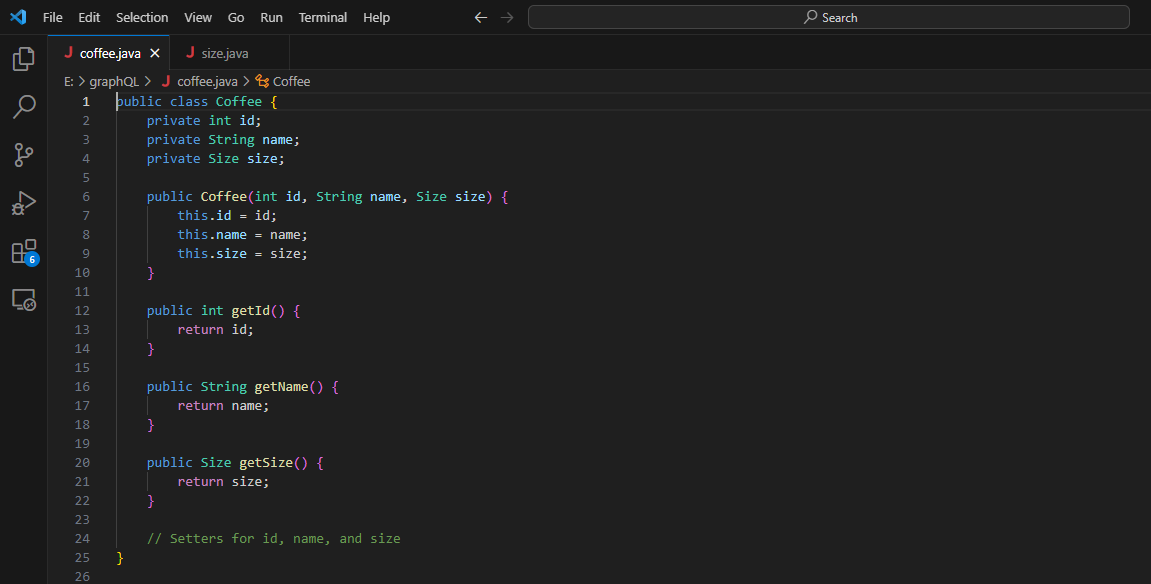
Let's begin by creating two simple data models: Coffee and Size. These models will be implemented as Java classes, each with attributes representing relevant information.
You will need to create two classes in two different files and In each class, you need to add constructors, getters, and setters for the attributes.
public class Coffee {
    private int id;
    private String name;
    private Size size;

    // Constructors, getters, setters
}

public class Size {
    private int id;
    private String name;

    // Constructors, getters, setters
}
After creating and adding these classes, you need to ensure that they are located in the appropriate package within your Spring Boot project. The package structure should reflect the package name you provided when generating the project in the Spring Initializr.
Here is how you can add setters, getters, and constructors for Coffee.java class.
Setting Up Data Management:
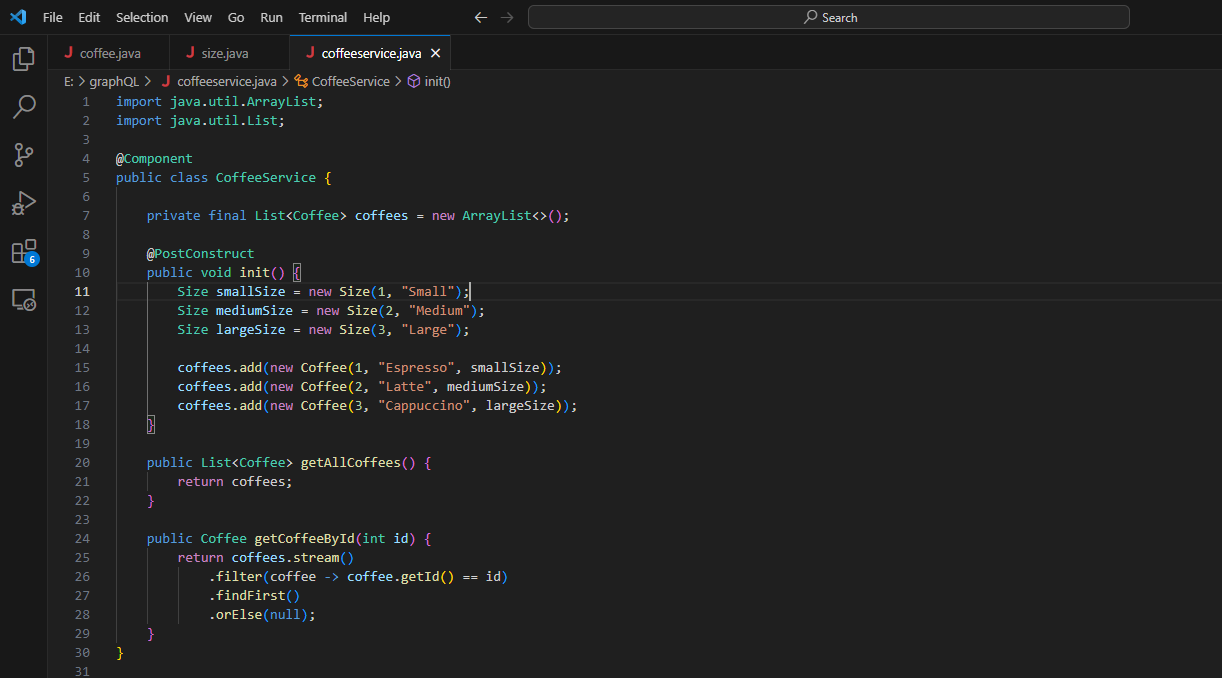
We'll create a simple CoffeeService class to serve as an in-memory data repository and manage coffee data. To demonstrate, we'll populate this repository with a few sample coffee items.
import java.util.ArrayList;
import java.util.List;

@Component
public class CoffeeService {

	private final List<Coffee> coffees = new ArrayList<>();

	@PostConstruct
	public void init() {
    	Size smallSize = new Size(1, "Small");
    	Size mediumSize = new Size(2, "Medium");
    	Size largeSize = new Size(3, "Large");

    	coffees.add(new Coffee(1, "Espresso", smallSize));
    	coffees.add(new Coffee(2, "Latte", mediumSize));
    	coffees.add(new Coffee(3, "Cappuccino", largeSize));
	}

	public List<Coffee> getAllCoffees() {
    	return coffees;
	}

	public Coffee getCoffeeById(int id) {
    	return coffees.stream()
        	.filter(coffee -> coffee.getId() == id)
        	.findFirst()
        	.orElse(null);
	}
}
The CoffeeService class manages coffee-related data, acting as a storage and retrieval system. It initializes sample coffee data upon creation, offering methods to retrieve all coffees or a specific one by ID. This abstraction streamlines data access and manipulation, preparing data for interaction within the GraphQL schema.
How to Create the GraphQL Schema?
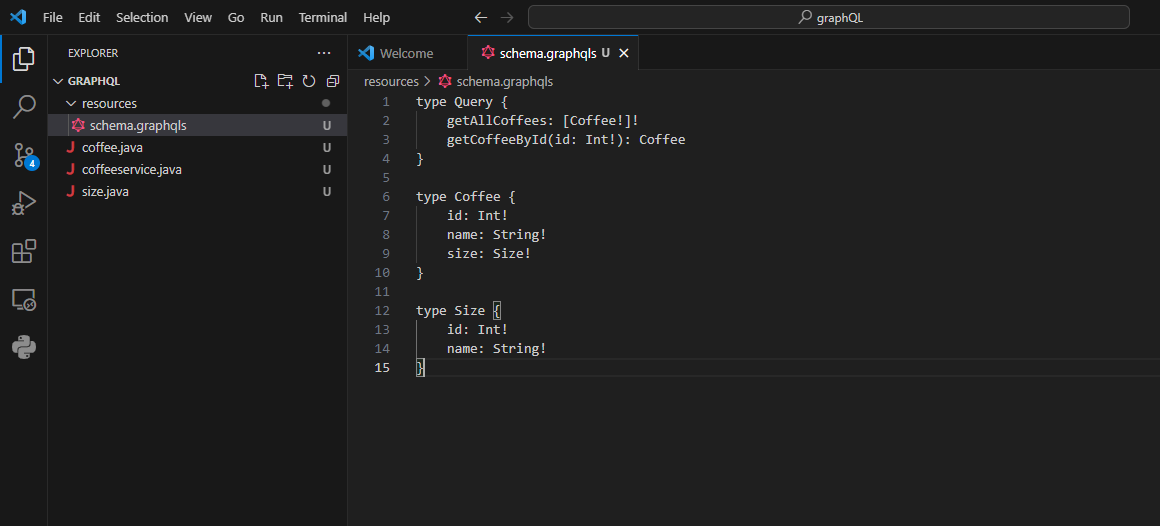
Create a file named schema.graphqls in the src/main/resources folder and define the GraphQL schema using the Schema Definition Language (SDL).
type Query {
	getAllCoffees: [Coffee!]!
	getCoffeeById(id: Int!): Coffee
}

type Coffee {
	id: Int!
	name: String!
	size: Size!
}

type Size {
	id: Int!
	name: String!
}
Here is how you can do it.
Create Data Fetchers:
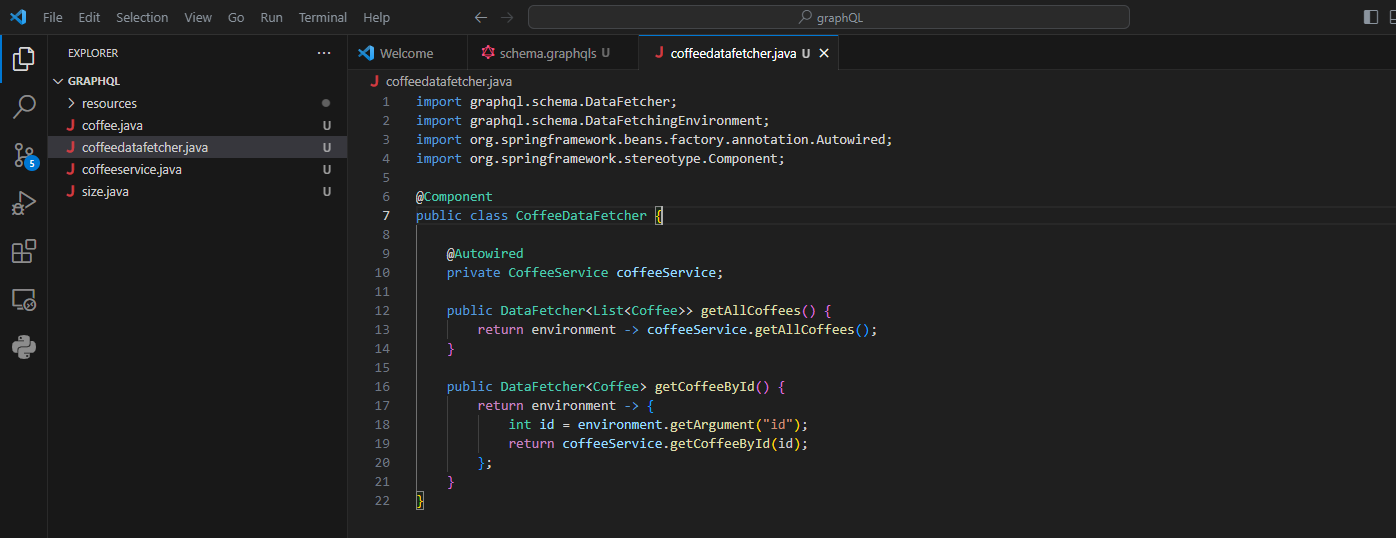
The code defines a class named CoffeeDataFetcher responsible for retrieving data for GraphQL queries. It's annotated with @Component to be managed by Spring. The getAllCoffees() fetcher retrieves a list of coffee items using the coffeeService.getAllCoffees() method. The getCoffeeById() fetcher extracts an ID from query arguments and uses it to fetch a specific coffee item from the CoffeeService.
import graphql.schema.DataFetcher;
import graphql.schema.DataFetchingEnvironment;
import org.springframework.beans.factory.annotation.Autowired;
import org.springframework.stereotype.Component;

@Component
public class CoffeeDataFetcher {

	@Autowired
	private CoffeeService coffeeService;

	public DataFetcher<List<Coffee>> getAllCoffees() {
    	return environment -> coffeeService.getAllCoffees();
	}

	public DataFetcher<Coffee> getCoffeeById() {
    	return environment -> {
        	int id = environment.getArgument("id");
        	return coffeeService.getCoffeeById(id);
    	};
	}
}
Here is how you can do it.
Create GraphQL Controller:
In Spring, GraphQL controllers provide endpoints to interact with your GraphQL schema. These controllers handle incoming queries and return corresponding data.
import graphql.GraphQL;
import org.springframework.beans.factory.annotation.Autowired;
import org.springframework.web.bind.annotation.PostMapping;
import org.springframework.web.bind.annotation.RequestBody;
import org.springframework.web.bind.annotation.RestController;

@RestController
public class GraphQLController {

	@Autowired
	private GraphQL graphQL;

	@PostMapping("/graphql")
	public Map<String, Object> executeQuery(@RequestBody String query) {
    	ExecutionResult executionResult = graphQL.execute(query);
    	return executionResult.toSpecification();
	}
}
This controller will handle incoming GraphQL queries and interact with your GraphQL schema. It provides a RESTful endpoint at /graphql that accepts POST requests with the GraphQL query in the request body. The controller then uses the GraphQL instance to execute the query and returns the execution result as a map.
Spring GraphQL is a powerful framework that enables developers to build efficient APIs using the GraphQL query language. Unlike traditional REST APIs, where multiple endpoints dictate data retrieval, GraphQL empowers clients to specify exactly what data they need in a single request, reducing over-fetching or under-fetching of data. Spring GraphQL leverages the Spring ecosystem's strengths, combining Spring Boot's simplicity with GraphQL's flexibility.
The process involves defining your data models, creating a service layer to manage data, and establishing a schema with types and queries. Spring GraphQL's schema-first approach ensures a clear design and structured development process. Data fetching is simplified through resolvers, and real-time updates are facilitated by subscriptions.
GraphQL Testing Tools:
GraphQL has become a popular way to build APIs, and testing them is crucial to ensure they work correctly. Testing tools help developers check if their GraphQL APIs are functioning as intended.
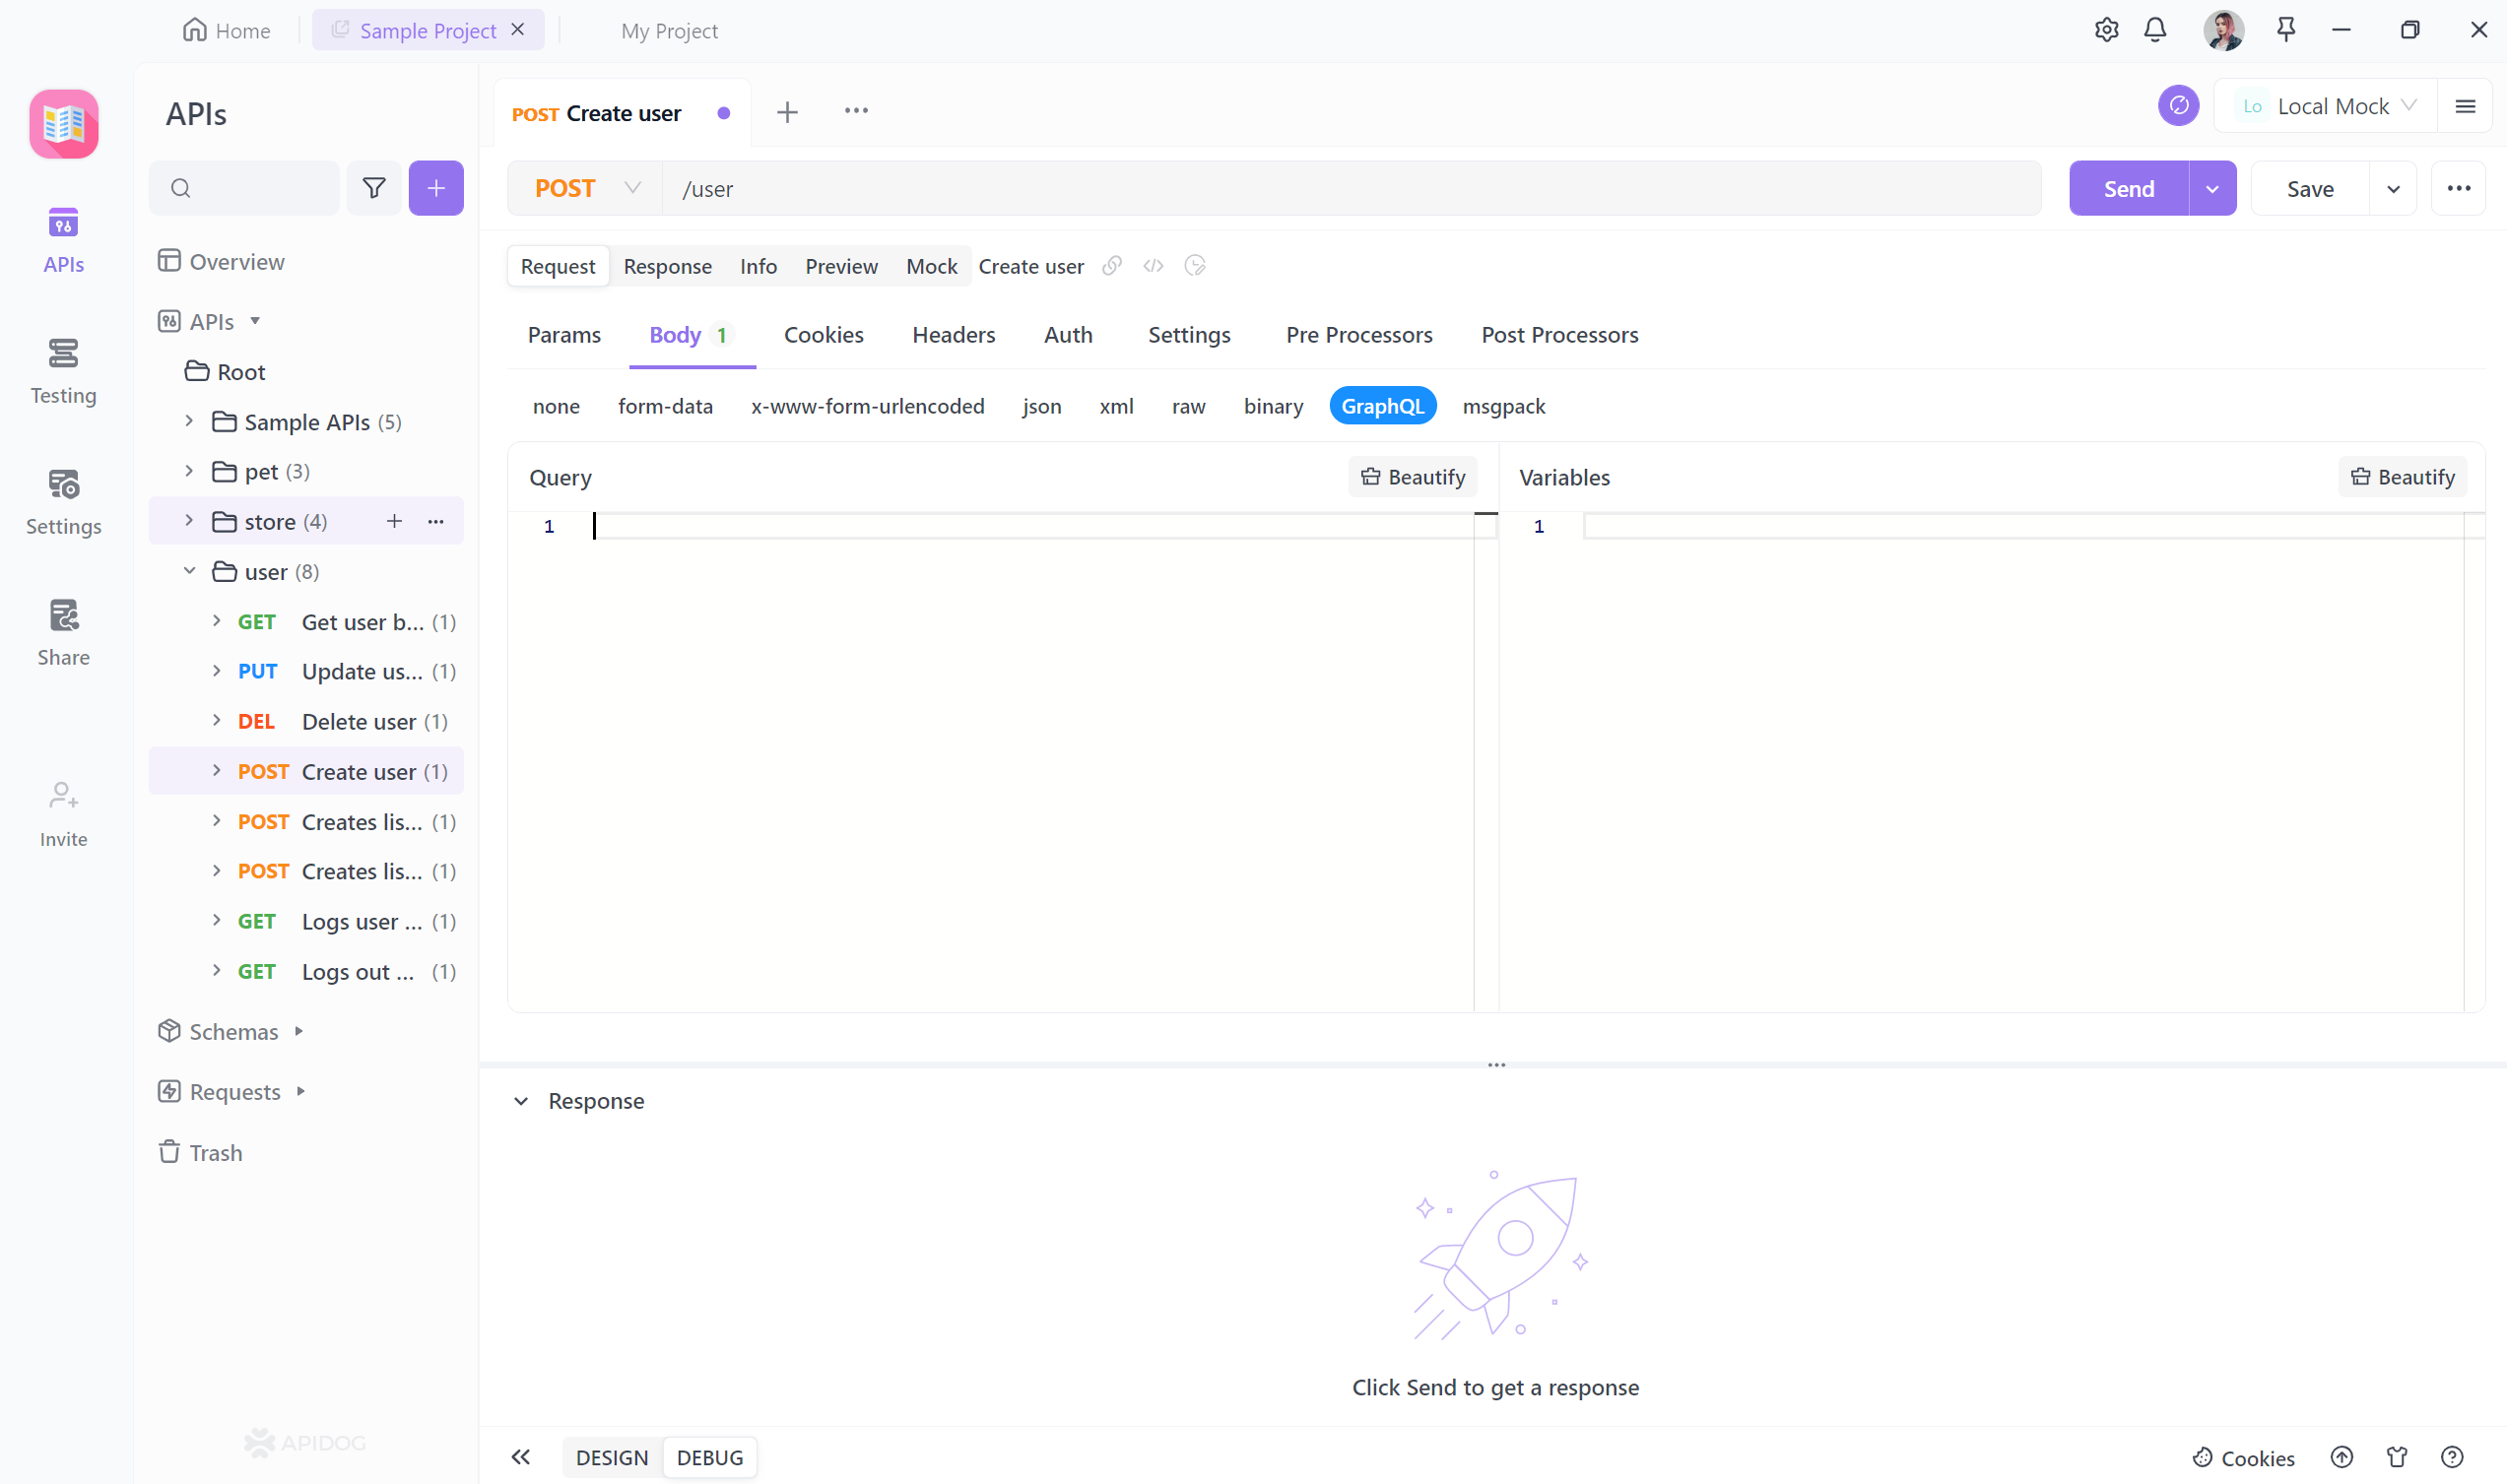
One of these tools is Apidog, which offers a range of features to make API testing easier. Let's look at what Apidog can do and mention some other useful testing tools for GraphQL.
Apidog:
Apidog is a versatile toolkit that covers the entire API creation process. It's like a Swiss Army knife for APIs, helping with design, testing, and more. Here's what Apidog offers:
What Apidog Offers for GraphQL Testing:
Apidog works well for testing GraphQL APIs too. It has features like:
- Support for GraphQL: Apidog can test and debug GraphQL APIs.
- Automation: It can automate tasks and keep your API definitions in sync.
- Database Integration: Apidog can connect to databases for better testing.
Conclusion
As APIs keep evolving, the blend of GraphQL, Spring GraphQL, and tools like Apidog reshapes how APIs are made. This combination gives developers more control and efficiency, resulting in strong, adaptable, and high-performing APIs.


