
React WebSockets are a really useful tool for web developers. They allow servers and clients to talk to each other in real time. This can be used to make all sorts of things, like chat rooms and games where multiple people can play together. With React WebSockets, developers can add lots of cool features to their projects, like notifications, updates, and sharing data in real time.
What is WebSocket and How It Works
WebSocket, as a communication protocol, stands as a cornerstone for real-time, bidirectional data exchange between clients and servers. Unlike traditional HTTP, WebSocket establishes a persistent, full-duplex connection that allows both the client and server to send and receive data at any given time. This makes WebSocket particularly suitable for applications requiring instantaneous updates and low-latency communication.
If you find yourself yearning for a deeper dive into the intricacies of WebSocket or wish to explore additional aspects, refer to our comprehensive article.

Websocket and React
React, a JavaScript library for building user interfaces is renowned for its declarative and component-based approach. When it comes to real-time updates, WebSocket complements React by allowing developers to push data from the server to the client instantly. This is particularly valuable for applications such as chat systems, live notifications, and collaborative editing, where immediate data synchronization is paramount.
WebSockets are a Web API that is accessible in all major web browsers. Since React is based on JavaScript, you can access WebSockets without the need for additional modules or React-specific code. Below is an example of how to establish a WebSocket connection and handle messages in React:
const socket = new WebSocket("ws://localhost:8080");

// Connection opened
socket.addEventListener("open", event => {
  socket.send("Connection established");
});

// Listen for messages
socket.addEventListener("message", event => {
  console.log("Message from server ", event.data);
});
Why Use WebSocket with React?
While there is no specific React library required to start using WebSockets, you may find it beneficial to use one. The WebSocket API provides flexibility, but it also requires additional work to create a production-ready WebSocket solution.
When using the WebSocket API directly, you will need to code the following yourself:
- Authentication and authorization.
- Robust disconnect detection by implementing a heartbeat.
- Seamless automatic reconnection.
- Recovering missed messages that the user missed while temporarily disconnected.
Instead of creating these features from scratch, it is often more efficient to use a general WebSocket library that provides these features out of the box. This allows you to focus on building unique application features rather than generic real-time messaging code.
Main WebSocket Libraries for React
Several WebSocket libraries seamlessly integrate with React, simplifying the implementation process. Some popular react WebSocket library include:
- React useWebSocket: A thin layer on top of the WebSocket API that features automatic reconnection and a fallback to HTTP long polling in case WebSocket is not supported by the browser.
- Socket.IO: A JavaScript library built on top of WebSockets that enables real-time communication between clients and servers. It provides features such as automatic reconnection, multiplexing, and fallback to HTTP long polling.
- SockJS Client: A WebSocket emulation library that provides a fallback mechanism for browsers that do not support WebSockets.
- React-use-websocket: A custom React hook that provides a WebSocket connection with automatic reconnection and message parsing.
- uWebSockets.js: A high-performance WebSocket library that provides a simple API for building WebSocket servers and clients.

Choosing the Right WebSocket Library
When selecting the most suitable WebSocket library for your project, there are several important factors to take into account. These considerations can assist you in making an informed decision:
Project Requirements: Each project has its own unique set of requirements. For example, you may prioritize performance or aim to minimize project complexity. Additionally, certain libraries are better suited for specific use cases. For instance, Socket.IO is well-suited for chat applications, while React useWebSocket simplifies the development of real-time dashboards.
Library Limitations: It's important to be aware of the limitations of each library. For example, WS presents challenges in configuration, and Socket.IO provides an "at-most-once" message guarantee. Understanding these limitations is crucial, as it allows you to weigh the trade-offs related to browser support, error handling, and ease of use.
React Compatibility: Some developers prefer WebSocket libraries that are tailored to their specific technology stack to have better control over implementation. React useWebSocket, for instance, is designed specifically for React, whereas libraries such as Socket.IO and WS are not.
Library Community and Maintenance: The activity of a library's community and the frequency of updates are indicators of a well-maintained library. It's beneficial to consider factors such as the library's GitHub repository, support channels, and available online resources. These resources can be invaluable for debugging code and overcoming challenges.
For instance, Socket.IO, SockJS, and WS all have active communities on GitHub. An active community reflects ongoing efforts to enhance these libraries, ensuring an improved developer experience over time.
How to Use WebSocket with React (Using React useWebSocket)
Using WebSocket with React can be accomplished with the help of the react-use-websocket library, which simplifies the integration of WebSocket functionality into your React application. Below are the steps to use WebSocket with React using react-use-websocket:
Step 1: Install the Library
Install the react-use-websocket library using npm or yarn:
npm install react-use-websocket
# or
yarn add react-use-websocket
Step 2: Import the Hook
In your React component, import the useWebSocket hook from the react-use-websocket library:
import { useWebSocket } from 'react-use-websocket';
Step 3: Use the Hook in your Component
Use the useWebSocket hook in your functional component. Provide the WebSocket URL as a parameter to the hook:
import React from 'react';
import { useWebSocket } from 'react-use-websocket';

const MyWebSocketComponent = () => {
  const socketUrl = 'wss://your-websocket-url';
  const { sendJsonMessage, lastJsonMessage } = useWebSocket(socketUrl);

  // Your component logic here...

  return (
    <div>
      {/* Render your component content */}
    </div>
  );
};

export default MyWebSocketComponent;
Step 4: Interact with the WebSocket
You can use the sendJsonMessage function to send JSON messages to the WebSocket server. The lastJsonMessage variable will contain the latest JSON message received from the server.
Here's an example of how to use the WebSocket functions:
import React, { useState } from 'react';
import { useWebSocket } from 'react-use-websocket';

const MyWebSocketComponent = () => {
  const socketUrl = 'wss://your-websocket-url';
  const { sendJsonMessage, lastJsonMessage } = useWebSocket(socketUrl);
  const [message, setMessage] = useState('');

  const sendMessage = () => {
    if (message.trim() !== '') {
      sendJsonMessage({ type: 'chat', message });
      setMessage('');
    }
  };

  return (
    <div>
      <div>
        Last received message: {lastJsonMessage && lastJsonMessage.message}
      </div>
      <input
        type="text"
        value={message}
        onChange={(e) => setMessage(e.target.value)}
      />
      <button onClick={sendMessage}>Send Message</button>
    </div>
  );
};

export default MyWebSocketComponent;
This example demonstrates a simple chat application where you can send messages to the WebSocket server and display the last received message.
Remember to replace 'wss://your-websocket-url' with your actual WebSocket server URL. Additionally, adjust the messaging format and logic according to your specific use case.
Testing WebSocket API with Apidog
Apidog is a tool designed for API testing. Although it has traditionally been linked with HTTP APIs, Apidog has broadened its capabilities to encompass WebSocket testing as well.
Once your endpoint is prepared and your server is operational. Firstly, download and install Apidog, and start the Apidog application.
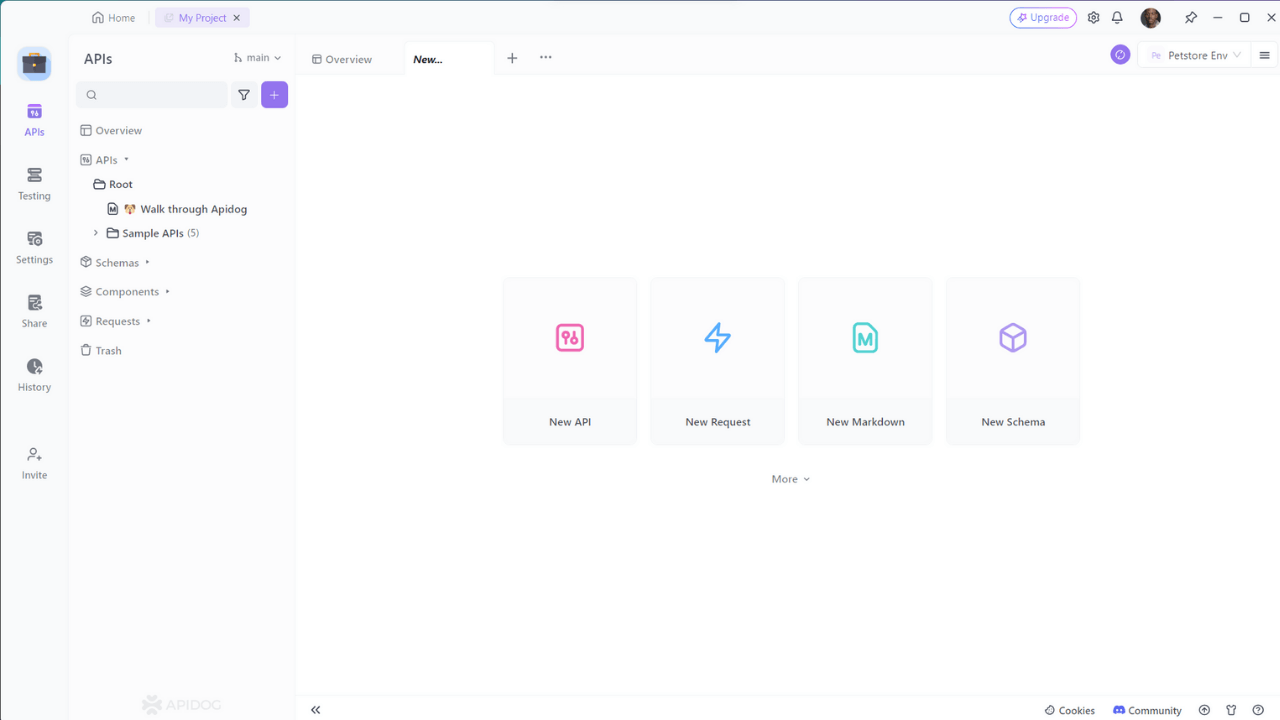
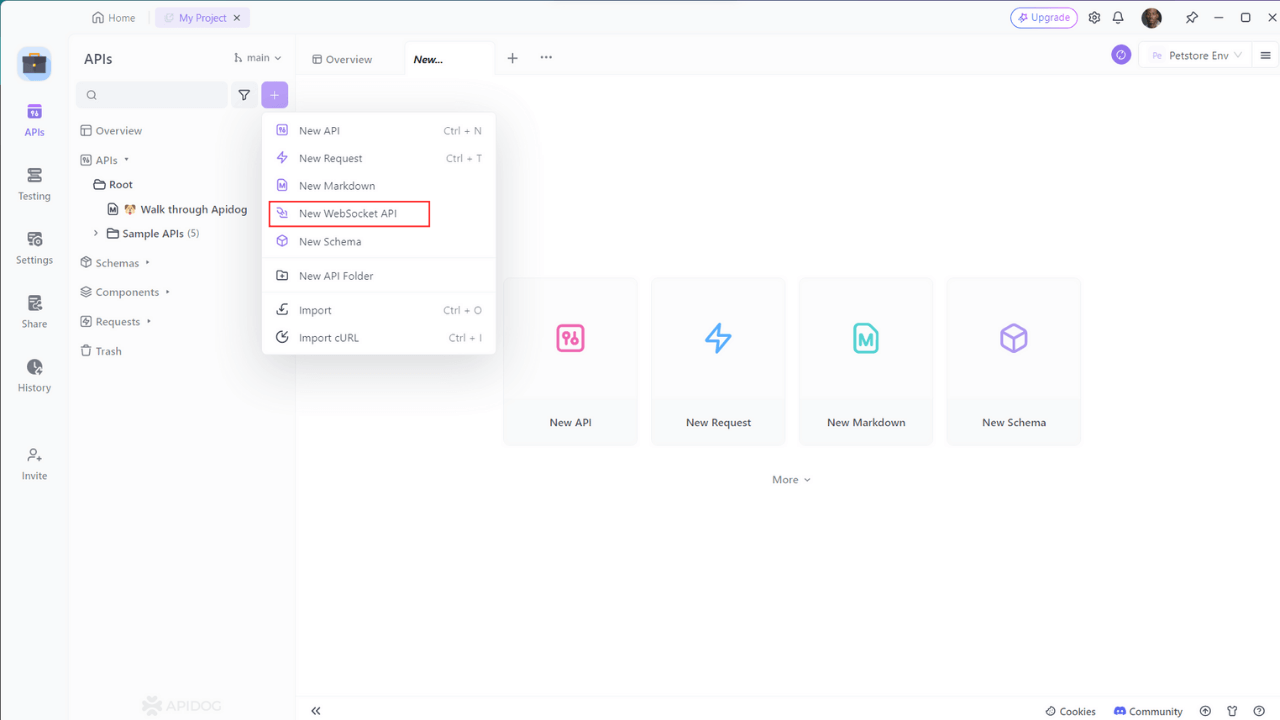
Click on the "+" button on the left side, A new drop-down will be opened. From there choose "New WebSocket API":
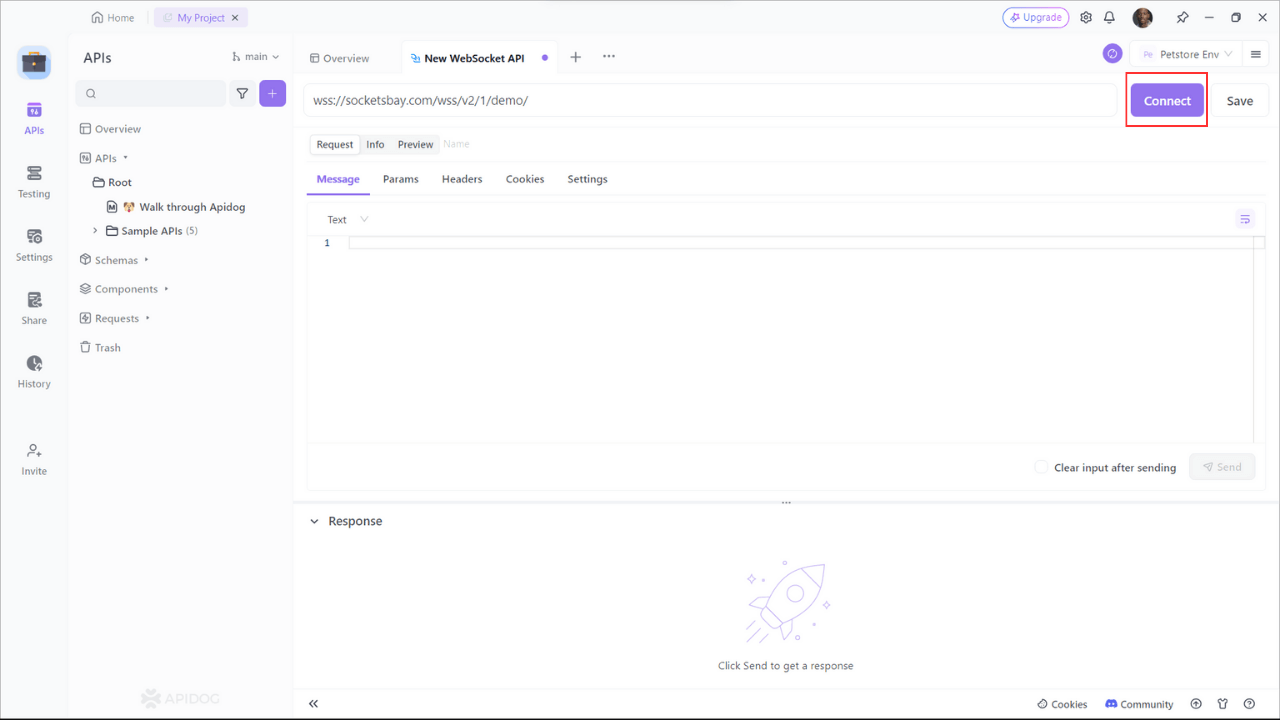
We’ll be testing a raw WebSocket request. Now let’s add the URL. Press the "Connect" button and test the connection:
Send the WebSocket request and analyze the response.
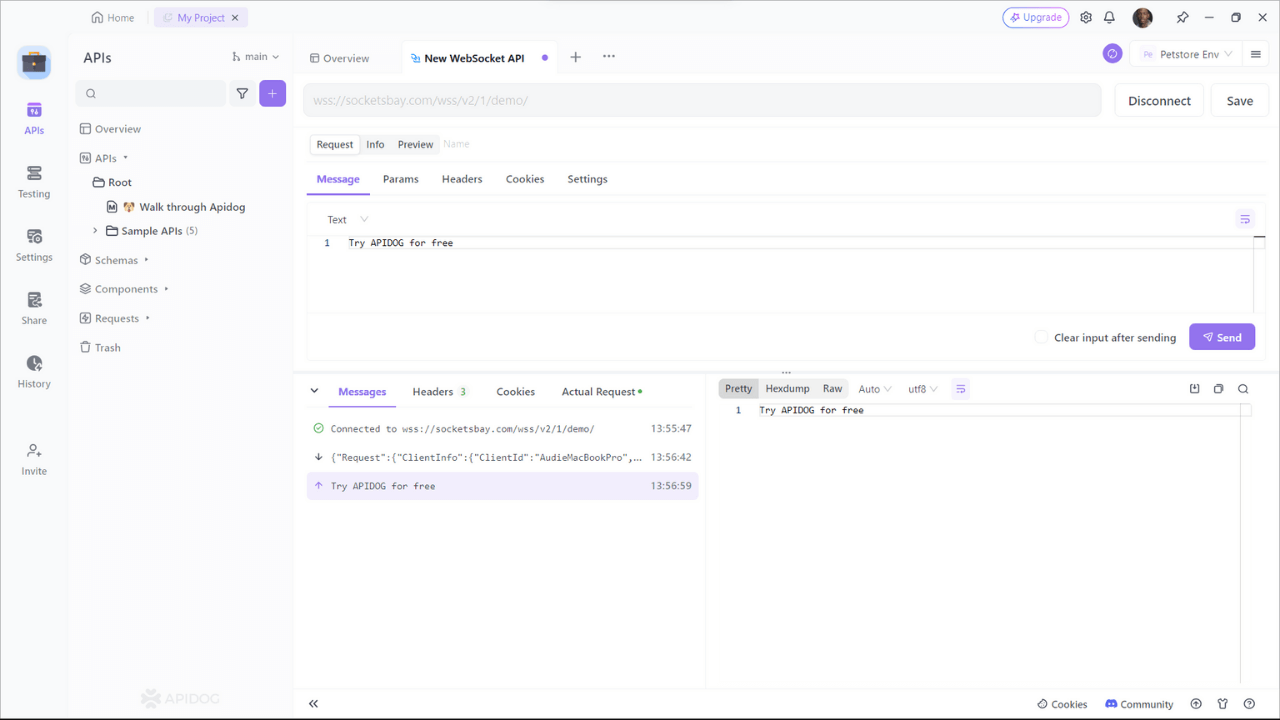
After our test is done, we can disconnect simply by clicking the Disconnect button.
Conclusion
Integrating WebSocket with React opens up a realm of possibilities for real-time applications. The combination of React's component-based architecture and WebSocket's bidirectional communication enhances user experiences, making applications more interactive and responsive.
By choosing an appropriate WebSocket library like React-WebSocket and employing tools like Apidog for testing, developers can streamline the development and testing process. Mastering React WebSocket integration can significantly elevate your web development game.
We highly recommend trying out Apidog if you are exploring a new and powerful API interface debugging tool.


