12 Best UI Automation Testing Tools
In this article, we will explore the significance of the 12 best UI automation testing tools, their features, and the benefits they bring.
Apidog
All-in-one Collaborative API Development Platform
API Design
API Documentation
API Debugging
API Mock
API Automated Testing
RobotFramework-based interface automation testing is an essential tool to improve testing efficiency and quality. In this article, we will define RobotFramework, explain how to install RobotFramework, etc.
Robot Framework-based interface automation testing is an important tool to improve testing efficiency and quality. In this article, we will define RobotFramework, explain how to install RobotFramework, etc.
Robot Framework is a versatile open-source automation framework that can be used for test automation and robotic process automation (RPA). Supported by the Robot Framework Foundation, it is widely used by leading companies in software development. It is open and extensible, allowing seamless integration with various tools to create powerful, flexible automation solutions. Best of all, it is free to use without any licensing fees.
Robot Framework employs a simple syntax that leverages human-readable keywords. Its functionality can be extended using libraries implemented in Python, Java, and many others. It boasts a rich ecosystem of libraries and tools developed as separate projects, further enhancing its capabilities.

The project utilizes Robot Framework for API automation testing.
The technology stack of the project includes:
The basic structure diagram of the project is as follows:

The framework adopts an interface layering approach, where the separation of data and business logic is followed. This is reflected in the following aspects:
Directory Structure Explanation
To begin, Robot Framework needs to be installed. It can be installed using pip with the following command:
pip install robotframework
Next, you need to install libraries related to interface automation testing. Use the following commands:
Copy code
pip install robotframework-requests
pip install robotframework-jsonlibrary
pip install robotframework-databaselibrary
Among them, robotframework-requests is used for sending HTTP requests, robotframework-jsonlibrary is used for handling JSON formatted data, and robotframework-databaselibrary is used for interacting with databases.
Encapsulation of Request Methods:
* Settings *
Library RequestsLibrary
Library Collections
Library HttpLibrary.HTTP
Resource ../icmcenterApi/common_configuration/common_configuration_index.txt
* Keywords *
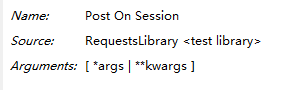
SendPost
[Arguments] ${root_url} ${uri} ${ParameterDict} ${DataType} ${header}
[Documentation] ${root_url}: API host;
... ${uri}:api uri;
... ${dict}: Interface input parameters, dictionary data type;
... ${DataType}: Type of input parameters, such as data;
... ${header}: Request header, dictionary type.
...
... Response data is in JSON format.
...
... If it's an independent request, the connection can be released immediately after the request is completed.
${RequestData} Create Dictionary
log ${ParameterDict.keys()}
: FOR ${key} IN @{ParameterDict.keys()}
\ set to dictionary ${RequestData} ${key} ${ParameterDict['${key}']}
log ${RequestData}
create session api ${root_url}
${response} post request api ${uri} ${DataType}=${RequestData} headers=${header} timeout=${timeout}
# Convert JSON data from string type to Python dictionary type.
Comment ${ResponseBody} To Json ${response.content}
sleep ${sleepTime}
log ${response.text}
[Return] ${response.text}
SendGet
[Arguments] ${root_url} ${uri} ${ParameterDict} ${header}
[Documentation] Response data is in JSON format
${RequestData} Create Dictionary
log ${ParameterDict.keys()}
: FOR ${key} IN @{ParameterDict.keys()}
\ set to dictionary ${RequestData} ${key} ${ParameterDict['${key}']}
log ${RequestData}
create session api ${root_url}
${response} get request api ${uri} params=${RequestData} headers=${header} timeout=${timeout}
Comment ${ResponseBody} To Json ${response.content}
sleep ${sleepTime}
log ${response.text}
[Return] ${response.text}
re_session
[Arguments] ${host}
[Documentation] Create session
create session session ${host}
re_post
[Arguments] ${uri} ${ParameterDict} ${DataType} ${header}
[Documentation] Send a POST request without creating a session;
... Response data is in JSON format
${RequestData} Create Dictionary
log ${ParameterDict.keys()}
: FOR ${key} IN @{ParameterDict.keys()}
\ set to dictionary ${RequestData} ${key} ${ParameterDict['${key}']}
log ${RequestData}
${response} post request session ${uri} ${DataType}=${RequestData} headers=${header} timeout=${timeout}
Comment ${ResponseBody} To Json ${response.content}
sleep ${sleepTime}
log ${response.text}
[Return] ${response}
re_get
[Arguments] ${uri} ${ParameterDict} ${header}
[Documentation] Send a POST request without creating a session;
... Response data is in JSON format
${RequestData} Create Dictionary
log ${ParameterDict.keys()}
: FOR ${key} IN @{ParameterDict.keys()}
\ set to dictionary ${RequestData} ${key} ${ParameterDict['${key}']}
log ${RequestData}
${response} get request session ${uri} params=${RequestData} headers=${header} timeout=${timeout}
Comment ${ResponseBody} To Json ${response.content}
sleep ${sleepTime}
log ${response.text}
[Return] ${response}
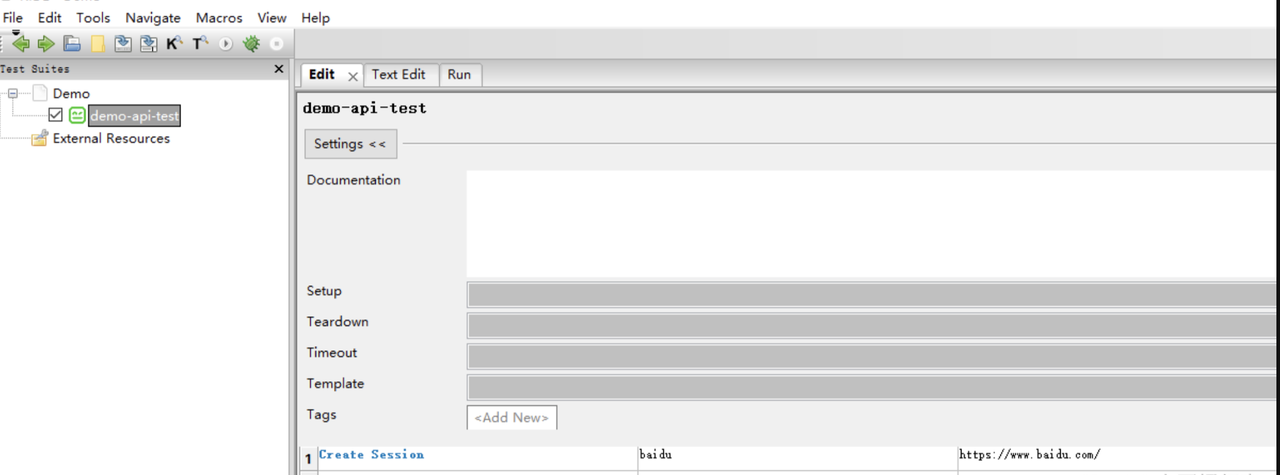
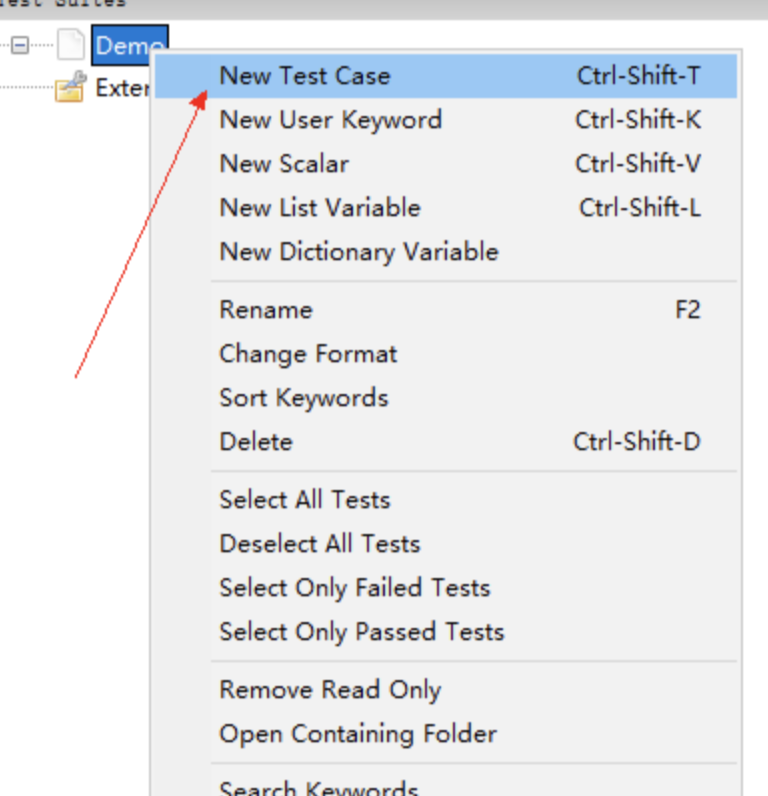
Create a Test Case in Test Suite.

Fill in the corresponding test case information:

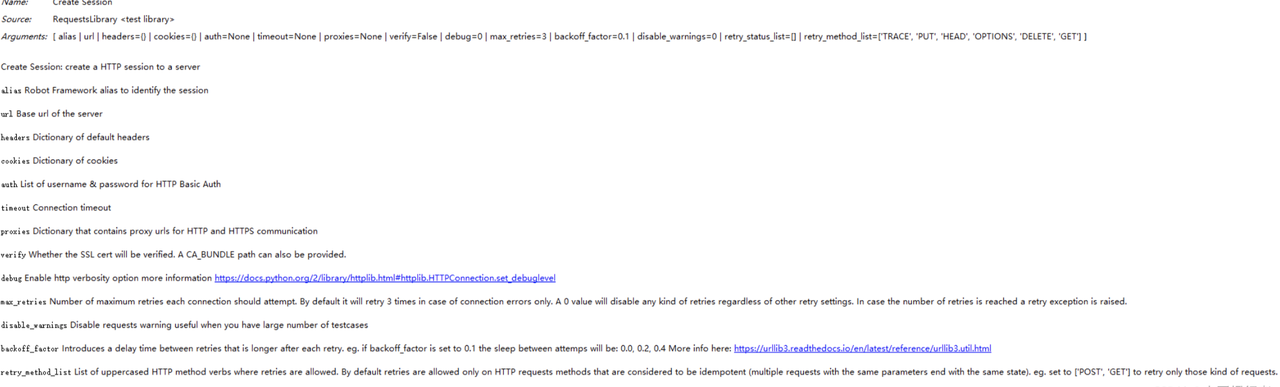
First, we need to create a session with Robot Framework, and this session does the following things:
Then, fill in the basic information in this session interface.
After that, you can send a request directly.

Or you can also send a request in the session.
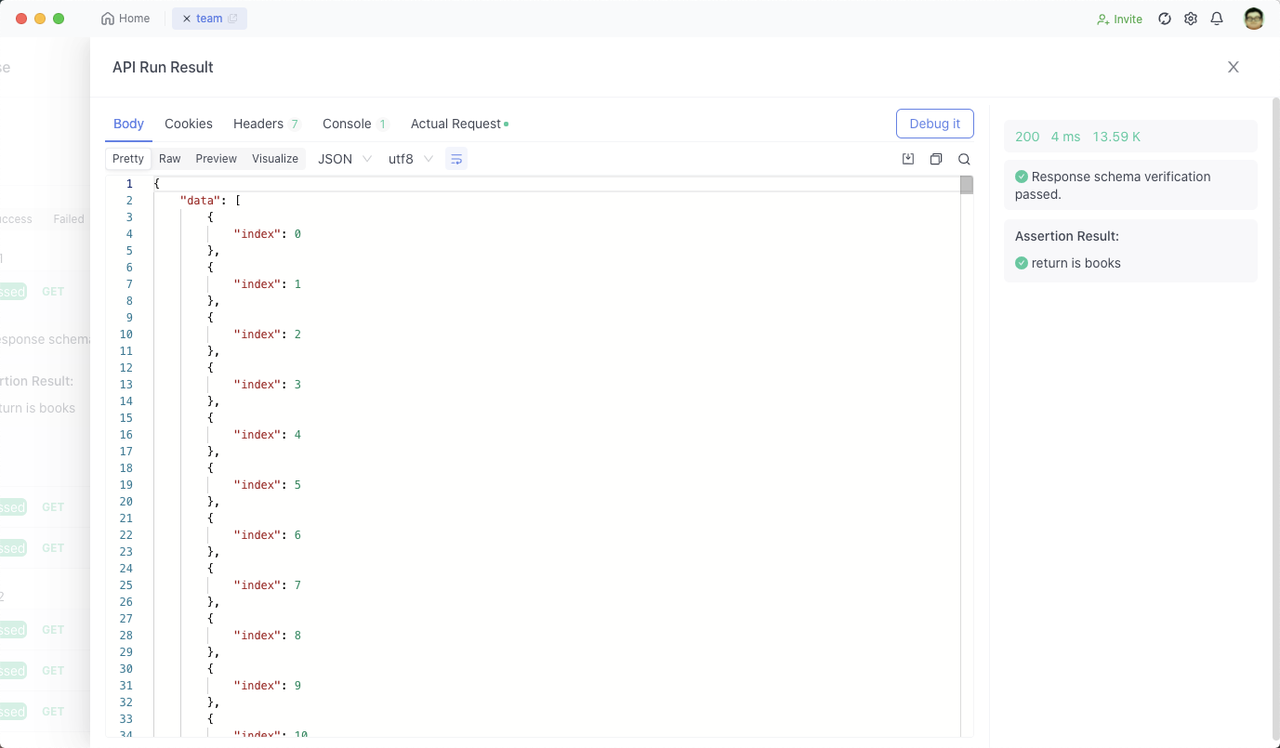
While Robot Framework falls within the category of UI testing tools and is capable of performing basic API testing, for more complex API testing, it is recommended to utilize professional-grade API tools like Apidog. Apidog offers a superior visual experience and provides convenient and efficient operations. It also caters to users who require Chinese language support. Some of the features Apidog offers include:
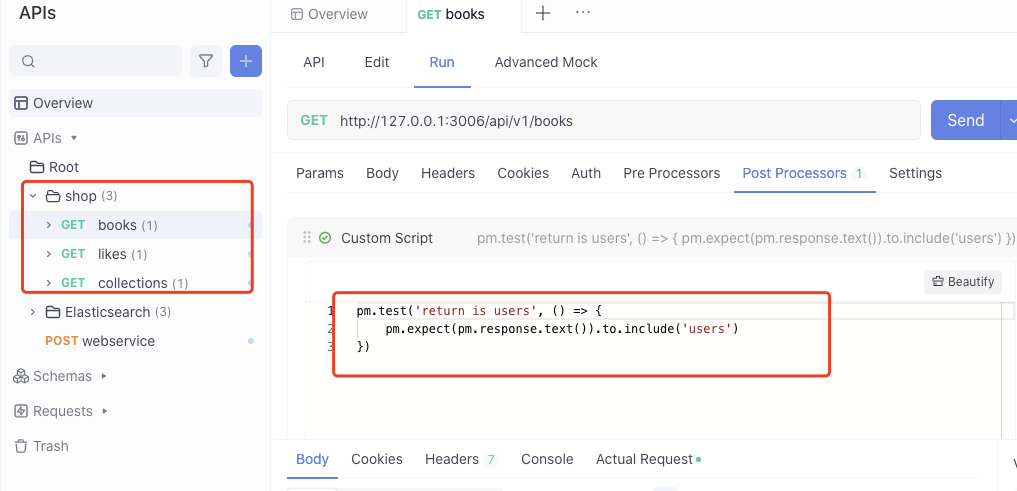
With Apidog's intuitive interface, adding assertion validation scripts becomes clearer through visual post-operation options.
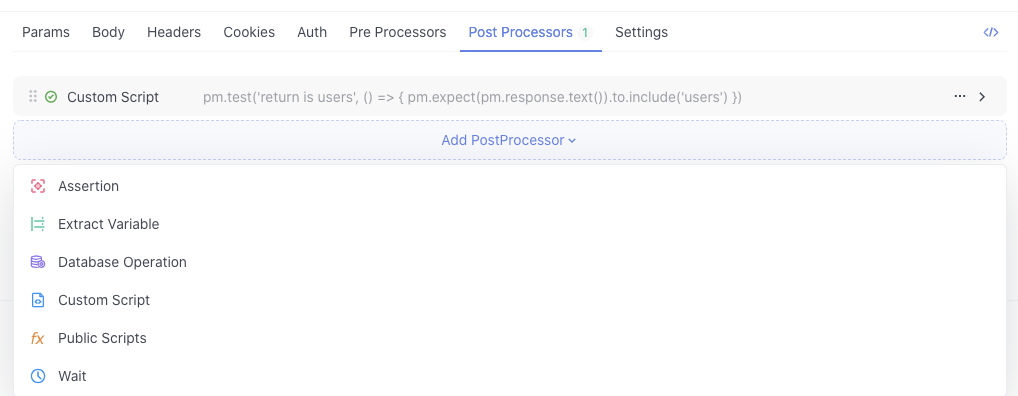
After selecting the custom script option, fill in the corresponding script code. The script code will be the same for all three API operations.
Create a test case, setting up the priority of the test case.
Click the test case and Import the API example.
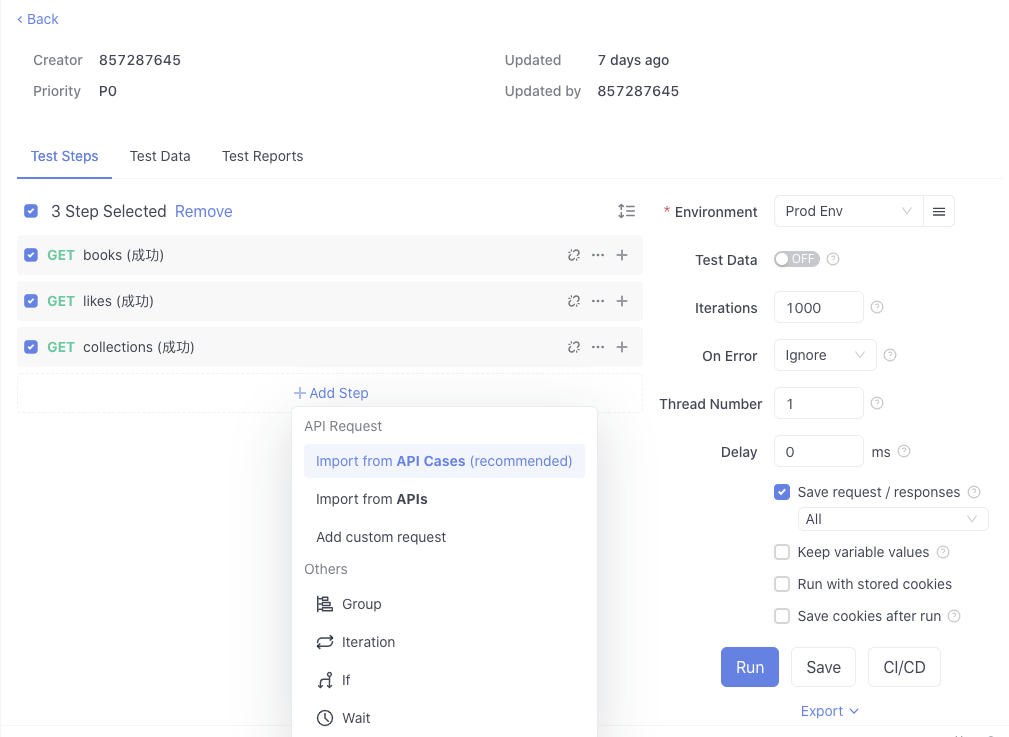
On the right-hand side, you can set some important runtime parameters, including the test environment, the number of iterations, the delay between iterations, and whether to ignore errors encountered during the test.
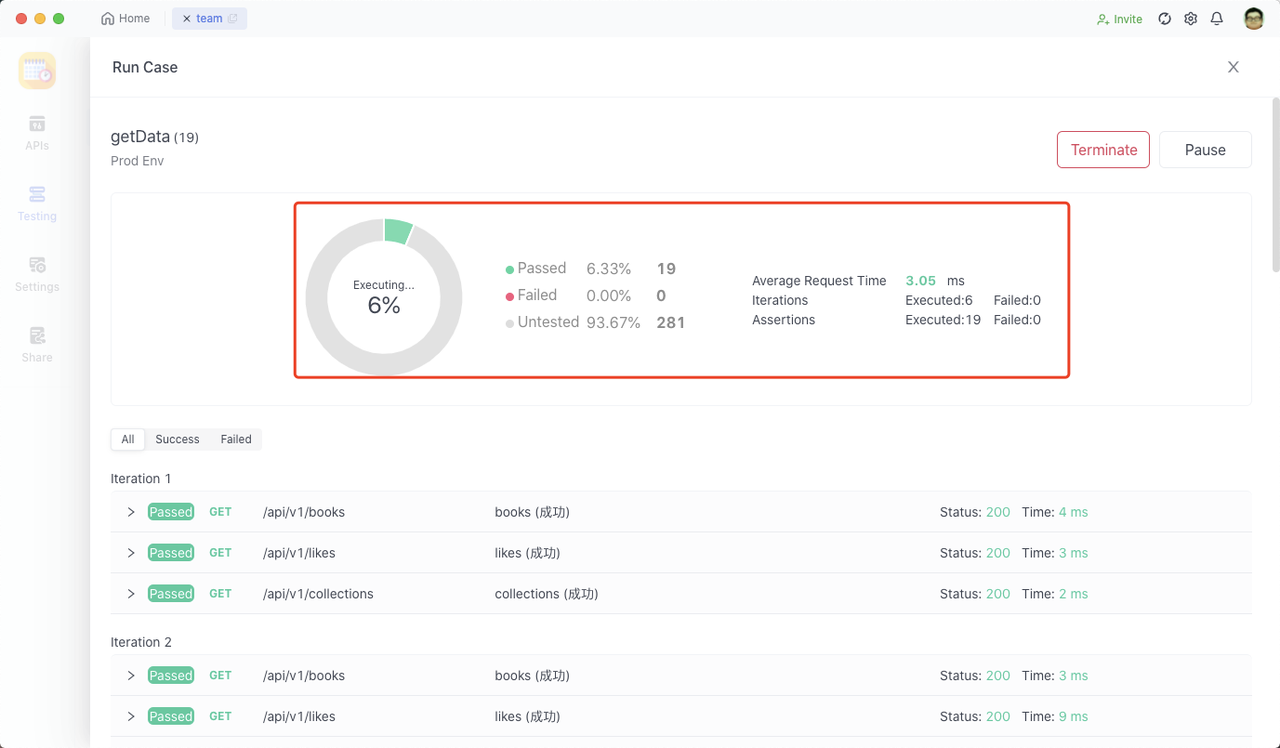
Clicking the "Run" button allows you to visually see the execution process, including the percentage of tests executed, pass rate, failure rate, and untested cases, among others.
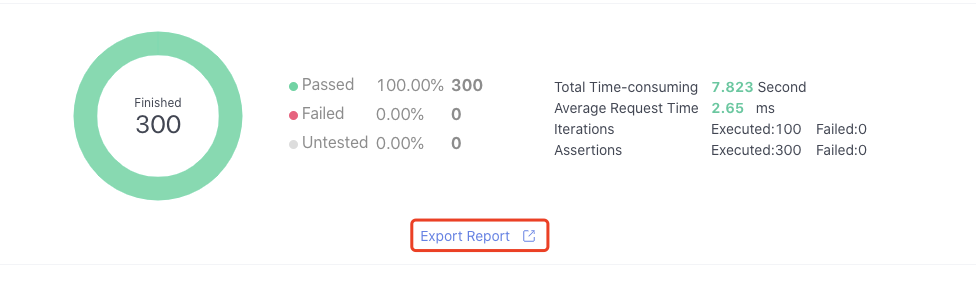
Moreover, after the execution is complete, you can also obtain the overall test duration, average interface response time, number of iterations, and number of assertions.
You can choose to export the test report and share it with your colleagues for review.
If you want to simply view a specific test case data, please click the More button.
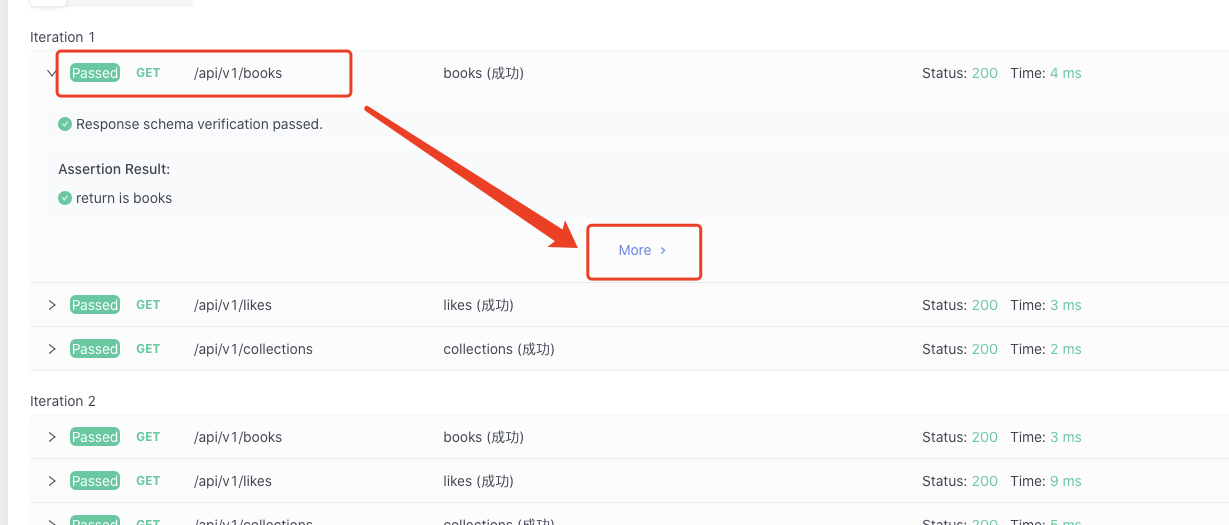
You can also debug certain steps according to the API result.