
Flask is a popular Python web framework that is used to build web applications. One of the most common tasks when building a web application is to send data from the client to the server. This is typically done using the HTTP POST method. JSON (JavaScript Object Notation) is a lightweight data interchange format that is commonly used for sending data over the internet.
In this post, we will explore how to use Flask to handle JSON data sent via the HTTP method and discover how to use Apidog, an all-in-one platform that facilitates efficient API development, to design and test your Python REST API
You can also inspect the headers, cookies, status codes, and other details of the response. Apidog also lets you manipulate the response data using JavaScript, filter the data using JSONPath, and validate the data using JSON Schema.
JSON Data
JSON (JavaScript Object Notation) is a lightweight data interchange format that is commonly used for sending data over the internet. It is based on a subset of the JavaScript programming language, but it can be used with any programming language.
One of the advantages of using JSON is that it is easy to read and write. JSON data is represented as key-value pairs, which makes it easy to understand and work with. JSON can represent six types of data natively: strings, numbers, booleans, null, arrays, and objects. For example, here is a JSON representation of a blog post:
{
  "id": 1001,
  "title": "What is JSON?",
  "author": {
    "id": 1,
    "name": "James Walker"
  },
  "tags": [
    "api",
    "json",
    "programming"
  ],
  "published": false,
  "publishedTimestamp": null
}
This example demonstrates all the JSON data types. It also illustrates the concision of JSON-formatted data, one of the characteristics that’s made it so appealing for use in APIs.
HTTP POST Method
The HTTP POST method is one of the most common HTTP methods used to send data from the client to the server. When a client sends an HTTP POST request, it includes a message body that contains the data that is being sent. This data can be in a variety of formats, including JSON.
By using JSON, developers can ensure that the data sent to the server is well-organized and easily understandable, thereby enhancing the efficiency of resource creation and updates.

What is Flask and Why Should You Use It?
Flask is a lightweight web framework that is written in Python. It is designed to be simple and easy to use, while still providing all of the features that you need to build a modern web application.
Flask is built on top of the Werkzeug WSGI toolkit and the Jinja2 template engine. It provides a simple and intuitive API for handling HTTP requests and responses.

One of the key features of Flask is its support for handling JSON data. Flask provides a simple way to parse JSON data sent via the HTTP POST method. This makes it easy to build web applications that can accept JSON data from clients.
Installation of Flask
Flask is a Python-based microframework, so you’ll need to have Python installed on your computer. You can download the latest version of Python from the official website:
Create a virtual environment: It’s a good practice to create a virtual environment for your project to avoid conflicts with other Python projects. You can create a virtual environment using the venv module that comes with Python. Here’s how you can create a virtual environment:
$ python3 -m venv myenv
This will create a new directory called myenv in your current directory.
Activate the virtual environment: Once you’ve created the virtual environment, you need to activate it. Here’s how you can activate the virtual environment:
$ source myenv/bin/activate
Install Flask: With the virtual environment activated, you can now install Flask using pip, the Python package manager. Here’s how you can install Flask:
$ pip install Flask
This will install Flask and its dependencies.
Verify the installation: To verify that Flask has been installed correctly, you can create a new file called app.py with the following contents:
from flask import Flask

app = Flask(__name__)

@app.route('/')
def hello_world():
    return 'Hello, World!'

if __name__ == '__main__':
    app.run()
Save the file and run it using the following command:
$ flask run
This will start a local development server at http://localhost:5000. Open your web browser and navigate to http://localhost:5000. You should see a message that says “Hello, World!”.
Handling JSON Requests In Flask
To handle JSON data in Flask, you will need to use the request object. The request object is provided by Flask and contains all of the data that was sent in the HTTP request. To parse JSON data, you can use the json attribute of the request object.
Getting JSON Data in Flask
To access the JSON data sent by the client, you can use the request object’s json attribute or the get_json() method. Both of them return a Python dictionary or list that represents the parsed JSON data.
The difference is that the json attribute will raise an exception if the data is not valid JSON, while the get_json() method will return None in that case. You can also pass a force parameter to the get_json() method to force parsing the data as JSON, regardless of the content type.
Here is an example of a simple route handler that receives a POST request with JSON data and prints it to the console:
from flask import Flask, request

app = Flask(__name__)

@app.route('/json', methods=['POST'])
def json():
    # Get the JSON data from the request
    data = request.get_json()
    # Print the data to the console
    print(data)
    # Return a success message
    return 'JSON received!'
The content type of the request is important because it tells Flask how to parse the data. If the content type is application/json, Flask will automatically parse the data as JSON and make it available through the json attribute or the get_json() method.
If the content type is not specified or is something else, Flask will not parse the data as JSON unless you use the force parameter of the get_json() method. Therefore, it is recommended to set the content type to application/json when sending JSON data to Flask, or to handle the cases where the content type is not correct or the data is not valid JSON.
Sending JSON Responses to the Client
To create and return JSON responses using the jsonify() function from Flask, you need to import the function from the flask module and pass a Python dictionary or list as an argument. The function will convert the Python object into a JSON string and set the content type of the response to application/json. This way, the client can easily parse the JSON data and use it for their purposes.
Here is an example of a simple route handler that sends a JSON response with some data back to the client:
from flask import Flask, jsonify

app = Flask(__name__)

@app.route('/data')
def data():
    # Create a Python dictionary with some data
    data = {
        'name': 'Bing',
        'age': 10,
        'hobbies': ['searching', 'chatting', 'learning']
    }
    # Return a JSON response using the jsonify() function
    return jsonify(data)
The jsonify() function has some optional parameters that can affect the formatting and ordering of the JSON output. For example, you can use the sort_keys parameter to sort the keys of the JSON object alphabetically, or the indent parameter to add indentation and newlines to the JSON string. These parameters can make the JSON output more readable and consistent, but they can also increase the size of the response.

How to POST JSON Data with Apidog
Apidog is a great tool for anyone who works with APIs, whether you are a developer, a tester, a designer, or a student. It helps you to:
- Learn how to use different APIs and explore their features
- Test and debug your own APIs and find errors and bugs
- Experiment with different parameters and options and see how they affect the response
- Document and demonstrate your API usage and results
- Collaborate and communicate with other API users and developers
To test your Flask API that can send and receive JSON data using Apidog, you need to follow these steps:
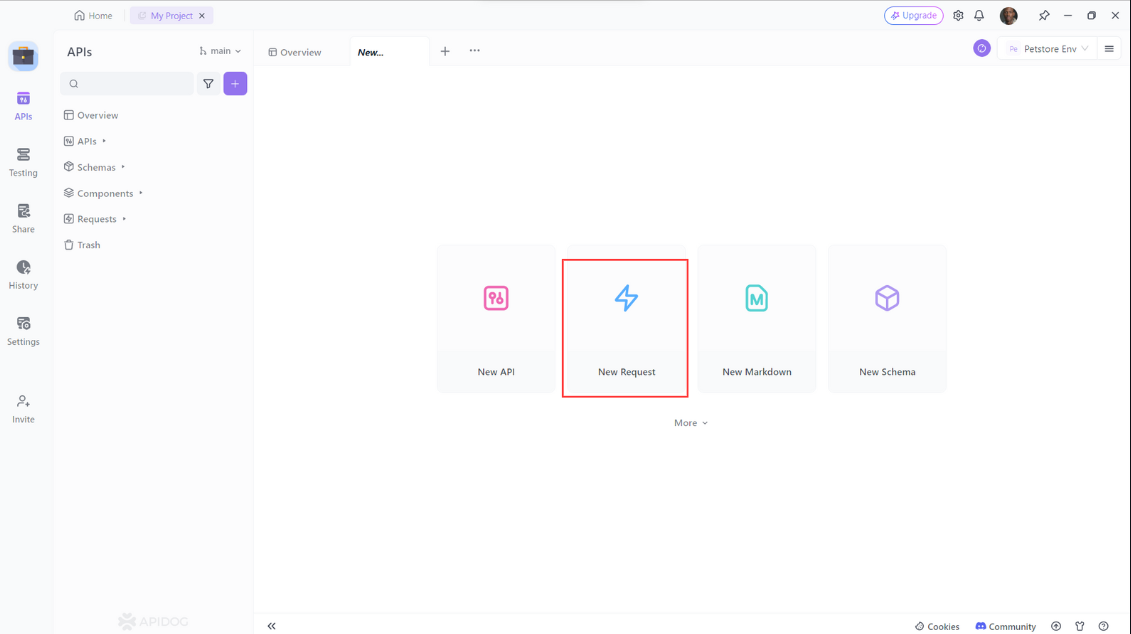
- Visit the Apidog website and create a free account. You can also use Apidog without an account, but you won’t be able to save and share your requests. Open Apidog and create a new request.
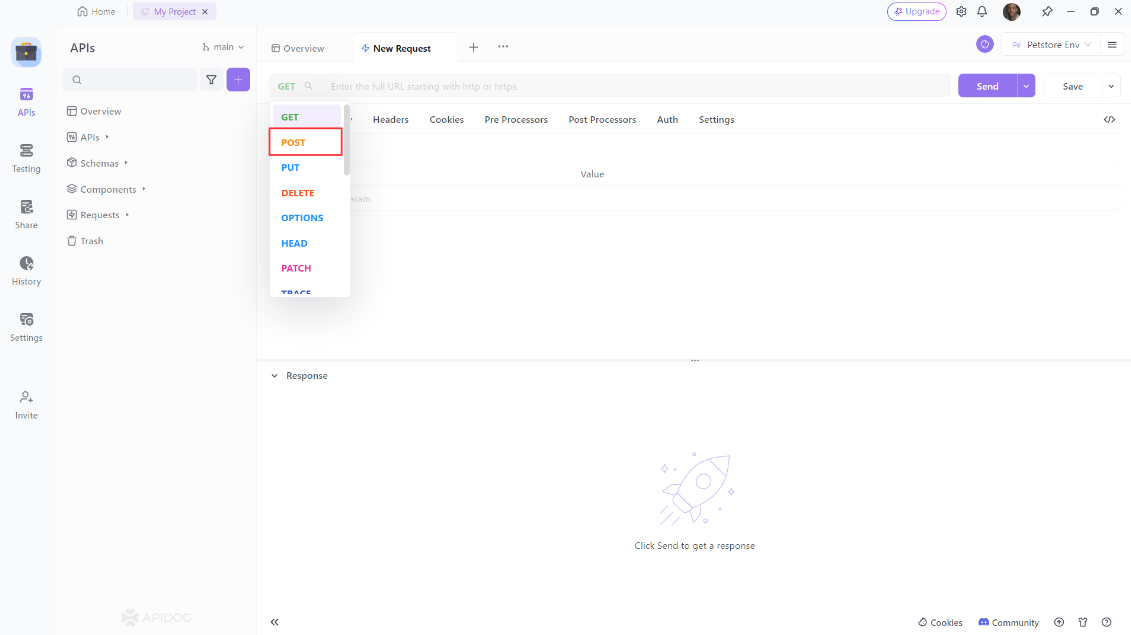
- Select the HTTP method that you want to use. For example, if you want to get the list of messages, you can select the GET method. If you want to create a new message, you can select the POST method.
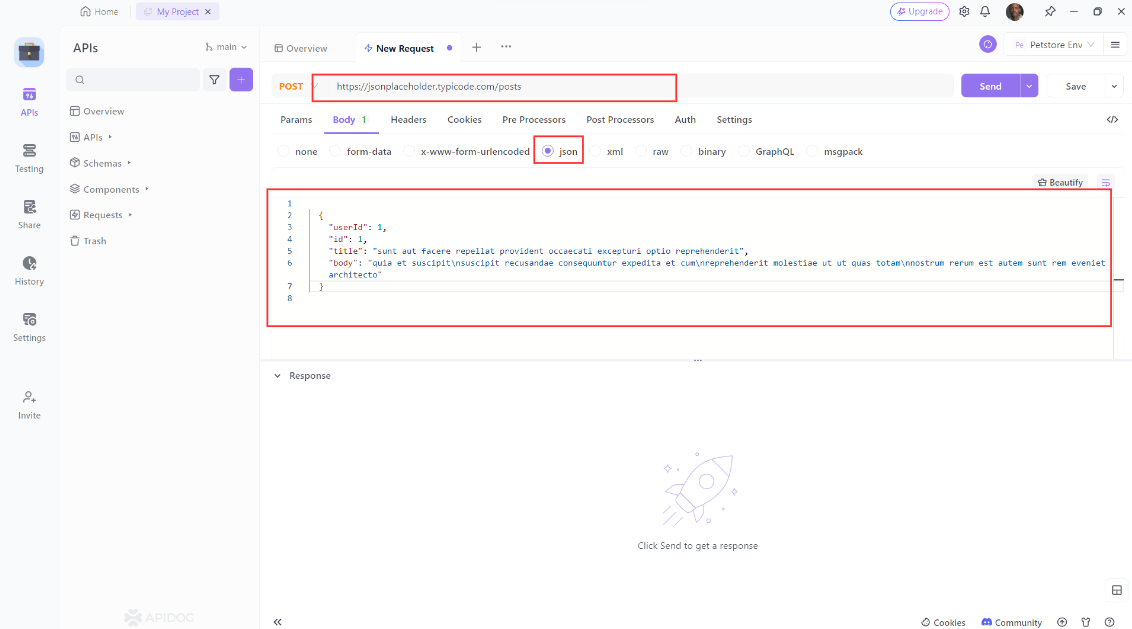
- Enter the URL of your API endpoint in the URL input field. Add any headers, cookies, or parameters that you need for your request. For example, if you want to create a new message, you need to add the
Content-Typeheader with the valueapplication/jsonand write the data in JSON format in the body input field. For example, you can write the following data:
- Click on the Send button to send the request to your API. Apidog will then display the response from your API in the Response tab. You can also switch to the Headers, Cookies, or Raw tabs to see other details of the response.
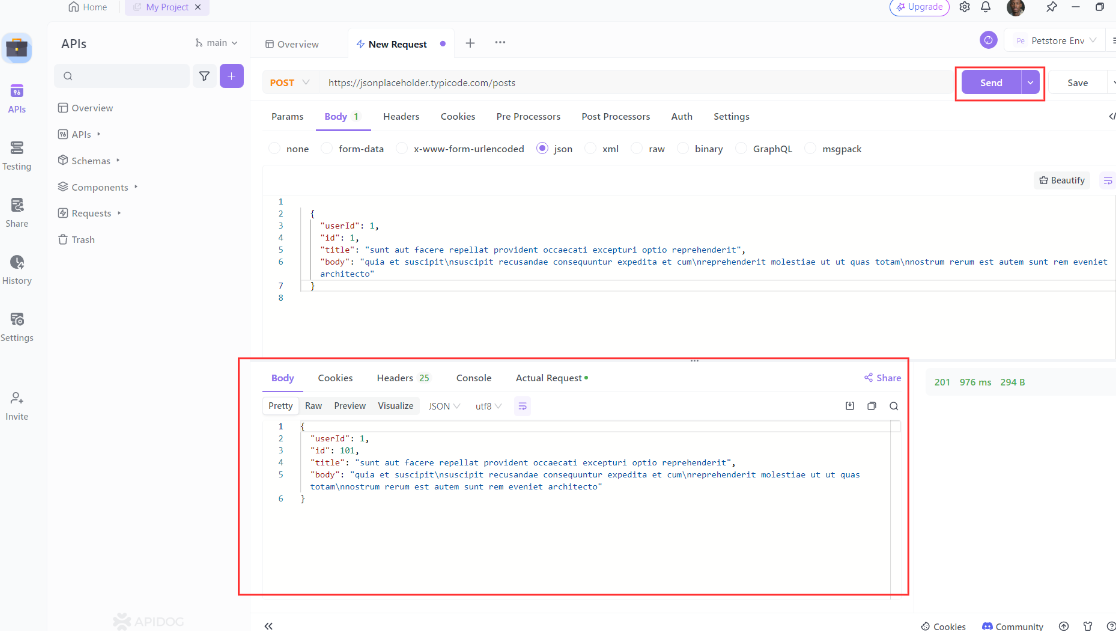
- Analyze and manipulate the response data using Apidog’s features and tools. You can use the JSON Viewer, JSONPath, JavaScript, JSON Schema, and other features and tools to view, filter, modify, or validate the response data. You can also save your request and response and share them with others using a unique URL.
You have now tested your FlaskAPI that can send and receive JSON data using Apidog. You can also test other API endpoints and methods using the same steps. You can also use Apidog to test other APIs that you find online or create yourself. Apidog is a versatile and powerful tool that can help you with any API-related task. You can learn more about Apidog and its features and tools from the official website:
Conclusion
In this post, we have learned how to handle JSON requests in Flask, a popular micro-framework for web development in Python. We have seen how to:
- Get and parse JSON data from POST requests using the
requestobject’sjsonattribute or theget_json()method. - Create and return JSON responses using the
jsonify()function, which converts a Python dictionary or list into a JSON string and sets the appropriate content type for the response. - Use some optional parameters of the
jsonify()function, such assort_keysandindent, to affect the formatting and ordering of the JSON output. - Using Apidog to POST JSON data