
Swagger UI is a tool that allows you to view the API documentation generated in Swagger specification (OpenAPI Specification). Swagger UI also provides offline and online versions for you, but for various reasons, you may need to open the generated Swagger specification file with Swagger UI locally. In this article, we will show you how to run Swagger UI locally, if you encounter some problem in this process, follow up.
What is Swagger UI?
Swagger UI is a tool that allows you to interactively display and verify API definitions written in the OpenAPI Specification (formerly Swagger Specification). By setting up a Swagger UI in a local environment and importing the API definition, developers can develop while checking the API specifications in real time.
Why use Swagger UI locally?
While Swagger UI offers a SaaS version, many users prefer to install it on their local machines and set up a local web server. Consequently, many users are accessing Swagger UI on their localhost. So, what are the advantages of using Swagger UI locally? Let's explore these benefits in detail.
The primary reasons for utilizing Swagger UI in a local environment include:
- Real-Time API Development: When developing an API locally, it's essential to have the capability to check the API definition in real time.
- Offline Documentation Reference: Local usage allows you to reference API documentation offline, eliminating the need for a network connection.
- Enhanced Privacy: Local usage ensures that your in-development API remains private, without the need for external publication, keeping it away from third-party access.
- Mock Server Testing: You can set up and test a local Mock server to verify your API's functionality.
- Iterative API Definition: Local usage enables you to make iterative changes to the API definition and check its impact each time.
- CI/CD Pipeline Validation: Local validation becomes a part of your CI/CD pipeline, ensuring the reliability and quality of your API during development.
Advantages of using Swagger UI locally
The advantages of using Swagger UI in a local environment are listed below, but it is best to decide whether to use a cloud-based service or use it locally depending on the specific situation.
- Can be used offline as it does not depend on the internet environment
- Easy development because you can check local API definitions in real time
- There is no need to expose the API under development to the outside world.
- You can set up a mock server locally, so you can check the operation.
- The response is fast because it does not depend on the specifications of the development machine.
- Increase productivity by developing at your own pace
- More secure than using a shared server
- Easy to synchronize API definition and implementation
How to Use Swagger UI Locally?
So what should I do if I want to use Swagger UI locally? Next, I will explain in detail how to use Swagger UI locally.
Install Swagger UI and setup the Dev environment
First, you need to download Swagger UI and install it on your local machine. The latest version is prefer. The Swagger UI repository is managed on GitHub, so please install it using the following command.
git clone https://github.com/swagger-api/swagger-ui.git
Then set up your Dev environment using commands like:
cd swagger-ui
npm run dev
The Swagger UI will be launched by accessing http://localhost:3200/ in your browser.
Set up a local web server
Next, in order to launch Swagger UI, you need to prepare a web server using the following command line. Here we will use Node.js' http-server module.
npm install -g http-server
Start HTTP-server and launch Swagger UI
Navigate to the directory where the Swagger Specification file is located, start http-server in that directory, and enable CORS using a command like the following:
cd {your-oas-document-dir}
http-server --cors
Then, http://localhost``:8080when you access it in your browser, the Swagger UI will launch.
Prepare the Swagger specification file
Next, prepare the Swagger Specification file. Generally, Swagger specification files are written in Json or Yaml format. For example, swagger.yaml suppose you write it in a file called. The URL of Swagger's spec file is http://localhost:8080/swagger.yaml.
Also, if you want to know more about Swagger Spec files or change the default path of Swagger UI URL, please refer to the following articles:

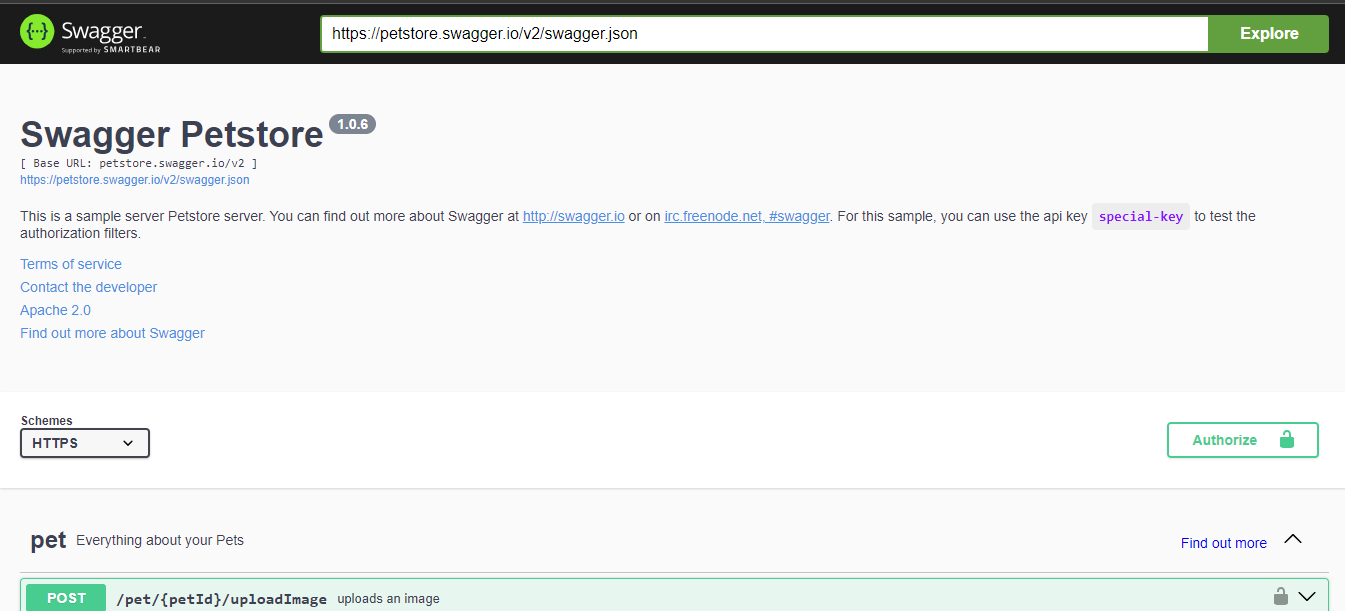
Enter the URL of the Swagger specification file and open it in the Swagger UI
Then, on the Swagger UI screen, enter the swagger.yaml URL in the above SPEC URL in the input box at the top, and click the Explore button to display the local API definition document.
Apidog: Manage Your APIs more efficiently
When using Swagger UI, you need to build a server and set a URL, which can be quite a pain. If you're looking for an easier solution, we recommend using Apidog, an easy-to-use API management tool.
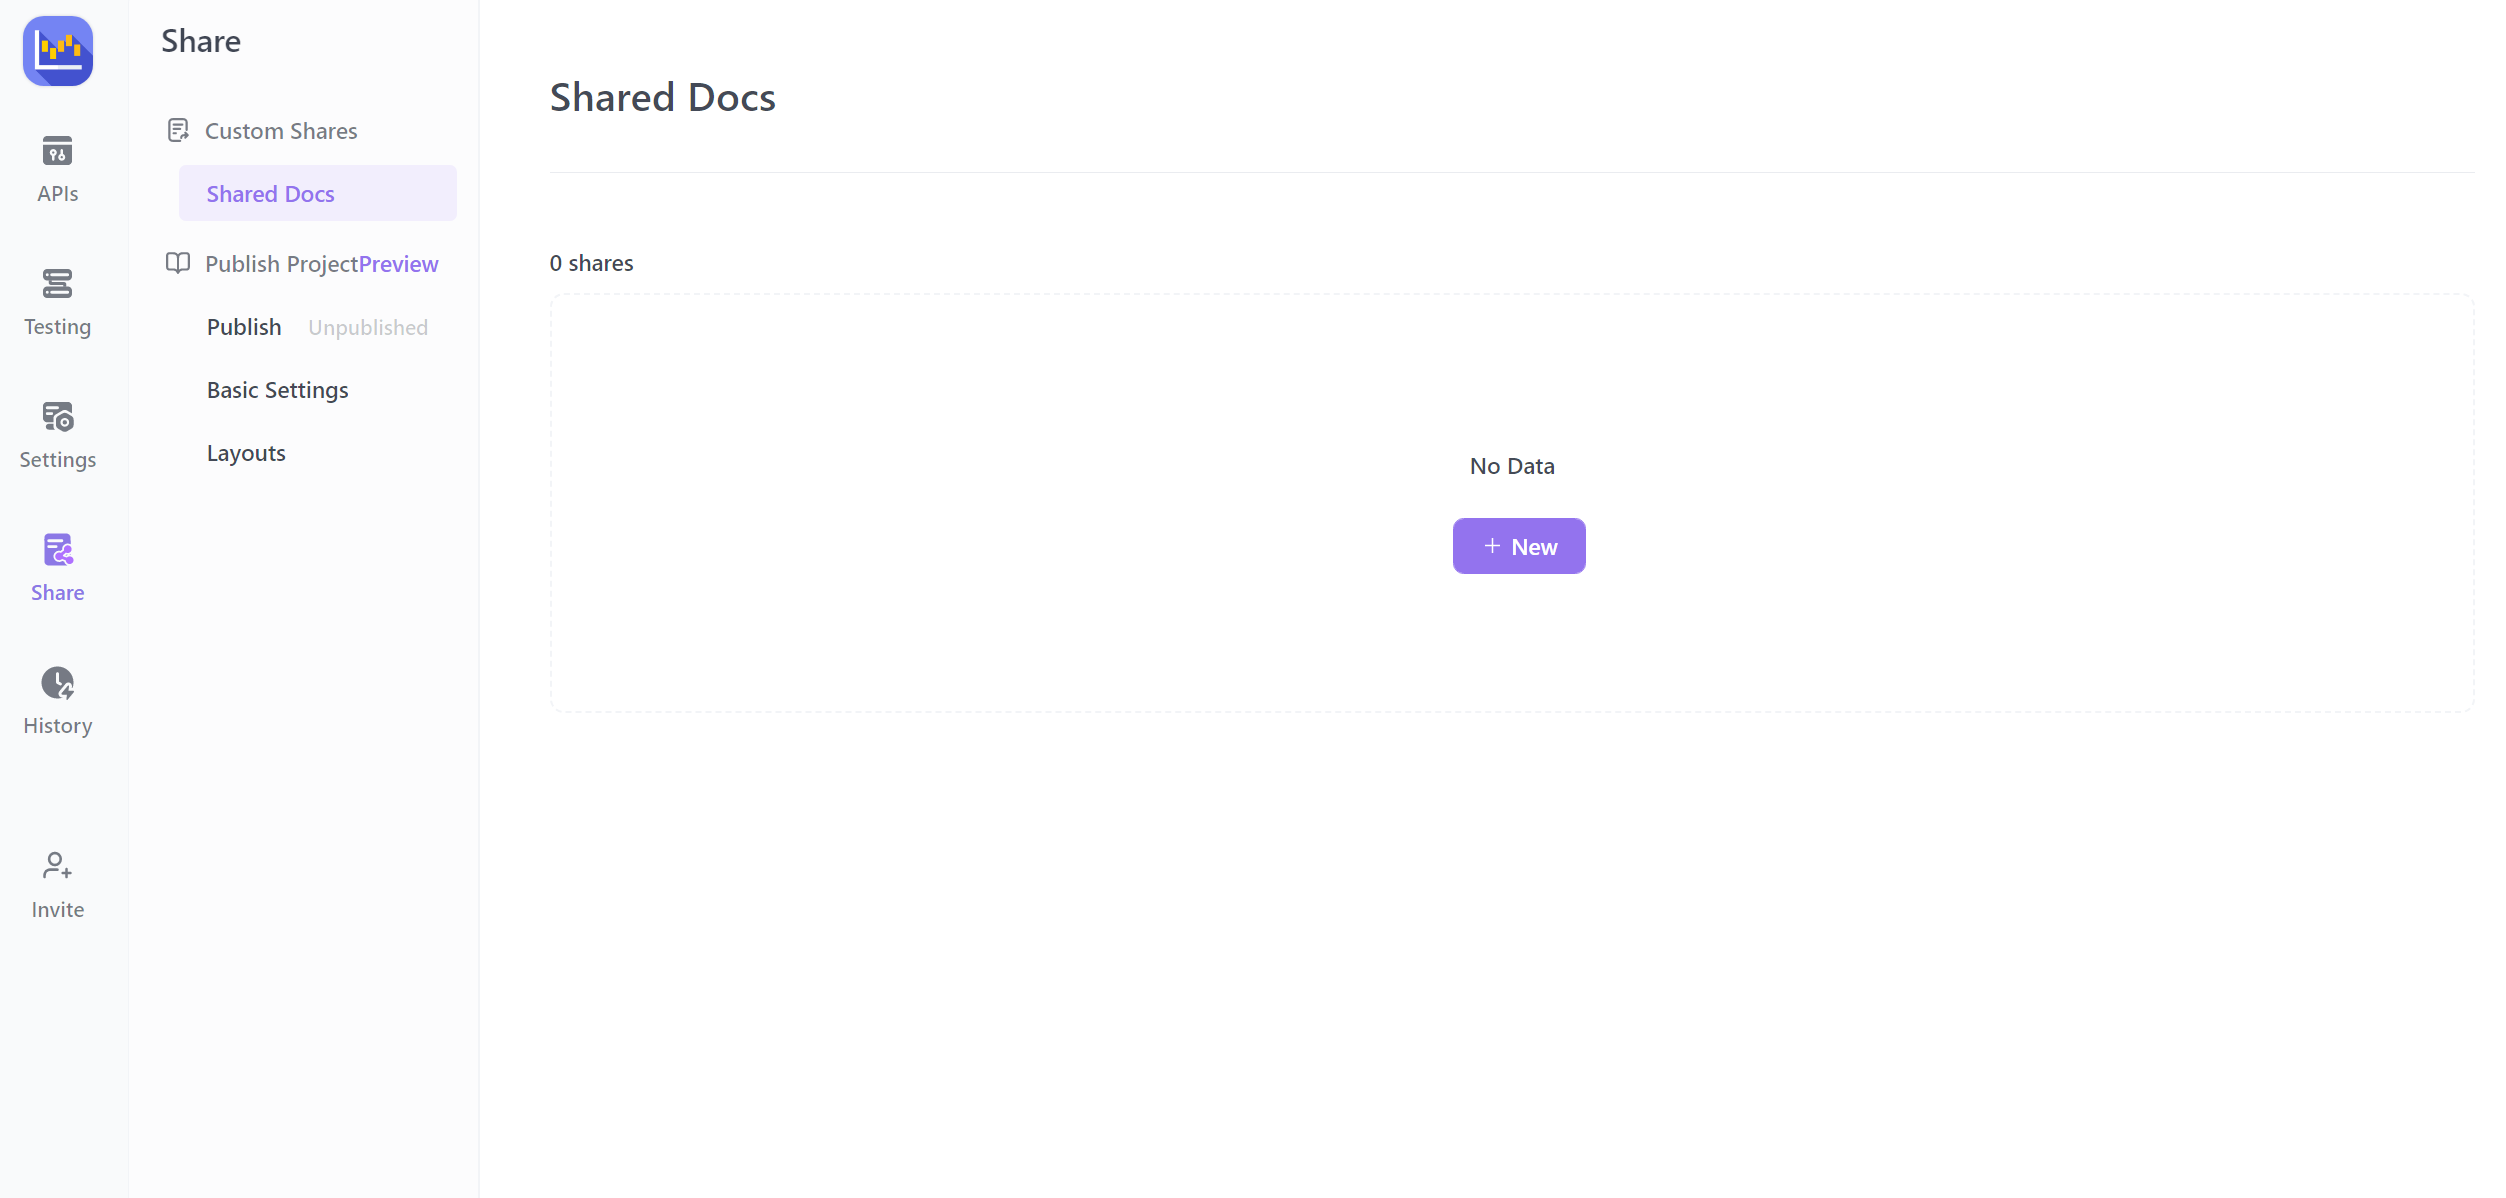
Apidog can read Swagger Json and Yaml files directly and quickly test your API. You can also use its sharing feature to generate and share beautiful API documentation.
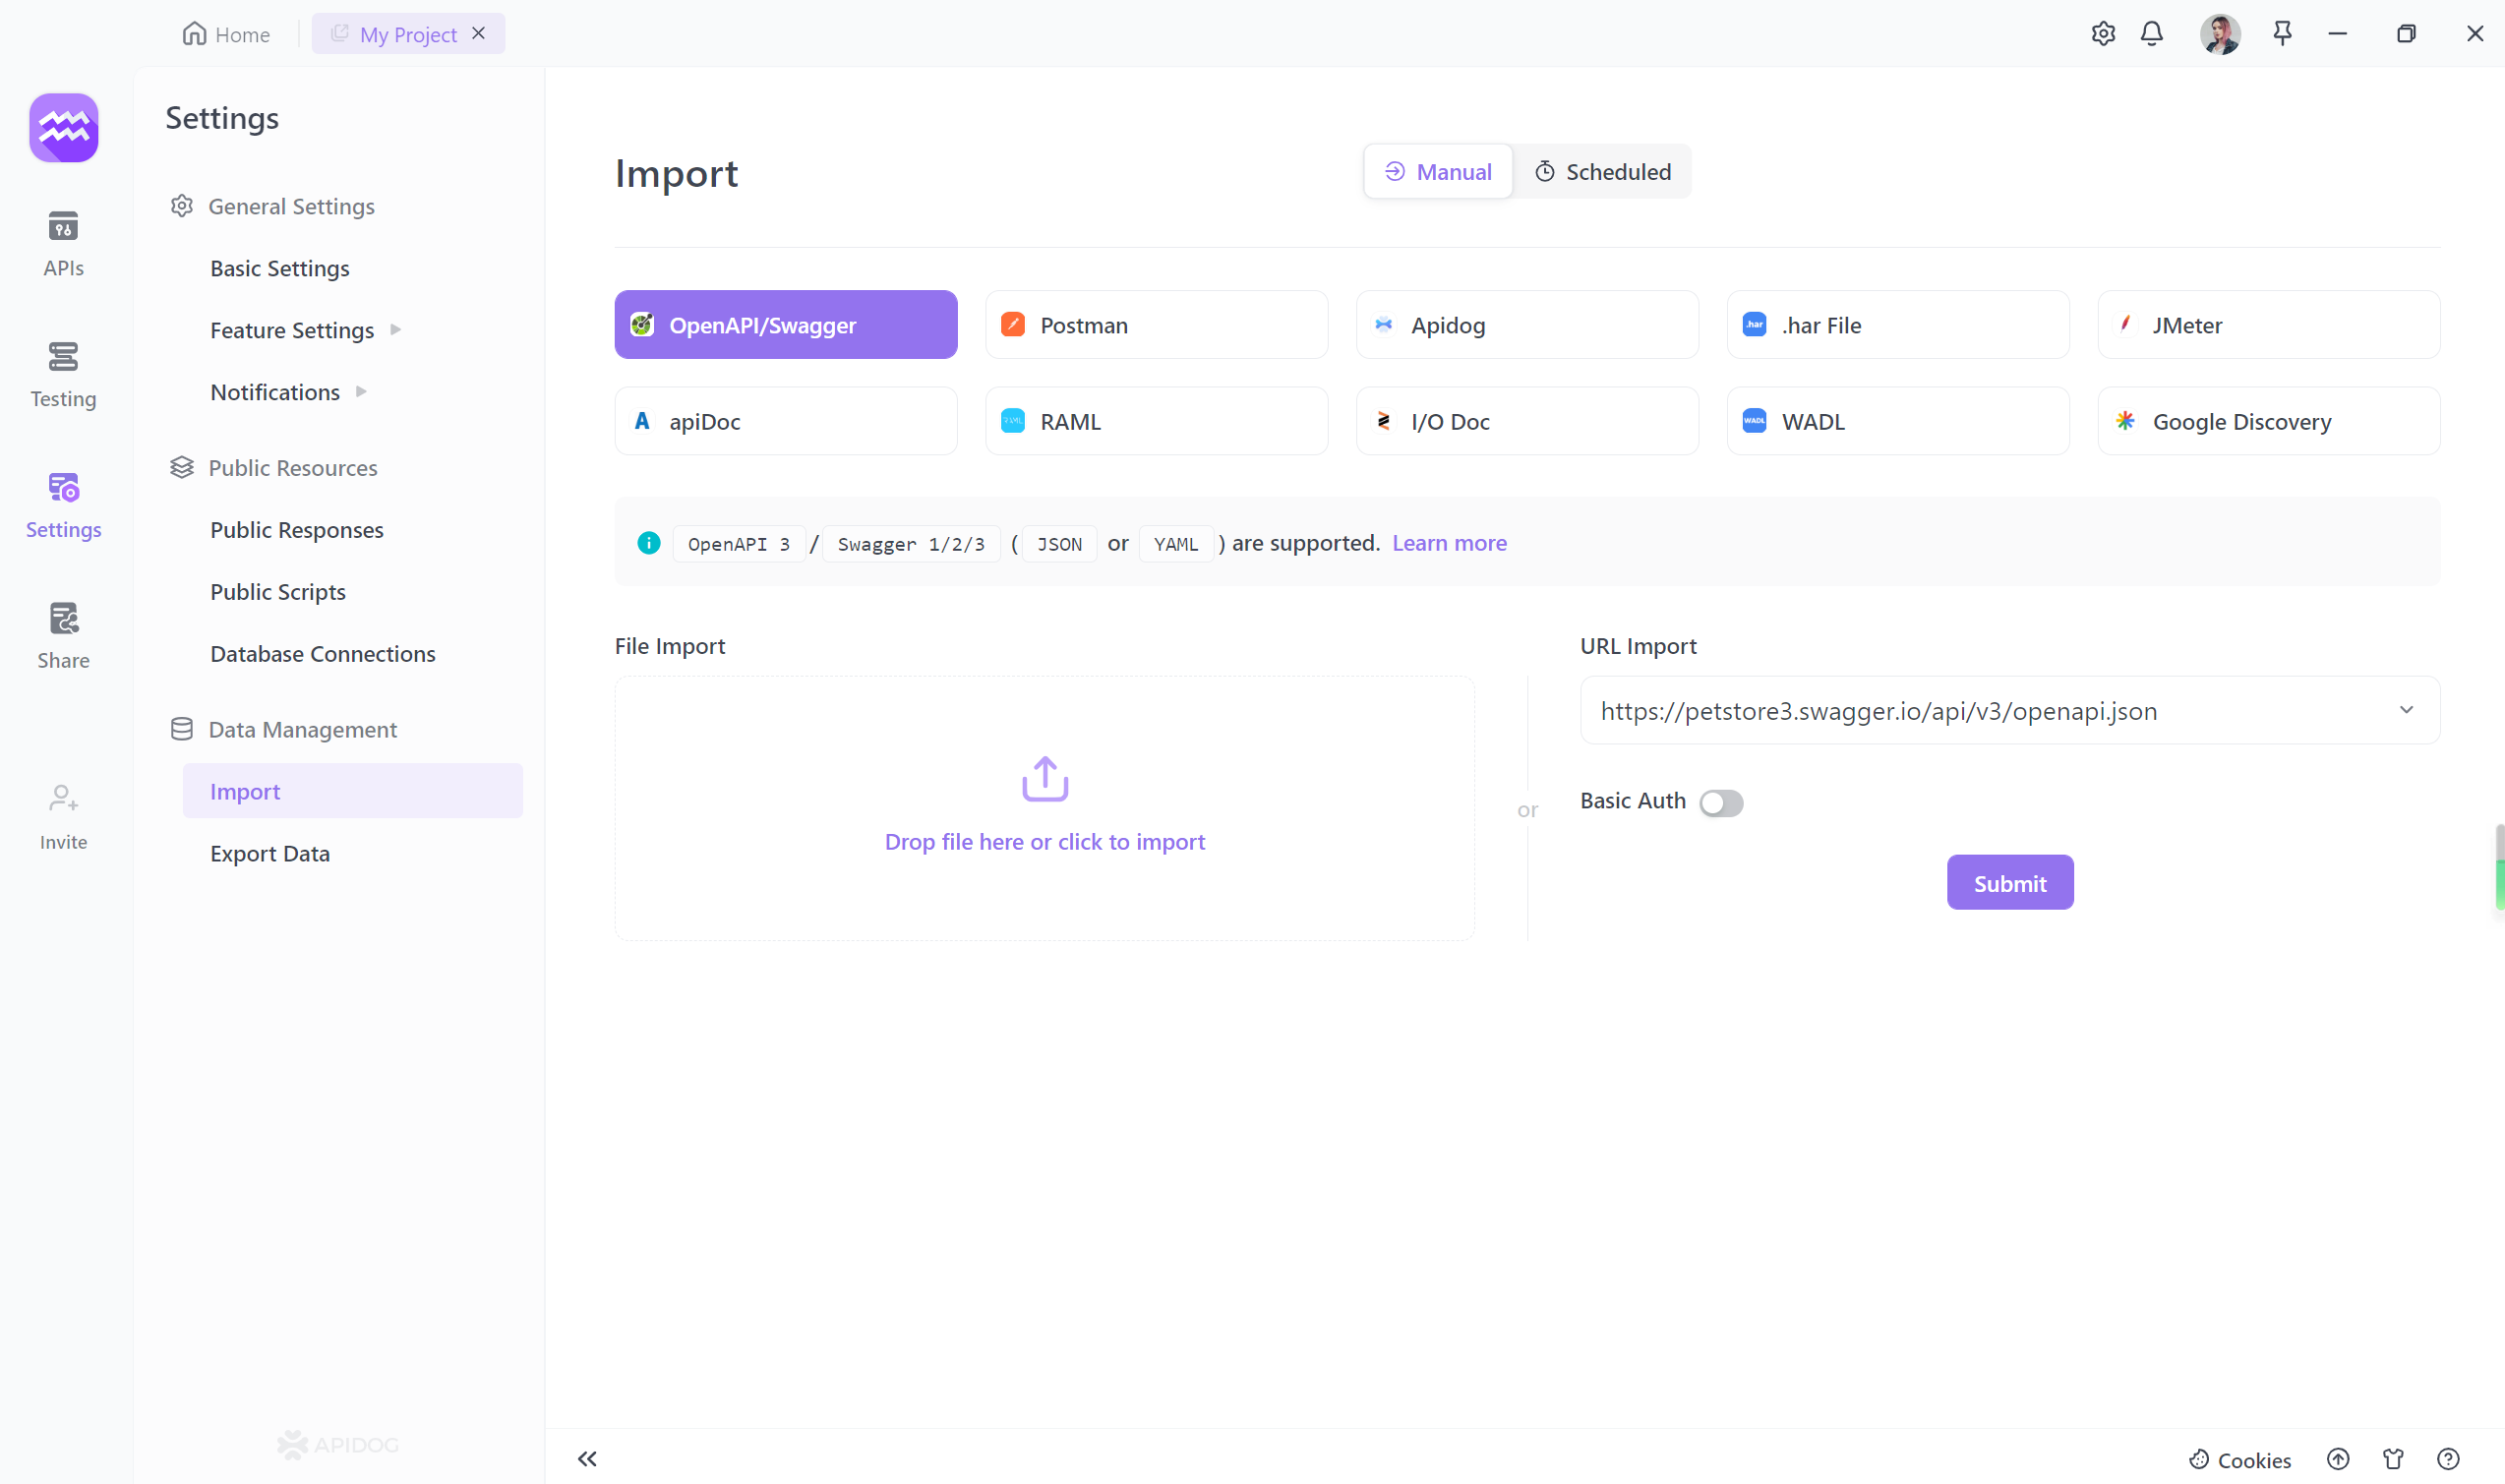
Easily import JSON and YAML into Apidog
Apidog supports importing data with YAML and JSON, so you can fully parse these files and fully import your API's data into Apidog for testing.
Open your project settings in Apidog, click Import Data, select OpenAPI/Swagger, and drag the YAML file into Apidog.
Test your API with Apidog
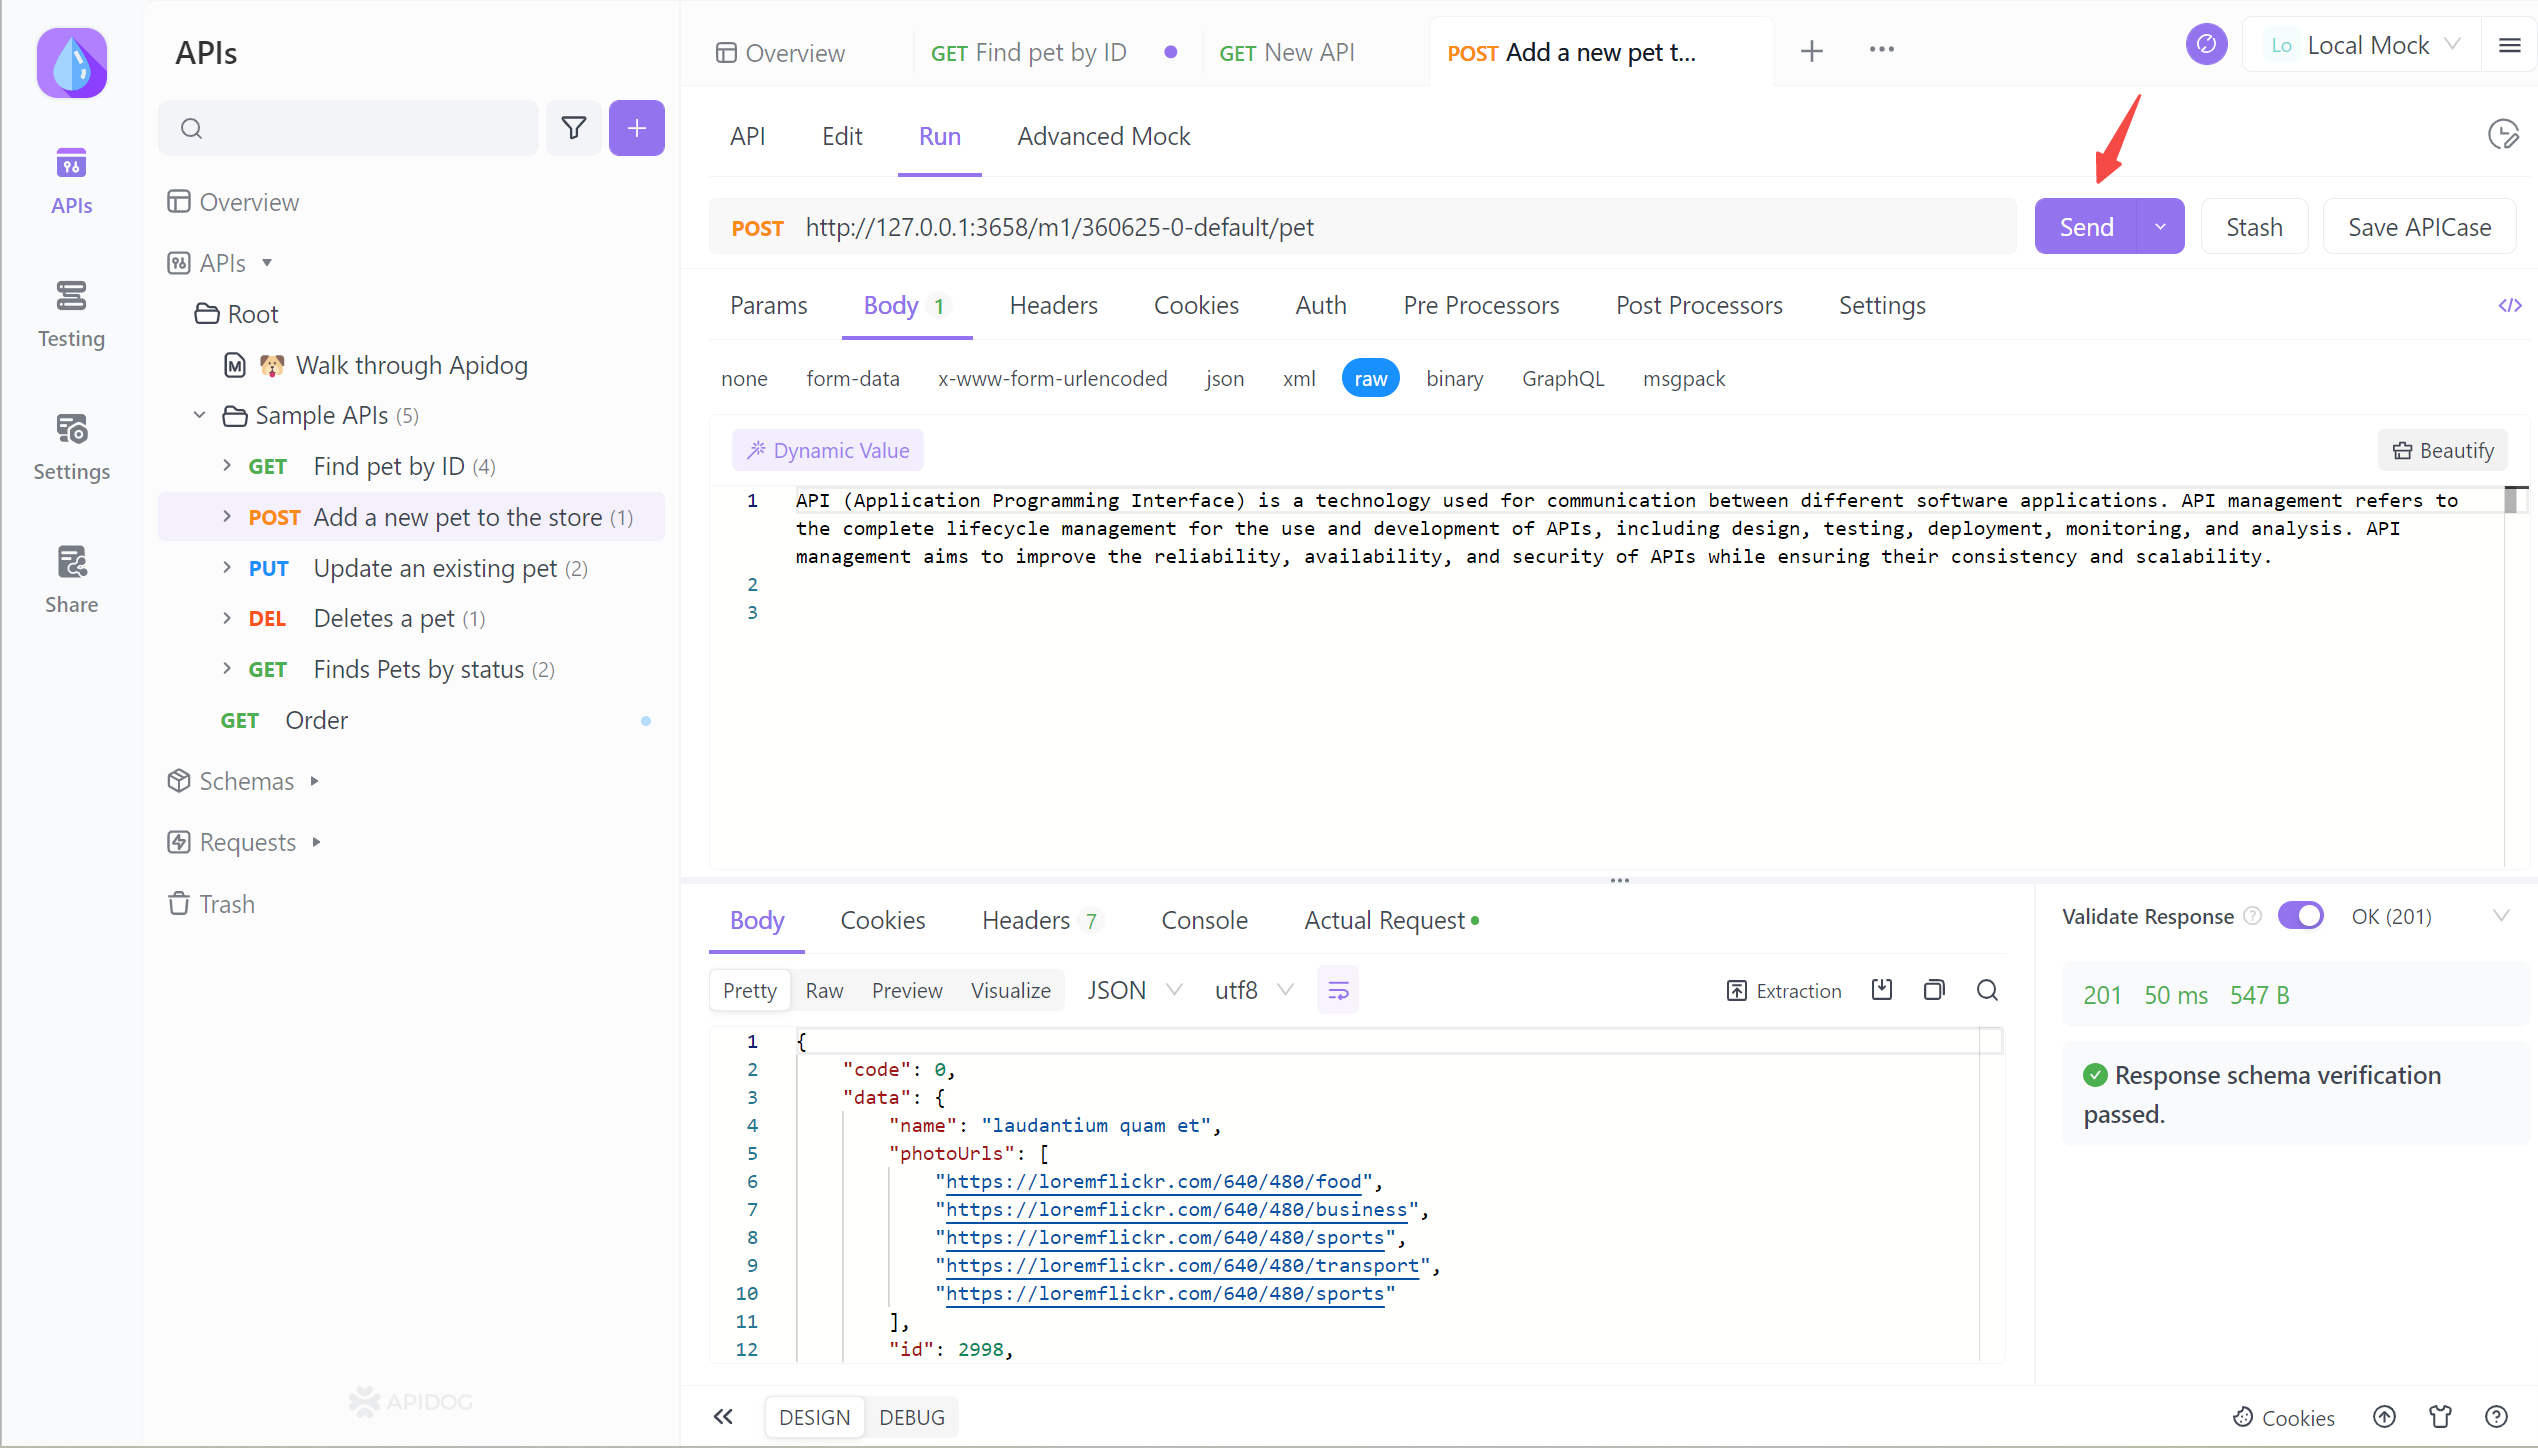
Once you have imported your API's data into Apidog, you can view the imported API by clicking the APIs tab on the left. If you want to test a specific API endpoint, you can click on it, fill in the parameters in an intuitive UI, "send" the request, and get the response.
Generating and sharing API documentation is also very easy using Apidog. The following is a sample API documentation generated by Apidog:

FAQs about Swagger UI Localhost
How to access Swagger UI on localhost?
- Run your API project locally, then navigate to
http://localhost``:<port>/swaggerin your browser. The port is usually 5000 or 5001.
What is the URL for the Swagger local host?
- The default URL is http://localhost:/swagger where the port your API is running on locally.
How do you host Swagger documentation locally?
- Enable Swagger in your startup code, launch the API project, and navigate to the /swagger endpoint to view the UI.
What is the Swagger URL for localhost .NET core?
- For .NET Core APIs, the Swagger URL is typically http://localhost:/swagger/v1/swagger.json
Summary
Swagger UI is a useful tool when developing APIs, but it has limitations for more advanced API lifecycle management. Apidog provides one-stop functionality for API development, such as API definition, automatic document generation, testing, monitoring, and sharing.
Apidog allows you to import Swagger and OpenAPI specification files and interactively test your API. Share features allow you to create beautiful documents and share them with your team. If you want to streamline your API development process, Apidog is the solution for you. By using it in conjunction with Swagger UI, you will be able to achieve more powerful API lifecycle management.


