Looking to supercharge your local automation on macOS or Linux? The open-source CUA (Computer-Use Agent) framework, paired with its MCP server, allows AI agents like Claude 3.7 to control your computer through natural language—securely and without cloud dependencies. This hands-on tutorial walks API developers and backend engineers through setting up the CUA MCP server on Apple Silicon or Linux, testing it with real-world automation, and integrating it with Claude Desktop. No advanced skills required—just curiosity and a willingness to try something new.
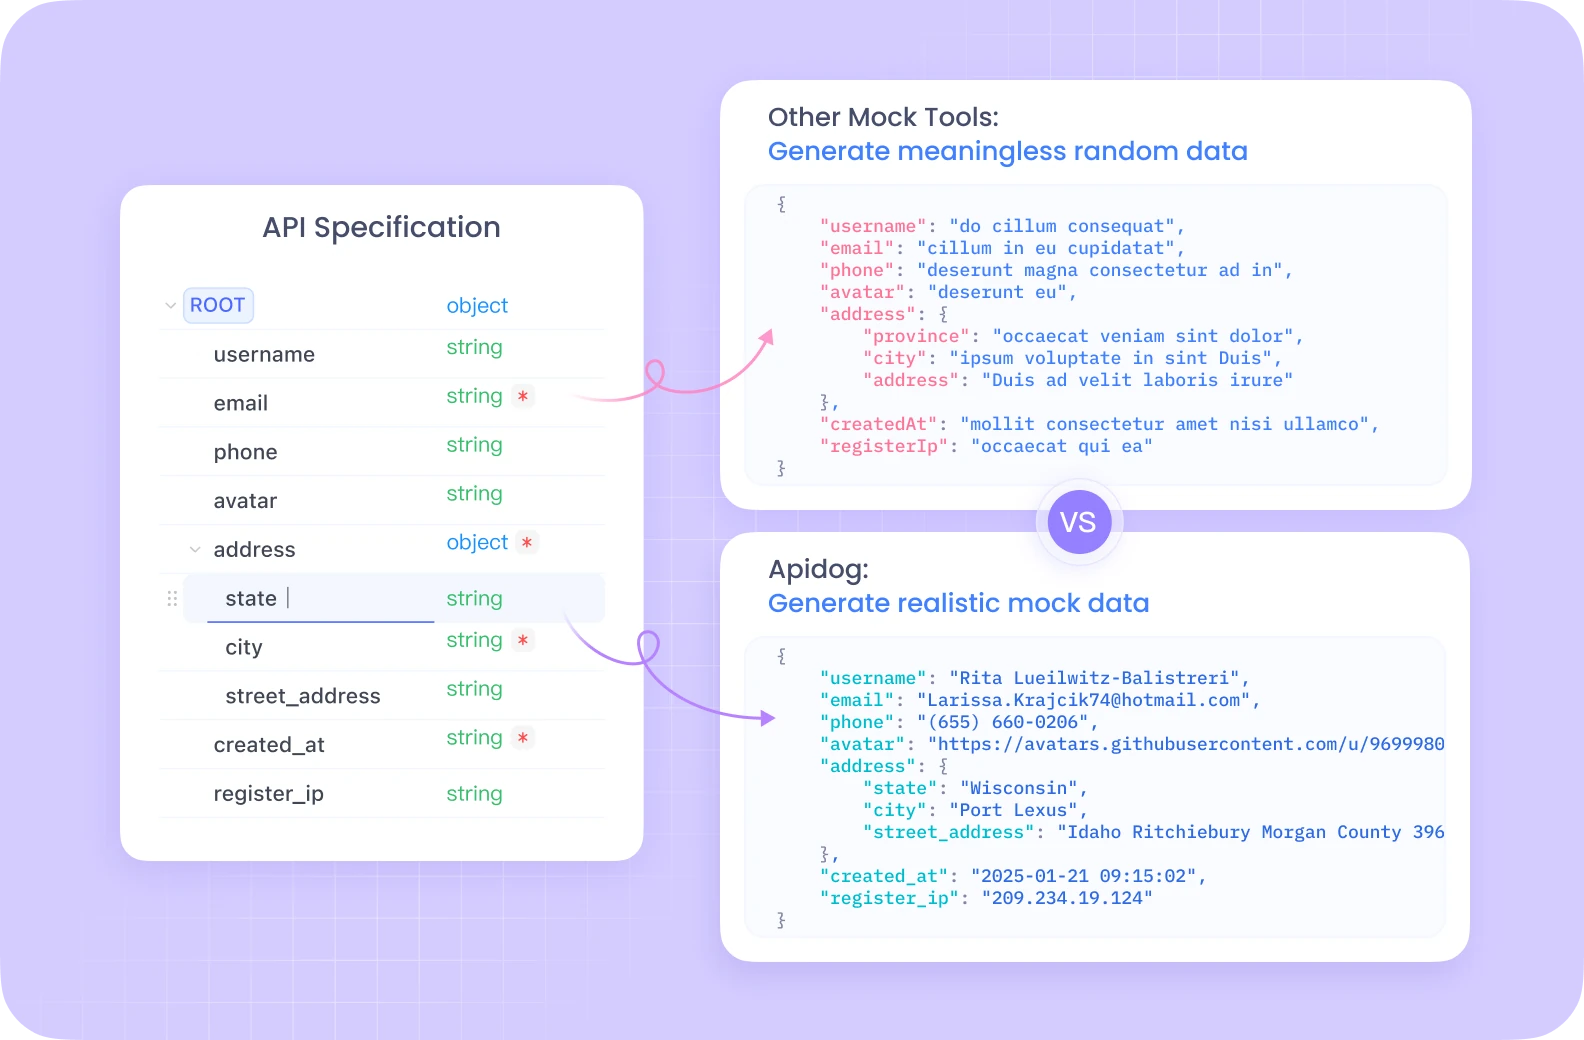
💡 Looking for a better API testing workflow? Apidog generates beautiful API documentation and offers an all-in-one platform for developer teams, boosting productivity while replacing Postman at a more affordable price.
What Is CUA and the MCP Server?
CUA (Computer-Use Agent) is an open-source automation framework that empowers AI agents to interact directly with your computer. It supports actions like screen control, keyboard/mouse automation, and even launching sandboxed virtual machines—optimized for Apple Silicon Macs and Linux.
The CUA MCP server (Model Context Protocol) acts as a secure bridge, allowing AI models (like Claude) to issue system-level commands via natural language. This keeps your automation local and private—ideal for developer teams concerned with data security.
Prerequisites: Preparing Your System for CUA MCP
Before installing CUA MCP, ensure your environment meets these requirements:
- Python 3.10+: Check with
python --version. Download here if needed. - Git: Required for cloning the repository. Check with
git --version. - Docker: Ensures sandboxed, containerized execution. Verify with
docker --version. - Hardware: Apple Silicon Mac (M1/M2/M3) or Linux, 4+ core CPU, 16GB+ RAM, 10GB+ free disk.
Tip: Missing a dependency? Install it before continuing to avoid setup issues.
Step 1: Set Up Your Project Environment
Organize your workspace for a clean install:
mkdir cua-mcp-test
cd cua-mcp-test
This keeps your CUA MCP files isolated for easy management.
Step 2: Clone and Prepare the CUA Repository
Grab the latest CUA codebase:
git clone https://github.com/trycua/cua.git
cd cua
Now, create a dedicated Python virtual environment to avoid dependency conflicts:
python -m venv venv
# Activate the environment
# On Mac/Linux:
source venv/bin/activate
# On Windows:
venv\Scripts\activate
A (venv) prefix in your terminal indicates you're working in the isolated environment.
Step 3: Open Your Project in VS Code
For optimal Python development, open the project in Visual Studio Code:
code .
If you don't have VS Code, download it here. Its Python integration streamlines scripting and debugging.
Step 4: Install the CUA MCP Server
Quick Install via Script
Automate installation with the official script:
curl -fsSL https://raw.githubusercontent.com/trycua/cua/main/libs/mcp-server/scripts/install_mcp_server.sh | bash
This script will:
- Create the
~/.cuadirectory if missing. - Generate a startup script for MCP.
- Manage Python environments and install the
cua-mcp-serverpackage. - Set up Docker for containerized execution.
Note: Installation may take several minutes as dependencies are downloaded.
Manual Installation (If Needed)
If the script fails, install manually:
pip install cua-mcp-server
This installs the MCP server and all required agent dependencies.
Confirm Docker is Running
The MCP server depends on Docker. Check with:
docker ps
If Docker isn’t running, start it via Docker Desktop (Mac) or:
sudo systemctl start docker
(on Linux).
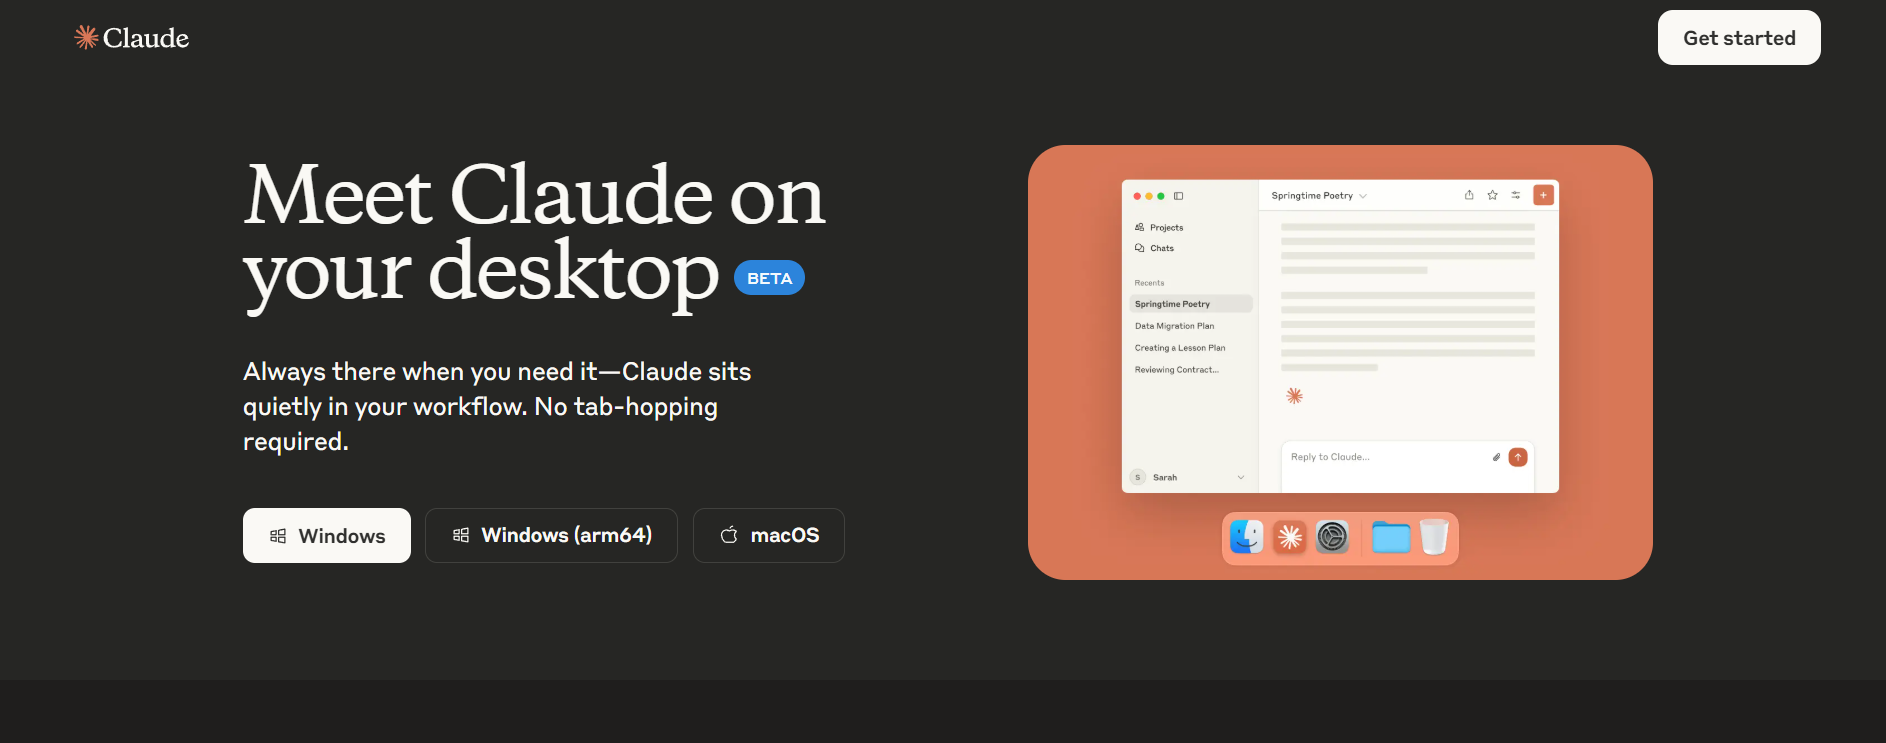
Step 5: Configure CUA MCP Server for Claude Desktop
Integrate CUA with Claude 3.7 using your Anthropic API key.
1. Obtain Your Anthropic API Key
- Sign up or log in at Anthropic.
- Navigate to API settings and generate a key.
- Store your key securely.
2. Update Claude Desktop Configuration
Open (or create) ~/.config/claude-desktop/claude_desktop_config.json and add:
{
  "mcpServers": {
    "cua-agent": {
      "command": "/bin/bash",
      "args": ["~/.cua/start_mcp_server.sh"],
      "env": {
        "CUA_AGENT_LOOP": "OMNI",
        "CUA_MODEL_PROVIDER": "ANTHROPIC",
        "CUA_MODEL_NAME": "claude-3-7-sonnet-20250219",
        "ANTHROPIC_API_KEY": "your-api-key"
      }
    }
  }
}
Replace "your-api-key" with your actual Anthropic API key.
- The
"OMNI"loop allows flexible task handling. - All commands run locally for privacy.
3. Optional: Cursor Integration
Want to control your computer with Cursor? Add a similar MCP config to .cursor/mcp.json (project-specific) or ~/.cursor/mcp.json (global). Then, in Cursor’s Agent chat, prompt:
“Use the computer control tools to open Safari.”
Step 6: Test CUA MCP Server with Claude 3.7
Let's validate your setup by asking Claude to open a terminal and list directory contents.
1. Create a Test Script
In VS Code, save the following as test.py:
import os
import asyncio
from computer import Computer
from agent import ComputerAgent, LLM, AgentLoop, LLMProvider

async def run_task() -> str:
    async with Computer(verbosity='DEBUG') as computer:
        agent = ComputerAgent(
            computer=computer,
            loop=AgentLoop.OMNI,
            model=LLM(
                provider=LLMProvider.ANTHROPIC,
                model_name="claude-3-7-sonnet-20250219",
                api_key="your-api-key"
            )
        )
        task = "Open a terminal and list the contents of the current directory"
        async for result in agent.run(task):
            return result

async def main():
    result = await run_task()
    print("\n\nResult:", result)

if __name__ == "__main__":
    asyncio.run(main())
Replace
"your-api-key"with your Anthropic key, or set it as theANTHROPIC_API_KEYenvironment variable.
2. Select Python Interpreter in VS Code
- Press
Ctrl + P(orCmd + Pon Mac) and search for “Select Python Interpreter.” - Choose the virtual environment you created earlier.
3. Run Your Script
With Docker running and configs set, execute:
python test.py
Claude 3.7, via CUA MCP, will open a terminal and execute ls.
You should see a result like:
Result: cua test.py venv
If you encounter issues, double-check:
- Docker is running
- API key is correct
- Port 11434 is not blocked (for Ollama fallback)
- Logs at
~/Library/Logs/Claude/mcp*.log(on Mac)
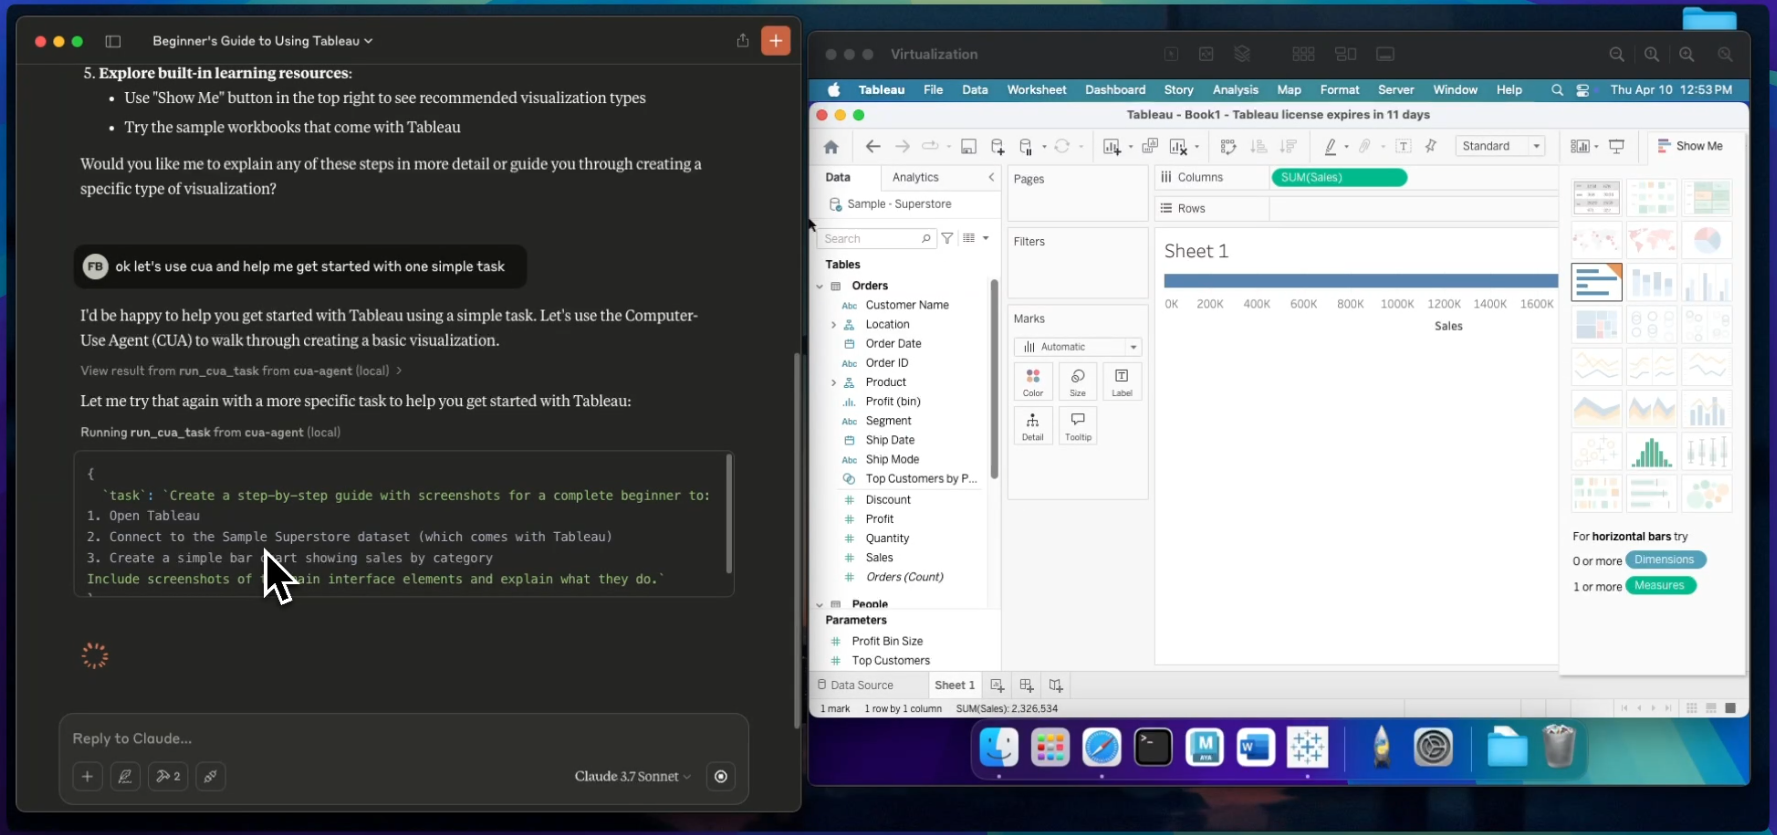
4. Test Directly in Claude Desktop
Open Claude Desktop and type:
“Open a terminal and list the contents of the current directory.”
Claude will use CUA MCP to automate the action and display results in chat.
CUA MCP Server Tools: What Can You Automate?
CUA MCP exposes two main tools to AI agents like Claude 3.7:
- run_cua_task: Automate a single command, e.g., “Open Chrome and go to github.com.”
- run_multi_cua_tasks: Chain multiple commands, e.g., “Create a folder named ‘Projects’ on my desktop, then open it.”
Sample Prompts:
- “Create a folder called ‘Projects’ on my desktop.”
- “Find all PDF files in my Downloads folder.”
- “Take a screenshot and highlight the error message.”
Claude automatically routes these requests to CUA for execution.
For more advanced use cases, see:
How to Use MCP Servers in Windsurf AI: Unlock Seamless Automation
Developer Insights: Using CUA MCP with Claude 3.7
What stands out after hands-on use:
- Local-First Security: All commands run on your machine—no cloud required. Ideal for privacy-conscious API and backend developers.
- Intuitive Automation: Claude 3.7 understands instructions naturally, from file operations to app launching.
- Setup Tips: Docker and API key config can be tricky, but the install script speeds things up.
- Broad Potential: Automate repetitive tasks, manage files, or even build custom coding assistants.
If you run into trouble, check the CUA GitHub issues for known fixes or review your Docker/API settings.
Pro Tips for Reliable CUA MCP Automation
- Debugging: Review Claude logs at
~/Library/Logs/Claude/mcp*.logor rundocker logsfor troubleshooting. - Try Creative Tasks: Ask Claude to “Open a browser and go to github.com” or “Create a file called hello.txt.”
- Optimize Context: Set
CUA_MAX_IMAGES=5in your config to keep more screenshots for tasks that require visual context.
Final Thoughts: Unlock Local AI Automation for Developers
With CUA MCP and Claude 3.7, you can automate your Mac or Linux system using natural language—everything stays private and under your control. Try automating app launches, file management, or even building your own coding assistant. For more advanced API workflows, Apidog delivers an integrated, all-in-one platform for teams seeking efficiency and seamless collaboration.