Have you ever wanted to create a web application or a microservice with Java, but felt overwhelmed by the complexity and configuration involved? If so, you are not alone. Many developers struggle with the challenges of web development, such as setting up the server, managing the dependencies, handling the database, and more.
That’s why Spring Boot is a game-changer. Spring Boot is a framework that simplifies web development with Java. It provides features such as auto-configuration, embedded servers, starter dependencies, and more. With Spring Boot, you can focus on writing your business logic, rather than dealing with the boilerplate code.
But creating a web application or a microservice is not enough. You also need to test it. Testing is crucial for ensuring the quality and reliability of your software. It helps you find and fix bugs, improve performance, and prevent errors.
That’s where Apidog comes in.
In this blog post, you will learn how to build and test a Spring Boot API with Apidog. You will create a simple RESTful API with Spring Boot and test it with Apidog .
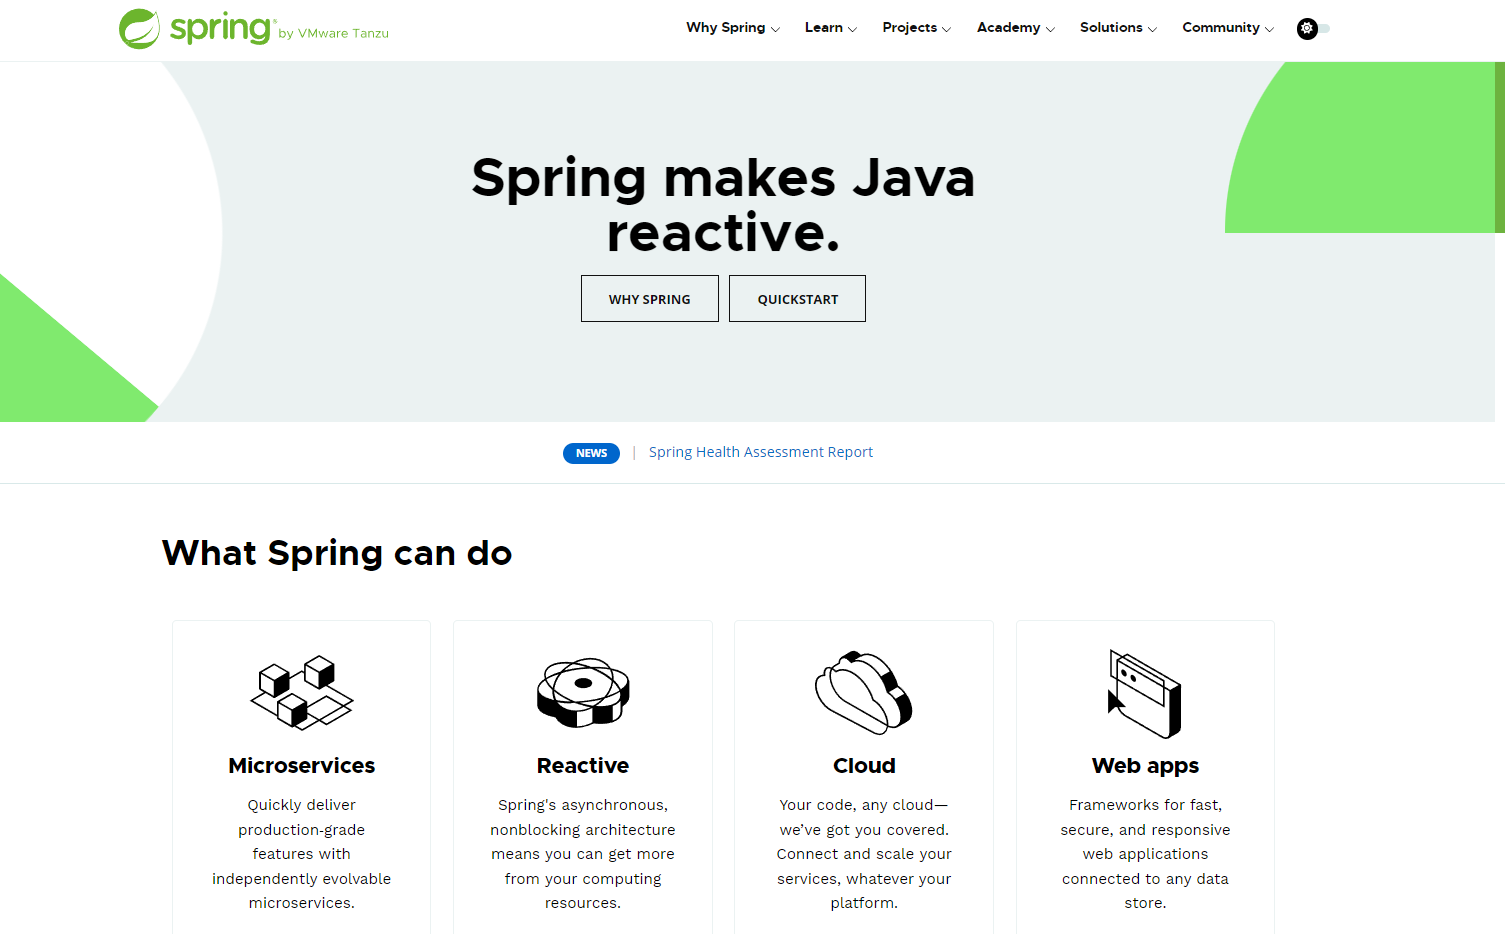
What is Spring Boot and why use it?
Spring Boot is a framework that simplifies the development of Spring applications. It provides a lot of features and conventions that make it easier to create, configure, run, and deploy Spring applications. Some of the benefits of using Spring Boot are:
- It has a starter dependency management system that automatically adds the required libraries and versions for your project.
- It has an embedded web server that allows you to run your application without any additional configuration or installation.
- It has an auto-configuration mechanism that detects and applies the optimal settings for your application based on the dependencies and environment.
- It has a production-ready support that includes features such as health checks, metrics, logging, and security.
With Spring Boot, you can focus on writing your business logic and let the framework handle the rest.
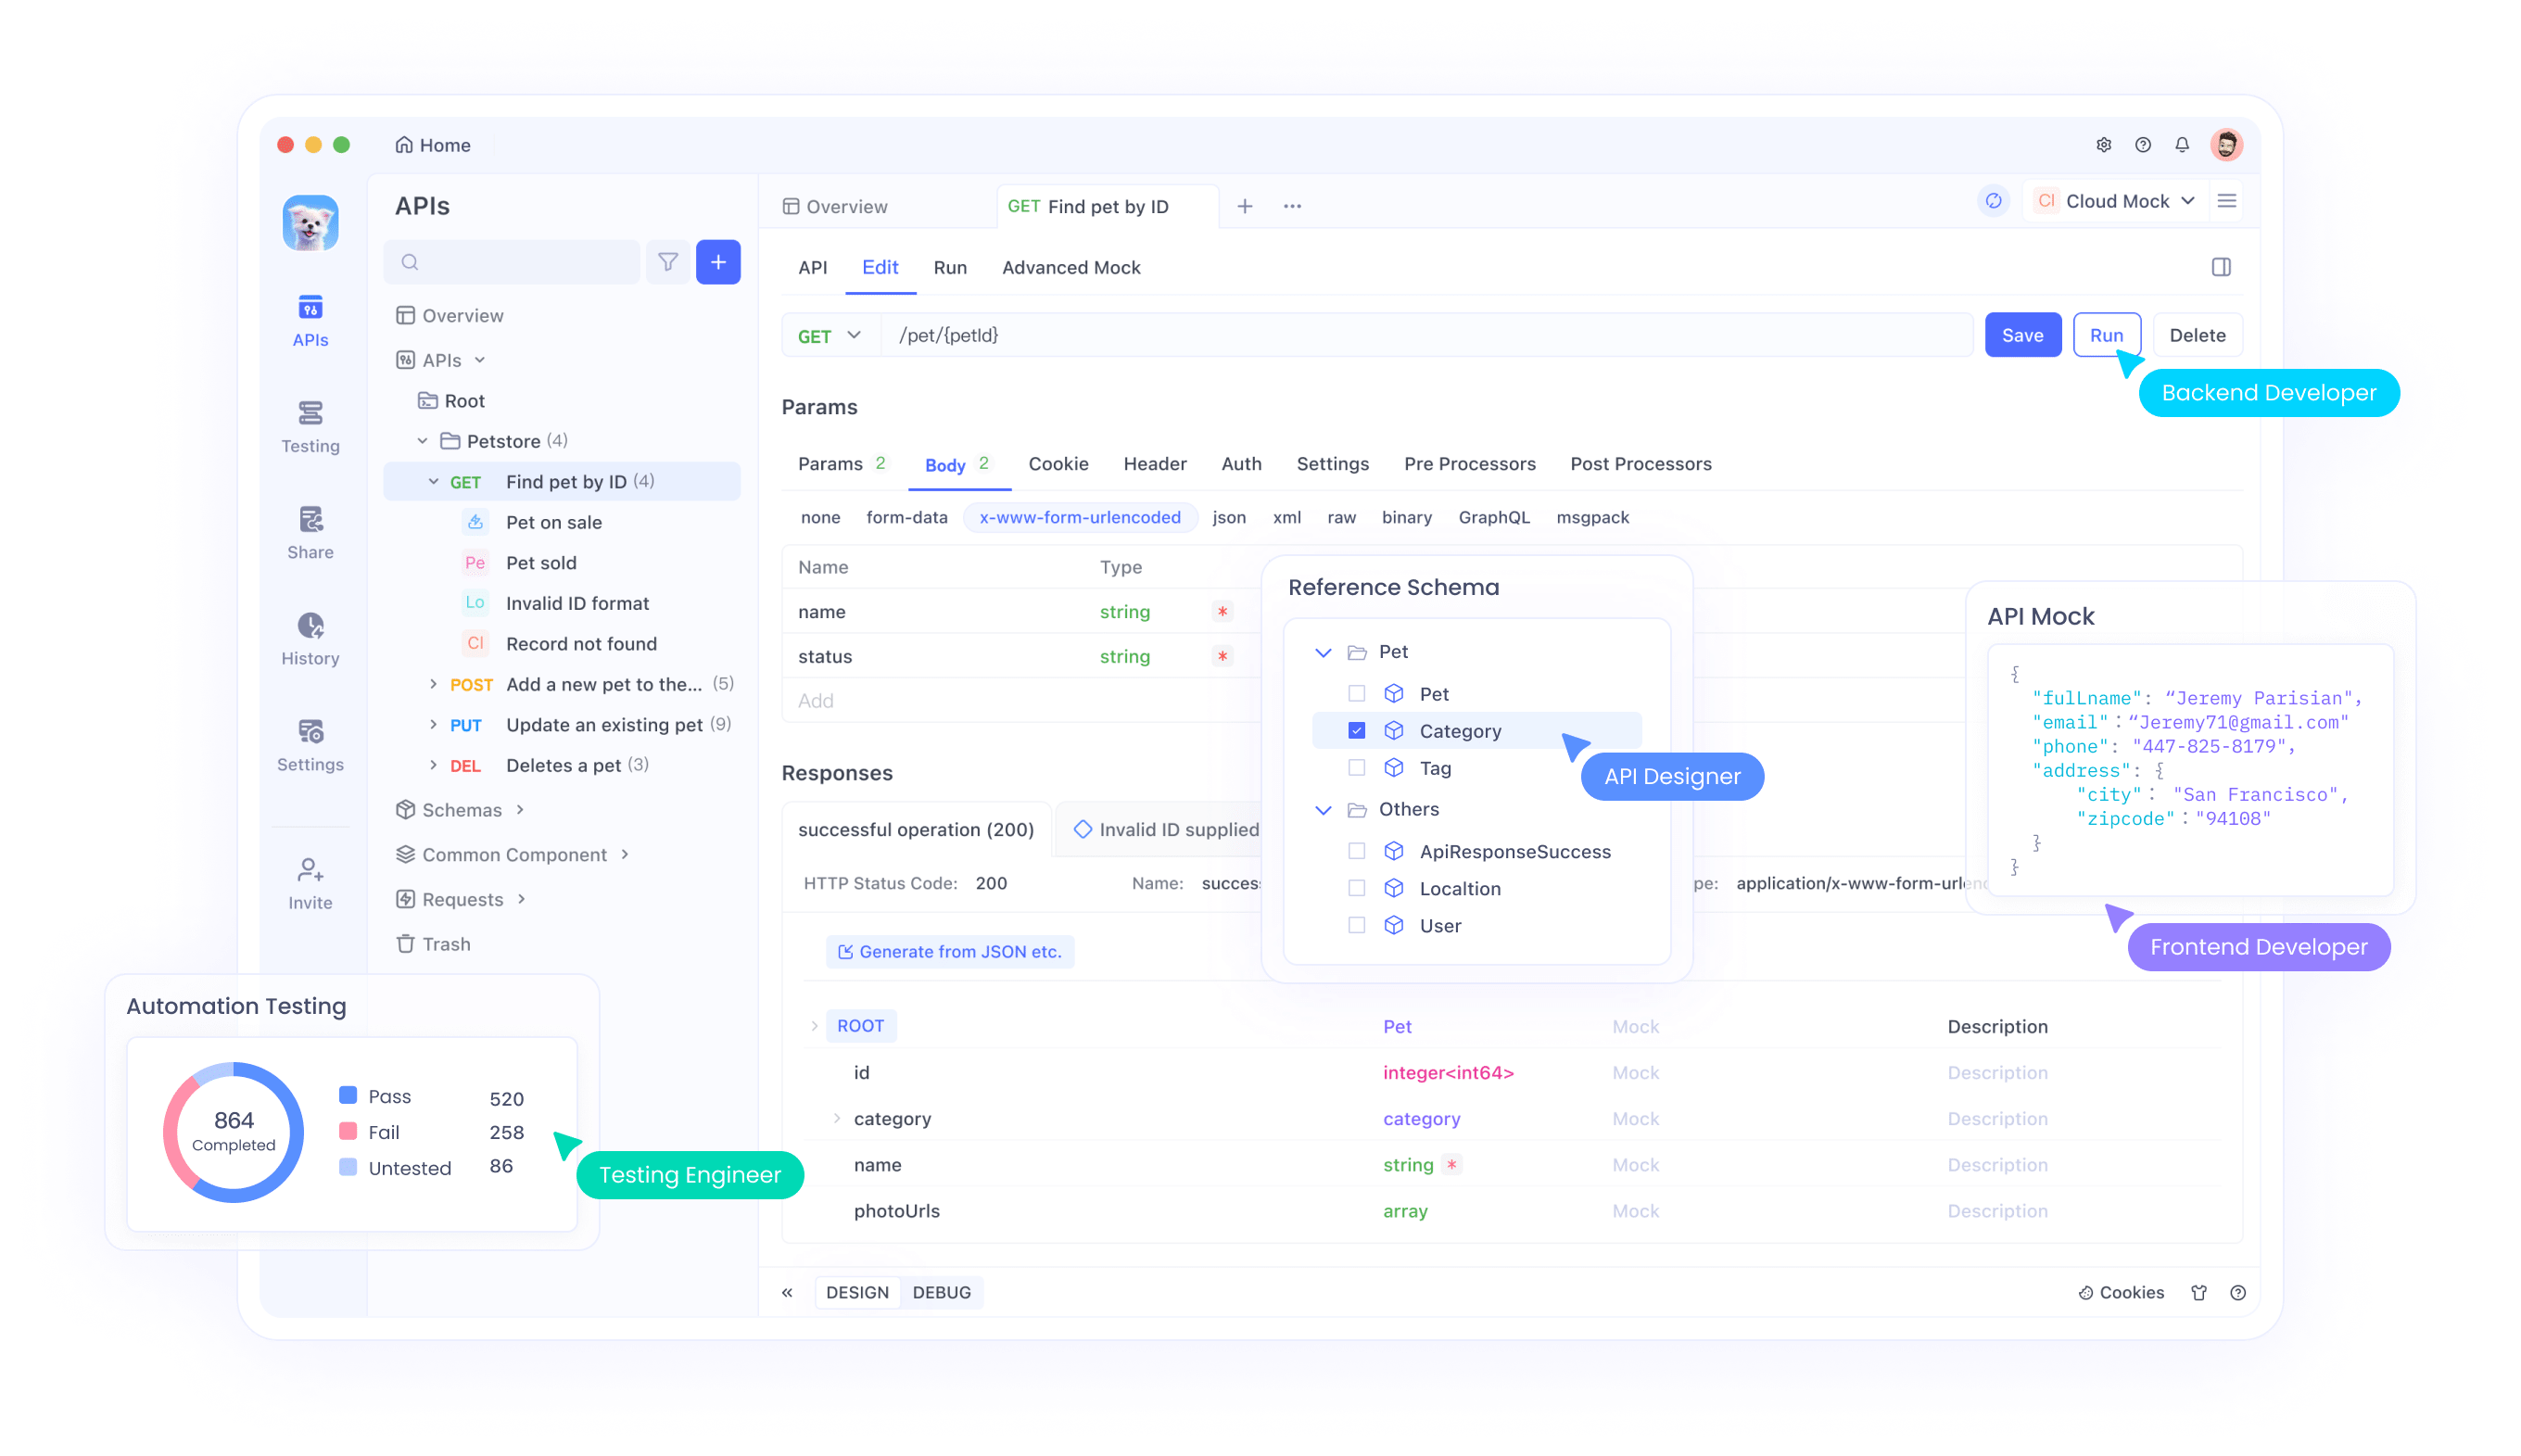
What is Apidog and how it can help you test your API?
Apidog is a tool that helps you test your APIs in a simple and intuitive way. It allows you to connect to your API, explore the endpoints, and create and run test cases for your API. Some of the features of APIdog are:
- It has a graphical user interface that makes it easy to interact with your API and see the results.
- It has a code editor that lets you write and edit your test cases using JavaScript and Chai assertions.
- It has a test runner that executes your test cases and shows you the status, output, and errors of each test.
- It has a report generator that creates a comprehensive and customizable report of your test results.
With Apidog, you can test your API in a fast and reliable way and ensure its quality and functionality..
Setting up the project
The first step is to create a Spring Boot project with Spring Initializr. Spring Initializr is a web tool that generates a basic project structure and configuration for you based on your preferences. To use Spring Initializr, follow these steps:
Go to https://start.spring.io/ and fill in the details of your project. For this example, I will use the following settings:
- Project: Maven Project
- Language: Java
- Spring Boot: 3.2.3
- Project Metadata:
- Group: com.example
- Artifact: apidog-demo
- Name: apidog-demo
- Description: Demo project for Spring Boot
- Package name: com.example.apidog-demo
- Packaging: Jar
- Java: 17
- Dependencies: Spring Web, Spring Data JPA, H2 Database
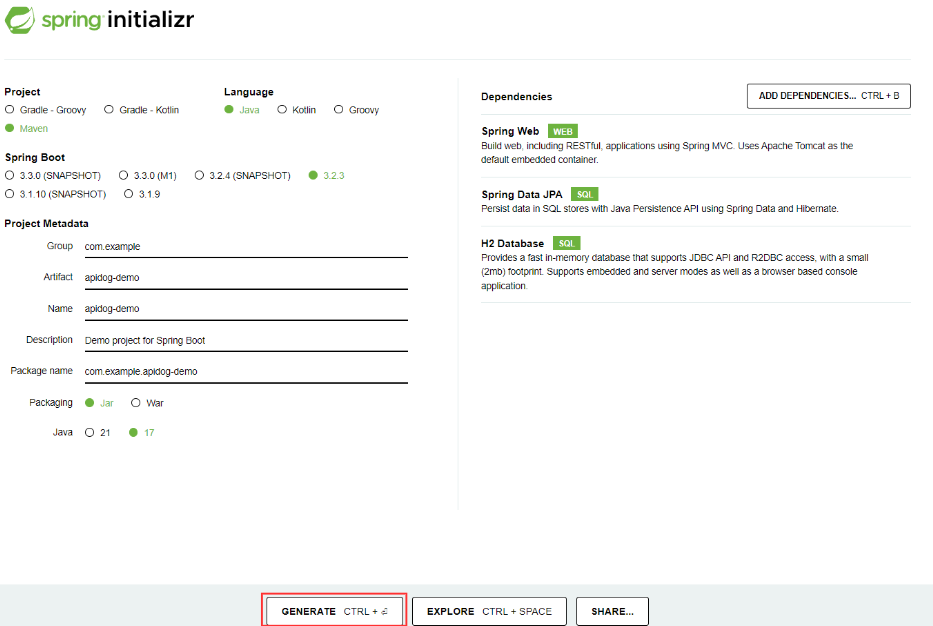
Click on the GENERATE button and download the zip file of your project.
Extract the zip file and open the project in your favorite IDE.
Adding the dependencies for Spring Web and Spring Data JPA
The next step is to add the dependencies for Spring Web and Spring Data JPA. Spring Web is a module that provides the essential web support for building RESTful APIs with Spring. Spring Data JPA is a module that simplifies the access and manipulation of data in relational databases using JPA and Hibernate.
To add these dependencies, you can use the Spring Initializr as mentioned above, or you can manually edit the pom.xml file of your project and add the following dependencies:
<dependency>
  <groupId>org.springframework.boot</groupId>
  <artifactId>spring-boot-starter-web</artifactId>
</dependency>
<dependency>
  <groupId>org.springframework.boot</groupId>
  <artifactId>spring-boot-starter-data-jpa</artifactId>
</dependency>
<dependency>
  <groupId>com.h2database</groupId>
  <artifactId>h2</artifactId>
  <scope>runtime</scope>
</dependency>
Configuring the application properties
The next step is to configure the application properties. The application.properties file is a file that contains the key-value pairs that define the behavior and settings of your application. For this example, we will use the following properties:
# Enable the H2 console for accessing the database
spring.h2.console.enabled=true
# Set the path of the H2 console
spring.h2.console.path=/h2-console
# Set the URL of the database
spring.datasource.url=jdbc:h2:mem:testdb
# Set the username of the database
spring.datasource.username=sa
# Set the password of the database
spring.datasource.password=
# Set the dialect of the database
spring.jpa.database-platform=org.hibernate.dialect.H2Dialect
# Show the SQL statements in the console
spring.jpa.show-sql=true
# Generate the database schema from the entity classes
spring.jpa.hibernate.ddl-auto=update
# Enable the Swagger UI for documenting the API
springdoc.swagger-ui.enabled=true
# Set the path of the Swagger UI
springdoc.swagger-ui.path=/swagger-ui.html
Creating the API
The next step is to create the API. The API will consist of a domain model, a repository, and a controller for a simple entity called Book. A Book will have the following properties: id, title, author, and price.
Creating the domain model and a repository for a simple entity
The domain model is a class that represents the data and behavior of the entity. The repository is an interface that extends the JpaRepository interface and provides the methods for accessing and manipulating the data of the entity.
To create the domain model and the repository for the Book entity, follow these steps:
- Create a new package called com.example.apidogdemo.model and create a new class called Book.java inside it.
- Annotate the class with @Entity to mark it as a JPA entity and @Table to specify the name of the table in the database.
- Define the properties of the class and annotate them with @Id, @GeneratedValue, @Column, and @NotNull to specify the primary key, the generation strategy, the column name, and the validation constraint respectively.
- Generate the getters and setters, the constructor, and the toString method for the class.
The Book.java class should look like this:
package com.example.apidogdemo.model;

import javax.persistence.*;
import javax.validation.constraints.NotNull;
import java.math.BigDecimal;

@Entity
@Table(name = "books")
public class Book {

    @Id
    @GeneratedValue(strategy = GenerationType.IDENTITY)
    private Long id;

    @Column(name = "title")
    @NotNull
    private String title;

    @Column(name = "author")
    @NotNull
    private String author;

    @Column(name = "price")
    @NotNull
    private BigDecimal price;

    public Book() {
    }

    public Book(Long id, String title, String author, BigDecimal price) {
        this.id = id;
        this.title = title;
        this.author = author;
        this.price = price;
    }

    public Long getId() {
        return id;
    }

    public void setId(Long id) {
        this.id = id;
    }

    public String getTitle() {
        return title;
    }

    public void setTitle(String title) {
        this.title = title;
    }

    public String getAuthor() {
        return author;
    }

    public void setAuthor(String author) {
        this.author = author;
    }

    public BigDecimal getPrice() {
        return price;
    }

    public void setPrice(BigDecimal price) {
        this.price = price;
    }

    @Override
    public String toString() {
        return "Book{" +
                "id=" + id +
                ", title='" + title + '\'' +
                ", author='" + author + '\'' +
                ", price=" + price +
                '}';
    }
}
- Create a new package called com.example.apidogdemo.repository and create a new interface called BookRepository.java inside it.
- Annotate the interface with @Repository to mark it as a Spring Data JPA repository.
- Extend the JpaRepository interface and specify the entity type and the primary key type as the generic parameters.
- Optionally, you can define custom methods for querying the data of the entity.
The BookRepository.java interface should look like this:
package com.example.apidogdemo.repository;

import com.example.apidogdemo.model.Book;
import org.springframework.data.jpa.repository.JpaRepository;
import org.springframework.stereotype.Repository;

@Repository
public interface BookRepository extends JpaRepository<Book, Long> {
    // You can define custom methods here
}
Creating a controller and defining the endpoints for CRUD operations
The controller is a class that handles the requests and responses of the API. The controller defines the endpoints for the CRUD operations (create, read, update, and delete) for the entity.
To create the controller and define the endpoints for the Book entity, follow these steps:
- Create a new package called com.example.apidogdemo.controller and create a new class called BookController.java inside it.
- Annotate the class with @RestController to mark it as a Spring MVC controller that returns JSON responses.
- Annotate the class with @RequestMapping to specify the base path of the endpoints.
- Inject the BookRepository instance using the @Autowired annotation.
- Define the endpoints for the CRUD operations using the @GetMapping, @PostMapping, @PutMapping, and @DeleteMapping annotations and specify the path and the parameters of each endpoint.
- Use the ResponseEntity class to wrap the response data and the status code for each endpoint.
- Use the @Valid annotation to validate the request body for the create and update endpoints.
- Use the @ExceptionHandler and @ResponseStatus annotations to handle the exceptions and return the appropriate status code and message.
The BookController.java class should look like this:
package com.example.apidogdemo.controller;

import com.example.apidogdemo.model.Book;
import com.example.apidogdemo.repository.BookRepository;
import org.springframework.beans.factory.annotation.Autowired;
import org.springframework.http.HttpStatus;
import org.springframework.http.ResponseEntity;
import org.springframework.web.bind.annotation.*;
import org.springframework.web.server.ResponseStatusException;

import javax.validation.Valid;
import java.util.List;
import java.util.Optional;

@RestController
@RequestMapping("/api/books")
public class BookController {

    @Autowired
    private BookRepository bookRepository;

    // Get all books
    @GetMapping
    public ResponseEntity<List<Book>> getAllBooks() {
        List<Book> books = bookRepository.findAll();
        return new ResponseEntity<>(books, HttpStatus.OK);
    }

    // Get a book by id
    @GetMapping("/{id}")
    public ResponseEntity<Book> getBookById(@PathVariable Long id) {
        Optional<Book> book = bookRepository.findById(id);
        if (book.isPresent()) {
            return new ResponseEntity<>(book.get(), HttpStatus.OK);
        } else {
            throw new ResponseStatusException(HttpStatus.NOT_FOUND, "Book not found");
        }
    }

    // Create a book
    @PostMapping
    public ResponseEntity<Book> createBook(@Valid @RequestBody Book book) {
        Book savedBook = bookRepository.save(book);
        return new ResponseEntity<>(savedBook, HttpStatus.CREATED);
    }

    // Update a book by id
    @PutMapping("/{id}")
    public ResponseEntity<Book> updateBook(@PathVariable Long id, @Valid @RequestBody Book book) {
        Optional<Book> existingBook = bookRepository.findById(id);
        if (existingBook.isPresent()) {
            book.setId(id);
            Book updatedBook = bookRepository.save(book);
            return new ResponseEntity<>(updatedBook, HttpStatus.OK);
        } else {
            throw new ResponseStatusException(HttpStatus.NOT_FOUND, "Book not found");
        }
    }

    // Delete a book by id
    @DeleteMapping("/{id}")
    public ResponseEntity<Void> deleteBook(@PathVariable Long id) {
        Optional<Book> existingBook = bookRepository.findById(id);
        if (existingBook.isPresent()) {
            bookRepository.deleteById(id);
            return new ResponseEntity<>(HttpStatus.NO_CONTENT);
        } else {
            throw new ResponseStatusException(HttpStatus.NOT_FOUND, "Book not found");
        }
    }

    // Handle the validation exceptions
    @ExceptionHandler(javax.validation.ConstraintViolationException.class)
    @ResponseStatus(HttpStatus.BAD_REQUEST)
    public String handleValidationExceptions(javax.validation.ConstraintViolationException ex) {
        return ex.getMessage();
    }
}
Testing the Spring boot API with APIdog
The final step is to test the API with Apidog. Apidog is a tool that helps you test your APIs in a simple and intuitive way. It allows you to connect to your API, explore the endpoints, and create and run test cases for your API.
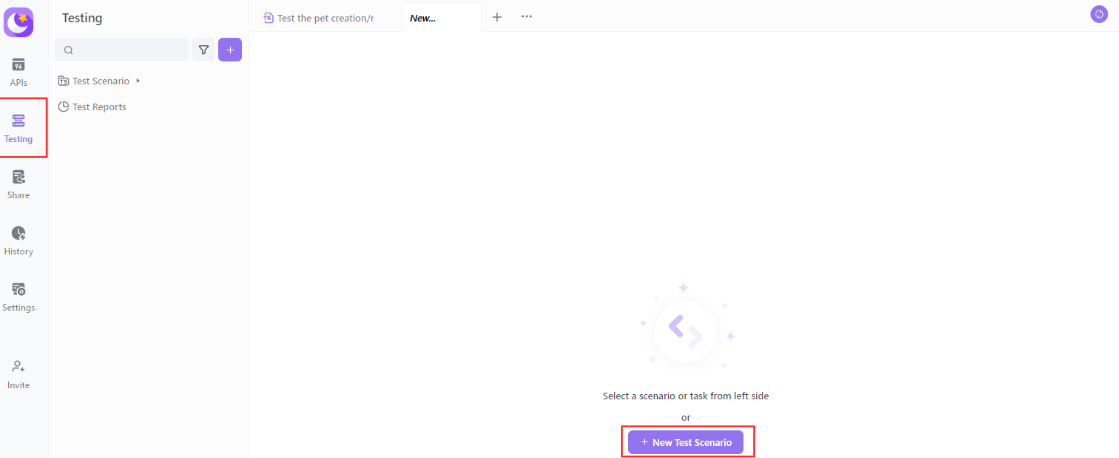
To test the API with Apidog, follow these steps:
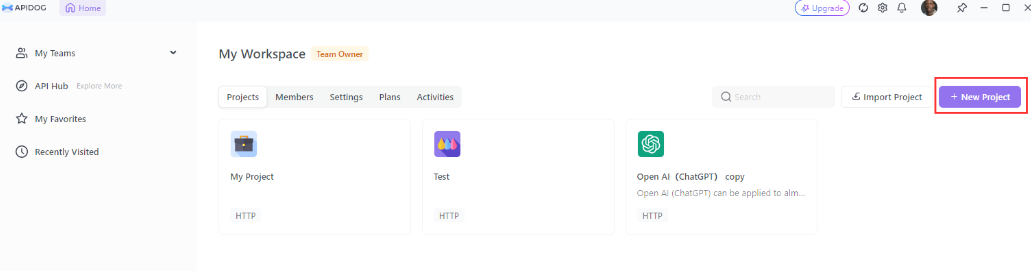
- Launch Apidog and create a new project by clicking on the New Project button.
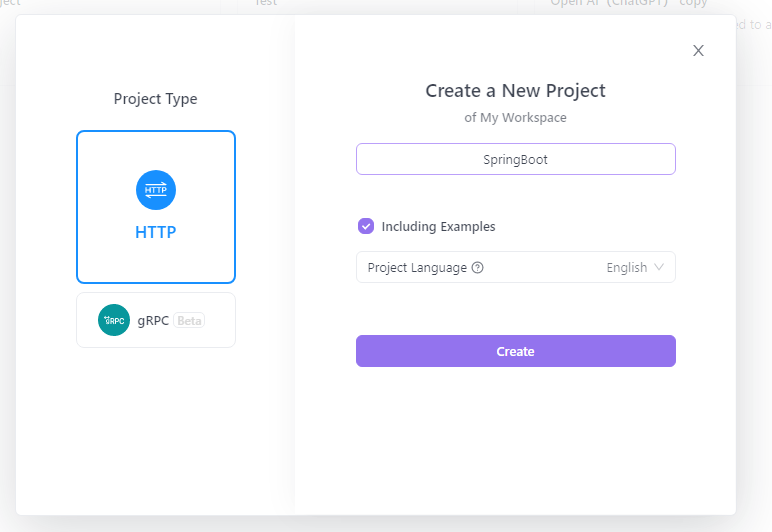
- Enter the name and the description of your project and click on the Create button.
- Enter the base URL of your API and click on the Connect button.
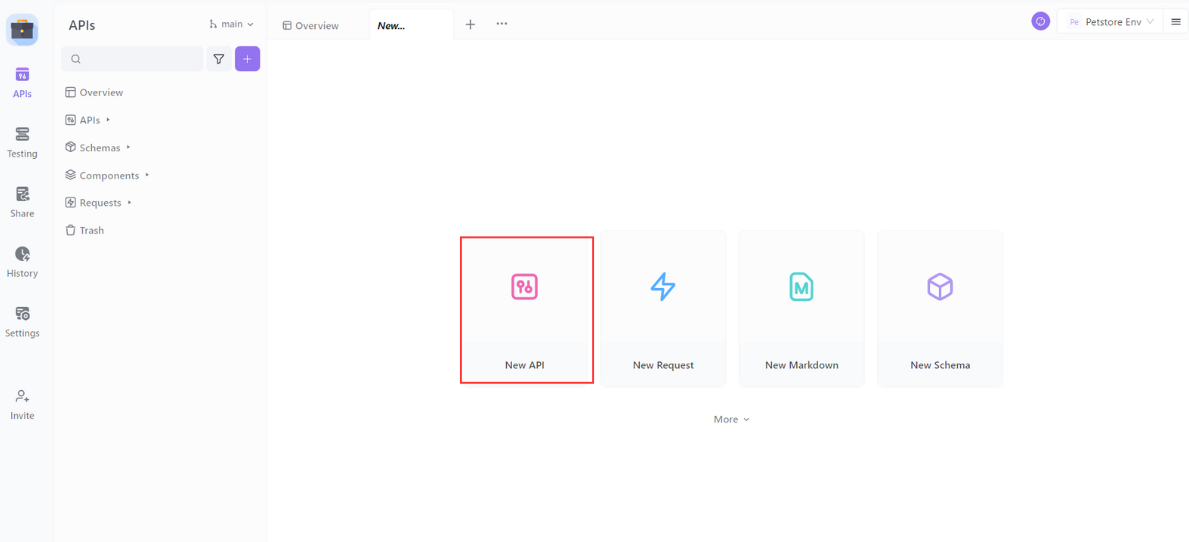
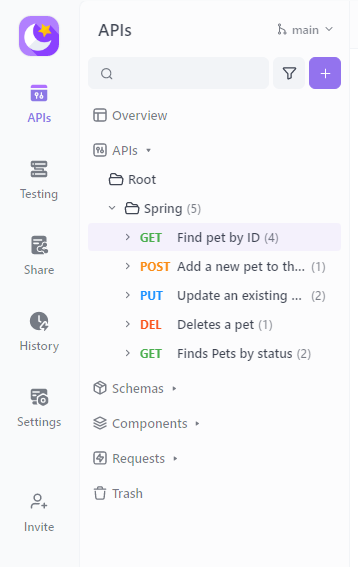
- You can see the list of endpoints of your API on the left panel. You can click on each endpoint to see the details and the examples on the right panel.
- You can create and run test cases for your API by clicking on the Test Cases tab on the right panel. You can use the code editor to write and edit your test cases using JavaScript and Chai assertions.
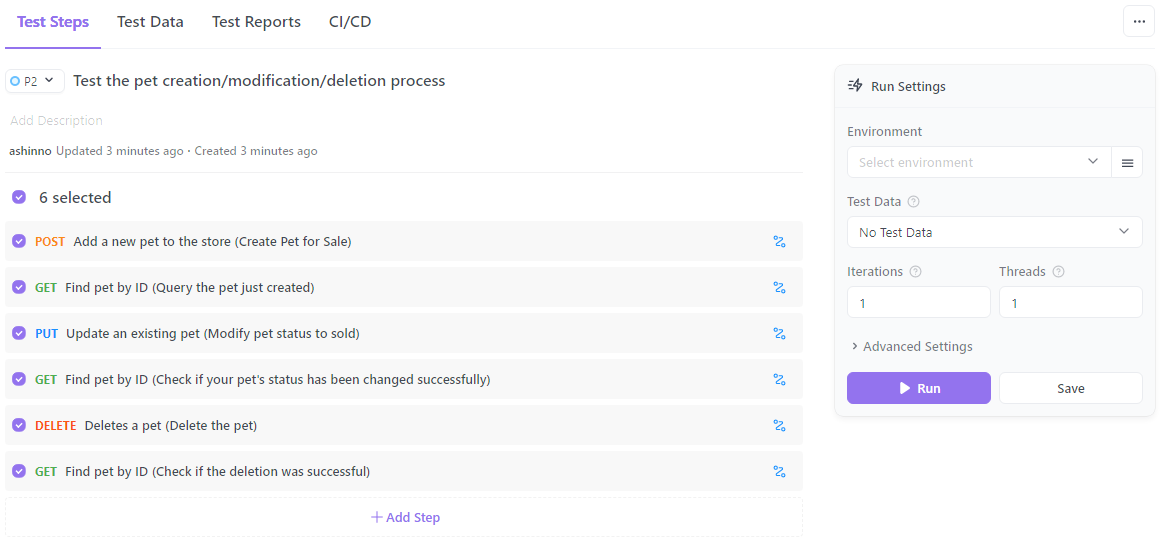
You can use the test runner to execute your test cases and see the status, output, and errors of each test. You can use the report generator to create a comprehensive and customizable report of your test results.
Spring Boot makes Java a defensible choice for API development, though it is worthcomparing it against Python, Go, and C# on the merits — each language brings different trade-offs to the API layer that compound over time.
Conclusion
In this blog post, you have learned how to build and test a Spring Boot API with Apidog. You have created a simple RESTful API with Spring Boot and tested it with Apidog.
Spring Boot is a framework that simplifies web development with Java. It provides features such as auto-configuration, embedded servers, starter dependencies, and more. With Spring Boot, you can focus on writing your business logic, rather than dealing with the boilerplate code.
Apidogis a tool that helps you test and debug your APIs. It allows you to connect to your API and explore the endpoints, create and run test cases, and generate reports. With Apidog, you can test your API faster and easier, without writing any code.


