In today's digital age, the seamless integration of data from various sources is crucial for businesses and developers. APIs play a pivotal role in this integration, allowing different software systems to communicate and share data.
One common use case involves connecting an API to a MySQL database, allowing for data retrieval and storage. This comprehensive guide will delve into the steps required to connect an API to a MySQL database using Apidog.
Apidog: Easily Connect API to Your Database
In the past, it would have been very difficult for applications to communicate directly to data storage locations. The data store becomes a big box, and applications have to write complex command lines to retrieve data from it.
Apidog is an API lifecycle management tool that also provides all the features needed for API development, including database connectivity. Apidog allows you to connect to and interact with your database while developing your API, making API testing smoother than ever.
Database Types in Apidog:
Apidog can also support databases from currently mainstream providers. Next, we would like to introduce you to the database types that Apidog can support.
- MySQL: Open source relational database. It is fast, has excellent load tolerance, and is often used in web applications.
- SQL Server: Relational database by Microsoft. Characterized by high stability and availability. Highly compatible with Windows systems.
- Oracle: A long-established commercial relational database. Boasts advanced functionality and performance. For large-scale systems.
- PostgreSQL: Open source relational database. Standard-compliant and feature-rich. Characterized by stable operation and reliability.
- ClickHouse: A fast column-oriented analytical database. Suitable for processing large amounts of data for real-time analysis.
- MongoDB: Document-oriented NoSQL database. It has a flexible schema and high extensibility. Popular for web/mobile apps.
In this way, it is important to select an appropriate database according to its purpose and characteristics. You need to consider it according to your system requirements.
How to Connect API to MySQL Database?
So how to connect API to a database using Apidog? Next, we will explain a very detailed operation guide.
Step ⒈ While testing the API, you can use " Database operation " in the "Pre Processors" and "Post Processors".

Step ⒉ Configure the database. Here you can add a new database under " New Database Connection ". You can add a new database by entering the information required to connect to the database, as shown in the image below.

Method 1. Fetch MySQL Database Data and Verify the Response
Step ⒈ Enter SQL commands to define what data you want to target and what operations you want to perform. For example select * from users where id=2, you can enter the command: to retrieve the data for the user with id=2 from the users database.
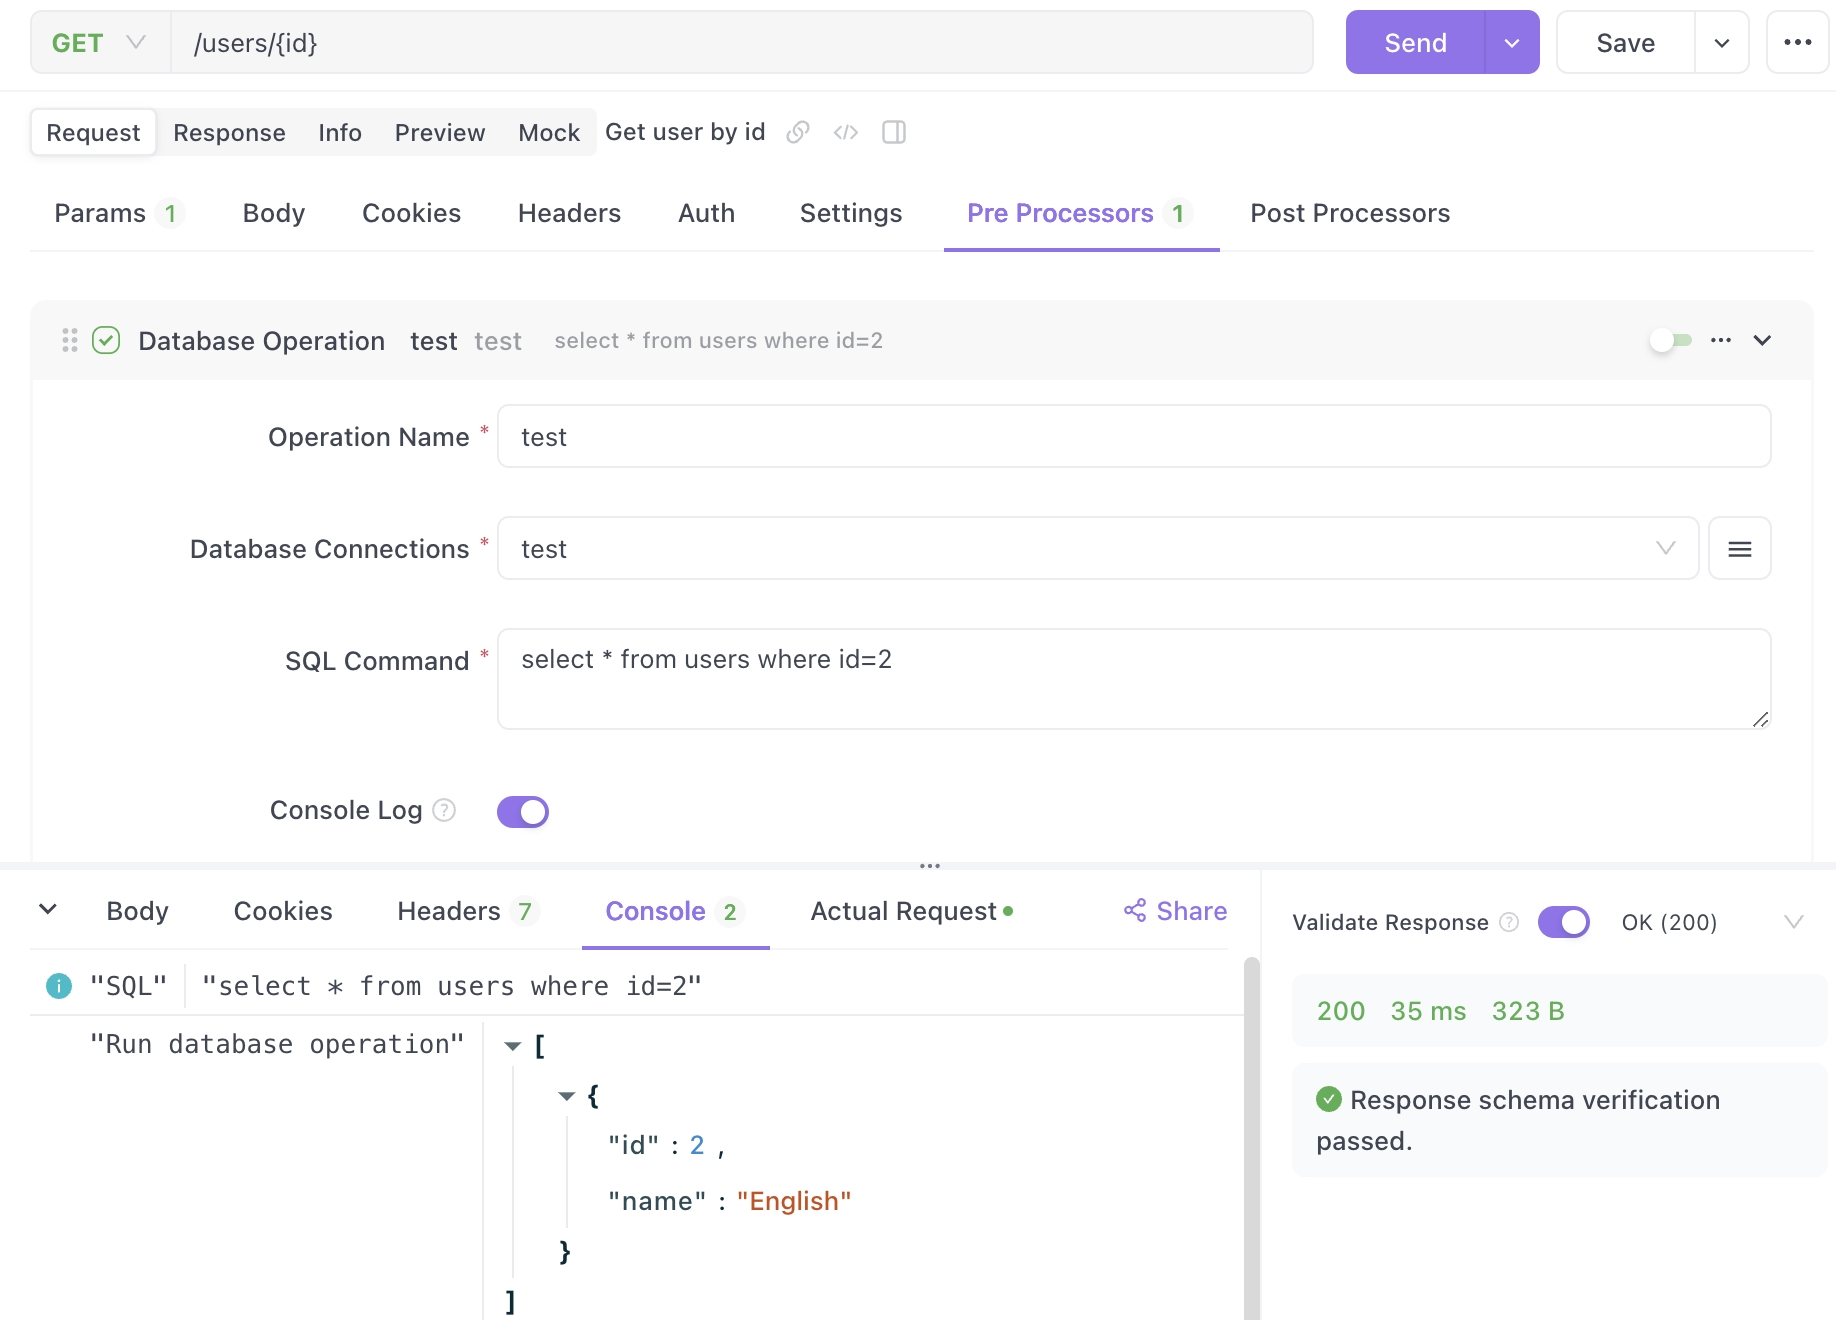
Information: If you switch on " Display results in console " and click the "Submit" button, you can display the data retrieved from the database in the " console ".
In step ⒉ " Extract results to variables ", you can save the data retrieved from the database as Apidog's environment variables, global variables, and local variables by entering variable names and JSONPath expressions.
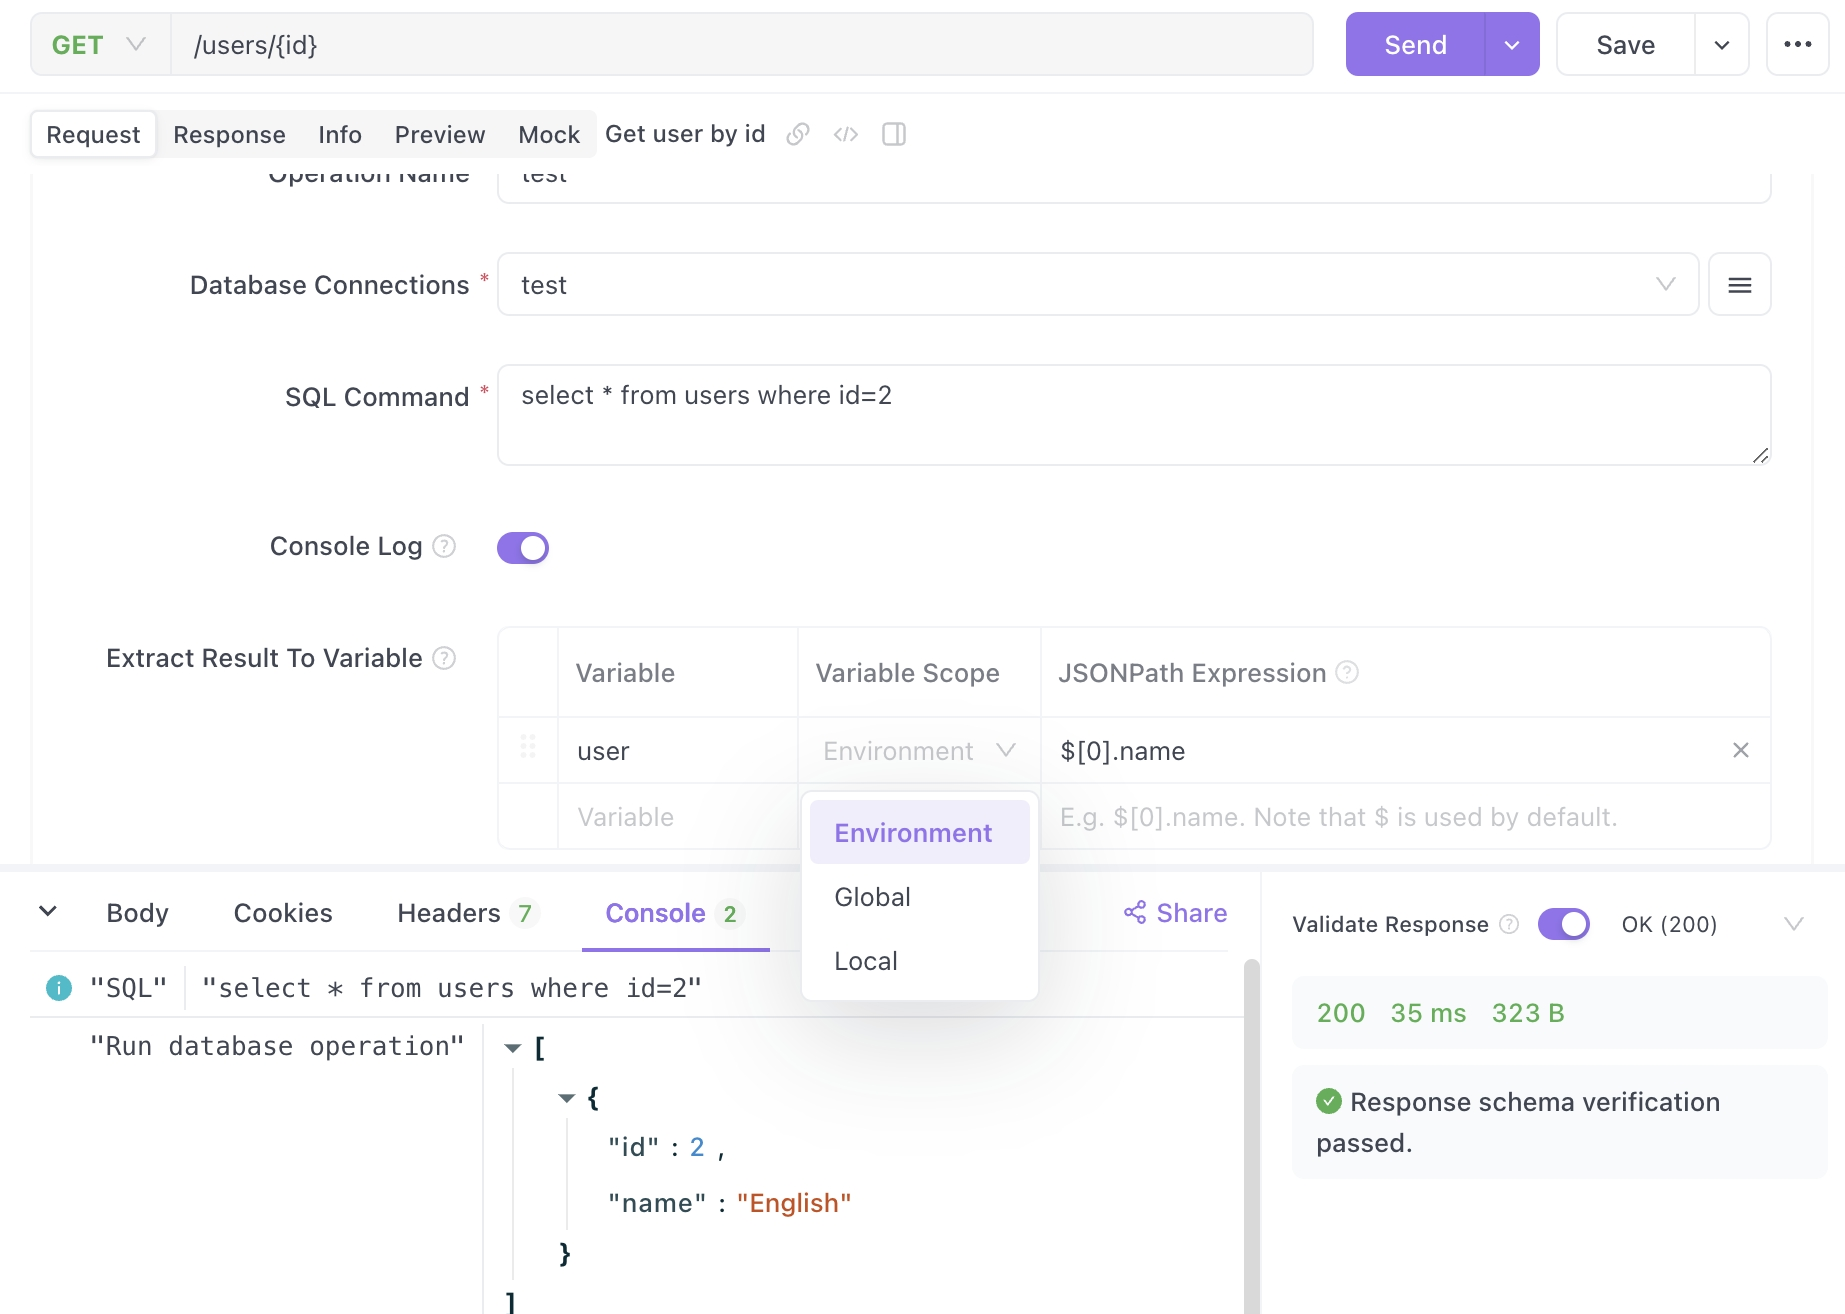
Step ⒊ Once you have finished setting the variables, click the " Submit " button to save the variables. You will now be able to see your saved variables by clicking on the Preferences icon in the top right corner.
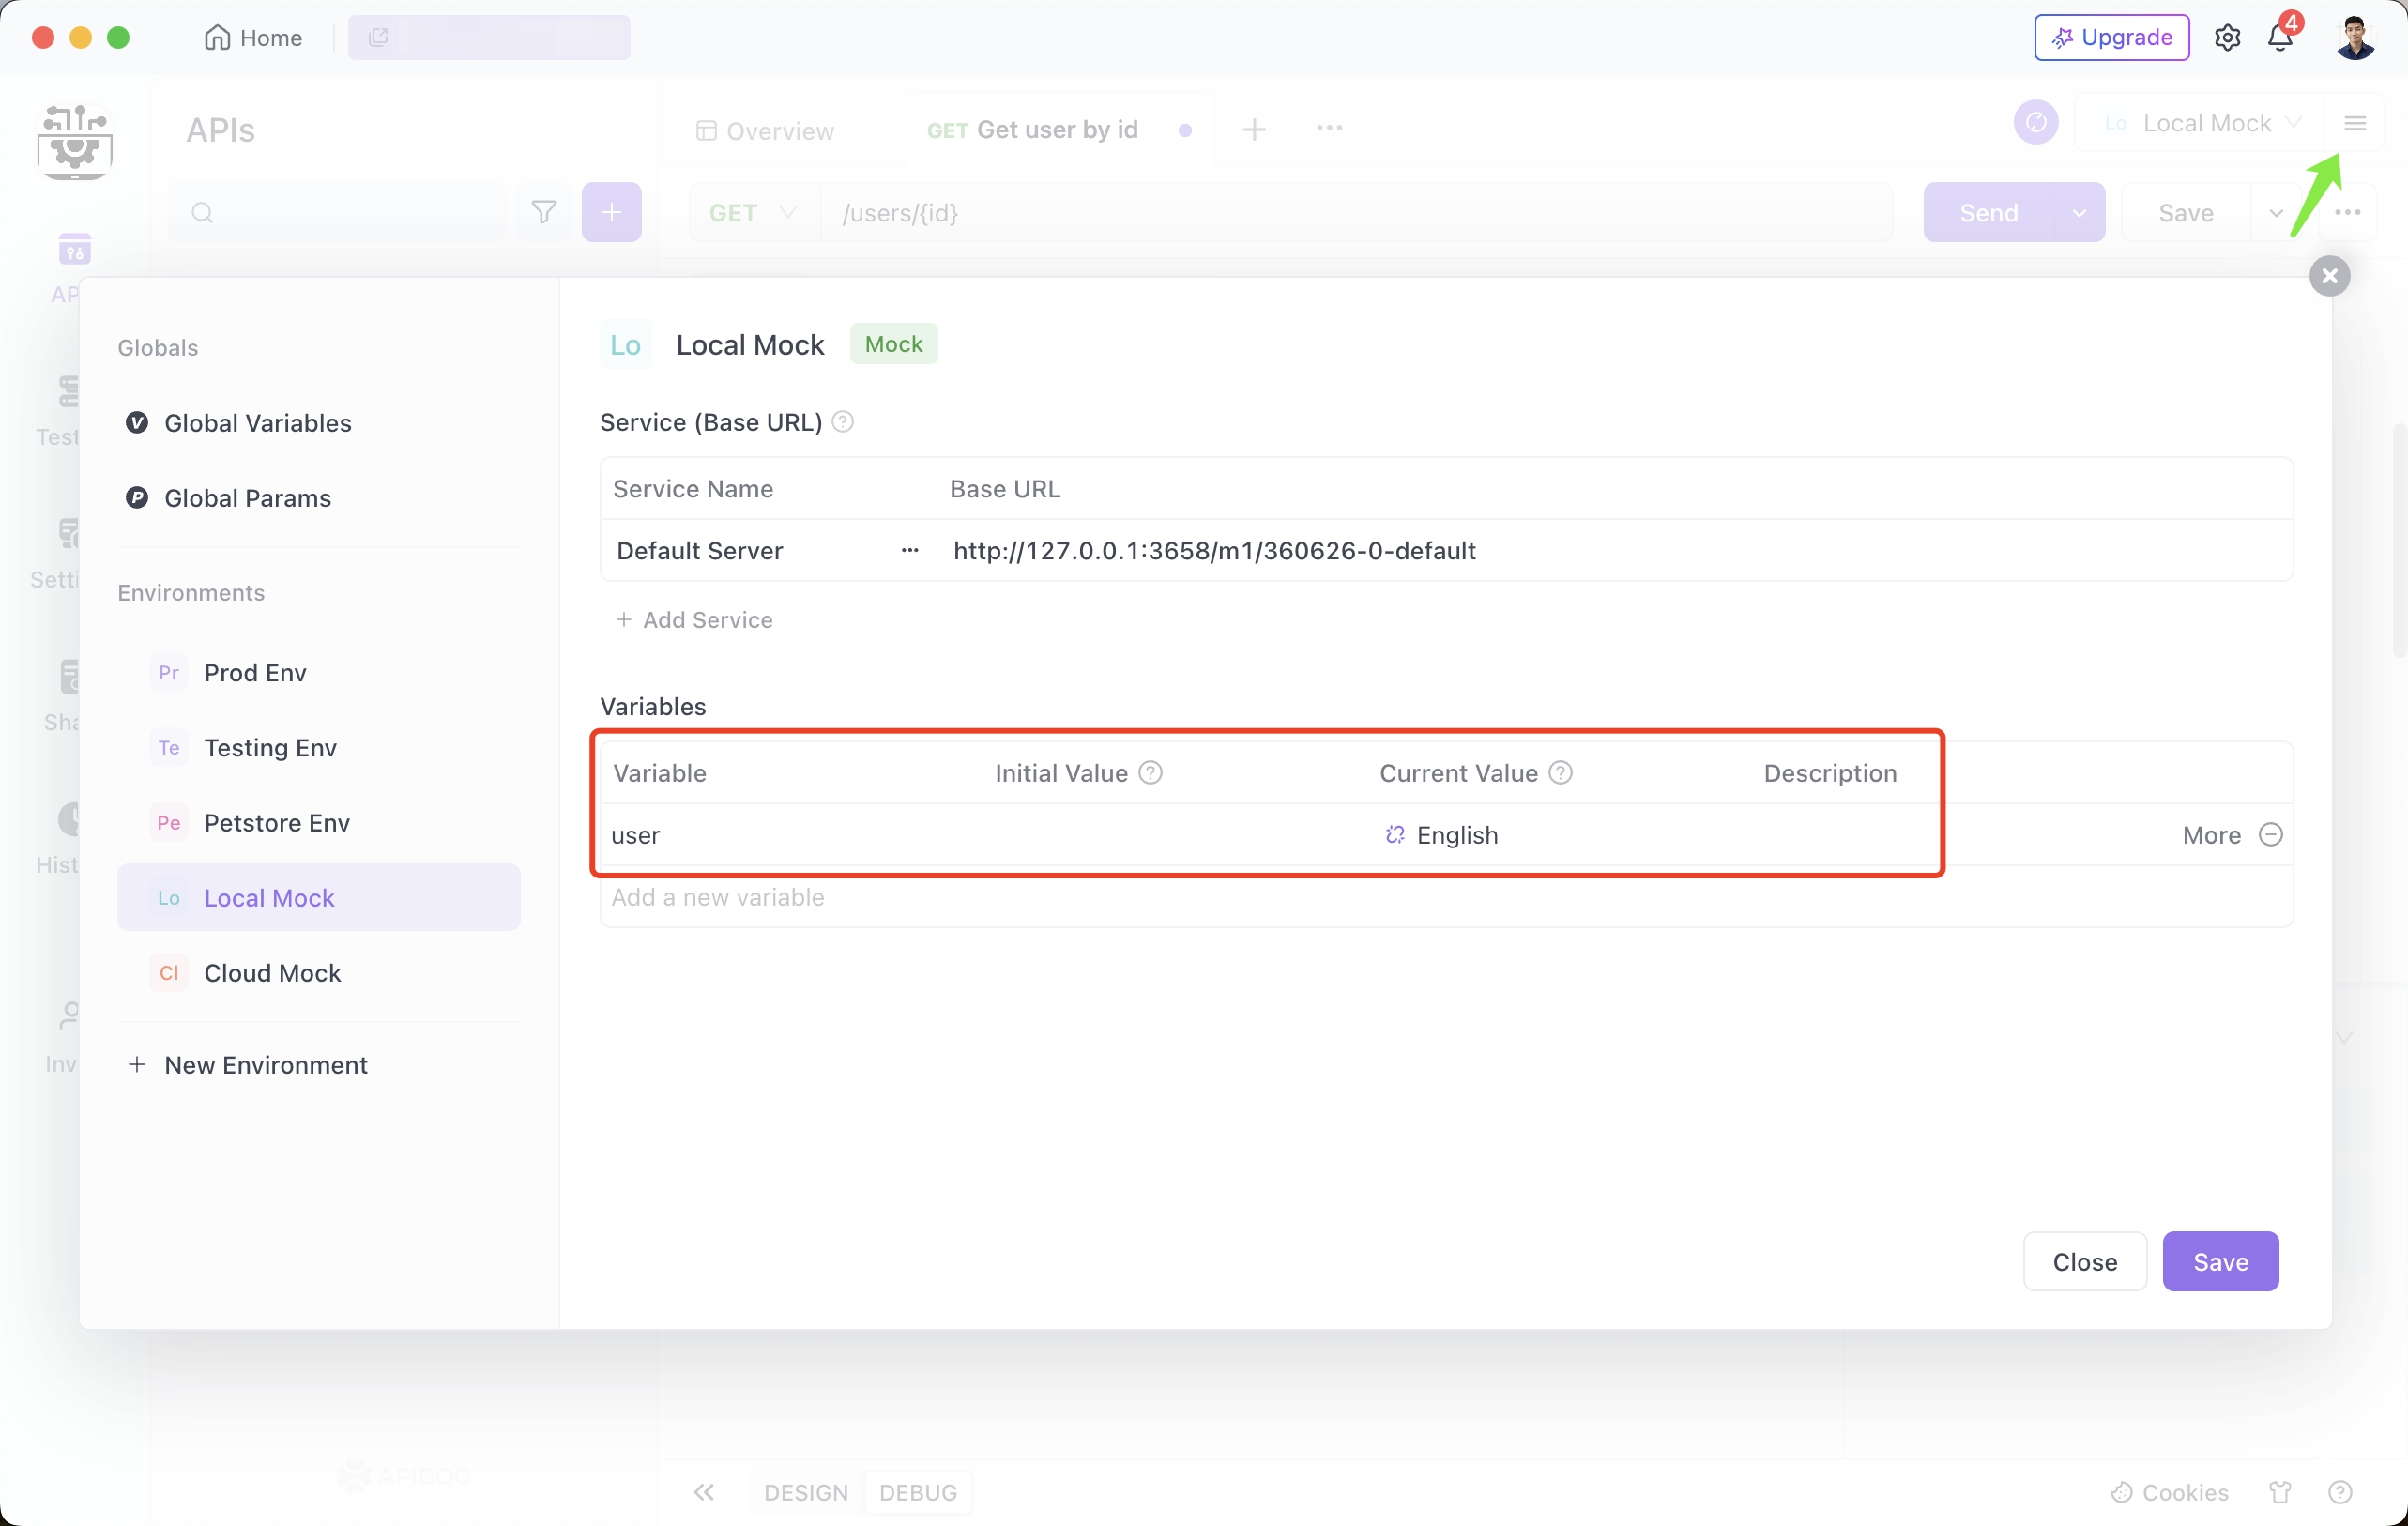
In this way, by saving variables with real data retrieved from the database, you will be able to directly refer to these variables in the API testing process in the future and perform API tests using real data.
By using Apidog's assertion function, it is possible to automatically verify whether the obtained API response matches the data in the database. For instance, fetch the fields like {{user}} from the database, which is a very useful function for verifying API operation and ensuring quality.
Once you set up an assertion, Apidog will automatically verify that the data returned in the response matches the data in your database.
Method 2. Add New Information from the Response to the Database
Also, if you send an API request and get a response, you can save the information returned in the response as a record in the database.
For example, if you want to save users obtained from an API endpoint called User Information in a database called Users, you first need to extract the information you want to save in the record from the response.
Step ⒈ Click "Extract variable" in the post processors of the relevant API and define the information you want to extract.
Here, we need to extract the user ID and user name, so add an "extraction variable" and use JSONPath to extract the user ID and user name to environment variables such as user_id and new_user , respectively . To do.
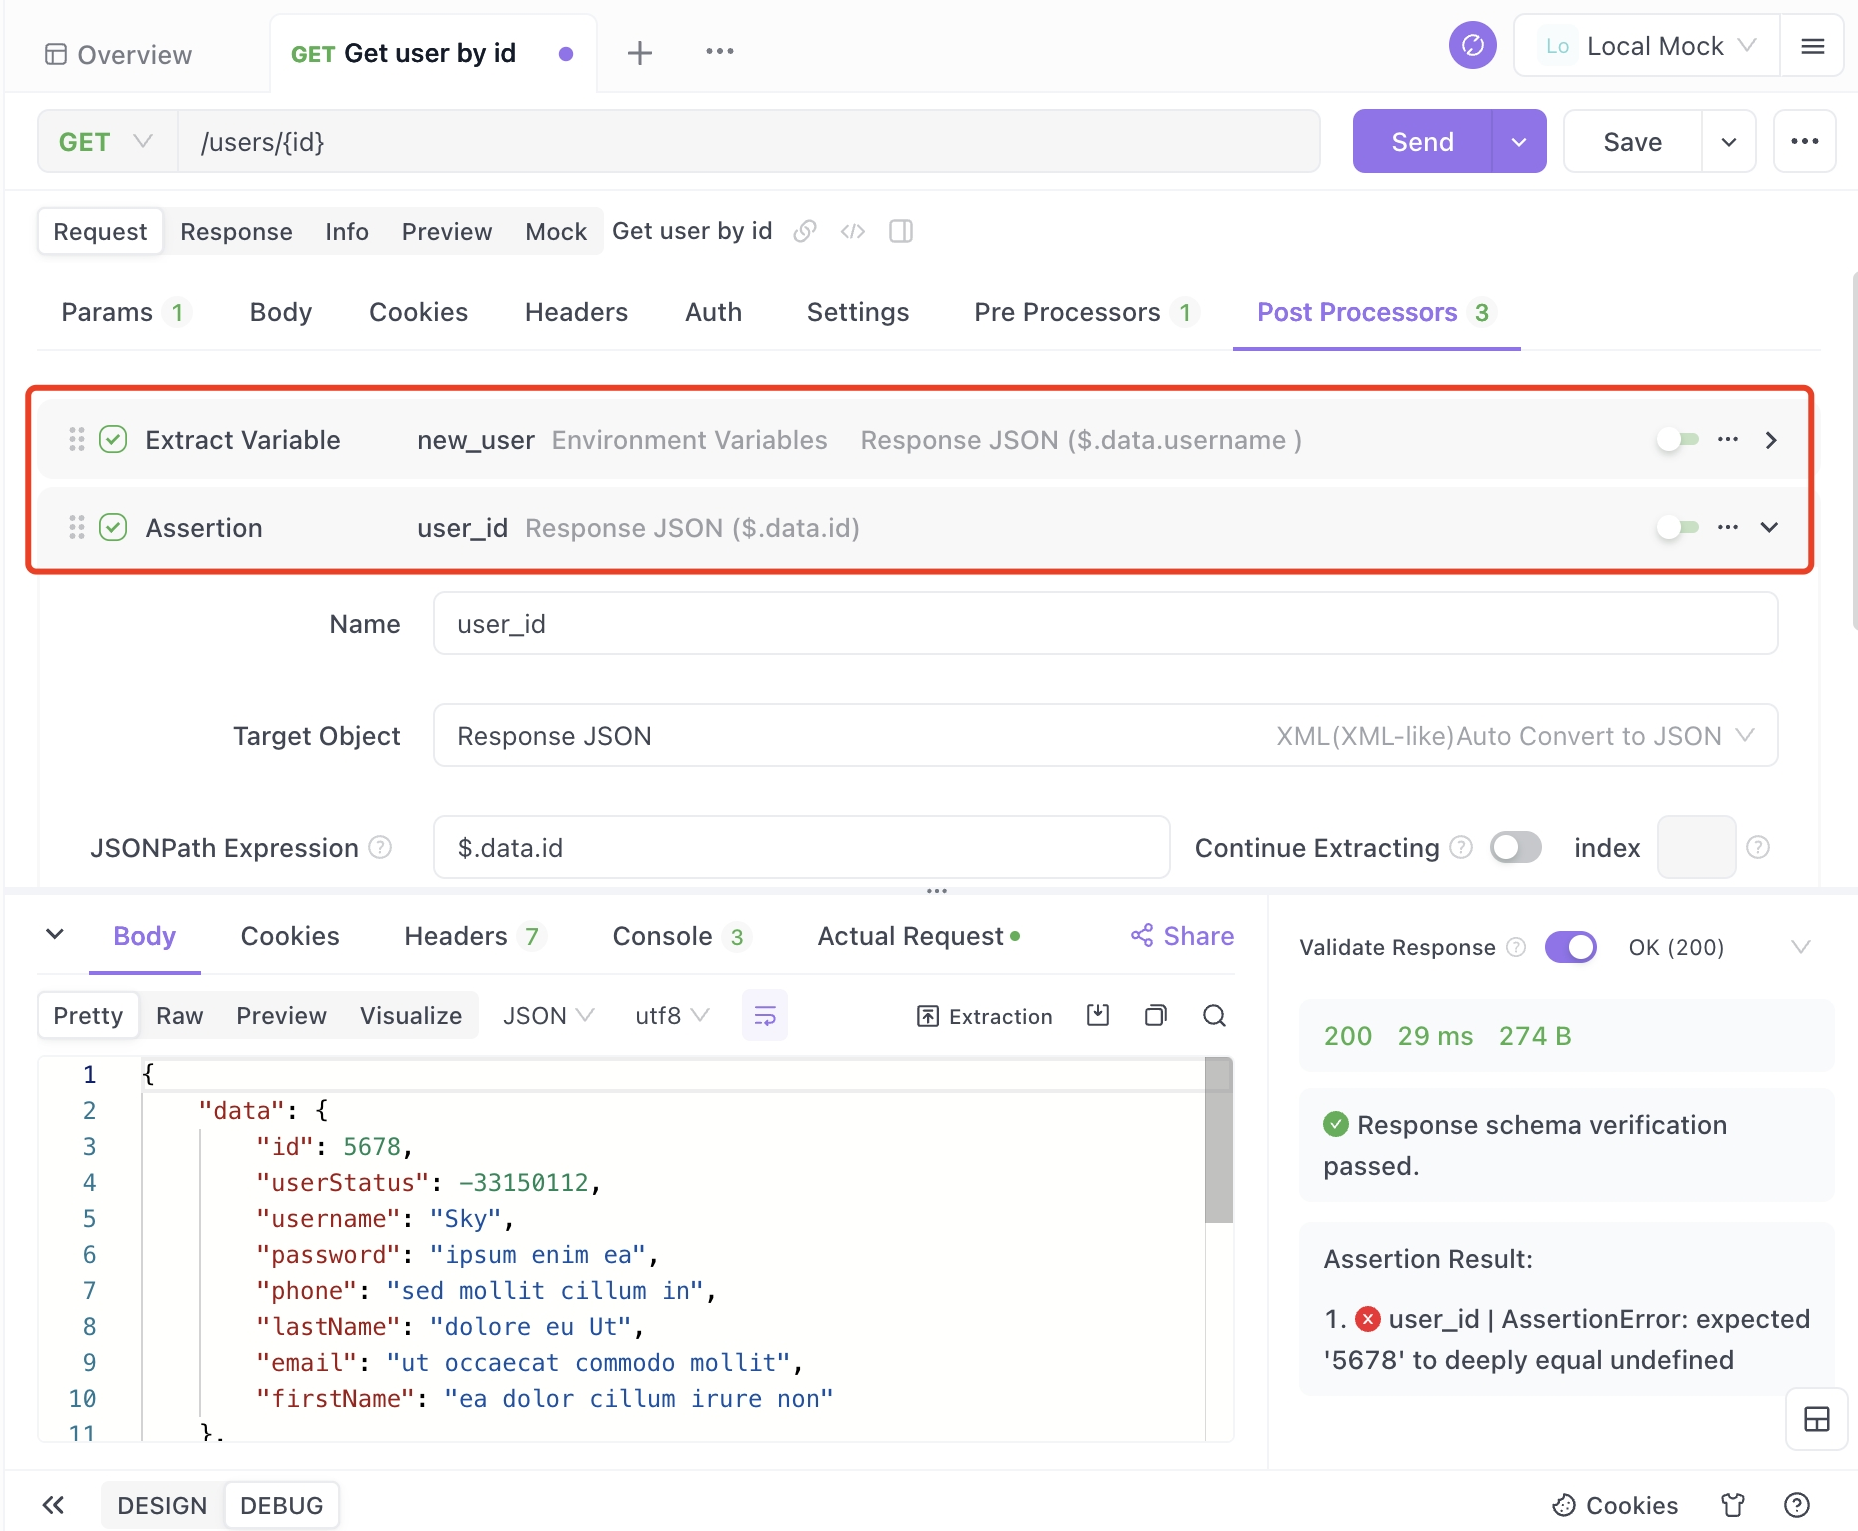
Step ⒉ Then, add "Database operation" in post-processing, connect to the database with database connection, enter the following command (environment variables can also be applied to SQL commands), and click the "Send" button. This will create a new record in the database.
INSERT INTO users (id, name) VALUES ({{user_id}}, '{{new_user}}');
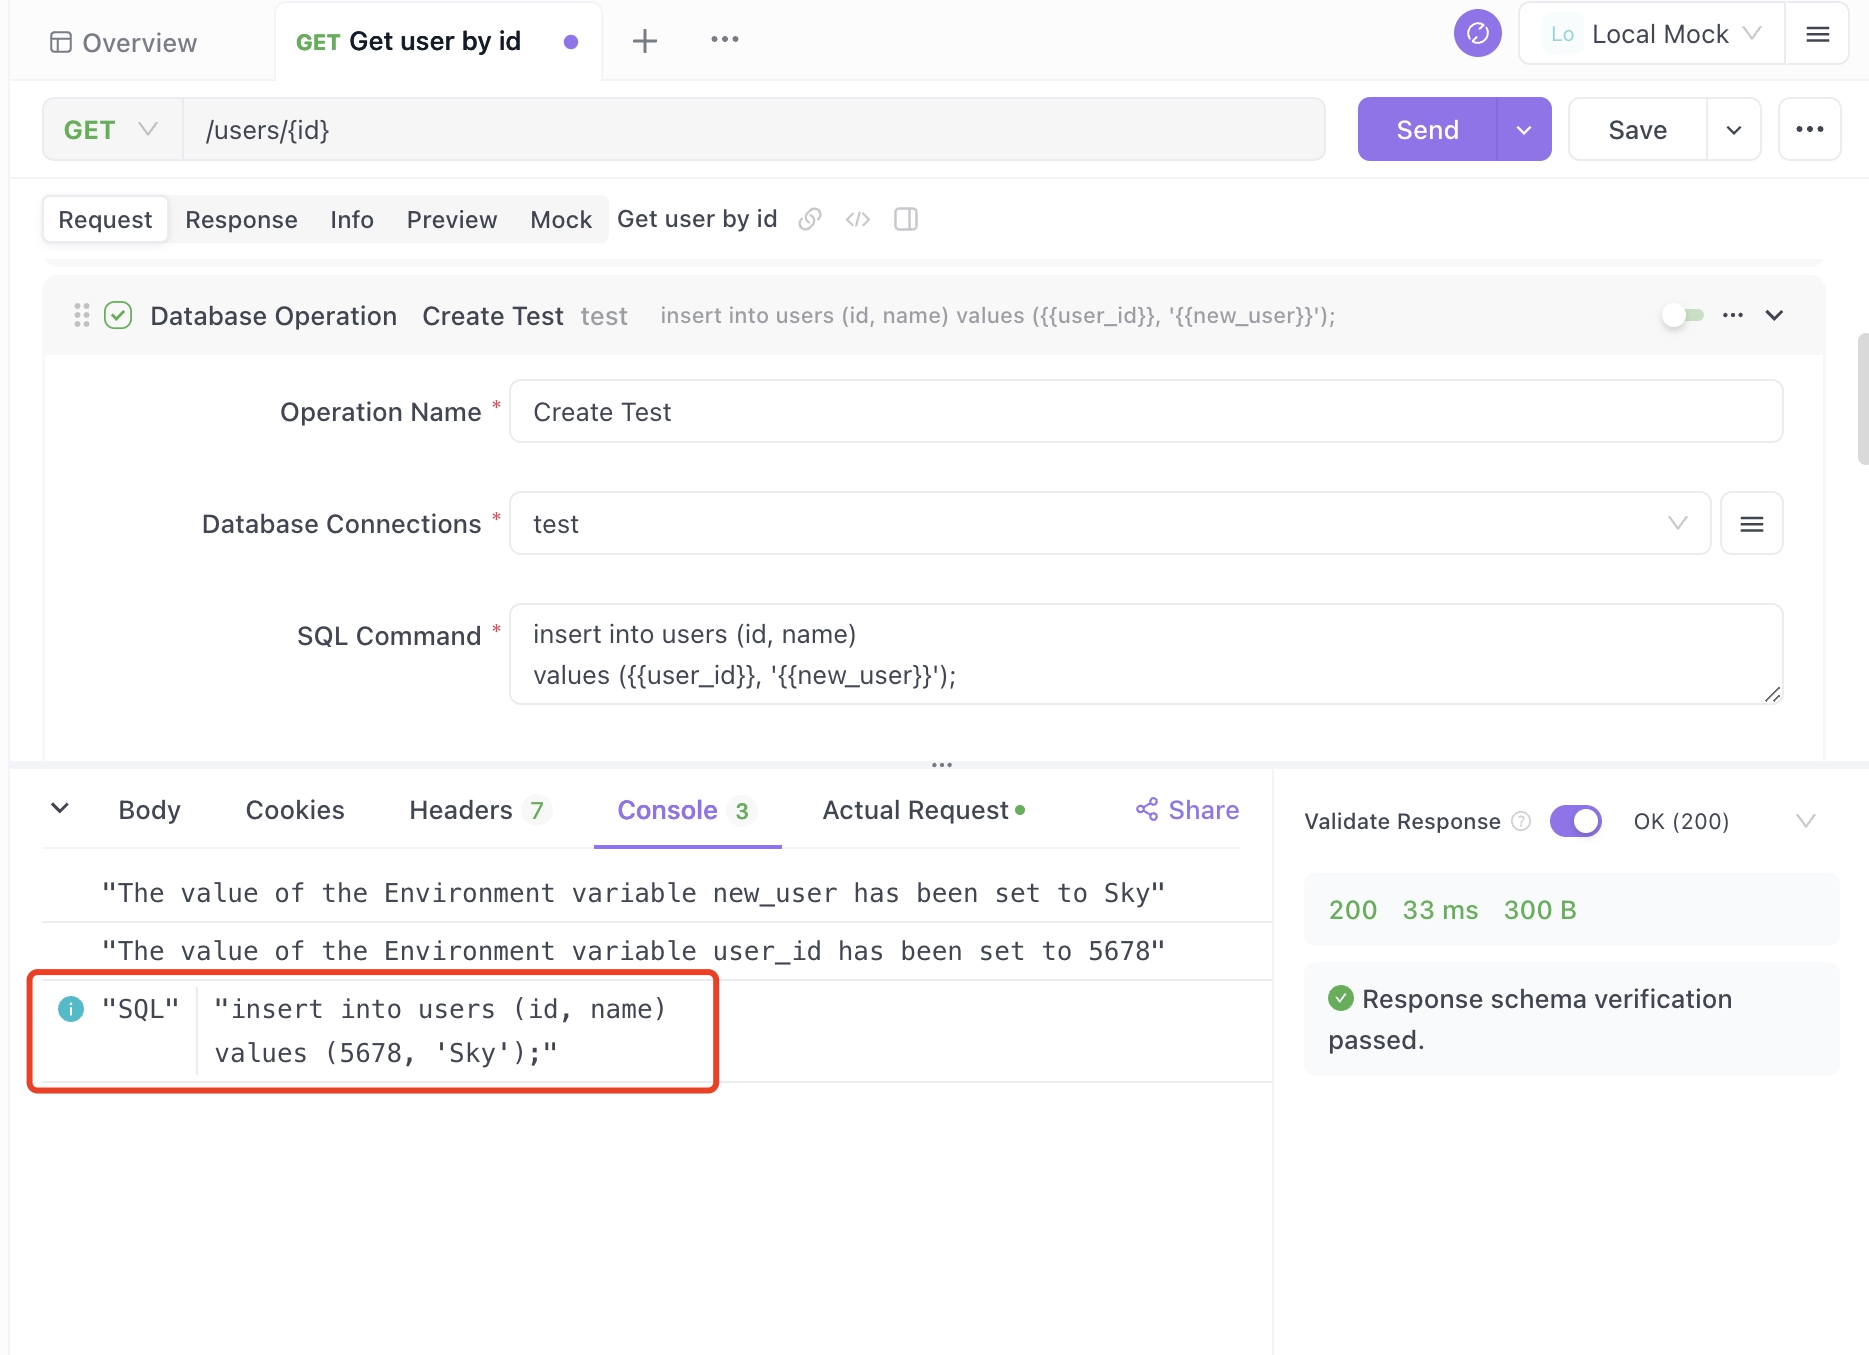
Step ⒊As shown in the image above, the user name seen from the API response data is Fukuda and the ID is 1684. Then, when I opened the users table in the database, a record for the user name=Fukuda id=1684 was automatically added.
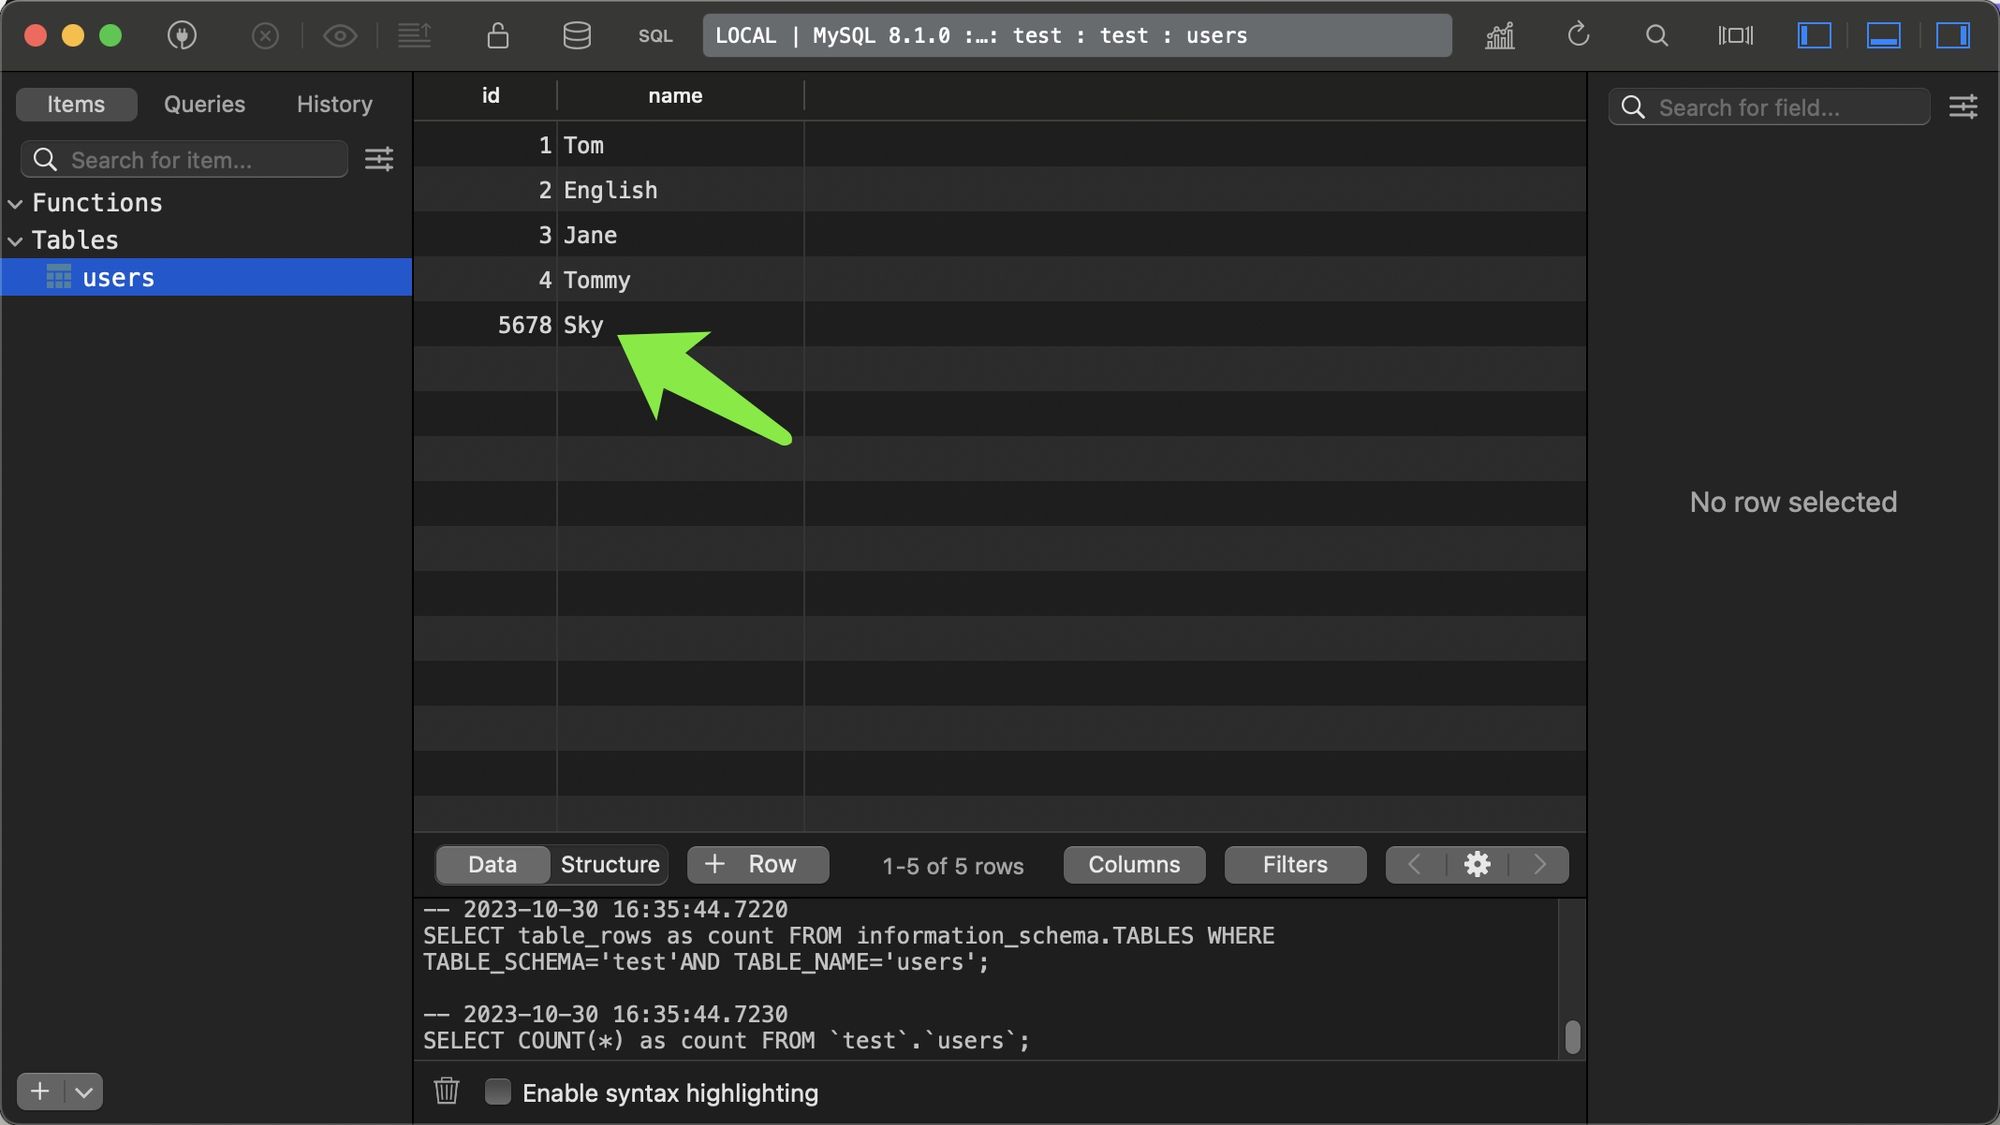
In this way, you can also automatically change data in the database every time you call the API, which is very convenient. Also, when you connect to a database using Apidog, you can not only retrieve data and add new data, but also perform all CRUD operations depending on your needs, so please try it.


