In the world of web development, ensuring secure communication between a front-end application and a backend API is paramount. Cross-Origin Resource Sharing (CORS) serves as a critical security mechanism that governs how web browsers handle requests made to a domain different from the one that served the initial web page.
Learn more about Apidog by clicking the button below!

Understanding and effectively testing CORS configurations is essential for seamless API development. This article delves into the concept of the Postman CORS Test, equipping developers with a comprehensive understanding of how to leverage this functionality within the popular API development platform.
What is CORS?
Cross-Origin Resource Sharing (CORS) is a web security concept implemented by web browsers to mitigate potential security risks associated with such cross-origin requests. By default, browsers restrict a web page from making requests to a different domain than the one that served the page. This prevents malicious scripts from one domain from accessing sensitive data on another domain.
Key Elements of CORS
Origin
The origin of a request is a combination of three parts: protocol (like https), hostname (e.g., www.example.com), and port number (often 80 for standard web traffic). It essentially identifies where a request originates from. For instance, https://www.example.com:8080 is a complete origin string.
Preflight Requests
For certain HTTP methods considered "preemptive" (e.g., OPTIONS, GET, HEAD), browsers might send a preflight request (OPTIONS) before the actual request. This preflight request acts like a scout, asking the server if the specific request is even allowed.
CORS Headers
Servers can include specific HTTP headers in their responses to indicate whether a cross-origin request is permitted. These headers define various aspects of the allowed interaction:
- Access-Control-Allow-Origin: This header specifies which origins are allowed to access the resource. It can be a specific domain (like
https://www.example.com) or a wildcard character (*) to allow all origins (generally discouraged for security reasons). - Access-Control-Allow-Methods: This header defines the HTTP methods (GET, POST, PUT, DELETE, etc.) that are allowed for CORS requests.
- Access-Control-Allow-Headers: This header specifies which HTTP header fields can be included in the CORS request headers (e.g.,
Content-Type,Authorization). - Access-Control-Allow-Credentials: This header indicates whether credentials (like cookies or authorization tokens) are allowed to be included in CORS requests. The value is typically set to
trueorfalse.
Simple Requests vs. Preflighted Requests
Based on the HTTP method, headers used, and presence of credentials, CORS requests can be categorized as simple requests or preflight requests. Simple requests do not trigger a preflight request, while preflighted requests do, ensuring the server allows that type of cross-origin interaction.
Purposes of CORS Testing
CORS testing is used to verify how a web browser handles requests made to a different domain (origin) than the one that served the initial web page. This ensures that resources are accessed securely and as intended. Here's a breakdown of its key purposes:
Ensuring API Accessibility
Modern web applications often rely on APIs hosted on separate domains. CORS testing helps developers confirm that their frontend application (running on one domain) can successfully access and interact with the backend API (on a different domain) without encountering CORS restrictions.
Debugging CORS Issues
If a frontend application experiences issues fetching data from a backend API, CORS misconfigurations might be the culprit. CORS testing helps pinpoint these issues by simulating requests from the front end's perspective and analyzing the server's response headers.
Verifying CORS Configuration
When configuring CORS on a backend server, CORS testing provides a way to validate if the headers are set correctly. Developers can test with different origins, methods, and headers to ensure the server responds appropriately according to the desired CORS policy.
Preventing Security Vulnerabilities
Improper CORS configurations can introduce security vulnerabilities. By testing CORS, developers can identify potential weaknesses and ensure that only authorized origins can access sensitive resources.
Step-by-step Guide on CORS Testing in Postman
Step 1 - Create a Postman Account
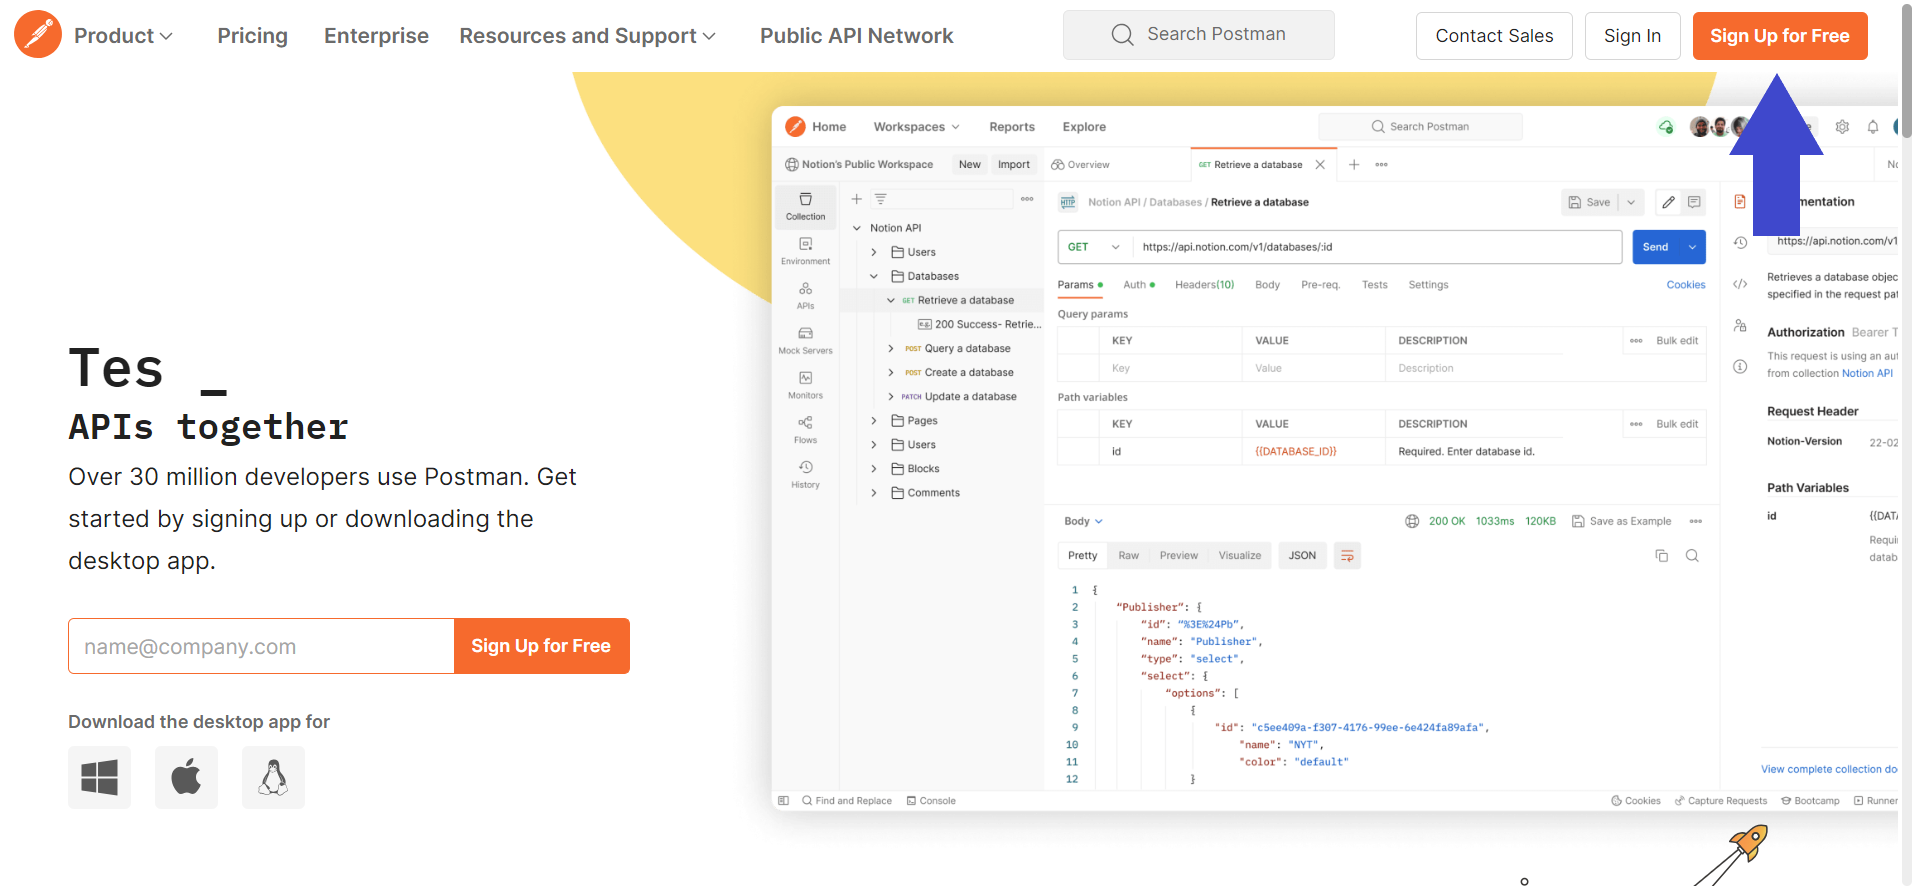
First, you will need to create a new Postman account (only if you do not have one.) and download the Postman application onto your device. The application provides more utility compared to its web version.
Step 2 - Create a New API Request on Postman
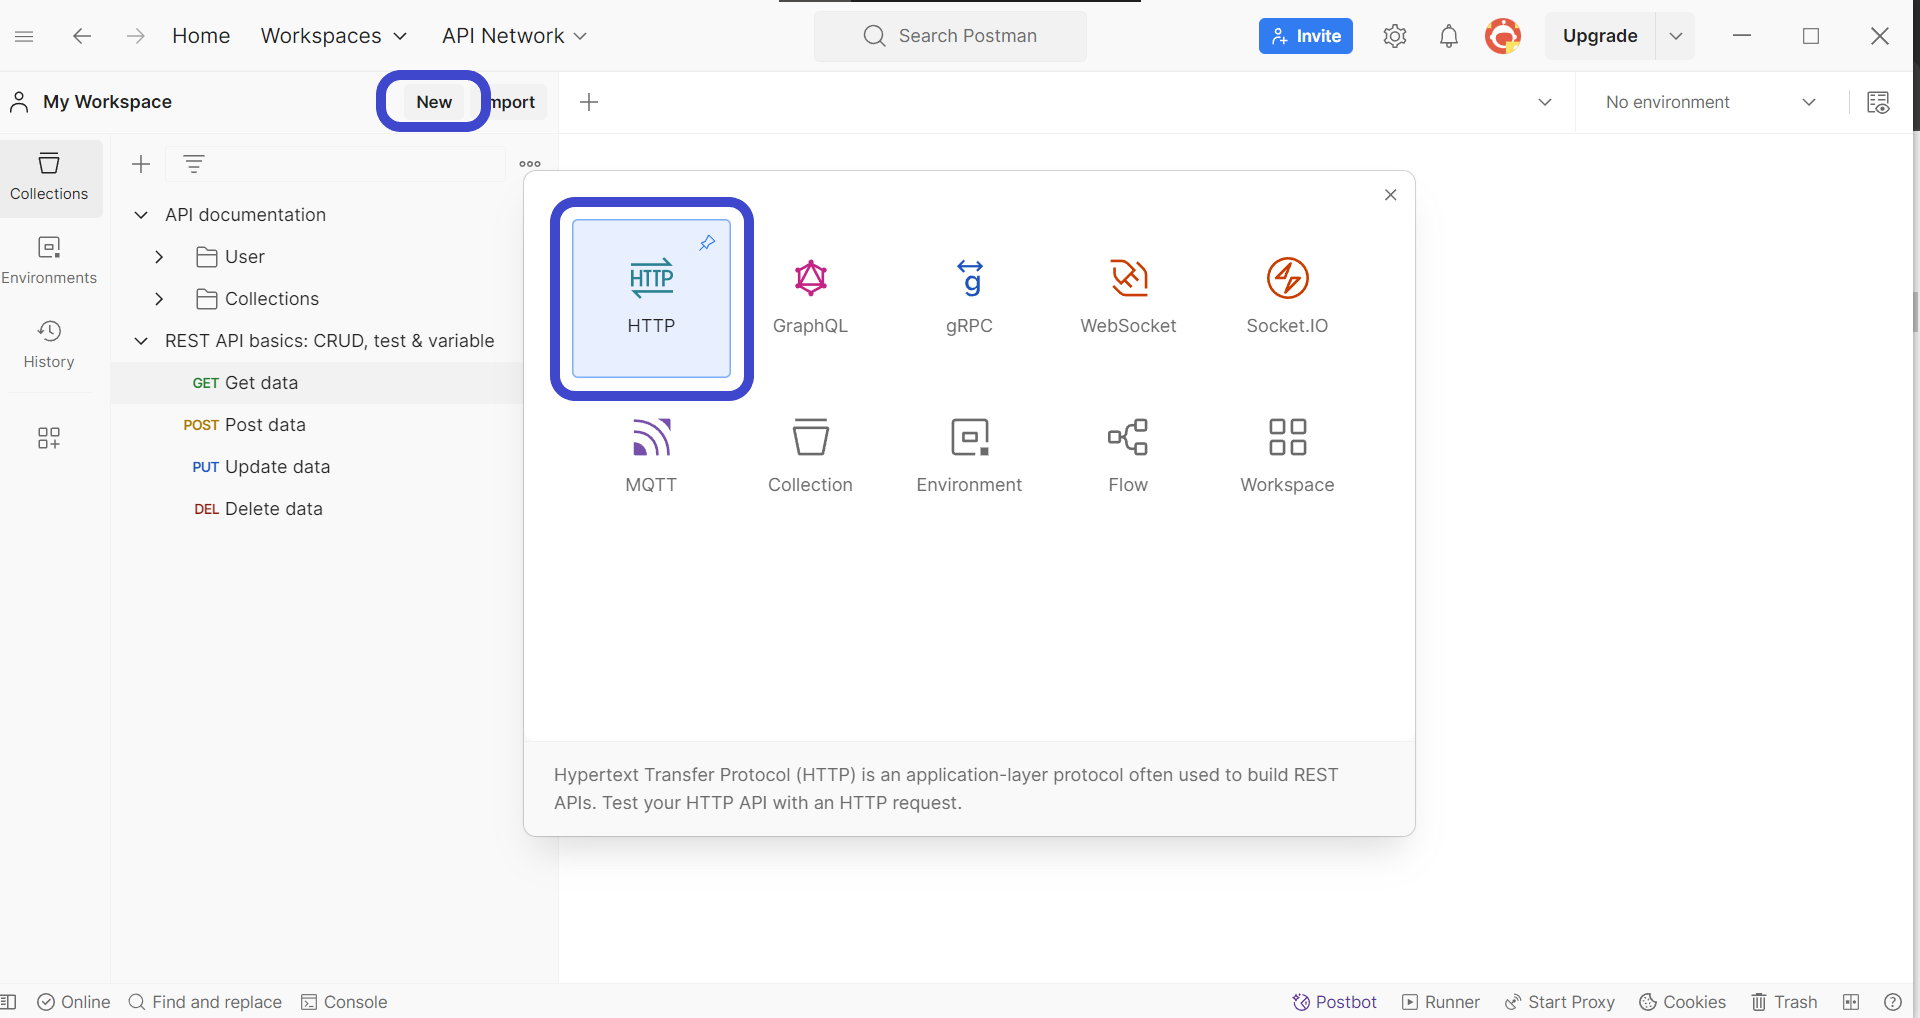
Once you have installed Postman, create a new request by clicking the New button in the top left corner of the Postman window. Select HTTP Request to create a new request, as shown in the image above.
Step 3 - Enter API Method and Details
Next, you need to include the details of the API request you wish to create. It must include components such as the URL, HTTP methods, and additional parameters the API will require.

Step 4 - Configure API Request Header

In the Headers section, add a new header with a Key named "Origin" and the value as the base URL. This "Origin" Key value will be used for simulating the header sent by the browser during a cross-origin request.
Step 5 - View API Response Header

You can finally check for the related CORS headers in the header section as seen in the image above.
Apidog - Run CORS Testing and More
Apidog is an excellent API development platform that allows you to build, test, mock, and document APIs. Apidog is also capable of providing multiple-step test cases - test scenarios - to ensure that your APIs run smoothly.


Testing APIs Using Apidog
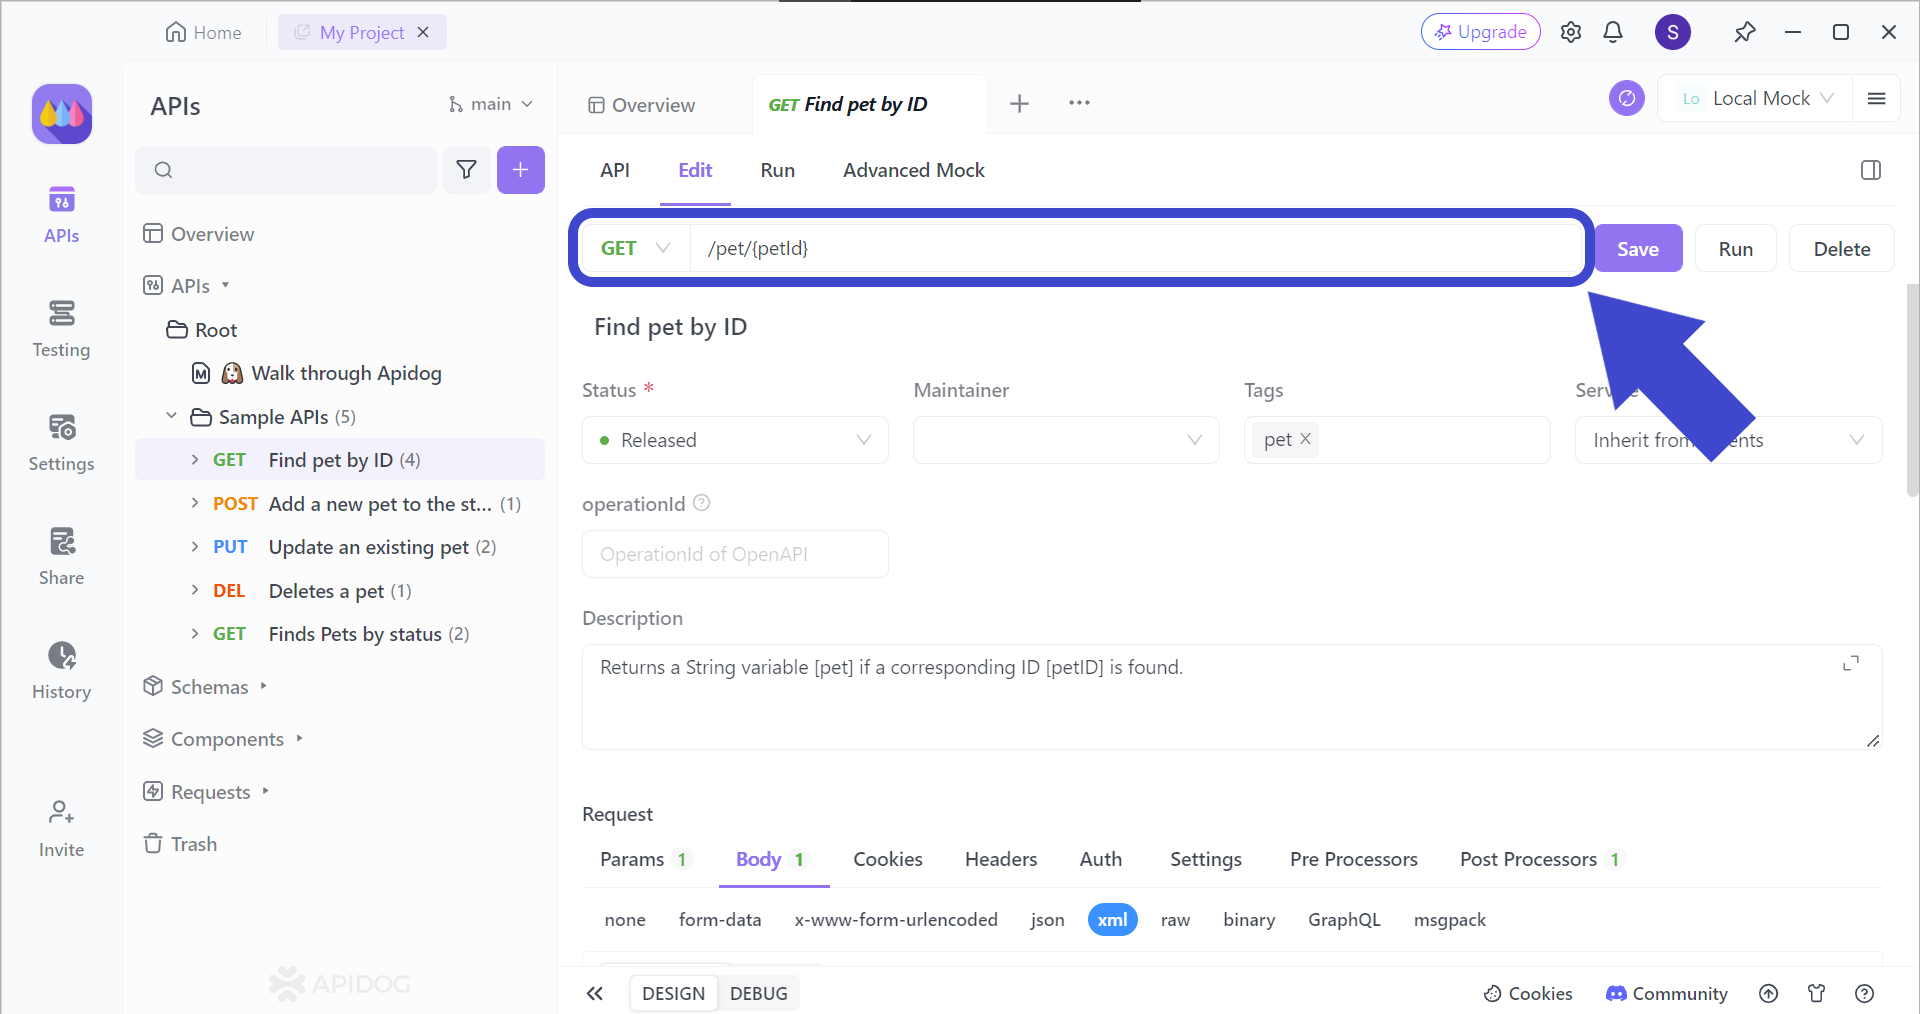
The first step is to enter the specific API endpoint you want to test. Include additional details such as parameters if necessary for the specific API you're testing.
If you're unsure about using multiple parameters in a URL, this article (link not included) can guide you on how to hit the exact resource within larger datasets!

Utilizing Testing Scenarios for Your API Using Apidog
Want to test your API like it's used in everyday situations? Apidog's testing scenario feature lets you create complex test scenarios, mimicking real-world interactions.
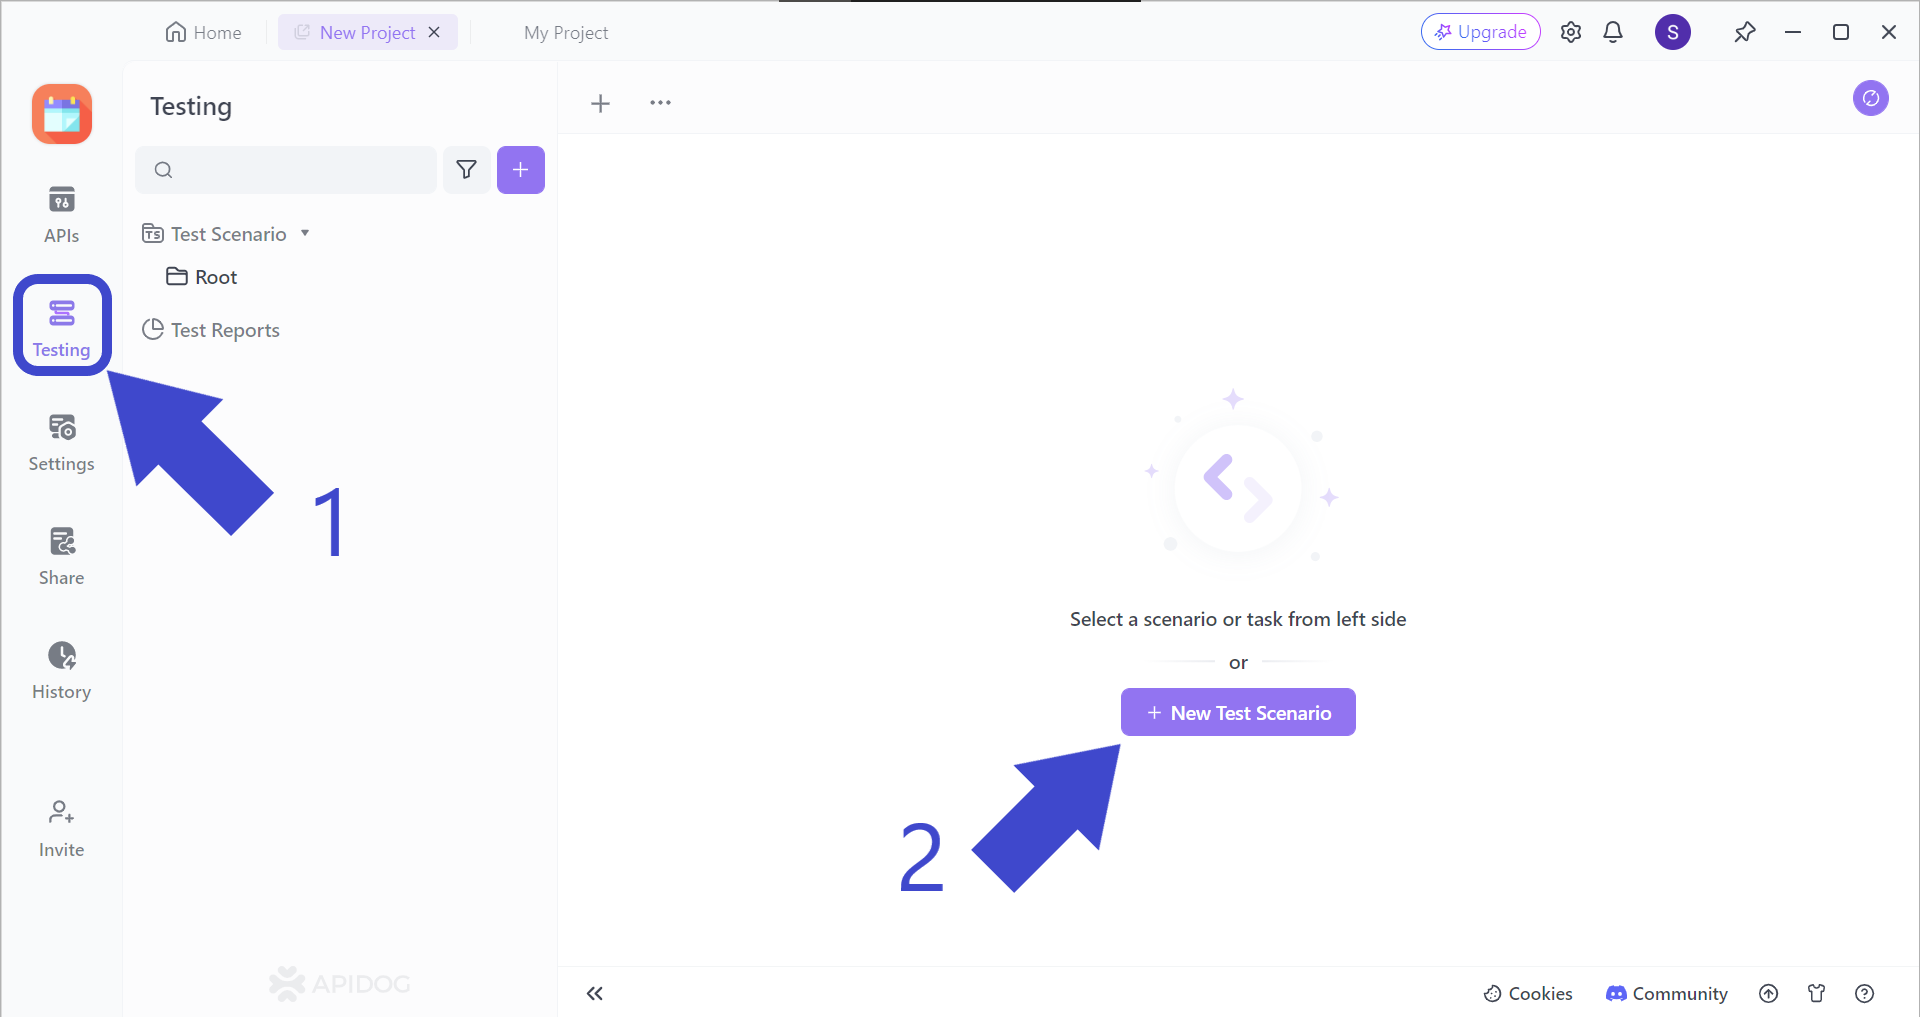
Firstly, hit the Testing button, followed by the + New Test Scenario button.
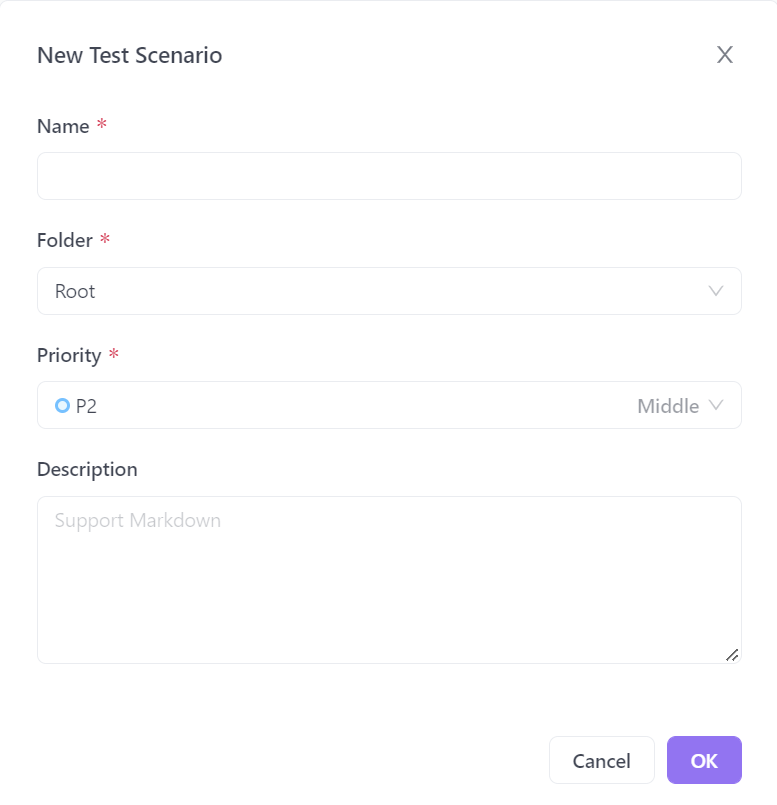
Apidog will prompt you to fill in the details for your new test scenario. Make sure to give it a proper name so its function is predictable.
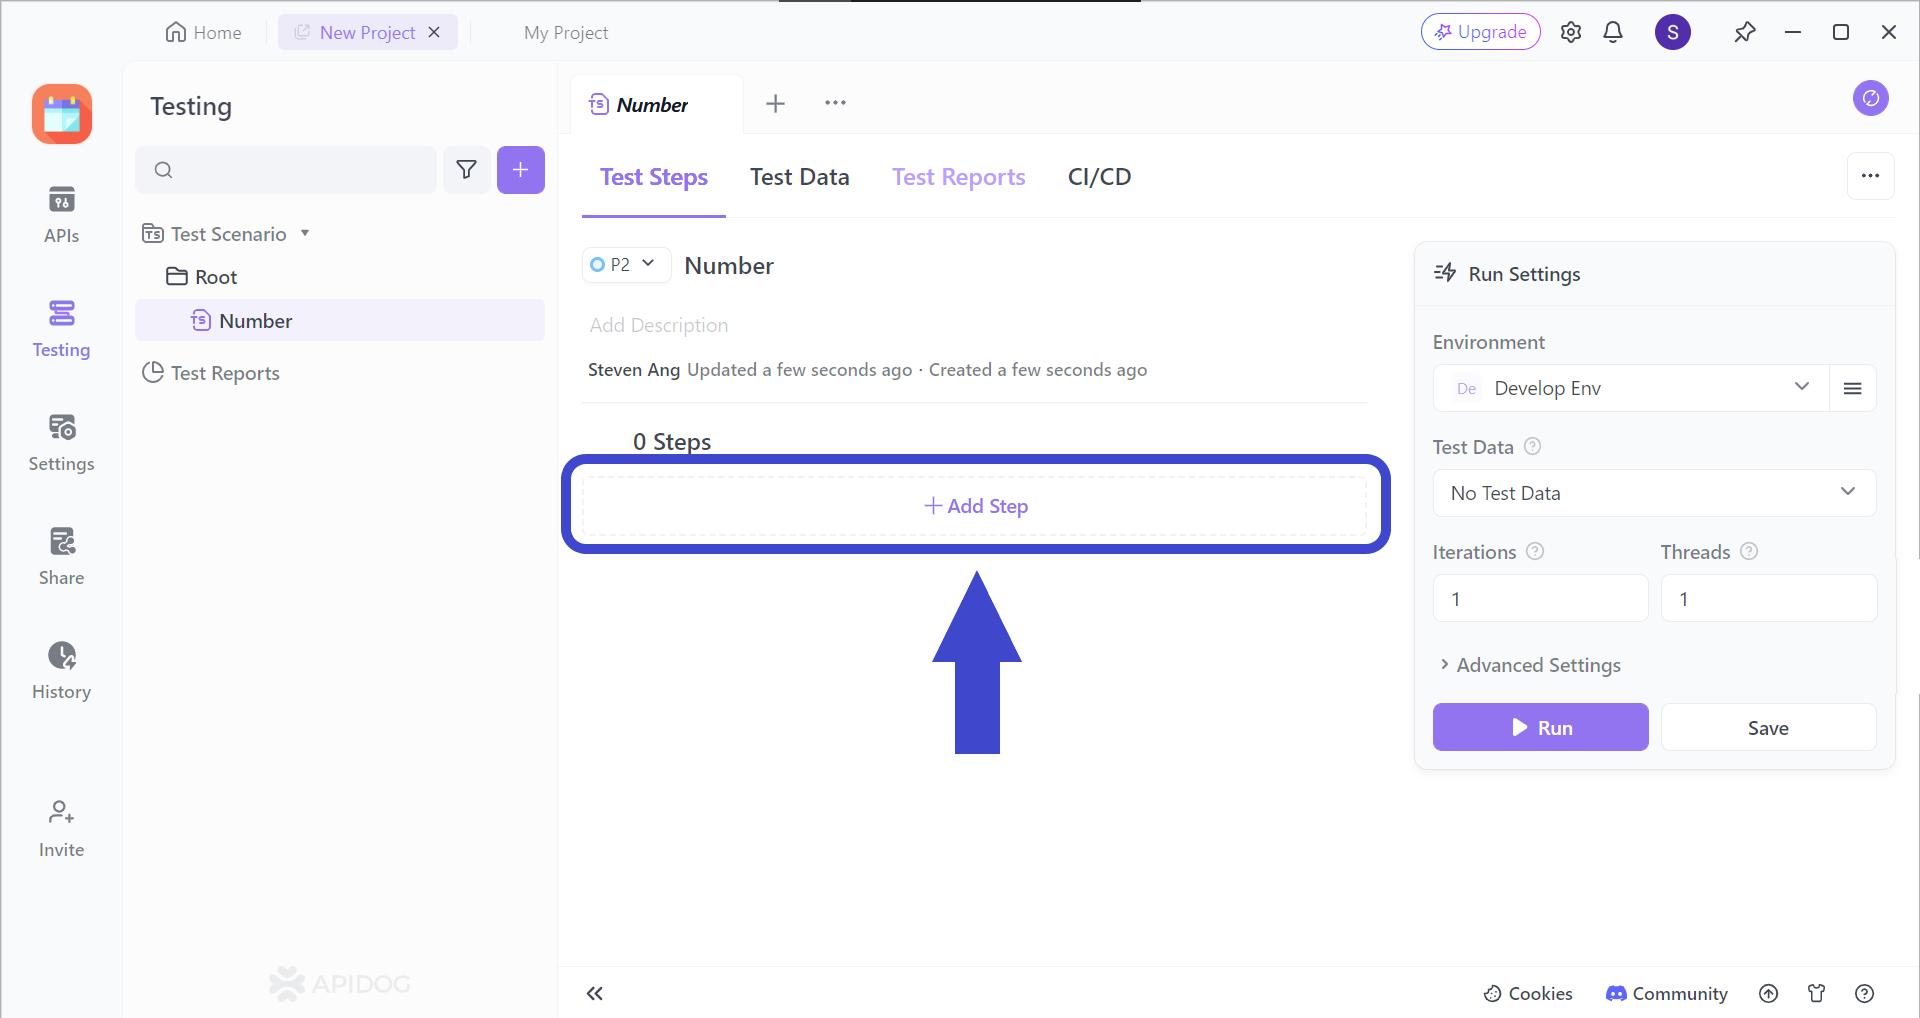
Continue by adding a step (or many more steps) to your test scenarios by clicking on the Add Step section. You should be able to see the image below.
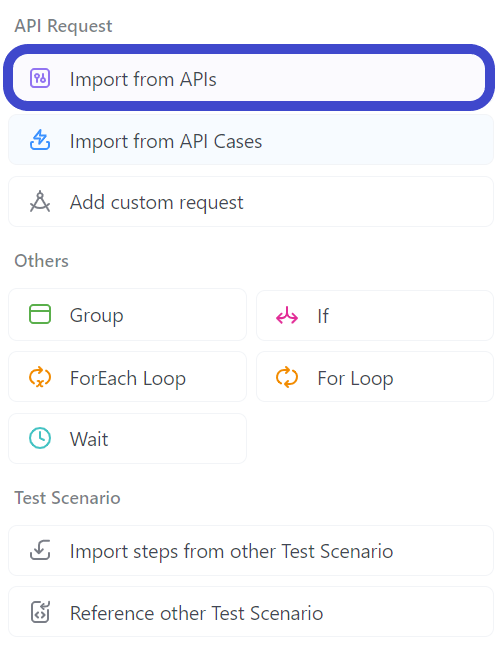
Select "Import from API" from the drop-down menu.
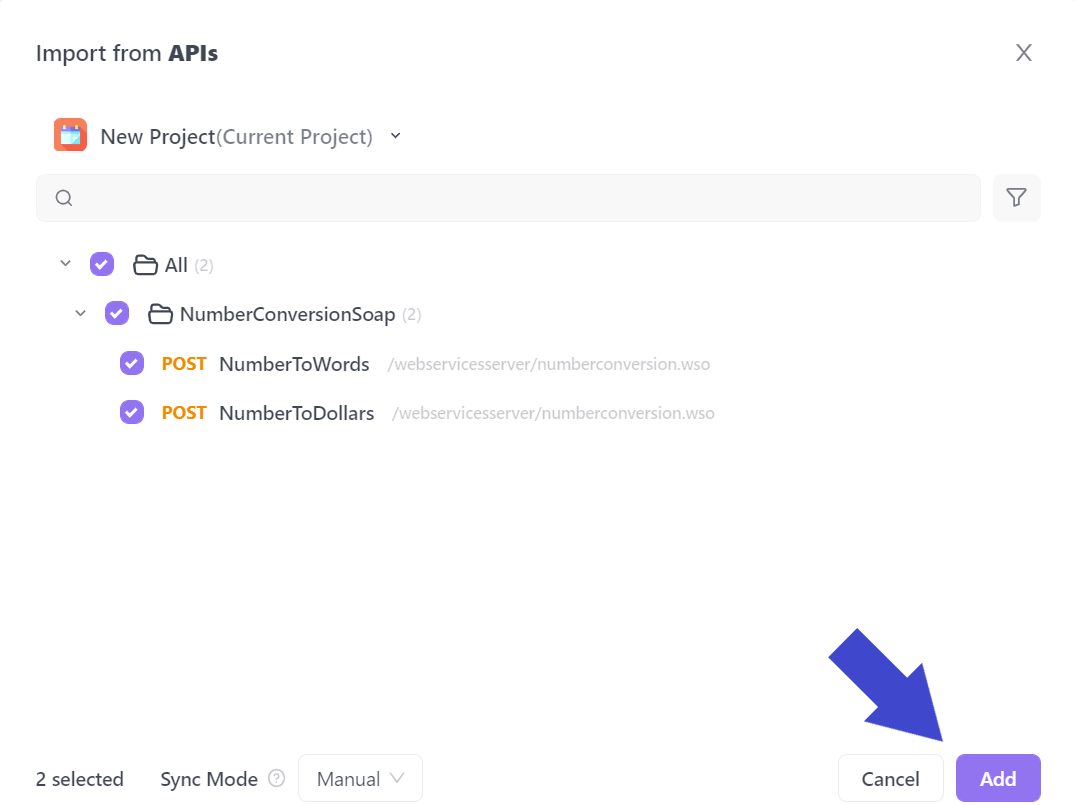
Next, select all the APIs you would like to include in your test scenario. In the example above, the API called NumberConversionSOAP has been included.
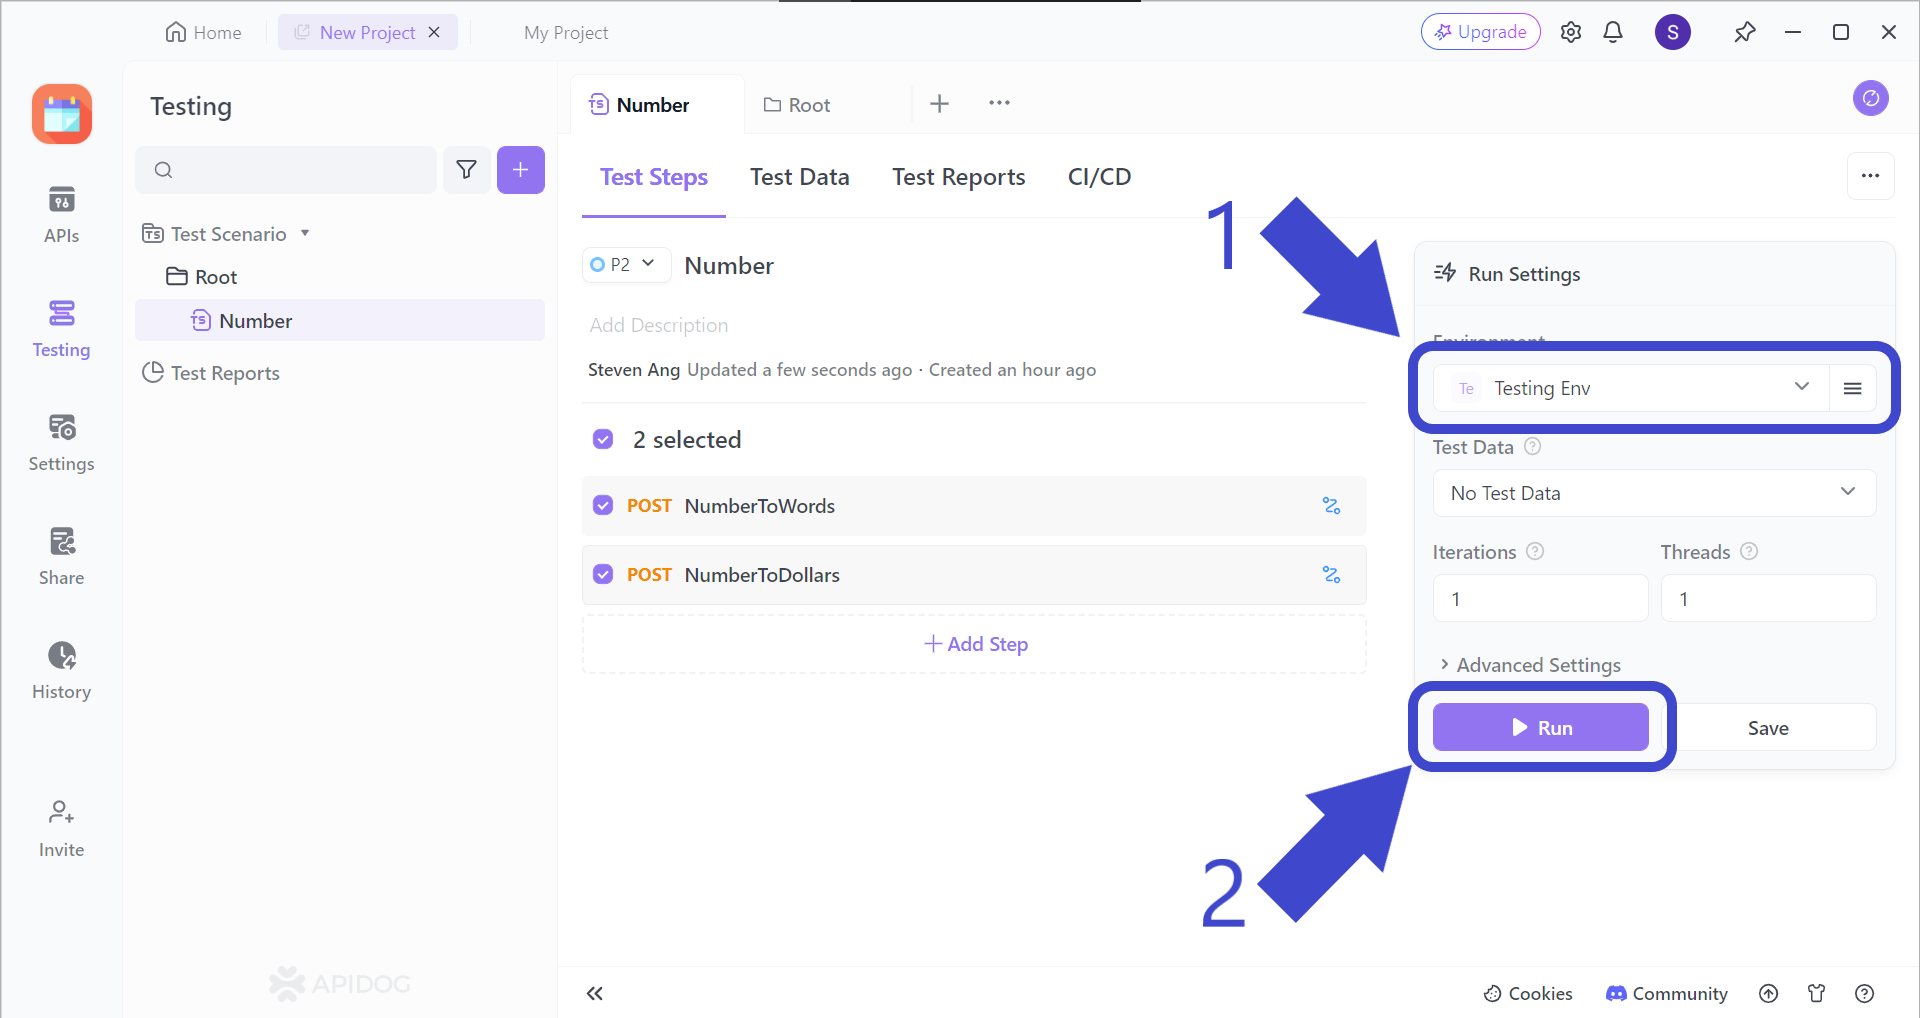
Before hitting the Run button to start your test scenario, make sure to change the test scenario environment, which should be Testing Env, as pointed out by Arrow 1.
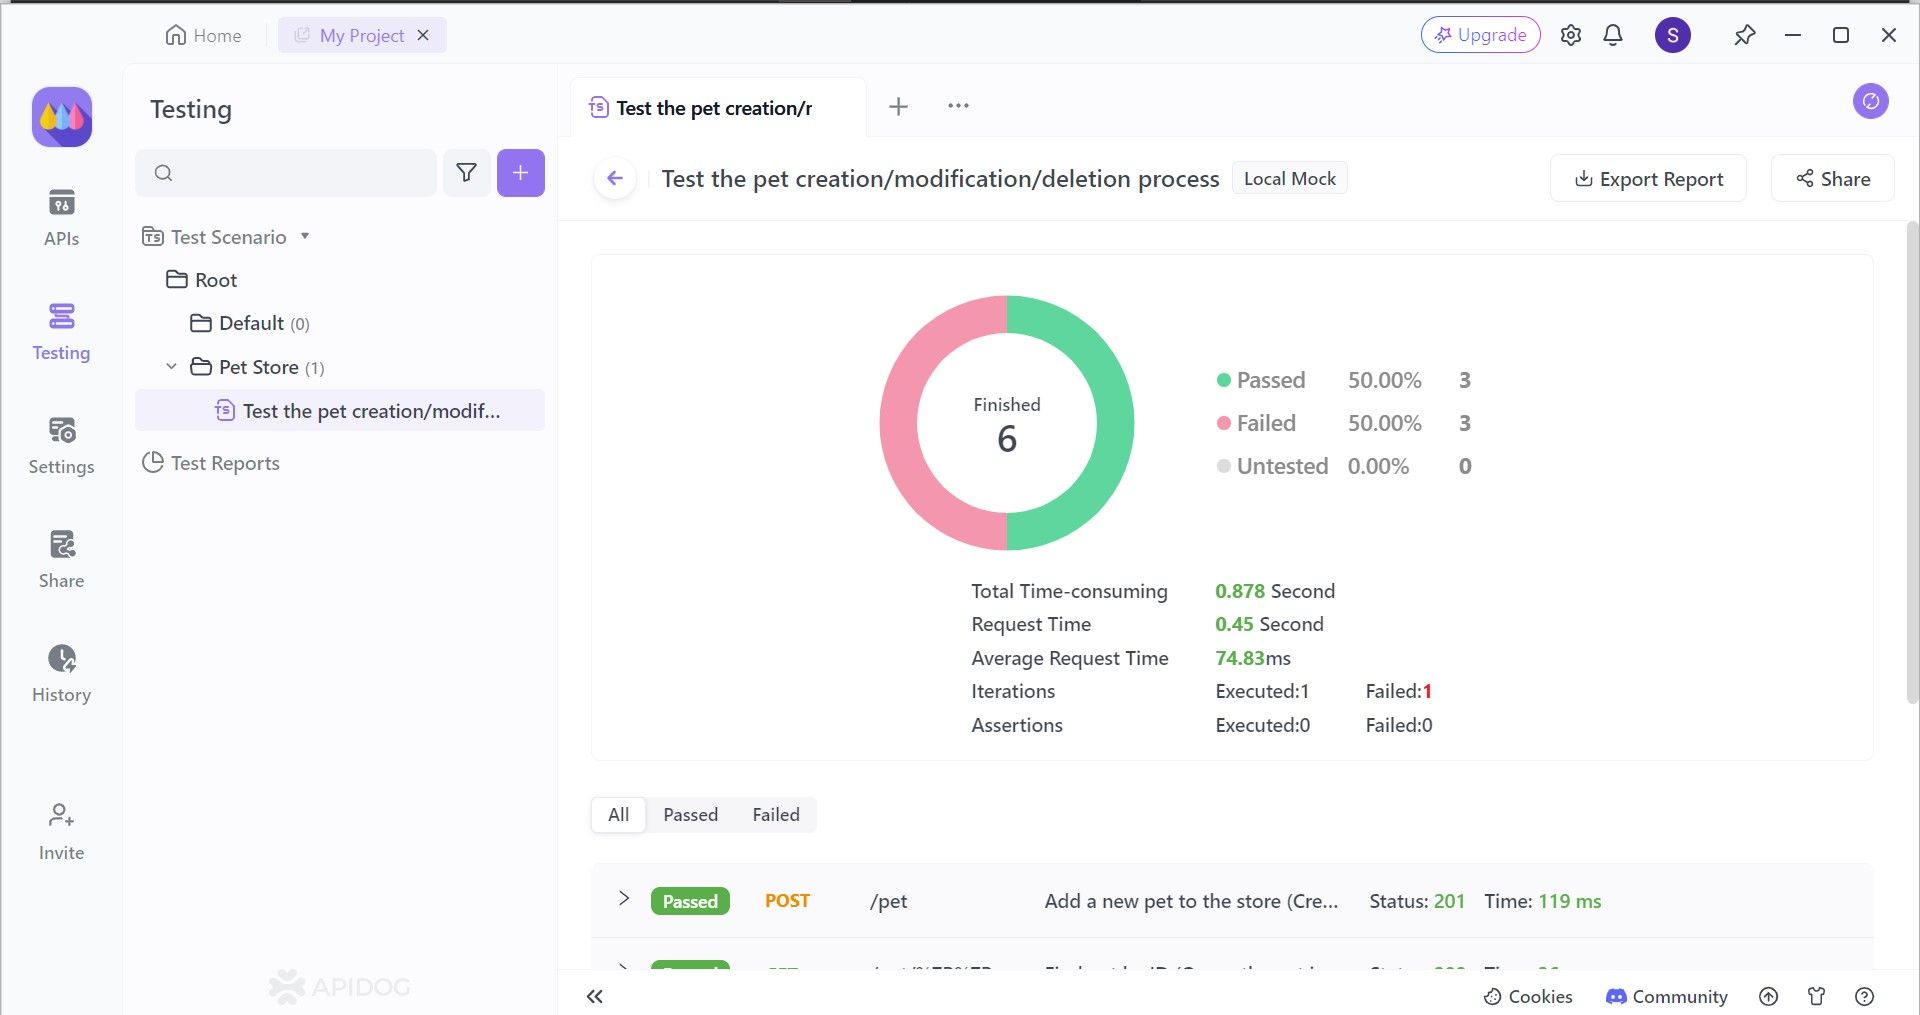
By analyzing your API's performance, you gain valuable insights into its strengths and weaknesses. This knowledge is key to making informed decisions about how to improve your API in the next development phase.
Conclusion
the Postman CORS Test empowers developers with a user-friendly and effective tool to ensure seamless communication between frontend applications and backend APIs. By understanding CORS fundamentals and leveraging Postman's testing capabilities, developers can streamline development workflows, identify and rectify CORS misconfigurations, and ultimately build secure and robust web applications.
Through proper CORS configuration and testing, developers can guarantee that their APIs function as intended, adhering to browser security mechanisms and enabling unrestricted access from authorized origins. By following the steps outlined in this article and integrating Postman CORS testing into their development process, developers can foster a more secure and efficient web development experience.


