Schema
The schemas in Apidog is similar to the data model in any programming language.
It helps you to define the schema of the API response and request body.
Basic Usage
Schema is mainly used for return response and body parameters(JSON/XML format) in API design. The data schema can be reused in different APIs.
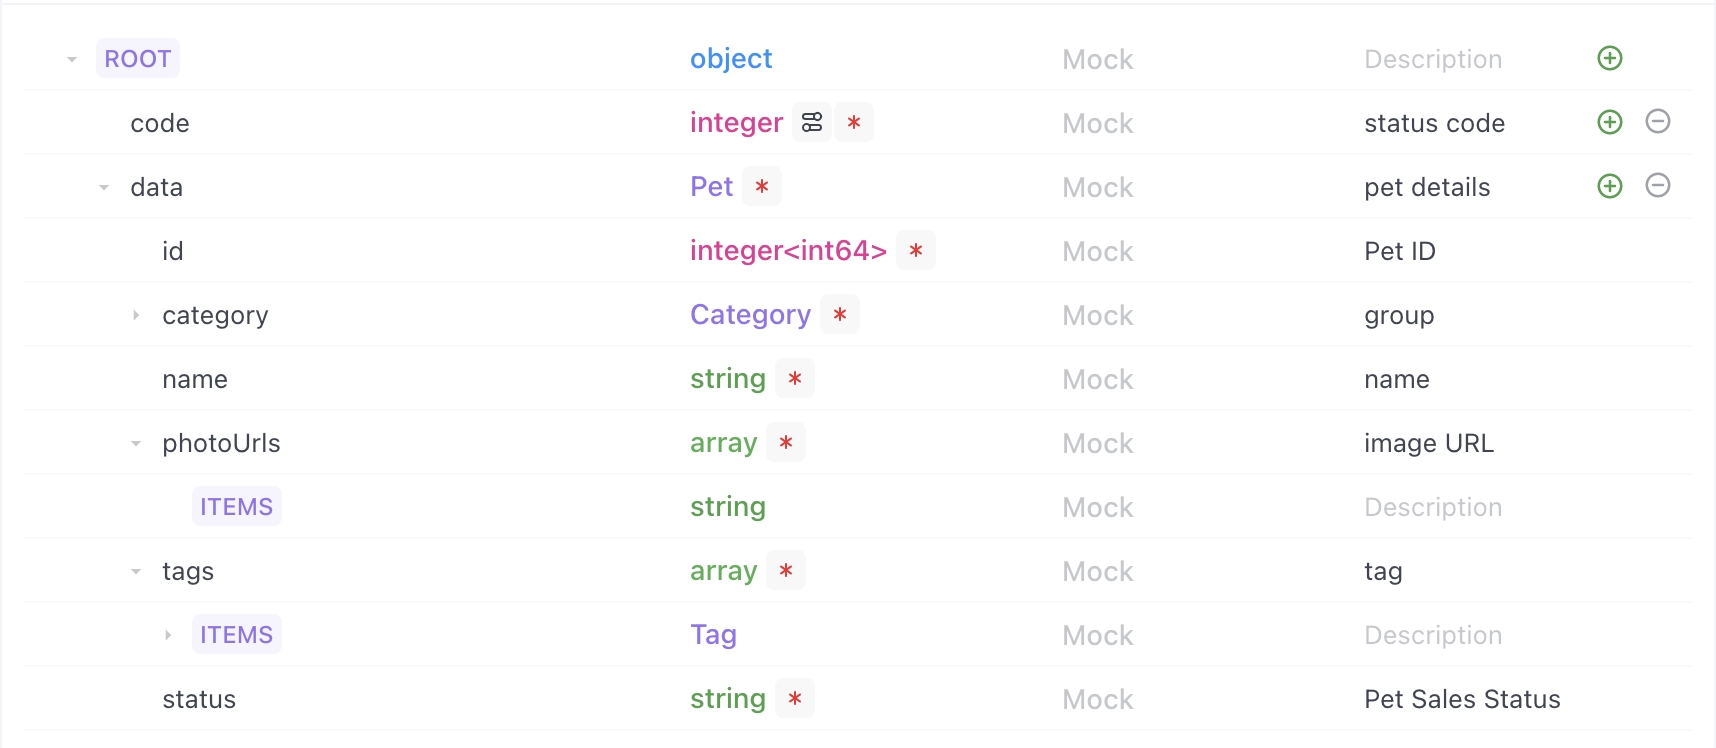
Edit Schema
- You can choose whether the field is required.

- You can select the data type of the field.

You can edit the mock config for the field. View the mock section for more details on mock syntax.
You can add a new field or delete an existing field.

- You can drag and drop the fields around to change their order.

- We are building a productive way to fill in the instructions for the fields. Stay tuned!
Batch Bulk Import
Apidog supports automatically generating schemas in bulk through JSON, XML, JSON Schema, Databases, and Faker.js in addition to manually filling in the schema. You can click the "Generate from JSON etc." button to quickly import in the request parameters and response.

- JSON
You can use JSON-formatted code to generate schemas.

The role of JSON parsing is to generate schemas only, without saving the actual values contained in the JSON. Starting from version 2.1.39, Apidog's JSON parsing function gained the ability to recognize the "comment" field and document it accordingly.
- XML
Click on the XML page, input the XML format code to generate schemas.

- JSON Schema
Click on the JSON Schema page, input the JSON format code to generate schemas.

- Database
Supports importing from the database and automatically generating the schemas in the API documentation.
1. Through database connection
Click "Edit" in API specification, and then access the "Generate from JSON etc" button in the responses.

Switch to the "Import from database" tab page, and then tap "Database Connections" → "Manage Database Connection" → "New".
Select the target database type and fill in the corresponding database information, and click "Save".

For security reasons, the Database Address, Port, Username, Password, Database Name are only stored locally on your computer and will not be synchronized to the cloud. Databases between team members will not be synchronized mutually, and each member needs to manually set up the database by themselves.
2. Select Database
Select the target database in the left directory, and the preview area will display the data read from the database. During the importing process, you can also choose to adjust the Overwrite mode (smart merge or complete overwrite), Naming style conversion (keep original or camel case), and Comment Writing.
When schemas already have mock, name, and description, it is recommended to use
Smart Merge. For the same field imported, the new imported part will not cover the original mock, name, description, and other data.

3. Insert Schemas
After confirming the data, click the "OK" button to insert the schemas. You can click the "Auto Generate" button in the example to also generate detailed response sample based on the schemas.

You can also input the SQL (DDL) in the "Input Create Table SQL(DDL)" tab page to read the database field lengths and write field attributes. Generating schemas in the API documents while inserting the command into the database.

Managing Schema
Before building the schema, you must first build the reusable schema. As shown in the screenshot below, you can create a new schema or manage the relationship of different schemas under the schema section.

Reference to Schema
As shown in the screenshot below, you can select the established schema in data type under the body parameter(JSON/XML type) for return response in API design.


- If the chosen schema does not meet the requirements, you can modify it directly in the schema tab.

When you only need to reference a schema partially, you can modify it directly, which will not change the original schema.
- When a field in the schema does not apply to your use case, you can choose to hide the field, and the hidden field will not appear in your API doc.

- When you need to change a field in a schema for specific use cases, you can choose to disconnect the field from the schema. You can always re-establish the connection later on.

You can reference multiple schemas. Additionally, we support using drag-and-drop to sort the order of different schemas.

Preview
We support generating realistic data based on the schema. You can view the results from the mock easily.
Code Generation
We support code generation for multiple languages based on the schema.
Editing Source Code
The schema in Apidog follow the JSON Schema specification. You can define schema by editing your JSON Schema. View the documentation for more details on JSON Schema.
Advanced Usage
HashMap, Dictionary, Array
HashMap, also known as Map, dictionary, or associative array. It is a collection of key-value pairs, where the key names can be any content, rather than predefined.
The OpenAPI specification supports defining a HashMap with string keys. This is done by setting the element type to object, and then using the additionalProperties keyword to specify the type of the values in the key-value pairs.
Suppose there is a user information query API, and the returned data format has the following requirements:
- The returned data is an object
- The child elements of the object are key-value pairs of a HashMap
- The user ID is the key, and the user information is the value
When editing the API documentation in Apidog, you can define it as follows:
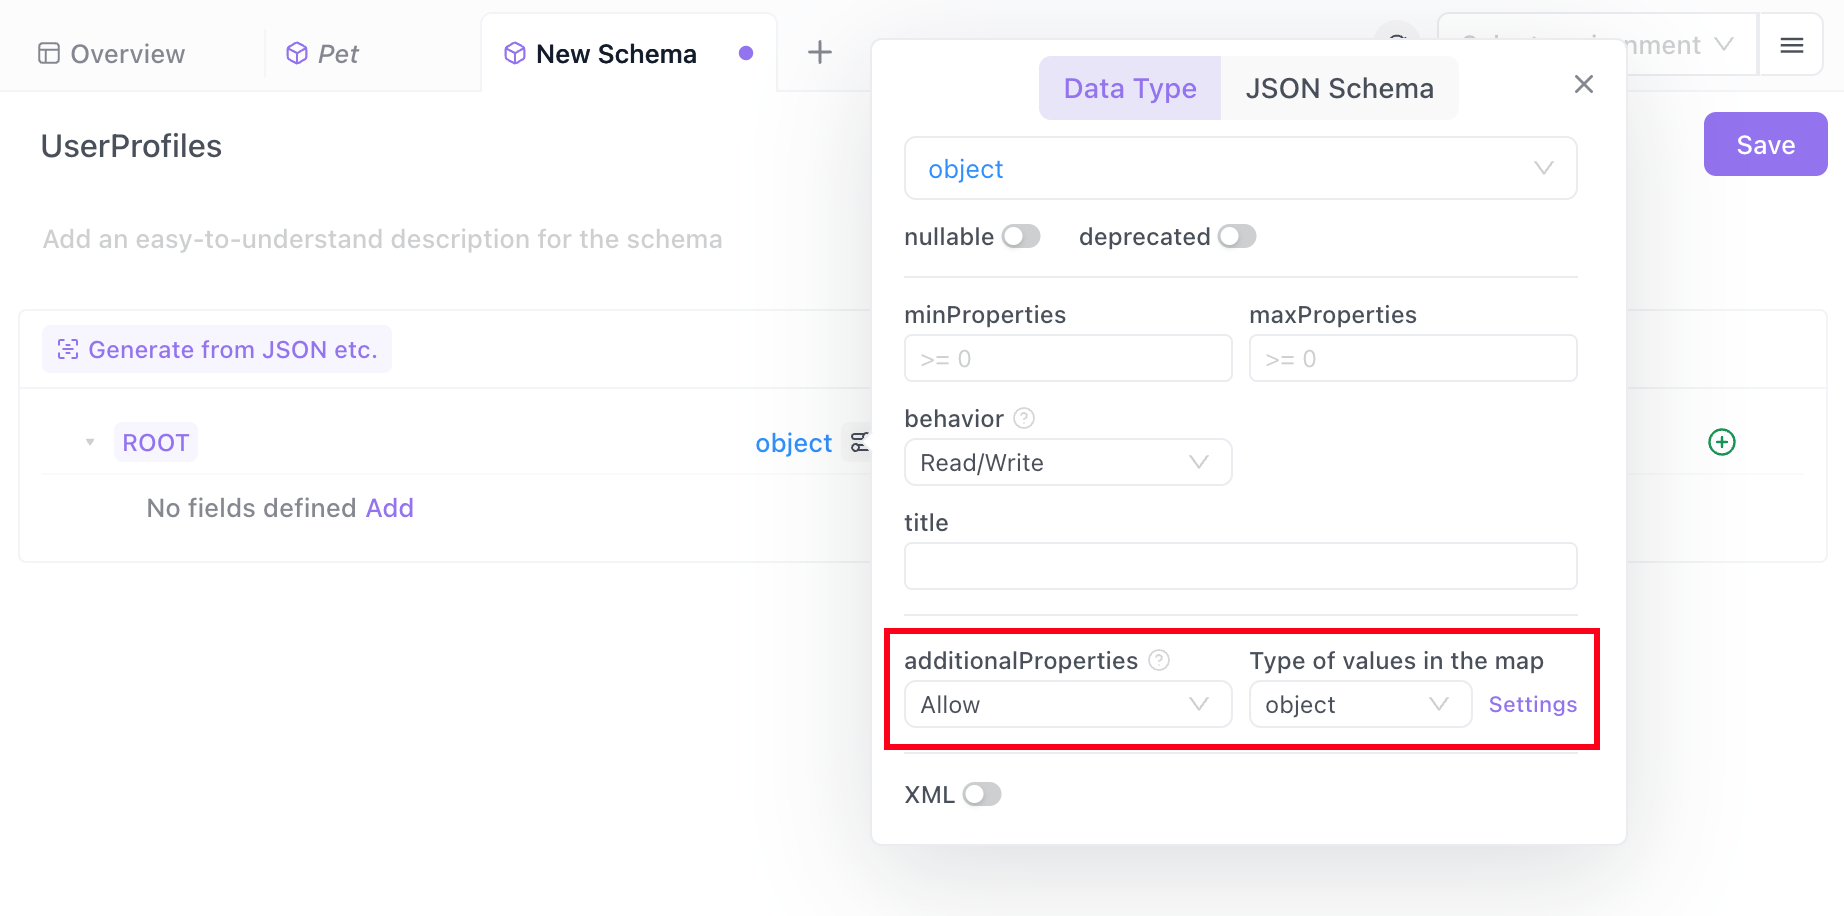
- Create a new schema and name it "UserProfiles"
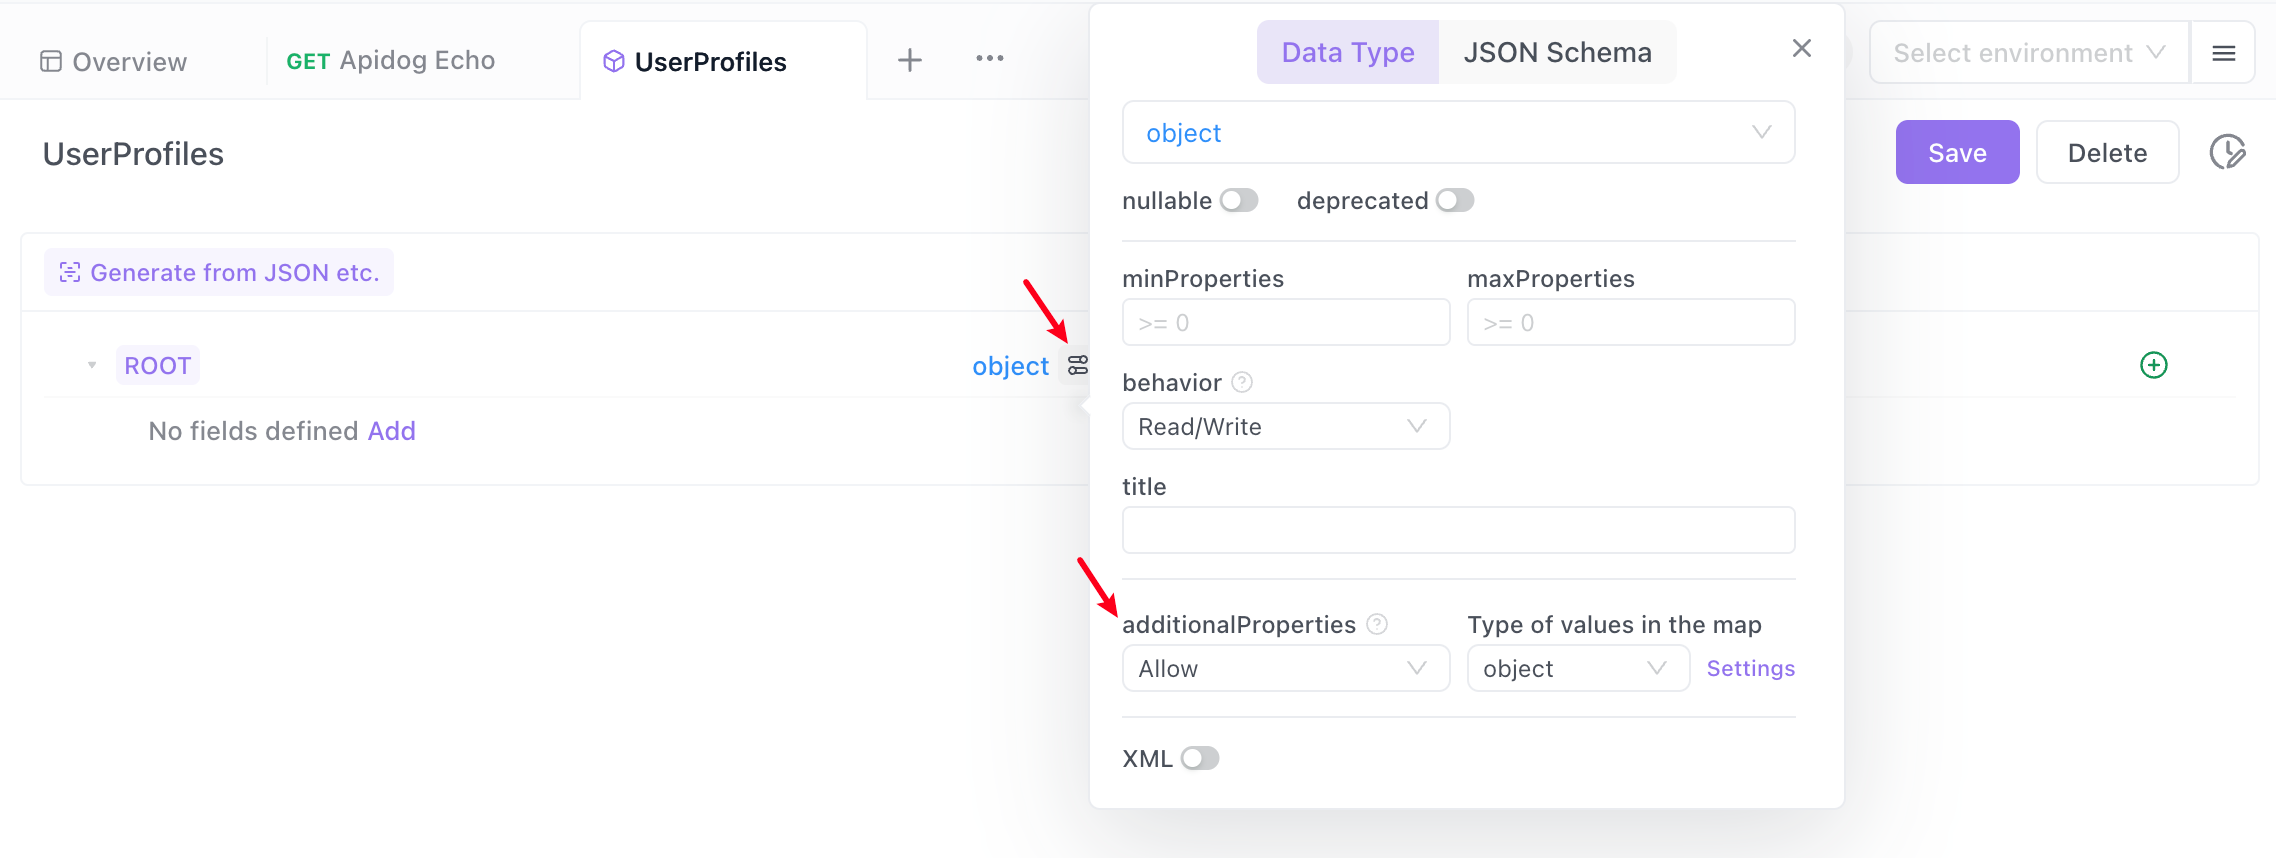
- In the "UserProfiles", specify the root node as an "object" type. Then click "Advanced Configuration", set "additionalProperties" to "Allow", and click the "Settings" button on the right.
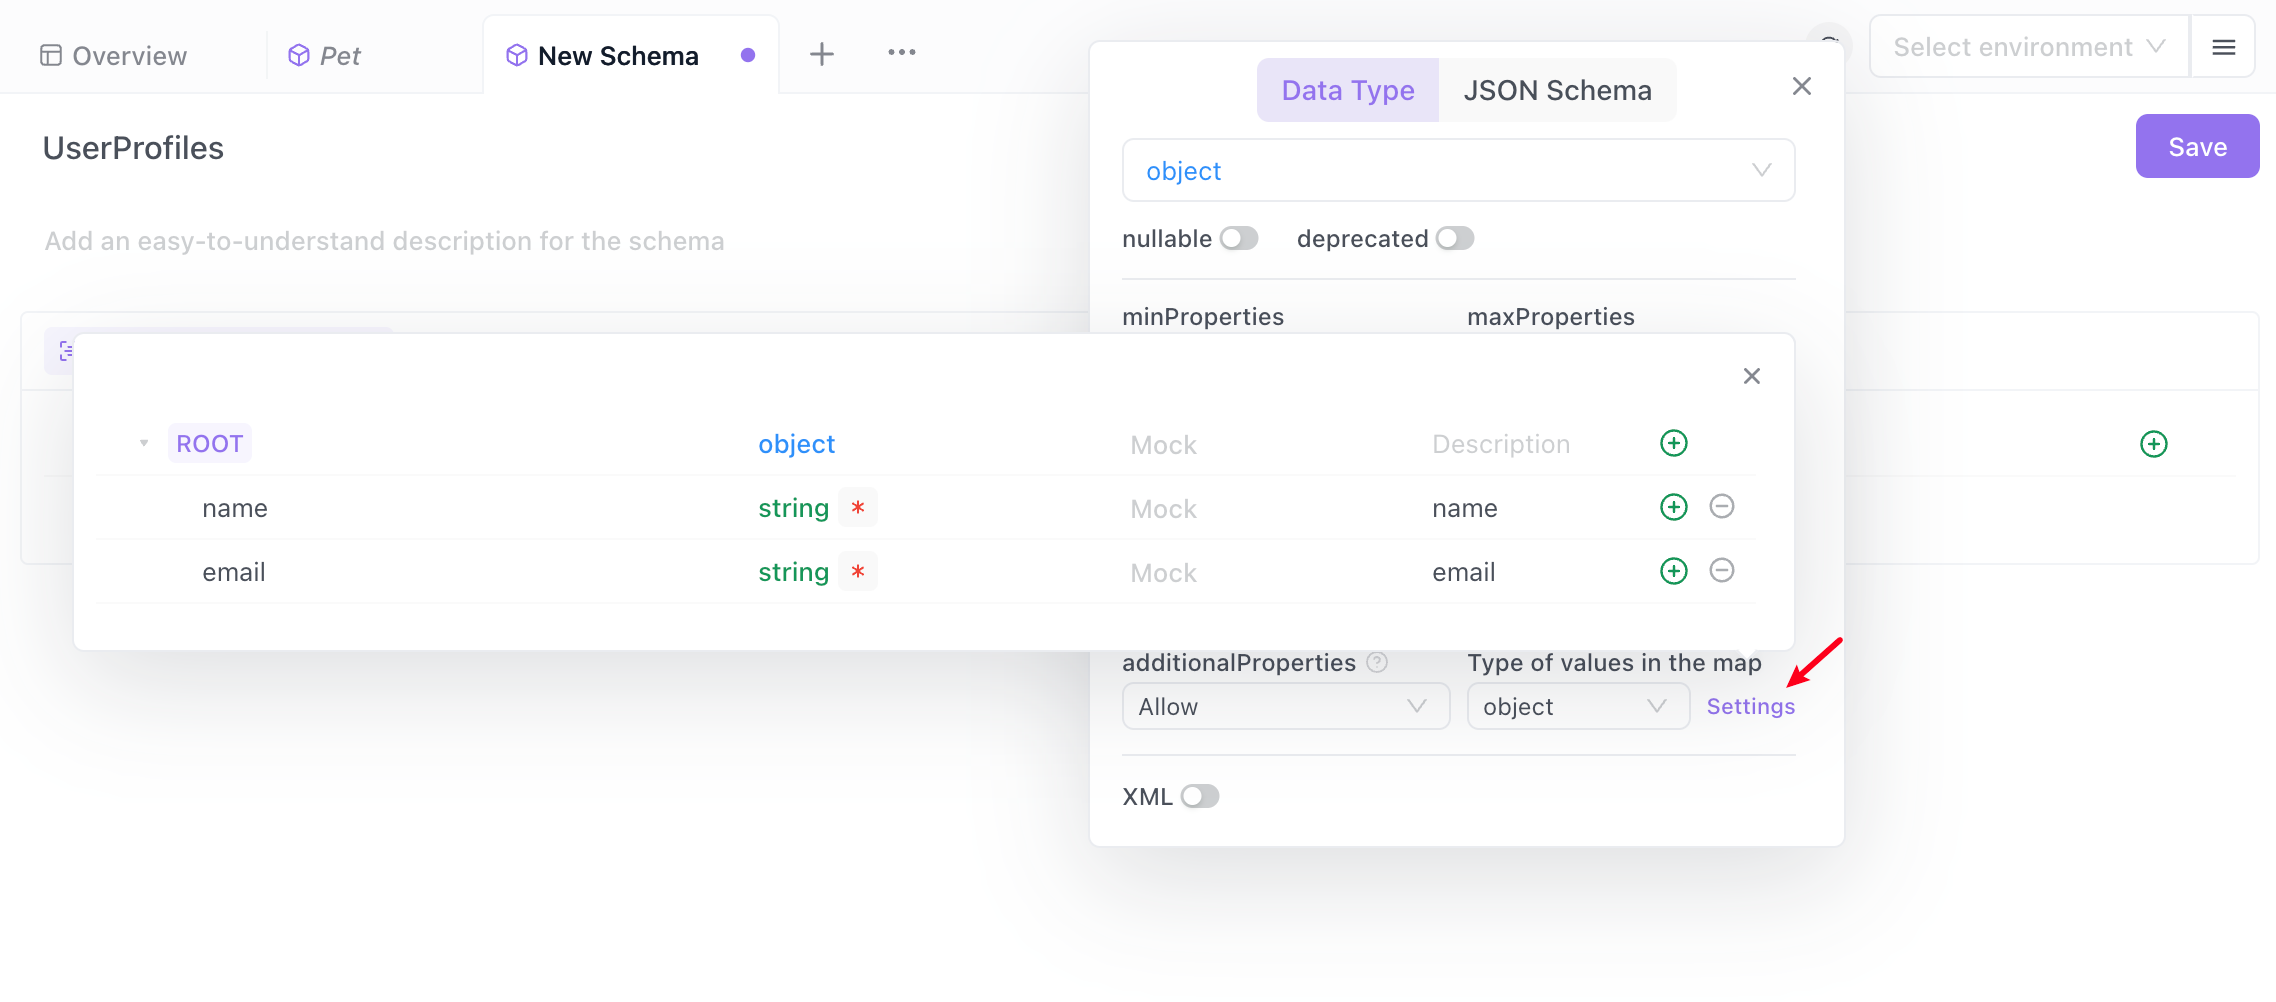
- In the pop-up, add the required user information, with the user's name and email as fields of the object.It saves automatically
- In the API documentation's responses, reference the schema at the root node and select "user profiles" that you just created.
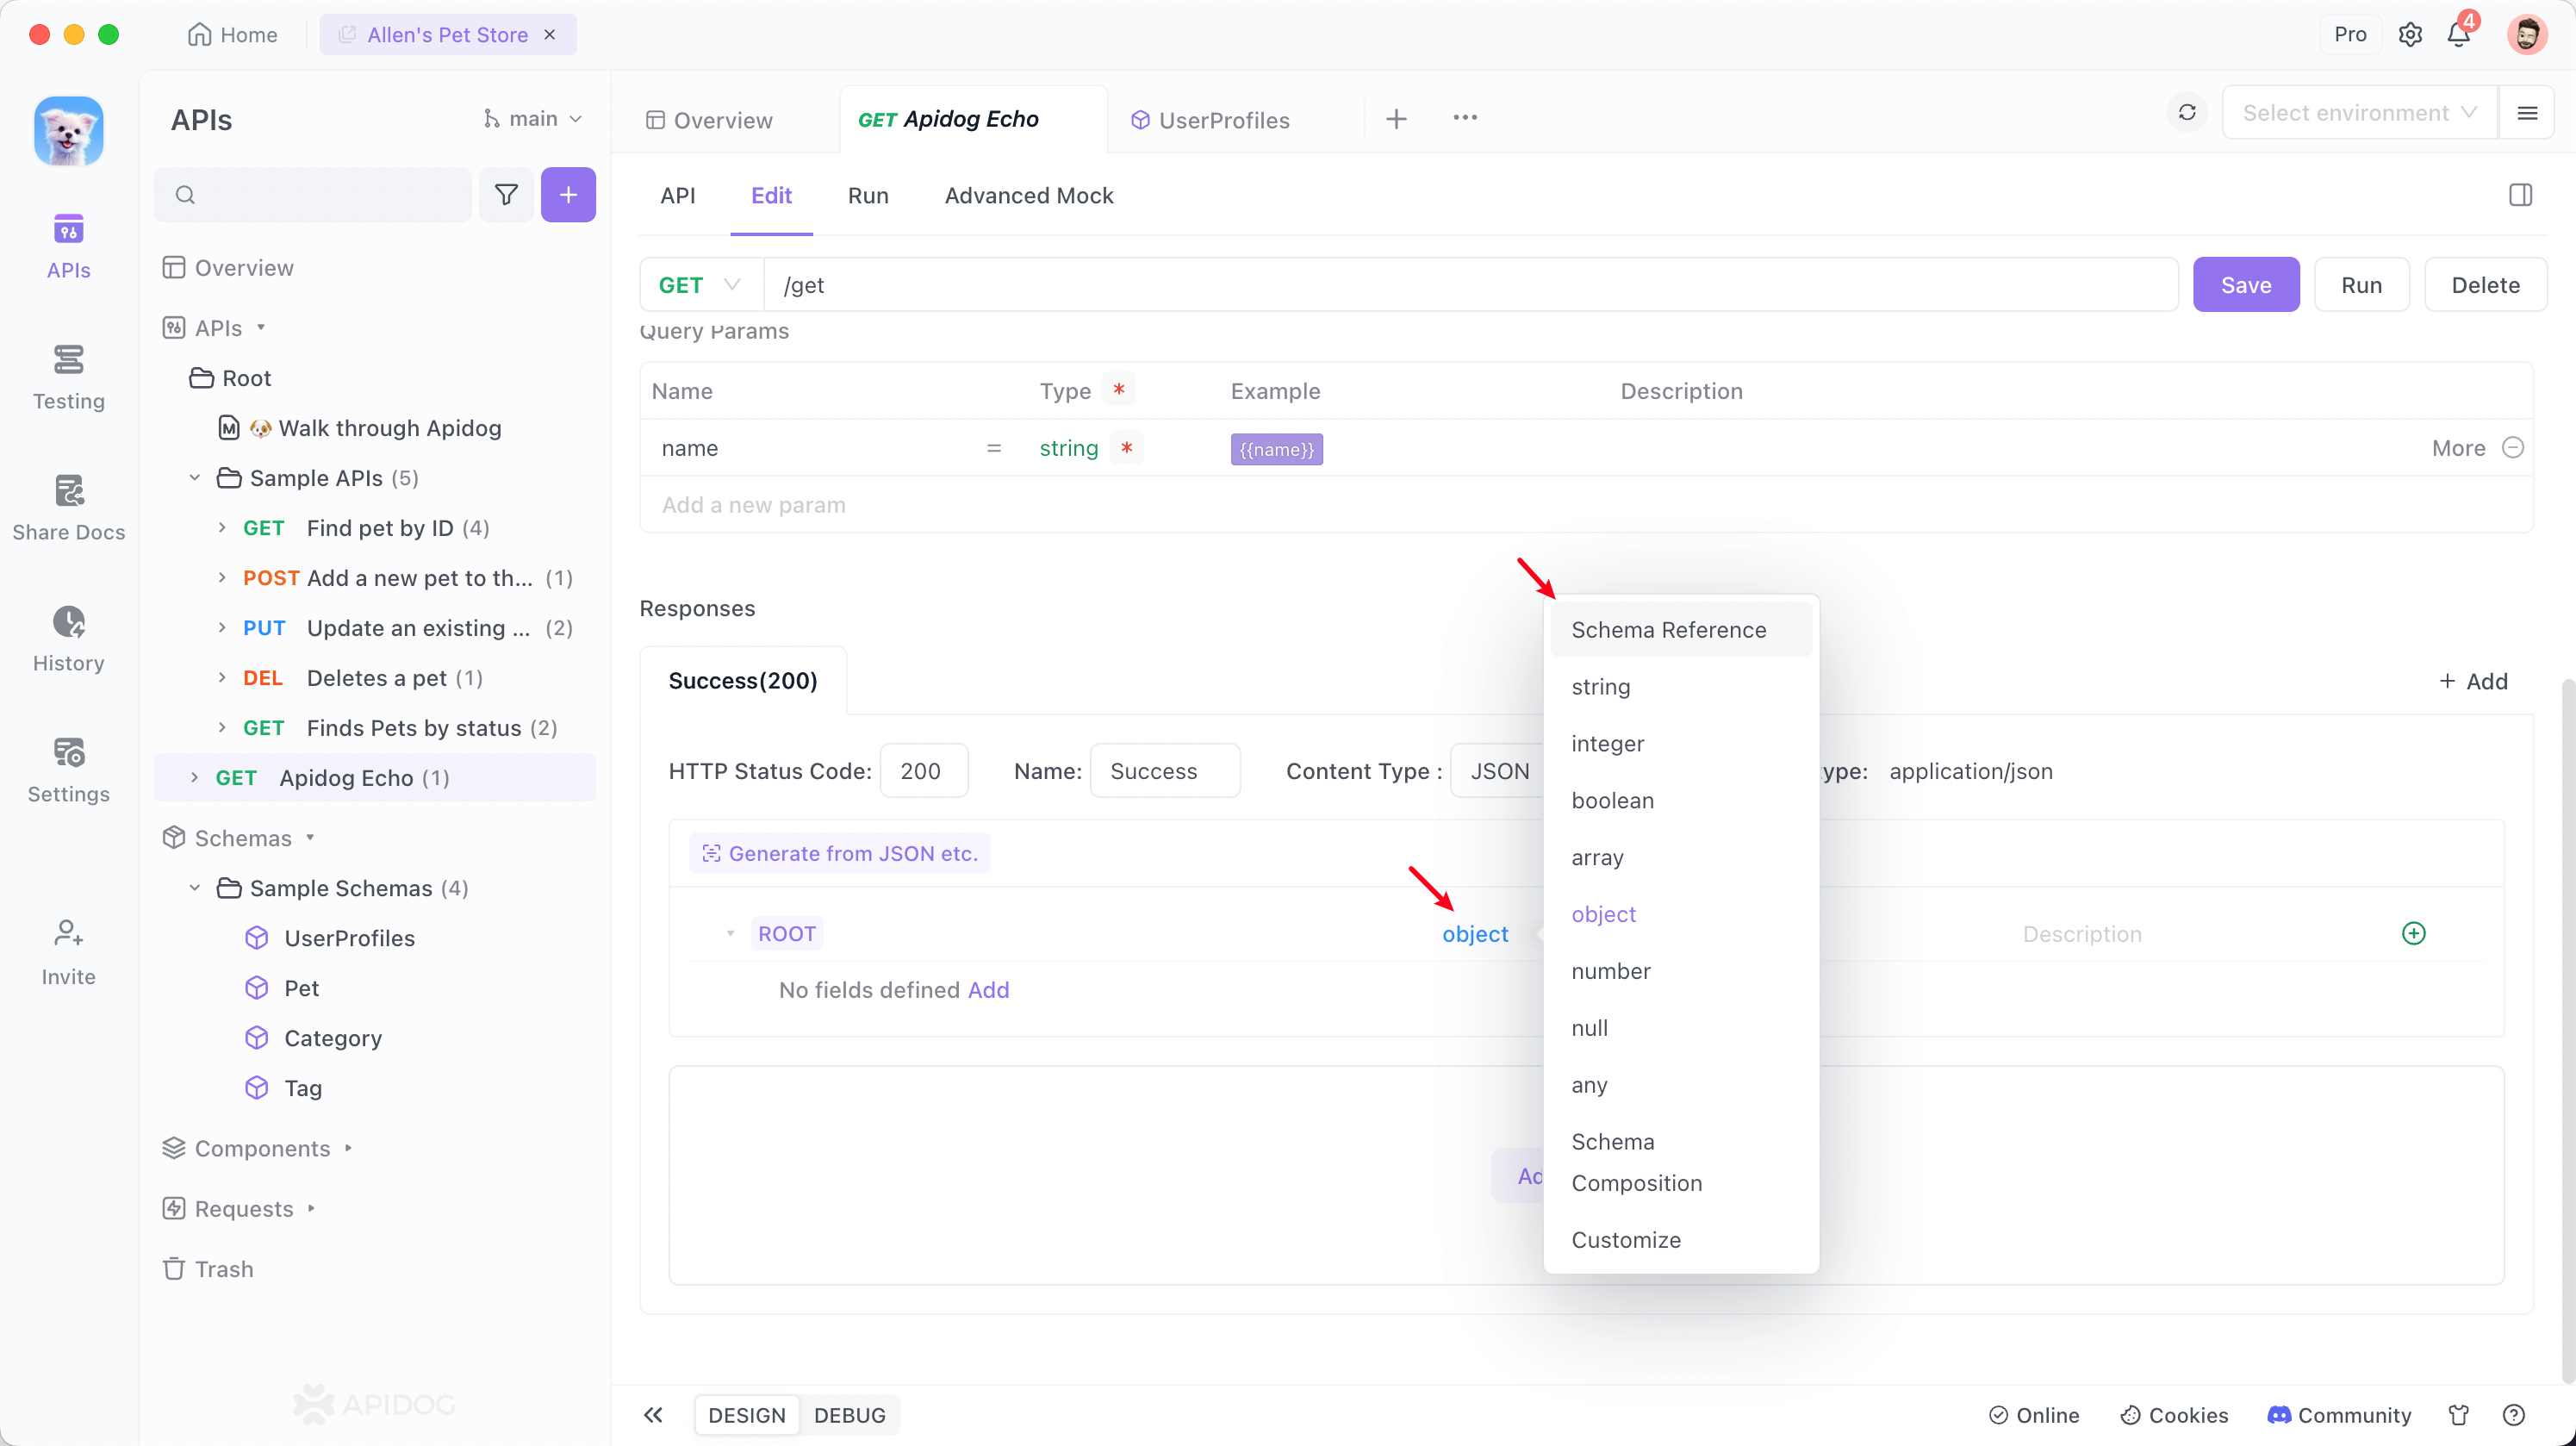
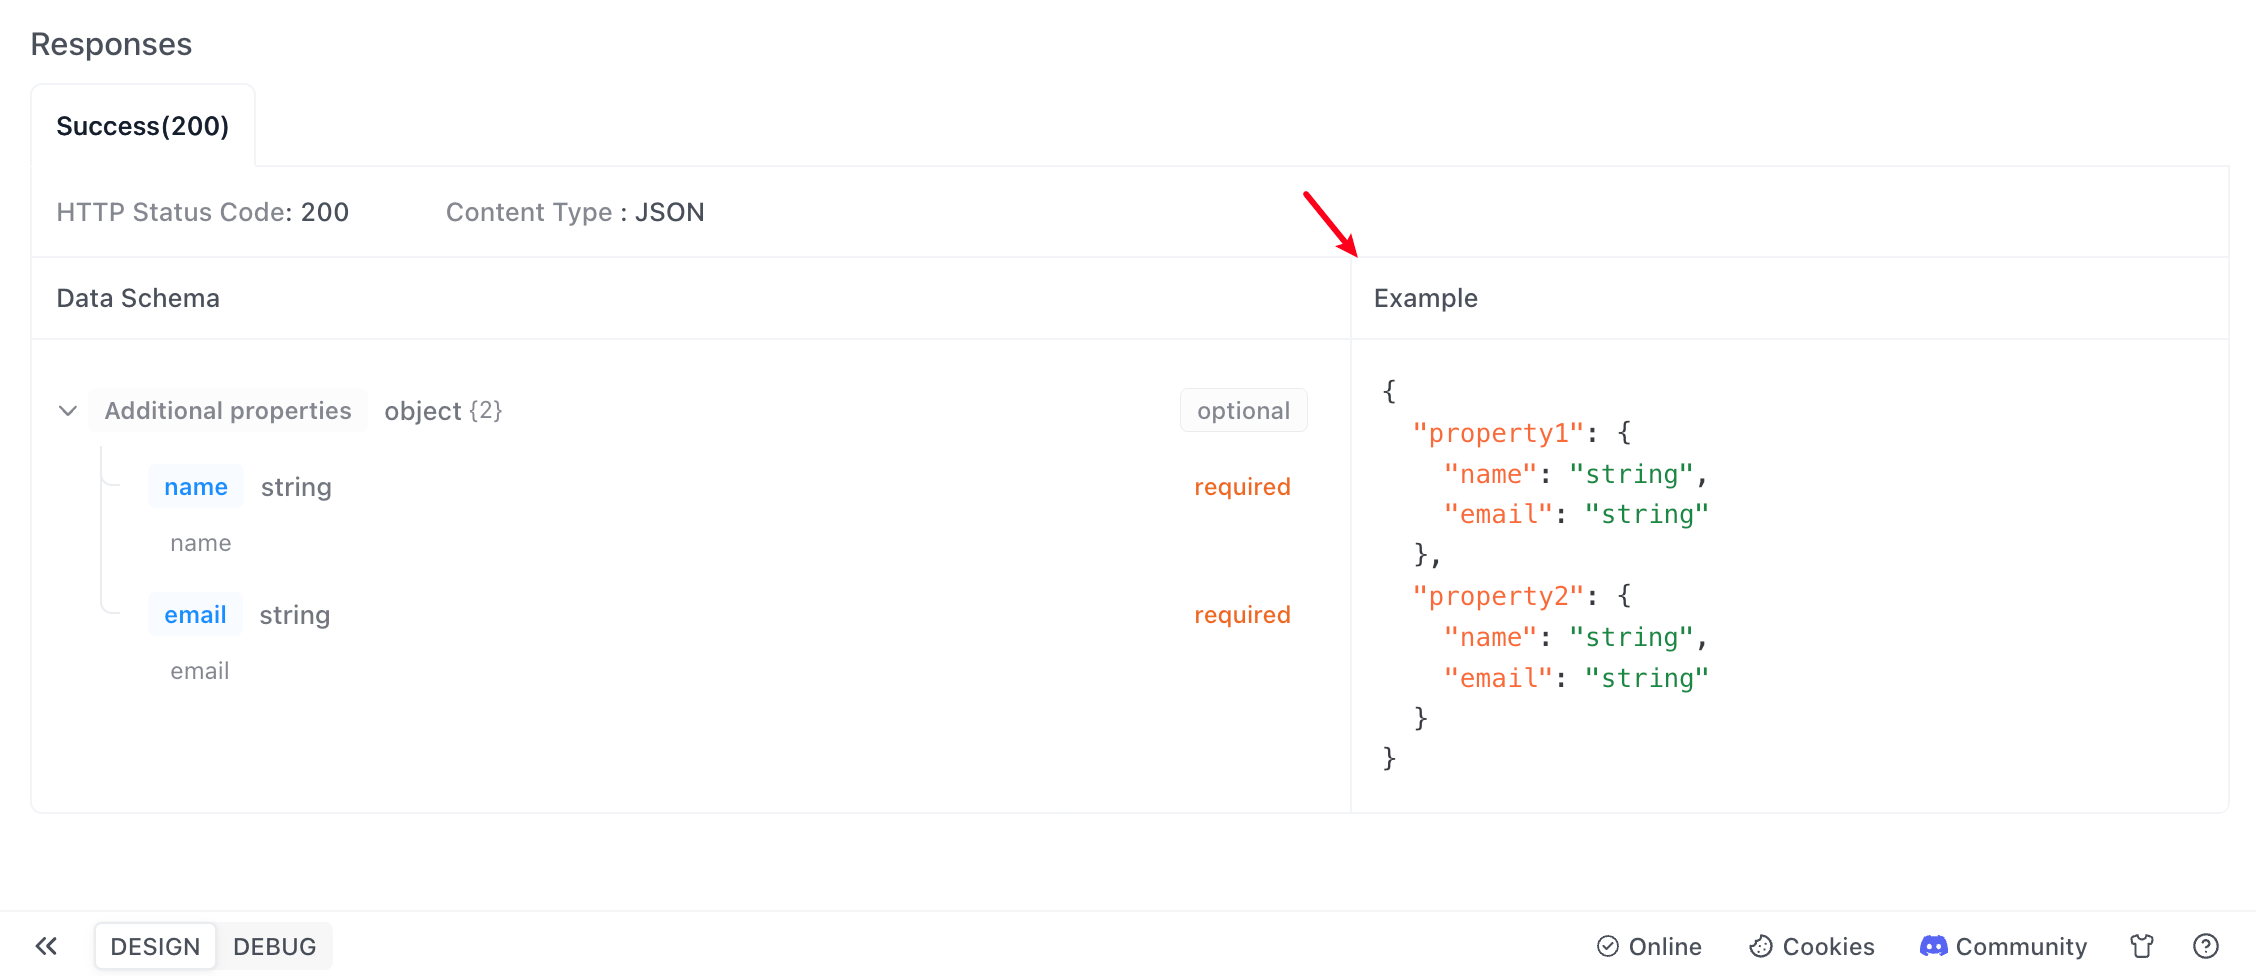
- Click save, and then you can see the defined schema and example values in the return response example within the API documentation.
Objects with additionalProperties
As the actual development work iterates, the objects returned by the API may have additionalProperties compared to the originally defined object. According to the OpenAPI specification, this situation can also be handled using the "additionalProperties" feature.
Suppose there is now a user information query API, where the originally defined response fields when querying user information by user ID were name and email. Now, with the system upgrade, you want to include other fields.
When editing the API documentation, you can define it as follows: In the root node of the data model, click "Advanced Settings", set "additionalProperties" to "Allow", and set the field value type to "any".
Then you can see the defined data structure and example values in the API documentation.

Tuples
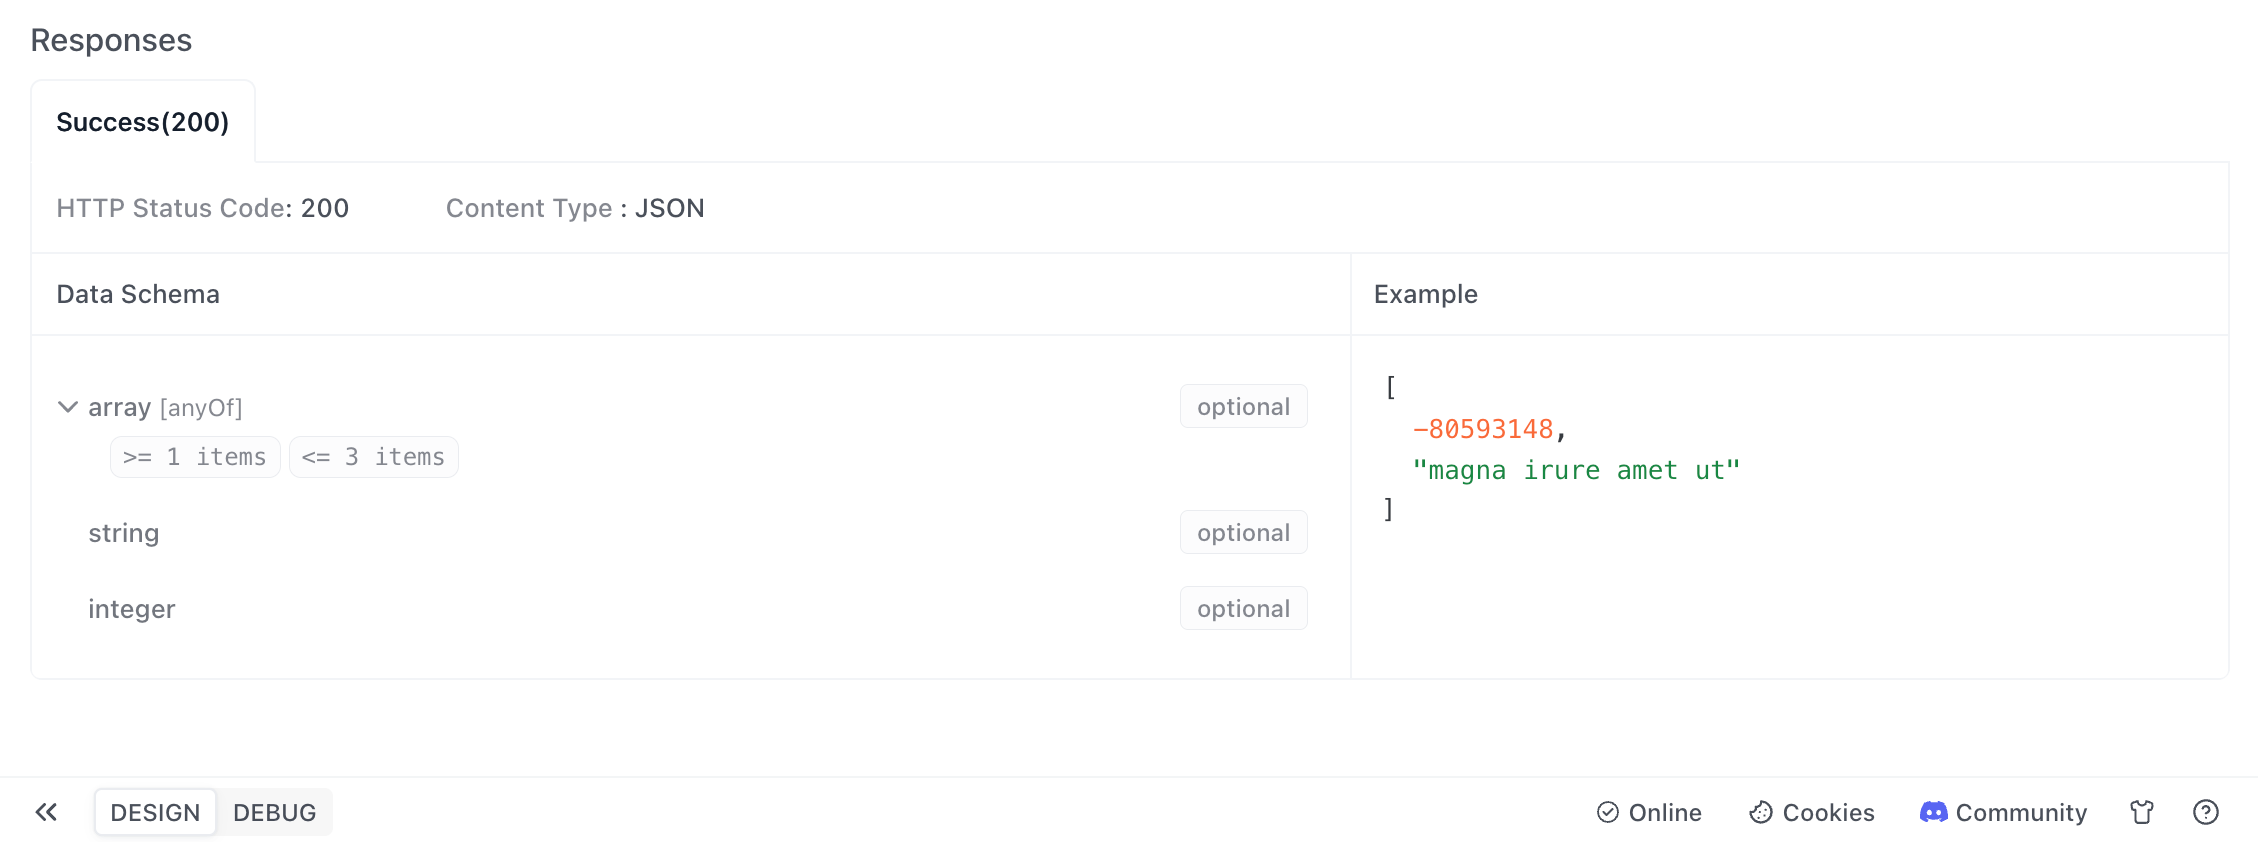
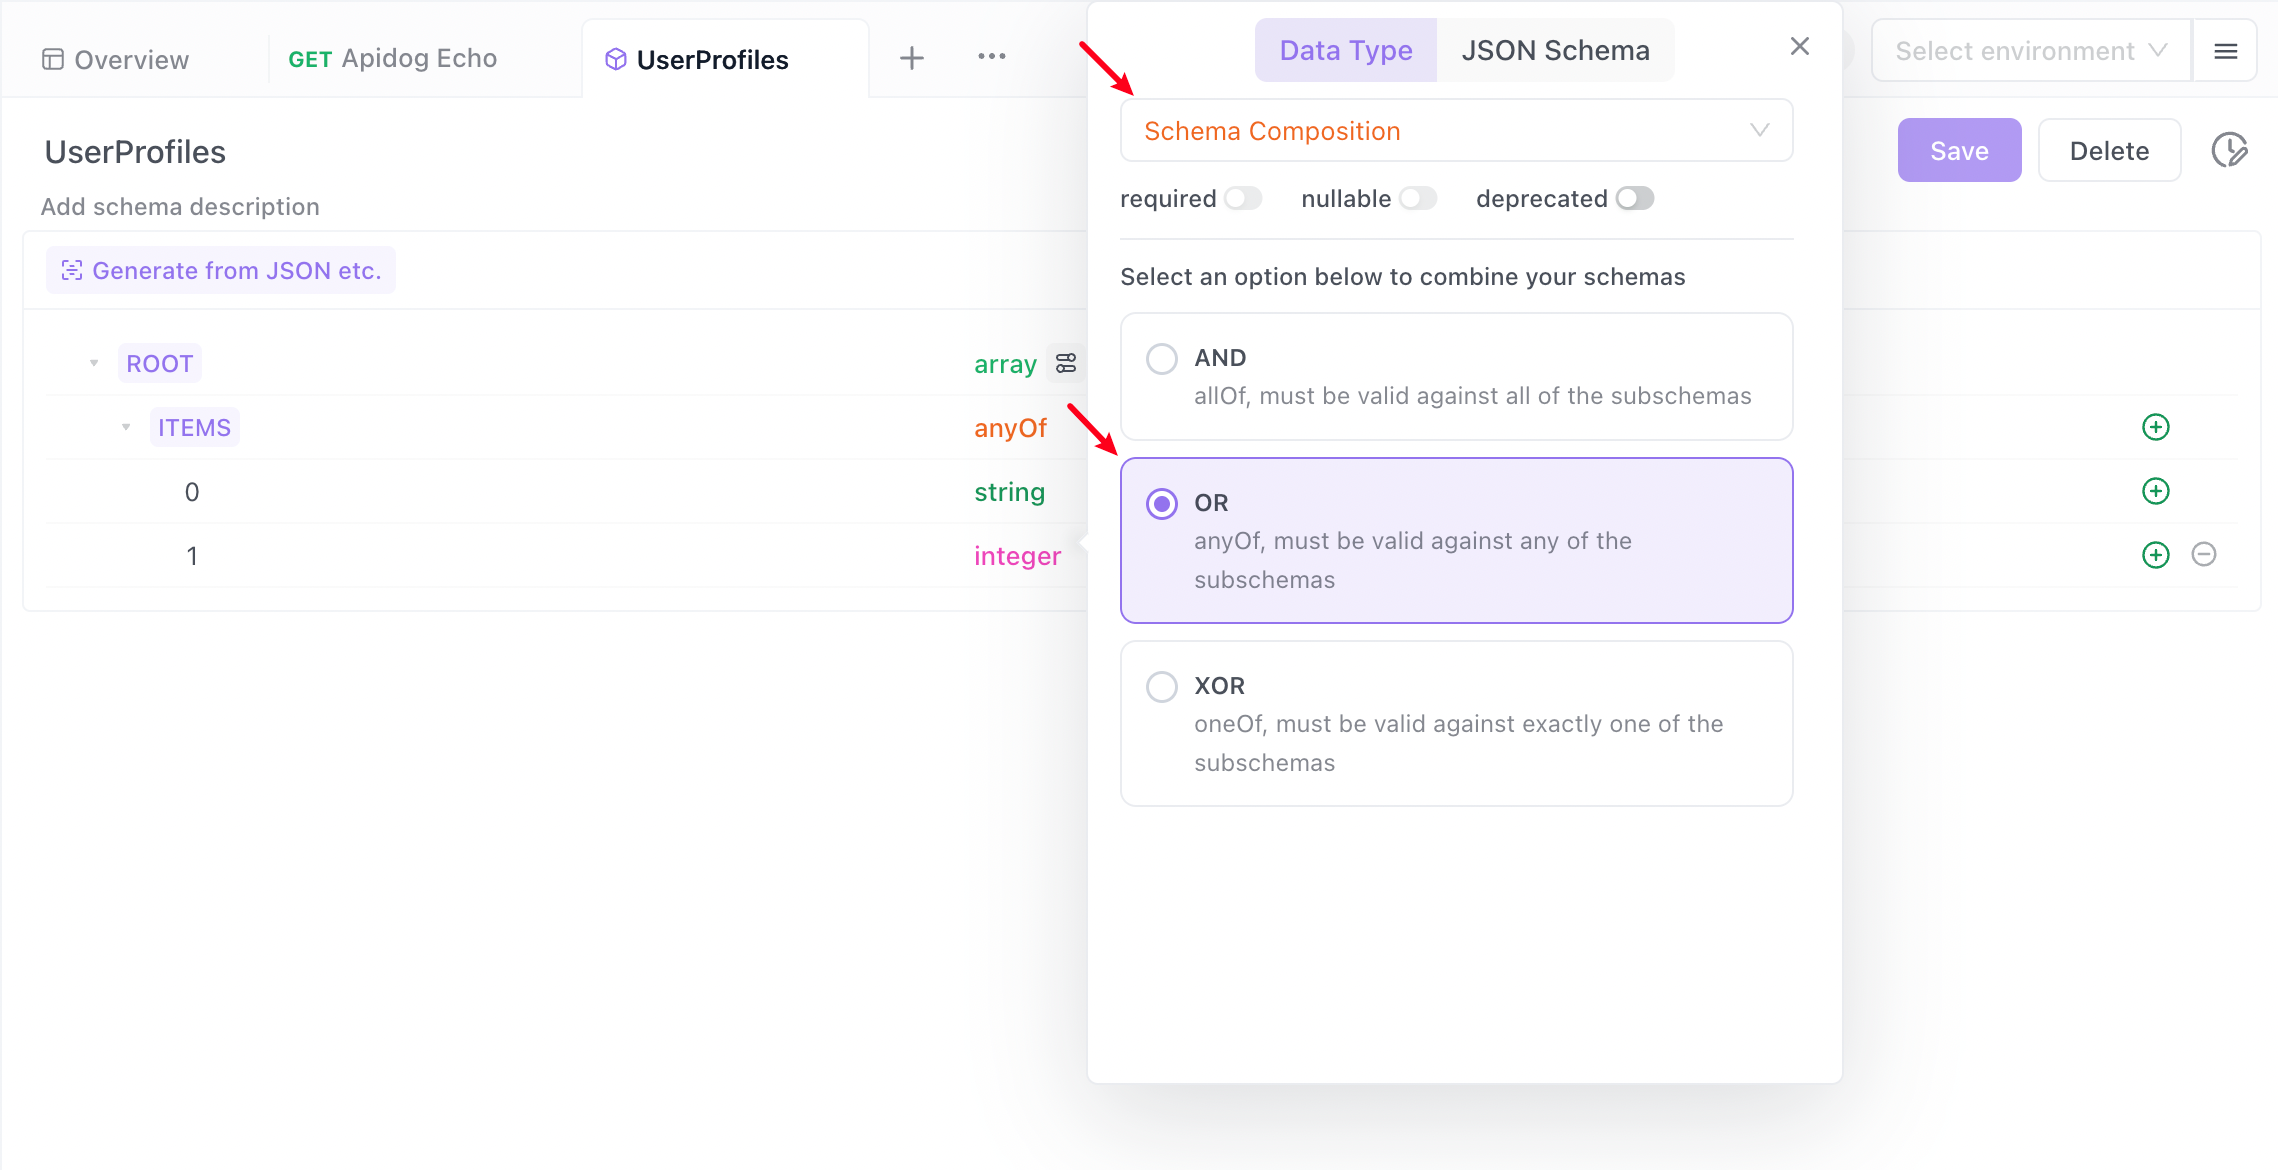
Typically, the internal elements of an array must be of the same type, while tuples can contain different types of data. If you want to define a tuple that includes both string and integer types, such as data like (0,"A",2,"C"), you can set the element type to array in the data model, then set the type of items to anyOf in the combination pattern, and then add child elements of type string and integer respectively.
If you want to generate multiple elements when generating examples, please specify the minimum and maximum number of elements in the advanced settings of the root node.
After saving, click "Generate Automatically" in the API documentation to see the defined data structure and example values.
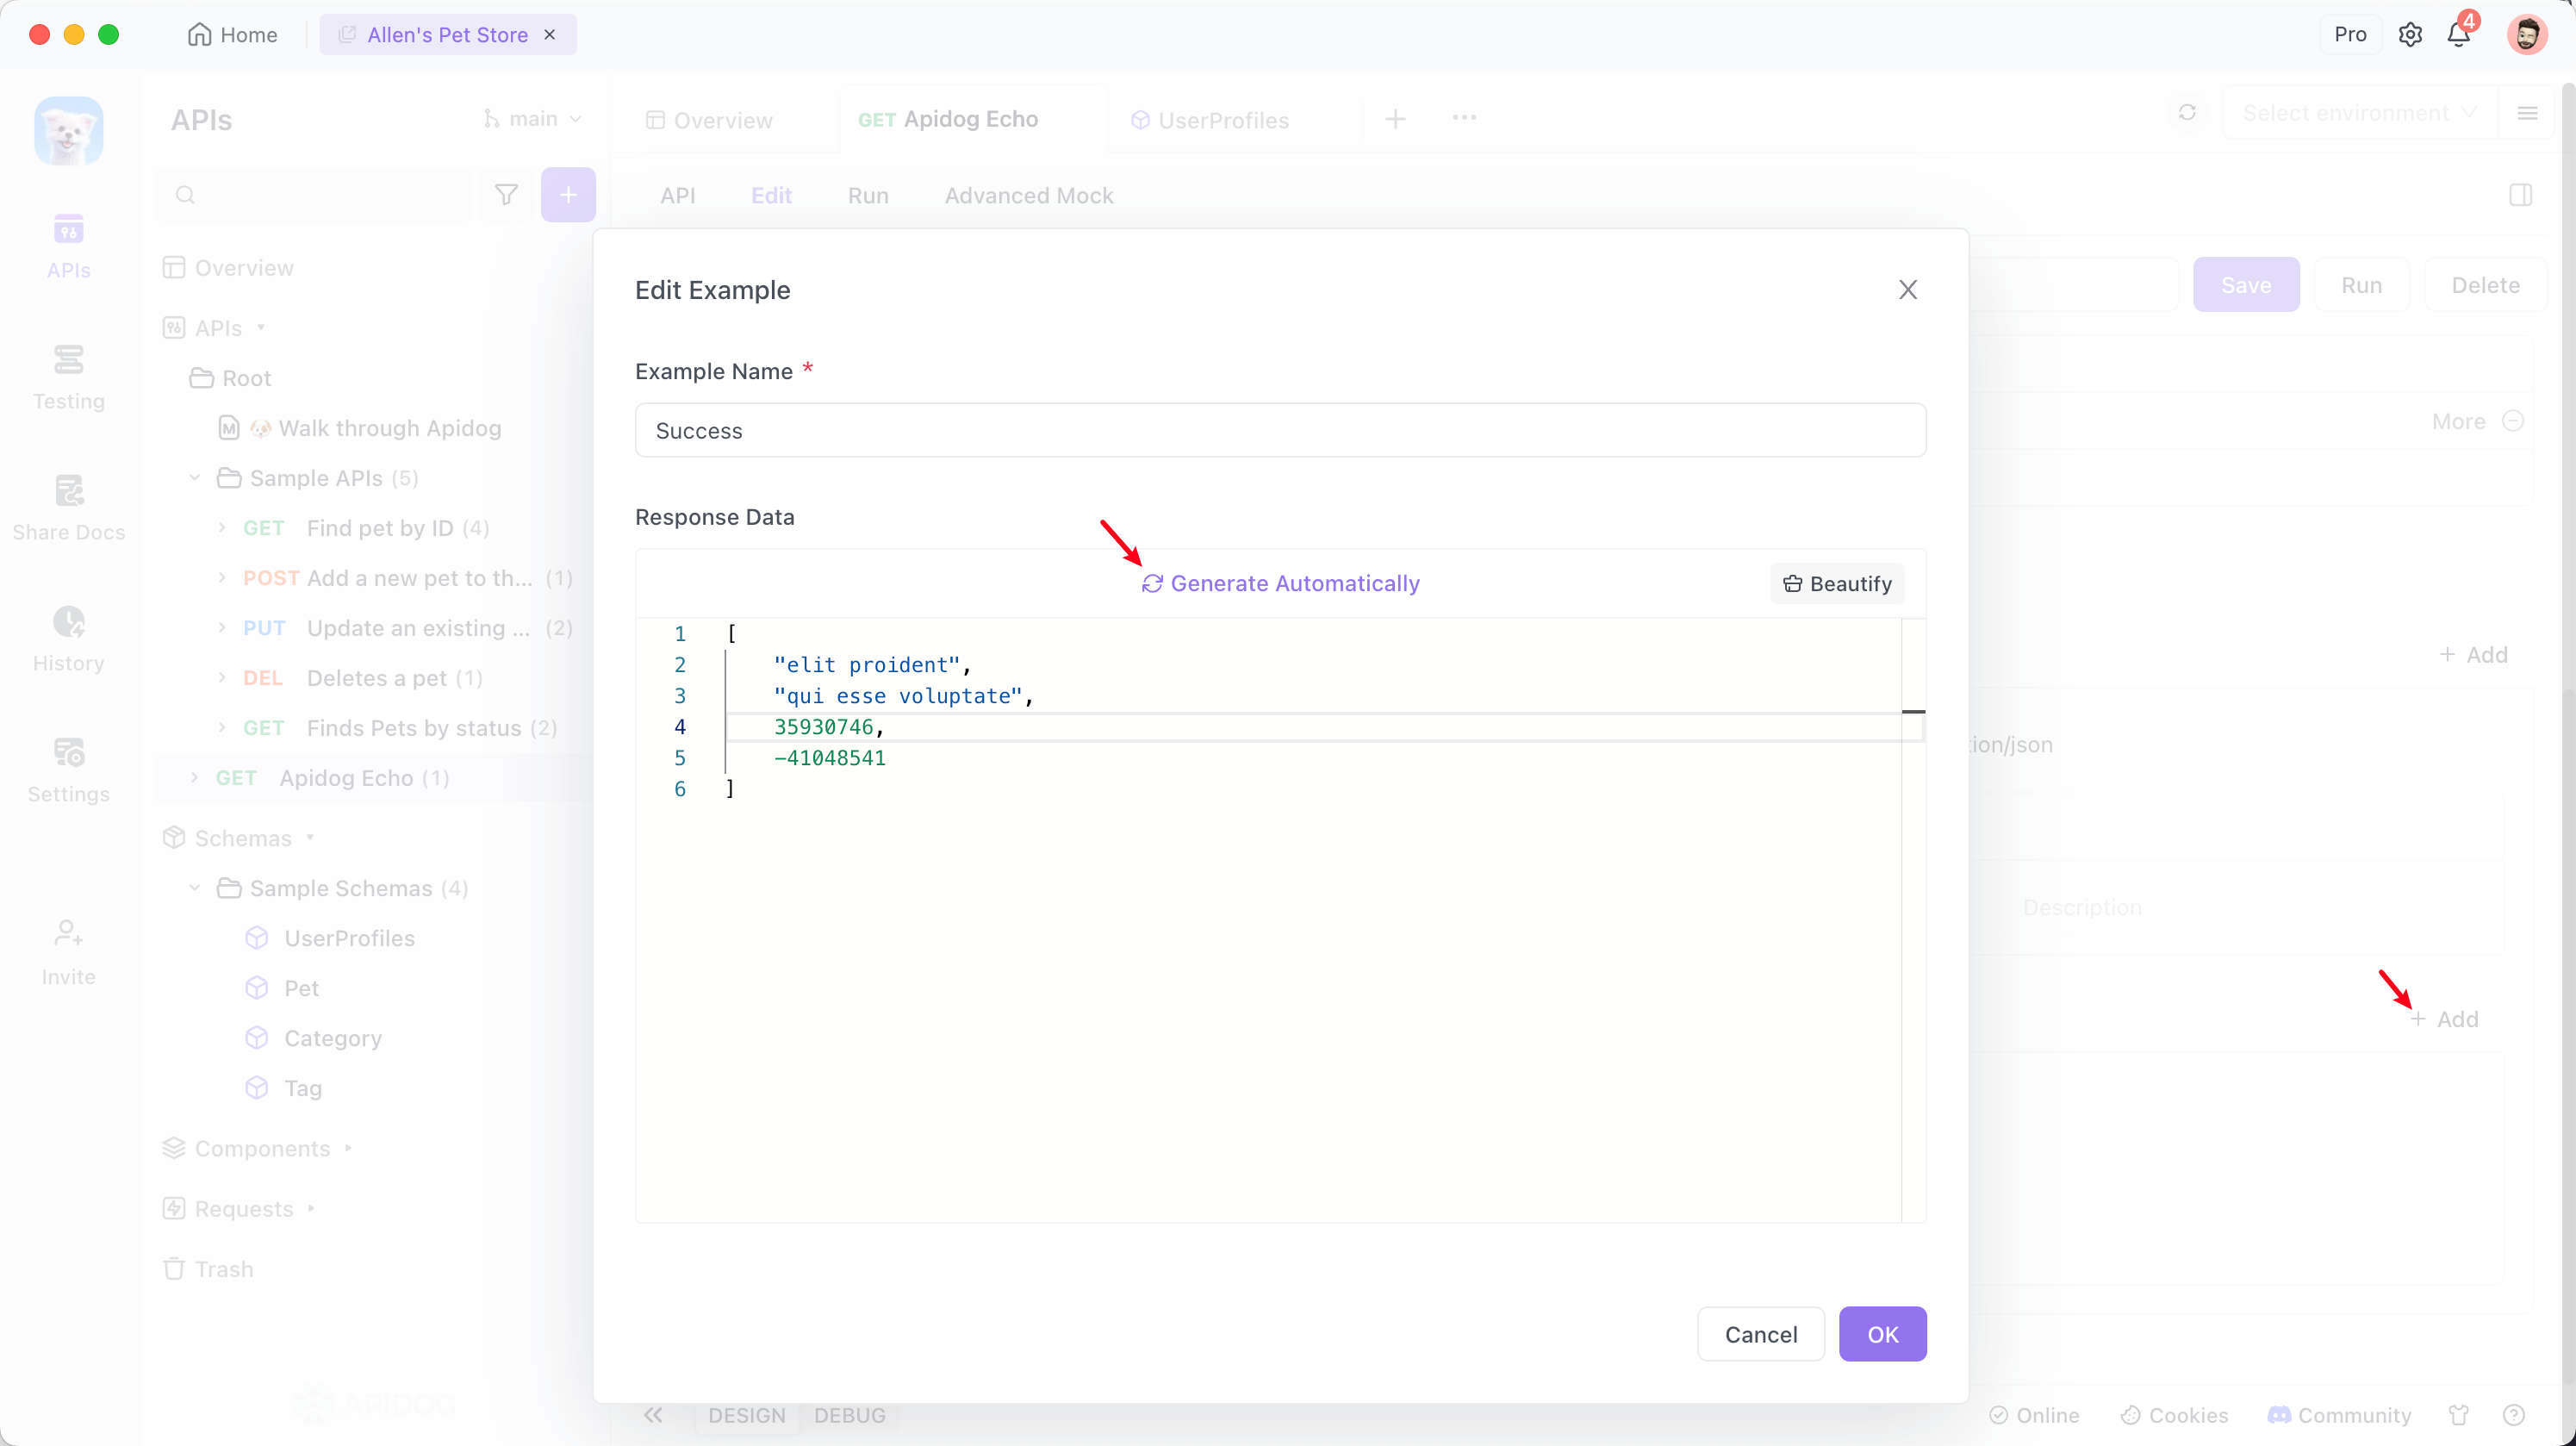
You can also see the example values of the tuple in the return response in the documentation.