![[Postman] Passing the Current Timestamp in a Postman Request](https://assets.apidog.com/blog-next/2026/02/postman-pass-timestamp.png)
When creating new data records or modifying existing data on the back end, passing the current timestamp can be an important component to have. Luckily, Postman, an API tool, has the necessary features to provide timestamps in requests.
With Apidog, you can do anything revolving around APIs, starting from building, all the way to documentation. To see what other functionalities Apidog offers, click the button below to begin. 👇
This article dives into two effective methods for incorporating the current timestamp within your Postman requests: utilizing the predefined timestamp variable and leveraging the power of pre-request scripts.
What is Postman?
For developers, Postman poses as a popular and reliable API toolkit. It empowers them not only to craft and test APIs but also to document them. By streamlining the entire API development process, Postman makes the often-complex world of APIs more approachable and understandable.

What is a Current Timestamp?
A current timestamp refers to a representation of the exact time at which an event occurs. There are a few formats that timestamps can be expressed in:
Unix TImestamp (Seconds Since Epoch)
This format represents the number of seconds elapsed since a specific point in time, typically January 1st, 1970, 00:00:00 UTC. It offers a compact and machine-readable format for APIs.
ISO 8601 Format (YYYY-MM-DDTHH:mm:ss.sssZ):
This standardized format expresses the date and time in a human-readable and machine-parsable way. It includes the year, month, day, hour, minute, second, milliseconds (optional), and a time zone indicator (Z for UTC). This format facilitates clear communication and avoids confusion across different systems.
Importance of Timestamps in APIs
- Accuracy and Ordering: They establish the exact time an event occurred within an API interaction. This helps track data creation or modification times, ensuring accurate sequencing and preventing confusion about when things happened.
- Data Freshness: Timestamps can indicate how recent data is. This is crucial for scenarios where real-time information or data with a limited lifespan is involved. Imagine a stock quote API - knowing the timestamp helps determine if the quote reflects the current market situation.
- Error Identification: Timestamps can aid in troubleshooting errors. By comparing timestamps in request and response, developers can identify potential delays or pinpoint where issues occurred in the communication flow.
- Version Control and Auditing: Timestamps can be used to track API version changes or log user activity. This facilitates rollbacks to previous versions if necessary and helps maintain a record of API usage for auditing purposes.
Step-by-step Guide On How to Pass Current Timestamp in Postman API Request
Step 1 - Create a Postman Account
Create a new Postman account (only if you do not have one) and start downloading the Postman application onto your device. The application offers more features than its web version.
Step 2 - Create a New API Request on Postman
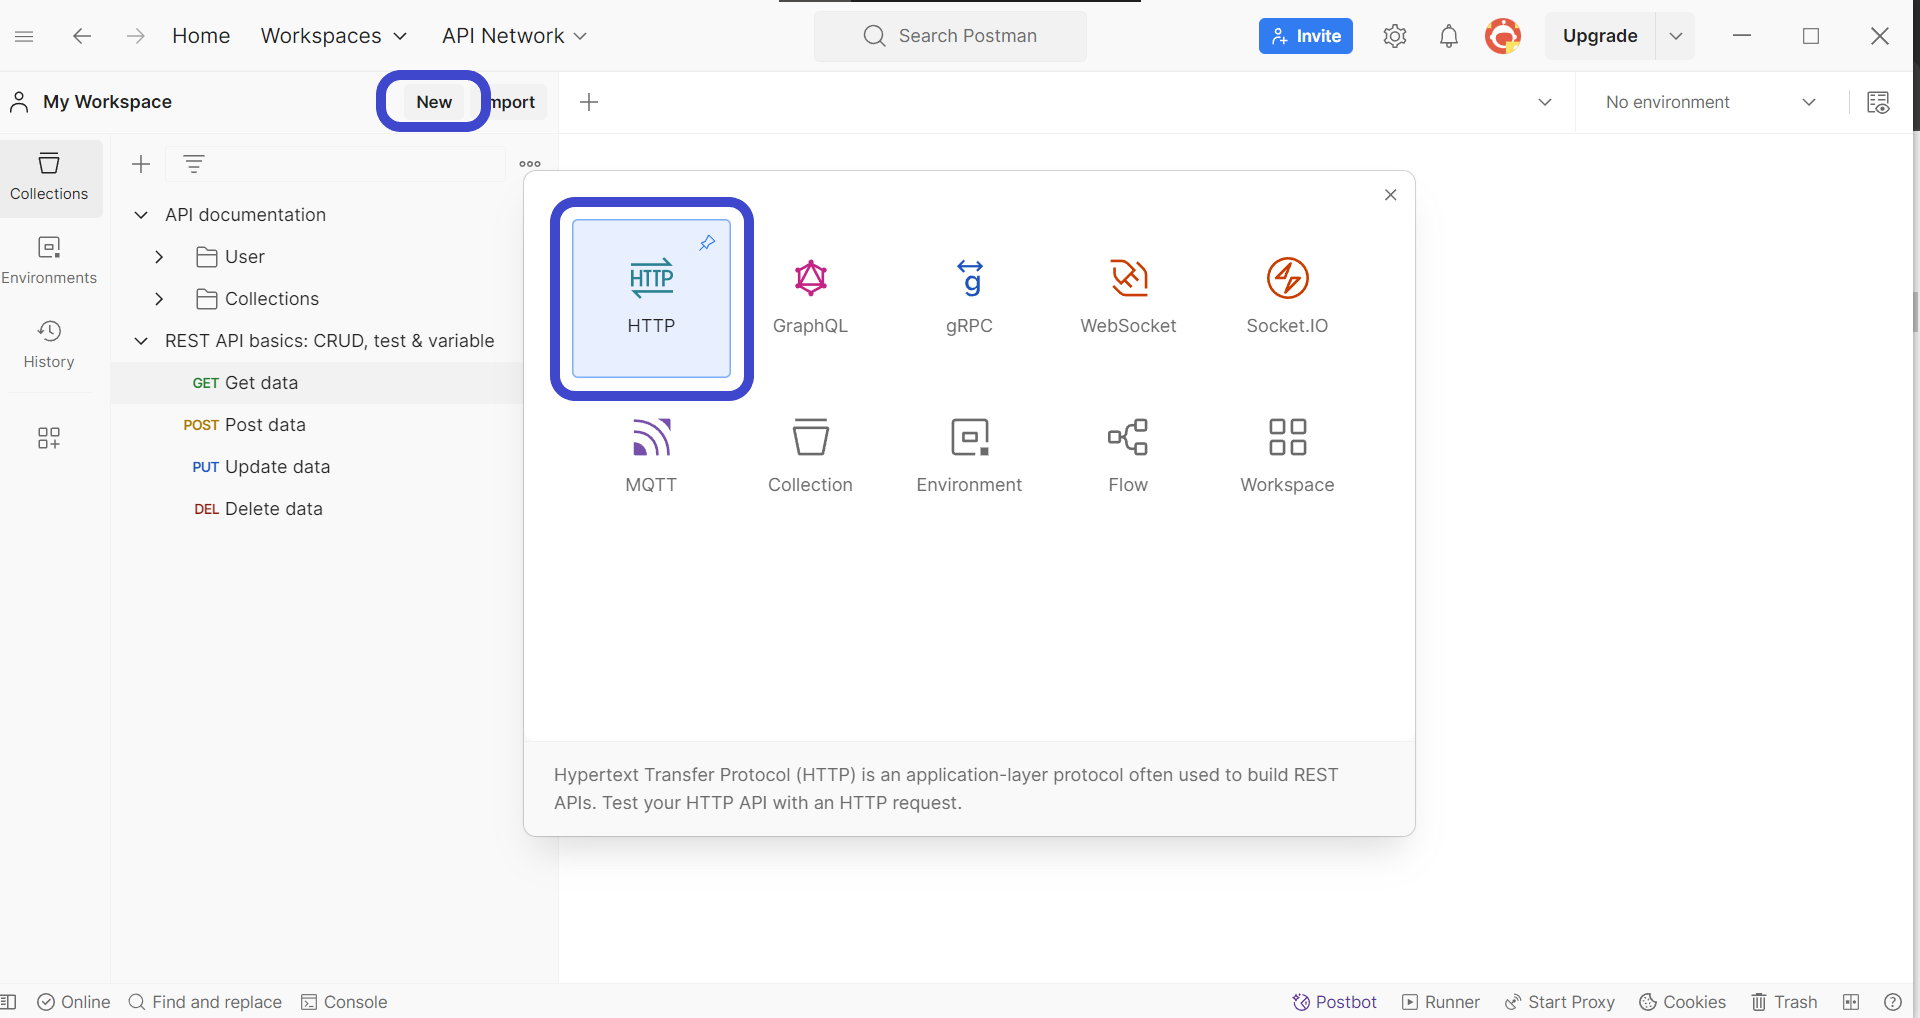
Once you have installed Postman, create a new request by clicking the New button in the top left corner of the Postman window. Select HTTP Request to create a new request, as shown in the image above.
Step 3 - Enter API Method and Details
Next, you need to include the details of the API request you wish to create. It must include components such as the URL, HTTP methods, and additional parameters the API will require.
Step 4 - Open the Pre-Request Script Section

On your completed API, search for the Pre-request script section, as shown in the image above.
Step 5 - Insert Necessary Code For Including Timestamp
In this empty section under the Pre-request Script tab, insert the following lines of code so that you can include the timestamp.
var moment = require('moment');

pm.environment.set('currentdate', moment().format(("YYYY-MM-DD HH:MM:SS")));
For this particular example, the timestamp will be stored in the currentdate variable using the pm.environment.set method.
Step 6 - Include the currentdate Variable as a Request Variable

Lastly, make sure to include the timestamp variable in the API by setting the API's parameter. Now that every time you send a request on this particular API, you should be able to find the timestamp when the request was sent!
Apidog - Providing the Finest Details by Default
Apidog is a comprehensive API development platform that can be an excellent alternative to Postman. With Apidog, you no longer have to worry about the smaller details - all of them have been accounted for by Apidog - so take a look at the sections below to see how to view these API details!

Including Timestamp in Request Headers in Apidog
To include the current timestamp in the API request header, follow these steps below!

To add the current timestamp to an API's request header, prepare the following lines of code to be pasted into a custom script under the Pre Processors section, as shown in the image above.
var timestamp = new Date().getTime();
pm.environment.set("timestamp", timestamp);

Once you have initialized the timestamp variable, make sure to add the variable as a query parameter. See the image above for reference.
Viewing Timestamp and More in Apidog API Request

With Apidog, you can find more than just the automated timestamp, you can also view other finer details entailing the API, such as cookies and the raw request format. With Apidog, you can accurately troubleshoot your APIs to ensure that your APIs are ready for deployment.
You can also consider doing API load testing to further explore your API to guarantee that the API is fool-proof!

Conclusion
Incorporating timestamps into your Postman requests unlocks a range of benefits. Whether you require precise data tracking, verification of request freshness, or streamlined error identification, timestamps empower you to work with APIs more effectively. By leveraging either the predefined variable or pre-request scripts, you can seamlessly integrate timestamps into your workflow.
Remember to consult the API documentation to ensure you're using the appropriate format for optimal communication and data clarity. With timestamps at your disposal, you can elevate your API testing and development experience in Postman.


